
My grandmother used to make this Chocolate Gravy Recipe every Sunday morning when I’d visit her in Tennessee as a kid. The first time I watched her whisk together cocoa and milk in that old cast iron pot, I thought she’d lost her mind. Chocolate for breakfast? Poured over biscuits like regular gravy?
But one bite of that warm, velvety chocolate sauce dripping down the sides of a buttery biscuit changed everything for me. Now I’m the one standing at my stove on lazy weekend mornings, whisking away while my kids peek around the corner asking if it’s ready yet.
| Quick Recipe Summary | |
|---|---|
| Prep Time | 5 minutes |
| Cook Time | 10 minutes |
| Total Time | 15 minutes |
| Servings | 4-6 servings (about 2 cups) |
| Difficulty Level | Easy |
If you’re craving more sweet breakfast treats, you’ll love my Buttermilk Waffle Recipe too.

Why You’ll Love This Chocolate Gravy Recipe
This isn’t just another chocolate sauce recipe. Chocolate gravy is a genuine Southern tradition that dates back generations, born from resourceful cooks who turned simple pantry staples into something magical.
What makes this recipe special is how it walks the line between breakfast and dessert without toppling into either category. It’s sweet enough to feel indulgent but not so rich that you can’t enjoy it first thing in the morning. The texture is key here: thicker than hot fudge but thinner than pudding, with just the right consistency to soak into warm biscuits without making them soggy.
I’ve simplified this recipe down to six basic ingredients you probably already have in your kitchen. No fancy chocolate bars or complicated techniques required. Just good old-fashioned cocoa powder, sugar, flour, milk, butter, and vanilla working together to create pure comfort in a pot.
The best part? This comes together in about 15 minutes from start to finish. I’ve made this on rushed school mornings when I wanted to surprise my kids, and I’ve made it on slow Sunday brunches when we had nowhere to be. It works beautifully either way, and the leftovers (if there are any) taste amazing reheated the next day.
Here’s what you’ll love most:
- Quick and easy: Ready in 15 minutes with minimal hands-on work
- Budget-friendly: Uses basic pantry staples you likely already own
- Versatile: Delicious on biscuits, waffles, pancakes, or even ice cream
- Family-approved: Even picky eaters can’t resist this sweet breakfast treat
- Make-ahead friendly: Stores well and reheats beautifully
- Customizable: Easy to adjust sweetness or add your own flavor twists
Ingredients
You’ll need just six simple ingredients to make this authentic Southern chocolate gravy. I’ve tested this recipe dozens of times, and these exact measurements create the perfect consistency every time.
The key is using quality cocoa powder. Don’t skimp here. I learned this the hard way when I tried using an old tin of cocoa from the back of my pantry and ended up with gravy that tasted flat and dusty. Fresh unsweetened cocoa powder makes all the difference.
- 1 cup granulated sugar (200g): Provides the sweetness that balances the bitter cocoa
- 3 tablespoons unsweetened cocoa powder (18g): The star ingredient that gives this gravy its rich chocolate flavor
- 3 tablespoons all-purpose flour (24g): Acts as the thickening agent to create that perfect gravy consistency
- 1/4 teaspoon salt (1.5g): Enhances the chocolate flavor and balances the sweetness
- 2 cups whole milk (480ml): Creates the creamy base; whole milk gives the best texture
- 2 tablespoons unsalted butter (28g): Adds richness and creates a silky, glossy finish
- 1 teaspoon vanilla extract (5ml): Deepens the chocolate flavor and adds warmth
Kitchen Equipment Needed
Having the right tools makes this recipe even easier. I’ve made chocolate gravy with minimal equipment, but these items will give you the smoothest, lump-free results.
The whisk is absolutely essential here. I tried making this once with just a spoon when my whisk was in the dishwasher, and I ended up with lumpy gravy that I had to strain. Don’t make my mistake. A good whisk is worth its weight in gold for this recipe.
- Medium heavy-bottomed saucepan: Prevents scorching and distributes heat evenly
- Wire whisk: Essential for breaking up lumps and achieving a smooth consistency
- Measuring cups and spoons: For accurate measurements
- Wooden spoon or silicone spatula: Helpful for stirring once the gravy thickens
- Small bowl: For mixing dry ingredients before adding to the pan (optional but helpful)
Recommended Products for This Recipe
After making chocolate gravy more times than I can count, I’ve found that a few specific products really do make a difference in the final result. These aren’t necessary, but they’ll help you achieve that perfect, silky-smooth gravy every time.
1. Hershey’s Natural Unsweetened Cocoa
This is my go-to cocoa powder for chocolate gravy. The flavor is consistently rich and chocolatey without any bitterness, and it dissolves smoothly into the milk without clumping. I’ve tried fancier brands, but honestly, good old Hershey’s cocoa gives you that classic chocolate gravy taste that tastes just like grandma used to make.
2. All-Clad Stainless Steel Saucepan
A heavy-bottomed saucepan is crucial for preventing scorching, and this All-Clad pan is worth every penny. The thick base distributes heat evenly, so you don’t get hot spots that burn the milk. I’ve had mine for years, and it’s still going strong. The wide base also makes whisking easier.
3. OXO Good Grips 11-Inch Balloon Whisk
This whisk changed my chocolate gravy game completely. The wires are strong enough to break up any cocoa clumps, but flexible enough to reach into the corners of the pan. The comfortable grip means your hand won’t cramp up even when you’re whisking constantly for several minutes.
4. Nielsen-Massey Madagascar Bourbon Pure Vanilla Extract
Quality vanilla extract makes a noticeable difference in the final flavor. This Madagascar vanilla has a rich, complex flavor that enhances the chocolate beautifully. A little goes a long way, and one bottle lasts me months.
You might also enjoy: Sausage Gravy Recipe
Step-by-Step Instructions: How to Make Chocolate Gravy
I’ve broken this down into detailed steps so even if you’ve never made gravy before, you’ll end up with perfect results. The key is constant whisking and patience. Don’t rush the thickening process.
1. Combine the Dry Ingredients
- Add the sugar, cocoa powder, flour, and salt to your medium saucepan
- Whisk these dry ingredients together thoroughly until they’re completely combined and there are no visible lumps of cocoa or flour
- Take your time with this step; breaking up the cocoa lumps now prevents lumpy gravy later
- The mixture should look like a uniform brown powder with no white streaks of flour visible
2. Add the Milk Gradually
- Pour about half of the milk into the dry ingredients
- Whisk vigorously to create a smooth paste with no lumps
- Add the remaining milk and continue whisking until the mixture is completely smooth
- The gravy will look thin at this point, almost like chocolate milk, and that’s exactly what you want
- Make sure to scrape the bottom and corners of the pan to incorporate any dry ingredients that might be stuck there
3. Heat and Thicken the Gravy
- Place the saucepan over medium heat
- Whisk constantly as the mixture heats up; this is crucial to prevent scorching
- Watch for the mixture to start steaming, which happens around 3-4 minutes
- Continue whisking as small bubbles begin to form around the edges of the pan
- After about 7-10 minutes total, you’ll feel the gravy start to thicken noticeably on your whisk
- The gravy is ready when it coats the back of a spoon and slowly drips off rather than running right off
- It should have the consistency of thin pancake batter or traditional savory gravy
4. Add Butter and Vanilla
- Remove the pan from heat immediately once the gravy reaches the right thickness
- Add the butter and vanilla extract to the hot gravy
- Stir with your whisk until the butter is completely melted and incorporated
- The butter will give the gravy a beautiful glossy sheen and silky texture
- The vanilla will deepen the chocolate flavor and add a wonderful aroma
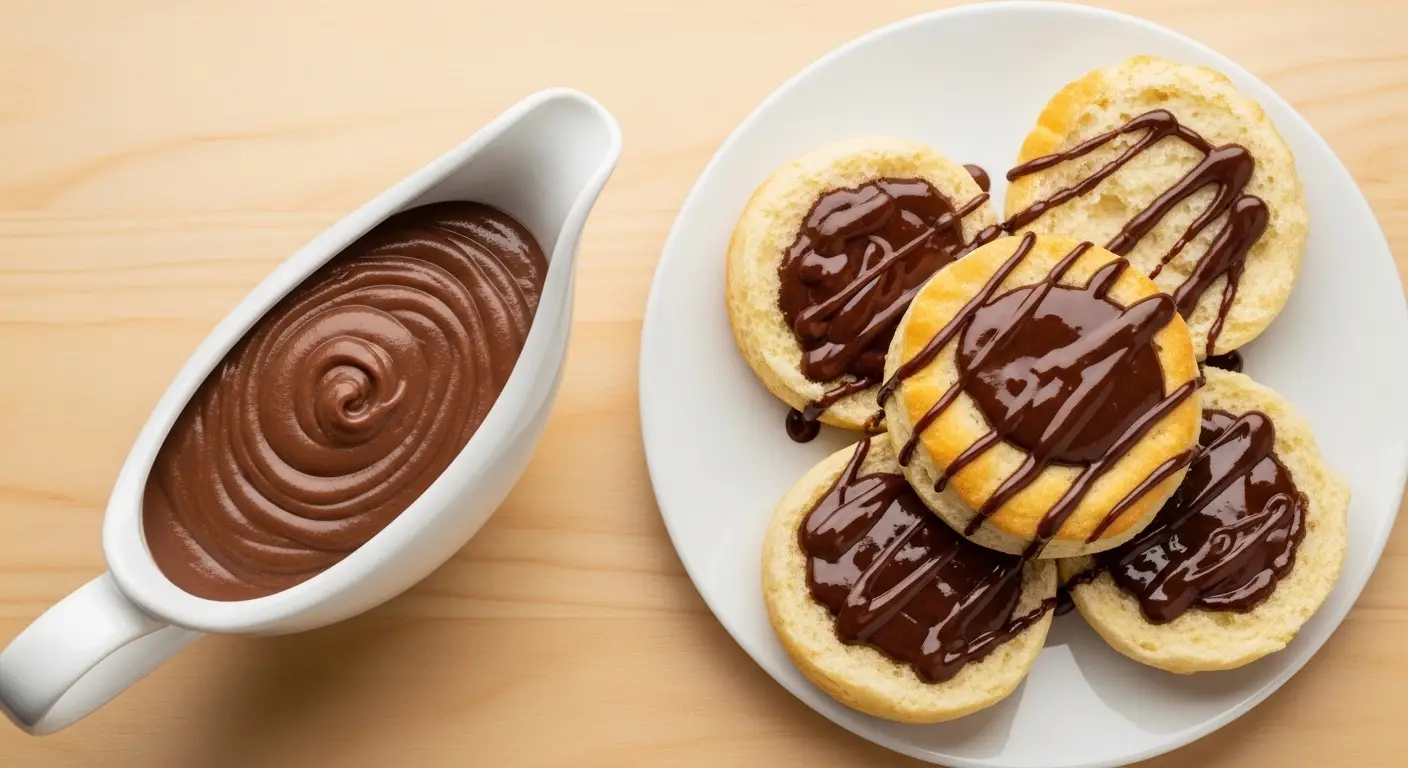
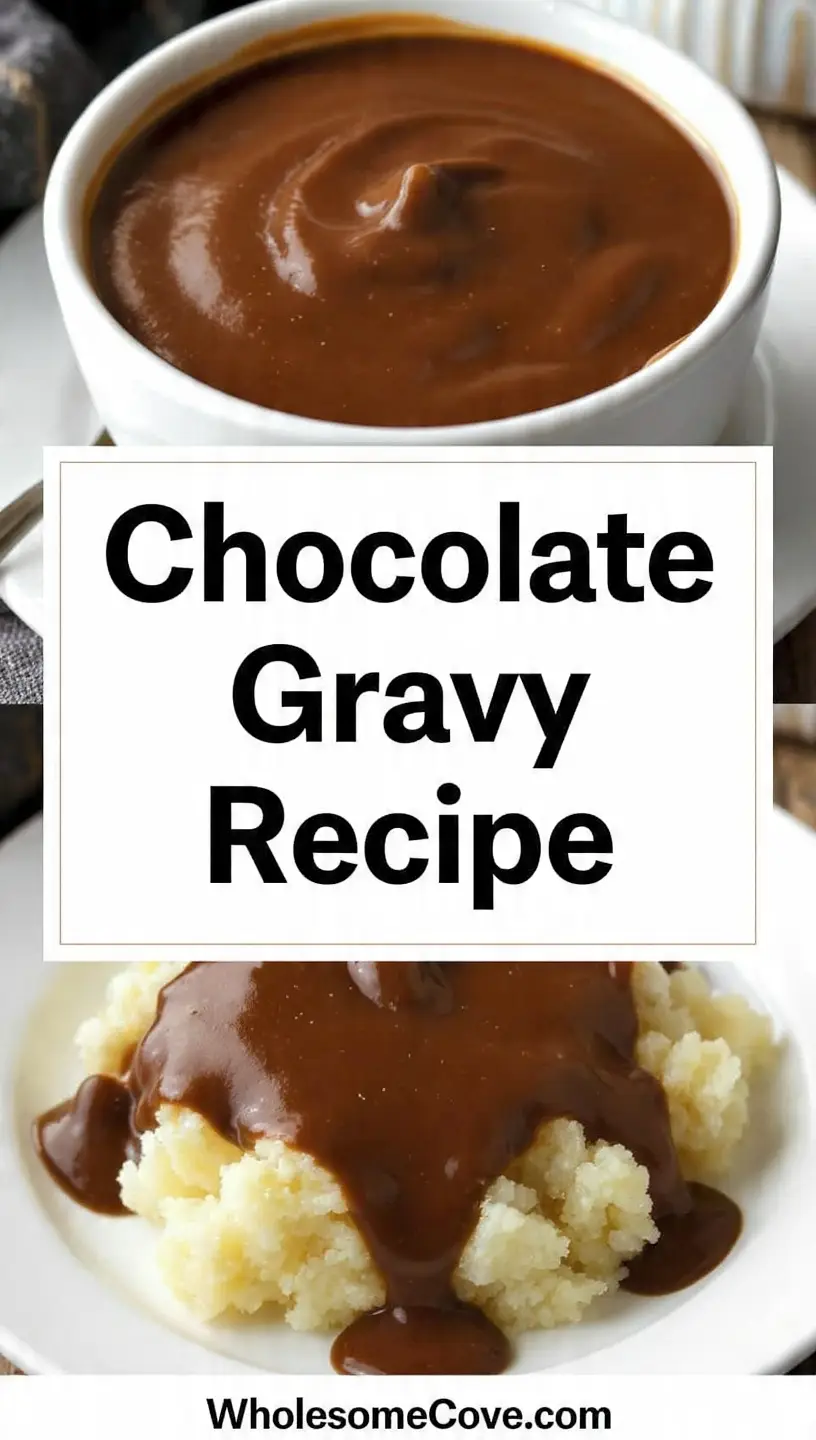
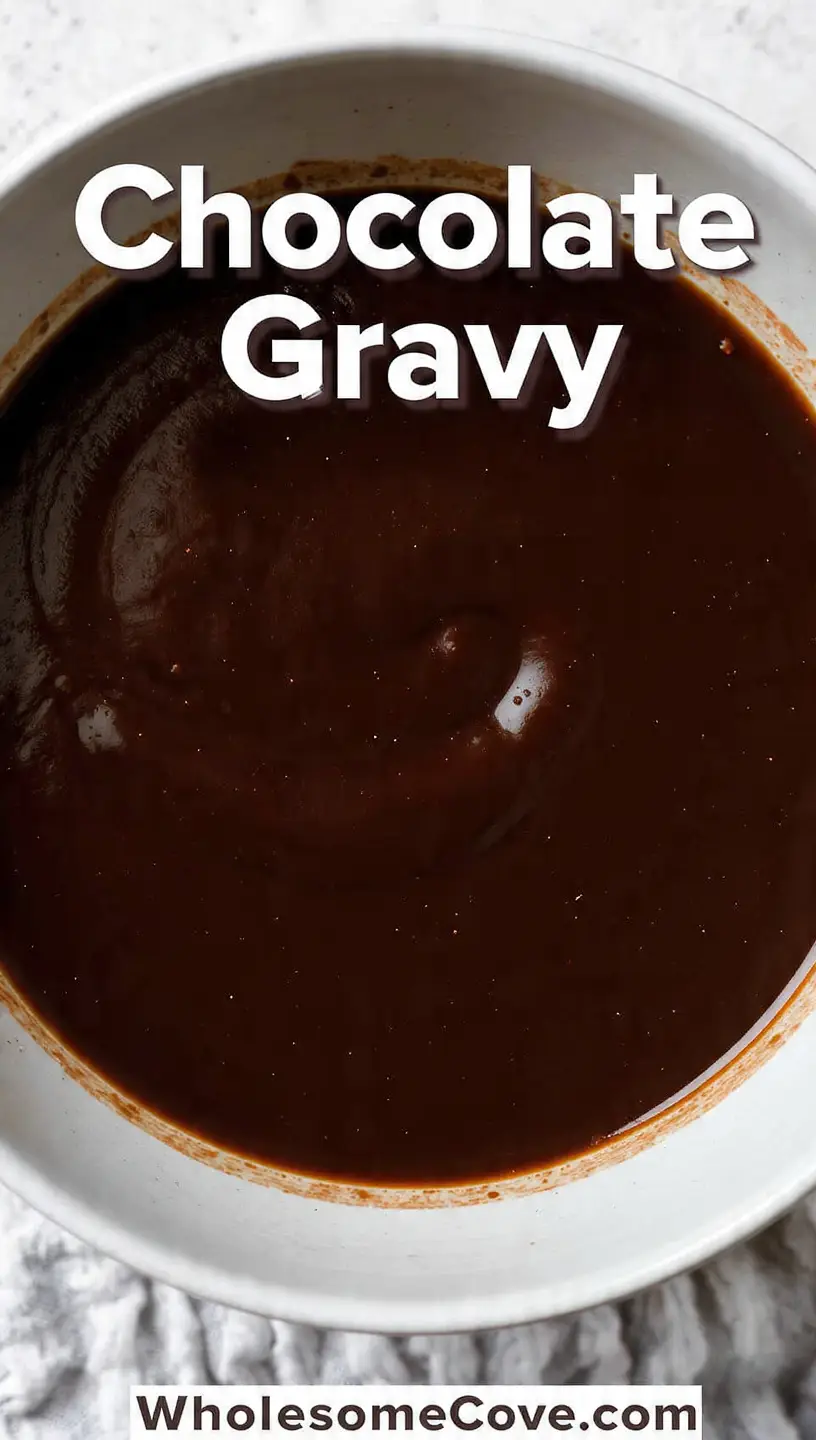
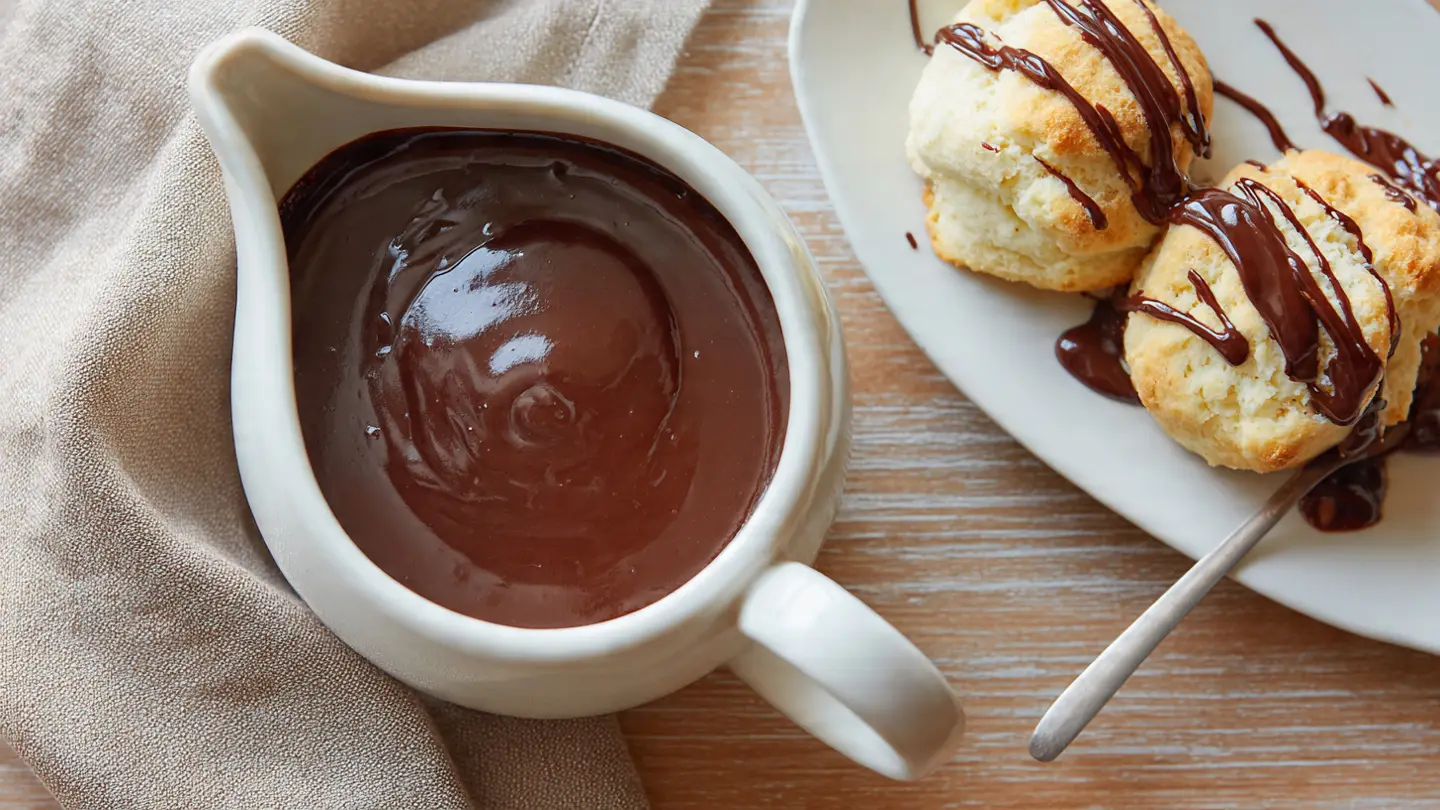
5. Serve Immediately
- Pour the chocolate gravy into a serving bowl or gravy boat
- Serve immediately while still warm over fresh biscuits, waffles, or your preferred base
- The gravy will continue to thicken slightly as it sits, which is normal
- If it gets too thick, you can thin it with a tablespoon or two of warm milk
Another favorite: Biscuits and Gravy Recipe
Tips for The Best Chocolate Gravy
I’ve learned these tricks through trial and error, and they’ll help you avoid the mistakes I made when I was first mastering this recipe. Pay special attention to the whisking technique because that’s where most problems occur.
The biggest mistake I see people make is not whisking constantly. I once got distracted by a phone call and ended up with a scorched bottom and lumpy gravy. Trust me, your arm might get tired, but constant whisking is non-negotiable.
- Use fresh cocoa powder: Old cocoa loses its flavor and can taste dusty or flat; check the expiration date before using
- Don’t skip the salt: It seems counterintuitive in a sweet recipe, but salt enhances the chocolate flavor dramatically
- Whisk constantly: This prevents lumps and keeps the milk from scorching on the bottom of the pan
- Watch your heat level: Medium heat is perfect; too high and you’ll scorch the milk, too low and it takes forever to thicken
- Test the consistency: Dip a spoon in the gravy and run your finger through it; if the line holds, it’s ready
- Adjust thickness as needed: If it’s too thick, whisk in milk a tablespoon at a time; if too thin, cook a bit longer
- Serve warm: Chocolate gravy is best enjoyed warm; the texture changes as it cools
- Mix dry ingredients well: Take the time to whisk the sugar, cocoa, and flour together thoroughly before adding milk
- Use whole milk: Lower fat milk works but won’t give you the same rich, creamy texture
- Clean your whisk often: If cocoa builds up on the whisk, rinse it quickly and continue whisking
What to Serve with Chocolate Gravy

The classic pairing is warm buttermilk biscuits, but I’ve served this gravy over just about everything and discovered some amazing combinations along the way. My kids’ favorite is actually over vanilla ice cream, which technically makes it more dessert than breakfast, but who’s counting?
Traditional Southern breakfast calls for pouring this over fresh-from-the-oven biscuits, but don’t be afraid to get creative.
- Buttermilk Biscuits: The traditional and best pairing, in my opinion
- Waffles: Especially Belgian-style with deep pockets to hold the gravy
- Pancakes: Both fluffy buttermilk and thin crepes work beautifully
- French toast: The eggy richness complements the chocolate perfectly
- Vanilla ice cream: Turn breakfast into dessert with this indulgent combination
- Pound cake: A thick slice makes an elegant dessert when topped with warm chocolate gravy
- Fresh strawberries: The fruit’s tartness balances the sweet gravy wonderfully
- Oatmeal: Stir a spoonful into your morning oats for a chocolate twist
- Angel food cake: Light and airy cake soaks up the gravy beautifully
Read Also: Pumpkin Waffle Recipe
Variations of Chocolate Gravy
Once you’ve mastered the basic recipe, these variations keep things interesting. I rotate through these depending on my mood and what I have in the pantry. The Mexican chocolate version is my personal favorite for special occasions.
The basic recipe is perfect as-is, but sometimes it’s fun to shake things up. I learned the hard way that major substitutions don’t always work (looking at you, coconut milk disaster of 2019), but these tested variations are delicious.
- Mexican Chocolate Gravy: Add 1/2 teaspoon ground cinnamon and a pinch of cayenne pepper to the dry ingredients for a spicy-sweet kick
- Mocha Gravy: Replace 1/2 cup of the milk with strong brewed coffee for a coffee-chocolate combination
- Dark Chocolate Gravy: Use Dutch-process cocoa powder instead of natural cocoa for a deeper, darker chocolate flavor
- Mint Chocolate Gravy: Replace vanilla extract with 1/2 teaspoon peppermint extract for a refreshing twist
- Peanut Butter Chocolate Gravy: Stir in 2 tablespoons of creamy peanut butter along with the butter for a PB cup flavor
- Salted Caramel Chocolate Gravy: Increase salt to 1/2 teaspoon and drizzle with caramel sauce when serving
- Orange Chocolate Gravy: Add 1/2 teaspoon orange zest and replace vanilla with orange extract
- Coconut Chocolate Gravy: Use full-fat coconut milk instead of regular milk and add 1/4 teaspoon coconut extract
- Espresso Chocolate Gravy: Stir in 1 teaspoon instant espresso powder with the dry ingredients
Storage and Reheating
Leftover chocolate gravy (if you’re lucky enough to have any) keeps beautifully in the fridge. I actually think it tastes even better the next day after the flavors have had time to meld together.
The gravy will thicken quite a bit as it cools, which is completely normal. Don’t panic when you open the fridge and find it’s turned into something closer to pudding consistency.
- Refrigerator storage: Transfer cooled gravy to an airtight container and refrigerate for up to 5 days
- Freezer storage: Freeze in a freezer-safe container for up to 3 months; thaw overnight in the refrigerator before reheating
- Portion control: Store in individual portions for easy reheating and serving
- Reheating on stovetop: Place gravy in a saucepan over low heat, whisking constantly and adding milk 1 tablespoon at a time until you reach desired consistency
- Reheating in microwave: Heat in 20-second intervals, stirring between each, until warm and smooth
- Texture adjustment: Add milk or cream to thin it out if it becomes too thick after refrigeration
- Avoid boiling: When reheating, bring it to warm, not hot or boiling, to prevent the texture from breaking down
- Skin formation: A thin skin may form on top during storage; simply stir it back in or remove it before reheating
For a savory take on gravy, try my Chicken Gravy Recipe.
Nutritional Facts
Per serving (based on 6 servings, about 1/3 cup each, without biscuits or toppings):
- Calories: 185
- Total Fat: 5g
- Saturated Fat: 3g
- Cholesterol: 14mg
- Sodium: 100mg
- Total Carbohydrates: 34g
- Dietary Fiber: 1g
- Sugars: 29g
- Protein: 3g
- Calcium: 79mg
- Iron: 1mg
- Potassium: 150mg
Note: Nutritional information is approximate and will vary based on specific ingredients used and serving size. This does not include biscuits, waffles, or other foods served with the gravy.
You might also like: Turkey Gravy Recipe
Health Benefits of Key Ingredients
While chocolate gravy is definitely a treat rather than health food, some of the ingredients do offer nutritional benefits. I’m not going to pretend this is a superfood, but it’s nice to know there’s some good mixed in with the indulgence.
Moderation is key here. This is a special-occasion breakfast or dessert, not an everyday staple. That said, the cocoa and milk do bring some legitimate nutritional value to the table.
- Cocoa powder: Rich in antioxidants called flavonoids that support heart health, contains minerals like iron and magnesium, may improve mood through compounds that affect neurotransmitters
- Milk: Excellent source of calcium for strong bones and teeth, provides protein for muscle health and satiety, contains vitamin D (if fortified) which aids calcium absorption and supports immune function
- Vanilla extract: Contains small amounts of antioxidants, has been shown to have calming properties that may reduce stress and anxiety
- Dark cocoa varieties: Dutch-process or dark cocoa powders offer even higher antioxidant levels compared to regular cocoa powder
Another sweet option: Strawberry Sauce Recipe
FAQs About Chocolate Gravy
1. What is chocolate gravy?
Chocolate gravy is a sweet Southern sauce made from cocoa powder, sugar, flour, milk, and butter. It has a consistency similar to traditional savory gravy but with a rich chocolate flavor.
It’s traditionally served over warm biscuits for breakfast but can also top pancakes, waffles, French toast, or even ice cream. The dish originated in the Appalachian region and has been a beloved Southern comfort food for generations.
2. Can I use water instead of milk to make chocolate gravy?
Yes, you can use water instead of milk, though the flavor and texture will be slightly different. Some traditional recipes actually call for water rather than milk.
Water creates a lighter, less creamy gravy with a more pronounced chocolate flavor. If using water, I recommend adding an extra tablespoon of butter to compensate for the richness you lose without milk. The cooking process remains the same.
3. Why is my chocolate gravy lumpy?
Lumpy chocolate gravy usually results from not whisking the dry ingredients thoroughly before adding the liquid, or from not whisking constantly while heating. Cocoa powder and flour clump easily if not properly incorporated.
To fix lumpy gravy, pour it through a fine-mesh strainer to remove lumps, then return it to the pan to continue cooking. To prevent lumps in the first place, whisk the dry ingredients together very well, add milk gradually while whisking, and whisk constantly during the entire cooking process.
4. How do I thicken chocolate gravy that’s too thin?
If your chocolate gravy is too thin, continue cooking it over medium heat while whisking constantly for a few more minutes to allow more liquid to evaporate. The flour needs time and heat to activate its thickening properties.
Alternatively, you can make a slurry by mixing 1 tablespoon of flour with 2 tablespoons of cold milk in a small bowl until smooth, then whisking this into the gravy. Cook for 2-3 more minutes until thickened. Remember that the gravy will also thicken slightly as it cools.
5. Can I make chocolate gravy ahead of time?
Absolutely! Chocolate gravy is actually a great make-ahead recipe. Prepare it according to the recipe instructions, let it cool completely, then store it in an airtight container in the refrigerator for up to 5 days.
When ready to serve, reheat it gently on the stovetop over low heat, whisking constantly and adding a splash of milk to restore the proper consistency. You can also reheat it in the microwave in 20-second intervals, stirring between each interval until warm and smooth.
Read Also: Brown Gravy Recipe
Chocolate Gravy Recipe
Ingredients
- 1 cup granulated sugar - 200g
- 3 tablespoons unsweetened cocoa powder - 18g
- 3 tablespoons all-purpose flour - 24g
- 1/4 teaspoon salt - 1.5g
- 2 cups whole milk - 480ml
- 2 tablespoons unsalted butter - 28g
- 1 teaspoon vanilla extract - 5ml
Equipment
- Medium heavy-bottomed saucepan - Prevents scorching and distributes heat evenly
- Wire whisk - Essential for breaking up lumps and achieving smooth consistency
- Measuring cups and spoons - For accurate measurements
- Wooden spoon or silicone spatula - Helpful for stirring once the gravy thickens
- Small bowl - (optional) For mixing dry ingredients before adding to pan
Method
- Add sugar, cocoa powder, flour, and salt to a medium saucepan and whisk together thoroughly until completely combined with no visible lumps.
- Pour half the milk into the dry ingredients and whisk vigorously to create a smooth paste. Add remaining milk and continue whisking until completely smooth with no lumps.
- Place saucepan over medium heat and whisk constantly for 7-10 minutes until the mixture thickens to the consistency of thin pancake batter and coats the back of a spoon.
- Remove from heat immediately and stir in butter and vanilla extract until butter is completely melted and incorporated, creating a glossy finish.
- Pour into a serving bowl and serve immediately while warm over biscuits, waffles, or your preferred base. Gravy will continue to thicken slightly as it sits.
Nutrition
Notes
- Use fresh cocoa powder for best flavor. Old cocoa can taste dusty and flat.
- Whisk constantly while heating to prevent lumps and scorching on the bottom of the pan.
- Medium heat is ideal. Too high will scorch the milk, too low takes too long to thicken.
- For thinner gravy, add milk 1 tablespoon at a time. For thicker gravy, cook a bit longer.
- Gravy is best served warm. The texture changes as it cools and will thicken considerably.
- Store leftovers in an airtight container in the refrigerator for up to 5 days.
- Reheat gently on the stovetop over low heat, whisking constantly and adding milk to thin as needed.
- Can be frozen for up to 3 months. Thaw overnight in refrigerator before reheating.
- For Mexican chocolate variation, add 1/2 teaspoon cinnamon and a pinch of cayenne pepper.
- For mocha gravy, replace 1/2 cup milk with strong brewed coffee.
Private Notes
Tried this recipe?
Let us know how it was!Final Thoughts
This Chocolate Gravy Recipe has become one of those dishes I make when I want to create special memories with my family. There’s something magical about watching my kids’ faces light up when I tell them we’re having chocolate for breakfast.
It reminds me of lazy Sunday mornings at my grandmother’s house, where time moved slower and breakfast could last for hours. Now I’m passing that tradition down to my own children, and I hope you’ll start this tradition in your home too.
Give this recipe a try this weekend and let me know how it turns out! I’d love to hear about your favorite way to serve it or any creative variations you come up with. Leave a comment below and share your chocolate gravy experience with our community.
Recommended:
- Belgian Waffle Recipe
- Sourdough Waffle Recipe
- Protein Waffle Recipe
- Vegan Waffle Recipe
- Sweet and Sour Sauce Recipe
- Honey Mustard Sauce Recipe
- Chocolate Chip Cookies Recipe
- Peanut Butter Cookies Recipe
- No Bake Cookies Recipe
- Oatmeal Cookies Recipe
