
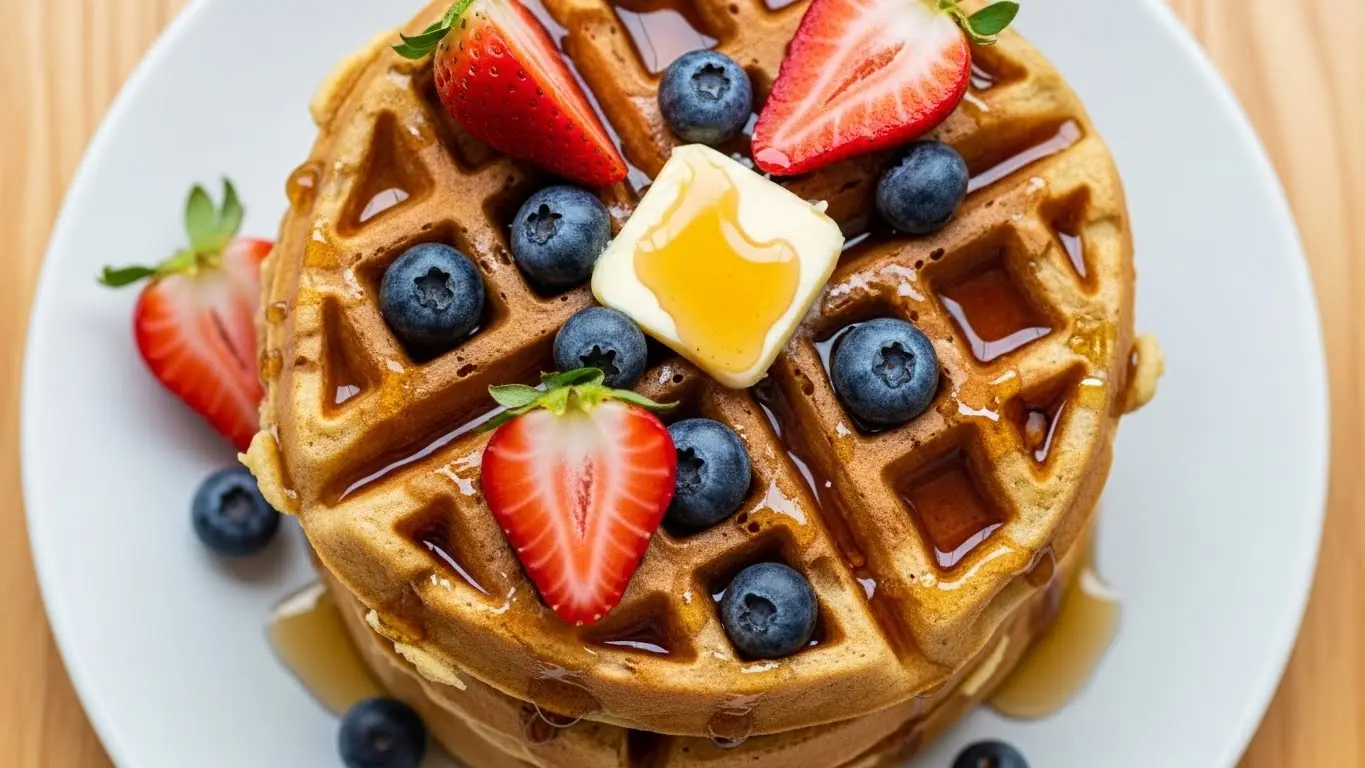
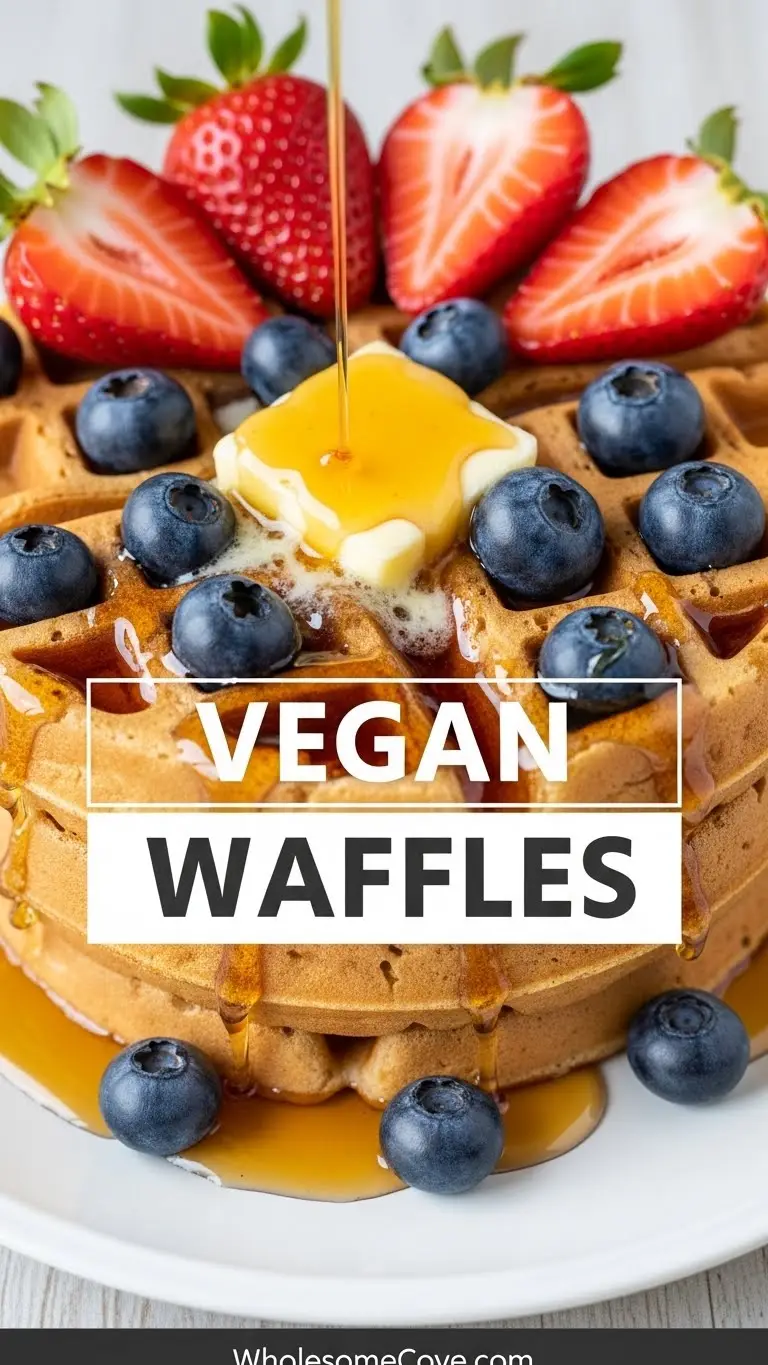
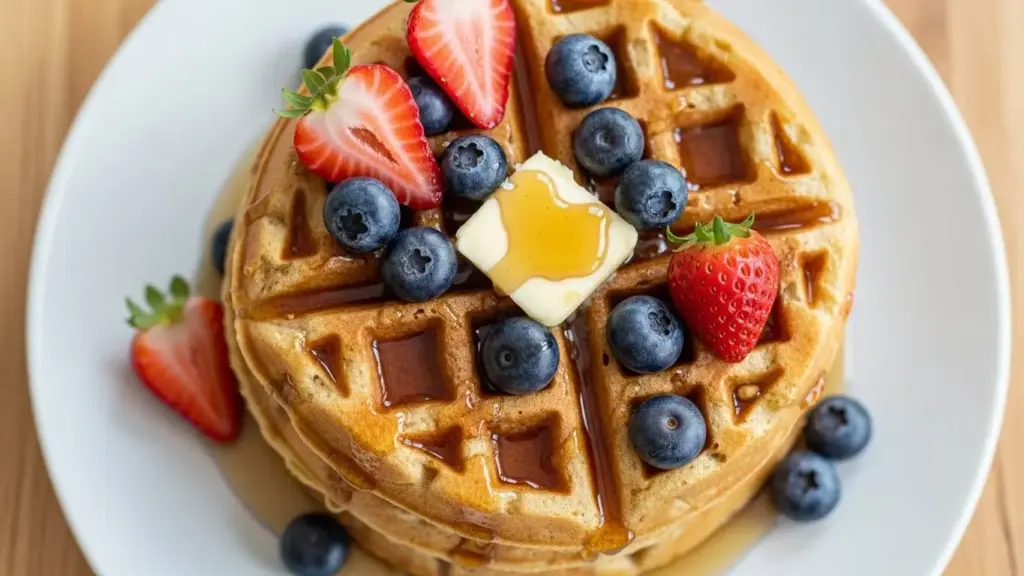
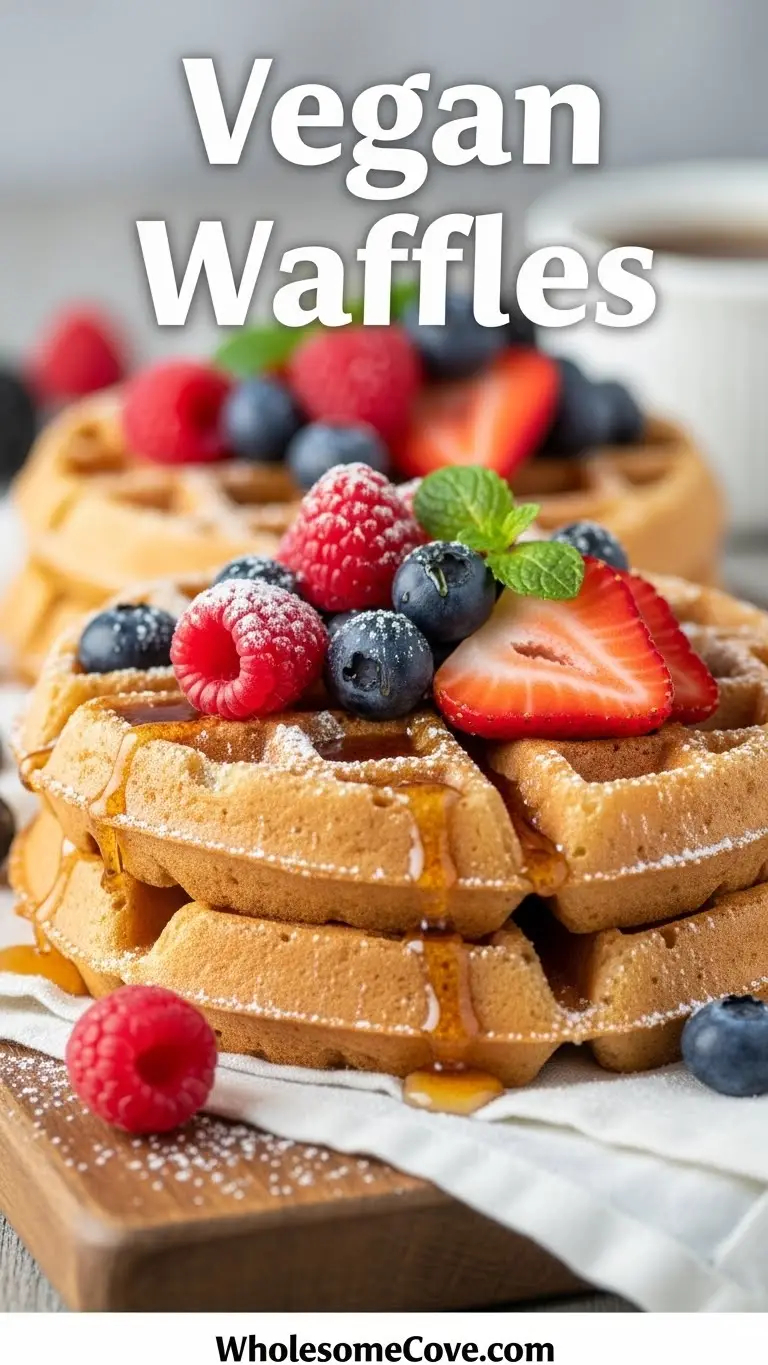
I never thought I’d find a Vegan Waffle Recipe that could compete with the classic buttermilk version my grandmother used to make every Sunday morning. But after countless experiments in my kitchen (and more than a few flat, rubbery disasters), I finally cracked the code.
These vegan waffles are everything you want in a breakfast classic: golden and crispy on the outside, light and fluffy on the inside, with that perfect vanilla sweetness that makes you reach for seconds. The best part? You’d never guess they’re completely plant-based.
My journey to perfecting this recipe started when my daughter announced she was going vegan last year. Suddenly, our traditional weekend waffle breakfasts were off the table, and I wasn’t about to let that tradition die.
After serving these to my meat-eating, dairy-loving husband, he looked at me with genuine shock and asked, “Wait, these are vegan?” That was the moment I knew I’d nailed it.
| Quick Recipe Summary | |
|---|---|
| Prep Time | 10 minutes |
| Cook Time | 20 minutes |
| Total Time | 30 minutes |
| Servings | 6 waffles |
| Difficulty Level | Easy |
If you’re looking for other plant-based breakfast options, my pumpkin overnight oats are another family favorite.
Why You’ll Love This Vegan Waffle Recipe
The thing that surprised me most about developing this recipe was how simple it turned out to be. I expected to need specialty ingredients or complicated techniques, but the reality is much more straightforward.
These waffles get their incredible texture from a combination of plant milk and a touch of vinegar, which creates a vegan buttermilk effect. The result is waffles that are tender inside with edges so crispy they practically shatter when you bite into them.
Here’s what makes these vegan waffles absolutely irresistible:
- Perfect texture every single time: The combination of all-purpose flour and just the right amount of fat creates waffles with crispy exteriors and fluffy, tender centers that rival any traditional recipe
- No weird ingredients required: Everything you need is probably already in your pantry, no hunting down specialty vegan products at expensive health food stores
- Ready in under 30 minutes: From pulling out your waffle iron to sitting down with a stack of golden waffles, this entire recipe takes less time than a coffee shop run
- Freezer-friendly for busy mornings: Make a double batch on Sunday and pop them in the toaster all week long for breakfast that tastes freshly made
- Naturally dairy-free and egg-free: Perfect for anyone with allergies or dietary restrictions, but delicious enough that no one will feel like they’re missing out
- Endlessly customizable: The base recipe is a blank canvas for whatever flavors you’re craving, from chocolate chips to fresh berries
You may also like: Protein Waffle Recipe
Ingredients
This recipe uses simple, everyday ingredients that work together to create the perfect vegan waffle. I’ve tested this with various substitutions, and I’ll share what works best.
The key to these waffles is creating that “buttermilk” effect with plant milk and vinegar. This isn’t just for flavor; it actually helps activate the leavening agents and creates a lighter texture.
- 2 cups (240g) all-purpose flour: I’ve tried this with whole wheat flour, but all-purpose gives you the lightest, fluffiest texture
- 2 tablespoons (25g) granulated sugar: Just enough sweetness to complement your toppings without making the waffles taste like dessert
- 1 tablespoon (12g) baking powder: This is your main leavening agent, make sure yours is fresh for the best rise
- 1/2 teaspoon (3g) salt: Don’t skip this, it balances the sweetness and brings out all the other flavors
- 1 3/4 cups (420ml) unsweetened almond milk: Any plant milk works, but I love almond milk for its neutral flavor (soy milk makes them slightly denser, oat milk adds a subtle sweetness)
- 1 tablespoon (15ml) apple cider vinegar: This creates the vegan buttermilk magic, white vinegar works too but apple cider adds a lovely depth
- 1/3 cup (80ml) neutral oil: I use vegetable or canola oil, melted coconut oil works but adds a slight coconut flavor
- 1 1/2 teaspoons (7ml) vanilla extract: Pure vanilla makes such a difference here, imitation just doesn’t give you that same warm, comforting flavor
- Cooking spray or additional oil for the waffle iron: I like using a brush to apply oil for more control
Try my Pumpkin Waffle Recipe.
Kitchen Equipment Needed
Having the right tools makes this recipe even easier, though you can definitely work with what you have. After making these waffles at least fifty times, here’s what I’ve found most helpful.
Your waffle iron is obviously the star of the show here, but the other tools matter too. I learned the hard way that undermixing is better than overmixing, so having separate bowls for wet and dry ingredients helps you control that.
- Waffle iron: Any style works, but I prefer a Belgian waffle maker for those deep pockets that hold all the syrup and toppings
- Two large mixing bowls: One for dry ingredients, one for wet, keeping them separate until the last moment ensures tender waffles
- Whisk: For mixing the dry ingredients and the wet ingredients separately
- Measuring cups and spoons: Baking is chemistry, accurate measurements really do make a difference
- Pastry brush or paper towel: For applying oil to your waffle iron if it’s not nonstick
- Wire cooling rack: This keeps your waffles crispy while you finish the batch, setting them on a plate makes them soggy
- Large spoon or ladle: For pouring the batter onto the waffle iron
Another favorite: Mochi Waffle Recipe
Recommended Products for This Recipe
After making these waffles countless times and testing different products, I’ve found a few items that genuinely make a difference in the final result. These aren’t necessities, but they’ll take your vegan waffles from good to absolutely phenomenal.
1. Cuisinart WAF-F20 Double Belgian Waffle Maker
This is the waffle iron I use every single weekend, and it’s been a complete workhorse. The double feature means I can make two waffles at once, which is a lifesaver when you’re feeding a hungry family. The temperature control helps you get that perfect golden color without any guesswork, and the nonstick coating means I barely need any oil.
2. Bob’s Red Mill Organic All-Purpose Flour
I switched to this flour about six months ago, and I noticed an immediate improvement in texture. It’s finely milled, which creates lighter waffles with a more delicate crumb. The organic quality means no weird aftertastes or chemical residues, just pure, clean flavor.
3. Bragg Organic Apple Cider Vinegar
The quality of your vinegar matters more than you’d think. Bragg’s raw, unfiltered apple cider vinegar creates the best vegan buttermilk reaction I’ve found. It adds a subtle depth of flavor that regular white vinegar just can’t match, and the organic “mother” actually helps with the leavening process.
4. OXO Good Grips Silicone Pastry Brush
This brush has completely changed how I oil my waffle iron. The silicone bristles don’t absorb oil like traditional brushes, so you use less and get more even coverage. It’s heat-resistant, which means I can brush on oil even when the waffle iron is already hot.
Step-by-Step Instructions: How to Make Vegan Waffles
I’ve broken this process down into foolproof steps that guarantee perfect waffles every time. The key is not to overthink it, this is one of those recipes where simplicity wins.
1. Preheat Your Waffle Iron and Create the Vegan Buttermilk
The first step happens before you even start mixing anything. Trust me, you want that waffle iron hot and ready to go.
- Turn on your waffle iron to medium-high heat and let it preheat for at least 5 minutes, a properly heated iron is the secret to crispy exteriors
- While it’s heating, combine the almond milk and apple cider vinegar in a measuring cup or small bowl
- Stir gently and let this mixture sit for 5-10 minutes, you’ll notice it starts to curdle slightly and thicken, which is exactly what you want
- This “buttermilk” reaction is what gives these vegan waffles their incredible tender texture and subtle tang
2. Mix the Dry Ingredients
Getting your dry ingredients perfectly combined ensures every waffle has consistent flavor and texture. I learned this after making a batch where the baking powder clumped in one corner, those waffles were… interesting.
- In your large mixing bowl, whisk together the all-purpose flour, sugar, baking powder, and salt
- Whisk vigorously for about 30 seconds to make sure everything is evenly distributed and there are no lumps of baking powder hiding
- Create a well in the center of your dry ingredients by pushing them toward the sides of the bowl, this makes it easier to incorporate the wet ingredients smoothly
- Set this bowl aside and don’t be tempted to mix anything into it until you’ve prepared the wet ingredients
3. Combine the Wet Ingredients
This is where your vegan buttermilk comes into play. The timing matters here, you want to add everything together quickly once you start.
- Add the neutral oil and vanilla extract to your vegan buttermilk mixture (the one that’s been sitting and curdling)
- Whisk these together until they’re well combined and slightly emulsified, you should see the mixture get a bit foamy
- Give it one final stir right before adding it to the dry ingredients, this ensures the vinegar is fully incorporated and working its magic
4. Mix Wet and Dry Ingredients Together
This is the step where most people go wrong. I used to overmix my waffle batter, thinking I needed to eliminate every single lump. Big mistake.
- Pour your wet ingredient mixture into the well you created in the center of the dry ingredients
- Using a whisk or large spoon, gently fold the wet ingredients into the dry, starting from the center and working your way outward
- Stop mixing as soon as you don’t see any more dry flour, the batter should still have some small lumps throughout
- It’s going to look a little lumpy and imperfect, resist the urge to keep stirring, those lumps will work themselves out during cooking
- Let the batter rest for 2-3 minutes while you prepare your waffle iron, this brief rest allows the flour to hydrate and the baking powder to start working
5. Prepare Your Waffle Iron
Even if you have a nonstick waffle iron, I still recommend a light coating of oil for the crispiest results. I learned this from my sourdough waffle recipe experiments.
- Using your pastry brush or a paper towel dipped in oil, lightly coat both plates of your preheated waffle iron
- You don’t need much, just a thin, even layer that catches the light when you look at it
- If you’re using cooking spray, give it a quick 2-second spritz on each plate
- Make sure you coat every nook and cranny, especially in the corners and deep pockets of Belgian-style irons
6. Pour and Cook the Waffles
The actual cooking part is straightforward, but there are a few tricks to getting them perfect every time. Patience is key here.
- Use a ladle or measuring cup to pour batter onto the center of your waffle iron, I use about 1/2 to 2/3 cup depending on your iron’s size
- Pour the batter in a circular motion starting from the center, this helps it spread more evenly
- Close the lid gently and don’t open it for at least 3-4 minutes, opening too early is the number one cause of waffles sticking and tearing
- Most waffle irons have an indicator light that tells you when they’re done, but I’ve found that cooking for an additional 30-60 seconds after the light turns off gives you extra crispy waffles
- You’ll know they’re ready when you can lift the lid easily without any resistance and the waffles are golden brown with crispy edges
- Carefully remove the waffle using a fork or tongs, avoid using metal utensils on nonstick surfaces
7. Keep Waffles Warm and Crispy
If you’re making multiple waffles (and with this recipe, you definitely are), keeping the first ones warm and crispy while you finish the batch is crucial. Nobody wants a soggy waffle.
- Transfer each finished waffle to a wire cooling rack set over a baking sheet
- Place the whole setup in an oven preheated to 200°F (95°C), this keeps them warm without continuing to cook them
- Never stack waffles directly on top of each other or place them on a plate, this traps steam and makes them soggy
- If you don’t have a wire rack, you can place them directly on the oven rack, they might get a bit crispier but that’s not a bad thing
- They’ll stay perfectly warm and crispy for up to 20 minutes while you finish cooking the rest of the batch
Read Also: Belgian Waffle Recipe
Tips for The Best Vegan Waffles
I’ve made every mistake possible with this recipe, and I’ve learned something from each one. These tips will help you avoid the pitfalls I stumbled into along the way.
After making these waffles more times than I can count, I’ve discovered some tricks that make a real difference. These aren’t just nice-to-knows, they’re the secrets to truly exceptional vegan waffles.
- Don’t overmix the batter: This is the single most important tip I can give you, overmixing develops the gluten in the flour and creates tough, chewy waffles instead of light, fluffy ones (I mix just until the dry ingredients disappear, even if there are still lumps)
- Let your batter rest: Allowing the batter to sit for 2-3 minutes after mixing gives the flour time to absorb the liquid fully and the leavening agents time to activate, resulting in lighter waffles
- Use fresh baking powder: Baking powder loses its potency over time, if yours is more than 6 months old, get a new container (I test mine by dropping a spoonful in hot water, it should bubble vigorously)
- Don’t underfill your waffle iron: I used to be conservative with the batter, thinking I could avoid overflow, but using too little creates thin waffles that don’t have that satisfying contrast between crispy outside and fluffy inside
- Wait for the steam to stop: When the steam stops escaping from your waffle iron, that’s your signal that the waffles are nearly done, this is more reliable than any timer
- Adjust for your waffle iron: Every waffle iron is different, yours might run hotter or cooler than mine, so your first waffle is always a test (I often eat that one while I’m cooking the rest)
- Keep the iron closed: It’s so tempting to peek, but opening the lid early causes waffles to stick and tear every single time, resist for at least 3 minutes
- Oil between each waffle: Even with a nonstick surface, I apply a fresh thin coating of oil before each waffle for the crispiest results
- Use room temperature ingredients: Cold almond milk can slow down the buttermilk reaction and create denser waffles, let everything come to room temperature if you have time
Try my Buttermilk Waffle Recipe.
What to Serve with Vegan Waffles
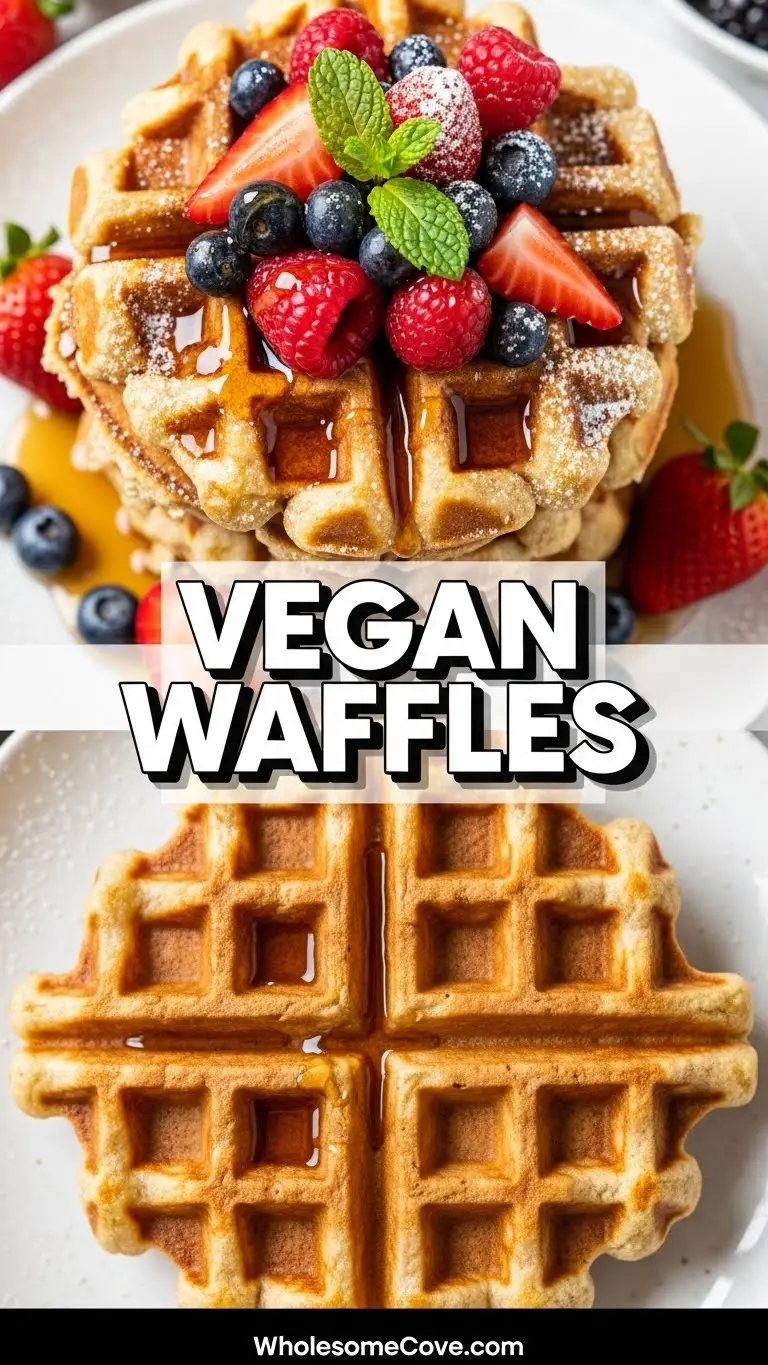
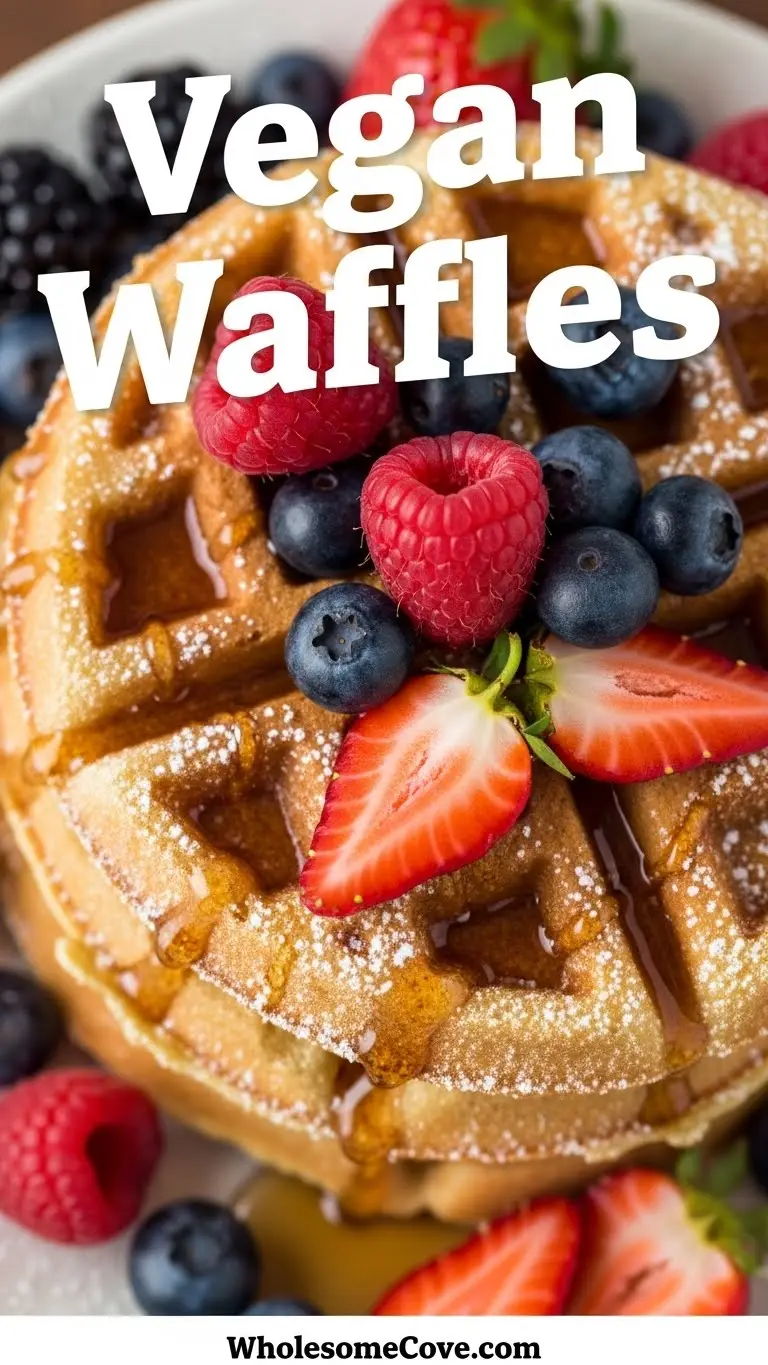
The beauty of a great waffle recipe is that it’s a canvas for whatever flavors you’re craving. I’ve served these with everything from classic maple syrup to elaborate fruit compotes, and they’ve never disappointed.
These vegan waffles pair beautifully with both sweet and savory accompaniments. My personal favorite is fresh berries and coconut whipped cream, but there’s truly no wrong answer here.
Here are my favorite ways to serve these waffles:
- Classic maple syrup and vegan butter: Sometimes simple is best, pure maple syrup (not pancake syrup) adds incredible depth, and Earth Balance butter melts into all those crispy pockets perfectly
- Fresh berry compote: I simmer mixed berries with a little sugar and lemon juice for 10 minutes to create a warm, jammy topping that tastes like summer
- Coconut whipped cream: Chill a can of full-fat coconut milk overnight, scoop out the solid cream, and whip it with powdered sugar and vanilla for a dairy-free topping that’s legitimately better than regular whipped cream
- Sliced bananas and almond butter: This combination adds protein and healthy fats, making these waffles a more substantial breakfast that keeps you full until lunch
- Strawberry sauce: This homemade sauce is the perfect sweet topping for waffles
- Sautéed apples with cinnamon: I dice apples and cook them in a little vegan butter with cinnamon and a touch of brown sugar, it tastes like apple pie on a waffle
- Peanut butter and chocolate chips: My kids request this version constantly, warm waffles melt the chocolate chips slightly and make the peanut butter extra drippy
- Avocado toast toppings: For a savory twist, I’ll use these waffles as the base for smashed avocado, everything bagel seasoning, and cherry tomatoes
Read Also: Best Waffle Recipe.
Variations of Vegan Waffles
Once you’ve mastered the basic recipe, the variations are endless. I’ve tried dozens of different flavor combinations, and these are the ones my family requests over and over.
The base recipe is incredibly versatile and forgiving. You can customize these waffles to match any craving or use up whatever you have in your pantry.
- Chocolate chip waffles: Fold 1/2 cup (90g) of dairy-free chocolate chips into the batter right before cooking, my kids call these “dessert waffles” and I can’t really argue with them
- Blueberry waffles: Gently fold 3/4 cup (110g) of fresh or frozen blueberries into the finished batter, frozen berries work just as well and you don’t need to thaw them first
- Cinnamon sugar waffles: Add 1 1/2 teaspoons of ground cinnamon to the dry ingredients and increase the sugar to 3 tablespoons, these taste like churros in waffle form
- Lemon poppy seed waffles: Add 1 tablespoon of poppy seeds and the zest of one lemon to the dry ingredients, replace the vanilla extract with lemon extract for even more citrus punch
- Pumpkin spice waffles: Replace 1/2 cup of the almond milk with pumpkin puree and add 1 1/2 teaspoons of pumpkin pie spice to the dry ingredients, these are my go-to all fall long
- Banana nut waffles: Mash one ripe banana and add it to the wet ingredients, fold in 1/3 cup (40g) of chopped walnuts before cooking, the banana makes them extra moist and naturally sweet
- Savory herb waffles: Skip the sugar and vanilla, add 2 tablespoons of chopped fresh herbs (rosemary, thyme, or chives work wonderfully) and 1/4 teaspoon of garlic powder, these are incredible topped with avocado toast ingredients
- Whole wheat waffles: Replace up to half the all-purpose flour with whole wheat flour for a heartier, nuttier waffle, I don’t recommend using all whole wheat as they become quite dense
Storage and Reheating
One of the best things about this recipe is how well these waffles store. I actually prefer making a double batch on Sunday and having quick breakfasts ready all week.
Proper storage and reheating techniques mean you can enjoy crispy, delicious waffles any day of the week without having to pull out the waffle iron every single morning. This has been an absolute lifesaver on busy weekday mornings.
- Room temperature storage: Freshly made waffles will stay fresh at room temperature for up to 2 hours, just keep them on that wire rack so they stay crispy
- Refrigerator storage: Let waffles cool completely on a wire rack (about 30 minutes), stack them with pieces of parchment paper between each waffle to prevent sticking, store in an airtight container or sealed plastic bag for up to 4 days
- Freezer storage: This is my preferred method for meal prep, let waffles cool completely, arrange them in a single layer on a baking sheet and freeze for 1-2 hours until solid, transfer frozen waffles to a freezer bag with parchment paper between each one, they’ll keep for up to 3 months
- Toaster reheating: This is the fastest method and gives you the crispiest results, pop frozen or refrigerated waffles directly into the toaster on medium-high heat for 2-3 minutes (no need to thaw first)
- Oven reheating: Preheat your oven to 350°F (175°C), place waffles directly on the oven rack or on a baking sheet for 5-7 minutes if refrigerated or 10-12 minutes if frozen, this method makes them incredibly crispy
- Microwave reheating: I only use this method when I’m desperate for speed, place a waffle on a microwave-safe plate and heat for 30-45 seconds if refrigerated or 60-90 seconds if frozen, they won’t be crispy but they’ll be warm
- Pro tip for extra crispy reheated waffles: After toaster or oven reheating, pop them back in the waffle iron for 30-60 seconds, this refreshes that just-made crispiness perfectly
Nutritional Facts
Here’s the nutritional breakdown per waffle (this recipe makes 6 waffles). These values are approximate and can vary based on the specific brands of ingredients you use.
Per Waffle:
- Calories: 245
- Total Fat: 13g
- Saturated Fat: 1g
- Sodium: 285mg
- Total Carbohydrates: 28g
- Dietary Fiber: 1g
- Sugars: 5g
- Protein: 4g
These waffles provide a good source of energy to start your day. The fat content comes primarily from the healthy oils used in the recipe, which helps keep you satisfied throughout the morning.
For a healthier version, I’ve detailed some great options in my healthy banana bread, and similar principles can be applied here.
Health Benefits of Key Ingredients
While I make these waffles primarily because they taste incredible, I love that they’re made with wholesome plant-based ingredients that offer real nutritional benefits. It’s nice when delicious and nutritious overlap.
Understanding what each ingredient brings to the table helps you appreciate why this recipe works so well, both in terms of flavor and nutrition.
Here’s what makes these waffles a better choice than many traditional recipes:
- Almond milk: Naturally low in calories and free from cholesterol, fortified versions provide calcium, vitamin D, and vitamin E, it’s also easier to digest for those with lactose sensitivities
- Apple cider vinegar: Contains beneficial acids that can support digestion, helps stabilize blood sugar levels when consumed with carbohydrate-rich foods like waffles, may support heart health by helping maintain healthy cholesterol levels
- All-purpose flour: Provides complex carbohydrates for sustained energy throughout your morning, enriched varieties contain added B vitamins and iron that support metabolism and energy production
- Plant-based oils: Contain heart-healthy unsaturated fats that help your body absorb fat-soluble vitamins, provide essential fatty acids that your body can’t produce on its own
- No eggs or dairy: Makes these waffles cholesterol-free and easier on digestion, perfect for anyone with egg or dairy allergies or sensitivities, contains no animal hormones or antibiotics that are sometimes present in conventional dairy products
Read Also: Healthy Waffle Recipe.
FAQs About Vegan Waffles
These are the questions I get asked most often when I share this recipe. I’ve learned the answers through lots of trial and error, so hopefully, I can save you some time and frustration.
1. Can I make these waffles gluten-free?
Yes, but with some adjustments. I’ve had the best success using a 1:1 gluten-free flour blend that contains xanthan gum (Bob’s Red Mill makes a great one).
The waffles will be slightly more delicate and may take an extra minute to cook, but the texture is still quite good. Avoid using single-grain flours like rice flour or almond flour alone, as they don’t have the structure you need for waffles.
2. Why are my vegan waffles soggy instead of crispy?
This usually comes down to one of three issues: not cooking them long enough, using too much liquid in the batter, or not letting your waffle iron get hot enough before cooking. Make sure you’re cooking until the steam stops escaping and consider cooking for an additional 30-60 seconds after your indicator light says they’re done.
Also, always transfer finished waffles to a wire rack instead of stacking them on a plate. Trapped steam makes them soggy every time.
3. Can I use a different type of plant milk?
Absolutely, I’ve tested this recipe with every plant milk I could find. Soy milk creates slightly denser waffles but works beautifully, oat milk adds a subtle sweetness that’s lovely, and coconut milk makes them extra rich.
Just make sure you’re using unsweetened and unflavored varieties unless you want to adjust the sugar in the recipe. The vinegar will create that buttermilk reaction with any plant milk.
4. My waffles keep sticking to the iron, what am I doing wrong?
Sticking usually happens when you open the iron too early or when there isn’t enough oil on the plates. Wait at least 3-4 minutes before opening, even if you think they might be burning.
Season your waffle iron properly by coating it with oil before the first use and between each waffle. If your iron is older or the nonstick coating is wearing off, you might need to use slightly more oil than the recipe calls for.
5. Can I make the batter ahead of time?
I don’t recommend mixing the batter the night before because the baking powder will start reacting and lose its leavening power. However, you can measure out your dry ingredients in advance and store them in an airtight container.
In the morning, just mix your wet ingredients and combine everything fresh. The whole process takes less than 5 minutes anyway, so making it ahead doesn’t save much time.
Final Thoughts
These Vegan Waffles have become such a staple in our house that I honestly can’t remember the last time we made traditional waffles. The plant-based version is just as delicious, if not better, and I love knowing exactly what’s going into them.
The beauty of this recipe is its simplicity. You don’t need any fancy equipment beyond a waffle iron, and you probably already have all the ingredients in your pantry right now.
I hope these waffles bring as much joy to your breakfast table as they’ve brought to mine. There’s something special about sitting down to a stack of golden, crispy waffles on a lazy weekend morning, knowing they’re both delicious and aligned with your values.
Give this recipe a try and let me know how it turns out. I’d love to hear about any creative toppings or variations you come up with!
Recommended:
- Sourdough Focaccia Recipe
- Homemade Biscuit Recipe
- Creme Brulee Cheesecake Recipe
- Crème Brûlée French Toast Recipe
- Creme Brulee French Toast Casserole Recipe
- Fresh Milled Flour Bread Recipe
- French Toast Recipe
- Easy Pancake Recipe
- Breakfast Burrito Recipe
- Baked Oatmeal Recipe
