
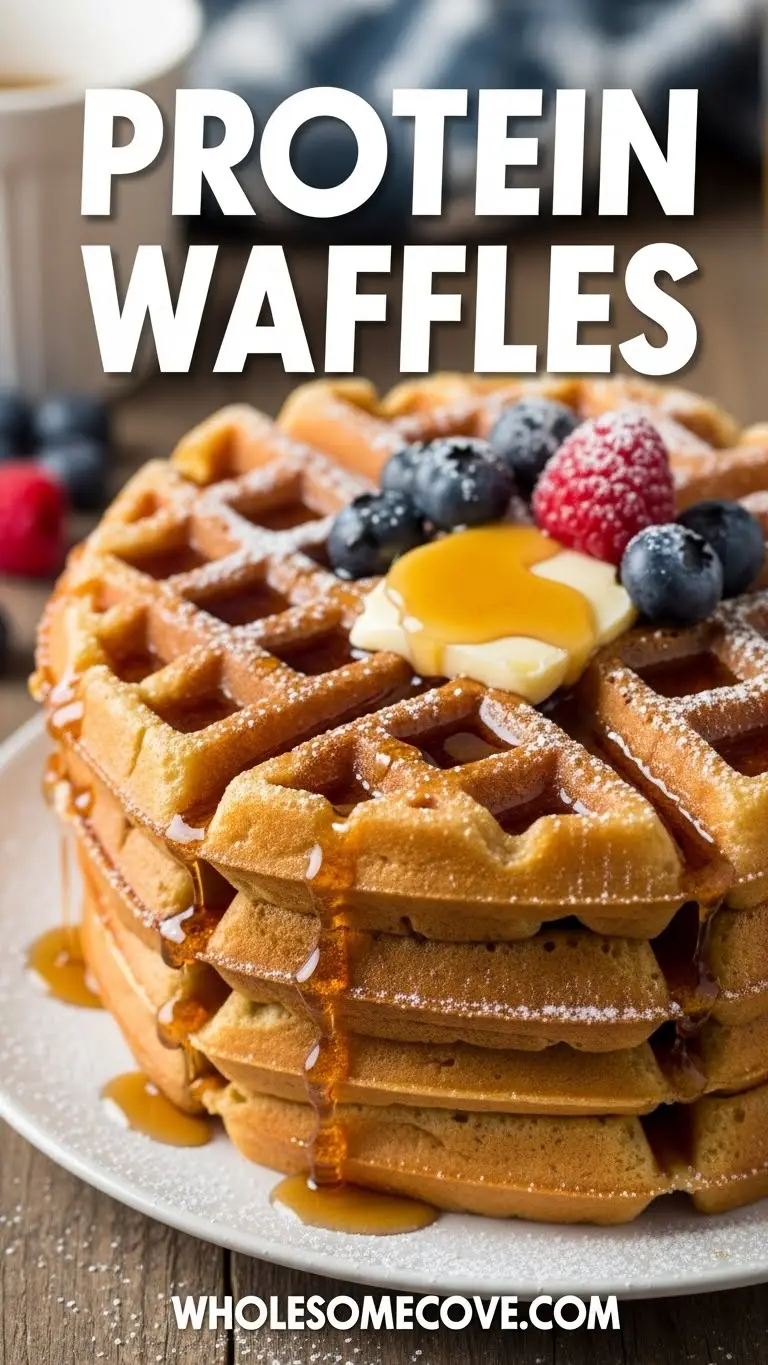
I used to think protein powder was only for post-workout shakes until I stumbled upon the idea of adding it to my weekend waffle routine. Now, my Protein Waffle Recipe has completely transformed my mornings.
These aren’t the dry, cardboard-textured “healthy” waffles you might be imagining. They’re genuinely fluffy, crispy on the outside, and packed with enough protein to keep you satisfied until lunch. I’ve spent months perfecting this recipe, tweaking the ratios until I found the sweet spot between nutrition and incredible taste.
The best part? You won’t feel that mid-morning energy crash anymore. My kids don’t even realize they’re eating something packed with 20 grams of protein per serving.
| Quick Recipe Summary | |
|---|---|
| Prep Time | 10 minutes |
| Cook Time | 15 minutes |
| Total Time | 25 minutes |
| Servings | 6 waffles |
| Difficulty Level | Easy |
You may also like: Belgian Waffle Recipe.
Why You’ll Love This Protein Waffle Recipe
I know what you’re thinking. Protein powder in waffles sounds like a recipe for disaster. I felt the same way at first, but after testing different protein powders and ratios, I’ve created waffles that taste like a weekend treat while fueling your body properly.
These waffles have transformed my family’s breakfast routine, especially on busy school mornings when we need something quick yet substantial. My teenage son used to raid the pantry an hour after breakfast, but these keep him full all morning during football practice.
Here’s what makes this recipe stand out:
- Perfectly balanced texture with crispy edges and fluffy centers that rival traditional waffles
- 20 grams of protein per serving keeps you energized without feeling heavy or sluggish
- Works with any protein powder so you can use vanilla, chocolate, or unflavored based on your preference
- Simple ingredients you likely already have in your pantry
- Freezer-friendly for meal prep Sundays when you want grab-and-go breakfasts ready
- Kid-approved taste that doesn’t scream “health food”
- Customizable flavors from classic vanilla to decadent chocolate chip variations
Another favorite: Baked Oatmeal Recipe
Ingredients
When I first started making protein waffles, I learned the hard way that not all protein powders behave the same in baking. Some created rubbery waffles, others turned chalky. After numerous experiments, I’ve found that whey protein isolate gives the best results, though quality vanilla protein powder works beautifully too.
The Greek yogurt here is crucial for moisture. I once tried making these without it, and the waffles were too dry to enjoy.
Dry Ingredients:
- 1 cup (125g) all-purpose flour or whole wheat flour
- ½ cup (60g) vanilla protein powder
- 2 tablespoons (25g) granulated sugar or coconut sugar
- 2 teaspoons baking powder
- ½ teaspoon baking soda
- ½ teaspoon salt
- 1 teaspoon cinnamon (optional, but highly recommended)
Wet Ingredients:
- 1¼ cups (300ml) milk (dairy or unsweetened almond milk)
- ½ cup (120g) plain Greek yogurt
- 2 large eggs
- 3 tablespoons (45ml) melted coconut oil or melted butter
- 1 teaspoon pure vanilla extract
For Serving:
- Pure maple syrup
- Fresh berries
- Almond butter or peanut butter
- Greek yogurt
Kitchen Equipment Needed
You don’t need fancy equipment for these waffles, but having the right tools makes a significant difference in the final texture. I learned this when I tried using my ancient, non-stick-coated waffle maker that was practically falling apart. The waffles stuck terribly and came out unevenly cooked.
Here’s what you’ll need:
- Belgian waffle maker (makes thicker, fluffier waffles with deeper pockets for toppings)
- Large mixing bowl for dry ingredients
- Medium mixing bowl for wet ingredients
- Whisk for combining ingredients smoothly
- Measuring cups and spoons for accurate measurements
- Rubber spatula for scraping down bowl sides
- Cooking spray or oil for greasing the waffle maker
- Wire cooling rack (prevents soggy bottoms while waffles rest)
- Ladle or measuring cup for portioning batter evenly
You might also enjoy: French Toast Recipe
Recommended Products for This Recipe
After years of making protein waffles weekly, I’ve found certain products genuinely make a difference. These aren’t just nice to have but truly elevate your waffle experience.
1. Cuisinart WAF-F20 Double Belgian Waffle Maker
This waffle maker changed my breakfast routine completely. It makes two thick Belgian waffles at once, which is perfect when you’re feeding a family and don’t want to stand at the counter for 30 minutes. The temperature control ensures perfectly golden waffles every single time, and the non-stick plates release the waffles effortlessly without tearing.
2. Optimum Nutrition Gold Standard Whey Protein
I’ve tried at least a dozen different protein powders in this recipe, and this one consistently produces the best texture and flavor. The vanilla flavor is subtle enough that it doesn’t overpower the waffles, and it mixes smoothly without clumping. It’s also one of the few protein powders that doesn’t leave any chalky aftertaste.
3. Fage Total 0% Greek Yogurt
This Greek yogurt is incredibly thick and creamy, which gives the waffles that perfect tender interior texture. I’ve tried other brands that were too watery, and the waffles turned out dense. The high protein content in Fage also boosts the overall protein per serving.
4. Bob’s Red Mill Whole Wheat Flour
When I want to add extra fiber and nutrients to my waffles, I swap half the all-purpose flour for this whole wheat flour. It’s finely ground, so the waffles don’t turn out grainy or dense like they do with coarser whole wheat flours. This brand is also never rancid, which I’ve experienced with store-brand whole wheat flour.
5. Nutiva Organic Virgin Coconut Oil
I prefer coconut oil over butter in this recipe because it keeps the waffles dairy-free if you’re using almond milk. This brand has a very mild coconut flavor that doesn’t overpower the vanilla protein powder. It also helps the waffles crisp up beautifully on the outside.
Step-by-Step Instructions: How to Make Protein Waffles
The key to perfect protein waffles is not overmixing the batter. I made that mistake my first few attempts, and the waffles turned out tough and chewy instead of fluffy. Protein powder can tighten the batter if you work it too much, so gentle folding is essential.
1. Preheat Your Waffle Maker
- Turn on your waffle maker to medium-high heat and allow it to preheat for at least 5 minutes before adding any batter.
- A properly preheated waffle maker is crucial for getting that crispy exterior while maintaining a fluffy interior, so don’t skip this step even if you’re in a hurry.
- While the waffle maker heats up, lightly coat the cooking surfaces with cooking spray or brush them with melted coconut oil to prevent sticking.
- If your waffle maker has temperature settings, aim for a medium-high setting, around 375°F (190°C) for optimal browning without burning.
2. Mix the Dry Ingredients
- In a large mixing bowl, whisk together the flour, protein powder, sugar, baking powder, baking soda, salt, and cinnamon until no lumps remain.
- Make sure to break up any clumps in the protein powder by pressing them against the side of the bowl with your whisk, as these can create pockets of concentrated protein flavor in your finished waffles.
- Whisking the dry ingredients thoroughly ensures even distribution of the leavening agents, which helps your waffles rise uniformly and develop a consistent texture throughout.
- Create a well in the center of the dry ingredients using the back of your whisk or a spoon, which will make it easier to incorporate the wet ingredients without overmixing.
3. Combine the Wet Ingredients
- In a separate medium mixing bowl, whisk together the milk, Greek yogurt, eggs, melted coconut oil, and vanilla extract until the mixture is smooth and homogeneous.
- Make sure your melted coconut oil has cooled slightly before adding it to avoid cooking the eggs, but don’t let it cool so much that it solidifies again.
- If your Greek yogurt has liquid on top, stir it back in before measuring, or drain it off if there’s excessive liquid that could make your batter too thin.
- Whisk the wet ingredients vigorously for about 30 seconds to ensure the yogurt is fully incorporated and there are no streaks remaining.
Read Also: Buttermilk Waffle Recipe
4. Combine Wet and Dry Ingredients
- Pour the wet ingredients into the well you created in the dry ingredients all at once.
- Using a rubber spatula or wooden spoon, gently fold the ingredients together with broad strokes, scraping from the bottom of the bowl upward and over the top.
- Stop mixing as soon as you no longer see any dry flour streaks, even if the batter looks slightly lumpy, as overmixing will activate the protein powder and create tough, rubbery waffles.
- The batter should be thick but pourable, similar to the consistency of pancake batter, and it’s perfectly fine if you see a few small lumps remaining.
- Let the batter rest for 3-5 minutes while your waffle maker finishes heating, which allows the flour to hydrate fully and helps create a lighter texture.
5. Cook the Waffles
- Ladle about ¾ cup (180ml) of batter onto the center of your preheated waffle maker, spreading it slightly with the back of the ladle if needed but avoiding spreading it all the way to the edges.
- Close the waffle maker lid gently and let the waffle cook without opening it for at least 3-4 minutes, as opening too early can cause the waffle to split or stick.
- Most waffle makers have an indicator light that will tell you when the waffle is done, but if yours doesn’t, cook for 4-5 minutes or until steam stops escaping from the sides of the waffle maker.
- When the waffle is done, carefully open the lid and use a fork or wooden spatula to gently lift the waffle out, being careful not to scratch non-stick surfaces.
- Place finished waffles on a wire cooling rack in a single layer rather than stacking them, which prevents them from becoming soggy from trapped steam.
6. Repeat and Keep Warm
- Repeat the cooking process with the remaining batter, re-greasing the waffle maker lightly between each batch if the waffles start sticking.
- If you need to keep finished waffles warm while cooking the remaining batches, place them on a baking sheet in a 200°F (95°C) oven, but note that they won’t stay as crispy as freshly made waffles.
- Alternatively, you can serve waffles immediately as they come off the waffle maker while continuing to cook the remaining batter for other family members.
- Adjust the heat on your waffle maker if you notice the waffles are browning too quickly or not getting golden enough, as different models vary in their heating patterns.
Tips for The Best Protein Waffles
After making these waffles countless times, I’ve learned several tricks that consistently produce perfect results. The first time I made them, I didn’t let the batter rest, and they turned out dense. These small details make all the difference.
- Choose the right protein powder: Use vanilla whey protein isolate or a high-quality blend for the best flavor and texture, and avoid plant-based proteins unless you’re willing to experiment with ratios since they absorb liquid differently.
- Don’t skip the Greek yogurt: This ingredient adds moisture and tang that keeps the waffles tender instead of dry, and it also contributes extra protein without adding more protein powder.
- Let the batter rest: Allowing the batter to sit for 3-5 minutes before cooking gives the flour time to hydrate and produces lighter, fluffier waffles.
- Avoid overmixing: Mix just until the dry ingredients disappear to prevent tough, rubbery waffles, and remember that a few lumps are perfectly fine.
- Preheat thoroughly: Always let your waffle maker heat completely before adding batter, which usually takes at least 5 minutes, to ensure even cooking and easy release.
- Use the right amount of batter: Too much batter causes overflow and mess, while too little creates thin, crispy waffles without fluffy centers, so aim for about ¾ cup per waffle.
- Don’t open too early: Resist the urge to check on your waffles before the indicator light signals they’re done, as opening too soon causes them to stick and tear.
- Serve immediately for crispiness: Protein waffles are crispiest right off the waffle maker, so if you want that restaurant-quality crunch, serve them hot.
- Adjust protein powder gradually: If using a different brand than recommended, start with slightly less protein powder and add more if the batter seems too thin.
- Control sweetness: The amount of sugar can be adjusted based on your protein powder’s sweetness, with vanilla protein often needing less added sugar than unflavored.
This pairs beautifully with my Protein Overnight Oats Recipe for a complete high-protein breakfast rotation.
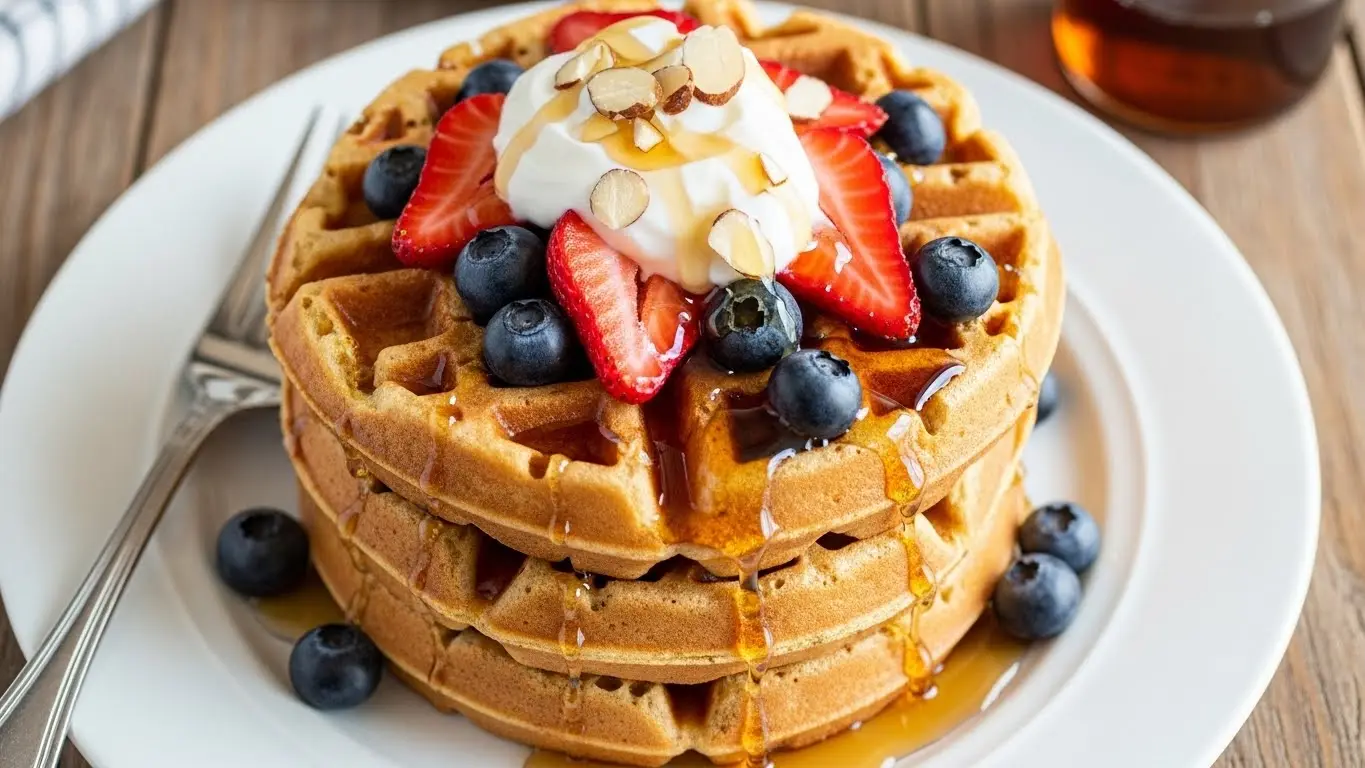
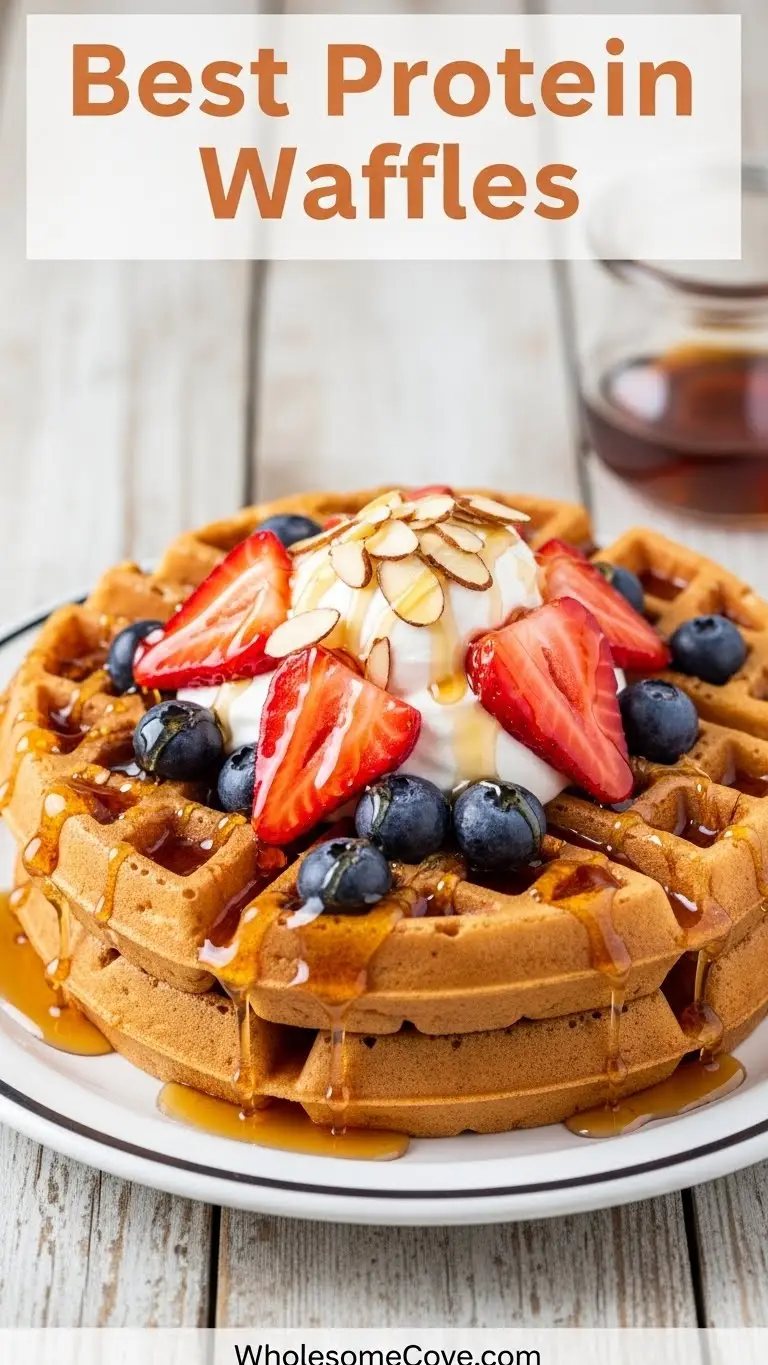
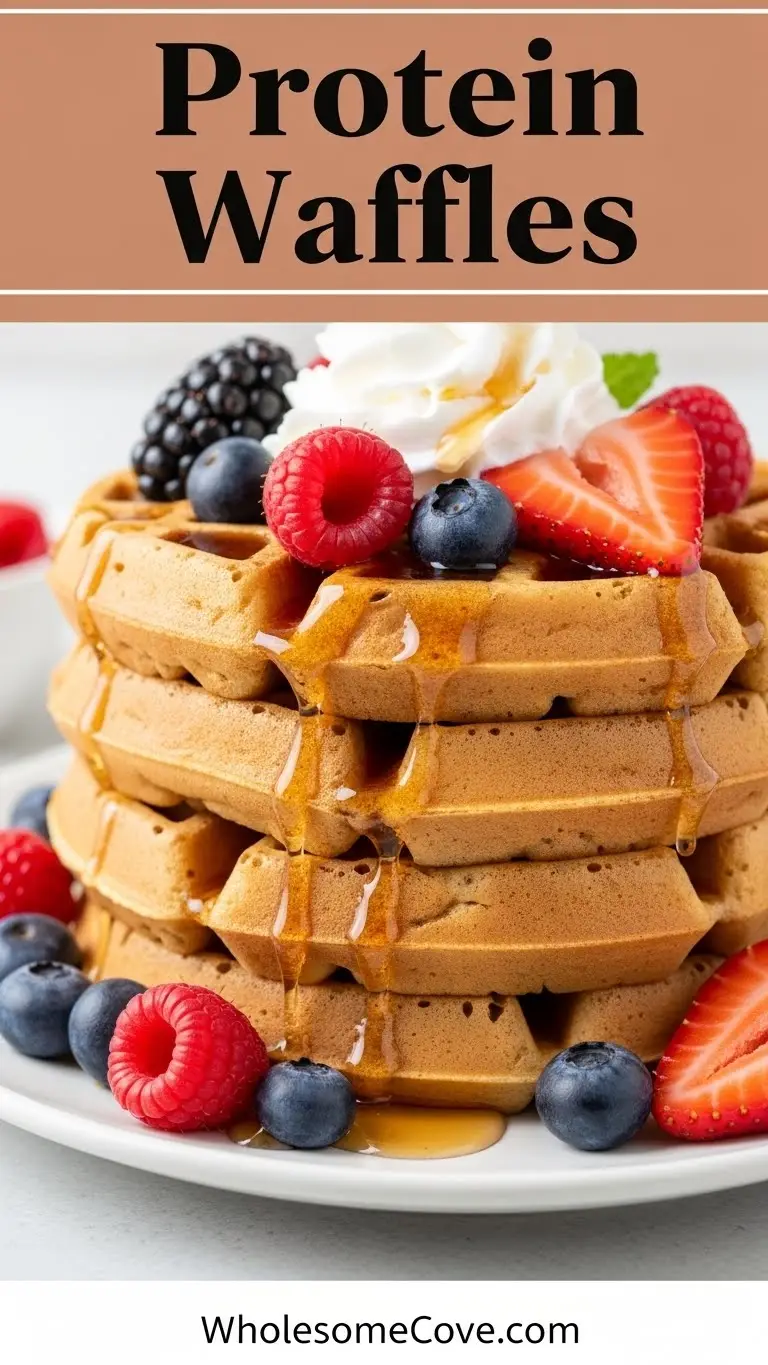
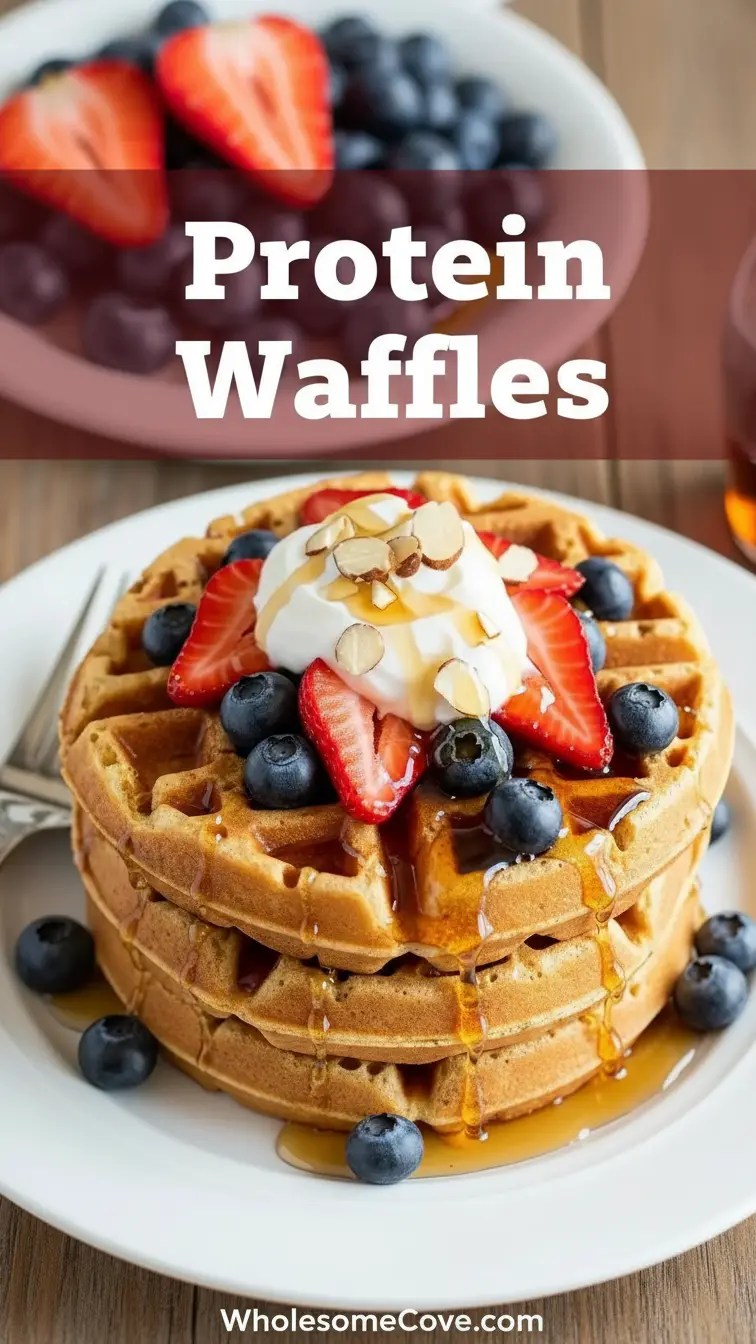
What to Serve with Protein Waffles
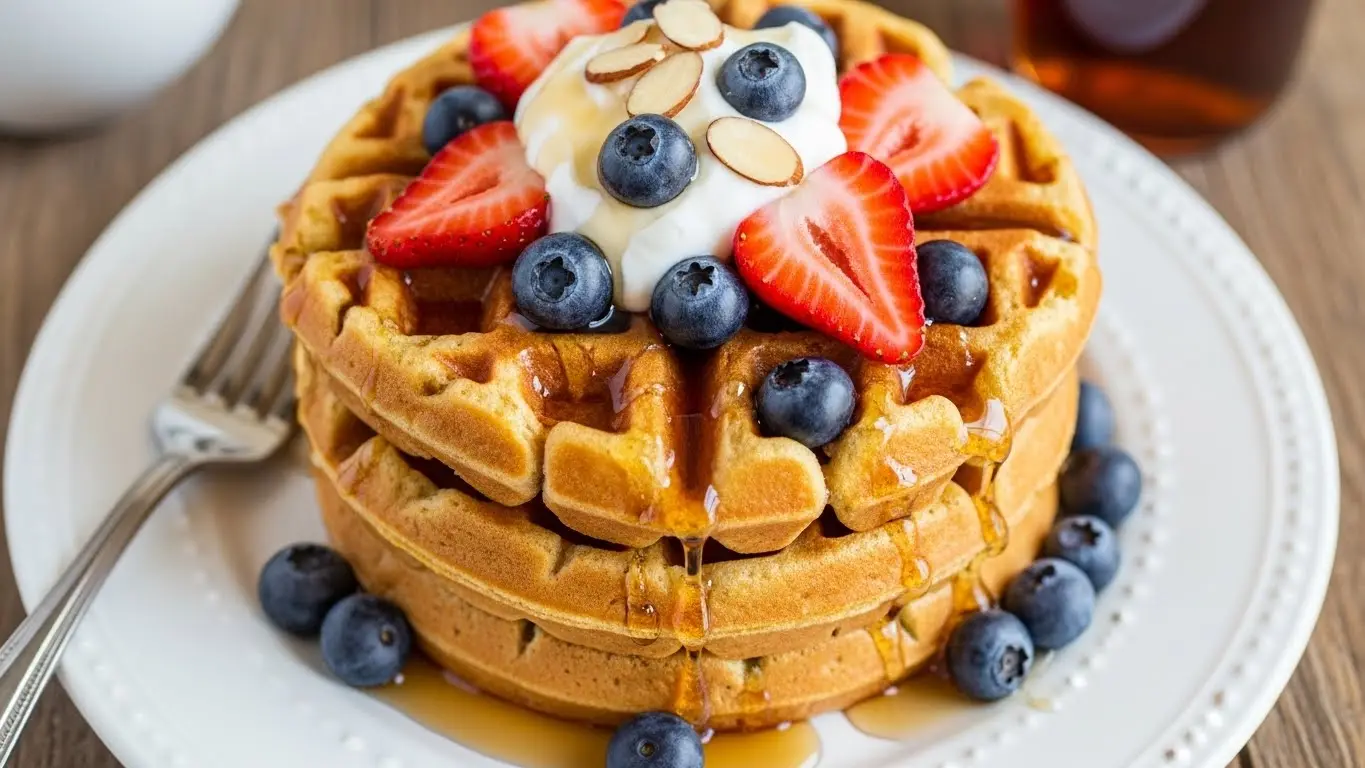
When I serve these waffles for weekend brunch, I love setting up a topping bar so everyone can customize their plate. My daughter always loads hers with fresh berries and a drizzle of almond butter, while my husband prefers the classic maple syrup route.
These protein-packed waffles pair wonderfully with both sweet and savory accompaniments.
Here are my favorite serving suggestions:
- Fresh berries like blueberries, strawberries, or raspberries add natural sweetness, antioxidants, and a pop of color
- Greek yogurt provides extra protein and a creamy tang that complements the vanilla in the waffles
- Almond butter or peanut butter adds healthy fats and makes the meal even more satisfying
- Pure maple syrup offers classic waffle sweetness without processed sugars
- Sliced bananas bring natural sweetness and potassium, plus they caramelize slightly on warm waffles
- Scrambled eggs or Deviled Eggs create a complete protein-packed breakfast plate
- Crispy bacon or turkey sausage for those who enjoy savory breakfast meats alongside their waffles
- Homemade Strawberry Sauce when fresh berries aren’t in season
- Whipped cream for special occasions or weekend treats
- Chopped nuts like pecans or walnuts add crunch and healthy omega-3s
- Avocado Toast on the side for a trendy, nutrient-dense brunch spread
Variations of Protein Waffles
One of the best things about this recipe is how easily it adapts to different flavor preferences and dietary needs. I’ve made dozens of variations over the years, from kid-friendly chocolate chip to sophisticated lemon blueberry.
- Chocolate Chip Protein Waffles: Fold ½ cup (85g) mini chocolate chips into the batter just before cooking, and use chocolate protein powder for an extra decadent breakfast.
- Blueberry Protein Waffles: Gently fold 1 cup (150g) fresh or frozen blueberries into the finished batter, being careful not to overmix and turn the batter purple.
- Banana Nut Protein Waffles: Mash 1 ripe banana and mix it into the wet ingredients, then fold ½ cup (60g) chopped walnuts into the batter.
- Cinnamon Roll Protein Waffles: Add 1 tablespoon cinnamon to the dry ingredients and drizzle finished waffles with cream cheese frosting made from Greek yogurt.
- Pumpkin Spice Protein Waffles: Replace ¼ cup milk with pumpkin puree and add 1 teaspoon pumpkin pie spice to the dry ingredients.
- Chocolate Peanut Butter Protein Waffles: Use chocolate protein powder and swirl 2 tablespoons natural peanut butter into the batter before cooking.
- Lemon Poppy Seed Protein Waffles: Add 2 tablespoons fresh lemon zest and 1 tablespoon poppy seeds to the batter for a bright, refreshing twist.
- Coconut Protein Waffles: Replace milk with canned coconut milk and fold in ½ cup (40g) unsweetened shredded coconut.
- Apple Cinnamon Protein Waffles: Fold in 1 cup (120g) finely diced apples tossed with cinnamon for a fall-inspired breakfast.
- Gluten-Free Protein Waffles: Replace all-purpose flour with a 1:1 gluten-free baking flour blend and add ¼ teaspoon xanthan gum if your blend doesn’t include it.
For another protein-packed breakfast option, try my Shakshuka Recipe.
Storage and Reheating
I make double batches of these protein waffles every Sunday for easy weekday breakfasts. Proper storage is key to maintaining their texture and preventing them from becoming soggy or dried out.
Refrigerator Storage:
- Let waffles cool completely on a wire rack before storing, which prevents condensation from making them soggy.
- Place cooled waffles in an airtight container or resealable plastic bag with parchment paper between layers to prevent sticking.
- Store in the refrigerator for up to 5 days.
- Reheat refrigerated waffles in a toaster or toaster oven at medium heat for 2-3 minutes until crispy and warmed through.
Freezer Storage:
- Cool waffles completely, then arrange them in a single layer on a baking sheet and freeze for 1-2 hours until solid.
- Once frozen solid, transfer waffles to a freezer-safe bag or container, placing parchment paper between layers if stacking.
- Label the container with the date and store in the freezer for up to 3 months.
- To reheat frozen waffles, place them directly in the toaster or toaster oven (no need to thaw) and toast on medium-high for 3-4 minutes until heated through and crispy.
- Alternatively, you can reheat frozen waffles in a 350°F (175°C) oven for 8-10 minutes, which is ideal when reheating multiple waffles at once.
Best Reheating Methods:
- Toaster or toaster oven: This is my preferred method as it restores the crispy exterior perfectly.
- Oven: Great for reheating multiple waffles, place them on a baking sheet at 350°F (175°C) for 5-8 minutes.
- Air fryer: Set to 350°F (175°C) and heat for 3-4 minutes for incredibly crispy results.
- Avoid the microwave: While it’s the quickest option, microwaving makes protein waffles rubbery and tough rather than crispy.
Nutritional Facts
Each protein waffle (1 of 6 servings) contains approximately:
- Calories: 245
- Protein: 20g
- Carbohydrates: 26g
- Dietary Fiber: 2g
- Sugars: 7g
- Fat: 7g
- Saturated Fat: 4g
- Cholesterol: 75mg
- Sodium: 385mg
- Potassium: 285mg
- Calcium: 180mg
- Iron: 2mg
Note that nutritional values will vary based on the specific brands of ingredients you use, particularly the protein powder and type of milk. Using unsweetened almond milk reduces calories by about 20 per serving compared to whole milk.
Health Benefits of Key Ingredients
I started making these protein waffles when I realized my family needed more sustained energy in the mornings rather than the quick sugar spike from traditional waffles. Understanding the nutritional value of each ingredient helped me appreciate why this recipe works so well for active lifestyles.
These ingredients work together to create a nutritious breakfast that supports your wellness goals.
- Protein powder: Provides essential amino acids for muscle repair and growth, helps maintain steady blood sugar levels, and keeps you feeling full for hours after eating.
- Greek yogurt: Offers probiotics for gut health, contains high-quality protein that complements the protein powder, and adds calcium for strong bones and teeth.
- Eggs: Supply complete protein with all nine essential amino acids, contain choline for brain health and development, and provide vitamin D and B vitamins for energy metabolism.
- Whole wheat flour: Delivers fiber that aids digestion and promotes satiety, contains B vitamins essential for converting food into energy, and provides minerals like iron and magnesium.
- Cinnamon: Helps regulate blood sugar levels and may improve insulin sensitivity, contains powerful antioxidants that fight inflammation, and adds flavor without any added calories or sugar.
- Coconut oil: Provides medium-chain triglycerides that are easily digested and used for quick energy, may support healthy cholesterol levels, and has antimicrobial properties.
- Milk: Contributes calcium and vitamin D for bone health, adds protein to boost the overall protein content of the waffles, and provides B vitamins for energy production.
FAQs About Protein Waffles
1. Can I use a different type of protein powder in this recipe?
Absolutely, though results will vary slightly depending on what you choose. Whey protein isolate gives the best texture, but casein protein and egg white protein work well too. Plant-based proteins like pea or brown rice protein tend to absorb more liquid, so you may need to add an extra 2-3 tablespoons of milk to achieve the right batter consistency.
2. Why are my protein waffles coming out rubbery or tough?
This usually happens from overmixing the batter, which activates the protein too much and creates a dense, chewy texture. Mix just until the dry ingredients disappear, even if you see a few lumps. Another common cause is using too much protein powder, so stick to the ½ cup measurement unless you’ve tested your specific brand in baking before.
3. Can I make these waffles dairy-free?
Yes, and I’ve made this modification many times for friends with dairy sensitivities. Replace the milk with unsweetened almond milk, oat milk, or coconut milk, and substitute the Greek yogurt with a dairy-free alternative like coconut yogurt or cashew yogurt. Use coconut oil instead of butter, and the waffles will turn out just as delicious.
4. How do I prevent the waffles from sticking to my waffle maker?
Make sure you’re thoroughly preheating your waffle maker and generously greasing it before each batch, even if it has a non-stick coating. I brush melted coconut oil on mine between every waffle. If waffles still stick, try letting them cook an extra 30-60 seconds before opening the lid, as they’ll release more easily when fully set.
5. Can I make the batter ahead of time?
I don’t recommend preparing the batter more than 30 minutes in advance, as the leavening agents start working immediately and the protein powder continues to absorb liquid. The waffles won’t rise as well if the batter sits too long. Instead, I suggest making and freezing the cooked waffles, which reheat beautifully and taste just as good as fresh.
Final Thoughts
Making protein waffles has honestly transformed how my family approaches breakfast. We’re no longer grabbing sugary cereal or skipping breakfast entirely because we’re rushed.
These waffles prove that eating healthy doesn’t mean sacrificing flavor or spending hours in the kitchen. I hope they become a staple in your home just like they have in mine. Try making a double batch this weekend and let me know how they turn out!
I’d love to hear about your favorite variations or toppings in the comments below. Don’t forget to share your waffle creations on social media and tag me so I can see your delicious results!
Recommended:
- Breakfast Burrito Recipe
- Peanut Butter Overnight Oats Recipe
- Overnight Oats Recipe
- Hashbrown Casserole Recipe
- Homemade Biscuit Recipe
- Waffle Recipe
- Easy Pancake Recipe
- Air Fryer Pancake Recipe
- Creme Brulee French Toast Casserole Recipe
- Creme Brulee French Toast Recipe
