
I’ve been making this peanut butter cookies recipe for over a decade, and it never gets old. My mom taught me this version when I was twelve, and it’s the one I’ve come back to time and time again.

The smell of these cookies baking takes me right back to Saturday mornings in her kitchen, flour dusted across the counter and my little brother sneaking warm cookies before they’d even cooled. This recipe is foolproof, uses ingredients you probably already have, and delivers that perfect combination of soft centers with slightly crispy edges.
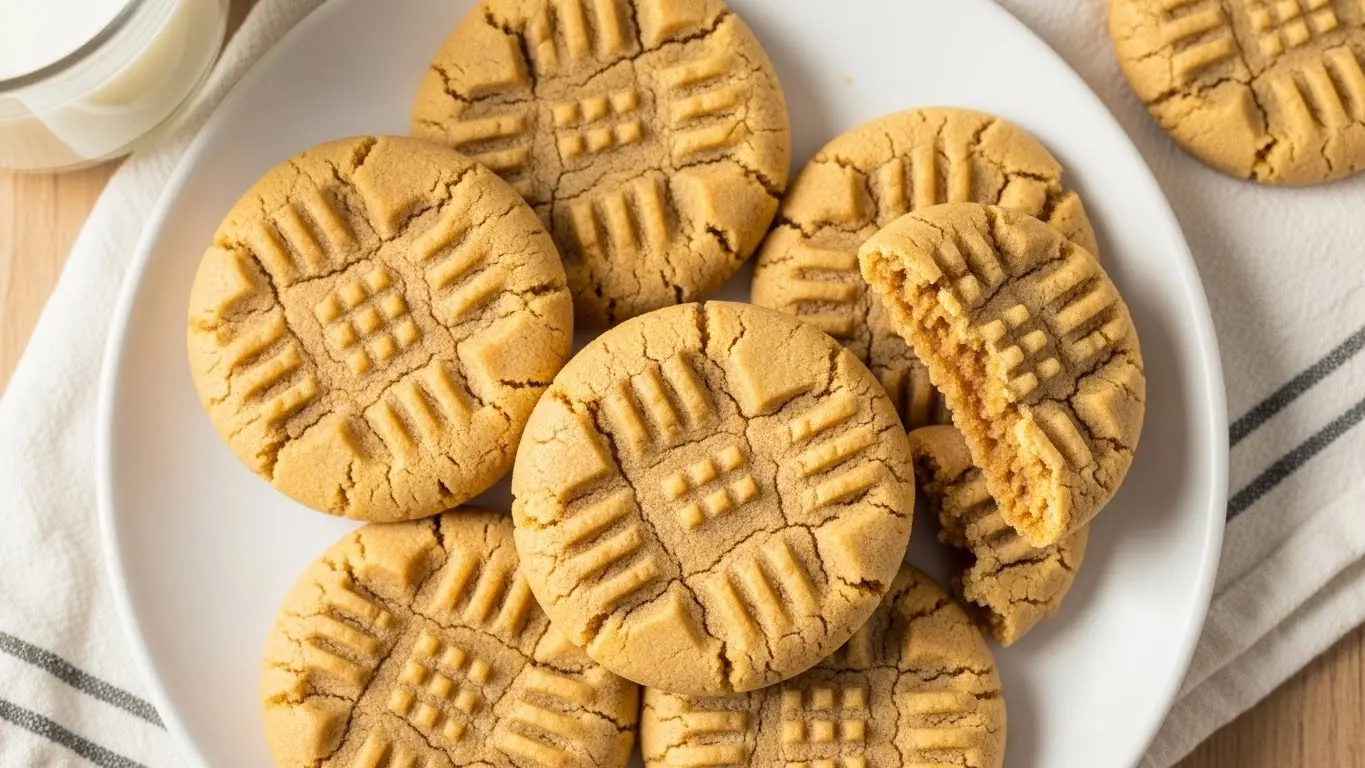
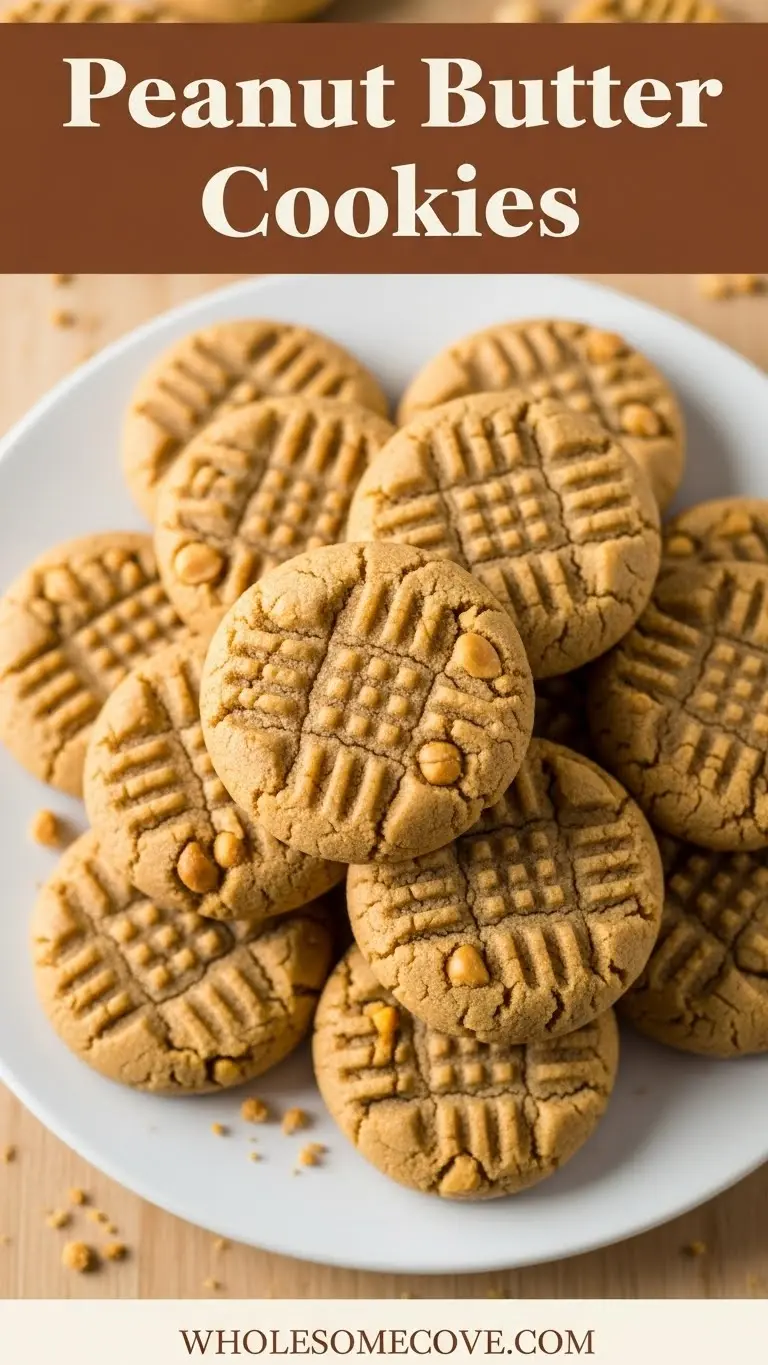
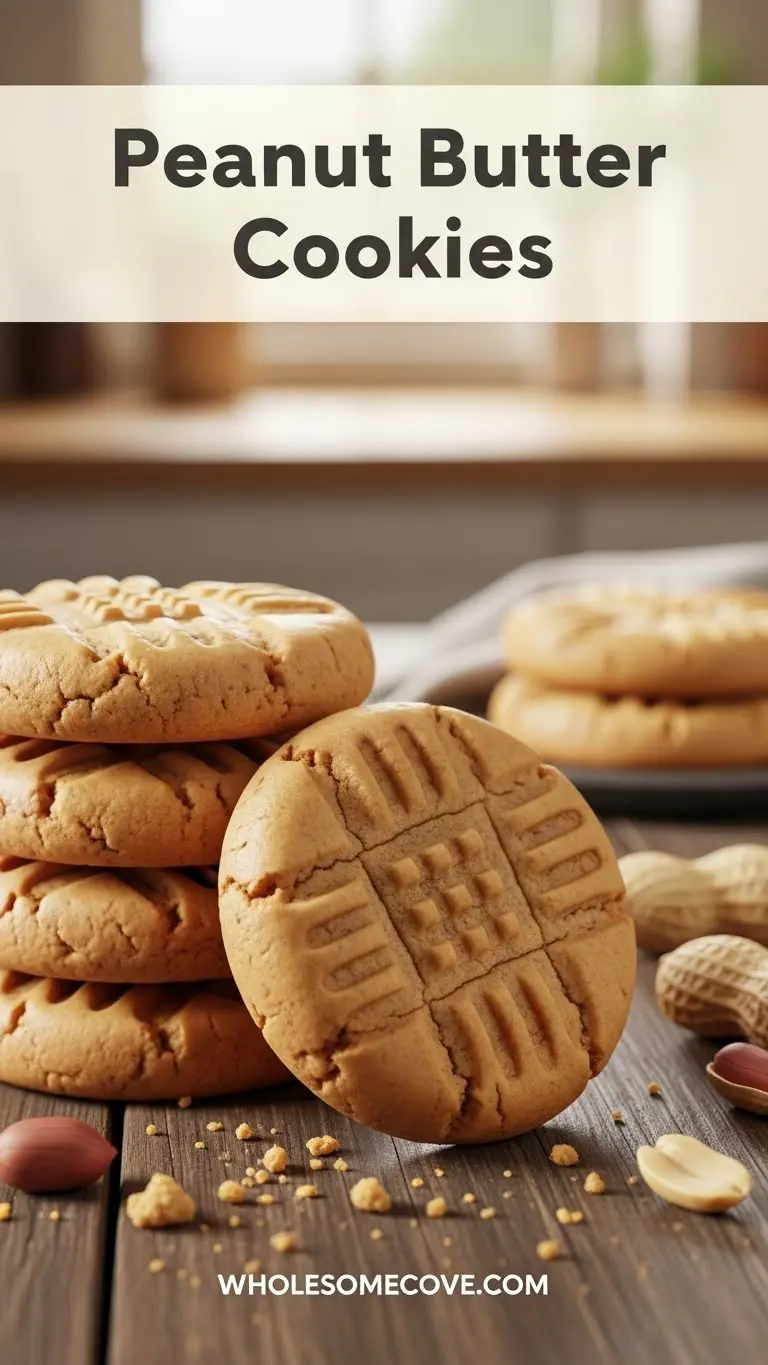
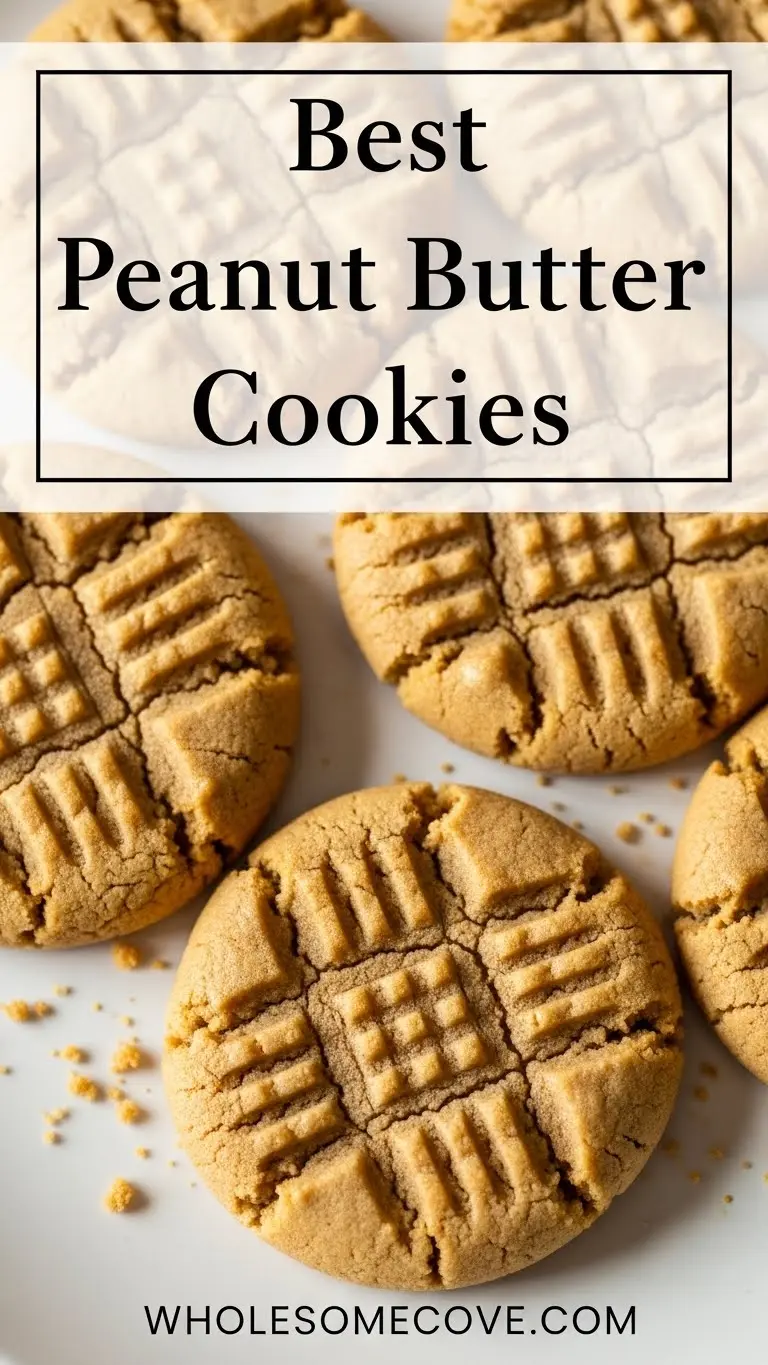
What I love most is how the peanut butter flavor really shines through without being overpowering. You get that rich, nutty taste in every bite, and the classic crosshatch pattern on top isn’t just for looks, it actually helps them bake more evenly.
| Quick Recipe Summary | |
|---|---|
| Prep Time | 15 minutes |
| Cook Time | 12 minutes |
| Total Time | 27 minutes |
| Servings | 24 cookies |
| Difficulty Level | Easy |
Why You’ll Love This Peanut Butter Cookies Recipe
This recipe has become my go-to for potlucks, bake sales, and those random Tuesday evenings when I just need something sweet. The texture is what really sets these apart from other peanut butter cookies I’ve tried.
They’re tender in the middle with just enough chew around the edges. I’ve experimented with dozens of variations over the years, and this combination of ingredients creates the perfect balance every single time.
Here’s why this recipe stands out:
- Simple ingredients – You probably have everything in your pantry right now
- Quick prep – From start to oven in just 15 minutes
- Consistent results – Works perfectly every time, even for beginners
- Customizable – Easy to adapt for dietary needs or flavor variations
- Kid-friendly – My nieces love helping press the fork patterns on top
- Great for gifting – These cookies stay fresh for days and transport beautifully
For a cozy breakfast option the morning after baking, try my Peanut Butter Overnight Oats that pairs wonderfully with leftover cookies crumbled on top.
Ingredients
Getting the right ingredients makes all the difference in these cookies. I learned this the hard way when I once tried substituting regular sugar for brown sugar and ended up with flat, crispy discs instead of soft, chewy cookies.
Now I stick to this exact combination, and they come out perfect every time. The quality of your peanut butter really matters here, so choose a brand you love eating straight from the jar.
- 1 cup (240g) creamy peanut butter (not natural or separated)
- 1 cup (200g) granulated sugar
- 1 cup (220g) packed light brown sugar
- 1 cup (226g) unsalted butter, softened
- 2 large eggs, room temperature
- 2½ cups (315g) all-purpose flour
- 1 teaspoon baking powder
- 1½ teaspoons baking soda
- ½ teaspoon salt
- 1 teaspoon pure vanilla extract
Kitchen Equipment Needed
Having the right tools makes this recipe so much easier. I didn’t have a stand mixer for the first few years of making these, and while a hand mixer worked fine, my KitchenAid has been a total revelation.
The dough comes together faster and more evenly. Don’t stress if you don’t have every single item on this list, but these are the essentials that’ll make your baking experience smoother.
- Large mixing bowl or stand mixer
- Electric hand mixer (if not using stand mixer)
- Medium mixing bowl
- Measuring cups and spoons
- Whisk
- Rubber spatula
- Cookie scoop (1½ tablespoon size)
- Baking sheets (2-3 sheets recommended)
- Parchment paper or silicone baking mats
- Fork
- Wire cooling rack
Recommended Products for This Recipe
After making these cookies countless times, I’ve found a few products that genuinely make the process easier and the results even better. These aren’t must-haves, but they’ve earned permanent spots in my kitchen for a reason.
1. Jif Creamy Peanut Butter
This is the peanut butter I use every single time. It has the perfect consistency for baking, not too thick or runny, and the flavor is spot-on. I’ve tried natural peanut butters in these cookies, and they just don’t deliver the same texture because of the oil separation.
2. OXO Good Grips Cookie Scoop
I resisted buying a cookie scoop for way too long, thinking I could just use spoons. This tool changed everything. Every cookie comes out exactly the same size, which means they all bake evenly and look professional. The squeeze handle releases the dough perfectly every time.
3. Nordic Ware Natural Aluminum Baking Sheets
These baking sheets heat evenly and never warp, even after years of use. The light color prevents the cookie bottoms from burning, which was a constant problem with my old dark pans. They’re also the perfect size for spacing cookies properly.
4. Reynolds Parchment Paper
I used to grease my pans, but parchment paper makes cleanup so much easier and prevents sticking completely. These precut sheets fit standard baking sheets perfectly, so there’s no measuring or cutting involved. Plus, the cookies slide right off.
You might also enjoy: Sugar Cookies
Step-by-Step Instructions: How to Make Peanut Butter Cookies
I’m going to walk you through every step of this process because I remember how intimidating baking felt when I was just starting out. Don’t skip any steps, even if they seem minor, they all contribute to that perfect cookie texture.
1. Prep Your Workspace and Preheat the Oven
- Clear your counter space and gather all your ingredients and equipment before you start
- Preheat your oven to 350°F (175°C) so it’s ready when you are
- Line your baking sheets with parchment paper or silicone baking mats
- Make sure your butter is properly softened (it should leave a slight indent when pressed but not be melty or greasy)
- Let your eggs sit at room temperature for about 10 minutes if they’re straight from the fridge (this helps them incorporate better)
2. Mix the Dry Ingredients
- In a medium bowl, whisk together the flour, baking powder, baking soda, and salt
- Whisk for a solid 30 seconds to make sure everything is evenly distributed and there are no clumps of baking soda or powder
- Set this bowl aside while you work on the wet ingredients
- This step is crucial because it ensures even distribution of leavening agents throughout the dough
Read Also: Gingerbread Cookie
3. Cream the Butter and Sugars
- In your large mixing bowl or stand mixer, add the softened butter, granulated sugar, and brown sugar
- Beat on medium speed for 3-4 minutes until the mixture is light and fluffy (it should look almost doubled in volume and be a pale cream color)
- Stop and scrape down the sides of the bowl at least once during this process to ensure everything gets incorporated
- Don’t rush this step, proper creaming creates tiny air pockets that make your cookies tender
- The mixture should be noticeably lighter in color and texture than when you started
4. Add Peanut Butter and Eggs
- Add the peanut butter to your butter-sugar mixture and beat on medium speed for about 1 minute until fully combined
- The mixture will become thicker and take on that gorgeous peanut butter color
- Add the eggs one at a time, beating well after each addition (about 30 seconds per egg)
- After the first egg is incorporated, the mixture might look a bit curdled, but it’ll smooth out when you add the second egg
- Add the vanilla extract and mix for another 15-20 seconds
- Scrape down the bowl one more time to catch any unmixed ingredients at the bottom
5. Combine Wet and Dry Ingredients
- With your mixer on low speed (this is important to avoid flour clouds), gradually add the dry ingredient mixture to the wet ingredients
- Add it in three parts, mixing just until you can’t see dry flour anymore after each addition
- Stop the mixer and use a rubber spatula to scrape the bottom and sides of the bowl
- Fold the dough a few times with your spatula to make sure everything is evenly incorporated
- The dough should be thick, slightly sticky, and hold together well when pressed
- Don’t overmix at this stage or your cookies will be tough (once the flour is just incorporated, stop mixing)
The rich peanut flavor in these cookies comes through beautifully, much like the depth you get in my Peanut Sauce.
6. Shape the Cookie Dough
- Use your cookie scoop (or a tablespoon) to portion out the dough into balls about 1½ tablespoons each
- Roll each portion between your palms to create smooth, round balls
- Place the dough balls on your prepared baking sheets, spacing them about 2 inches apart (they’ll spread during baking)
- You should get about 8 cookies per standard baking sheet
- Don’t flatten them yet, that comes in the next step
7. Create the Classic Crosshatch Pattern
- Take a fork and dip it lightly in sugar (this prevents sticking)
- Press down firmly on each dough ball to flatten it to about ½ inch thick
- Rotate the fork 90 degrees and press down again to create the classic crosshatch pattern
- Press firmly enough that the pattern goes deep into the dough, it shouldn’t be just surface-level
- If the fork starts sticking, dip it in sugar again
- The cookies should now be about 2-2½ inches in diameter
8. Bake the Cookies
- Place one baking sheet in the center of your preheated oven
- Bake for 10-12 minutes, rotating the pan halfway through for even baking
- The cookies are done when the edges are set and lightly golden, but the centers still look slightly underdone and soft
- They should not be brown all over, just golden at the edges (they’ll continue to cook on the hot pan after you remove them)
- Don’t overbake or they’ll be dry instead of chewy
- While the first batch bakes, prepare your second batch on another baking sheet
For dessert variety, serve these alongside Eggnog Cookies during the holidays.
9. Cool the Cookies
- Remove the baking sheet from the oven and let the cookies sit on the hot pan for 5 minutes (this is crucial, they need this time to set up)
- After 5 minutes, use a thin spatula to carefully transfer the cookies to a wire cooling rack
- Let them cool for at least 10 more minutes before eating (I know it’s hard to wait, but they’ll fall apart if you try to eat them too soon)
- The cookies will firm up as they cool and develop that perfect texture
- Repeat the baking and cooling process with remaining dough

Tips for The Best Peanut Butter Cookies
I’ve made every mistake possible with these cookies over the years, and I’ve learned so much from each one. These tips will help you avoid the pitfalls I stumbled into and get perfect cookies every single time.
- Use room temperature ingredients – This is non-negotiable. Cold eggs won’t incorporate properly and cold butter won’t cream correctly, leading to dense, flat cookies.
- Don’t skip the creaming step – Beating the butter and sugars until light and fluffy incorporates air that makes your cookies tender. I rushed this once when I was in a hurry, and the cookies came out dense and heavy.
- Measure flour correctly – Spoon flour into your measuring cup and level it off with a knife. Don’t scoop directly from the bag or you’ll pack in too much flour and get dry cookies.
- Slightly underbake – Take them out when they still look a tiny bit underdone in the center. They continue cooking on the hot pan and will be perfect once cooled.
- Use parchment paper – This prevents sticking and helps cookies bake more evenly. Silicone baking mats work great too.
- Space cookies properly – Give them at least 2 inches between each cookie. I learned this the hard way when they all baked together into one giant cookie sheet.
- Rotate the pan – Halfway through baking, turn your pan 180 degrees to ensure even browning.
- Don’t flatten too much – The crosshatch should create cookies about ½ inch thick. Thinner than that and they’ll be too crispy.
- Cool on the pan first – Those 5 minutes on the hot baking sheet are essential for the cookies to set without breaking apart.
- Store properly from day one – Put them in an airtight container as soon as they’re completely cool to maintain that perfect texture.
Another favorite: Fudge Brownie
Serving Suggestions
These peanut butter cookies are delicious on their own, but I’ve discovered some amazing combinations over the years. My favorite way to serve them is still slightly warm with a cold glass of milk, but there are so many other options that elevate them into something special.
Here are my top serving ideas:
- Classic milk pairing – Ice-cold whole milk is traditional for a reason, it balances the richness perfectly
- Coffee companion – These are incredible dunked into hot coffee or espresso
- Ice cream sandwiches – Sandwich vanilla or chocolate ice cream between two cookies and freeze for 30 minutes
- With Hot Chocolate – Crumble a cookie on top or dunk it in for an indulgent treat
- Dessert platter – Arrange them with Fudge and fresh fruit for a simple dessert spread
- Breakfast treat – Pair with French Toast for a sweet weekend breakfast
- Afternoon tea – Serve alongside Baked Oatmeal for a cozy afternoon snack
- Party display – Stack them on a pretty plate with Homemade Biscuits for brunch
Variations of Peanut Butter Cookies
Once you’ve mastered the basic recipe, the fun really begins. I’ve tested dozens of variations over the years, and these are the ones that have become regular rotations in my kitchen.
Each one changes the character of the cookie while maintaining that essential peanut butter goodness. Don’t be afraid to experiment, that’s how I discovered some of my favorite versions.
- Chocolate chip peanut butter cookies – Fold in 1 cup of chocolate chips before shaping the dough. The combination of chocolate and peanut butter is unbeatable.
- Crunchy peanut butter version – Swap creamy peanut butter for crunchy to add extra texture and peanut pieces throughout.
- Brown sugar only – Replace all the granulated sugar with brown sugar for a deeper, more caramel-like flavor and chewier texture.
- Peanut butter cup cookies – Press a miniature peanut butter cup into the center of each cookie as soon as they come out of the oven.
- Honey peanut butter cookies – Replace ¼ cup of sugar with honey for a subtle floral sweetness (reduce baking time by 1 minute).
- Salted peanut butter cookies – Sprinkle flaky sea salt on top before baking for a sweet-salty contrast.
- Whole wheat version – Substitute half the all-purpose flour with whole wheat flour for a heartier, nuttier cookie.
- Gluten-free option – Use a 1:1 gluten-free flour blend (I’ve had success with Bob’s Red Mill).
- Double peanut butter – Add ½ cup of peanut butter chips to the dough for extra peanut flavor.
- Jam-filled cookies – Make a thumbprint in each cookie before baking and fill with your favorite jam.
The same technique for achieving perfect texture here works beautifully in Pumpkin Cookies too.
Storage and Reheating
Proper storage is what keeps these cookies tasting fresh for days. I’ve learned through trial and error that how you store them makes a huge difference in maintaining that perfect texture.
The key is preventing them from drying out while also not making them soggy. Here’s exactly what works best.
Room Temperature Storage:
- Let cookies cool completely before storing (any warmth will create condensation)
- Place in an airtight container with a tight-fitting lid
- Layer cookies with parchment paper between each layer to prevent sticking
- Store at room temperature for up to 5 days
- Add a slice of bread to the container to keep cookies soft (replace the bread every 2 days)
- Keep container in a cool, dry place away from direct sunlight
Refrigerator Storage:
- These cookies don’t need refrigeration and actually get harder when chilled
- Only refrigerate if your kitchen is very hot and humid
- Bring to room temperature before eating for the best texture
- Can last up to 10 days when refrigerated
Freezer Storage:
- Freeze baked cookies in a freezer-safe container or zip-top bag for up to 3 months
- Layer with parchment paper to prevent sticking
- Label with date so you remember when you made them
- Thaw at room temperature for about 30 minutes before eating
- You can also freeze the shaped, unbaked dough balls on a baking sheet, then transfer to a freezer bag once solid
- Bake frozen dough balls directly from freezer, adding 2-3 minutes to baking time
Reheating:
- Warm in microwave for 8-10 seconds for that fresh-baked taste
- Heat in oven at 300°F (150°C) for 3-4 minutes
- Don’t overheat or they’ll become too soft and fall apart
Nutritional Facts
Here’s the approximate nutritional information per cookie (recipe makes 24 cookies):
- Calories: 185
- Total Fat: 9g
- Saturated Fat: 4g
- Cholesterol: 30mg
- Sodium: 150mg
- Total Carbohydrates: 23g
- Dietary Fiber: 1g
- Sugars: 15g
- Protein: 4g
Note: These values are estimates and will vary based on specific brands and exact measurements used. If you’re following a specific diet plan, I recommend calculating nutrition based on your exact ingredients.
Another classic treat: Apple Pie
Health Benefits of Key Ingredients
While these cookies are definitely a treat, some of the ingredients do offer nutritional benefits. I’m not claiming these are health food (they’re cookies, after all), but it’s nice to know you’re getting some good stuff along with the deliciousness.
Peanut butter is the star here, and it brings more to the table than just flavor.
- Peanut butter provides protein and healthy fats – Each cookie contains about 4g of protein thanks to the peanut butter, which helps keep you satisfied. The monounsaturated fats in peanuts are the same heart-healthy fats found in olive oil and avocados.
- Good source of vitamin E – Peanuts are rich in vitamin E, an antioxidant that supports skin health and immune function.
- Contains essential minerals – You’ll get small amounts of magnesium, phosphorus, and zinc from the peanut butter, all of which support bone health and energy production.
- Provides quick energy – The combination of carbohydrates and fats makes these cookies a good energy source, perfect for a pre-workout snack or afternoon pick-me-up.
- Eggs add quality protein – The eggs contribute additional protein and provide important vitamins like B12 and riboflavin.
FAQs About Peanut Butter Cookies
1. Why did my peanut butter cookies turn out flat?
Flat cookies usually happen because the butter was too soft or melted, or the dough was too warm when it went into the oven. Make sure your butter is just softened (it should hold its shape but have a slight give when pressed).
If your kitchen is warm, chill the shaped dough balls in the refrigerator for 15-20 minutes before baking. Also check that your baking soda and baking powder are fresh, expired leavening agents won’t provide enough lift.
2. Can I make these cookies without eggs?
Yes, you can substitute each egg with a “flax egg” (1 tablespoon ground flaxseed mixed with 3 tablespoons water, let sit for 5 minutes). I’ve also had success using commercial egg replacers.
The texture will be slightly different, a bit denser and less tender, but they’ll still be delicious. You could also try using ¼ cup of unsweetened applesauce per egg.
3. Why are my cookies hard instead of soft and chewy?
Overbaking is the most common culprit for hard cookies. Remember, they should look slightly underdone in the center when you remove them from the oven.
Also, using too much flour (from packing your measuring cups) will dry them out. Make sure you’re measuring correctly by spooning flour into the cup and leveling it off.
4. Can I use natural peanut butter for this recipe?
I don’t recommend it. Natural peanut butter (the kind with just peanuts and salt) has a different oil content and consistency that affects the texture of the cookies.
The oil separates and makes the dough greasy, resulting in flat, oily cookies. Stick with conventional creamy peanut butter like Jif or Skippy for the best results.
5. How can I make my cookies thicker?
Chill your dough balls in the refrigerator for at least 30 minutes before baking. Cold dough spreads less in the oven.
You can also slightly increase the flour by 2-3 tablespoons, but be careful not to add too much or they’ll be dry. Make sure you’re not pressing them too flat with the fork when making the crosshatch pattern.
For another comforting baked good, try Sweet Potato Casserole.
Final Thoughts
These peanut butter cookies have been with me through so many life moments, from my first apartment baking adventures to teaching my own kids how to make them. There’s something truly special about a recipe that’s this simple yet consistently delivers such incredible results.
The best part is watching people’s faces light up when they take that first bite. I hope this recipe becomes as beloved in your kitchen as it is in mine, and that you create your own wonderful memories around these cookies.
Give them a try this weekend and let me know how they turn out! Drop a comment below if you make any fun variations or have questions about the recipe. Happy baking!
Recommended:
- Peanut Butter Fudge
- Healthy Chocolate Chip Cookies
- Pumpkin Chocolate Chip Cookies
- Pumpkin Oatmeal Cookies
- Pumpkin Snickerdoodle Cookies
- Caramel Sauce
- Dinner Rolls
- Pecan Pie
- Pumpkin Pie
- Apple Crisp