
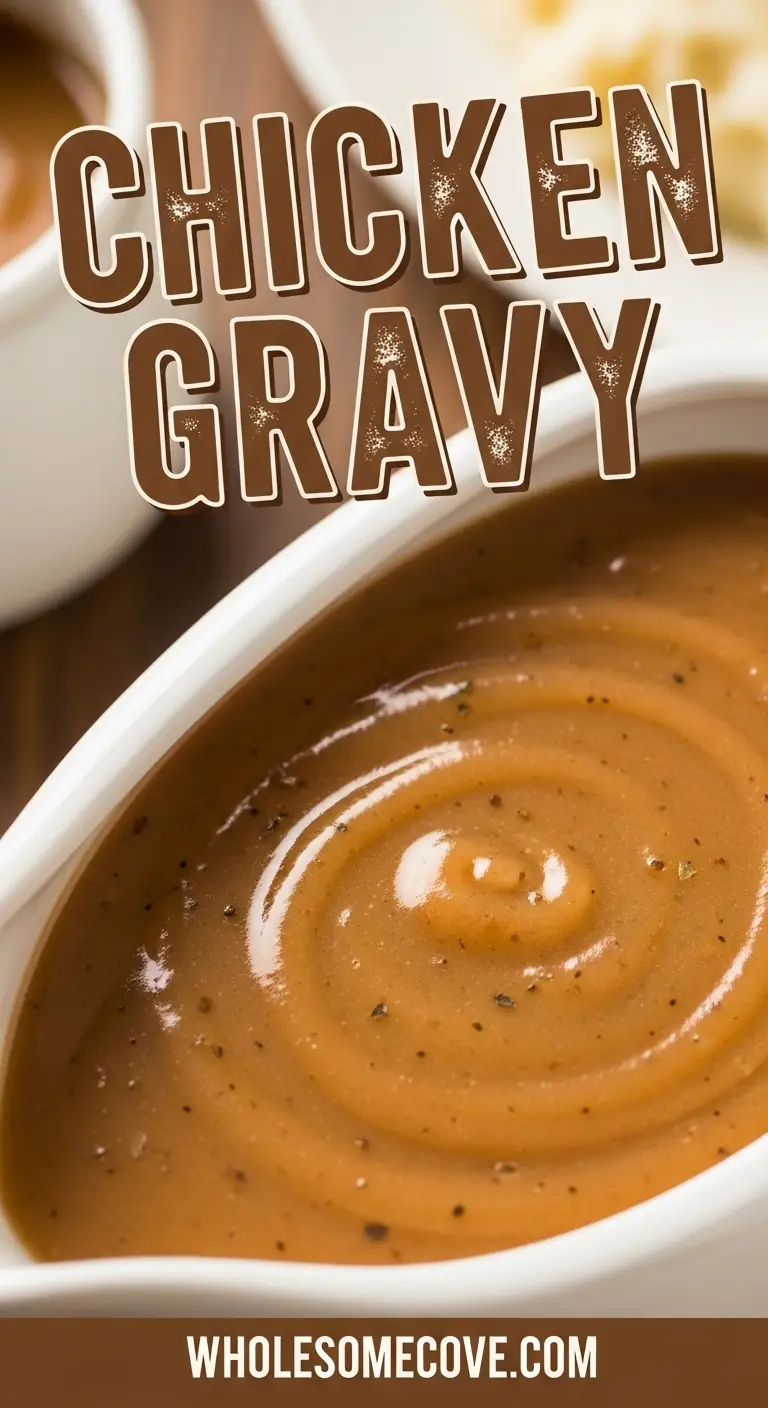
There’s nothing quite like homemade chicken gravy to transform an ordinary meal into something special. I learned to make this chicken gravy recipe from my grandmother, who insisted that packet gravy was an insult to good cooking.
She was absolutely right. Once you taste real, from-scratch gravy made with butter, flour, and rich chicken broth, you’ll never go back to the powdered stuff.
The first time I tried making gravy, I was terrified I’d end up with a lumpy mess. My hands were shaking as I whisked the flour into the melted butter, convinced I was ruining Sunday dinner.
But then something magical happened. The roux came together smoothly, the broth whisked in without a single lump, and within minutes, I had this gorgeous, silky gravy that made my mashed potatoes sing.
| Quick Recipe Summary | |
|---|---|
| Prep Time | 3 minutes |
| Cook Time | 8 minutes |
| Total Time | 11 minutes |
| Servings | 8 servings (2 cups) |
| Difficulty Level | Easy |
If you’re looking for more ways to elevate your comfort food game, you’ll love my Biscuits and Gravy Recipe that uses a similar technique with even more richness.
Why You’ll Love This Chicken Gravy Recipe
This recipe takes less than 15 minutes from start to finish, which means you can whip it up while your chicken rests or your vegetables finish roasting. No waiting around, no stress.
The technique is foolproof once you understand the basics. I’ve taught this recipe to my kids, my friends who claim they can’t cook, and even my mother-in-law who insisted gravy was “too complicated.”
- Incredibly versatile – Works perfectly over roasted chicken, mashed potatoes, rice, biscuits, turkey, or even vegetables
- Uses simple pantry staples – You probably already have everything you need: butter, flour, and chicken broth
- Can be made with or without drippings – No roasted chicken? No problem. This version works beautifully with just broth
- Completely customizable – Add herbs, adjust the thickness, or stir in cream for extra richness
- Budget-friendly – Costs just a few dollars to make and tastes better than anything store-bought
- Makes everything better – Seriously, I’ve started putting this gravy on things I never thought needed gravy
Ingredients
You’ll need just a handful of basic ingredients to create this silky, flavorful gravy. I always use unsalted butter so I can control the salt level, especially since chicken broth can vary in sodium content.
- 4 tablespoons (60g) unsalted butter – Creates the base for the roux and adds rich flavor
- 1/4 cup (30g) all-purpose flour – Thickens the gravy to perfect consistency
- 2 cups (480ml) low-sodium chicken broth – The star of the show; use high-quality broth for best flavor
- 1 teaspoon chicken bouillon paste (optional) – Adds extra depth when not using drippings
- 1/2 teaspoon onion powder – Enhances the savory notes
- 1/2 teaspoon garlic powder – Adds aromatic complexity
- 1/4 teaspoon black pepper – For subtle heat and flavor
- Salt to taste – Start small and adjust at the end
- 1/4 cup (60ml) heavy cream (optional) – For creamy, luxurious gravy
Optional pan drippings variation: If you have drippings from roasted chicken, use 3 tablespoons of fat from the drippings in place of butter, and replace 1/2 cup of the broth with the defatted drippings.
For a twist on traditional gravy, check out my Sausage Gravy Recipe that takes breakfast to a whole new level.
Kitchen Equipment Needed
Having the right tools makes gravy-making so much easier. I learned this the hard way after my first attempt with a flimsy whisk that couldn’t handle the job.
- Medium saucepan (2-3 quart capacity) – For making the roux and cooking the gravy
- Whisk – Essential for smooth, lump-free gravy; use a sturdy wire whisk
- Measuring cups and spoons – For accurate ingredient measurements
- Wooden spoon or silicone spatula – For scraping the bottom of the pan
- Fat separator (optional) – If using pan drippings, this makes separating fat from liquid easy
- Fine-mesh strainer (optional) – For ultra-smooth gravy, though not necessary with proper whisking
Recommended Products for This Recipe
Over the years of making gravy, I’ve discovered a few products that make the process easier and the results better. These aren’t necessities, but they’ve definitely earned permanent spots in my kitchen.
1. Better Than Bouillon Roasted Chicken Base
This concentrated chicken base is a game-changer for adding deep, roasted chicken flavor when you don’t have pan drippings. I keep a jar in my fridge at all times because it transforms simple broth into something that tastes like it simmered for hours. Just a teaspoon dissolved in your broth makes all the difference.
2. OXO Good Grips 11-Inch Balloon Whisk
I can’t stress enough how much a quality whisk matters for gravy. This balloon whisk has the perfect shape and stiff wires that power through any forming lumps without bending. The comfortable handle means your hand won’t cramp even when whisking continuously for several minutes.
3. Le Creuset Enameled Cast Iron Saucepan
While any saucepan works, this Le Creuset pan distributes heat so evenly that you’ll never have hot spots that burn your roux. The enameled interior is easy to clean even after making gravy, and the heavy bottom prevents scorching. It’s an investment that’ll last decades.
4. Swanson Unsalted Chicken Stock
When you’re not using drippings, the quality of your broth directly impacts your gravy’s flavor. Swanson’s unsalted stock gives you a clean, rich chicken taste without the excessive sodium found in regular broth. This lets you control the seasoning perfectly.
5. OXO Good Grips Fat Separator
If you’re making gravy with pan drippings, this fat separator makes the job effortless. The built-in strainer catches any solids, and the spout pours from the bottom so you get pure, defatted drippings without any of the grease. It’s much faster and cleaner than the old spoon-skimming method.
You might also enjoy: Turkey Gravy Recipe

Step-by-Step Instructions: How to Make Chicken Gravy
The key to perfect gravy is patience and constant whisking. I know it seems simple, but trust me, those few minutes of active stirring make all the difference between silky smooth gravy and a lumpy disaster.
1. Prepare Your Ingredients
- Measure out all your ingredients before you start cooking
- If using pan drippings, pour them into a fat separator and let sit for 5 minutes until the fat rises to the top
- Separate 3 tablespoons of the fat to use in place of butter
- Pour the remaining liquid (avoiding the fat layer) into a measuring cup
- Add enough chicken broth to the defatted drippings to equal 2 cups total liquid
- Have your whisk and all ingredients within easy reach
Why this matters: Gravy comes together quickly, so having everything measured and ready prevents burning or lumps while you scramble for ingredients.
2. Make the Roux
- Place your saucepan over medium heat and add the butter
- Let the butter melt completely, swirling the pan occasionally for even melting
- Once melted and just starting to foam, sprinkle in the flour all at once
- Immediately begin whisking vigorously to combine the flour and butter
- Continue whisking constantly for 2-3 minutes until the mixture is smooth, bubbly, and turns a light golden color
- The roux should smell nutty and toasted, not raw like flour
- Don’t rush this step; properly cooking the roux eliminates the raw flour taste
Chef’s tip: I learned from experience that if you see brown specks forming, your heat is too high. The roux should bubble gently, not violently.
3. Add the Chicken Broth
- While whisking continuously with one hand, slowly pour the chicken broth into the roux with the other hand
- Add the broth in a thin, steady stream (not all at once)
- Keep whisking vigorously as you pour to prevent lumps from forming
- If using bouillon paste, add it now along with the broth
- Once all the liquid is incorporated, whisk in the onion powder, garlic powder, and black pepper
- The mixture will be thin at first but will start to thicken as it heats
Common mistake: Dumping all the broth in at once is the number one cause of lumpy gravy. Slow and steady wins the race here.
4. Bring to a Simmer
- Increase the heat to medium-high
- Continue whisking frequently, making sure to scrape the bottom and corners of the pan
- Watch for the first bubbles to appear around the edges
- Once the gravy starts bubbling, reduce heat to medium-low
- Let it simmer gently for 3-4 minutes, whisking every 30 seconds
- The gravy should thicken to coat the back of a spoon
- If you drag your finger across the spoon, it should leave a clear line
5. Adjust Consistency and Season
- Assess the thickness of your gravy
- If too thick, whisk in broth 1 tablespoon at a time until you reach desired consistency
- If too thin, let it simmer 1-2 minutes longer, whisking occasionally
- Taste the gravy (careful, it’s hot!)
- Add salt gradually, starting with 1/4 teaspoon and tasting after each addition
- Remember, you can always add more salt but can’t take it away
- For creamy gravy, stir in the heavy cream now and heat through for 1 minute
- Adjust black pepper to taste
Serving tip: Gravy continues to thicken as it cools, so aim for slightly thinner than your desired final consistency.
6. Strain and Serve (Optional)
- For restaurant-quality smooth gravy, pour it through a fine-mesh strainer into a serving bowl or gravy boat
- Use a ladle to press any bits through the strainer
- This step isn’t necessary if you whisked properly, but it guarantees silky perfection
- Serve immediately while hot
- If the gravy sits and develops a skin, just whisk it back in before serving
Another favorite of mine is this Brown Gravy Recipe that’s perfect for beef dishes.
Tips for The Best Chicken Gravy
After making countless batches of gravy over the years, I’ve picked up some tricks that make the process easier and the results more consistent. These tips have saved me from gravy disasters more times than I can count.
- Use room temperature butter – It melts more evenly and combines better with flour than cold butter straight from the fridge
- Whisk constantly when adding liquid – This is the single most important step for lump-free gravy
- Don’t walk away – Gravy needs your attention for those 10 minutes; multitasking leads to burnt roux or lumpy gravy
- Adjust thickness gradually – It’s easier to thin gravy with extra broth than to thicken it once it’s too thin
- Taste before salting – Different broths have wildly different sodium levels, so always taste first
- Keep the heat moderate – High heat can cause the gravy to break or develop an unpleasant flavor
- Use a flat-bottomed whisk – It reaches into the corners of the pan better than a balloon whisk
- Scrape the pan bottom – Bits stuck to the bottom will flavor your gravy, so make sure to incorporate them
- Make it ahead – Gravy reheats beautifully; just thin it with a splash of broth as you warm it
- Double the recipe – Gravy freezes well, so make extra and freeze in portions for quick weeknight meals
- Add herbs fresh – If using fresh herbs like thyme or sage, add them in the last 2 minutes to preserve their flavor
- Watch for the “nape” – Professional term for when gravy coats the back of a spoon; that’s your cue it’s ready
What to Serve with Chicken Gravy
Honestly, asking what to serve with chicken gravy is like asking what doesn’t taste better with gravy. I grew up in a household where we put gravy on just about everything, and I’ve continued that tradition with my own family.
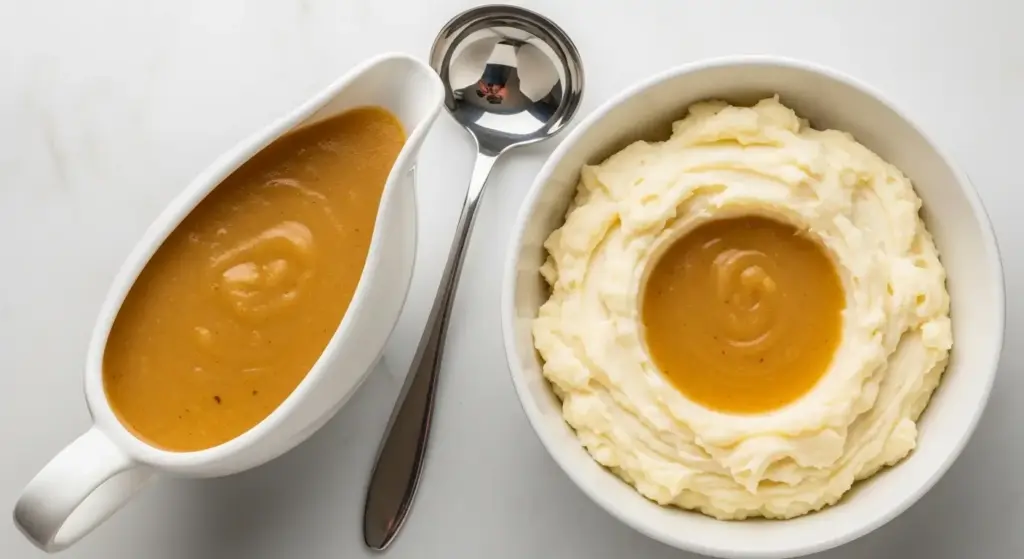
This versatile gravy enhances so many dishes. Pour it generously over Roasted Potatoes, Smashed Potatoes, or creamy Twice Baked Potatoes.
- Classic mashed potatoes – The most traditional pairing; the gravy pools in every creamy crater
- Roasted or fried chicken – Drizzle over sliced chicken breast or drumsticks
- Buttermilk biscuits – Split them open and smother with gravy for the ultimate comfort breakfast
- Rice – White or brown rice becomes infinitely more interesting with a generous ladle of gravy
- Turkey – Works just as well on Thanksgiving turkey as it does on chicken
- Stuffing or dressing – Moistens stuffing and adds extra flavor dimension
- Roasted vegetables – Try it over roasted carrots, green beans, or Brussels sprouts
- Meatloaf – Transforms basic meatloaf into something special
- Chicken fried steak – A Southern classic that demands good gravy
- Open-faced sandwiches – The hot brown and similar dishes benefit from this gravy
- Breakfast hash – Pour over a skillet hash with potatoes and eggs
- Biscuit sandwiches – Use as a sauce for breakfast or lunch sandwiches
Variations of Chicken Gravy
Once you master the basic technique, gravy becomes a blank canvas for flavor experimentation. I love adapting this recipe based on what I’m serving or what’s in my pantry.
- Herb gravy – Stir in 1 tablespoon fresh thyme, sage, or rosemary in the last minute of cooking
- Mushroom chicken gravy – Sauté 8 ounces sliced mushrooms in the butter before adding flour; proceed with recipe
- Lemon pepper gravy – Add 1 tablespoon fresh lemon juice and 1 teaspoon lemon zest with extra black pepper
- Garlic lovers gravy – Increase garlic powder to 1 teaspoon or sauté 3 minced garlic cloves in the butter
- Creole gravy – Add 1/2 teaspoon Cajun seasoning and a dash of hot sauce
- White wine gravy – Replace 1/2 cup of the broth with dry white wine for sophisticated flavor
- Cream gravy – Use half chicken broth and half heavy cream for ultra-rich gravy
- Pan dripping gravy – Use all defatted drippings from roasted chicken for maximum flavor
- Gluten-free gravy – Replace flour with 2 tablespoons cornstarch mixed with 2 tablespoons cold water; add at the simmer stage
- Dairy-free gravy – Use olive oil or chicken fat instead of butter; skip the cream
- Giblet gravy – Simmer chopped cooked chicken giblets in the finished gravy for 5 minutes
Read Also: Honey Mustard Sauce Recipe
Storage and Reheating
I always make extra gravy because it stores so well and turns leftovers into exciting new meals. Here’s how to keep it fresh and bring it back to its original glory.
- Refrigerator storage – Transfer cooled gravy to an airtight container and refrigerate for up to 4 days
- Freezer storage – Pour completely cooled gravy into freezer-safe containers or bags, leaving 1/2 inch headspace; freeze for up to 3 months
- Portioning tip – Freeze in ice cube trays, then transfer frozen cubes to a freezer bag for single-serving portions
- Thawing – Move frozen gravy to the refrigerator 24 hours before using, or defrost in the microwave on 30% power
- Stovetop reheating – Pour gravy into a saucepan over medium-low heat, whisking frequently until heated through (about 5 minutes)
- Microwave reheating – Heat in 30-second intervals at 50% power, stirring between each interval
- Thinning reheated gravy – Add 1-2 tablespoons chicken broth or water as needed; gravy thickens as it sits
- Avoiding separation – Reheat gently and whisk well; high heat can cause cream-based gravy to separate
- Make-ahead tip – Prepare gravy completely up to 2 days ahead, refrigerate, then gently reheat before serving
- Gravy skin prevention – Press plastic wrap directly on the surface of cooling gravy to prevent skin formation
For another make-ahead sauce option, try my Sweet and Sour Sauce Recipe.
Nutritional Facts
Per serving (1/4 cup, based on 8 servings):
- Calories: 70
- Total Fat: 6g
- Saturated Fat: 4g
- Cholesterol: 16mg
- Sodium: 220mg
- Total Carbohydrates: 4g
- Dietary Fiber: 0g
- Sugars: 0g
- Protein: 1g
Note: Nutritional values are estimates and will vary based on specific brands used and optional ingredients added. Using cream increases calories and fat content. Sodium content varies significantly based on the broth used.
Looking for more sauce recipes? Check out my Garlic Parmesan Sauce Recipe.
Health Benefits of Key Ingredients
While gravy isn’t typically considered health food, the ingredients do offer some nutritional benefits. I’m not suggesting you eat it by the bowlful, but there’s more to it than just empty calories.
Chicken broth forms the base and provides several nutrients that support overall wellness.
- Chicken broth – Contains collagen and gelatin that support joint health and may improve skin elasticity; provides small amounts of protein and minerals like calcium and magnesium
- Butter – Offers fat-soluble vitamins A, D, E, and K; provides conjugated linoleic acid (CLA) which may have health benefits; choose grass-fed butter for higher omega-3 content
- Garlic powder – Contains antioxidants that support immune function; may help reduce blood pressure and cholesterol levels
- Onion powder – Provides quercetin, a powerful antioxidant with anti-inflammatory properties; supports heart health
- Black pepper – Contains piperine which enhances nutrient absorption and has anti-inflammatory effects
- Flour – Provides small amounts of iron and B vitamins when using enriched all-purpose flour
If you’re interested in exploring more chicken-based dishes, browse through my collection of Best Chicken Soup Recipes.
FAQs About Chicken Gravy
1. Why is my gravy lumpy?
Lumps form when flour isn’t properly incorporated into the fat or when liquid is added too quickly. The key is whisking constantly as you add the broth in a slow, steady stream.
If you do get lumps, don’t panic. Pour the gravy through a fine-mesh strainer or blend it with an immersion blender until smooth.
2. Can I make chicken gravy without flour?
Absolutely. Use a cornstarch slurry instead by mixing 2 tablespoons cornstarch with 2 tablespoons cold water.
Bring your broth to a boil, then whisk in the slurry. Simmer for 2-3 minutes until thickened, stirring constantly.
3. How do I fix gravy that’s too salty?
Add more unsalted chicken broth to dilute the saltiness, then simmer to reduce back to desired thickness. You can also add a peeled, quartered potato and simmer for 10 minutes, which absorbs excess salt.
Remove the potato before serving. In the future, always use low-sodium broth and taste before adding salt.
4. Can I use chicken drippings instead of broth?
Yes, and it makes incredible gravy. Pour pan drippings into a fat separator and let the fat rise to the top.
Use 3 tablespoons of the fat in place of butter for your roux, then use the defatted drippings plus additional broth to equal 2 cups total liquid. The flavor will be significantly richer than broth-only gravy.
5. Why is my gravy too thick or too thin?
Gravy thickness depends on the flour-to-liquid ratio and cooking time. Too thick means too much flour or too little liquid; whisk in broth 1 tablespoon at a time.
Too thin means either insufficient flour or not enough simmering time. Let it bubble gently for a few more minutes to thicken, or mix 1 tablespoon cornstarch with 1 tablespoon cold water and whisk it in.
Another sauce that pairs beautifully with chicken is my Worcestershire Sauce Recipe.
Chicken Gravy
Ingredients
- 4 tablespoons unsalted butter - 60g
- 1/4 cup all-purpose flour - 30g
- 2 cups low-sodium chicken broth - 480ml
- 1 teaspoon chicken bouillon paste - optional
- 1/2 teaspoon onion powder
- 1/2 teaspoon garlic powder
- 1/4 teaspoon black pepper
- salt - to taste
- 1/4 cup heavy cream - 60ml, optional
Equipment
- Medium saucepan - 2-3 quart capacity
- Whisk - Sturdy wire whisk
- Measuring cups and spoons
- Wooden spoon or silicone spatula
- Fat separator - (optional) If using pan drippings
- Fine-mesh strainer - (optional) For ultra-smooth gravy
Method
- Measure all ingredients before starting. If using pan drippings, separate 3 tablespoons of fat and combine defatted drippings with broth to equal 2 cups total liquid.
- Melt butter in saucepan over medium heat. Add flour and whisk vigorously for 2-3 minutes until smooth, bubbly, and light golden.
- While whisking constantly, slowly pour chicken broth into the roux in a thin, steady stream. Add bouillon paste, onion powder, garlic powder, and black pepper.
- Increase heat to medium-high and bring to a simmer, whisking frequently. Reduce heat and simmer gently for 3-4 minutes until thickened enough to coat the back of a spoon.
- Taste and adjust consistency by adding broth to thin or simmering longer to thicken. Add salt gradually and stir in cream if using.
- For ultra-smooth gravy, strain through fine-mesh strainer into serving bowl. Serve immediately while hot.
Nutrition
Notes
- Use room temperature butter for even melting and better incorporation with flour
- Whisk constantly when adding liquid to prevent lumps from forming
- If lumps do form, strain through fine-mesh strainer or use immersion blender
- Adjust thickness gradually – easier to thin with extra broth than to thicken once too thin
- Gravy continues to thicken as it cools, so aim for slightly thinner than desired final consistency
- For gluten-free version, replace flour with 2 tablespoons cornstarch mixed with 2 tablespoons cold water added during simmer stage
- Store refrigerated in airtight container for up to 4 days or freeze for up to 3 months
- Reheat gently over low heat, whisking frequently and adding broth as needed to restore consistency
- For maximum flavor, use defatted pan drippings from roasted chicken in place of some or all of the broth
- Make ahead up to 2 days before serving and gently reheat when needed
Private Notes
Tried this recipe?
Let us know how it was!Final Thoughts
Making homemade chicken gravy is one of those skills that seems intimidating until you try it once. Then you realize it’s actually easier than opening a packet and tastes about a thousand times better.
I hope this recipe gives you the confidence to ditch the store-bought gravy forever. Once you see how simple it is to make this silky, flavorful sauce from scratch, you’ll find yourself making it for weeknight dinners, not just special occasions.
Give this chicken gravy recipe a try and let me know how it turns out. Drop a comment below with your favorite way to use gravy, or share a photo if you make it!
Recommended:
- Biscuits and Gravy Recipe
- Sausage Gravy Recipe
- Turkey Gravy Recipe
- Brown Gravy Recipe
- Roasted Potatoes Recipe
- Smashed Potatoes Recipe
- Twice Baked Potatoes Recipe
- Chicken Soup Recipe
- Shepherds Pie Recipe
- Baked Ziti Recipe