
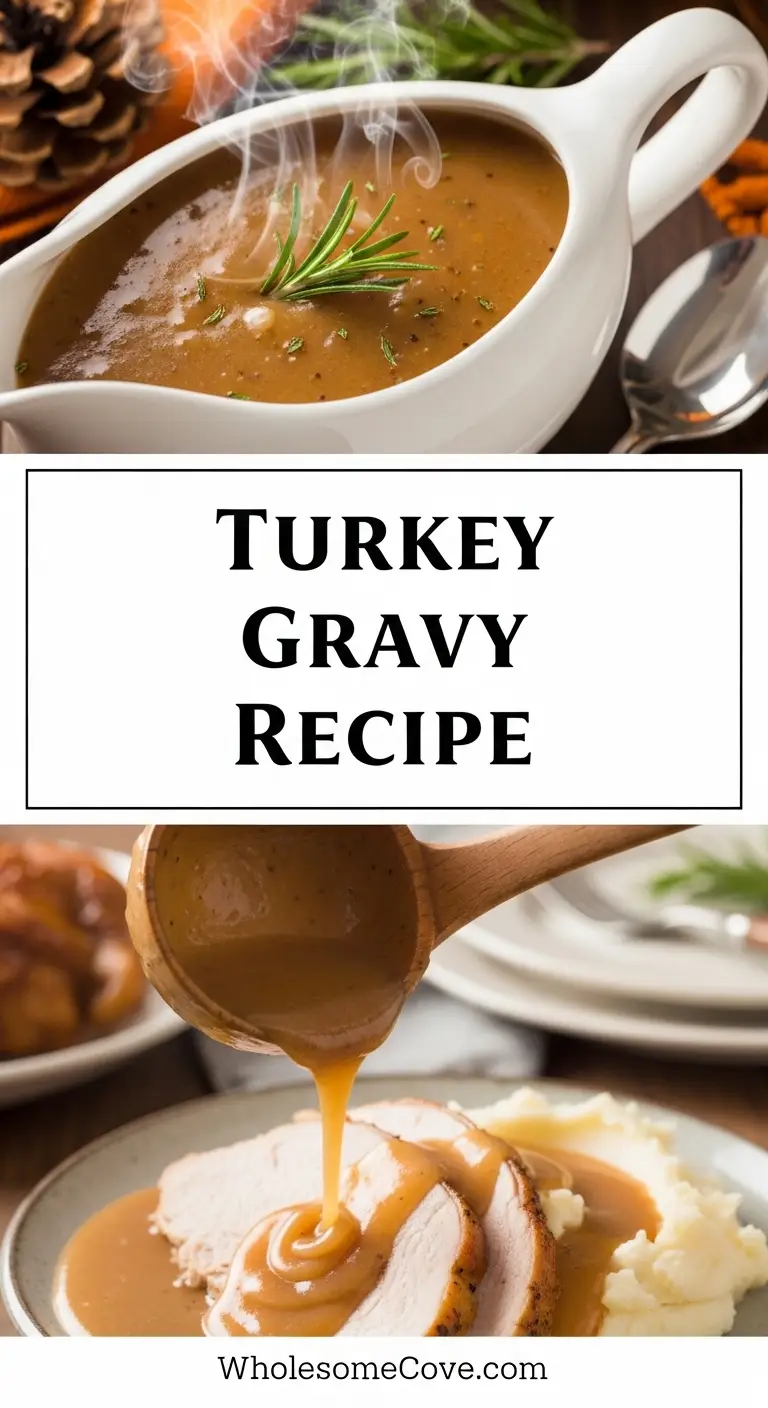
I’ll never forget the first time I tried making turkey gravy from scratch. My mother-in-law handed me the roasting pan filled with those golden drippings and said, “Now make the gravy.” I panicked.
Up until that moment, I’d relied on those little packets from the store. But once I learned how to make this Turkey Gravy Recipe, everything changed. The rich, velvety sauce transformed our Thanksgiving turkey from good to absolutely unforgettable.
If you’re looking for the perfect complement to your roasted turkey, this recipe delivers every single time. The best part? It uses the flavorful pan drippings that you’d otherwise throw away, transforming them into liquid gold that’ll have everyone asking for seconds.
| Quick Recipe Summary | |
|---|---|
| Prep Time | 5 minutes |
| Cook Time | 10 minutes |
| Total Time | 15 minutes |
| Servings | 8 servings (2 cups) |
| Difficulty Level | Easy |
You might also enjoy: Brown Gravy Recipe
Why You’ll Love This Turkey Gravy Recipe
This isn’t just another gravy recipe. It’s the one that’ll become your Thanksgiving tradition.
I’ve made this gravy dozens of times, tweaking and perfecting it until it became foolproof. The secret is in the technique of building a proper roux and whisking constantly to avoid lumps.
- Uses turkey drippings: Every drop is packed with the flavor of your perfectly roasted bird, herbs, and seasonings
- Quick and easy: From start to finish, you’ll have restaurant-quality gravy in just 15 minutes
- No special equipment needed: Just a saucepan, whisk, and measuring cups
- Smooth and silky: The roux technique ensures a lump-free gravy every time
- Perfectly seasoned: The drippings already carry seasoning from your turkey, so you’re starting with a flavor advantage
- Make-ahead friendly: Prepare it ahead and just reheat when dinner is ready
Read Also: Worcestershire Sauce Recipe
Ingredients
The beauty of this turkey gravy is its simplicity. You probably have most of these ingredients in your pantry already.
- 1/4 cup (60ml) turkey fat (skimmed from drippings) or unsalted butter
- 1/4 cup (30g) all-purpose flour (or gluten-free flour blend for GF option)
- 2 cups (475ml) turkey drippings and chicken broth (combined)
- 1/2 cup (120ml) heavy cream or whole milk (optional, for extra richness)
- Salt and freshly ground black pepper to taste
- 1 teaspoon fresh thyme (optional, for added depth)
For a lighter option, try pairing this gravy with our Healthy Mashed Potatoes.
Kitchen Equipment Needed
You won’t need fancy equipment for this recipe, just a few basic kitchen tools.
- Medium saucepan (2-3 quart capacity)
- Wire whisk (silicone-coated works great to protect your pan)
- Fine-mesh strainer (for straining drippings)
- Large measuring cup (4-cup capacity, preferably with a spout)
- Fat separator (optional but helpful, or use a spoon to skim fat)
- Wooden spoon (for scraping up browned bits from the roasting pan)
Another favorite: Bechamel Sauce Recipe
Recommended Products for This Recipe
After years of making this gravy, I’ve found a few products that make the process even easier and deliver better results.
1. OXO Good Grips Fat Separator
This is hands down the best investment for gravy making. It has a strainer built into the top and a spout that pours from the bottom, leaving all the fat behind. No more skimming with a spoon and hoping you got it all. The measurements on the side are also incredibly helpful for getting the ratios right.
2. Better Than Bouillon Roasted Chicken Base
When you don’t have quite enough turkey drippings (or if you’re making gravy without a turkey), this paste is a lifesaver. Unlike boxed broth, it’s super concentrated and adds incredible depth of flavor. I always keep a jar in my fridge for gravies, soups, and sauces. A little goes a long way.
3. Cuisinart Silicone Whisk
I learned the hard way that metal whisks can scratch your nice pans. This silicone whisk is gentle on cookware but still sturdy enough to whisk out any lumps. The handle is comfortable even when you’re whisking continuously, which you’ll be doing with this recipe.
4. Pyrex Glass Measuring Cup (4-Cup)
You need a good measuring cup to collect and measure your drippings. This Pyrex one is microwave-safe (great for reheating leftover gravy), has a pouring spout, and the measurements are super easy to read. I’ve had mine for over a decade and it still looks new.
Try this sauce too: Garlic Parmesan Sauce Recipe
Step-by-Step Instructions: How to Make Turkey Gravy
Making turkey gravy is all about timing and technique. Follow these steps carefully and you’ll have perfect gravy every time.
1. Collect and Strain the Turkey Drippings
- Remove the roasted turkey from the pan and transfer it to a cutting board to rest
- Tilt the turkey slightly to allow any juices inside the cavity to pour into the roasting pan
- Place a fine-mesh strainer over your large measuring cup
- Pour all the pan drippings through the strainer to catch any solid bits, herbs, or burnt pieces
- Discard what’s caught in the strainer (these bits can make gravy bitter)
- Let the strained drippings sit for 2-3 minutes so the fat rises to the top
2. Separate the Fat from the Drippings
- If using a fat separator, pour the drippings into it and let the fat rise (about 2 minutes)
- Pour the defatted drippings from the bottom spout into a clean measuring cup, stopping before the fat layer reaches the spout
- Alternatively, use a large spoon to carefully skim the fat off the top and transfer 1/4 cup (60ml) to a small bowl
- If you don’t have enough turkey fat, supplement with unsalted butter to reach 1/4 cup
- Add enough chicken broth to the remaining drippings to equal 2 cups (475ml) total liquid
3. Deglaze the Roasting Pan
- Place the roasting pan over medium heat on your stovetop (use two burners if needed for a large pan)
- Add 1/2 cup of your measured drippings to the pan
- Use a wooden spoon to scrape up all the browned bits stuck to the bottom (this is pure flavor)
- Pour this liquid back into your measuring cup with the rest of the drippings
4. Make the Roux
- Heat the reserved 1/4 cup turkey fat (or butter) in a medium saucepan over medium heat
- Once melted and shimmering, add the flour all at once
- Whisk immediately and vigorously to combine, breaking up any lumps
- Continue cooking and whisking constantly for 3-4 minutes until the roux turns a light golden brown and smells nutty (not raw)
- The roux should be smooth and bubble gently; if it’s browning too quickly, reduce the heat slightly
5. Add the Liquid and Cook
- Remove the pan from heat temporarily (this prevents splattering)
- Add about 1/2 cup of the warm drippings mixture to the roux
- Whisk constantly until fully incorporated and smooth
- Return the pan to medium heat and gradually add the remaining drippings in 1/2 cup increments
- Whisk constantly after each addition, ensuring the liquid is fully absorbed before adding more
- Once all liquid is added, bring the mixture to a gentle boil
- Reduce heat to medium-low and simmer for 5-7 minutes, whisking occasionally
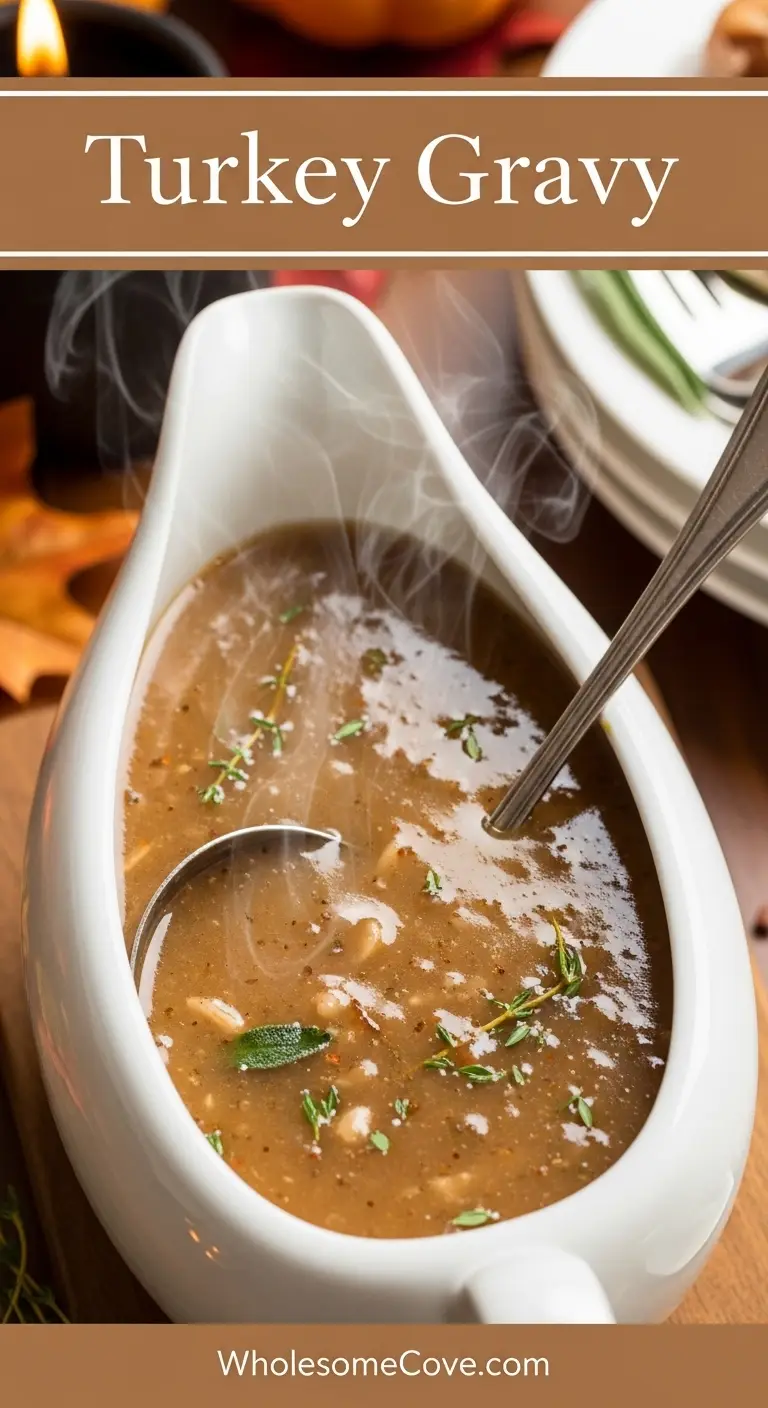
6. Finish and Season the Gravy
- The gravy should coat the back of a spoon when ready; if too thick, whisk in more broth, 2 tablespoons at a time
- If too thin, continue simmering for 2-3 more minutes
- For extra richness, stir in the heavy cream or milk
- Add fresh thyme if using, and let it steep for 1 minute
- Taste the gravy and season with salt and freshly ground black pepper (remember, the drippings are already seasoned)
- For an ultra-smooth finish, strain the gravy through a fine-mesh strainer into a serving pitcher or gravy boat
- Serve immediately or keep warm over very low heat, whisking occasionally
Pair this with our delicious Shepherds Pie Recipe.
Tips for The Best Turkey Gravy
Over the years, I’ve learned a few tricks that make the difference between good gravy and great gravy.
- Keep everything warm: Cold liquid added to a hot roux can cause lumps. Warm your drippings slightly before adding if they’ve cooled.
- Whisk, whisk, whisk: The key to lump-free gravy is constant whisking, especially when adding the liquid to the roux.
- Don’t rush the roux: Cooking the flour properly removes that raw, pasty taste. Give it those full 3-4 minutes.
- Taste before salting: Turkey drippings are often well-seasoned from the bird, so add salt gradually and taste as you go.
- Strain for perfection: If you do get a few lumps, simply strain the finished gravy through a fine-mesh strainer.
- Make it ahead: Gravy can be made up to 2 days ahead and refrigerated. It will thicken when cold, so add a bit of broth when reheating.
- Save those drippings: Don’t have a turkey? Save drippings from roasted chicken or use high-quality chicken or turkey stock as the base.
- Control consistency: Remember that gravy continues to thicken as it cools. Make it slightly thinner than your ideal consistency.
- Add flavor boosters: A splash of white wine, cognac, or even a dash of soy sauce can add incredible depth.
- Use quality stock: If supplementing with store-bought broth, choose low-sodium so you can control the salt level.
This pairs wonderfully with our Roasted Potatoes Recipe.
What to Serve with Turkey Gravy
Turkey gravy is incredibly versatile and elevates so many dishes beyond just Thanksgiving turkey.
Of course, it’s perfect poured over sliced turkey breast or thighs. But don’t stop there.
- Healthy Mashed Potatoes
- Twice Baked Potatoes
- Scalloped Potatoes
- Biscuits and bread rolls
- Stuffing or dressing
- Roasted vegetables
- Open-faced turkey sandwiches
- Savory waffles or pancakes for a unique brunch
- Breakfast Potatoes
Consider serving alongside our Healthy Coleslaw Recipe.
Variations of Turkey Gravy
While the classic version is perfect, here are some delicious ways to customize your gravy.
- Giblet Gravy: Simmer the turkey neck, heart, and gizzard in salted water for 1 hour while the turkey roasts. Chop finely and add to the finished gravy.
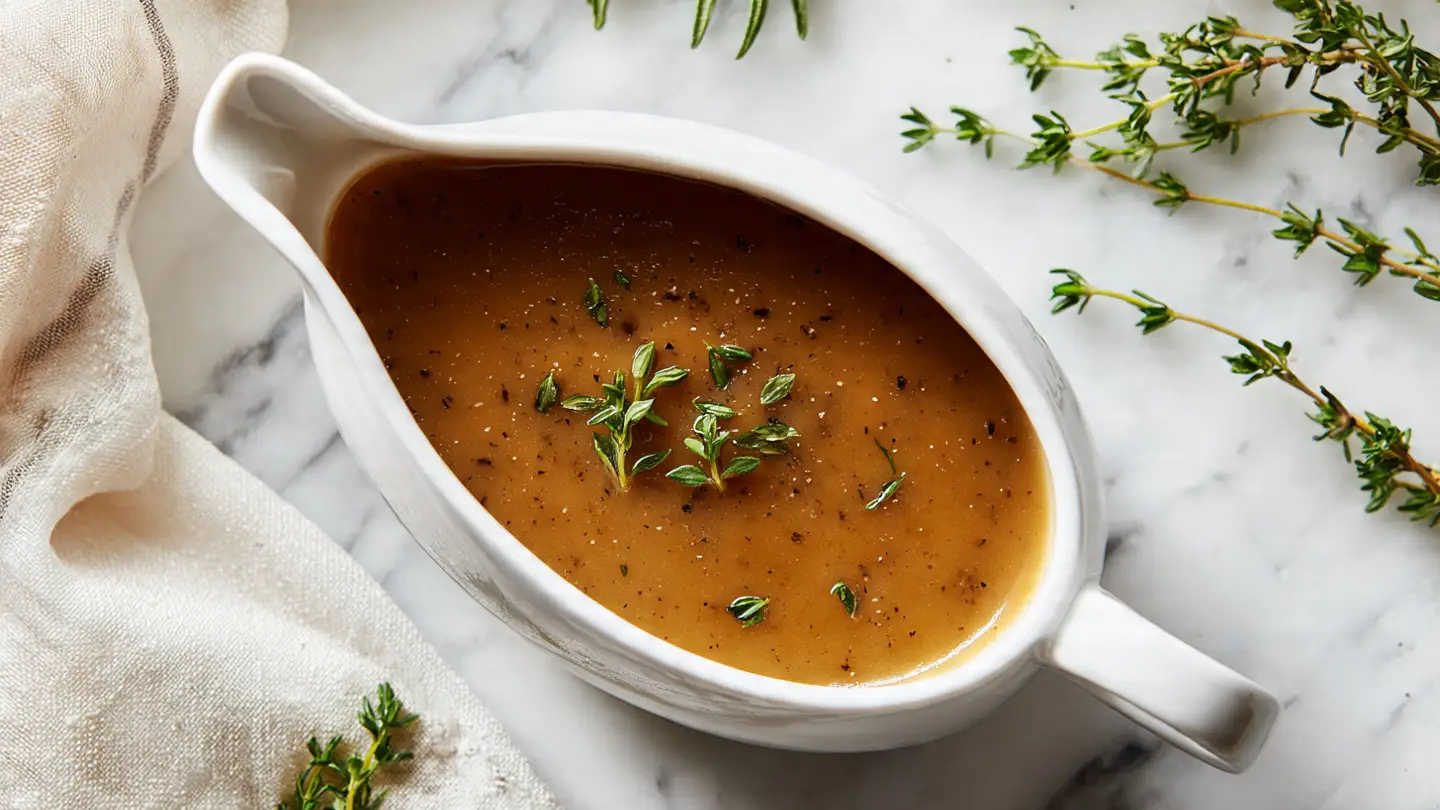
- Herb-Infused Gravy: Add fresh rosemary, sage, and thyme sprigs to the drippings while they simmer, then strain before using.
- Mushroom Turkey Gravy: Sauté 8 oz sliced mushrooms in butter until golden, then add to the finished gravy.
- White Wine Gravy: Replace 1/2 cup of the broth with dry white wine for a sophisticated flavor.
- Cognac Gravy: Add 2 tablespoons cognac or brandy after the gravy thickens for depth.
- Dairy-Free Version: Skip the cream and use all turkey drippings and broth. Use olive oil instead of butter if needed.
- Gluten-Free Gravy: Substitute cornstarch (2 tablespoons) or gluten-free flour blend for regular flour.
- Spicy Gravy: Add a pinch of cayenne pepper or a few dashes of hot sauce.
- Onion Gravy: Sauté 1 diced onion in the fat before adding flour for sweet, caramelized flavor.
- Make-Ahead Gravy: Make the base with butter and broth 2 days ahead, then stir in fresh drippings when reheating on Thanksgiving day.
For a different take on gravy, try our Honey Mustard Sauce.
Storage and Reheating
Proper storage ensures your gravy stays delicious for days after the big meal.
Refrigerator Storage:
- Let gravy cool completely to room temperature
- Transfer to an airtight container
- Store in the refrigerator for up to 3-4 days
- Gravy will thicken considerably when chilled
Freezer Storage:
- Cool gravy completely
- Pour into freezer-safe containers or heavy-duty freezer bags, leaving 1 inch of headspace for expansion
- Label with date and contents
- Freeze for up to 3 months
- For easier portioning, freeze in ice cube trays, then transfer cubes to a freezer bag
Reheating Instructions:
- Stovetop method: Pour cold gravy into a saucepan over medium-low heat. Whisk frequently as it warms. Add 2-4 tablespoons of broth or water to thin to desired consistency.
- Microwave method: Transfer to a microwave-safe bowl. Heat in 30-second intervals, whisking between each, until hot and smooth. Add liquid to thin if needed.
- Don’t rush reheating: Low and slow prevents the gravy from breaking or becoming greasy.
Pro Tips:
- Always whisk while reheating to restore smooth texture
- Add fresh broth gradually; it’s easier to thin than to thicken
- Taste and re-season after reheating, as flavors can dull when refrigerated
- Never refreeze thawed gravy
Try our Tomato Sauce Recipe for another versatile sauce option.
Nutritional Facts
Per Serving (1/4 cup or 60ml):
- Calories: 85
- Total Fat: 7g
- Saturated Fat: 4g
- Trans Fat: 0g
- Cholesterol: 18mg
- Sodium: 220mg
- Total Carbohydrates: 4g
- Dietary Fiber: 0g
- Sugars: 1g
- Protein: 2g
- Vitamin A: 4% DV
- Calcium: 2% DV
- Iron: 2% DV
- Potassium: 85mg
Notes:
- Nutritional values are estimates and will vary based on the exact drippings used
- Values include optional heavy cream
- Using skim milk instead of cream reduces calories to approximately 65 per serving
- Turkey drippings’ sodium content varies depending on how the turkey was seasoned
- This recipe makes approximately 8 servings (2 cups total)
Complement your meal with our Broccoli Salad.
Health Benefits of Key Ingredients
While gravy is traditionally considered indulgent, it does offer some nutritional benefits when made from scratch.
Turkey Drippings: Turkey drippings contain protein, B vitamins (especially B6 and niacin), and minerals like selenium and phosphorus. The collagen from the roasted bird adds beneficial amino acids that support joint and skin health.
- Protein: Supports muscle maintenance and repair
- Selenium: Acts as a powerful antioxidant and supports thyroid function
- B Vitamins: Essential for energy metabolism and nervous system health
- Phosphorus: Important for bone health and cellular function
- Zinc: Supports immune function (from the turkey)
- Collagen peptides: May benefit skin elasticity and joint health
- Healthy fats: When made with quality butter, provides fat-soluble vitamins A, D, E, and K
- Homemade advantage: No preservatives, artificial flavors, or excess sodium compared to store-bought versions
Moderation Matters: Gravy is rich and should be enjoyed as part of a balanced meal. A little goes a long way in terms of flavor, so use it thoughtfully to enhance rather than overwhelm your dishes.
You might also like our Potato Salad Recipe.
FAQs About Turkey Gravy
1. Can I make turkey gravy without drippings?
Absolutely! Use 2 cups of high-quality chicken or turkey stock instead of drippings. For extra flavor, sauté some diced onions, garlic, and herbs in the butter before making the roux. You can also add a splash of soy sauce or Worcestershire sauce for depth.
The result won’t be quite as rich as gravy made with real drippings, but it will still be delicious and far better than store-bought options.
2. Why is my gravy lumpy?
Lumpy gravy usually happens when the liquid is added too quickly to the roux or when you don’t whisk constantly. If you catch lumps forming, immediately whisk vigorously.
For already-lumpy gravy, strain it through a fine-mesh strainer into a clean pot. Alternatively, use an immersion blender to smooth it out, though this will affect the texture slightly.
3. How do I fix gravy that’s too thick?
Too-thick gravy is easy to fix. Simply whisk in additional warm chicken or turkey broth, 2 tablespoons at a time, until you reach your desired consistency. Make sure to add the liquid gradually and whisk well between additions.
Remember that gravy continues to thicken as it cools, so err on the side of slightly thinner than your ideal consistency.
4. Can I make turkey gravy ahead of time?
Yes! You can prepare gravy up to 2 days in advance. Make it as directed, let it cool completely, then refrigerate in an airtight container. When ready to serve, reheat gently over medium-low heat, whisking frequently and adding broth to thin as needed.
For make-ahead planning, you can prepare the roux base with butter and flour, then add fresh turkey drippings on Thanksgiving day for the best flavor.
5. What’s the best way to prevent greasy gravy?
The key is properly separating the fat from the drippings. Use a fat separator or let drippings sit until the fat rises, then carefully skim it off. You only want 1/4 cup of fat for the roux.
Excess fat won’t incorporate into the gravy properly and will leave an oily film on top. If your finished gravy seems greasy, you can gently blot the surface with a paper towel to absorb excess fat.
Don’t miss our Buffalo Sauce Recipe for another classic condiment.
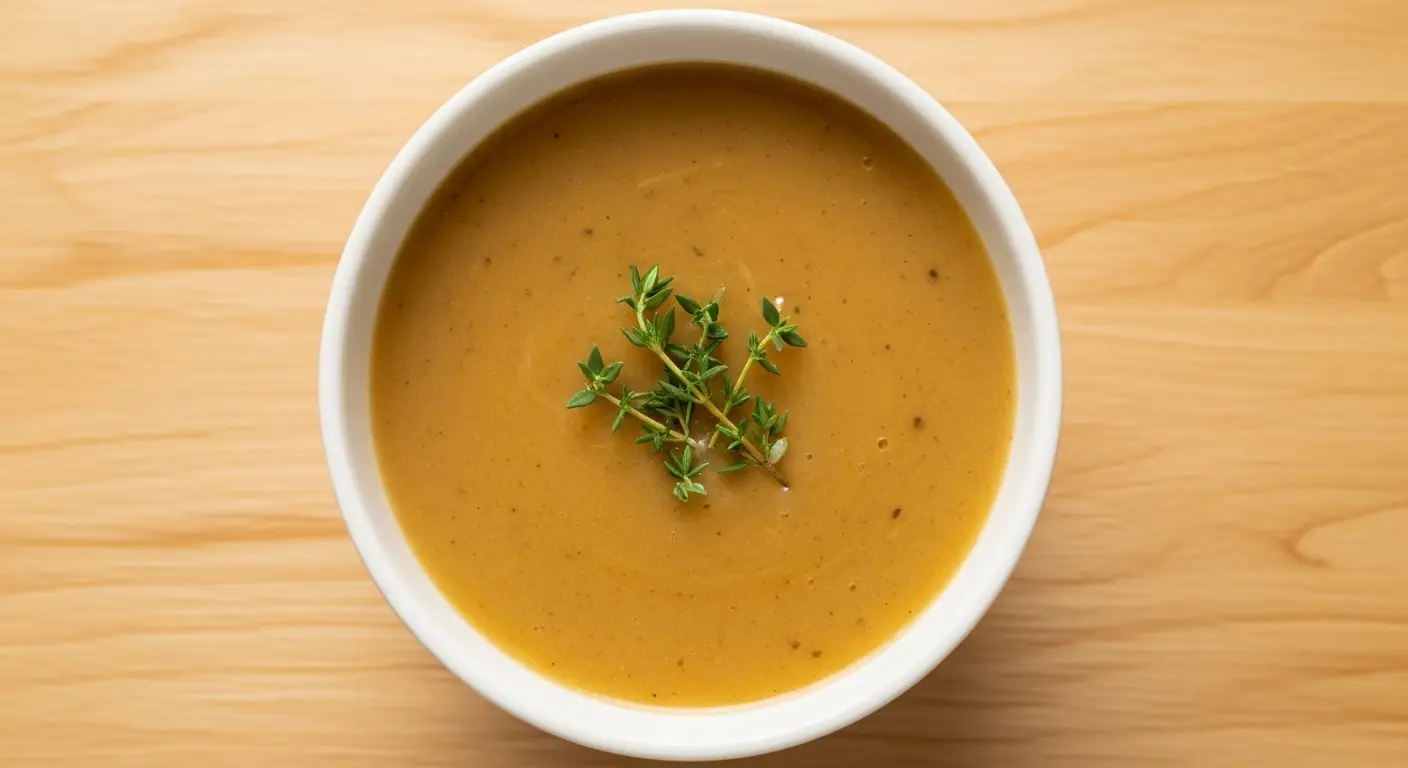
Turkey Gravy
Ingredients
- 1/4 cup turkey fat - 60ml, skimmed from drippings, or use unsalted butter
- 1/4 cup all-purpose flour - 30g, or use gluten-free flour blend for GF option
- 2 cups turkey drippings and chicken broth - 475ml, combined
- 1/2 cup heavy cream - 120ml, or whole milk, optional for extra richness
- salt and freshly ground black pepper - to taste
- 1 teaspoon fresh thyme - optional, for added depth
Equipment
- Medium saucepan - 2-3 quart capacity
- Wire whisk - Silicone-coated works great
- Fine-mesh strainer - For straining drippings
- Large measuring cup - 4-cup capacity, preferably with spout
- Fat separator - (optional)
- Wooden spoon - For scraping roasting pan
Method
- Remove roasted turkey from pan. Pour drippings through a fine-mesh strainer into a measuring cup and let sit 2-3 minutes for fat to rise.
- Use a fat separator or spoon to skim fat from drippings, reserving 1/4 cup fat. Add chicken broth to remaining drippings to equal 2 cups total liquid.
- Place roasting pan over medium heat, add 1/2 cup drippings, and scrape up browned bits with a wooden spoon. Pour back into measuring cup.
- Heat reserved turkey fat in a medium saucepan over medium heat. Add flour all at once and whisk constantly for 3-4 minutes until light golden brown and nutty-smelling.
- Remove from heat and whisk in 1/2 cup drippings until smooth. Return to heat and gradually add remaining drippings in 1/2 cup increments, whisking constantly. Bring to a gentle boil, then simmer 5-7 minutes.
- Stir in cream if using, add thyme, and season with salt and pepper to taste. Strain through fine-mesh strainer if desired. Serve immediately or keep warm over low heat.
Nutrition
Notes
- Keep drippings warm before adding to roux to prevent lumps
- Constant whisking is key to smooth, lump-free gravy
- Cook the roux for the full 3-4 minutes to remove raw flour taste
- Gravy can be made up to 2 days ahead and refrigerated; add broth when reheating to thin
- If you don’t have enough turkey fat, supplement with unsalted butter
- For giblet gravy, simmer turkey giblets in water, chop finely, and add to finished gravy
- Make gravy slightly thinner than desired as it continues to thicken when cooling
- For gluten-free version, use cornstarch (2 tablespoons) or gluten-free flour blend
- Store in airtight container in refrigerator for 3-4 days or freeze up to 3 months
- Add a splash of white wine or cognac for extra depth of flavor
Private Notes
Tried this recipe?
Let us know how it was!Final Thoughts
Making turkey gravy from scratch might seem intimidating at first, but once you master this technique, you’ll never go back to the packet mixes. The rich, savory flavor of homemade gravy made from real turkey drippings is simply incomparable.
This recipe has become my go-to for every Thanksgiving, and I’ve shared it with countless friends and family members who were initially nervous about making gravy. Every single one of them has told me how easy it turned out to be.
Give this Turkey Gravy Recipe a try this holiday season, and I promise you’ll wonder why you ever bought gravy from a jar. If you make this recipe, I’d love to hear how it turns out! Drop a comment below with your experience, any tweaks you made, or how your family loved it.
Recommended:
- Sweet and Sour Sauce Recipe
- Cheese Sauce Recipe
- Vodka Sauce Recipe
- Teriyaki Sauce Recipe
- Enchilada Sauce Recipe
- Spaghetti Sauce Recipe
- Au Gratin Potatoes Recipe
- Funeral Potatoes Recipe
- Cheesy Potatoes Recipe
- Smashed Potatoes Recipe