
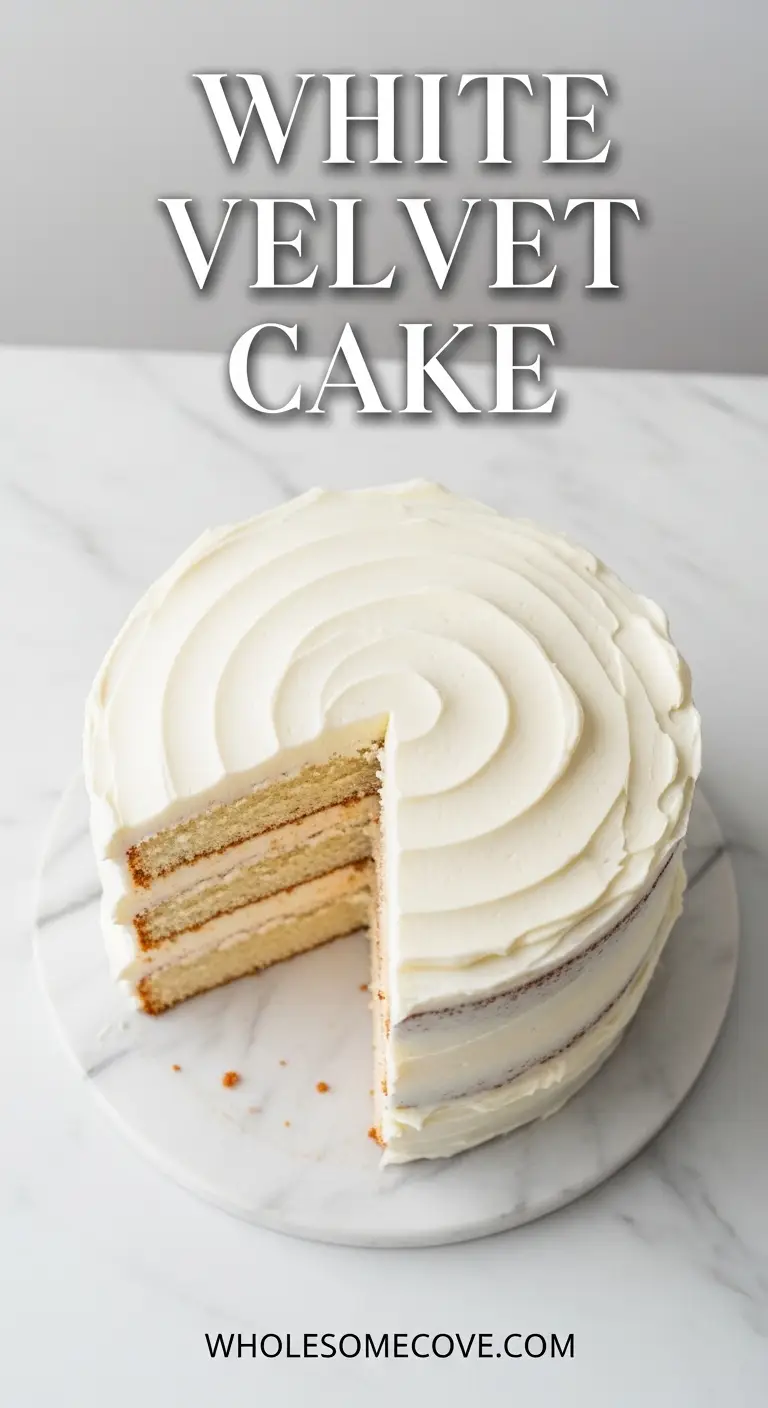
The first time I baked a White Velvet Cake Recipe, I was skeptical that it would live up to the hype of its famous red cousin. But one bite changed everything.
The velvety soft texture and delicate crumb were unlike any white cake I’d ever tasted. My family couldn’t stop talking about it, and it quickly became the go-to cake for every birthday celebration in our house.
| Quick Recipe Summary | |
|---|---|
| Prep Time | 20 minutes |
| Cook Time | 30 minutes |
| Total Time | 50 minutes |
| Servings | 12 slices |
| Difficulty Level | Intermediate |
If you’re a fan of velvet cakes, you’ll also love my Red Velvet Cake Recipe with its classic tangy flavor and gorgeous color.

Why You’ll Love This White Velvet Cake Recipe
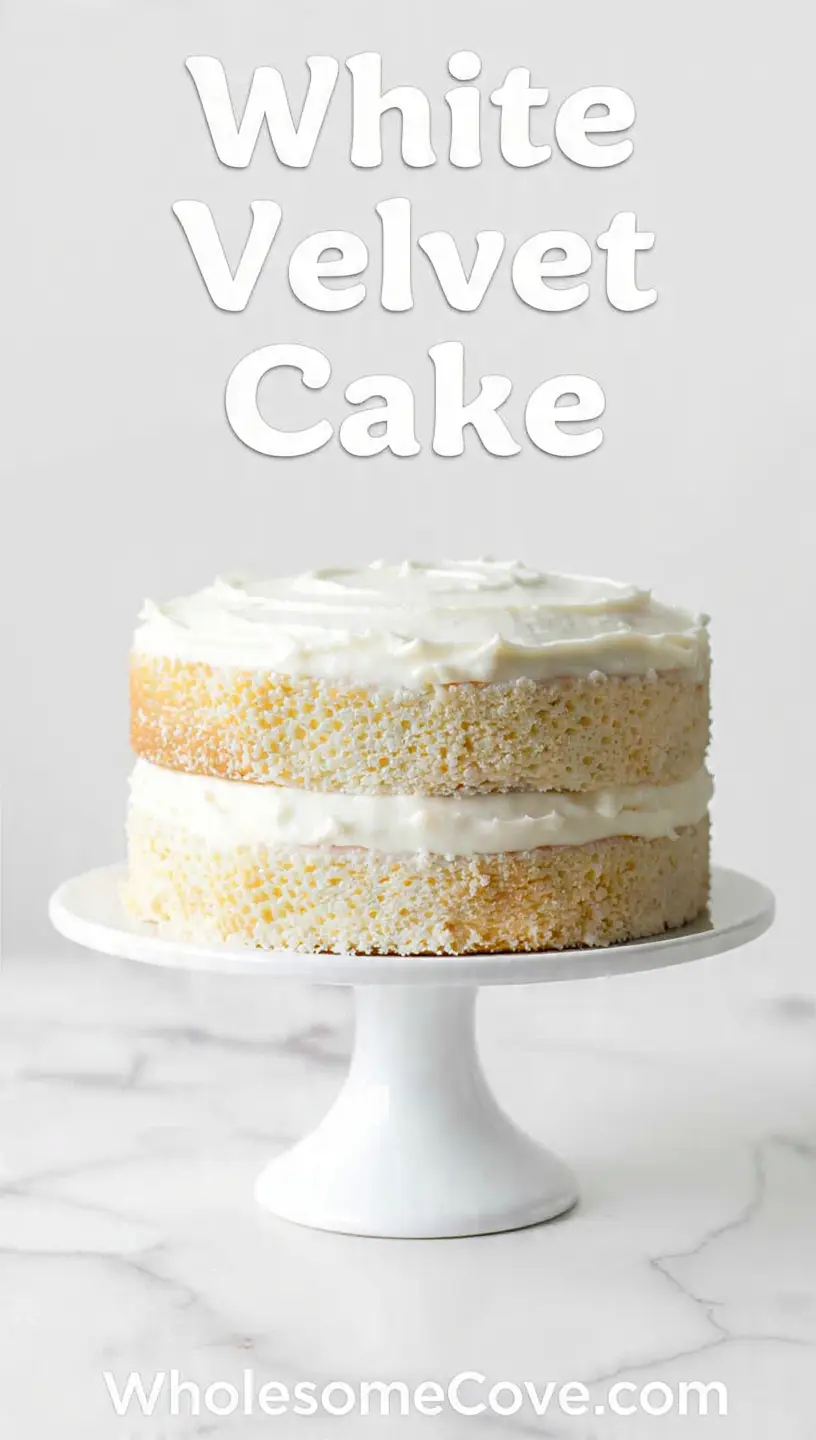
This cake delivers everything you want in a celebratory dessert without any of the fuss. The texture is impossibly soft and melts in your mouth with every bite.
Unlike dense vanilla cakes, this one stays light and airy thanks to the buttermilk and reverse creaming method. The subtle tang from the buttermilk balances the sweetness perfectly, making it less cloying than typical white cakes.
Here’s what makes this recipe special:
- Incredibly moist texture: The combination of butter and oil keeps the cake tender for days
- Velvety soft crumb: Buttermilk breaks down gluten for that signature pillowy texture
- Pure white color: Using egg whites only creates a stunning snow-white cake
- Versatile base: Pairs beautifully with any frosting or filling you choose
- Easy to stack: The sturdy crumb makes it perfect for layered cakes
- Crowd-pleasing flavor: Balanced sweetness with a hint of vanilla that everyone loves
Ingredients
This recipe uses simple pantry staples, but the quality of your ingredients really matters for the best results. Fresh buttermilk is essential for that tender crumb.
For the Cake:
- 2 ¾ cups (330g) all-purpose flour
- ¼ cup (28g) cornstarch
- 2 cups (400g) granulated sugar
- 1 tablespoon baking powder
- ½ teaspoon baking soda
- 1 teaspoon salt
- 1 cup (227g) unsalted butter, softened to room temperature
- ½ cup (120ml) vegetable oil
- 1 ½ cups (360ml) buttermilk, room temperature
- 6 large egg whites, room temperature
- 2 teaspoons vanilla extract
- 1 teaspoon almond extract
- 1 teaspoon white vinegar
For the Cream Cheese Frosting:
- 16 oz (454g) cream cheese, softened to room temperature
- 1 cup (227g) unsalted butter, softened to room temperature
- 6 cups (720g) powdered sugar, sifted
- 2 teaspoons vanilla extract
- Pinch of salt
I learned the hard way that room temperature ingredients make all the difference in this cake. Cold eggs won’t incorporate properly into the batter, creating a dense texture instead of that light, velvety crumb we’re after.
You might also enjoy: Blue Velvet Cake Recipe
Kitchen Equipment Needed
Having the right tools makes this recipe come together smoothly. I invested in quality cake pans years ago and they’ve never let me down.
- Three 8-inch (20cm) round cake pans
- Stand mixer or hand mixer
- Mixing bowls (medium and large)
- Measuring cups and spoons
- Rubber spatula
- Cooling racks
- Parchment paper
- Offset spatula for frosting
- Toothpick or cake tester
- Sifter or fine-mesh strainer
The offset spatula is my secret weapon for getting that perfectly smooth frosted finish. Regular butter knives just don’t give you the same control.
For a different take on velvet cakes, try my Black Velvet Cake Recipe with its rich chocolate flavor.
Recommended Products for This Recipe
After making this cake dozens of times, I’ve found a few products that truly elevate the results and make the process easier.
1. Wilton Performance Aluminum Cake Pans
These pans heat evenly, which means no burnt edges or undercooked centers. The straight sides create perfectly level layers that are much easier to frost and stack.
2. Nielsen-Massey Pure Vanilla Extract
High-quality vanilla extract makes a noticeable difference when vanilla is the star flavor. This brand has a pure, clean taste without any artificial notes.
3. Philadelphia Cream Cheese
For the frosting, stick with Philadelphia brand. I’ve tested several brands and this one has the perfect consistency and tang that complements the cake beautifully.
4. Ateco Offset Spatula Set
These offset spatulas make frosting layers so much easier. The angled blade helps you get a smooth finish without dragging cake crumbs into the frosting.
If you love classic cakes, my Fruit Cocktail Cake Recipe is another nostalgic favorite that’s incredibly moist and easy to make.
Step-by-Step Instructions: How to Make White Velvet Cake
1. Prepare Your Pans and Preheat the Oven
- Preheat your oven to 325°F (163°C).
- Grease three 8-inch round cake pans generously with butter or non-stick spray.
- Cut three circles of parchment paper to fit the bottom of each pan.
- Place parchment circles in the bottom of each greased pan.
- Lightly grease the parchment paper as well to ensure easy release.
- Set the prepared pans aside while you make the batter.
The lower temperature of 325°F prevents the edges from browning too quickly while the center bakes through. I used to bake at 350°F and always ended up with dark edges.
2. Mix the Dry Ingredients
- In the bowl of your stand mixer, combine the all-purpose flour, cornstarch, granulated sugar, baking powder, baking soda, and salt.
- Use the whisk attachment to mix these dry ingredients together for about 30 seconds until well combined.
- The cornstarch helps create a more tender crumb by reducing the protein content, mimicking cake flour.
- Make sure there are no lumps in the mixture.
- Remove the whisk attachment and switch to the paddle attachment for the next steps.
3. Add the Butter Using Reverse Creaming Method
- With the mixer on low speed, add the softened butter to the dry ingredients a few tablespoons at a time.
- Continue mixing until the butter is fully incorporated and the mixture resembles coarse sand or wet beach sand.
- This should take about 2 to 3 minutes.
- Scrape down the sides and bottom of the bowl to ensure even mixing.
- The reverse creaming method limits gluten development, resulting in a more tender cake with less doming.
I was hesitant to try reverse creaming at first, but it truly makes a difference in the texture. The cake layers come out flatter and softer.
4. Prepare the Wet Ingredients
- In a large measuring cup or medium bowl, whisk the egg whites until frothy.
- Add the buttermilk, vegetable oil, vanilla extract, almond extract, and white vinegar to the egg whites.
- Whisk everything together until completely combined and smooth.
- The mixture should be pale and slightly foamy.
- Make sure all ingredients are at room temperature for proper emulsification.
5. Combine Wet and Dry Ingredients
- With the mixer on low speed, slowly pour about half of the wet ingredient mixture into the butter-flour mixture.
- Mix for about 30 seconds until just combined.
- Scrape down the sides and bottom of the bowl thoroughly.
- Add the remaining wet ingredients and continue mixing on low speed.
- Once everything is added, increase to medium speed (speed 4 on a KitchenAid) and beat for exactly 2 minutes.
- The batter should be smooth, thick, and creamy with no visible lumps.
- Don’t overmix or you’ll develop too much gluten and end up with a dense cake.
6. Divide the Batter and Fill the Pans
- Use a kitchen scale to divide the batter evenly between the three prepared pans (about 720g or 25 oz per pan).
- If you don’t have a scale, use a large measuring cup and eyeball equal amounts.
- Spread the batter evenly in each pan using a spatula.
- Tap each pan gently on the counter 2 to 3 times to release any air bubbles.
- The pans should be about two-thirds full.
7. Bake the Cake Layers
- Place all three pans in the preheated 325°F (163°C) oven.
- If they don’t all fit on one rack, stagger them on two racks and rotate halfway through baking.
- Bake for 30 to 35 minutes, checking at the 28-minute mark.
- The cakes are done when the tops spring back when lightly pressed and the edges just start to pull away from the pan sides.
- Insert a toothpick into the center of each cake—it should come out clean or with just a few moist crumbs.
- The internal temperature should read about 204°F (96°C) on an instant-read thermometer.
Overbaking is the enemy of moist cake. I set a timer for 28 minutes and check from there rather than waiting the full time.
8. Cool the Cakes
- Remove the pans from the oven and place them on cooling racks.
- Let the cakes cool in the pans for exactly 10 minutes.
- After 10 minutes, run a thin knife around the edges of each pan to loosen the cakes.
- Invert each pan onto a cooling rack and gently tap to release the cake.
- Carefully peel off the parchment paper from the bottom of each layer.
- Flip the cakes right-side up on the cooling racks.
- Allow them to cool completely to room temperature before frosting, at least 1 to 2 hours.
- For faster cooling, you can refrigerate the layers for 30 minutes once they’ve cooled for 15 minutes on the counter.
If you frost warm cakes, the frosting will melt and slide right off. Patience is key here.
9. Make the Cream Cheese Frosting
- In a clean stand mixer bowl with the paddle attachment, beat the softened cream cheese on medium speed for 2 minutes until smooth and fluffy.
- Add the softened butter and beat for another 2 to 3 minutes until light and creamy.
- Scrape down the bowl thoroughly.
- Add the sifted powdered sugar one cup at a time, mixing on low speed after each addition to prevent a sugar cloud.
- Once all the sugar is incorporated, add the vanilla extract and salt.
- Increase the speed to medium-high and beat for 3 to 4 minutes until the frosting is light, fluffy, and smooth.
- If the frosting is too thick, add 1 tablespoon of heavy cream or milk at a time until you reach your desired consistency.
- If it’s too thin, add more powdered sugar ¼ cup at a time.
The key to perfect cream cheese frosting is making sure both the butter and cream cheese are truly at room temperature. Cold ingredients won’t whip up properly.
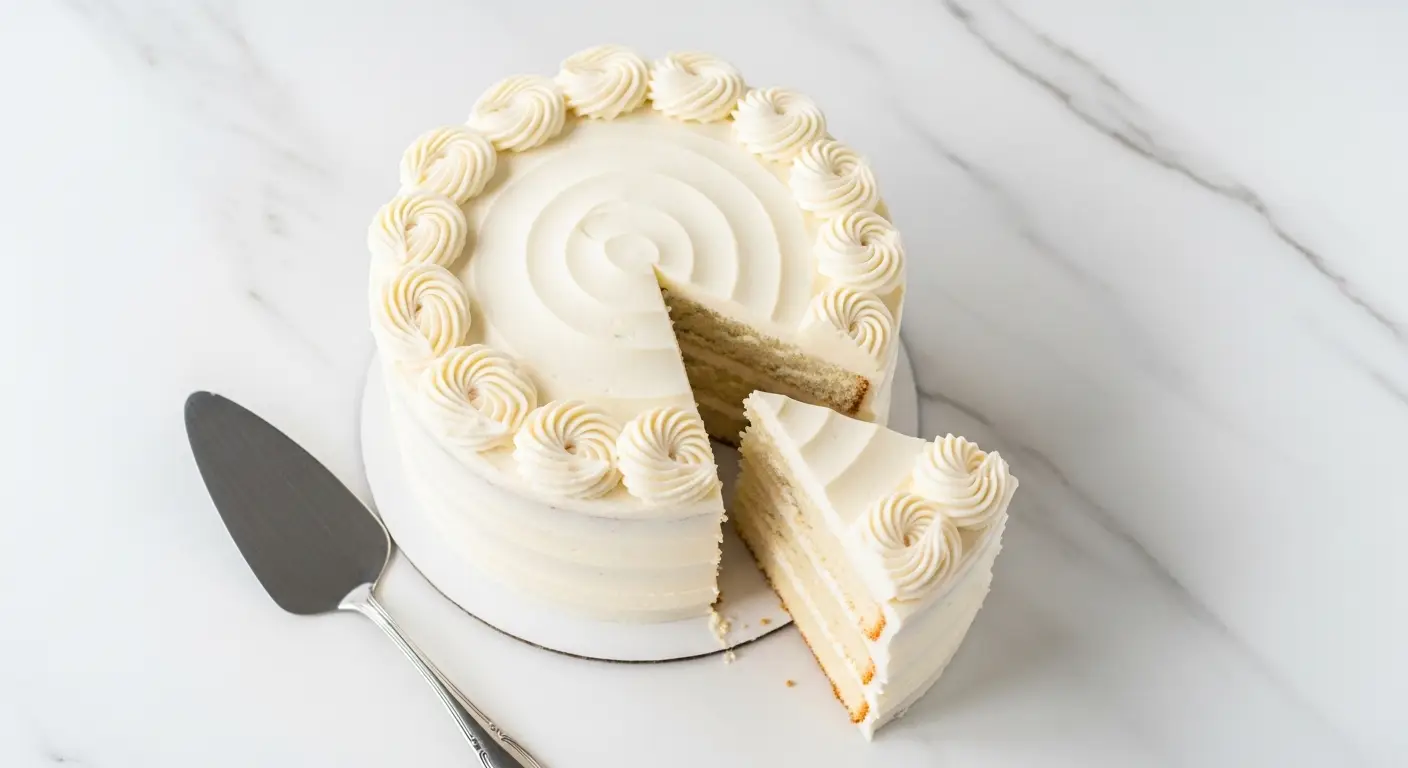
10. Assemble and Frost the Cake
- Place the first cake layer on your serving plate or cake stand.
- If the top is domed, use a serrated knife to level it off for easier stacking.
- Spread about 1 cup of frosting evenly across the top of the first layer, leaving a ¼-inch border around the edge.
- Place the second cake layer on top, again leveling the top if needed.
- Add another cup of frosting and spread evenly.
- Place the final layer on top, flat side up for the smoothest finish.
- Apply a thin crumb coat of frosting all over the cake to seal in crumbs.
- Refrigerate the cake for 15 to 20 minutes to set the crumb coat.
- Remove from the refrigerator and apply the final layer of frosting, using an offset spatula to create smooth sides and a beautiful top.
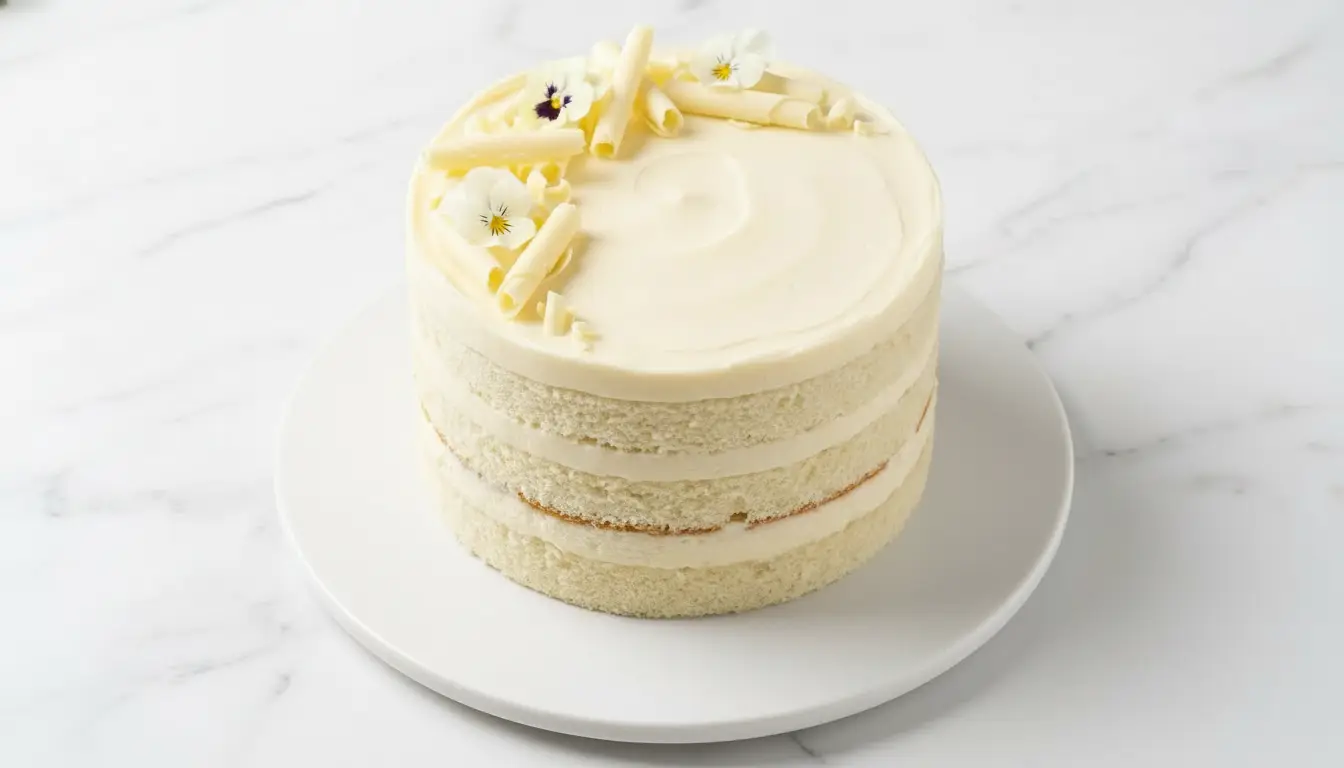
- Decorate as desired with extra frosting swirls, fresh berries, or sprinkles.
Another festive option is my Red Velvet Cheesecake Cake Recipe, which combines two classic desserts into one showstopper.
Tips for The Best White Velvet Cake
These tips come from trial and error over many batches. They’ll help you avoid the mistakes I made when I was perfecting this recipe.
- Bring all ingredients to room temperature: This is non-negotiable. Cold eggs and buttermilk won’t emulsify properly into the batter, resulting in a dense, uneven cake. Set everything out on the counter for at least 60 to 90 minutes before baking.
- Don’t skip the cornstarch: It acts as a tenderizer by reducing the gluten content in the flour. This is what gives the cake its signature soft texture. If you skip it, you’ll have a regular white cake instead of a velvet one.
- Use the reverse creaming method correctly: Adding butter to the dry ingredients instead of creaming it with sugar creates a tighter, more velvety crumb. This method also prevents excessive doming, giving you flatter layers.
- Measure flour properly: Spoon flour into your measuring cup and level it off with a knife. Don’t scoop directly from the bag or you’ll pack too much flour in, making the cake dry and dense.
- Don’t overmix the batter: Once you add the wet ingredients, mix just until combined. Overmixing develops gluten, which makes the cake tough instead of tender.
- Use parchment paper: Lining your pans with parchment circles ensures the cakes release cleanly every single time. I’ve had cakes stick and tear without it, ruining all my hard work.
- Test for doneness carefully: Start checking at 28 minutes. The cake is done when it springs back when touched and a toothpick comes out with just a few moist crumbs. Dry crumbs mean it’s overbaked.
- Cool completely before frosting: Warm cakes will melt your frosting. Wait at least 2 hours, or refrigerate for 30 minutes after the initial 15-minute counter cool.
- Sift your powdered sugar: Unsifted powdered sugar creates lumpy frosting. Take the extra 30 seconds to sift it for silky-smooth results.
- Level your layers: Use a serrated knife to trim any domed tops for perfectly flat, professional-looking layers.
For another delicious cake variation, check out my Eggnog Cake Recipe, which is perfect for the holiday season.
What to Serve with White Velvet Cake
This cake is versatile enough to pair with almost anything. The mild, sweet flavor makes it the perfect canvas for creative accompaniments.
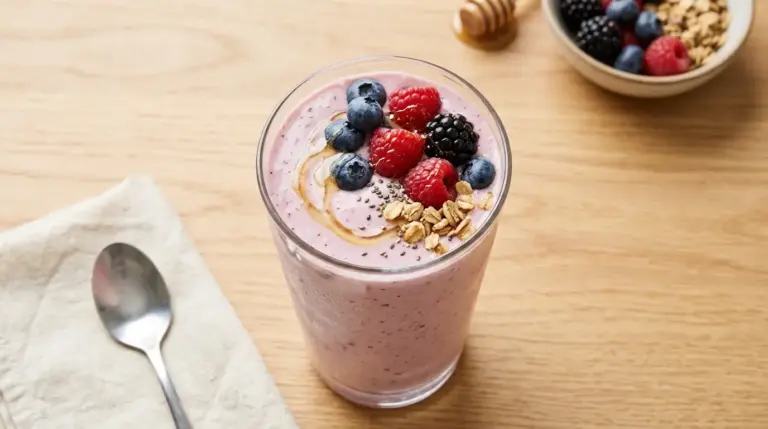
- Fresh berries: Strawberries, blueberries, raspberries, or blackberries add a tart contrast to the sweet cake
- Lemon curd: Tangy Lemon Pound Cake inspired filling adds brightness
- Chocolate ganache: Drizzle dark chocolate ganache over the top for an elegant finish
- Caramel sauce: My Caramel Sauce adds rich, buttery sweetness
- Whipped cream: Light and airy, perfect for those who prefer less sweet frosting
- Ice cream: Vanilla, strawberry, or Mint Chocolate Chip Ice Cream all pair beautifully
- Coffee or tea: A cup of hot coffee or Earl Grey tea balances the sweetness
- Champagne or sparkling wine: For celebrations, the bubbles cut through the richness
Variations of White Velvet Cake
Once you master the basic recipe, these variations let you customize the cake for any occasion. I’ve tried them all and each one is delicious.
- Pink Velvet Cake: Add 1 oz of pink or rose food coloring to create a gorgeous pastel pink cake. Use gel food coloring for vibrant color without affecting texture.
- Green Velvet Cake: Perfect for St. Patrick’s Day. Add 1 oz of leaf green gel food coloring to the batter for a festive green cake.
- Purple Velvet Cake: Mix 1 oz of purple or violet gel coloring for a royal purple cake that’s stunning at birthday parties.
- Almond White Velvet: Increase almond extract to 2 teaspoons and decrease vanilla to 1 teaspoon for a more pronounced almond flavor. Top with sliced almonds.
- Lemon White Velvet: Add 2 tablespoons of lemon zest and replace the almond extract with 1 teaspoon of lemon extract for a citrus twist.
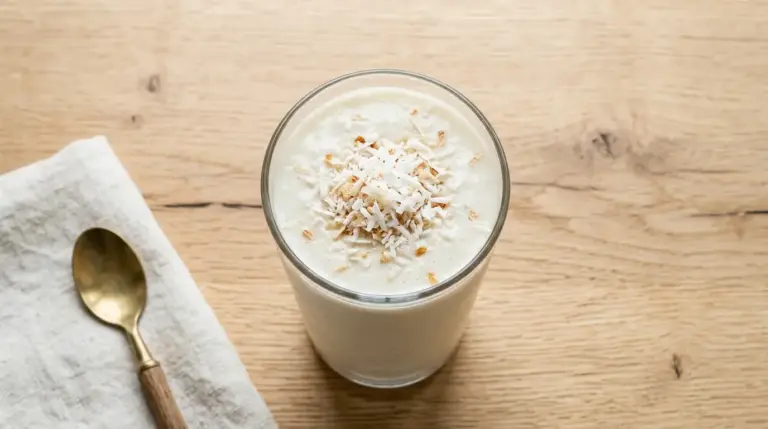
- Coconut White Velvet: Fold in 1 cup of sweetened shredded coconut to the batter and top the frosted cake with toasted coconut flakes.
- Funfetti White Velvet: Gently fold ½ cup of rainbow sprinkles into the finished batter for a birthday cake version kids will love.
- Strawberry-Filled White Velvet: Use strawberry jam or fresh strawberry filling between layers instead of frosting.
- Chocolate Chip White Velvet: Fold in 1 cup of mini chocolate chips at the very end of mixing for a cookies-and-cream effect.
- Cream Cheese Filling: Skip the frosting between layers and use sweetened whipped cream cheese filling instead, similar to my Cheesecake Ice Cream Cake.
For a chocolatey twist, my Chocolate Chip Cookies Recipe makes a perfect accompaniment to this white cake.
Storage and Reheating
Proper storage keeps this cake fresh and delicious for days. The cream cheese frosting does require refrigeration.
- Room temperature storage: Unfrosted cake layers can be covered tightly with plastic wrap and stored at room temperature for up to 2 days. Store in a cool, dry place away from direct sunlight.
- Refrigerator storage: Once frosted with cream cheese frosting, the assembled cake must be refrigerated. Cover loosely with plastic wrap or store in a cake carrier. The cake will stay fresh for 4 to 5 days in the refrigerator.
- Bring to room temperature before serving: For the best flavor and texture, remove the cake from the refrigerator 30 to 60 minutes before serving. Cold cake doesn’t taste as flavorful.
- Freezing unfrosted layers: Wrap each cooled, unfrosted layer tightly in plastic wrap, then in aluminum foil. Freeze for up to 3 months. Thaw overnight in the refrigerator before frosting.
- Freezing frosted cake: Freeze the assembled, frosted cake uncovered for 1 hour until the frosting is firm. Wrap the entire cake tightly in plastic wrap, then foil. Freeze for up to 2 months. Thaw overnight in the refrigerator.
- Individual slice freezing: Cut the cake into individual slices and wrap each slice in plastic wrap, then foil. Freeze for up to 2 months. Thaw individual slices in the refrigerator for 2 to 3 hours or at room temperature for 1 hour.
- Reheating: This cake is best served at room temperature or chilled. If you prefer it slightly warm, microwave individual slices for 10 to 15 seconds, being careful not to melt the frosting.
- Buttercream alternative for longer storage: If you need the cake to sit at room temperature for an event, frost with American buttercream instead of cream cheese frosting. It’s more stable at room temperature for several hours.
Try serving this alongside my Hot Chocolate Recipe for a cozy dessert pairing.
Nutritional Facts
Per slice (1/12 of cake, including frosting):
- Calories: 685
- Total Fat: 36g
- Saturated Fat: 20g
- Cholesterol: 95mg
- Sodium: 385mg
- Total Carbohydrates: 86g
- Dietary Fiber: 1g
- Sugars: 68g
- Protein: 6g
Note: Nutritional values are approximate and will vary based on specific ingredients used and portion sizes. These calculations are based on standard ingredients and the recipe as written with cream cheese frosting.
If you’re looking for a lighter option, my Healthy Carrot Cake Recipe uses whole wheat flour and less sugar.
Health Benefits of Key Ingredients
While this is definitely an indulgent dessert, some ingredients do offer nutritional value. Moderation is key.
- Buttermilk: Contains beneficial probiotics that support gut health, plus calcium for strong bones. The lactic acid in buttermilk aids in protein digestion.
- Eggs (whites): High in protein with zero fat or cholesterol. Egg whites provide essential amino acids your body needs for muscle repair and growth.
- Butter: Contains fat-soluble vitamins A, D, E, and K. Butter from grass-fed cows is particularly rich in vitamin K2 and conjugated linoleic acid (CLA).
- Vanilla extract: Contains trace amounts of antioxidants and may have anti-inflammatory properties. Real vanilla extract offers more nutrients than imitation vanilla.
- Almond extract: Made from almonds, which are rich in vitamin E, magnesium, and healthy fats. The extract retains some of these beneficial compounds in small amounts.
FAQs About White Velvet Cake
1. What’s the difference between white velvet cake and regular white cake?
White velvet cake has a much softer, more tender crumb than regular white cake due to the buttermilk and reverse creaming method. Regular white cakes use the traditional creaming method where you beat butter and sugar together first, resulting in a different texture.
White velvet cake also typically includes cornstarch, which reduces the gluten content and creates that signature velvety texture. The buttermilk adds a slight tang and extra moisture that you won’t find in basic white cakes.
2. Can I use all-purpose flour instead of adding cornstarch?
You can, but the texture won’t be as tender and velvety. The cornstarch reduces the protein content in all-purpose flour, essentially creating a homemade cake flour substitute.
If you have cake flour on hand, you can use 3 cups (360g) of cake flour and omit the cornstarch entirely. This will give you a very similar texture to the original recipe.
3. Why do I need to use room temperature ingredients?
Room temperature ingredients emulsify together much more easily than cold ingredients. Cold buttermilk and egg whites won’t incorporate smoothly into the batter, leading to a dense, uneven texture with possible lumps.
When ingredients are all at the same temperature, they blend together seamlessly, creating a smooth batter that bakes into a light, airy cake. This is especially important for the reverse creaming method used in this recipe.
4. Can I make this cake ahead of time?
Absolutely! You can bake the cake layers up to 2 days in advance and store them wrapped tightly at room temperature. For longer storage, freeze the unfrosted layers for up to 3 months.
You can also fully assemble and frost the cake up to 2 days ahead. Store the frosted cake in the refrigerator and bring it to room temperature 30 to 60 minutes before serving for the best flavor and texture.
5. What frosting works best with white velvet cake?
Cream cheese frosting is traditional and my personal favorite because the tanginess complements the subtle buttermilk flavor. However, this cake pairs beautifully with almost any frosting.
Try American buttercream for a sweeter option, Swiss meringue buttercream for something silky and less sweet, whipped cream for a lighter finish, or white chocolate buttercream for extra richness. You really can’t go wrong.
Another delicious pairing is my Strawberry Sauce Recipe, which can be drizzled over individual slices for a fruity finish.
White Velvet Cake
Ingredients
- 2 ¾ cups all-purpose flour - 330g
- ¼ cup cornstarch - 28g
- 2 cups granulated sugar - 400g
- 1 tablespoon baking powder
- ½ teaspoon baking soda
- 1 teaspoon salt
- 1 cup unsalted butter - 227g, softened to room temperature
- ½ cup vegetable oil - 120ml
- 1 ½ cups buttermilk - 360ml, room temperature
- 6 large egg whites - room temperature
- 2 teaspoons vanilla extract
- 1 teaspoon almond extract
- 1 teaspoon white vinegar
- 16 oz cream cheese - 454g, softened to room temperature
- 1 cup unsalted butter - 227g, softened to room temperature
- 6 cups powdered sugar - 720g, sifted
- 2 teaspoons vanilla extract
- salt - Pinch
Equipment
- Three 8-inch round cake pans
- Stand mixer or hand mixer
- Mixing bowls - Medium and large sizes
- Measuring cups and spoons
- Rubber spatula
- Cooling racks
- Parchment paper
- Offset spatula - For frosting
- Toothpick or cake tester
- Sifter or fine-mesh strainer
Method
- Preheat oven to 325°F (163°C). Grease three 8-inch round cake pans, line with parchment paper circles, and grease the parchment.
- In stand mixer bowl, whisk together flour, cornstarch, sugar, baking powder, baking soda, and salt for 30 seconds. Switch to paddle attachment.
- Add softened butter to dry ingredients on low speed, mixing for 2-3 minutes until mixture resembles coarse sand.
- In a separate bowl, whisk egg whites until frothy, then add buttermilk, oil, vanilla extract, almond extract, and vinegar until combined.
- Pour half the wet mixture into butter-flour mixture on low speed for 30 seconds. Scrape bowl, add remaining wet ingredients, then beat on medium speed for exactly 2 minutes.
- Divide batter evenly between three prepared pans (about 720g per pan). Tap pans gently on counter to release air bubbles.
- Bake for 30-35 minutes at 325°F until tops spring back when pressed and toothpick comes out clean. Check at 28 minutes.
- Cool cakes in pans for 10 minutes, then run knife around edges, invert onto cooling racks, remove parchment, and cool completely (1-2 hours).
- Beat cream cheese on medium speed for 2 minutes until smooth. Add butter and beat 2-3 minutes until fluffy.
- Add powdered sugar one cup at a time on low speed. Add vanilla and salt, then beat on medium-high for 3-4 minutes until light and fluffy.
- Place first cake layer on serving plate, spread 1 cup frosting on top. Add second layer, frost, then add final layer. Apply thin crumb coat and refrigerate 15-20 minutes.
- Apply final layer of frosting using offset spatula for smooth finish. Decorate as desired with frosting swirls, berries, or sprinkles.
Nutrition
Notes
- All ingredients must be at room temperature (60-90 minutes out of refrigerator) for proper emulsification and texture.
- The cornstarch is essential for the velvety texture. Do not omit or substitute with more flour.
- Reverse creaming method (adding butter to dry ingredients) creates a tighter, more tender crumb and prevents excessive doming.
- Bake at 325°F, not 350°F, to prevent edges from browning while center cooks through.
- For cake flour substitute: Use 3 cups (360g) cake flour and omit the cornstarch.
- Frosting variation: Substitute cream cheese frosting with Swiss meringue buttercream, American buttercream, or whipped cream.
- Storage: Refrigerate frosted cake covered for 4-5 days. Bring to room temperature 30-60 minutes before serving.
- Freezing: Wrap unfrosted layers tightly in plastic wrap and foil, freeze up to 3 months. Thaw overnight in refrigerator before frosting.
- Color variations: Add 1 oz gel food coloring to create pink, blue, purple, or green velvet cakes.
- Level cake layers with serrated knife before frosting for professional-looking results and easier stacking.
Private Notes
Tried this recipe?
Let us know how it was!Final Thoughts
This White Velvet Cake Recipe has become my go-to for every special occasion, from birthdays to anniversaries to casual weekend celebrations. The velvety texture and pure white color make it feel extra special, even though it’s surprisingly simple to make.
Once you master the basic recipe, you’ll find yourself reaching for it again and again because it’s so versatile and crowd-pleasing. Give this recipe a try and see why it’s earned a permanent spot in my baking rotation.
I’d love to hear how your cake turns out! Leave a comment below and let me know if you tried any of the variations or what frosting you chose.
Recommended:
- Pumpkin Cheesecake Recipe
- Creme Brulee Cheesecake Recipe
- Pumpkin Roll Recipe
- Cannoli Poke Cake Recipe
- Amish Apple Cake Recipe
- Healthy Apple Pie Recipe
- Healthy Pumpkin Pie Recipe
- Creme Brulee Recipe
- No Bake Cookies Recipe
- Peanut Butter Cookies Recipe
