
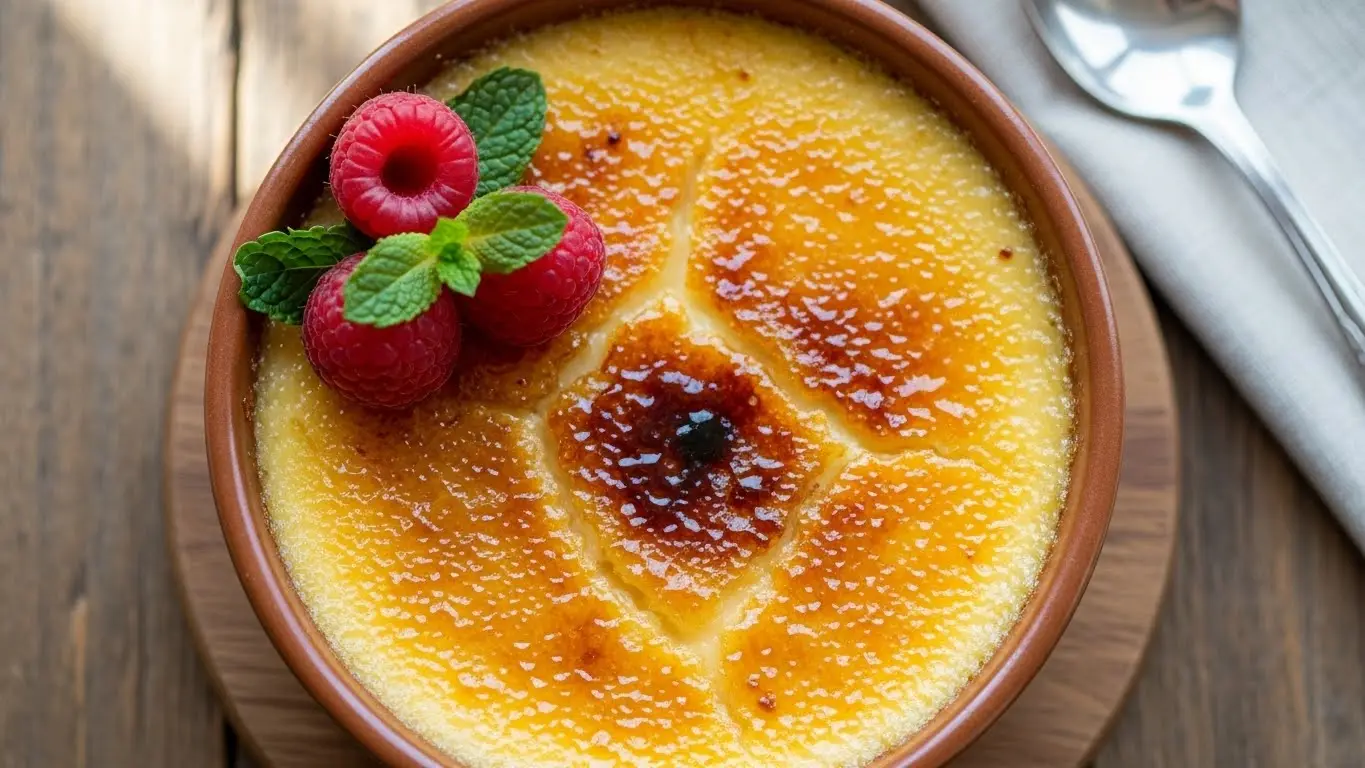
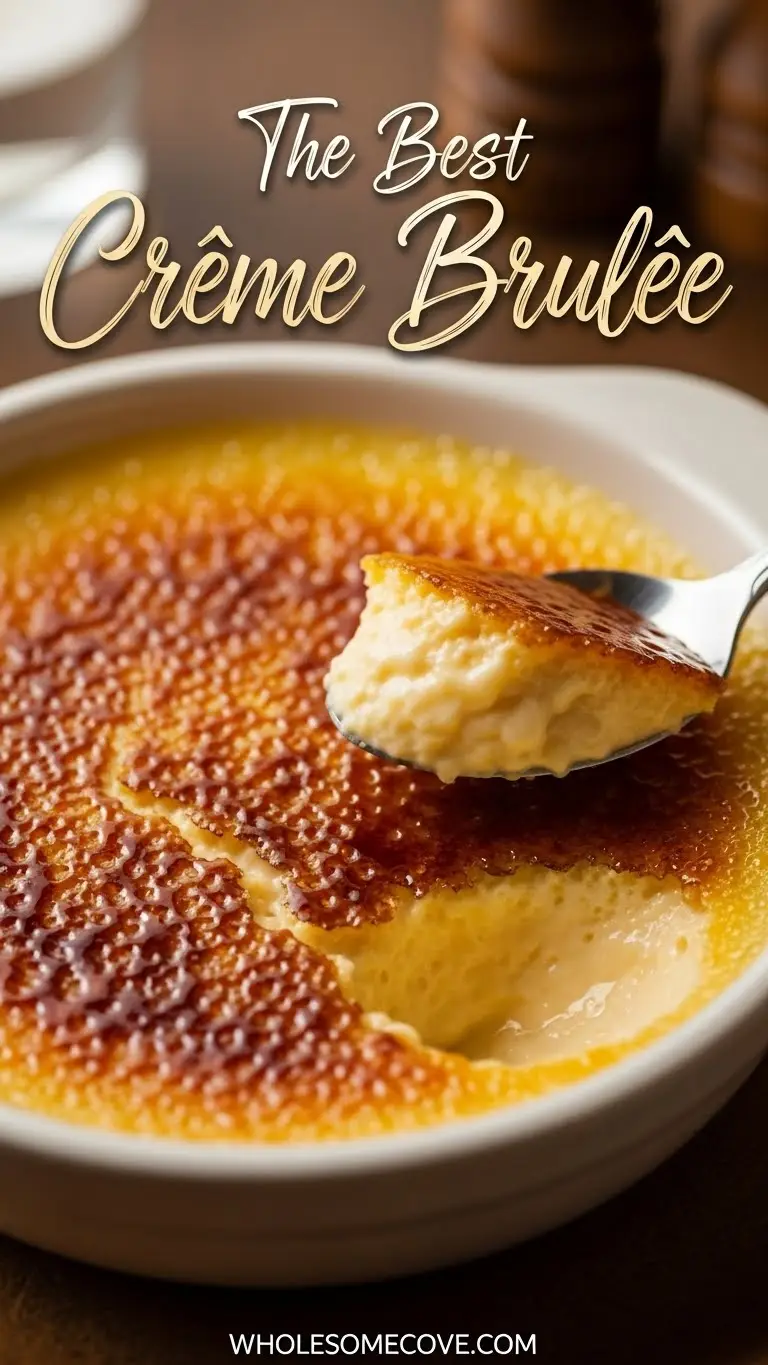
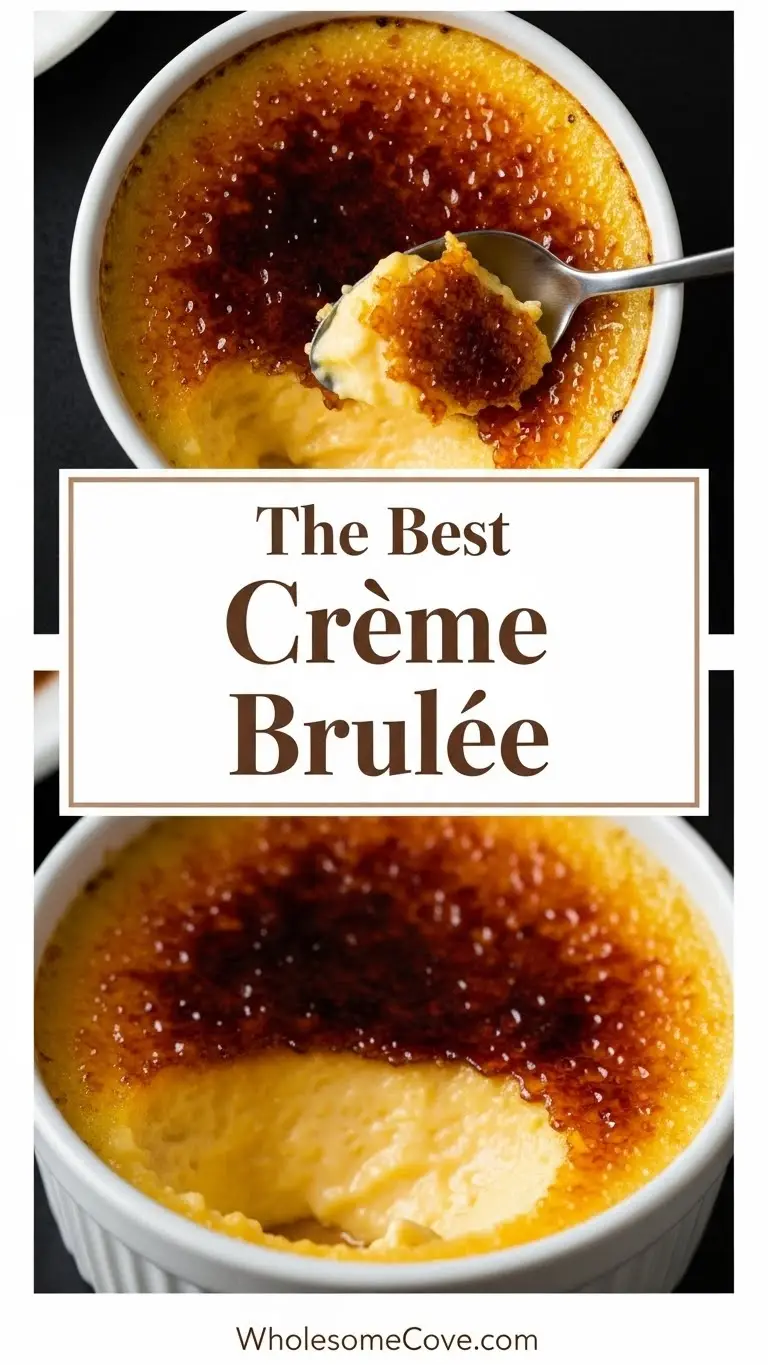
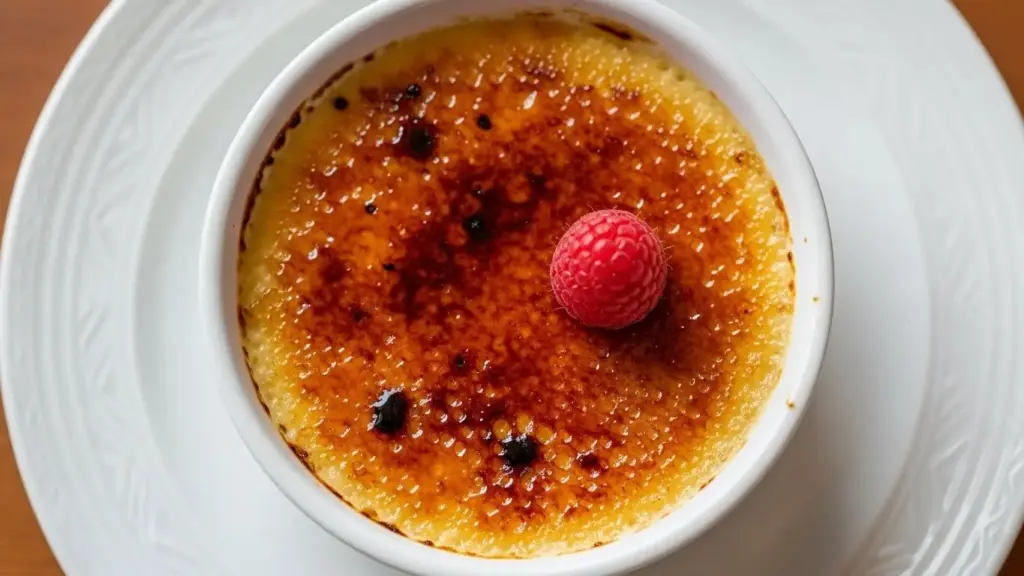
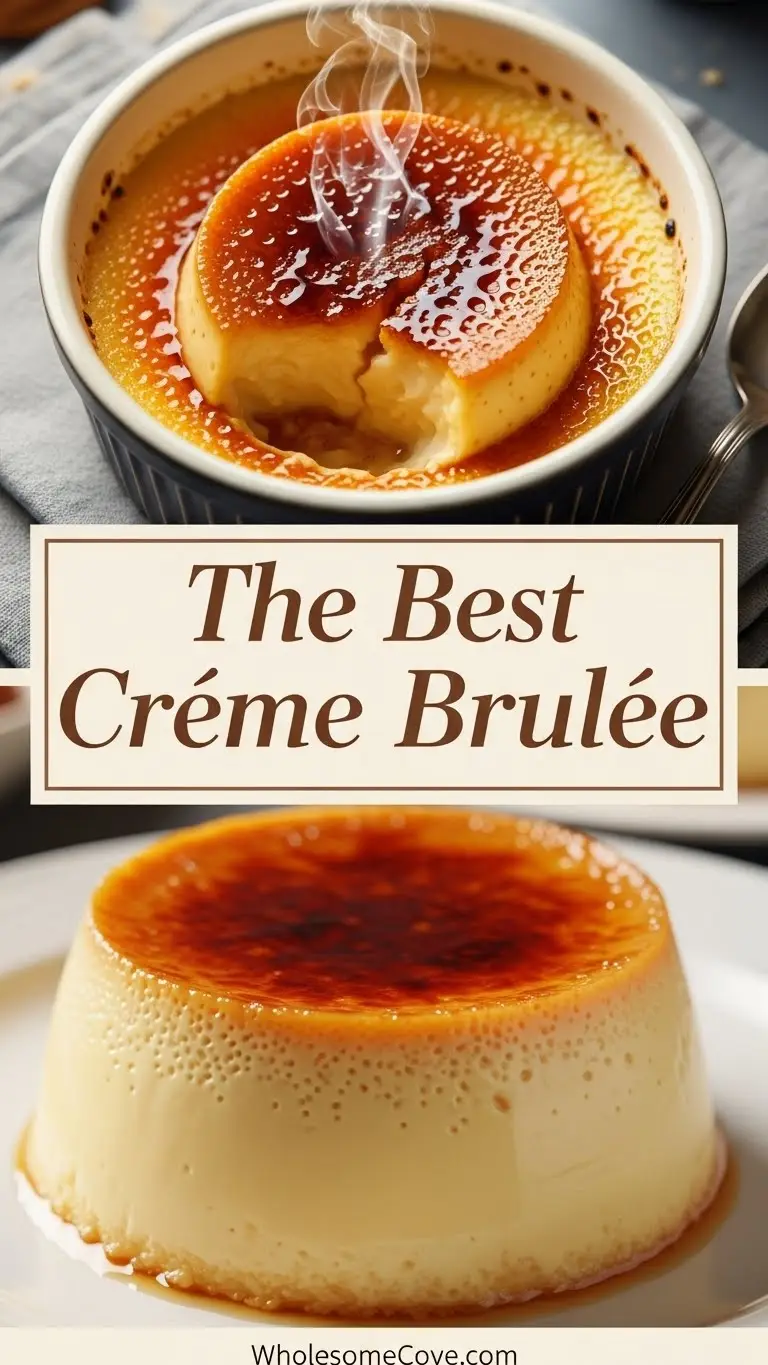
I’ll never forget the first time I cracked through that perfect caramelized sugar shell into the silky custard beneath. It was at a tiny bistro in my neighborhood, and I thought to myself, “I need to learn how to make this.” That moment sparked a minor obsession with perfecting my creme brulee recipe at home.
Fast forward to today, and I’ve made this elegant dessert more times than I can count. What I’ve learned is that creme brulee isn’t nearly as intimidating as it seems. Sure, it sounds fancy, but it’s really just a handful of simple ingredients transformed into something magical with a little patience and the right technique.
The beauty of this creme brulee recipe is that it looks and tastes like it came from a five-star restaurant, but you’re making it in your own kitchen. No special culinary degree required.
| Quick Recipe Summary | |
|---|---|
| Prep Time | 15 minutes |
| Cook Time | 45 minutes |
| Total Time | 5 hours (including chilling time) |
| Servings | 6 ramekins |
| Difficulty Level | Intermediate |
You may also like my Creme Brulee Cheesecake Recipe.
Why You’ll Love This Creme Brulee Recipe
This dessert is pure indulgence without being overly complicated. The custard base comes together in about 10 minutes, and most of the work is just waiting for it to set.
I love that you can make these a day or two ahead, which takes all the stress out of entertaining. Your guests will be thoroughly impressed when you bring out these little beauties, and you’ll know that the hardest part was just being patient enough to let them chill properly.
Here’s what makes this recipe special:
- Restaurant-quality results: That signature crack of caramelized sugar is totally achievable at home with the right technique.
- Make-ahead friendly: Prepare the custards up to 2 days in advance and torch just before serving.
- Foolproof vanilla flavor: Using both vanilla extract and a vanilla bean creates incredible depth.
- Perfect texture every time: The water bath method ensures silky smooth custard without any graininess.
- Impressive but manageable: Your guests will think you spent hours, but the active time is minimal.
I paired this with my fruit tart recipe for a French dessert spread that had everyone asking for both recipes.
Ingredients
This is where simplicity really shines. You probably have most of these ingredients already.
The key is using high-quality heavy cream and fresh eggs. I learned this the hard way after a batch made with old cream turned out slightly off in flavor.
- 2 cups (480ml) heavy cream: This is the base of your custard, so don’t skimp on quality.
- 5 large egg yolks: Save those whites for an omelet the next morning.
- ½ cup (100g) granulated sugar: Divided into ⅓ cup for the custard and the rest for the topping.
- 1 vanilla bean: Split and scraped, or 2 teaspoons of pure vanilla extract as a substitute.
- ⅛ teaspoon salt: Just a pinch to balance the sweetness.
- Additional sugar for caramelizing: About 1-2 tablespoons per ramekin, preferably superfine sugar for easier caramelization.
Try my Crème Brûlée French Toast Recipe.
Kitchen Equipment Needed
Having the right tools makes this process so much smoother. I made my first batch without a proper torch and tried using the broiler. It worked, but the torch gives you so much more control.
Here’s what you’ll need:
- Six 6-ounce (180ml) ramekins: These are the classic vessels for creme brulee.
- Kitchen torch: Essential for that perfect caramelized top.
- Large roasting pan: For the water bath.
- Fine mesh strainer: To remove any cooked egg bits and vanilla bean seeds that didn’t incorporate.
- Mixing bowls: One medium and one large.
- Whisk: For combining ingredients smoothly.
- Measuring cups and spoons: Precision matters in custard-making.
- Kettle or pot: For heating water for the bath.
Recommended Products for This Recipe
After making creme brulee dozens of times, I’ve found that investing in a few quality products really does make a difference in both the process and the final result.
These are my personal go-to items that I genuinely recommend.
1. Le Creuset Stoneware Ramekins
These ramekins heat evenly and retain temperature beautifully, which means your custards bake uniformly without any edges cooking faster than the center. The smooth interior makes it easy to run your spoon along the bottom and get every last bit of that creamy custard. Plus, they’re gorgeous enough to go straight from oven to table.
2. Iwatani Culinary Butane Torch
This is the torch that changed everything for me. It lights instantly, maintains a consistent flame, and gives you precise control over the caramelization. I’ve tried cheaper torches that sputtered or gave an uneven burn, but this one delivers that perfect golden-brown crust every single time. The refillable butane system is also more economical in the long run.
3. Madagascar Bourbon Vanilla Beans
Real vanilla beans make an absolutely stunning difference in creme brulee. The tiny specks throughout the custard and the intense vanilla aroma are impossible to replicate with extract alone. These Madagascar beans are plump, fragrant, and pack incredible flavor. One bean goes a long way, and the investment is worth it for special occasions.
4. Organic Valley Heavy Whipping Cream
The quality of your cream directly impacts the richness and texture of your custard. This organic heavy cream has a beautiful fat content and a clean, sweet taste that lets the vanilla shine. I’ve noticed that higher-quality cream also creates a smoother mouthfeel and doesn’t leave any off-flavors.
5. Norpro Stainless Steel Fine Mesh Strainer
Straining your custard mixture is crucial for achieving that luxuriously smooth texture. This fine mesh strainer catches any bits of cooked egg or vanilla bean pod that might have snuck in, ensuring your final product is silky perfection. The sturdy construction means it’ll last for years of creme brulee making and countless other kitchen tasks.
Another favorite: pumpkin cheesecake recipe
Step-by-Step Instructions: How to Make Creme Brulee
Take your time with these steps. Rushing the custard or skipping the water bath will give you scrambled eggs instead of silky perfection. Trust me, I learned that lesson early on.
1. Preheat and Prepare Your Equipment
- Preheat your oven to 325°F (163°C).
- Place your six ramekins in a large roasting pan or baking dish that’s at least 2 inches deep.
- Bring a kettle of water to a boil and set it aside for later.
- Have a fine mesh strainer ready near your mixing area.
2. Infuse the Cream with Vanilla
- Pour the heavy cream into a medium saucepan.
- Split the vanilla bean lengthwise with a sharp knife and use the back of the knife to scrape out all those beautiful seeds.
- Add both the seeds and the scraped pod to the cream.
- Heat the mixture over medium heat, stirring occasionally, until it just begins to simmer around the edges (about 5 minutes).
- Remove from heat immediately and let it steep for 10-15 minutes to really extract all that vanilla flavor.
- If you’re using vanilla extract instead, skip the steeping and add it after heating the cream.
3. Whisk the Egg Yolk Mixture
- In a large mixing bowl, combine the 5 egg yolks, ⅓ cup granulated sugar, and salt.
- Whisk vigorously for about 2-3 minutes until the mixture becomes pale yellow and slightly thickened.
- This step incorporates air and helps create that smooth, creamy texture we’re after.
- The mixture should fall in thick ribbons from your whisk when lifted.
4. Temper the Eggs
- Remove the vanilla bean pod from the cream if you used one.
- Very slowly, pour about ¼ cup of the warm cream into the egg mixture while whisking constantly.
- This gradual temperature increase prevents the eggs from scrambling.
- Continue adding the cream in a slow, steady stream, whisking the entire time.
- Once all the cream is incorporated, you should have a smooth, pale yellow custard base.
5. Strain and Divide the Custard
- Pour the custard mixture through your fine mesh strainer into a large measuring cup or bowl with a spout.
- This removes any bits of cooked egg or vanilla pod that might affect the texture.
- Divide the strained custard evenly among your six ramekins, leaving about ¼ inch of space at the top.
- Try to avoid creating bubbles on the surface, but if you do, gently skim them off with a spoon or pop them with a kitchen torch.
6. Create the Water Bath and Bake
- Carefully place the roasting pan with the filled ramekins on the oven rack.
- Pour the hot water from your kettle into the pan until it reaches halfway up the sides of the ramekins.
- The water bath ensures gentle, even cooking and prevents the custards from cracking or curdling.
- Bake for 40-45 minutes, checking after 35 minutes.
- The custards are done when the edges are set but the centers still jiggle slightly when you gently shake the pan.
- They’ll continue to set as they cool, so don’t overbake them.
7. Cool and Chill
- Carefully remove the roasting pan from the oven using oven mitts.
- Let the ramekins sit in the water bath for 10 minutes to cool gradually.
- Remove the ramekins from the water bath and place them on a wire rack to cool to room temperature (about 30 minutes).
- Once cooled, cover each ramekin tightly with plastic wrap and refrigerate for at least 4 hours, but preferably overnight.
- The long chill time allows the flavors to develop and the custard to firm up properly.
8. Caramelize the Sugar Topping
- When you’re ready to serve, remove the custards from the refrigerator.
- Gently blot any condensation from the surface with a paper towel.
- Sprinkle 1-2 tablespoons of superfine sugar evenly over each custard surface.
- Tilt and tap the ramekin to distribute the sugar uniformly.
- Hold your kitchen torch about 3-4 inches above the surface and move it in circular motions.
- The sugar will bubble, darken, and caramelize within 30-60 seconds.
- You want a deep amber color, but watch carefully to avoid burning.
- Let the caramelized tops cool and harden for 2-3 minutes before serving.
You might also enjoy: coconut cream pie recipe
Tips for The Best Creme Brulee
These tips come from plenty of trial and error. Some batches were perfect, others taught me valuable lessons about what not to do.
Here’s what I’ve learned along the way:
- Use room temperature eggs: They incorporate more smoothly into the cream and reduce the risk of curdling.
- Don’t skip the straining step: Even experienced cooks can end up with tiny bits of cooked egg in the mixture, and straining ensures silky perfection every time.
- Check for doneness carefully: The center should wobble like jello when you gently shake the ramekin. If it’s liquidy, keep baking; if it’s completely firm, you’ve overbaked.
- Torch technique matters: Keep the flame moving constantly to avoid hot spots or burnt sugar. Multiple light passes are better than one long burn.
- Use superfine sugar for caramelizing: It melts faster and more evenly than regular granulated sugar. You can make your own by pulsing regular sugar in a food processor.
- Serve at the right temperature: The custard should be cold and the caramelized top at room temperature for the best contrast.
- Don’t torch too far in advance: Caramelize the tops no more than 30 minutes before serving, or the sugar will start to soften and lose that signature crack.
- Quality ingredients make a difference: Splurge on good vanilla and fresh cream. You’ll taste the difference.
- Be patient with cooling: Rushing the cooling process can cause the custards to crack or develop a skin on top.
- Cover tightly when refrigerating: Custards absorb odors easily, so make sure they’re well-covered in the fridge.
Serving Suggestions
Creme brulee is elegant enough to stand on its own, but pairing it with the right accompaniments can elevate your dessert course even further.
Here are my favorite ways to serve it:
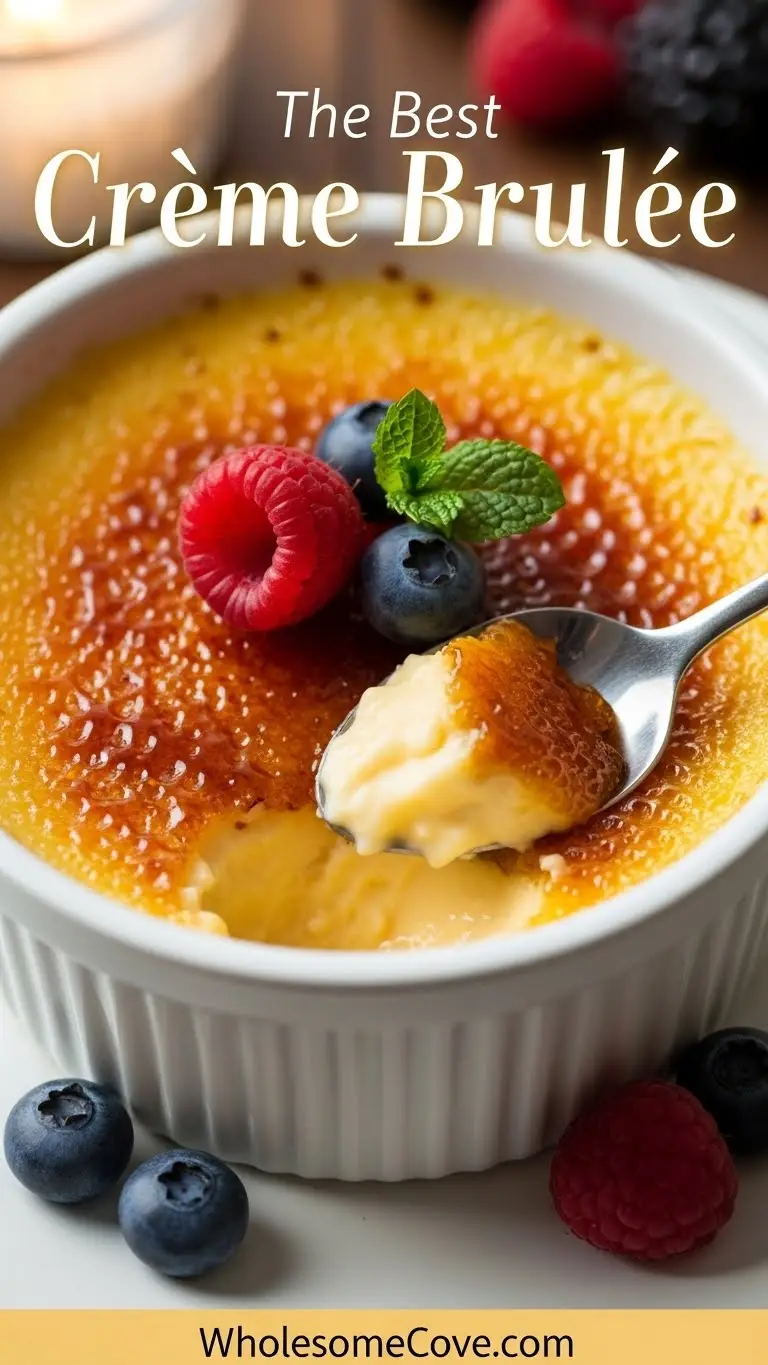
- Fresh berries: A handful of strawberries, raspberries, or blueberries adds a tart contrast to the rich custard.
- Whipped cream: A small dollop of lightly sweetened whipped cream balances the intensity of the caramelized sugar.
- Shortbread cookies: Buttery, crisp cookies like these sugar cookies are perfect for dipping into the custard.
- Coffee or espresso: The bitterness of coffee cuts through the sweetness beautifully. I love serving these with hot chocolate in winter months too.
- Candied citrus peel: A few strips of candied orange or lemon peel add a sophisticated touch and bright flavor.
- Chocolate shavings: For chocolate lovers, a sprinkle of dark chocolate shavings creates a wonderful flavor combination.
- Dessert wine: A glass of Sauternes or late-harvest Riesling pairs beautifully with the caramelized sugar and vanilla notes.
Variations of Creme Brulee
Once you’ve mastered the classic version, it’s fun to experiment with different flavors. The custard base is incredibly versatile and takes on infusions beautifully.
Here are some of my favorite variations:
- Chocolate creme brulee: Add 4 ounces of melted dark chocolate to the warm cream mixture before tempering the eggs. Rich and decadent.
- Coffee creme brulee: Steep 2 tablespoons of coarsely ground coffee beans with the cream, then strain. Perfect for coffee enthusiasts.
- Lavender creme brulee: Add 1 tablespoon of dried culinary lavender to the cream during the heating process. Floral and elegant.
- Earl Grey creme brulee: Steep 3 Earl Grey tea bags in the hot cream for 10 minutes. The bergamot flavor is stunning.
- Citrus creme brulee: Add the zest of 2 lemons or 1 orange to the cream while heating for a bright, refreshing twist.
- Maple creme brulee: Replace ¼ cup of the sugar with pure maple syrup for a fall-inspired version.
- Coconut creme brulee: Replace 1 cup of the heavy cream with full-fat coconut milk and add ½ teaspoon of coconut extract.
- Pumpkin spice creme brulee: Add ½ cup of pumpkin puree and 1 teaspoon of pumpkin pie spice to the custard. Seasonal and delicious.
- Caramel creme brulee: Swirl caramel sauce into the bottom of each ramekin before adding the custard.
- Espresso creme brulee: Dissolve 2 tablespoons of instant espresso powder in the warm cream for an intense coffee flavor.
For a similar custard dessert with a twist, try my authentic Italian tiramisu recipe.
Storage and Reheating
Proper storage is key to maintaining that perfect texture and preventing the custards from absorbing refrigerator odors.
Here’s how to store and serve your creme brulee:
- Refrigerator storage: Un-torched custards will keep covered in the refrigerator for up to 3 days. Make sure they’re tightly wrapped with plastic wrap.
- Don’t torch in advance: Only caramelize the sugar tops within 30 minutes of serving. The caramelized sugar will soften and lose its crisp texture if left too long.
- Freezing not recommended: Custards don’t freeze well as they can become grainy and watery when thawed.
- Serving temperature: Remove the custards from the refrigerator about 5 minutes before torching to take the chill off slightly.
- Leftover torched custards: If you’ve already caramelized the tops, store them uncovered in the refrigerator and consume within 24 hours. The sugar will soften but they’ll still be delicious.
- Transporting tips: If you need to bring these to a party, transport the un-torched custards in a cooler with ice packs, then torch them on-site for the best results.
- Reheating: There’s no need to reheat creme brulee. It’s meant to be served cold with a warm caramelized top. If the custard is too cold, simply let it sit at room temperature for 10 minutes.
Nutritional Facts
Per serving (1 creme brulee):
- Calories: 385
- Total Fat: 32g
- Saturated Fat: 19g
- Cholesterol: 315mg
- Sodium: 85mg
- Total Carbohydrates: 22g
- Sugars: 21g
- Protein: 5g
- Calcium: 8% DV
- Iron: 4% DV
Note: Nutritional values are approximate and may vary based on specific ingredients used.
Health Benefits of Key Ingredients
While creme brulee is definitely an indulgent dessert, some of its ingredients do offer nutritional value.
Here’s what makes this treat a bit more special:
- Eggs: Rich in high-quality protein, vitamins A, D, E, and B12, plus minerals like selenium and choline. The yolks contain lutein and zeaxanthin, which support eye health.
- Heavy cream: Provides fat-soluble vitamins A, D, E, and K. The butterfat also helps with the absorption of these nutrients and contributes to feelings of satiety.
- Vanilla: Contains antioxidants and has been shown to have calming properties. Real vanilla also provides trace amounts of minerals like magnesium and potassium.
- Moderate portion size: The individual ramekins naturally control portion sizes, which helps with mindful eating.
I love serving this with my healthy carrot cake recipe to balance out the richness.
FAQs About Creme Brulee
1. Can I Make Creme Brulee Without a Kitchen Torch?
Yes, you can use your oven’s broiler instead. Preheat the broiler on high and place the sugar-topped custards on the top rack, about 4 inches from the heat. Watch them very carefully as they can burn in seconds. The torch method gives you more control, but the broiler works in a pinch.
2. Why Is My Creme Brulee Grainy?
Graininess usually happens when the custard is overcooked or cooked at too high a temperature. The eggs begin to curdle and create a curdled texture instead of smooth custard. Make sure you’re using a water bath and checking for doneness when the centers still jiggle slightly.
3. Can I Use Vanilla Extract Instead of a Vanilla Bean?
Absolutely! While a vanilla bean provides those beautiful specks and intense flavor, 2 teaspoons of pure vanilla extract works perfectly well. Add it to the cream after heating rather than steeping it. Just avoid imitation vanilla as it can taste artificial in such a simple dessert.
4. How Do I Know When the Custard Is Done Baking?
The edges should be set and firm while the center still wobbles like jello when you gently shake the ramekin. It should jiggle about an inch in diameter in the center. The custard will continue to set as it cools, so it’s better to slightly underbake than overbake.
5. Why Did My Caramelized Sugar Turn Bitter?
Burnt sugar tastes bitter, so you may have held the torch too close or kept it in one spot too long. Keep the flame moving constantly in circular motions and aim for a deep amber color rather than dark brown or black. If this happens, simply scrape off the burnt sugar and try again with fresh sugar.
Read Also: Eggnog Pie Recipe
Final Thoughts
Making creme brulee at home is one of those kitchen accomplishments that feels incredibly satisfying. The first time you crack through that caramelized sugar shell into the silky custard below, you’ll understand why this dessert has remained a classic for centuries.
Don’t be intimidated by the fancy French name or the torch requirement. This creme brulee recipe breaks everything down into manageable steps that anyone can follow. Once you’ve made it a few times, you’ll find your rhythm and might even start experimenting with your own flavor variations.
I’d love to hear how your creme brulee turns out! Drop a comment below with your results, any questions, or your favorite flavor variations. And if you’re looking for more impressive desserts to add to your repertoire, check out some of my other recipes below.
Recommended:
- Pumpkin Pie Recipe
- Apple Pie Recipe
- Pecan Pie Recipe
- Eggnog Cake Recipe
- Eggnog Cookies Recipe
- Pumpkin Roll Recipe
- Fudge Brownie Recipe
- Gingerbread Cookie Recipe
- Sugar Cookies Recipe
- Oatmeal Cookies Recipe