
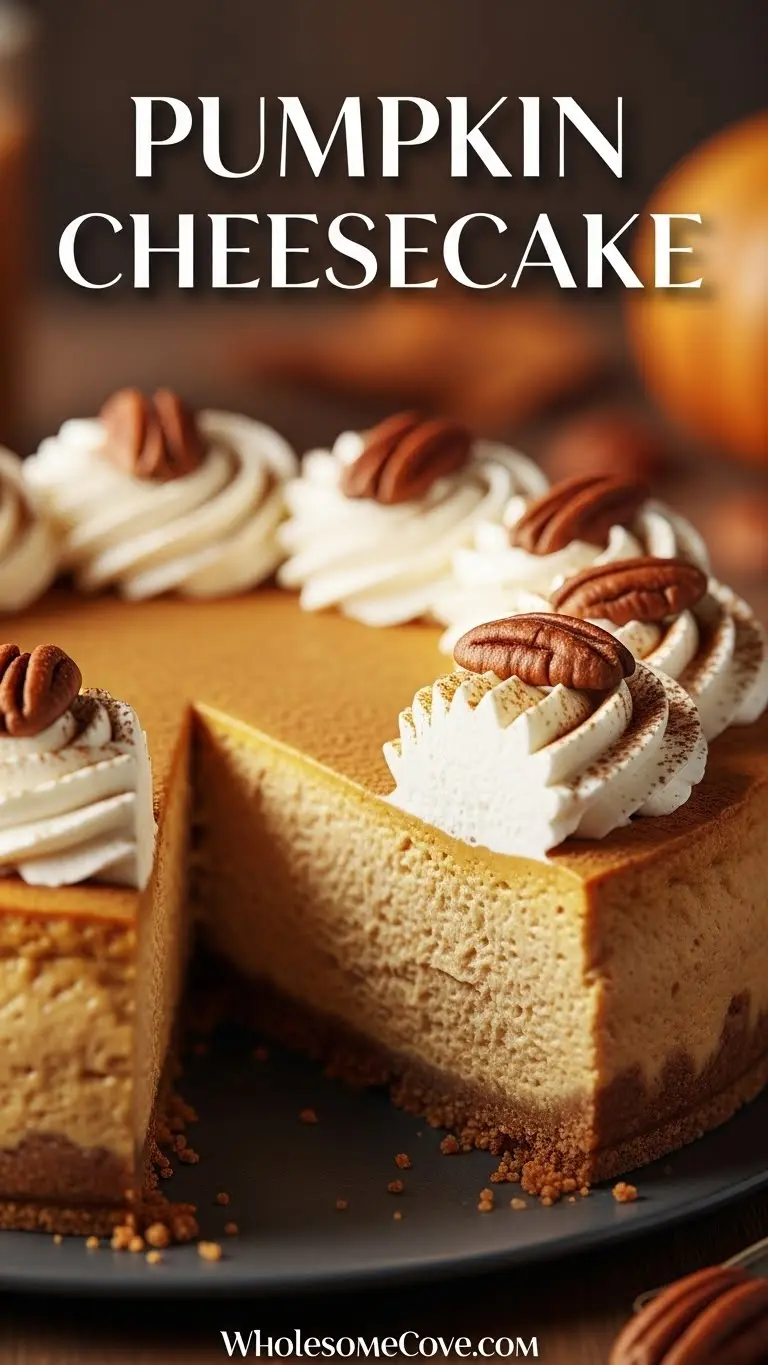
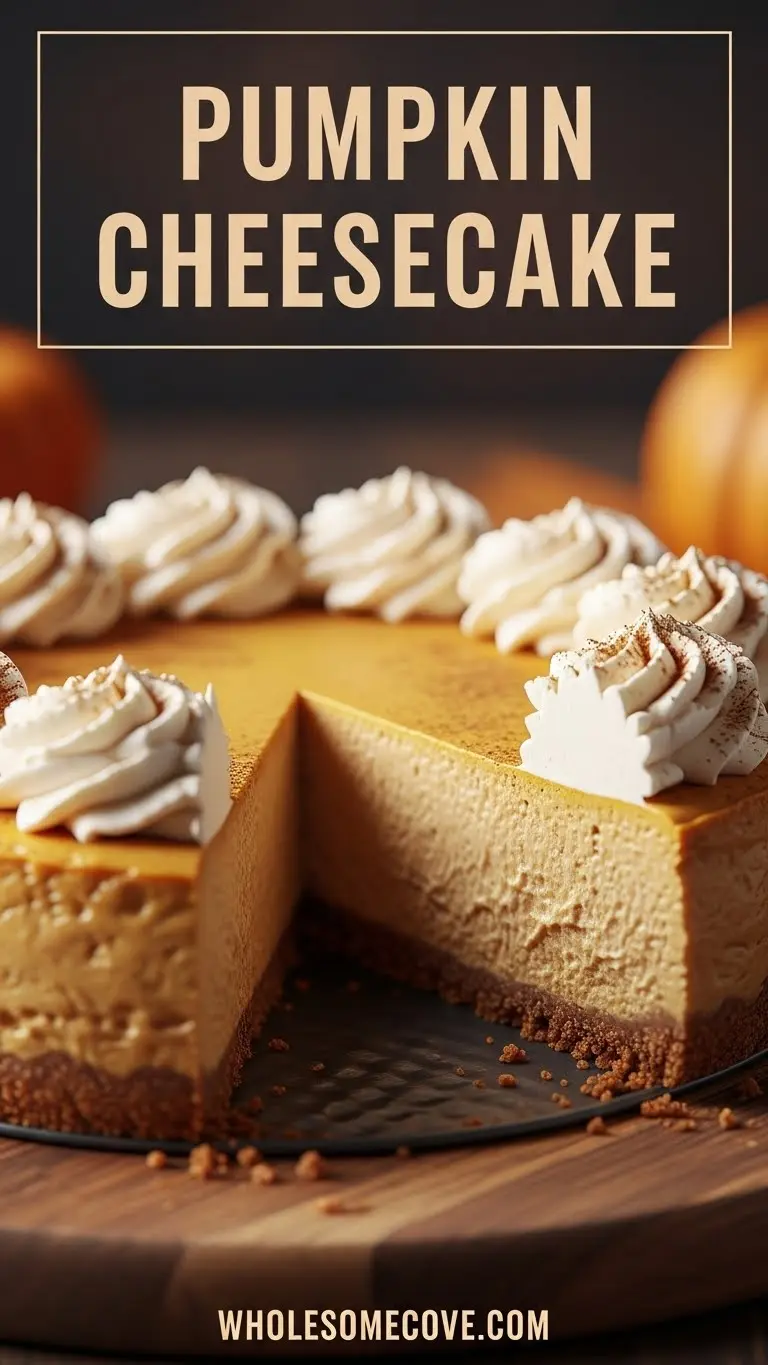
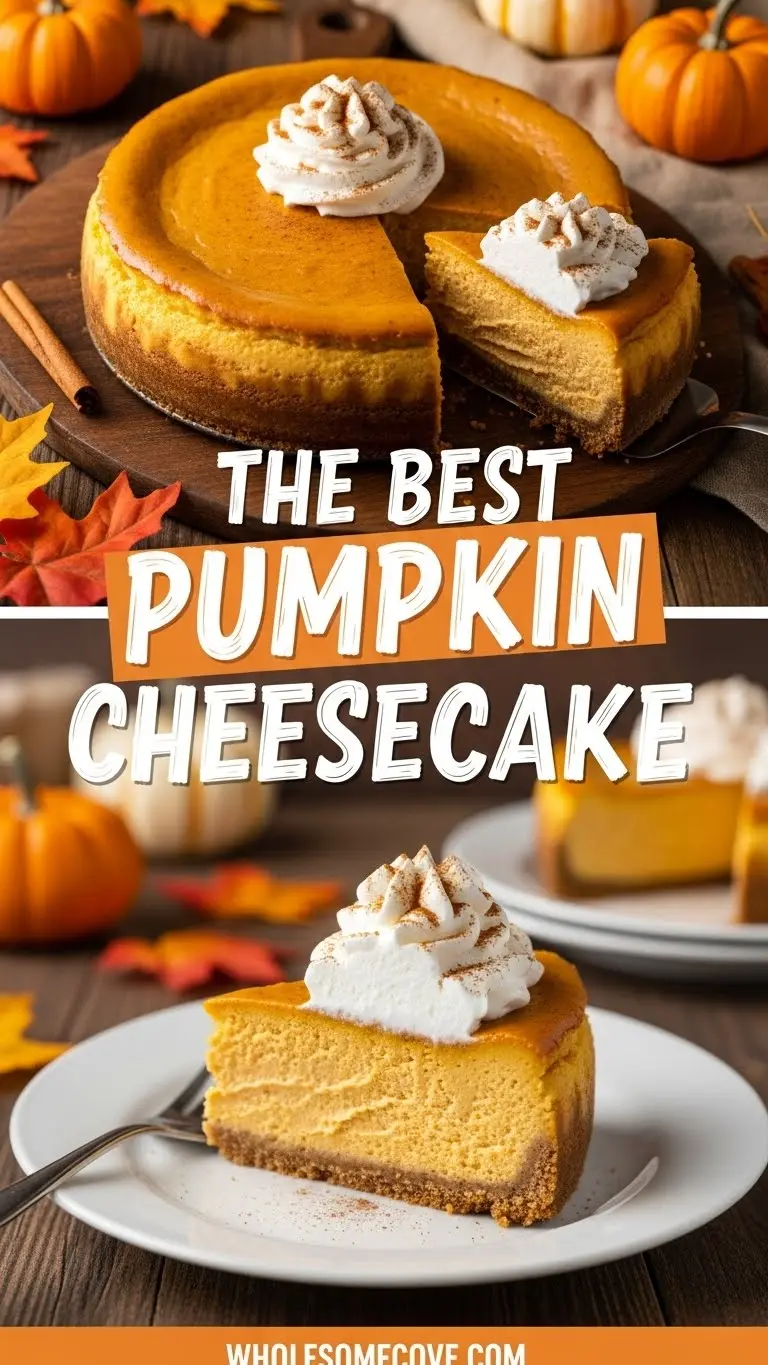
I never thought I’d be the type to obsess over a pumpkin cheesecake recipe, but here we are. It all started three years ago when my sister-in-law brought one to Thanksgiving, and I couldn’t stop thinking about it for weeks.
The creamy texture, that perfect balance of pumpkin and warm spices, the buttery graham cracker crust. I knew I had to figure out how to make it myself.
After plenty of trial and error (including one memorable disaster where I forgot to let my cream cheese soften and ended up with lumps everywhere), I’ve finally perfected my version. This isn’t just any pumpkin cheesecake.
It’s the kind that makes people ask for seconds before they’ve even finished their first slice. The kind that converts people who claim they don’t like cheesecake.
| Quick Recipe Summary | |
|---|---|
| Prep Time | 25 minutes |
| Cook Time | 70 minutes |
| Total Time | 5 hours 35 minutes (including cooling) |
| Servings | 12 slices |
| Difficulty Level | Intermediate |
Why You’ll Love This Pumpkin Cheesecake Recipe
This pumpkin cheesecake hits every note perfectly. The filling is silky smooth with just the right amount of pumpkin flavor, not overwhelming but definitely present.
I’ve calibrated the spice blend over dozens of attempts to get that warm, cozy flavor without any single spice dominating. The texture is what really sets this apart from other recipes I’ve tried.
It’s dense and creamy without being heavy, and it slices beautifully without cracking. Here’s what makes this recipe special:
- Foolproof technique: The water bath method ensures even baking and prevents cracks
- Perfect spice balance: Cinnamon, ginger, nutmeg, and cloves create that quintessential fall flavor
- Make-ahead friendly: Actually tastes better the next day after the flavors meld
- Crowd-pleaser: I’ve served this to pumpkin skeptics and cheesecake purists alike with rave reviews
- Versatile: Works beautifully for Thanksgiving, Christmas, or any fall gathering
Another favorite: Pumpkin Pie
Ingredients
The quality of your ingredients really matters here, especially the cream cheese and pumpkin puree. I learned this the hard way when I tried using a discount brand of cream cheese and the texture just wasn’t the same.
For the Crust:
- 2 cups (200g) graham cracker crumbs (about 16 full crackers)
- ¼ cup (50g) granulated sugar
- ½ cup (115g) unsalted butter, melted
- ½ teaspoon ground cinnamon
For the Filling:
- 32 oz (905g) cream cheese, softened to room temperature
- 1 cup (200g) granulated sugar
- ¾ cup (150g) packed light brown sugar
- 1 cup (240ml) pumpkin puree (not pumpkin pie filling)
- 3 large eggs, room temperature
- ⅓ cup (80ml) heavy cream
- 2 teaspoons vanilla extract
- 1 tablespoon cornstarch
- 1½ teaspoons ground cinnamon
- 1 teaspoon ground ginger
- ½ teaspoon ground nutmeg
- ¼ teaspoon ground cloves
- ¼ teaspoon salt
For Topping (Optional):
- Whipped cream
- Caramel sauce
- Candied pecans
- Extra cinnamon for dusting
Kitchen Equipment Needed
Having the right tools makes this recipe so much easier. Trust me, I tried making cheesecake in a regular cake pan once and it was a mess.
- 9-inch springform pan
- Heavy-duty aluminum foil (for water bath)
- Large roasting pan (for water bath)
- Electric mixer (stand or hand mixer)
- Food processor (for graham cracker crumbs, or use pre-made)
- Rubber spatula
- Mixing bowls
- Measuring cups and spoons
- Instant-read thermometer (optional but helpful)
Recommended Products for This Recipe
I’ve made this cheesecake countless times, and these are the products that have genuinely made a difference in my results.
1. Libby’s 100% Pure Pumpkin
This is the gold standard for pumpkin puree. It has the perfect consistency and rich flavor without any added sugars or spices. I’ve tried making my own pumpkin puree from fresh pumpkins, but honestly, Libby’s is more consistent and saves so much time.
2. Nordic Ware Leakproof Springform Pan
After having two different springform pans leak water into my cheesecake during the water bath, I finally invested in this leakproof pan. The silicone seal is a revelation. No more wrapping in multiple layers of foil and crossing your fingers.
3. Philadelphia Cream Cheese Brick Style
I know it seems like all cream cheese is the same, but Philadelphia really does make the smoothest, creamiest cheesecake. The brick style is key here, not the spreadable tub version, which has a different consistency.
4. KitchenAid Stand Mixer
While you can absolutely make this with a hand mixer, my KitchenAid stand mixer makes the process so much easier. It whips the cream cheese to perfect smoothness without any effort, and your arms won’t be tired before you even get the cheesecake in the oven.
You might also enjoy: Healthy Pumpkin Pie
Step-by-Step Instructions: How to Make Pumpkin Cheesecake
I’m going to walk you through this process in detail because cheesecake can be intimidating. But I promise, if you follow these steps, you’ll have a gorgeous, crack-free cheesecake.
1. Prepare Your Pan and Preheat the Oven
- Preheat your oven to 325°F (163°C).
- Wrap the outside of your 9-inch springform pan with two layers of heavy-duty aluminum foil, making sure to cover the bottom and come up the sides at least halfway. This prevents water from seeping in during the water bath.
- Grease the inside of the pan lightly with butter or cooking spray, paying special attention to the sides where the cheesecake tends to stick.
- Place a kettle or large pot of water on the stove to boil. You’ll need this for the water bath later.
2. Make the Graham Cracker Crust
- If using whole graham crackers, break them into pieces and pulse in a food processor until you have fine crumbs. You want the consistency of coarse sand.
- In a medium bowl, combine the graham cracker crumbs, sugar, melted butter, and cinnamon. Stir with a fork until the mixture resembles wet sand and holds together when pressed.
- Pour the mixture into your prepared springform pan and press it firmly into the bottom using the bottom of a measuring cup or glass. Make sure it’s tightly packed and even.
- Press the crumbs about halfway up the sides of the pan if you want a taller crust edge (I always do this).
- Bake the crust for 10 minutes, then remove and let it cool while you prepare the filling. This pre-baking step helps the crust stay crispy.
3. Prepare the Cream Cheese Base
- Make absolutely sure your cream cheese is at room temperature. This is crucial. Cold cream cheese will create lumps that are nearly impossible to remove.
- In a large mixing bowl or the bowl of your stand mixer, beat the cream cheese on medium speed for 2-3 minutes until it’s completely smooth and creamy with no lumps.
- Scrape down the sides and bottom of the bowl frequently with a rubber spatula. You’d be surprised how much cream cheese sticks to the sides.
- Add both sugars and beat for another 2 minutes until the mixture is light and fluffy.
4. Add the Pumpkin and Spices
- Add the pumpkin puree to the cream cheese mixture and beat on low speed until just combined. Don’t overmix at this stage.
- Add the cornstarch, cinnamon, ginger, nutmeg, cloves, and salt. Beat until the spices are evenly distributed throughout the mixture.
- The mixture should be smooth and aromatic at this point. If you see any lumps, continue beating on low speed.
5. Incorporate the Eggs
- Add the eggs one at a time, beating on low speed after each addition. This is important: only beat until each egg is just incorporated.
- Overmixing after adding eggs creates too much air, which can cause cracks and a grainy texture.
- After the last egg, add the heavy cream and vanilla extract, mixing on low speed for just 10-15 seconds.
- Give the batter one final stir with your rubber spatula, scraping the bottom and sides to ensure everything is evenly combined.
6. Assemble and Prepare for Baking
- Pour the filling over the pre-baked crust, spreading it evenly with a spatula.
- Tap the pan gently on the counter a few times to release any air bubbles. You can also run a knife through the batter in a swirling motion to pop bubbles.
- Place your wrapped springform pan in the center of a large roasting pan.
- Carefully pour the hot water from your kettle into the roasting pan until it comes about halfway up the sides of the springform pan. Be very careful not to splash water into the cheesecake.
7. Bake the Cheesecake
- Carefully transfer the roasting pan to the preheated oven, making sure not to slosh water.
- Bake for 65-75 minutes. The cheesecake is done when the edges are set but the center still jiggles slightly when you gently shake the pan (about a 3-inch diameter area in the center).
- If you’re using an instant-read thermometer, the center should read 150-155°F (65-68°C).
- The top should look mostly set but not browned. A few small cracks on the surface are normal and will be covered with toppings anyway.
8. Cool the Cheesecake Properly
- Turn off the oven and crack the door open about 4 inches. Leave the cheesecake in the oven for 1 hour. This gradual cooling prevents dramatic temperature changes that cause cracks.
- After an hour, carefully remove the roasting pan from the oven. Lift the springform pan out of the water bath (use oven mitts, it will still be hot).
- Remove the foil wrapping and place the cheesecake on a wire rack.
- Run a thin knife around the edge of the cheesecake to loosen it from the pan sides. This prevents the cheesecake from pulling away and cracking as it cools.
- Let it cool at room temperature for another hour, then refrigerate for at least 4 hours, but preferably overnight. Patience is key here.
Read Also: Pumpkin Bar

Tips for The Best Pumpkin Cheesecake
I’ve learned these lessons through many batches of cheesecake, including some spectacular failures. Here’s what actually makes a difference.
- Room temperature ingredients are non-negotiable: Take your cream cheese and eggs out of the fridge at least 2 hours before baking. Cold ingredients lead to lumps and overmixing.
- Don’t skip the water bath: I tried baking cheesecake without one once to save time. The edges overcooked, the center was undercooked, and cracks appeared everywhere. The water bath regulates temperature and adds moisture.
- Use pure pumpkin puree, not pie filling: Pumpkin pie filling already contains sugar and spices, which will throw off the balance of this recipe.
- Avoid overmixing: Mix on low speed and only until ingredients are just combined, especially after adding eggs. Too much air creates cracks and a grainy texture.
- The jiggle test is your friend: The center should wobble like Jell-O when gently shaken. It will firm up as it cools. If it looks completely set in the oven, it’s probably overbaked.
- Cool gradually: Rapid temperature changes cause cracks. Always cool in the oven first, then at room temperature, then in the fridge.
- Grease your pan well: Even with a springform pan, you want to grease the sides so the cheesecake releases cleanly.
- Wrap your pan thoroughly: Use two layers of heavy-duty foil and make sure there are no gaps where water could seep in.
- Don’t open the oven door: Every time you peek, you let out heat and moisture, which can affect the baking process.
Serving Suggestions
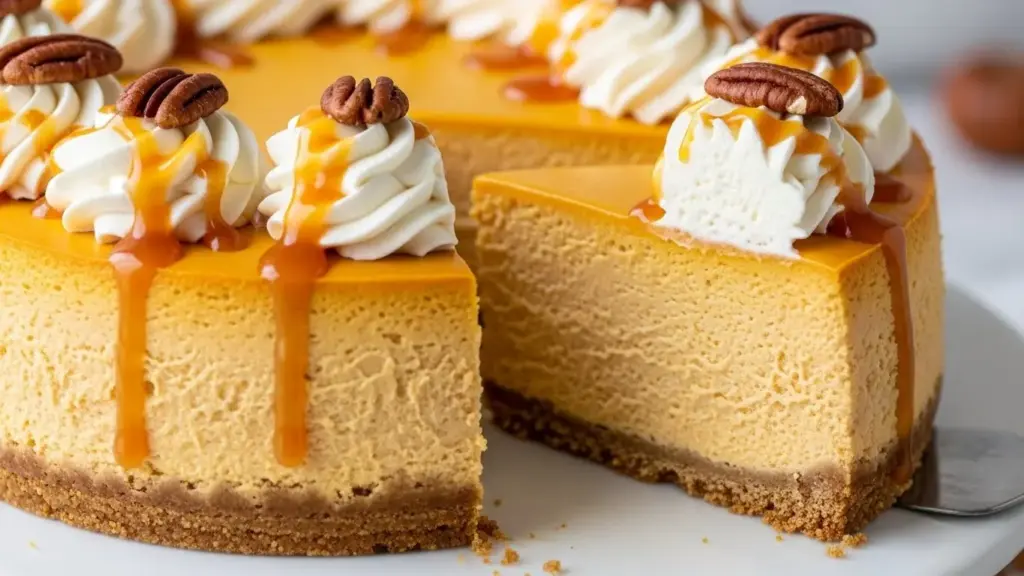
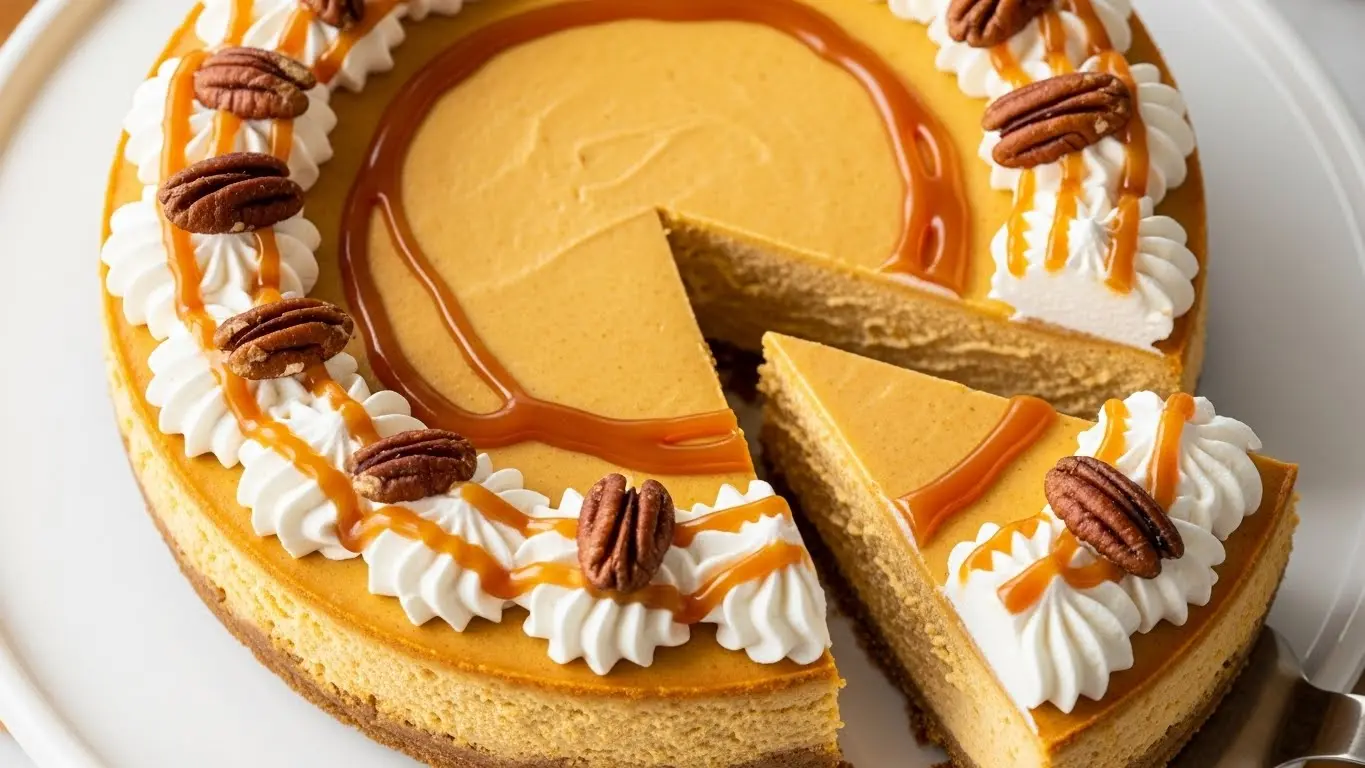
This cheesecake is stunning on its own, but these accompaniments take it to the next level. I usually set out a few topping options and let people customize their slices.
A generous dollop of fresh whipped cream adds a light, airy contrast to the dense cheesecake. I like to sweeten mine lightly with powdered sugar and a splash of vanilla.
Drizzle warm caramel sauce over each slice for an extra layer of sweetness that complements the pumpkin spices beautifully. The salted variety is especially delicious.
- Serve with a scoop of vanilla ice cream or cinnamon ice cream
- Top with candied pecans for crunch and visual appeal
- Add a sprinkle of cinnamon or pumpkin pie spice before serving
- Garnish with a cinnamon stick for an elegant presentation
- Pair with hot apple cider or pumpkin spice latte
- Serve alongside apple crisp for a complete fall dessert spread
- Add fresh berries for a pop of color and tartness
Variations of Pumpkin Cheesecake
Once you’ve mastered the basic recipe, these variations keep things interesting. I make a different version every year for Thanksgiving.
Chocolate Pumpkin Swirl Cheesecake:
- Reserve 1 cup of the pumpkin filling before pouring it into the pan
- Melt 4 oz of dark chocolate and mix it with the reserved filling
- Pour the remaining pumpkin filling into the pan, then drop spoonfuls of the chocolate mixture on top
- Use a knife to swirl the chocolate through the pumpkin filling for a marbled effect
Gingersnap Crust:
- Replace graham crackers with gingersnap cookies for a spicier, more robust crust
- Reduce the cinnamon in the crust to ¼ teaspoon since gingersnaps are already spiced
- This pairs exceptionally well with the pumpkin filling
Mini Pumpkin Cheesecakes:
- Line a muffin tin with cupcake liners
- Press about 1 tablespoon of crust mixture into each liner
- Divide the filling among the cups (fills about 18-20)
- Bake at 325°F for 20-25 minutes
- These are perfect for parties and portion control
Maple Pumpkin Cheesecake:
- Replace ½ cup of the granulated sugar with pure maple syrup
- Add 1 teaspoon of maple extract along with the vanilla
- Top with maple glazed carrots essence in your whipped cream topping
Pecan Praline Topping:
- Make a praline by cooking ½ cup brown sugar, ¼ cup butter, and 2 tablespoons cream until bubbly
- Stir in 1 cup chopped pecans
- Pour over the cooled cheesecake just before serving
Bourbon Pumpkin Cheesecake:
- Add 2 tablespoons of bourbon to the filling for a sophisticated twist
- The alcohol cooks off slightly but leaves a warm, complex flavor
Storage and Reheating
Proper storage is crucial for maintaining that perfect creamy texture. I’ve found that cheesecake actually improves with a day or two in the fridge.
Refrigerator Storage:
- Keep the cheesecake in its springform pan, covered with plastic wrap or in an airtight container
- It will stay fresh for up to 5 days in the refrigerator
- I actually think it tastes best on day 2 or 3 when the flavors have had time to meld
- Always store it on a flat surface to prevent it from tilting and potentially sliding
Freezer Storage:
- Pumpkin cheesecake freezes beautifully for up to 2 months
- Freeze the whole cheesecake or individual slices wrapped tightly in plastic wrap, then aluminum foil
- For best results, place slices on a baking sheet to freeze solid before wrapping
- Thaw overnight in the refrigerator before serving
- Don’t add toppings like whipped cream until after thawing
Serving from Cold:
- For the best texture, let the cheesecake sit at room temperature for 20-30 minutes before serving
- This allows the filling to soften slightly and brings out the flavors
- Use a sharp knife dipped in hot water and wiped clean between cuts for clean slices
Another favorite: Pumpkin Roll
Nutritional Facts
Here’s the approximate nutritional information per slice (based on 12 servings):
- Calories: 445
- Total Fat: 28g
- Saturated Fat: 16g
- Cholesterol: 135mg
- Sodium: 310mg
- Total Carbohydrates: 42g
- Dietary Fiber: 1g
- Sugars: 34g
- Protein: 7g
Keep in mind that these numbers can vary based on the specific brands you use and the size of your slices. Adding toppings like whipped cream or caramel will increase the calorie count.
Health Benefits of Key Ingredients
While cheesecake isn’t exactly a health food, some ingredients do offer nutritional benefits. I like to think of it as a treat that happens to have some good stuff in it.
Pumpkin puree is surprisingly nutritious and brings more to the table than just flavor. It’s loaded with vitamin A, which supports eye health and immune function.
The spices in this recipe aren’t just for taste. Cinnamon has been shown to help regulate blood sugar levels, while ginger has anti-inflammatory properties.
- Cream cheese provides calcium for bone health and protein for satiety
- Eggs are a complete protein source with all essential amino acids
- Pumpkin is rich in beta-carotene, fiber, and potassium
- Cinnamon may improve insulin sensitivity and has antioxidant properties
- Ginger can aid digestion and reduce nausea
- Nutmeg contains minerals like manganese, copper, and magnesium
FAQs About Pumpkin Cheesecake
1. Why did my cheesecake crack?
Cracks usually happen due to rapid temperature changes, overbaking, or too much air incorporated during mixing. Make sure you cool your cheesecake gradually (in the oven with the door cracked, then at room temperature, then in the fridge).
Don’t overbake it, the center should still jiggle slightly when done. Also, avoid overmixing, especially after adding the eggs, as this incorporates too much air.
2. Can I make this cheesecake without a water bath?
Technically yes, but I don’t recommend it. The water bath creates a humid environment that prevents the top from drying out and cracking.
It also regulates the oven temperature, ensuring even baking. If you absolutely must skip it, place a pan of water on the rack below the cheesecake and reduce the oven temperature to 300°F.
3. How do I know when my cheesecake is done?
The edges should be set and slightly puffed, while the center (about a 3-inch diameter) should still jiggle like Jell-O when you gently shake the pan. An instant-read thermometer inserted into the center should read 150-155°F.
The cheesecake will continue cooking as it cools and will firm up completely. It’s better to slightly underbake than overbake.
4. Can I use fresh pumpkin instead of canned?
You can, but it requires extra work and the results may be inconsistent. You’ll need to roast a sugar pumpkin, puree the flesh, and then drain it in a cheesecloth to remove excess moisture.
Canned pumpkin puree (not pie filling) is already the perfect consistency and actually gives more reliable results. I’ve tried both methods multiple times, and I always go back to canned.
5. Why is my cheesecake grainy?
A grainy texture usually means the cream cheese wasn’t fully softened before mixing, or the mixture was overmixed. Cold cream cheese creates lumps that never fully smooth out, even with extensive mixing.
Always let your cream cheese sit at room temperature for at least 2 hours before starting. Also, make sure to scrape down the bowl frequently while mixing to ensure no lumps are hiding along the sides.
Read Also: Healthy Tiramisu
Final Thoughts
This pumpkin cheesecake has become my signature fall dessert, the one everyone requests year after year. There’s something magical about that first slice, with its creamy pumpkin filling and buttery crust, that just feels like autumn.
The best part is that once you master the basic technique, you can experiment with all sorts of variations and make it your own. Don’t be intimidated by the steps or the water bath, it’s actually quite forgiving once you understand the principles.
Give this recipe a try for your next holiday gathering or special occasion. I’d love to hear how it turns out for you and which variations you try.
Drop a comment below with your results, or share a photo on social media and tag me so I can see your beautiful creation!
Recommended:
- Pumpkin Cookies
- Pumpkin Chocolate Chip Cookies
- Pumpkin Snickerdoodle Cookies
- Pumpkin Oatmeal Cookies
- Pumpkin French Toast
- Pumpkin Overnight Oats
- Pumpkin Sage Pasta
- Sweet Potato Casserole
- Apple Pie
- Pecan Pie