
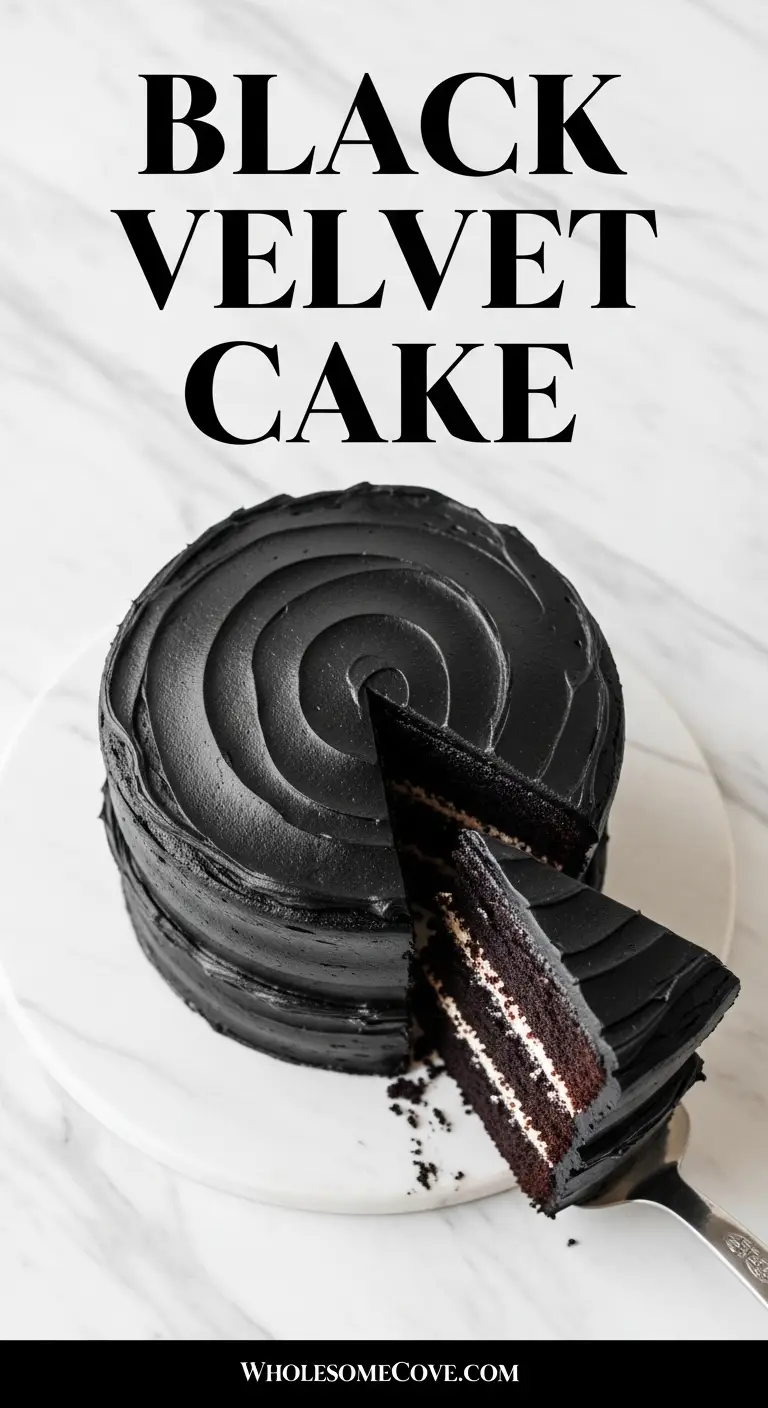
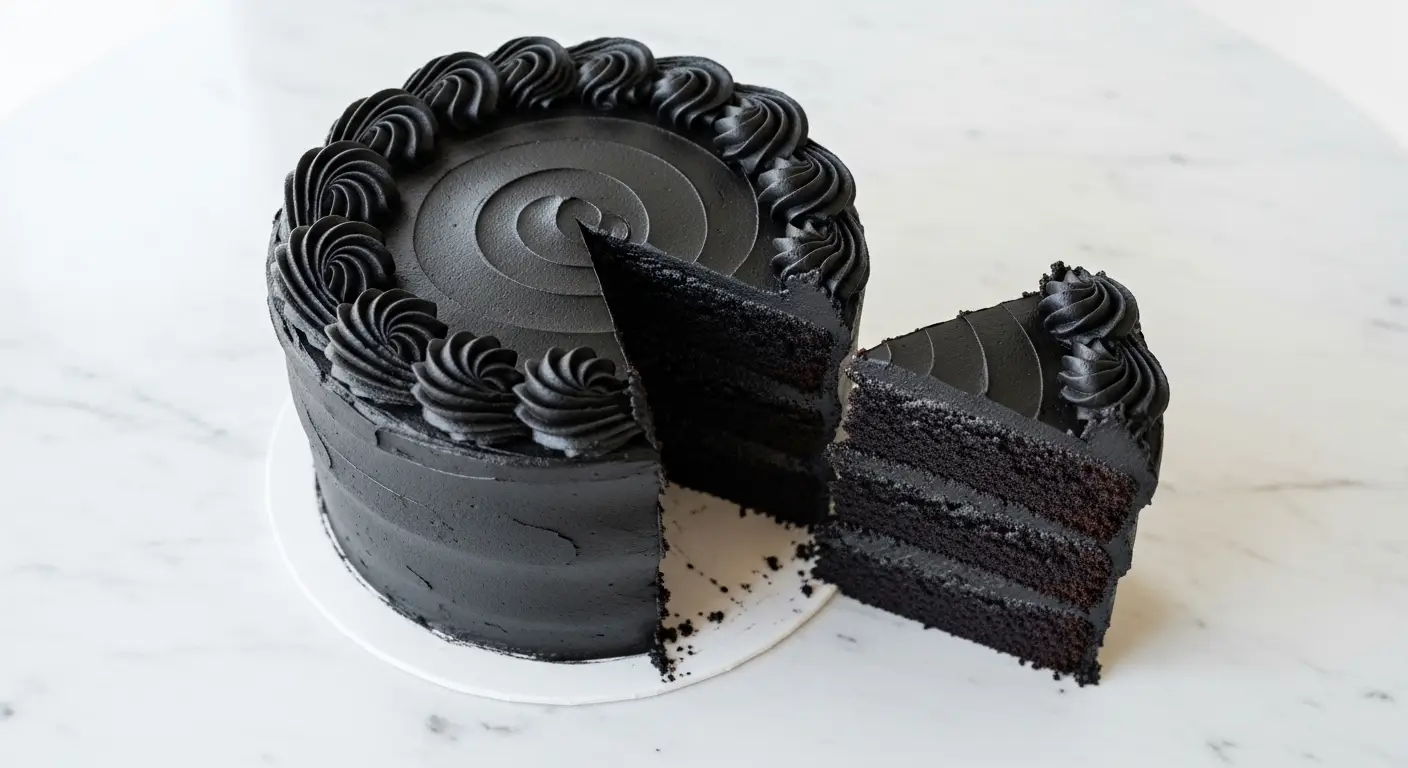
The first time I made a Black Velvet Cake Recipe, I was searching for a dessert that would be dramatic enough for my daughter’s Halloween party but sophisticated enough to serve to the adults attending. I had seen photos of these mysterious, pitch-black cakes online and was immediately captivated by their intense color.
What I didn’t expect was how much this cake would taste like an Oreo cookie come to life. The secret ingredient, black cocoa powder, gives this cake its deep, dark color naturally without a single drop of food dye, and it creates the most incredible chocolate flavor that’s rich but not overly sweet.
After years of perfecting this recipe, I’ve learned that the combination of black cocoa powder and buttermilk creates a texture that’s so tender and moist, it practically melts in your mouth.
| Quick Recipe Summary | |
|---|---|
| Prep Time | 25 minutes |
| Cook Time | 30 minutes |
| Total Time | 55 minutes (plus cooling time) |
| Servings | 12 slices |
| Difficulty Level | Moderate |
If you’re a fan of dramatic desserts with rich chocolate flavor, try my Red Velvet Cake Recipe for another stunning velvet cake option.
Why You’ll Love This Black Velvet Cake Recipe
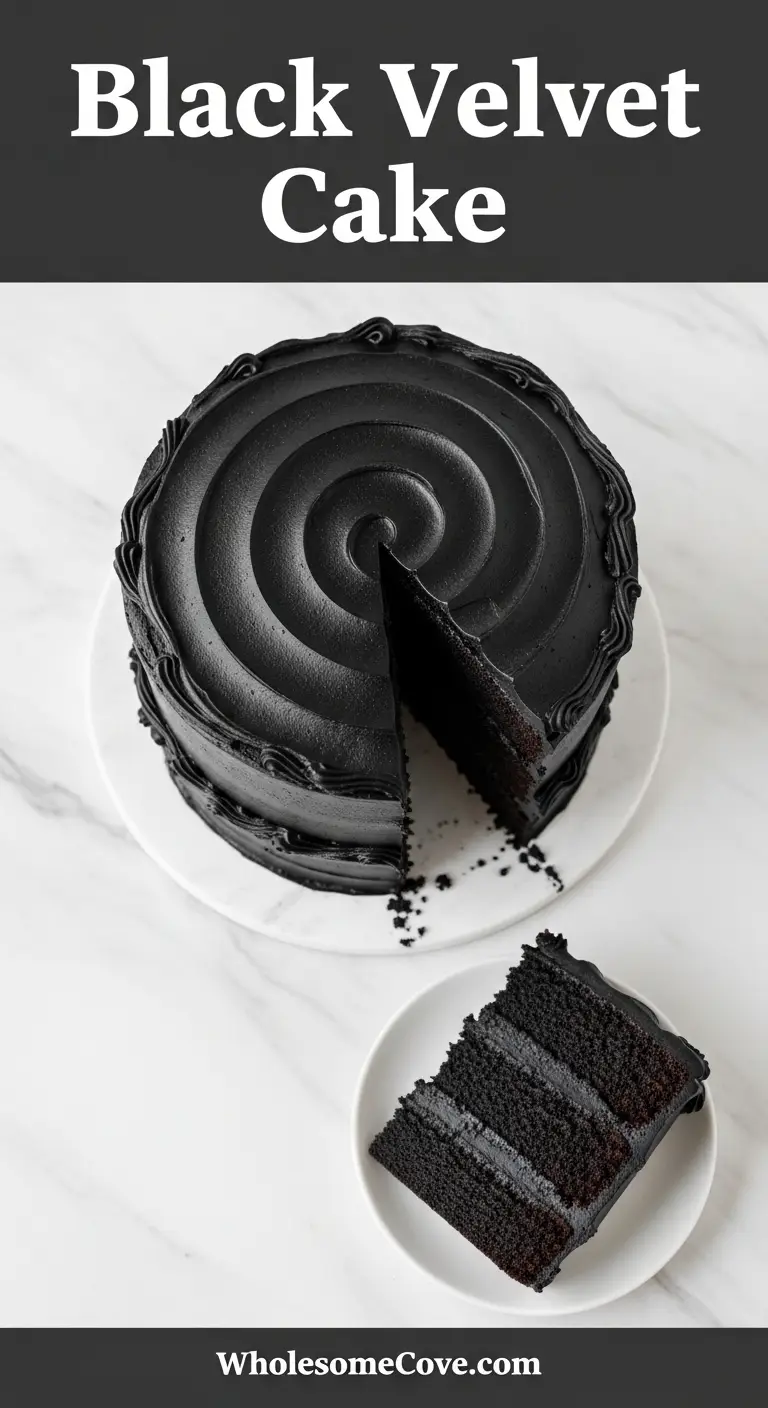
This Black Velvet Cake Recipe is everything you want in a showstopping dessert. The intense black color comes entirely from natural black cocoa powder, so there’s no worry about artificial food coloring staining your teeth or tongue.
The texture is what really sets this cake apart from regular chocolate cakes. The buttermilk and vinegar work together to create an incredibly tender, velvety crumb that’s lighter than traditional chocolate cake but still packed with deep chocolate flavor.
I love how versatile this cake is for decorating. The dark canvas makes any frosting color pop beautifully, and you can dress it up for Halloween with spooky decorations or keep it elegant for a sophisticated dinner party. Plus, it stays moist for days thanks to the oil-based batter.
Here’s what makes this recipe special:
- Naturally black color: Black cocoa powder creates the dramatic hue without any artificial dyes
- Oreo-like flavor: The same cocoa used in Oreo cookies gives this cake its distinctive taste
- Ultra-moist texture: Oil and buttermilk keep every slice tender and delicious
- Showstopper presentation: The deep black layers look stunning with any frosting color
- Perfect for occasions: Halloween parties, gothic weddings, or any time you want to impress
Ingredients
To make this stunning Black Velvet Cake, you’ll need ingredients divided into two main components: the cake layers and the silky chocolate buttercream frosting. The star ingredient is black cocoa powder, which you’ll need for both the cake and the frosting to achieve that signature deep color and Oreo-like flavor.
For the Cake Layers:
- 2 cups (250g) all-purpose flour
- 3/4 cup (75g) black cocoa powder, sifted
- 1/4 cup (25g) natural unsweetened cocoa powder
- 2 cups (400g) granulated sugar
- 2 teaspoons baking powder
- 1 1/2 teaspoons baking soda
- 1 teaspoon salt
- 1 cup (240ml) buttermilk, room temperature
- 1/2 cup (120ml) vegetable oil
- 2 large eggs, room temperature
- 2 teaspoons vanilla extract
- 1 tablespoon white vinegar
- 1 cup (240ml) hot brewed coffee (or hot water)
For the Black Cocoa Buttercream:
- 1 1/2 cups (340g) unsalted butter, softened
- 4 cups (480g) powdered sugar
- 3/4 cup (75g) black cocoa powder, sifted
- 1/4 cup (60ml) heavy cream
- 2 teaspoons vanilla extract
- 1/4 teaspoon salt
For another velvet cake variation, check out my Blue Velvet Cake Recipe.
Kitchen Equipment Needed
Having the right equipment makes all the difference when baking this Black Velvet Cake. I learned this the hard way when I first attempted velvet cakes with subpar pans that caused uneven baking and stuck layers. Investing in quality bakeware has transformed my cake-making experience completely.
- Three 8-inch round cake pans (2 inches deep)
- Parchment paper circles for lining pans
- Large mixing bowls (at least 2)
- Stand mixer with paddle attachment or hand mixer
- Wire whisk
- Rubber spatula
- Measuring cups and spoons
- Kitchen scale (recommended for accuracy)
- Wire cooling racks
- Cake leveler or serrated knife
- Offset spatula for frosting
- Cake turntable (optional but helpful)
- Fine mesh sieve for sifting cocoa powder
Recommended Products for This Recipe
After making this Black Velvet Cake dozens of times, I’ve found a few products that genuinely make the process easier and produce better results.
1. King Arthur Black Cocoa Powder
This is hands down the best black cocoa powder I’ve used. It creates that pitch-black color without any bitterness, and the flavor is remarkably smooth and rich. Unlike regular cocoa powder, this ultra-Dutched variety gives you that authentic Oreo cookie taste that makes this cake so special.
2. Fat Daddio’s Round Cake Pans
I switched to these anodized aluminum pans after years of fighting with stuck cake layers, and I’ll never go back. They heat evenly, release cleanly every time, and are completely non-reactive, which is important when working with acidic ingredients like buttermilk and vinegar.
3. Ateco Offset Spatula Set
Getting a perfectly smooth frosting finish requires the right tools, and this offset spatula set has been invaluable. The angled blade gives you excellent control, making it so much easier to frost the sides and top of your cake layers evenly.
4. Wilton Cake Turntable
This rotating cake stand transformed my decorating game. Being able to spin the cake smoothly while frosting makes achieving a professional finish so much easier, even if you’re a beginner.
My Red Velvet Cheesecake Cake Recipe also benefits from these same tools.
Step-by-Step Instructions: How to Make Black Velvet Cake
Making this Black Velvet Cake is easier than you might think, even though it looks incredibly impressive. I’ve broken down the process into detailed steps so even beginners can achieve bakery-quality results.
1. Prepare Your Pans and Preheat
- Preheat your oven to 350°F (175°C)
- Grease three 8-inch round cake pans thoroughly with butter or non-stick spray
- Line the bottom of each pan with a parchment paper circle (trace the pan and cut it out)
- Lightly grease the parchment paper as well to ensure easy release
- Set the prepared pans aside while you make the batter
2. Mix the Dry Ingredients
- In a large mixing bowl, sift together the black cocoa powder and regular cocoa powder to remove any lumps (this is crucial for a smooth batter)
- Add the all-purpose flour, granulated sugar, baking powder, baking soda, and salt
- Whisk everything together for about 30 seconds until fully combined and evenly distributed
- Make sure there are no streaks of cocoa powder remaining
- Set this bowl aside while you prepare the wet ingredients
3. Combine the Wet Ingredients
- In a separate medium bowl, whisk together the room temperature buttermilk, vegetable oil, eggs, vanilla extract, and white vinegar
- Whisk vigorously for about 30 seconds until the mixture is smooth and the eggs are fully incorporated
- The mixture should look slightly frothy and well combined
- Let this sit while you brew your hot coffee (the heat will help bloom the chocolate flavor)
4. Make the Cake Batter
- Add the wet ingredient mixture to the bowl with the dry ingredients
- Using a hand mixer on medium speed or a stand mixer with the paddle attachment, beat for about 2 minutes until smooth
- Scrape down the sides and bottom of the bowl with a rubber spatula to ensure everything is incorporated
- Slowly pour in the hot brewed coffee while mixing on low speed (the batter will become very thin, and that’s exactly what you want)
- Mix for another 30 seconds until the batter is completely smooth and glossy
- The batter should be quite liquid, almost like chocolate milk, which creates that incredibly moist texture
5. Bake the Cake Layers
- Divide the batter evenly among the three prepared pans (I like to weigh them to ensure they’re equal)
- Each pan should be about halfway full
- Tap the pans gently on the counter a few times to release any air bubbles
- Place the pans on the middle rack of your preheated oven, spacing them apart so air can circulate
- Bake for 28-32 minutes, or until a toothpick inserted into the center comes out with just a few moist crumbs
- The tops should spring back when gently pressed
- Don’t overbake or the cake will be dry
6. Cool the Cake Layers
- Remove the pans from the oven and let them cool in the pans on wire racks for 15 minutes
- After 15 minutes, run a knife around the edges of each pan to loosen the cakes
- Invert the cakes onto the wire racks and carefully peel off the parchment paper
- Flip the cakes right-side up and let them cool completely before frosting (at least 1 hour)
- Warm cake will melt the frosting, so patience is key here
7. Make the Black Cocoa Buttercream
- In the bowl of your stand mixer fitted with the paddle attachment (or using a hand mixer), beat the softened butter on medium-high speed for 3-4 minutes until light and fluffy
- Sift the black cocoa powder and powdered sugar together to remove lumps
- Add the cocoa powder and powdered sugar to the butter in three additions, mixing on low speed after each addition to prevent a powdered sugar cloud
- Add the heavy cream, vanilla extract, and salt
- Beat on low speed for 1 minute, then increase to medium-high and beat for 3-4 minutes until the frosting is light, fluffy, and smooth
- If the frosting is too thick, add more cream one tablespoon at a time; if it’s too thin, add more powdered sugar
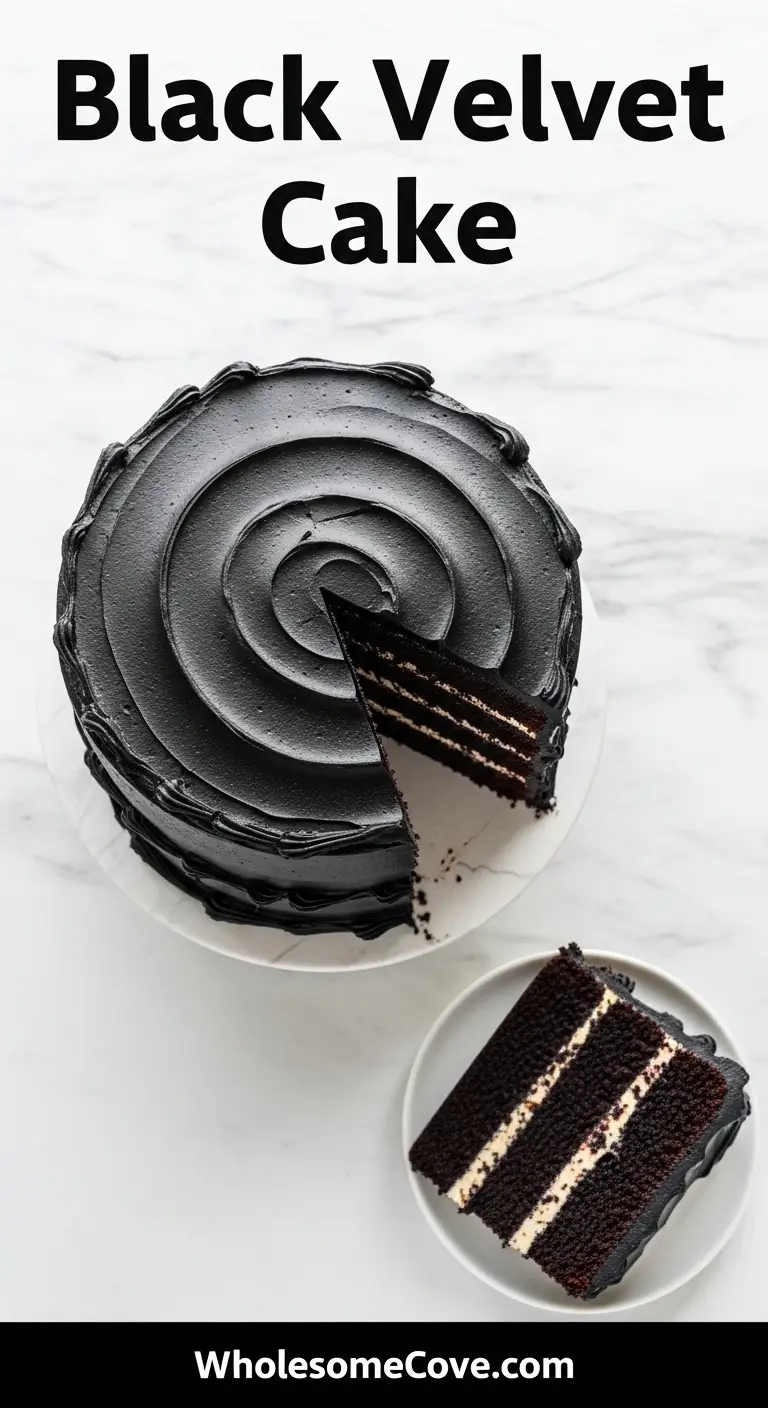
8. Level and Fill the Cake Layers
- Once the cakes are completely cool, use a cake leveler or serrated knife to trim off any domed tops so the layers are flat
- Place the first layer on your serving plate or cake board
- Spread about 3/4 cup of buttercream evenly across the top of the first layer, leaving a 1/4-inch border around the edge
- Place the second cake layer on top and repeat with another 3/4 cup of frosting
- Top with the third layer (placing it cut-side down for a flat top)
9. Apply the Crumb Coat
- Spread a very thin layer of frosting over the entire cake (top and sides) using an offset spatula
- This crumb coat doesn’t need to look perfect; its purpose is to seal in any loose crumbs
- Refrigerate the cake for 30 minutes to let the crumb coat firm up
- This step is essential for achieving a smooth final coat
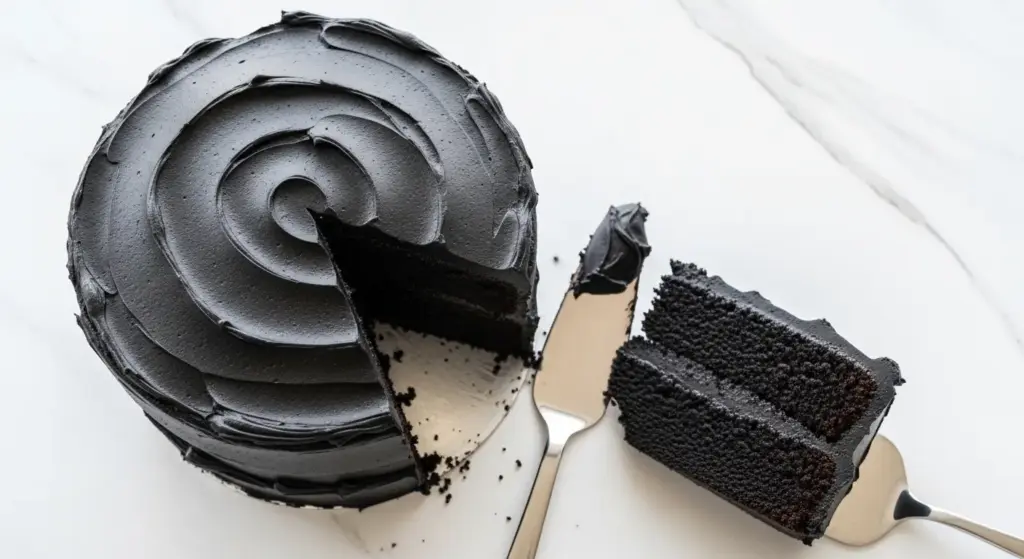
10. Apply the Final Frosting and Decorate
- Once the crumb coat is firm, apply the remaining frosting generously to the top and sides of the cake
- Use your offset spatula to smooth the frosting, holding it at a 45-degree angle against the cake
- If using a turntable, spin it slowly while holding the spatula steady against the cake for the smoothest finish
- For perfectly smooth sides, dip your spatula in hot water, dry it off, and run it along the frosting
- Decorate as desired with additional piped frosting, sprinkles, or themed decorations
- Refrigerate the finished cake for at least 1 hour before slicing for the cleanest cuts
You might also enjoy my Chocolate Chip Cookies Recipe for another classic dessert.
Tips for The Best Black Velvet Cake
After making this cake countless times and learning from a few mishaps along the way, I’ve gathered some essential tips that will help you achieve perfect results every time.
- Use actual black cocoa powder: While you can substitute with dark Dutch-process cocoa, you won’t get that true black color or the distinctive Oreo-like flavor. Black cocoa is worth ordering online for authentic results.
- Sift the cocoa powder thoroughly: Black cocoa powder clumps easily, and those lumps won’t dissolve during mixing. I learned this the hard way when I found cocoa pockets in my first attempt. Sift it twice if needed.
- Bring ingredients to room temperature: Cold eggs and buttermilk won’t emulsify properly with the oil, resulting in a less tender cake. Set them out 30 minutes before baking.
- Don’t skip the coffee: I know it sounds odd, but coffee enhances the chocolate flavor without making the cake taste like coffee. If you’re caffeine-sensitive, use decaf or hot water (though the flavor will be less intense).
- The batter should be very thin: When you first see how liquid this batter is, you might panic (I did!). But this thin consistency is exactly what creates the moist, tender texture. Trust the process.
- Weigh your cake pans: For perfectly even layers, weigh your filled pans before baking. They should all be within a few grams of each other.
- Don’t overbake: Start checking at 28 minutes. The toothpick test should show moist crumbs, not come out completely clean. Overbaking is the enemy of moisture.
- Let layers cool completely: I can’t stress this enough. Warm cake plus buttercream equals a melted, sliding mess. Wait the full hour, even if you’re impatient.
- Chill between frosting layers: The crumb coat needs to firm up before the final coat, or you’ll pull up crumbs and cake with your final layer of frosting.
- Use hot water on your spatula: For that bakery-smooth finish, dip your offset spatula in hot water, dry it quickly, and smooth the frosting. The slight warmth makes the buttercream glide beautifully.
Read Also: Eggnog Cake Recipe
What to Serve with Black Velvet Cake
This dramatic Black Velvet Cake pairs wonderfully with various beverages and complementary desserts that enhance the chocolate experience without overwhelming it.
For beverages, I love serving this cake with:
- Strong brewed coffee or espresso to complement the deep chocolate notes
- Hot Chocolate for an indulgent chocolate-on-chocolate experience
- Cold milk (classic and perfect for cutting through the richness)
- Red wine, particularly Cabernet Sauvignon or Port, for adult gatherings
- Champagne or prosecco for elegant celebrations
For complementary sides:
- Fresh berries like raspberries or strawberries to add brightness
- Vanilla ice cream for a classic combination
- Whipped cream for a lighter accompaniment
- Creme Brulee for an extra-special dessert spread
Variations of Black Velvet Cake
One of my favorite things about this Black Velvet Cake Recipe is how versatile it is for creative variations. Over the years, I’ve experimented with different flavors and fillings to keep things interesting.
- Black Velvet Oreo Cake: Crush Oreo cookies and fold them into the buttercream filling between layers. Top with whole Oreos for decoration. This amplifies the Oreo flavor that’s already present in the cake.
- Black Velvet Raspberry Cake: Spread raspberry jam or fresh raspberry compote between the layers before adding the buttercream. The tartness of raspberries cuts through the richness beautifully.
- Black Velvet Cream Cheese Frosting: Replace the chocolate buttercream with cream cheese frosting for a tangier, less sweet option that’s more traditional to velvet cakes.
- Cupcake Version: Divide the batter among 24 cupcake liners and bake for 18-22 minutes. Perfect for parties where slicing a cake isn’t practical.
- Black Velvet Bundt Cake: Pour the batter into a greased and floured Bundt pan and bake at 350°F for 45-55 minutes. Drizzle with chocolate ganache.
- Cookies and Cream Black Velvet: Add crushed Oreos directly to the cake batter (about 1 cup) for texture and extra cookie flavor throughout.
- Salted Caramel Black Velvet: Drizzle Caramel Sauce between the layers and add a pinch of sea salt to the frosting for a sweet-salty contrast.
- Mocha Black Velvet: Add 2 tablespoons of instant espresso powder to the cake batter and use coffee-flavored buttercream for a pronounced coffee flavor.
- Mini Layer Cakes: Use 6-inch pans instead of 8-inch for adorable individual cakes (perfect for intimate celebrations).
- Black Velvet Sheet Cake: Bake in a 9×13-inch pan for 35-40 minutes for easier serving at large gatherings.
Storage and Reheating
Proper storage is essential for keeping your Black Velvet Cake moist and delicious for days after baking. I’ve tested various storage methods to find what works best.
- Room Temperature Storage: Store the frosted cake under a cake dome or in an airtight container at room temperature for up to 2 days. Keep it away from direct sunlight or heat sources.
- Refrigerator Storage: The cake will stay fresh in the refrigerator for up to 5 days when properly covered. Place it in an airtight cake carrier or cover tightly with plastic wrap. Let the cake sit at room temperature for 30 minutes before serving for the best texture and flavor.
- Freezing Unfrosted Layers: Wrap each cooled cake layer individually in plastic wrap, then aluminum foil. Freeze for up to 3 months. Thaw in the refrigerator overnight before frosting.
- Freezing Frosted Cake: Freeze the frosted cake uncovered for 1 hour until the frosting is firm, then wrap tightly in plastic wrap and aluminum foil. Freeze for up to 2 months. Thaw overnight in the refrigerator, then bring to room temperature before serving.
- Freezing Individual Slices: Wrap individual slices in plastic wrap and store in a freezer bag for up to 3 months. Perfect for when you want just a single serving.
- Reheating Tip: If you prefer warm cake, microwave individual slices for 10-15 seconds. The cake becomes incredibly soft and the frosting gets slightly melty (my favorite way to enjoy leftovers!).
- Frosting Storage: Extra buttercream can be refrigerated in an airtight container for up to 1 week or frozen for up to 3 months. Let it come to room temperature and rewhip before using.
For more dessert storage tips, check out my Pumpkin Cheesecake Recipe.
Nutritional Facts
Per Slice (1/12 of cake):
- Calories: 645
- Total Fat: 34g
- Saturated Fat: 16g
- Cholesterol: 95mg
- Sodium: 385mg
- Total Carbohydrates: 82g
- Dietary Fiber: 3g
- Sugars: 64g
- Protein: 6g
Note: Nutritional values are approximate and will vary based on specific ingredients used and portion sizes.
Another rich dessert option is my Fruit Cocktail Cake Recipe.
Health Benefits of Key Ingredients
While Black Velvet Cake is definitely an indulgent treat, several of its key ingredients do offer some nutritional benefits worth noting.
Black cocoa powder provides:
- Antioxidants: Contains flavonoids that help fight free radicals and reduce inflammation
- Minerals: Good source of iron, magnesium, and zinc
- Mood Enhancement: Contains compounds that may boost serotonin and endorphin levels
- Heart Health: May help lower blood pressure and improve blood flow
Buttermilk contributes:
- Probiotics: Contains beneficial bacteria that support gut health
- Calcium: Essential for bone health and muscle function
- Protein: Helps with tissue repair and satiety
- B Vitamins: Supports energy metabolism and nervous system function
Eggs provide:
- Complete Protein: All nine essential amino acids
- Choline: Important for brain health and development
- Vitamin D: Supports immune function and bone health
- Lutein and Zeaxanthin: Antioxidants that protect eye health
Of course, this is still a dessert meant to be enjoyed in moderation as part of a balanced diet. The combination of sugar, butter, and oil makes it quite calorie-dense, so savor each slice mindfully!
FAQs About Black Velvet Cake
1. Can I use regular cocoa powder instead of black cocoa powder?
You can substitute with dark Dutch-process cocoa powder, but the cake won’t achieve that dramatic black color or the distinctive Oreo-like flavor. If you use regular cocoa powder, you’ll end up with a dark brown cake that tastes more like traditional chocolate cake.
To get closer to black with regular cocoa, you would need to add black food gel coloring. However, I highly recommend ordering black cocoa powder online since it’s the key ingredient that makes this recipe special.
2. Why is my cake dense instead of light and fluffy?
Several factors can cause a dense cake. The most common issue is overmixing the batter after adding the wet ingredients to the dry, which develops too much gluten.
Another culprit could be using old baking powder or baking soda that’s lost its leavening power. Also, make sure you’re measuring flour correctly by spooning it into the measuring cup and leveling off, not scooping directly from the bag, which compacts the flour and gives you too much.
3. Can I make this cake ahead of time?
Absolutely! You can bake the cake layers up to 2 days in advance and store them wrapped in plastic wrap at room temperature.
For longer storage, freeze the unfrosted layers for up to 3 months. You can also make the entire frosted cake a day ahead and refrigerate it, though I prefer to frost the day of serving for the best texture.
4. My frosting is grainy. How do I fix it?
Grainy frosting usually means the powdered sugar wasn’t fully incorporated or there were lumps in the cocoa powder. Sift both before adding them to the butter.
If your frosting is already made and grainy, try beating it on high speed for an additional 3-5 minutes. The prolonged mixing often smooths out small sugar crystals. If that doesn’t work, you can also try adding a tablespoon of heavy cream and beating again.
5. Can I make this recipe as cupcakes?
Yes! This batter makes about 24 standard cupcakes. Line your cupcake tins with paper liners and fill each about 2/3 full.
Bake at 350°F for 18-22 minutes, until a toothpick inserted in the center comes out with moist crumbs. Let them cool completely before frosting. The same amount of buttercream will frost all 24 cupcakes generously.
Black Velvet Cake
Ingredients
- 2 cups all-purpose flour - 250g
- 3/4 cup black cocoa powder - 75g, sifted
- 1/4 cup natural unsweetened cocoa powder - 25g
- 2 cups granulated sugar - 400g
- 2 teaspoons baking powder
- 1 1/2 teaspoons baking soda
- 1 teaspoon salt
- 1 cup buttermilk - 240ml, room temperature
- 1/2 cup vegetable oil - 120ml
- 2 large eggs - room temperature
- 2 teaspoons vanilla extract
- 1 tablespoon white vinegar
- 1 cup hot brewed coffee - 240ml, or hot water
- 1 1/2 cups unsalted butter - 340g, softened
- 4 cups powdered sugar - 480g
- 3/4 cup black cocoa powder - 75g, sifted
- 1/4 cup heavy cream - 60ml
- 2 teaspoons vanilla extract
- 1/4 teaspoon salt
Equipment
- 3 8-inch round cake pans - 2 inches deep
- Parchment paper
- Large mixing bowls - at least 2
- Stand mixer or hand mixer - with paddle attachment
- Wire whisk
- Rubber spatula
- Measuring cups and spoons
- Kitchen scale - recommended for accuracy
- Wire cooling racks
- Cake leveler or serrated knife
- Offset spatula - for frosting
- Cake turntable - optional but helpful
- Fine mesh sieve - for sifting
Method
- Preheat oven to 350°F (175°C). Grease three 8-inch round cake pans, line with parchment paper, and grease the paper.
- Sift both cocoa powders together, then whisk with flour, sugar, baking powder, baking soda, and salt until combined.
- In a separate bowl, whisk together buttermilk, oil, eggs, vanilla, and vinegar until smooth and frothy.
- Add wet ingredients to dry and beat for 2 minutes until smooth. Slowly pour in hot coffee while mixing on low, then mix 30 seconds more until batter is thin and glossy.
- Divide batter evenly among prepared pans and tap gently to release air bubbles. Bake 28-32 minutes until toothpick comes out with moist crumbs.
- Cool in pans 15 minutes, then invert onto wire racks, remove parchment, and cool completely (at least 1 hour).
- Beat softened butter 3-4 minutes until fluffy. Add sifted cocoa and powdered sugar in three additions, then add cream, vanilla, and salt. Beat 3-4 minutes until light and smooth.
- Level cake tops if needed. Place first layer on serving plate, spread 3/4 cup frosting on top, add second layer, repeat frosting, then top with third layer.
- Apply thin crumb coat over entire cake and refrigerate 30 minutes to firm up.
- Apply final layer of frosting to top and sides, smoothing with offset spatula. For best finish, dip spatula in hot water between passes. Refrigerate 1 hour before slicing.
Nutrition
Notes
- Black cocoa powder is essential for the authentic color and Oreo-like flavor. Dark Dutch-process cocoa can substitute but won’t be as dark.
- Sift cocoa powder thoroughly to prevent lumps in the batter and frosting.
- Room temperature ingredients (eggs, buttermilk, butter) are crucial for proper emulsification and texture.
- The thin batter consistency is correct and creates the moist, tender crumb.
- Hot coffee enhances chocolate flavor without adding coffee taste. Use decaf or hot water if preferred.
- Don’t overbake – check at 28 minutes. Toothpick should have moist crumbs, not come out clean.
- Weigh filled pans for even layers. They should all be within a few grams of each other.
- Let cakes cool completely before frosting or the buttercream will melt.
- Store frosted cake at room temperature up to 2 days or refrigerate up to 5 days in airtight container.
- Freeze unfrosted layers wrapped in plastic wrap and foil for up to 3 months.
Private Notes
Tried this recipe?
Let us know how it was!Final Thoughts
This Black Velvet Cake Recipe has become one of my most requested desserts, and I never tire of seeing people’s reactions when they slice into those dramatic black layers. There’s something magical about a cake that looks this dramatic but tastes so incredibly delicious.
The combination of tender, moist cake layers and silky chocolate buttercream creates a dessert that’s both visually stunning and absolutely delicious to eat. I love that the black cocoa powder gives you that intense color naturally, without any artificial dyes that might stain your hands or mouth.
Give this recipe a try for your next celebration, and don’t be surprised when everyone asks for seconds! I’d love to hear how your Black Velvet Cake turns out, so feel free to leave a comment below and let me know if you tried any of the variations. Happy baking!
Recommended:
- Amish Apple Cake Recipe
- Coffee Cake Recipe Using Cake Mix
- Cannoli Poke Cake Recipe
- Healthy Carrot Cake Recipe
- Easy Carrot Cake Recipe
- Pumpkin Roll Recipe
- White Fruitcake Recipe
- Chocolate Chip Bread Recipe
- Old Fashioned Pumpkin Bread Recipe
- Healthy Banana Bread Recipe
