

Last year, I attempted my first Red Velvet Cheesecake Cake Recipe for Valentine’s Day, and let me tell you, it was a complete disaster. The cheesecake layer cracked like the Grand Canyon, one of my red velvet layers collapsed, and the whole thing looked like it had been through an earthquake.

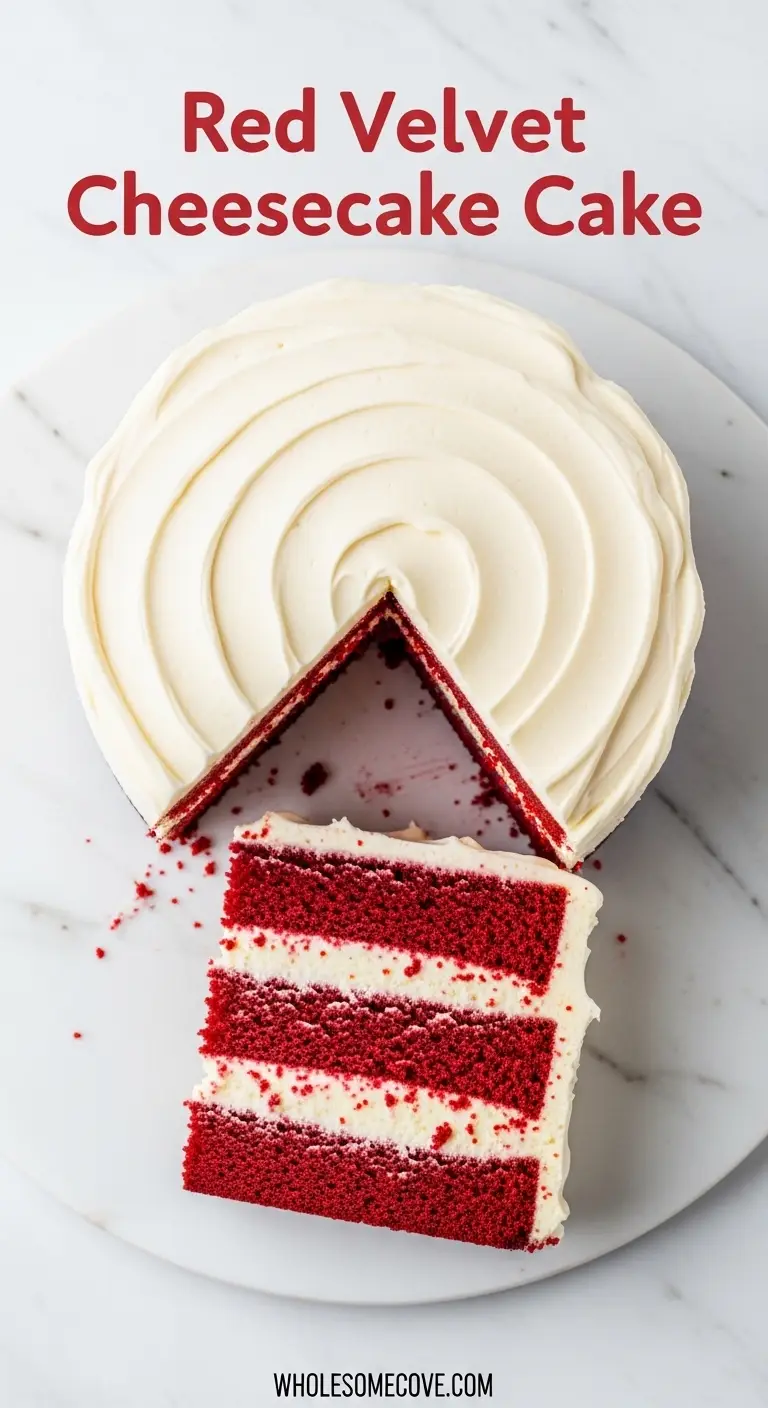
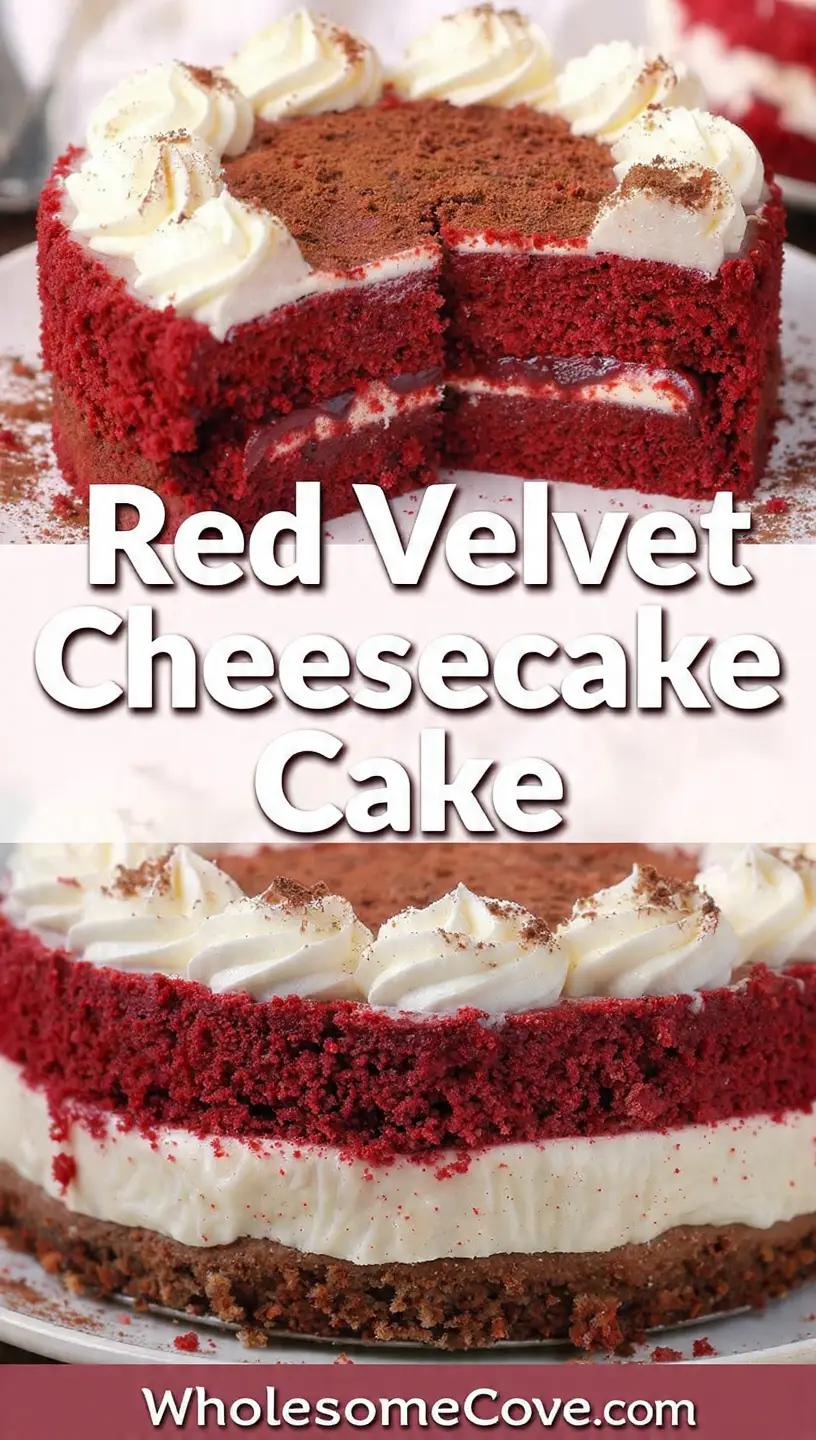
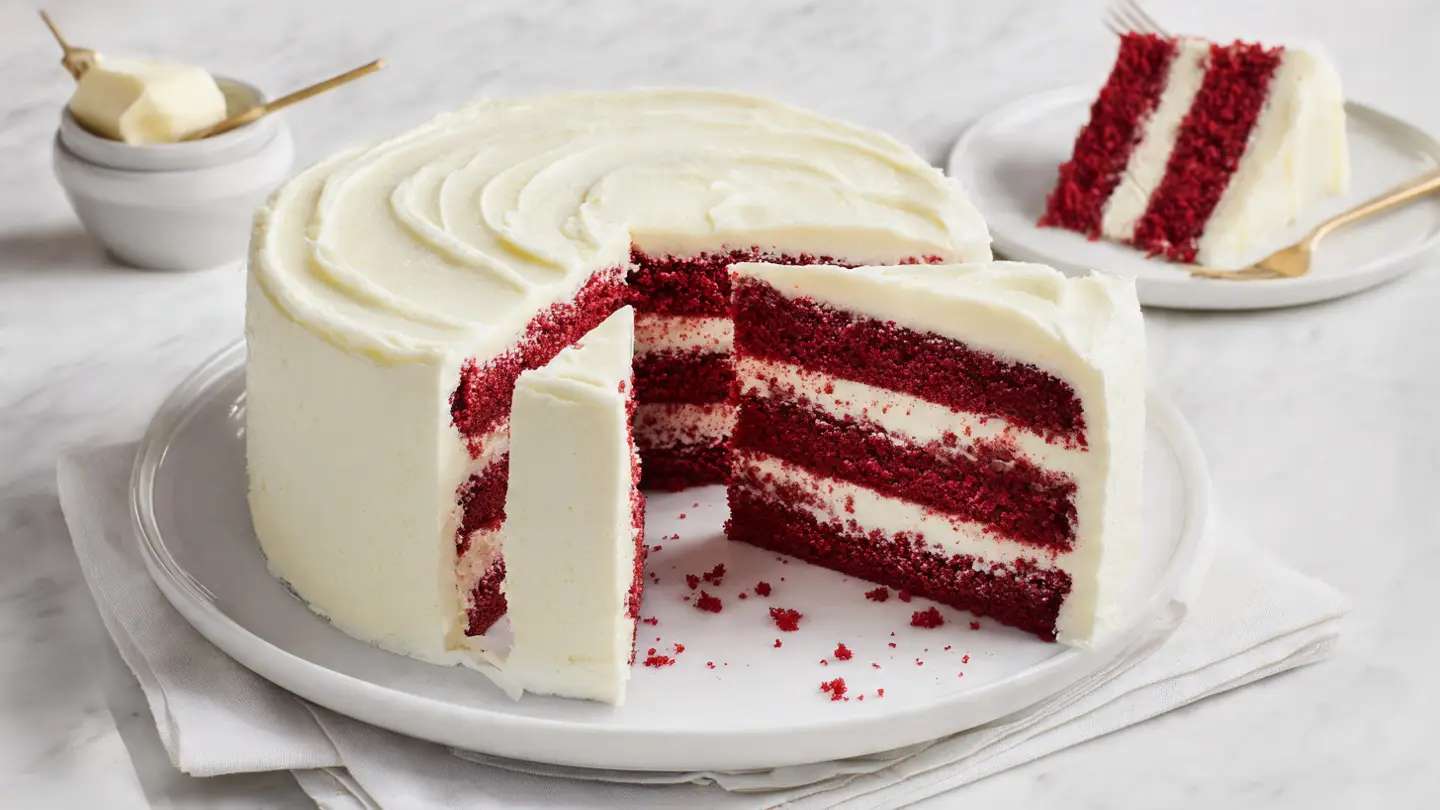
Fast forward to now, and this Red Velvet Cheesecake Cake has become my absolute showstopper dessert. After countless trials, I’ve mastered the art of creating perfectly moist red velvet layers with a dense, creamy cheesecake sandwiched right in the middle, all covered in smooth cream cheese frosting.
This isn’t just another red velvet cake. The magic happens when you bite through the tangy cream cheese frosting, hit that tender red velvet layer, then reach the rich, dense cheesecake in the center.
It’s the kind of dessert that makes people stop mid-conversation and ask for the recipe. I’ve learned that freezing the cheesecake layer before assembly is the secret to clean, professional-looking layers every single time.
| Quick Recipe Summary | |
|---|---|
| Prep Time | 45 minutes |
| Cook Time | 1 hour 25 minutes |
| Total Time | 6 hours 10 minutes (including chilling) |
| Servings | 12 slices |
| Difficulty Level | Intermediate |
If you love this showstopping dessert, you’ll absolutely adore my Blue Velvet Cake Recipe for a fun twist on the classic.
Why You’ll Love This Red Velvet Cheesecake Cake Recipe
This cake combines two beloved desserts into one incredible creation. You get the best of both worlds without having to choose between cake and cheesecake.
The contrast in textures is absolutely divine. The fluffy, tender red velvet cake pairs perfectly with the dense, creamy cheesecake layer, creating an eating experience that’s truly unforgettable.
- Impressive presentation: This cake looks like it came straight from a high-end bakery, with its stunning layers revealed when you slice into it
- Perfect for special occasions: Valentine’s Day, Christmas, birthdays, or anniversaries get instantly elevated with this showstopper
- Make-ahead friendly: You can bake components a day or two in advance, making party prep so much easier
- Not overly sweet: The tangy cream cheese frosting and cheesecake layer balance the sweetness beautifully
- Crowd-pleaser: I’ve never served this to someone who didn’t ask for seconds
Another favorite variation to try is my Red Velvet Cake Recipe if you want the classic without the cheesecake layer.
Ingredients
The beauty of this recipe is that most ingredients are probably already sitting in your kitchen. I always use room temperature cream cheese because it creates the smoothest, creamiest texture without lumps.
For the Cheesecake Layer:
- 24 oz (680g) cream cheese, softened to room temperature
- 3/4 cup (150g) granulated sugar
- 3 large eggs, room temperature
- 1/2 cup (120ml) sour cream
- 1/2 cup (120ml) heavy cream
- 2 tablespoons all-purpose flour
- 1 teaspoon vanilla extract
For the Red Velvet Cake Layers:
- 2 1/2 cups (300g) all-purpose flour
- 2 tablespoons unsweetened cocoa powder
- 1 teaspoon baking soda
- 1 teaspoon salt
- 1 1/2 cups (300g) granulated sugar
- 1 1/2 cups (360ml) vegetable oil
- 2 large eggs, room temperature
- 1 cup (240ml) buttermilk, room temperature
- 2 tablespoons red food coloring
- 1 teaspoon white vinegar
- 1 teaspoon vanilla extract
For the Cream Cheese Frosting:
- 16 oz (450g) cream cheese, softened
- 1 cup (225g) unsalted butter, softened
- 6 cups (720g) powdered sugar
- 2 teaspoons vanilla extract
- 2-3 tablespoons heavy cream (as needed for consistency)
For a different take on cheesecake desserts, check out my Creme Brulee Cheesecake Recipe.
Kitchen Equipment Needed
Having the right tools makes this complex recipe so much easier. After my first failed attempt, I invested in proper equipment and the difference was night and day.
- 9-inch springform pan for the cheesecake layer
- Two 9-inch round cake pans for the red velvet layers
- Stand mixer or hand mixer
- Large mixing bowls
- Parchment paper
- Aluminum foil
- Offset spatula for frosting
- Cake leveler or serrated knife
- Wire cooling racks
- Rubber spatula
If you’re passionate about baking, you’ll want to explore my Pumpkin Cheesecake Recipe next.
Recommended Products for This Recipe
After making this cake dozens of times, I’ve discovered a few products that genuinely make the process easier and the results better.
1. Nordic Ware Leakproof Springform Pan
I cannot stress enough how important a quality springform pan is for this recipe. Cheap pans leak, and nothing is worse than batter seeping out during baking. This Nordic Ware pan has never failed me, and the cheesecake releases perfectly every single time without sticking.
2. Wilton Bake Even Strips
These fabric strips changed my cake-baking game completely. You soak them in water and wrap them around your cake pans, and they ensure your cakes bake flat and level without domes. No more wasting cake when you have to trim off the tops, and your layers stack beautifully.
3. AmeriColor Super Red Gel Food Coloring
Liquid food coloring just doesn’t cut it for achieving that deep, vibrant red velvet color. This gel coloring is incredibly concentrated, so you need less of it, and it doesn’t thin out your batter. The color is stunning and doesn’t fade during baking.
4. Ateco Offset Spatula Set
Frosting this tall cake evenly requires the right tools. These offset spatulas make spreading frosting smooth and effortless, and they help you achieve those clean, professional-looking sides. I use the larger one for the sides and the smaller one for detail work.
You might also enjoy trying my Chocolate Chip Cookies Recipe for a simpler dessert option.

Step-by-Step Instructions: How to Make Red Velvet Cheesecake Cake
The key to success with this recipe is not rushing the process. Take your time with each component, and you’ll end up with a bakery-quality cake.
1. Prepare the Cheesecake Layer
- Preheat your oven to 300°F (148°C) and position a rack in the center of the oven
- Line the bottom of your 9-inch springform pan with parchment paper, then spray the entire inside with non-stick cooking spray, making sure to get into all the crevices where the pan meets the bottom
- Wrap the outside of the springform pan tightly with two layers of heavy-duty aluminum foil, ensuring the foil comes up at least halfway up the sides of the pan to prevent any water from seeping in during the water bath
- In your stand mixer fitted with the paddle attachment (or using a hand mixer), beat the softened cream cheese on medium-low speed for about 2-3 minutes until it’s completely smooth and fluffy with no lumps remaining
- Add the granulated sugar and flour to the cream cheese, then continue beating on low speed for another 2 minutes, scraping down the sides and bottom of the bowl at least twice to ensure everything is evenly mixed
- Add the eggs one at a time, mixing on the lowest speed possible after each addition until just incorporated, being careful not to overbeat as this can incorporate too much air and cause cracks
- Pour in the sour cream, heavy cream, and vanilla extract, then mix on low speed for about 30 seconds until the batter is smooth and uniform in color, again scraping the bowl to ensure no pockets of unmixed ingredients remain
- Pour the cheesecake batter into your prepared springform pan, then gently tap the pan on the counter 5-6 times to release any air bubbles trapped in the batter
- Place the springform pan inside a larger roasting pan, then carefully pour hot water into the roasting pan until it comes about 1 inch (2.5cm) up the sides of the springform pan
- Bake for 55-65 minutes, until the edges are set but the center still has a slight jiggle when you gently shake the pan (it should wobble like jello, not slosh like liquid)
- Turn off the oven, crack the oven door open about 4 inches, and let the cheesecake cool in the oven for 1 hour to prevent sudden temperature changes that cause cracking
- Remove from the oven and the water bath, then let it cool completely on a wire rack for another hour at room temperature
- Once cooled, wrap the entire springform pan (still with the cheesecake inside) tightly with plastic wrap, then place it in the freezer for at least 3 hours or overnight until it’s completely frozen solid
2. Make the Red Velvet Cake Layers
- Preheat your oven to 350°F (175°C) and position racks in the upper and lower thirds of the oven for even baking
- Grease two 9-inch round cake pans with butter or non-stick spray, then line the bottoms with parchment paper rounds, and grease the parchment as well
- Dust the greased pans lightly with flour, tapping out any excess so you have just a thin coating on all surfaces
- In a medium bowl, whisk together the flour, cocoa powder, baking soda, and salt until well combined with no visible streaks of cocoa, then set aside
- In your stand mixer bowl (or a large bowl if using a hand mixer), combine the vegetable oil and granulated sugar, then beat on medium speed for 2 minutes until the mixture is lighter in color and well combined
- Add the eggs one at a time, beating on medium speed for about 30 seconds after each addition until fully incorporated and the mixture is smooth
- In a measuring cup or small bowl, whisk together the buttermilk, red food coloring, vinegar, and vanilla extract until the color is evenly distributed throughout
- With your mixer on low speed, add about one-third of the flour mixture to the oil mixture, mixing just until you can barely see any dry flour remaining
- Pour in half of the buttermilk mixture, mixing on low speed until just combined, then scrape down the sides of the bowl
- Continue alternating between flour mixture and buttermilk mixture, ending with the flour mixture, mixing each addition only until just combined to avoid developing too much gluten which would make the cake tough
- Give the batter a few final stirs by hand with a rubber spatula, scraping the bottom and sides of the bowl to ensure everything is evenly mixed
- Divide the batter evenly between your two prepared cake pans, using a kitchen scale for precision if you have one (each pan should have about 650-700g of batter)
- Bake for 28-32 minutes, rotating the pans halfway through baking for even cooking, until a toothpick inserted into the center comes out with just a few moist crumbs attached (not wet batter)
- Let the cakes cool in their pans on wire racks for 15 minutes, then run a knife around the edges to loosen them
- Carefully invert the cakes onto the wire racks, peel off the parchment paper, then flip them right-side up to cool completely (this should take about 1 hour)
3. Prepare the Cream Cheese Frosting
- In your stand mixer bowl fitted with the paddle attachment (or using a large bowl and hand mixer), beat the softened cream cheese and butter together on medium speed for 3-4 minutes until the mixture is completely smooth, fluffy, and lighter in color
- Reduce the mixer speed to low, then gradually add the powdered sugar one cup at a time, mixing well after each addition and scraping down the bowl as needed
- Add the vanilla extract and 2 tablespoons of heavy cream, then beat on medium-high speed for 2-3 minutes until the frosting is light, fluffy, and smooth
- If the frosting seems too thick to spread easily, add the remaining tablespoon of heavy cream and beat for another minute, or if it’s too thin, add more powdered sugar 1/4 cup at a time until you reach the desired consistency
- The frosting should hold its shape when you lift the beaters but still be spreadable without tearing the cake
4. Assemble the Cake
- Remove the frozen cheesecake from the freezer and unwrap it, then carefully release and remove the springform pan sides, leaving the cheesecake on the pan bottom
- Peel away the parchment paper from the bottom of the cheesecake, working slowly and carefully so you don’t damage the surface
- Using a long serrated knife, carefully level the tops of both red velvet cake layers by sawing back and forth in a gentle motion to remove any doming, creating flat, even surfaces for stacking
- Place your cake board or serving plate on a turntable if you have one, then add a small dollop of frosting to the center and spread it around to create a sticky base that will prevent the cake from sliding
- Set the first red velvet cake layer on the serving plate, cut side up so you have the flattest surface possible
- Spread a thin layer of cream cheese frosting (about 1/2 cup) evenly over the top of this first cake layer, going all the way to the edges
- Carefully place the frozen cheesecake layer on top of the frosted cake layer, centering it as best you can (if the cheesecake is slightly larger than the cake, don’t worry, it will soften and you can trim it slightly)
- Spread another thin layer of frosting (about 1/2 cup) over the top of the cheesecake layer
- Place the second red velvet cake layer on top of the cheesecake, cut side down so the flat bottom of the cake forms the top of your assembled cake
- Apply a thin crumb coat of frosting all over the entire cake, spreading it as smoothly as possible and using just enough to seal in any loose crumbs, then refrigerate the cake for 30 minutes to set the crumb coat
- Remove the cake from the refrigerator and apply the final layer of frosting, using an offset spatula to create smooth sides and top, or create whatever decorative pattern you prefer
- If desired, pipe decorative borders, add fresh berries, or sprinkle red velvet cake crumbs on top for garnish
- Refrigerate the assembled cake for at least 2 hours before slicing to allow the cheesecake to thaw slightly and all the layers to set properly
For another impressive dessert, try my Fruit Tart Recipe.
Tips for The Best Red Velvet Cheesecake Cake
Through all my attempts at perfecting this recipe, I’ve learned some crucial lessons that will save you time and frustration.
- Temperature matters for ingredients: Bring all dairy products to room temperature before starting, as cold ingredients won’t mix smoothly and can create lumps in both the cheesecake and cake batters
- Don’t skip the water bath: This is essential for preventing cracks in your cheesecake and ensuring it bakes evenly without drying out around the edges
- Freeze the cheesecake completely: A fully frozen cheesecake is much easier to handle and won’t squish or break when you’re assembling the layers
- Use gel food coloring: Liquid food coloring requires so much more to achieve that vibrant red color, and it can thin out your batter
- Measure flour correctly: Spoon flour into your measuring cup and level it off with a knife rather than scooping directly from the bag, which packs it down and gives you too much flour
- Don’t overmix the cake batter: Once you add the flour, mix just until you can’t see dry flour anymore, as overmixing develops gluten and makes the cake tough and dense
- Cool cakes completely before assembly: Warm cakes will melt your frosting and create a messy, unstable structure
- Chill between frosting layers: The crumb coat needs time to set in the refrigerator before you add the final frosting layer
- Use a sharp knife and clean between cuts: For beautiful slices, use a long, sharp knife and wipe it clean with a hot, damp towel between each cut
You’ll also love my Shepherds Pie Recipe for a completely different comfort food experience.
What to Serve with Red Velvet Cheesecake Cake

This cake is rich and decadent, so I like to serve it with lighter accompaniments that won’t overwhelm your taste buds.
- Fresh berries: Strawberries, raspberries, or blackberries add a tart contrast that cuts through the richness
- Whipped cream: A simple dollop of lightly sweetened whipped cream adds airiness without extra heaviness
- Coffee or espresso: The slight bitterness balances the sweetness perfectly and is my go-to pairing
- Vanilla ice cream: For an extra indulgent treat, serve a slice with a small scoop of vanilla ice cream
- Champagne or sparkling wine: For special occasions, the bubbles and acidity complement the creamy frosting beautifully
Another crowd-pleaser to serve at gatherings is my Baked Ziti Recipe.
Variations of Red Velvet Cheesecake Cake
Once you’ve mastered the classic version, these variations can add fun twists for different occasions.
- White Chocolate Red Velvet Cheesecake: Add 4 oz of melted white chocolate to the cheesecake batter for extra richness and a subtle flavor boost
- Chocolate Ganache Drip: Top the frosted cake with a chocolate ganache drip for a dramatic, professional bakery look
- Red Velvet Crumb Topping: Save your cake scraps when leveling, let them dry out, then pulse them into crumbs and press them onto the sides of the frosted cake
- Mini Cheesecake Cakes: Use this same recipe but make cupcake-sized versions by layering red velvet cupcakes with small rounds of cheesecake
- Oreo Red Velvet Cheesecake: Crush Oreos and fold them into the cheesecake batter before baking for cookies and cream variation
- Raspberry Swirl: Swirl 1/2 cup of raspberry puree into the cheesecake batter before baking for fruity tartness
- Cream Cheese Filled: Instead of a separate cheesecake layer, pipe cream cheese filling between the red velvet layers for a simpler approach
If you enjoy trying dessert variations, check out my Eggnog Cake Recipe for a seasonal twist.
Storage and Reheating
Proper storage keeps this cake fresh and delicious for days.
Storing:
- Cover the cake loosely with plastic wrap or place it in a cake keeper to prevent it from drying out
- Store in the refrigerator for up to 5 days
- The cake actually tastes better after a day in the fridge as the flavors meld together beautifully
- Always keep this cake refrigerated due to the cream cheese frosting and cheesecake layer, never at room temperature for more than 2 hours
Freezing:
- Wrap individual slices tightly in plastic wrap, then in aluminum foil, and freeze for up to 3 months
- For the whole cake, freeze it unwrapped for 1 hour until the frosting is firm, then wrap it carefully in plastic wrap and foil
- Label with the date so you know how long it’s been frozen
- Thaw frozen slices in the refrigerator overnight for best texture
Reheating:
- This cake is best served chilled or at room temperature, so there’s no need to reheat it
- If you prefer softer cake, let refrigerated slices sit at room temperature for 15-20 minutes before serving
- Never microwave this cake as it will melt the frosting and make the cheesecake layer weepy
For more make-ahead dessert ideas, try my Fruit Cocktail Cake Recipe.
Nutritional Facts
Per Serving (1 slice, based on 12 servings):
- Calories: 780
- Total Fat: 48g
- Saturated Fat: 22g
- Cholesterol: 185mg
- Sodium: 450mg
- Total Carbohydrates: 82g
- Dietary Fiber: 1g
- Sugars: 64g
- Protein: 9g
Please note that these nutritional values are approximate and can vary based on specific brands of ingredients used and exact portion sizes.
Looking for lighter options? Try my Healthy Carrot Cake Recipe.
Health Benefits of Key Ingredients
While this is definitely an indulgent dessert, some ingredients do offer nutritional benefits.
- Cream cheese: Provides calcium for strong bones and teeth, along with vitamin A for eye health and immune function
- Eggs: Excellent source of high-quality protein and contain all nine essential amino acids your body needs
- Buttermilk: Contains probiotics that support digestive health and is easier to digest than regular milk for many people
- Cocoa powder: Rich in antioxidants called flavonoids that may support heart health and reduce inflammation
- Heavy cream: Contains fat-soluble vitamins like A, D, E, and K that are important for various bodily functions
If you’re interested in healthier dessert options, my Healthy Tiramisu Recipe is worth exploring.
FAQs About Red Velvet Cheesecake Cake
1. Can I use a box mix for the red velvet cake layers?
Absolutely! While I prefer the flavor and texture of homemade red velvet cake, a quality box mix works in a pinch.
Just follow the package directions and divide the batter between two 9-inch pans. The baking time should be similar, around 25-30 minutes.
2. Why did my cheesecake crack?
Cheesecake cracks happen when it’s overbaked, cooled too quickly, or if too much air was incorporated during mixing. Make sure you mix on low speed, don’t overbake past that slight jiggle in the center, and cool gradually in the oven with the door cracked.
The water bath also helps maintain even, gentle heat that prevents cracking.
3. Can I make this cake ahead of time?
Yes, this is actually a perfect make-ahead dessert! You can bake the cheesecake layer up to 3 days in advance and keep it frozen.
The red velvet cake layers can be baked a day ahead, wrapped tightly in plastic wrap, and stored at room temperature. Assemble the cake the day before serving for best results.
4. How do I get clean slices when cutting?
The secret is using a long, sharp knife and cleaning it between every single cut. Dip the knife in hot water, wipe it completely dry with a towel, then make your cut.
Repeat this process for each slice, and you’ll get those picture-perfect pieces every time.
5. Can I make this in a different size pan?
You can, but you’ll need to adjust baking times accordingly. For 8-inch pans, the layers will be taller and need about 5 minutes longer to bake.
For cupcake-sized versions, reduce baking time to about 18-20 minutes and use small cheesecake rounds. Just watch them carefully and test for doneness.
For another fun cake variation, check out my Cannoli Poke Cake Recipe.
Red Velvet Cheesecake Cake
Ingredients
- 24 oz cream cheese - 680g, softened to room temperature
- 3/4 cup granulated sugar - 150g
- 3 large eggs - room temperature
- 1/2 cup sour cream - 120ml
- 1/2 cup heavy cream - 120ml
- 2 tablespoons all-purpose flour
- 1 teaspoon vanilla extract
- 2 1/2 cups all-purpose flour - 300g
- 2 tablespoons unsweetened cocoa powder
- 1 teaspoon baking soda
- 1 teaspoon salt
- 1 1/2 cups granulated sugar - 300g
- 1 1/2 cups vegetable oil - 360ml
- 2 large eggs - room temperature
- 1 cup buttermilk - 240ml, room temperature
- 2 tablespoons red food coloring - gel coloring preferred
- 1 teaspoon white vinegar
- 1 teaspoon vanilla extract
- 16 oz cream cheese - 450g, softened
- 1 cup unsalted butter - 225g, softened
- 6 cups powdered sugar - 720g
- 2 teaspoons vanilla extract
- 2-3 tablespoons heavy cream - as needed for consistency
Equipment
- 9-inch springform pan - for cheesecake layer
- Two 9-inch round cake pans - for red velvet layers
- Stand mixer or hand mixer
- Large mixing bowls
- Parchment paper
- Aluminum foil - heavy-duty for water bath
- Offset spatula - for frosting
- Cake leveler or serrated knife
- Wire cooling racks
- Rubber spatula
Method
- Preheat oven to 300°F (148°C). Line a 9-inch springform pan with parchment paper, spray with non-stick spray, and wrap the outside tightly with two layers of aluminum foil.
- Beat cream cheese until smooth (2-3 minutes), then add sugar and flour, beating for 2 minutes. Add eggs one at a time on low speed, then mix in sour cream, heavy cream, and vanilla until just combined.
- Pour batter into prepared pan, tap to release air bubbles, then place in a roasting pan. Add hot water to come 1 inch up the sides and bake for 55-65 minutes until edges are set but center jiggles slightly.
- Turn off oven, crack door open 4 inches, and let cheesecake cool in oven for 1 hour. Remove from water bath, cool completely at room temperature for 1 hour, then wrap tightly and freeze for at least 3 hours or overnight.
- Preheat oven to 350°F (175°C). Grease two 9-inch round cake pans, line with parchment, grease parchment, and dust with flour.
- Whisk together flour, cocoa powder, baking soda, and salt in a medium bowl. In a large bowl, beat oil and sugar for 2 minutes, then add eggs one at a time, beating well after each.
- Whisk together buttermilk, red food coloring, vinegar, and vanilla. Alternately add flour mixture and buttermilk mixture to oil mixture, beginning and ending with flour, mixing just until combined.
- Divide batter evenly between prepared pans and bake for 28-32 minutes, rotating pans halfway through, until a toothpick comes out with moist crumbs. Cool in pans for 15 minutes, then invert onto wire racks to cool completely (about 1 hour).
- Beat cream cheese and butter together for 3-4 minutes until smooth and fluffy. Gradually add powdered sugar one cup at a time, then add vanilla and 2 tablespoons heavy cream, beating on medium-high for 2-3 minutes until light and fluffy.
- Remove frozen cheesecake from springform pan and peel away parchment. Level the tops of both red velvet layers with a serrated knife.
- Place first red velvet layer cut-side up on serving plate. Spread 1/2 cup frosting on top, place frozen cheesecake layer on top, spread another 1/2 cup frosting, then top with second red velvet layer cut-side down.
- Apply a thin crumb coat of frosting over entire cake and refrigerate for 30 minutes. Apply final layer of frosting smoothly over cake, creating desired finish with offset spatula.
- Refrigerate assembled cake for at least 2 hours before slicing to allow cheesecake to thaw slightly and layers to set. For clean slices, use a hot knife wiped clean between cuts.
Nutrition
Notes
- All dairy ingredients must be at room temperature for smooth mixing and proper texture.
- Don’t skip the water bath for the cheesecake – it prevents cracks and ensures even baking.
- Freezing the cheesecake layer completely makes assembly much easier and prevents squishing.
- Use gel food coloring instead of liquid for vibrant red color without thinning the batter.
- Don’t overmix cake batter once flour is added – mix just until combined to keep cake tender.
- Store covered in refrigerator for up to 5 days. Cake tastes even better after a day as flavors meld.
- Individual slices can be wrapped tightly and frozen for up to 3 months. Thaw in refrigerator overnight.
- For variations, try adding white chocolate to cheesecake batter or swirl in raspberry puree before baking.
- Make-ahead tip: Bake cheesecake and cake layers up to 3 days ahead, then assemble the day before serving.
- This cake is best served chilled or at room temperature – let slices sit out for 15-20 minutes before serving for softer texture.
Private Notes
Tried this recipe?
Let us know how it was!Final Thoughts
This Red Velvet Cheesecake Cake has become my signature dessert for every special occasion. The combination of tender red velvet cake, rich cheesecake, and tangy cream cheese frosting creates something truly magical.
Yes, it takes some time and patience to make, but every single bite is worth the effort. The look on people’s faces when they see those gorgeous layers is priceless.
I hope you’ll give this recipe a try for your next celebration. Start with quality ingredients, follow the steps carefully, and don’t rush the process.
Once you master this showstopper, you’ll have a dessert in your repertoire that will impress everyone at your table. I’d love to hear how your Red Velvet Cheesecake Cake turns out, so feel free to leave a comment below and share your experience!
Recommended:
- Creme Brulee Recipe
- Hot Chocolate Recipe
- Eggnog Pie Recipe
- Pumpkin Roll Recipe
- Fruitcake Recipe
- Chocolate Chip Bread Recipe
- Starbucks Banana Bread Recipe
- Easy Pancake Recipe
- Amish Apple Cake Recipe
- Easy Carrot Cake Recipe