
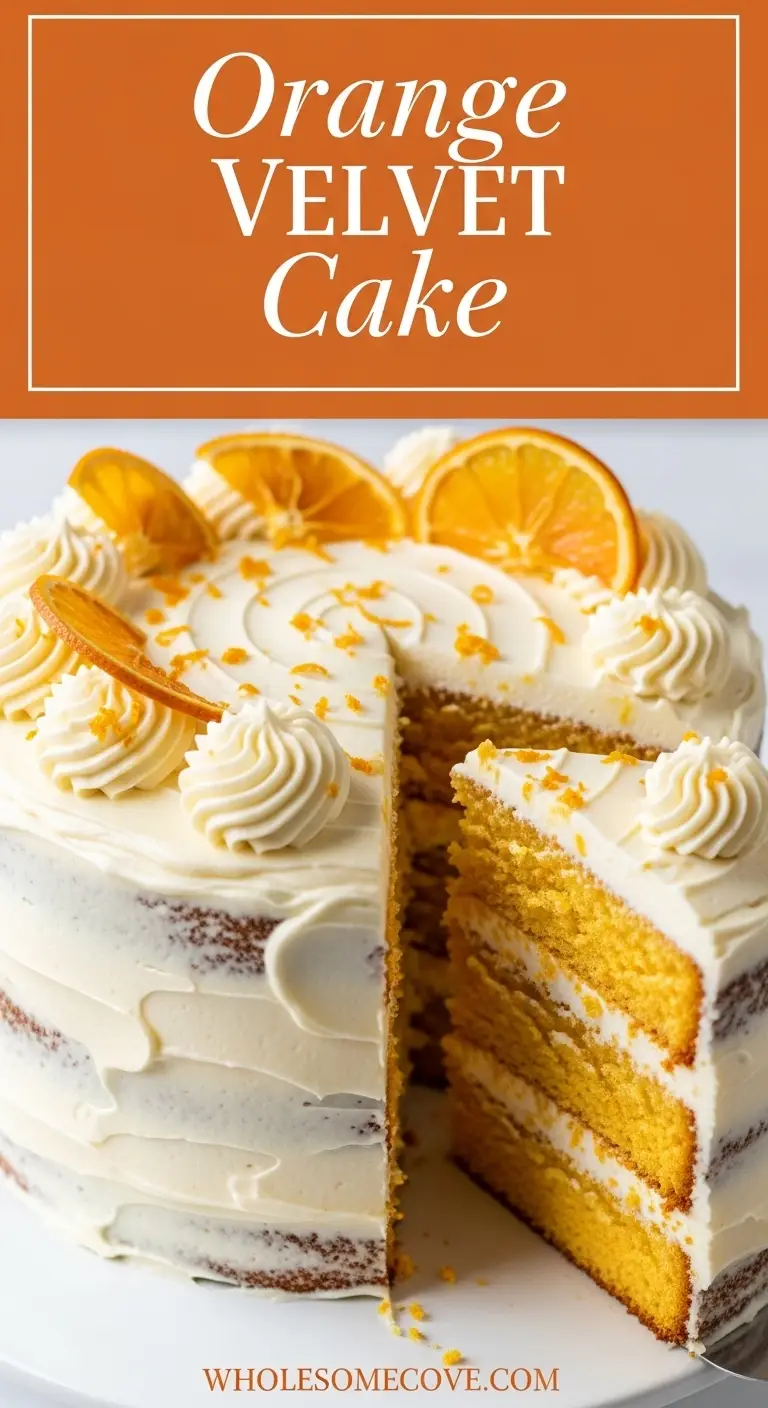
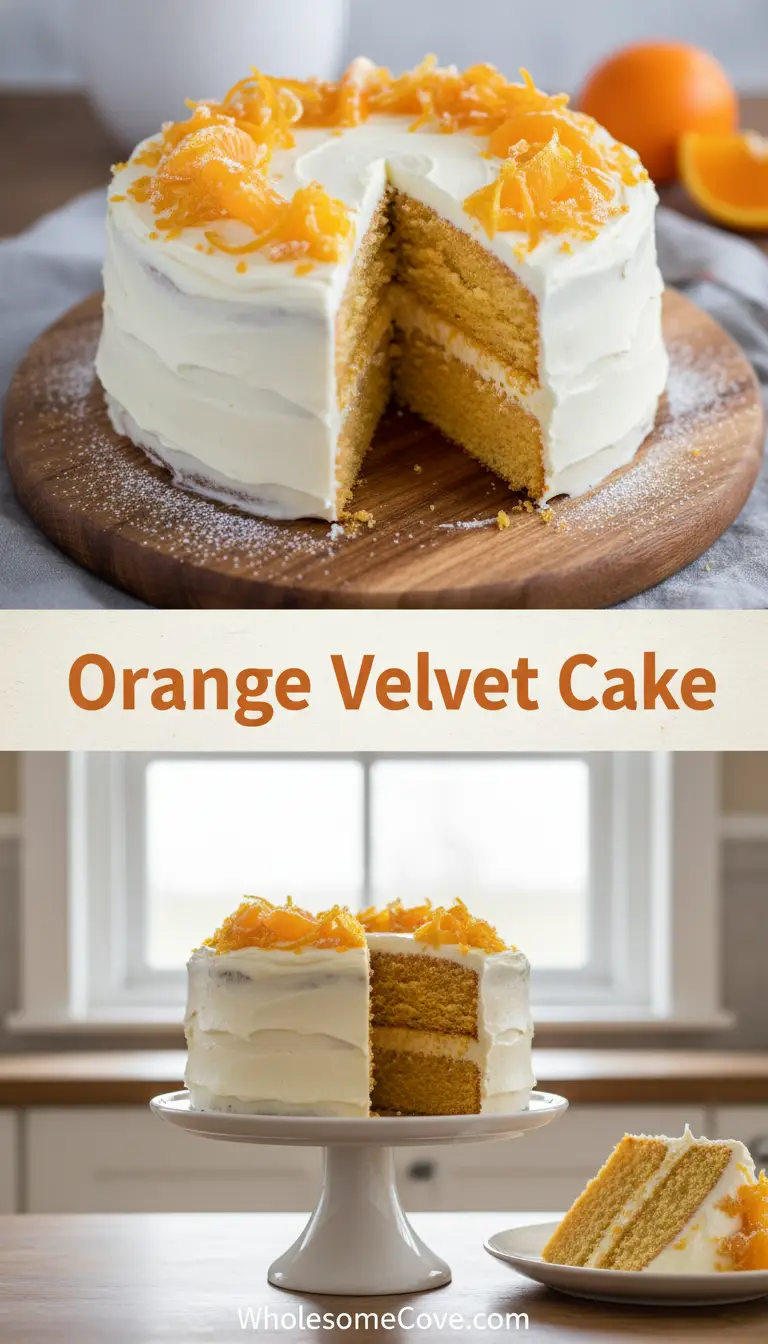
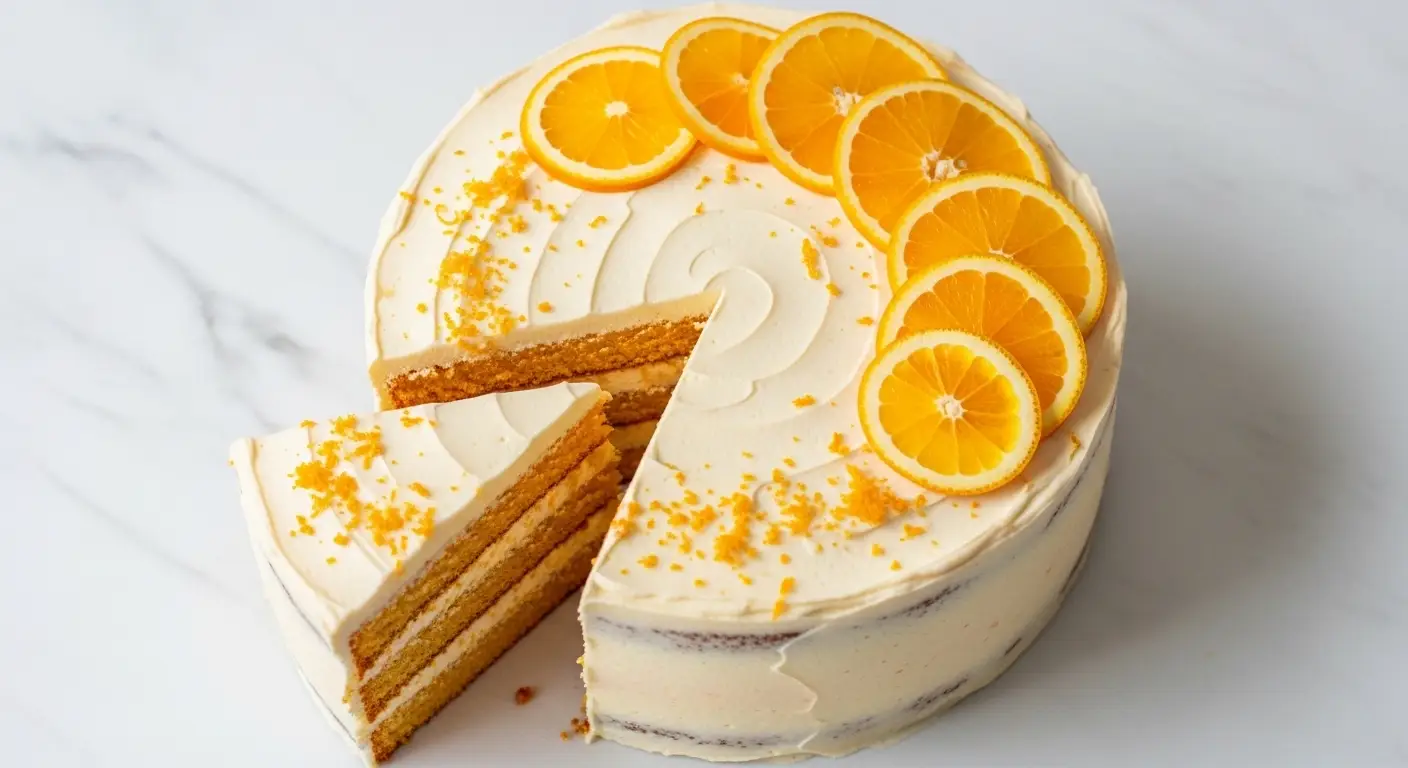
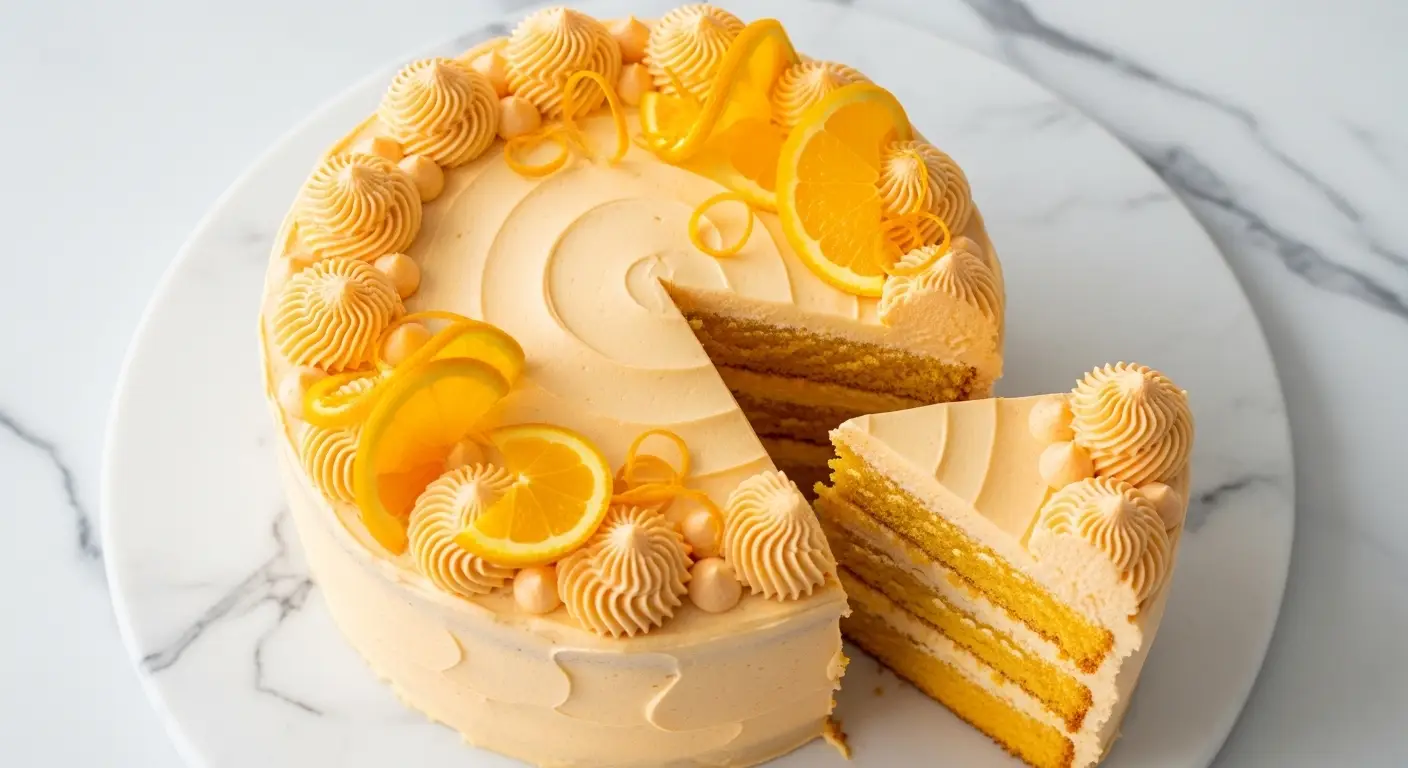
The first time I made this Orange Velvet Cake Recipe, I wasn’t sure what to expect. I’d been craving something bright and cheerful to shake off the winter blues, and this stunning citrus cake delivered beyond my wildest dreams.
The combination of soft, velvety layers infused with fresh orange zest and tangy buttermilk creates a texture that absolutely melts in your mouth. When you top it with rich orange cream cheese frosting, you get this incredible balance of sweet and tangy that keeps everyone coming back for seconds.
| Quick Recipe Summary | |
|---|---|
| Prep Time | 20 minutes |
| Cook Time | 28 minutes |
| Total Time | 48 minutes |
| Servings | 12 slices |
| Difficulty Level | Moderate |
If you love fruity cake variations, you’ll also want to try this Lemon Velvet Cake Recipe for another citrusy twist.
Why You’ll Love This Orange Velvet Cake Recipe
This cake brings together everything you love about traditional velvet cakes with a refreshing citrus upgrade. The gorgeous golden orange hue makes it an instant showstopper at any gathering.
The texture is what really sets this apart from regular layer cakes. That signature velvety crumb comes from a combination of buttermilk and a touch of vinegar, creating layers so tender they practically dissolve on your tongue.
I absolutely love how versatile this recipe is for different occasions. It’s fancy enough for birthdays and holidays, yet simple enough to make on a random Tuesday when you need a pick-me-up.
The orange flavor isn’t overwhelming or artificial. Fresh orange zest and juice give it a natural, bright taste that reminds me of creamsicles from childhood summers.
Every time I bring this to a potluck or family dinner, people are blown away by the flavor. They always assume it must be incredibly complicated, but honestly, it comes together just as easily as any other layer cake.
Ingredients
This Orange Velvet Cake uses simple ingredients that work together to create an extraordinary dessert. The fresh orange elements are what truly make this recipe shine, so don’t skip the zest!
For the Cake:
- 2 ½ cups (312g) all purpose flour, sifted
- 1 ¾ cups (350g) granulated sugar
- 1 tablespoon baking powder
- 1 teaspoon baking soda
- ½ teaspoon salt
- 3 large eggs, room temperature
- 1 cup (240ml) buttermilk, room temperature
- ¾ cup (180ml) vegetable oil or canola oil
- ⅓ cup (80ml) fresh orange juice (from about 1-2 oranges)
- 2 tablespoons freshly grated orange zest (from about 2-3 medium oranges)
- 2 teaspoons pure vanilla extract
- 1 tablespoon white vinegar
- Orange gel food coloring (optional, for deeper color)
For the Orange Cream Cheese Frosting:
- 16 oz (452g) cream cheese, softened to room temperature
- 1 cup (227g) unsalted butter, softened to room temperature
- 5 cups (600g) powdered sugar, sifted
- 1 tablespoon fresh orange zest
- 2 tablespoons fresh orange juice
- 1 teaspoon pure vanilla extract
- Pinch of salt
Kitchen Equipment Needed
Having the right tools makes this recipe come together smoothly and helps you achieve professional-looking results. Here’s what you’ll need on hand before you start baking.
- Two or three 9 inch round cake pans
- Parchment paper circles for lining pans
- Large mixing bowls (at least 2)
- Stand mixer or electric hand mixer
- Whisk
- Rubber spatula
- Microplane or fine grater for zesting
- Measuring cups and spoons
- Sifter or fine mesh strainer
- Offset spatula for frosting
- Cooling racks
- Toothpick or cake tester
For another delicious cake option, check out this Pink Velvet Cake Recipe that uses similar equipment.
Recommended Products for This Recipe
After making this cake countless times, I’ve found a few products that genuinely make the process easier and the results better. These are my go-to recommendations.
1. Microplane Premium Zester Grater
This tool has completely changed how I zest citrus for baking. The sharp blades create the finest, most aromatic zest without catching any of that bitter white pith. I use mine for this cake every single time, and it takes seconds to zest multiple oranges.
2. Wilton Perfect Results Cake Pans
These non-stick pans have never let me down. The cakes release beautifully every time, and they heat evenly so you don’t get overcooked edges with an undercooked center. They’re also the perfect depth for creating gorgeous, tall cake layers.
3. Ateco Offset Spatula Set
If you want that bakery-smooth frosting finish, you need a good offset spatula. This set gives you multiple sizes for different tasks, from crumb coating to creating those beautiful swoops and swirls in the final layer of frosting.
4. AmeriColor Soft Gel Paste Food Color in Orange
For that vibrant orange hue without watering down your batter, gel food coloring is essential. This brand gives you incredibly rich color with just a few drops, and the consistency is perfect for cake batter.
You might also enjoy: Purple Velvet Cake Recipe
Step-by-Step Instructions: How to Make Orange Velvet Cake
Follow these detailed steps to create a perfectly moist, tender orange velvet cake that will impress everyone. Take your time with each stage for the best results.
1. Prepare Your Pans and Preheat the Oven
- Preheat your oven to 350°F (175°C).
- Grease two or three 9 inch round cake pans thoroughly with butter or non-stick baking spray.
- Cut parchment paper circles to fit the bottom of each pan, then place them inside.
- Lightly grease the parchment paper as well to ensure the cakes release cleanly after baking.
- Set the prepared pans aside while you make the batter.
2. Prepare the Fresh Orange Components
- Wash and dry 2-3 medium oranges thoroughly.
- Using a microplane or fine grater, zest the oranges to get 2 tablespoons of zest for the cake batter, being careful to avoid the bitter white pith underneath the orange skin.
- Zest an additional tablespoon of orange peel for the frosting and set it aside separately.
- Cut the zested oranges in half and juice them to get ⅓ cup for the cake batter and 2 tablespoons for the frosting.
- Strain out any seeds from the juice using a fine mesh strainer.
3. Mix the Dry Ingredients
- In a large mixing bowl, sift together the all purpose flour, granulated sugar, baking powder, baking soda, and salt.
- Whisk the dry ingredients together thoroughly to ensure everything is evenly distributed.
- This helps prevent pockets of leavening agents and ensures a uniform rise.
- Set this bowl aside while you prepare the wet ingredients.
4. Combine the Wet Ingredients
- In another large bowl, whisk together the eggs until they’re well beaten and slightly frothy.
- Add the room temperature buttermilk, vegetable oil, fresh orange juice, orange zest, and vanilla extract to the eggs.
- Whisk everything together until completely smooth and well combined.
- If using orange gel food coloring, add 4-6 drops now and whisk until the color is evenly distributed throughout the mixture.
- The batter should have a lovely pale orange color even before adding the food coloring, thanks to the orange zest.
5. Create the Cake Batter
- Pour the wet ingredients into the bowl with the dry ingredients.
- Using a rubber spatula or wooden spoon, gently fold the ingredients together until just combined.
- Be careful not to overmix; it’s okay if there are a few small lumps remaining.
- In a small cup, combine the white vinegar with the baking soda (it will fizz slightly).
- Quickly fold this mixture into the batter with just a few strokes until incorporated.
- The batter should be smooth and pourable, with a silky consistency.
6. Bake the Cake Layers
- Divide the batter evenly between your prepared cake pans, using about 2 ⅓ cups of batter per 9 inch pan if making two layers, or 1 ½ cups per pan if making three layers.
- Tap each pan gently on the counter a few times to release any air bubbles trapped in the batter.
- Place the pans in the preheated oven on the middle rack, spacing them apart for even heat circulation.
- Bake for 25-28 minutes for two layers or 22-25 minutes for three thinner layers, until a toothpick inserted into the center comes out with just a few moist crumbs.
- The tops should spring back when lightly pressed, and the edges should just start to pull away from the sides of the pan.
7. Cool the Cakes Completely
- Remove the pans from the oven and place them on cooling racks.
- Let the cakes cool in the pans for exactly 10 minutes; this allows them to set slightly without becoming soggy.
- Run a knife around the edge of each pan to loosen the cakes.
- Carefully invert each pan onto a cooling rack, tap the bottom gently, and lift off the pan.
- Peel off the parchment paper circles from the bottom of each cake layer.
- Flip the cakes right side up and let them cool completely to room temperature before frosting, which takes about 1-2 hours.
8. Make the Orange Cream Cheese Frosting
- In the bowl of a stand mixer fitted with the paddle attachment (or using a large bowl with hand mixer), beat the softened cream cheese and butter together on medium-high speed for 2-3 minutes until completely smooth, light, and fluffy.
- Stop the mixer and scrape down the sides and bottom of the bowl to ensure even mixing.
- Add half of the sifted powdered sugar and beat on low speed until incorporated, then increase to medium speed.
- Add the remaining powdered sugar and continue beating until smooth.
- Add the orange zest, fresh orange juice, vanilla extract, and a pinch of salt.
- Beat on medium-high speed for an additional 2-3 minutes until the frosting is fluffy, creamy, and holds stiff peaks.
- If the frosting seems too thin, add more powdered sugar ¼ cup at a time; if too thick, add a teaspoon of orange juice at a time.
9. Assemble and Frost the Cake
- Place your first completely cooled cake layer on a serving plate or cake stand, flat side up.
- Scoop about 1 cup of orange cream cheese frosting onto the center of the layer.
- Using an offset spatula, spread the frosting evenly to the edges, creating a layer about ¼ to ½ inch thick.
- Carefully place the second cake layer on top, flat side down, and gently press to adhere.
- If using three layers, repeat this process with the middle layer.
- Apply a thin “crumb coat” of frosting all over the entire cake (top and sides) to seal in any loose crumbs.
- Refrigerate the crumb-coated cake for 20-30 minutes to let the frosting set.
- Apply the final layer of frosting generously over the chilled crumb coat, using smooth strokes with your offset spatula.
- Create swirls, peaks, or a smooth finish according to your preference.
10. Decorate and Serve
- Garnish the top and sides of your frosted cake with additional orange zest, fresh orange slices, or candied orange peel if desired.
- For an extra special touch, pipe rosettes of frosting around the top edge using a piping bag fitted with a large star tip.
- Refrigerate the finished cake for at least 30 minutes before slicing to help the frosting set and make clean cuts easier.
- When ready to serve, use a sharp knife dipped in hot water and wiped clean between slices.
- Let slices come to cool room temperature for 15-20 minutes before serving for the best flavor and texture.
Another beautiful velvet variation to try is this White Velvet Cake Recipe.

Tips for The Best Orange Velvet Cake
These tips come from years of making velvet cakes and learning what truly makes a difference. Follow these guidelines to ensure your orange velvet cake turns out perfect every time.
- Use fresh oranges, not bottled juice. The bright, natural flavor and aromatic oils from fresh zest make all the difference. Bottled orange juice and dried zest simply can’t compete with the real thing.
- Bring all refrigerated ingredients to room temperature. This includes eggs, buttermilk, cream cheese, and butter. Room temperature ingredients blend together much more smoothly, creating a better texture in both the cake and frosting.
- Don’t overmix the batter. Once you combine the wet and dry ingredients, mix just until you no longer see streaks of flour. Overmixing develops too much gluten, which results in a tough, dense cake instead of that signature tender velvet crumb.
- Measure flour correctly. Spoon the flour into your measuring cup and level it off with a knife rather than scooping directly from the bag. Scooping packs in too much flour, which can make your cake dry.
- Test for doneness carefully. Insert a toothpick into the center of the cake; it should come out with a few moist crumbs clinging to it, not completely clean. A completely clean toothpick means you’ve slightly overbaked.
- Cool cakes completely before frosting. I know it’s tempting to rush this step, but warm cakes will melt your cream cheese frosting and create a sticky mess. Patience here pays off with beautiful, smooth frosting.
- Sift your powdered sugar for the frosting. This eliminates lumps and creates an incredibly smooth, creamy frosting that’s easy to spread.
- Chill the crumb-coated cake before the final frosting layer. This trick makes decorating so much easier because the crumbs are sealed in and won’t mix into your final frosting layer.
- Use gel food coloring, not liquid. Gel colors are more concentrated and won’t thin out your batter. Start with just a few drops and add more until you reach your desired shade.
- Score the top of each layer before assembly. This helps you see if the layers are level and lets you trim off any dome if needed for a perfectly flat, professional-looking cake.
What to Serve with Orange Velvet Cake
This bright, citrusy cake pairs beautifully with several complementary flavors and textures that enhance the overall dessert experience.
A dollop of freshly whipped cream on the side adds a light, airy contrast to the rich frosting. For an extra citrus kick, try my Lemon Chicken Soup as a starter before serving dessert at dinner parties.
Fresh berries like strawberries, raspberries, or blueberries make an excellent accompaniment. Their natural tartness balances the sweetness of the cake perfectly.
A scoop of vanilla bean ice cream or orange sherbet alongside a warm slice creates an indulgent dessert plate. Cold brew coffee or hot tea, especially Earl Grey or chamomile, complements the orange flavors wonderfully.
For special occasions, consider serving with champagne or a sweet dessert wine. Candied orange peel or chocolate shavings make elegant garnishes.
Variations of Orange Velvet Cake
This versatile recipe can be adapted in several delicious ways to suit different tastes and occasions. Here are some of my favorite variations that I’ve tried and loved.
- Blood Orange Velvet Cake: Substitute blood orange juice and zest for regular oranges to create a stunning deep pink-orange cake with a slightly more complex, berry-like citrus flavor. The natural color from blood oranges is absolutely gorgeous.
- Orange Chocolate Chip Velvet Cake: Fold ¾ cup of mini chocolate chips into the batter just before pouring into pans. The combination of orange and chocolate is reminiscent of those chocolate oranges we all love.
- Cupcake Version: Divide the batter among 24 lined muffin cups and bake at 350°F for 18-22 minutes. These make perfect individual servings for parties and are easier to transport than a whole cake.
- Orange Coconut Velvet Cake: Add ½ cup of shredded sweetened coconut to the batter and sprinkle toasted coconut over the frosted cake. This creates a tropical twist that’s perfect for summer gatherings.
- Triple Citrus Velvet Cake: Use a combination of orange, lemon, and lime zest (1 tablespoon of each) for a more complex citrus flavor profile. Adjust the juice ratios accordingly.
- Bundt Cake Style: Pour all the batter into a greased and floured 10 inch bundt pan and bake at 325°F for 50-60 minutes. Drizzle with orange glaze instead of frosting for a simpler presentation.
- Orange Cream Filling: Add a layer of orange curd or orange pastry cream between the cake layers along with the frosting for an extra burst of citrus flavor.
If you enjoy experimenting with velvet cakes, the Blue Velvet Cake Recipe is another fun color variation.
Storage and Reheating
Proper storage keeps this cake fresh and delicious for several days. Here’s how to maintain that perfect texture and flavor.
- Room Temperature Storage: Store the frosted cake in an airtight container or covered cake dome at room temperature for up to 2 days in a cool, dry place away from direct sunlight.
- Refrigerator Storage: Because this cake has cream cheese frosting, refrigeration is recommended, especially in warm weather. Cover loosely with plastic wrap or store in an airtight container for up to 5 days. Bring slices to room temperature 20-30 minutes before serving for the best flavor and texture.
- Freezing Unfrosted Layers: Wrap completely cooled, unfrosted cake layers tightly in plastic wrap, then aluminum foil. Freeze for up to 3 months. Thaw in the refrigerator overnight before frosting.
- Freezing Frosted Cake: Place the entire frosted cake in the freezer unwrapped for 30 minutes until the frosting is firm, then wrap tightly in plastic wrap and aluminum foil. Freeze for up to 2 months. Thaw in the refrigerator overnight, still wrapped, then bring to room temperature before serving.
- Freezing Individual Slices: Freeze slices on a parchment-lined baking sheet until solid, then wrap each slice individually in plastic wrap and store in a freezer bag for up to 2 months. Perfect for portion control and quick treats.
- Reheating (Optional): While this cake is typically served at room temperature, you can warm individual slices in the microwave for 10-15 seconds if you prefer it slightly warm. The frosting will soften, so be careful not to overheat.
- Frosting Storage: Store extra orange cream cheese frosting in an airtight container in the refrigerator for up to 1 week or freeze for up to 2 months. Bring to room temperature and rewhip before using.
For another make-ahead dessert option, try this Pumpkin Cheesecake Recipe.
Nutritional Facts
Here’s the approximate nutritional information per slice (1/12 of the cake):
- Calories: 585
- Total Fat: 32g
- Saturated Fat: 14g
- Trans Fat: 0g
- Cholesterol: 98mg
- Sodium: 315mg
- Total Carbohydrates: 71g
- Dietary Fiber: 1g
- Sugars: 56g
- Protein: 5g
- Vitamin C: 8% DV
- Calcium: 6% DV
- Iron: 8% DV
Note: Nutritional values are estimates and may vary based on specific ingredients and portion sizes used.
Read Also: Red Velvet Cake Recipe
Health Benefits of Key Ingredients
While this is definitely an indulgent dessert, some of the ingredients do offer nutritional benefits worth noting.
Fresh orange zest and juice provide a good dose of vitamin C, which supports immune function and acts as an antioxidant in the body. Oranges also contain flavonoids that have anti-inflammatory properties.
- Oranges: Rich in vitamin C, fiber, and antioxidants that support immune health and skin health. The zest contains essential oils with anti-inflammatory properties.
- Eggs: Provide high-quality protein, vitamins D and B12, and choline, which supports brain health and development.
- Buttermilk: Contains probiotics that support digestive health and is lower in fat than regular milk. It’s also a good source of calcium and protein.
- Cream Cheese: Offers calcium for bone health and vitamin A for vision and immune function. It also contains conjugated linoleic acid, which may have health benefits.
- Vanilla Extract: Contains small amounts of antioxidants and has been traditionally used to reduce anxiety and improve mood.
Another indulgent treat with some surprising benefits is Hot Chocolate, which contains antioxidants from cocoa.
FAQs About Orange Velvet Cake
1. Can I make this cake without buttermilk?
Yes, you can easily make a buttermilk substitute if you don’t have any on hand. Simply add 1 tablespoon of white vinegar or fresh lemon juice to a measuring cup, then fill with regular milk to reach 1 cup total.
Stir and let it sit for 5-10 minutes until it thickens slightly. This creates the same tangy flavor and acidity that helps create that tender velvet texture.
2. Why is my orange velvet cake dense instead of light and fluffy?
The most common cause of a dense cake is overmixing the batter after adding the flour. When you overmix, you develop too much gluten, which makes the cake tough and heavy instead of tender.
Another possibility is that your leavening agents (baking powder and baking soda) are old or expired. Check the dates and replace them if they’re more than 6 months old. Also, make sure you’re measuring your flour correctly by spooning it into the measuring cup rather than scooping directly from the bag.
3. Can I use this recipe to make cupcakes instead of a layer cake?
Absolutely! This batter works beautifully for cupcakes. Line 24 standard muffin cups with paper liners and fill each about ⅔ full with batter.
Bake at 350°F for 18-22 minutes, or until a toothpick inserted in the center comes out with just a few moist crumbs. Let them cool completely before frosting. You’ll have enough cream cheese frosting to generously top all 24 cupcakes.
4. How do I prevent my cake layers from doming in the middle?
To prevent doming, you can use baking strips around your pans, which keep the edges from cooking too quickly. Another method is to slightly lower your oven temperature to 325°F and bake a bit longer.
If your cakes still dome, simply use a serrated knife to carefully level them off before assembly. Save the scraps for snacking or crumble them over ice cream!
5. Can I make this cake ahead of time for a special event?
Yes, this cake is perfect for making ahead! You can bake the unfrosted layers up to 2 days in advance, wrap them tightly in plastic wrap, and store them at room temperature.
You can also make the frosting 1-2 days ahead and keep it refrigerated; just bring it to room temperature and rewhip it before using. For even more advance prep, freeze the unfrosted layers for up to 3 months. The assembled, frosted cake can be refrigerated for up to 2 days before serving.
Read Also: Red Velvet Cheesecake Cake Recipe
Orange Velvet Cake
Ingredients
- 2 ½ cups all purpose flour - 312g, sifted
- 1 ¾ cups granulated sugar - 350g
- 1 tablespoon baking powder
- 1 teaspoon baking soda
- ½ teaspoon salt
- 3 large eggs - room temperature
- 1 cup buttermilk - 240ml, room temperature
- ¾ cup vegetable oil - 180ml, or canola oil
- ⅓ cup fresh orange juice - 80ml, from about 1-2 oranges
- 2 tablespoons orange zest - freshly grated, from about 2-3 medium oranges
- 2 teaspoons pure vanilla extract
- 1 tablespoon white vinegar
- orange gel food coloring - optional, 4-6 drops for deeper color
- 16 oz cream cheese - 452g, softened to room temperature
- 1 cup unsalted butter - 227g, softened to room temperature
- 5 cups powdered sugar - 600g, sifted
- 1 tablespoon fresh orange zest
- 2 tablespoons fresh orange juice
- 1 teaspoon pure vanilla extract
- salt - pinch
Equipment
- 9-inch round cake pans - Two or three pans
- Parchment paper
- Stand mixer or electric hand mixer
- Large mixing bowls - At least 2
- Microplane or fine grater - For zesting
- Whisk
- Rubber spatula
- Measuring cups and spoons
- Sifter or fine-mesh strainer
- Offset spatula - For frosting
- Cooling racks
- Toothpick or cake tester
Method
- Preheat oven to 350°F (175°C). Grease two or three 9-inch round cake pans, line with parchment paper circles, and grease the parchment.
- Wash and dry oranges, then zest to get 2 tablespoons for cake batter and 1 tablespoon for frosting. Juice oranges to get ⅓ cup for batter and 2 tablespoons for frosting, straining out seeds.
- In a large bowl, sift together flour, sugar, baking powder, baking soda, and salt. Whisk thoroughly to combine and set aside.
- In another bowl, whisk together eggs, buttermilk, oil, orange juice, orange zest, and vanilla until smooth. Add 4-6 drops of orange gel food coloring if desired and whisk until evenly distributed.
- Pour wet ingredients into dry ingredients and gently fold until just combined. Mix white vinegar with baking soda (it will fizz) and quickly fold into batter with a few strokes.
- Divide batter evenly between prepared pans and tap gently on counter to release air bubbles. Bake for 25-28 minutes (two layers) or 22-25 minutes (three layers) until toothpick comes out with moist crumbs.
- Cool cakes in pans for 10 minutes, then run knife around edges and invert onto cooling racks. Peel off parchment and let cool completely to room temperature, about 1-2 hours.
- Beat cream cheese and butter together for 2-3 minutes until fluffy. Add powdered sugar gradually, beating until smooth, then add orange zest, juice, vanilla, and salt. Beat 2-3 minutes until frosting holds stiff peaks.
- Place first cake layer on serving plate and spread 1 cup frosting to edges. Add second layer (and third if using), then apply thin crumb coat over entire cake. Refrigerate 20-30 minutes to set.
- Apply final layer of frosting generously over chilled cake using smooth strokes. Garnish with orange zest, fresh orange slices, or candied orange peel. Refrigerate 30 minutes before slicing.
Nutrition
Notes
- Use fresh oranges for the best flavor – bottled juice and dried zest can’t match the bright, natural taste and aromatic oils from fresh citrus.
- All refrigerated ingredients (eggs, buttermilk, cream cheese, butter) must be at room temperature for proper mixing and texture.
- Don’t overmix the batter after combining wet and dry ingredients – mix only until flour streaks disappear to prevent a tough, dense cake.
- Measure flour by spooning into measuring cup and leveling off rather than scooping directly from the bag to avoid using too much.
- Cool cakes completely before frosting – warm cakes will melt the cream cheese frosting and create a mess.
- The crumb coat step is essential for clean, professional-looking frosting – it seals in crumbs before the final layer.
- Store frosted cake in the refrigerator for up to 5 days due to cream cheese frosting. Bring slices to room temperature 20-30 minutes before serving for best flavor.
- Unfrosted cake layers can be wrapped tightly and frozen for up to 3 months – thaw in refrigerator overnight before frosting.
- This batter works perfectly for cupcakes – fill 24 lined muffin cups ⅔ full and bake at 350°F for 18-22 minutes.
- For blood orange variation, substitute blood orange juice and zest for a stunning pink-orange cake with complex berry-like citrus flavor.
Private Notes
Tried this recipe?
Let us know how it was!Final Thoughts
This Orange Velvet Cake Recipe has become one of my absolute favorite desserts to bake and share. The combination of bright citrus flavor with that signature velvety texture creates something truly special.
Every time I make this cake, I’m reminded of how simple ingredients can come together to create something extraordinary. The fresh orange zest makes your kitchen smell amazing, and that first bite of tender, moist cake with creamy frosting never disappoints.
I hope you’ll give this recipe a try and experience that same joy I get from baking it. Don’t forget to share your results in the comments below, and tag me on social media with your beautiful orange velvet creations!
Recommended:
- Black Velvet Cake Recipe
- Red Velvet Cake Recipe With Cake Mix
- Chocolate Chip Cookies Recipe
- Creme Brulee Recipe
- Pumpkin Waffle Recipe
- Eggnog Cake Recipe
- Fruit Cocktail Cake Recipe
- Easy Carrot Cake Recipe
- Banana Bread Recipe With No Eggs
- Healthy Tiramisu Recipe
