

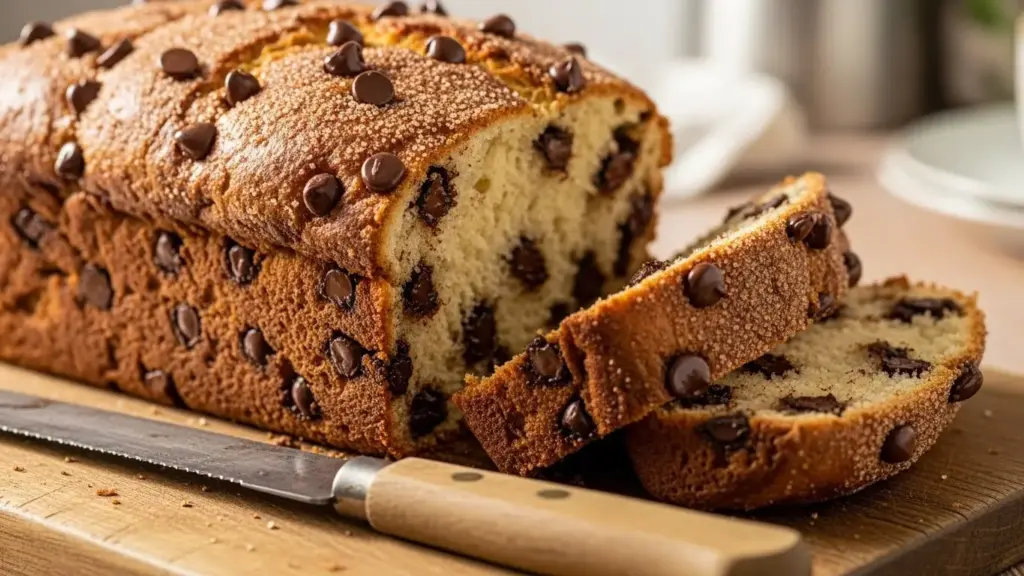
I never thought a simple loaf of bread could become the most requested treat in my household, but here we are. My Chocolate Chip Bread Recipe started as a rainy Saturday experiment when I wanted something comforting but not overly sweet.
Fast forward three years, and this bread has become my go-to gift for new neighbors, my contribution to every potluck, and the reason my kids actually get excited about breakfast. The best part? It’s technically bread, so eating it for breakfast feels slightly less indulgent than cake (even though we all know the truth).
This recipe walks that perfect line between quick bread and dessert, with pockets of melted chocolate throughout a tender, buttery crumb.
| Quick Recipe Summary | |
|---|---|
| Prep Time | 15 minutes |
| Cook Time | 55 minutes |
| Total Time | 1 hour 10 minutes |
| Servings | 1 loaf (10 slices) |
| Difficulty Level | Easy |
The texture of this bread is incredibly similar to my Banana Bread Recipe with No Eggs, though the flavor profile takes you in a completely different direction.
_result.jpg "Chocolate Chip Bread Recipe - Dessert Bread Made Easy")
Why You’ll Love This Chocolate Chip Bread Recipe
This bread hits different than your typical quick bread, and I mean that in the best way possible. The first time I pulled it from the oven, the chocolate was still slightly melty, the top had this gorgeous golden crack running down the center, and my kitchen smelled like a fancy bakery.
I’ve made this recipe at least forty times now, and it never fails to impress. Here’s why it’s become such a staple in my kitchen:
- Foolproof for beginners: Unlike yeast breads that require kneading, rising, and perfect timing, this comes together in one bowl with minimal effort. I’ve walked complete baking novices through this recipe over video calls, and they’ve nailed it every single time.
- Customizable sweetness: The original recipe is perfectly balanced, but I’ve adjusted the sugar down by a quarter cup when I want something more breakfast-appropriate, and up when I’m treating it as dessert. Both versions work beautifully.
- Uses pantry staples: No specialty ingredients here. Everything you need is probably already in your kitchen, which means you can decide to make this on a whim without a grocery store run.
- Freezer-friendly perfection: I always make two loaves and freeze one. Wrap it tightly in plastic wrap and then foil, and it’ll stay fresh for up to three months. Thaw it overnight on the counter, and it tastes like you just baked it.
- Texture that stays moist: Even days later, this bread maintains its tender crumb. The secret is in the sour cream, which keeps everything soft without making it heavy or dense.
If you’re also a fan of chocolate-studded baked goods, my Chocolate Chip Cookies Recipe uses a similar technique for distributing chocolate throughout.
Ingredients
The ingredient list might look basic, but each component plays a crucial role in creating the perfect texture and flavor. I learned this the hard way when I tried substituting Greek yogurt for sour cream (it worked, but the texture was slightly different), and when I used only bittersweet chocolate chips (too intense for most people’s taste).
Here’s everything you’ll need:
For the Bread:
- 1¾ cups (220g) all-purpose flour
- ¾ cup (150g) granulated sugar
- 2 teaspoons baking powder
- ½ teaspoon baking soda
- ½ teaspoon salt
- ⅔ cup (160ml) whole milk, at room temperature
- ½ cup (120g) sour cream, at room temperature
- ⅓ cup (80ml) vegetable oil
- 2 large eggs, at room temperature
- 2 teaspoons vanilla extract
- 1½ cups (270g) semi-sweet chocolate chips, divided
- 2 tablespoons all-purpose flour (for tossing with chocolate chips)
For the Topping:
- 2 tablespoons granulated sugar
- ½ teaspoon ground cinnamon
Optional Add-ins:
- ½ cup (60g) chopped walnuts or pecans
- 1 teaspoon espresso powder (enhances chocolate flavor)
- Zest of 1 orange (adds a subtle citrus note)
After mastering this recipe, I experimented with my Old Fashioned Pumpkin Bread Recipe using similar techniques but with completely different flavor profiles.
Kitchen Equipment Needed
Having the right tools makes this recipe even easier than it already is. I’ve made this bread in various kitchens with different equipment setups, and while you can certainly make do with basics, a few key items really elevate the process.
Here’s what I recommend having on hand:
- 9×5-inch loaf pan: This is non-negotiable for proper shape and even baking. I prefer metal over glass because it conducts heat better and creates a nicer crust.
- Large mixing bowl: You’ll need room to fold in those chocolate chips without making a mess.
- Medium mixing bowl: For combining dry ingredients separately before adding to wet ingredients.
- Whisk: Essential for breaking up any lumps in your dry ingredients and properly emulsifying the wet ingredients.
- Rubber spatula: Perfect for scraping down the sides of bowls and gently folding in chocolate chips without overmixing.
- Measuring cups and spoons: Accuracy matters in baking, so proper measuring tools are important.
- Parchment paper: Makes removal from the pan foolproof and cleanup a breeze.
- Wire cooling rack: Allows air circulation under the bread while it cools, preventing a soggy bottom.
- Toothpick or cake tester: For checking doneness in the center of the loaf.
If you’ve been baking other quick breads like my Sweet Potato Bread Recipe, you’ll already have most of these tools on hand.
Recommended Products for This Recipe
After making this bread dozens of times and gifting it to friends who’ve taken up baking, I’ve learned which products actually make a difference. These aren’t just random recommendations. They’re the tools and ingredients I genuinely use and would buy again in a heartbeat.
1. Ghirardelli Semi-Sweet Chocolate Chips
The chocolate you choose matters more than you might think. I’ve tested this recipe with at least eight different brands, and Ghirardelli consistently gives you the best melt, flavor, and value. These chips hold their shape during baking but still get gloriously gooey when you bite into a warm slice.
2. USA Pan Bakeware Aluminized Steel Loaf Pan
This pan changed my bread-baking life. The aluminized steel distributes heat evenly, so you never get those annoying dark corners while the center stays pale. It’s also naturally non-stick, which means you can skip the heavy greasing and your bread releases perfectly every time. I’ve had mine for four years, and it still looks nearly new.
3. Nielsen-Massey Madagascar Bourbon Pure Vanilla Extract
Yes, vanilla extract is expensive, but it’s one ingredient where quality truly shines through. This Madagascar bourbon vanilla has a rich, complex flavor that cheap imitation vanilla just can’t match. A single bottle lasts me months because you only need small amounts, and the difference in your baked goods is immediately noticeable.
4. King Arthur Baking Company All-Purpose Flour
Not all flours are created equal, and King Arthur’s consistency is unmatched. Their protein content is perfectly balanced for quick breads, giving you a tender crumb without being too delicate. I keep a 10-pound bag in my pantry at all times because I use it for everything from this chocolate chip bread to pancakes.
The same principles I use for this bread apply beautifully to my Healthy Banana Bread Recipe, though the ingredient proportions shift slightly to accommodate the banana moisture.
_result.jpg "Chocolate Chip Bread Recipe | Cozy Fall Baking")
Step-by-Step Instructions: How to Make Chocolate Chip Bread
I’m going to walk you through this recipe exactly how I make it, including all the little details that took me multiple attempts to figure out. The beauty of this bread is that even if you’re not an experienced baker, you’ll get great results if you follow these steps carefully.
1. Prepare Your Pan and Preheat the Oven
- Set your oven to 350°F (175°C) and position the rack in the center of the oven for even heat distribution.
- Line your 9×5-inch loaf pan with parchment paper, leaving an overhang on the two long sides. This creates convenient handles for lifting the bread out later.
- Lightly grease the parchment paper with cooking spray or butter. Even though parchment is non-stick, this extra step ensures absolutely no sticking.
- Let the lined pan sit while you prepare the batter. Having everything ready before you start mixing means your batter goes into the oven at peak freshness.
2. Combine the Dry Ingredients
- In your medium mixing bowl, whisk together 1¾ cups all-purpose flour, ¾ cup granulated sugar, 2 teaspoons baking powder, ½ teaspoon baking soda, and ½ teaspoon salt.
- Whisk for at least 30 seconds to ensure everything is evenly distributed. I learned this matters after getting a bite of straight baking soda once (not pleasant).
- In a small bowl, toss 1¼ cups of the chocolate chips with 2 tablespoons of flour. This coating helps prevent the chips from sinking to the bottom during baking.
- Set both bowls aside while you work on the wet ingredients.
3. Mix the Wet Ingredients
- In your large mixing bowl, whisk together ⅔ cup whole milk, ½ cup sour cream, ⅓ cup vegetable oil, 2 eggs, and 2 teaspoons vanilla extract.
- Whisk vigorously for about one minute until the mixture is smooth and slightly frothy. The sour cream should be completely incorporated with no lumps visible.
- Make sure all your wet ingredients are at room temperature. Cold ingredients don’t emulsify properly, and you’ll end up with a less tender crumb.
4. Combine Wet and Dry Ingredients
- Pour the dry ingredient mixture into the bowl with the wet ingredients.
- Using a rubber spatula, gently fold the ingredients together with broad, sweeping motions from the bottom of the bowl up and over the top.
- Stop mixing as soon as you no longer see dry flour streaks. The batter should look thick and slightly lumpy. Overmixing develops gluten and makes the bread tough and dense.
- This is the most critical step for texture. I used to overmix thinking I needed a perfectly smooth batter, but that resulted in a tough, chewy bread instead of the tender crumb we’re after.
5. Add the Chocolate Chips
- Gently fold in the flour-coated chocolate chips using the same folding motion from the previous step.
- Reserve the remaining ¼ cup of chocolate chips for topping the batter later.
- Fold just until the chips are evenly distributed throughout the batter. You should be able to see chips throughout when you look at the batter, but they shouldn’t all be broken up.
6. Transfer Batter to Pan and Add Topping
- Pour the batter into your prepared loaf pan, using the spatula to scrape out every last bit from the bowl.
- Gently spread the batter to the corners of the pan with your spatula, but don’t press down hard or you’ll deflate the air bubbles.
- The surface doesn’t need to be perfectly smooth. A slightly uneven top adds rustic charm and creates more surface area for the crunchy cinnamon-sugar topping.
- In a small bowl, mix together 2 tablespoons granulated sugar and ½ teaspoon ground cinnamon.
- Sprinkle this mixture evenly over the top of the batter, then press the reserved ¼ cup chocolate chips gently into the surface.
7. Bake the Bread
- Place the loaf pan on the center rack of your preheated 350°F (175°C) oven.
- Bake for 55 to 65 minutes. The exact time depends on your oven and how accurate its temperature is.
- Start checking for doneness at the 50-minute mark by inserting a toothpick or cake tester into the center of the loaf.
- The bread is done when the toothpick comes out clean or with just a few moist crumbs (not wet batter). A few melted chocolate smears are fine and expected.
- The top should be deeply golden brown, and the edges should pull away slightly from the sides of the pan.
- If the top is browning too quickly before the center is done (this happened to me in my old oven), tent the bread loosely with aluminum foil for the last 15-20 minutes of baking.
8. Cool the Bread
- Remove the pan from the oven and place it on a wire cooling rack.
- Let the bread cool in the pan for exactly 15 minutes. This rest time allows the structure to set properly without becoming soggy from trapped steam.
- After 15 minutes, use the parchment paper overhang to lift the bread out of the pan and transfer it to the wire rack.
- Let the bread cool for at least 30 more minutes before slicing. I know waiting is hard (the smell is intoxicating), but cutting into hot bread will result in a gummy texture and the slices will fall apart.
- For the cleanest slices, let the bread cool completely. Use a sharp serrated knife and a gentle sawing motion to cut through without crushing the bread.
You might also enjoy: Starbucks Banana Bread Recipe
_result.jpg "Chocolate Chip Bread Recipe - Easy Snack for Parties")
Tips for The Best Chocolate Chip Bread
I’ve learned these tips through trial and error, several failed loaves (thankfully few), and lots of feedback from friends and family who’ve made this recipe. These details might seem small, but they’re the difference between good bread and absolutely phenomenal bread.
Here are my hard-won insights:
- Room temperature ingredients are crucial: I can’t stress this enough. Cold eggs and sour cream won’t incorporate smoothly into the batter, leading to a denser texture. Take everything out of the fridge 30-45 minutes before you start baking.
- Don’t skip the flour-tossing step: Those 2 tablespoons of flour coating the chocolate chips prevent them from sinking to the bottom. I skipped this once out of laziness, and ended up with all the chocolate in the bottom third of the loaf.
- Use a light hand when mixing: The moment you no longer see dry flour, stop mixing. The batter should still have small lumps. I used to think smooth batter was better, but that overmixing created a tough, bread-like (in a bad way) texture.
- Check oven temperature accuracy: My oven runs 25°F cooler than it displays, which I discovered with an oven thermometer. This explained why my early attempts took forever to bake. Invest in a thermometer if you bake regularly.
- The toothpick test isn’t foolproof: Because of all the melted chocolate, your toothpick might come out with chocolate on it even when the bread is fully baked. Look for the bread pulling away from the pan sides and a firm top that springs back when lightly pressed.
- Quality chocolate makes a difference: I’ve made this with both expensive and cheap chocolate chips. The expensive ones melt better and have a richer flavor, but honestly, even store-brand chips work well if that’s what you have.
- Add espresso powder for deeper flavor: One teaspoon of instant espresso powder added to the dry ingredients doesn’t make the bread taste like coffee. Instead, it enhances and deepens the chocolate flavor dramatically.
- Tent with foil if browning too fast: If your oven runs hot or has hot spots, the top might brown before the inside is fully cooked. A loose aluminum foil tent over the top for the last 20 minutes solves this issue perfectly.
- Let it cool properly before slicing: This is where patience pays off. Cutting into warm bread releases all the steam that’s keeping it moist, and the texture becomes gummy and the slices fall apart.
- Store airtight to maintain moisture: Once completely cool, wrap the bread tightly in plastic wrap or store in an airtight container. It stays moist at room temperature for 3-4 days.
Another favorite: Air Fryer Banana Bread Recipe
What to Serve with Chocolate Chip Bread
This bread is delicious on its own, but pairing it with the right accompaniments can elevate it from a simple snack to a truly memorable experience. I’ve served this bread dozens of different ways, and these combinations have gotten the most enthusiastic responses.
Here are my favorite serving suggestions:
- Whipped cream cheese: Spread it on a slice while the bread is still slightly warm. The cream cheese melts just a little, creating the most luxurious texture. I like to add a splash of vanilla extract and a tablespoon of powdered sugar to plain cream cheese for extra decadence.
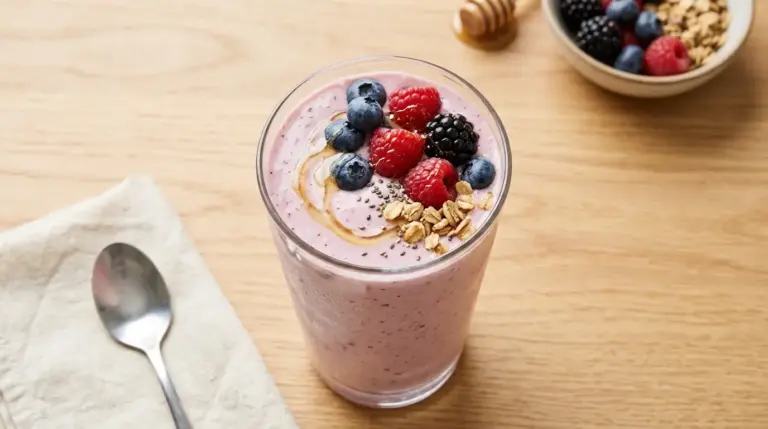
- Fresh berries: Sliced strawberries, raspberries, or blueberries add a fresh, tart contrast to the sweet bread. I serve this for brunch with a bowl of mixed berries on the side, and people pile them on top of their bread slices.
- Coffee or hot chocolate: The obvious pairing, but it works so perfectly. The chocolate in the bread pairs beautifully with a rich cup of coffee, and hot chocolate makes it feel like the ultimate comfort food combination.
- Vanilla ice cream: Toast a slice of the bread lightly, top with a scoop of good vanilla ice cream, and drizzle with Caramel Sauce for an incredible dessert.
- Nut butter: Almond butter or peanut butter spread on a slice adds protein and healthy fats, making this a more substantial breakfast or snack. The nutty flavor complements the chocolate beautifully.
- Greek yogurt and honey: For a lighter option, serve slices alongside Greek yogurt drizzled with honey. The tangy yogurt balances the sweetness of the bread nicely.
- Fresh whipped cream: Make your own whipped cream with heavy cream, a touch of sugar, and vanilla. Dollop it on warm slices for a dessert-like treat that feels fancy but comes together in minutes.
- Breakfast boards: I love including this bread on breakfast charcuterie boards alongside fresh fruit, cheeses, nuts, and other pastries. It’s always the first thing to disappear.
Variations of Chocolate Chip Bread
One of my favorite things about this recipe is how well it adapts to different flavors and dietary needs. I’ve experimented extensively with variations, and these are the versions that have become regular rotations in my kitchen alongside the original.
Here are the variations I make most often:
- Double Chocolate Chip Bread: Replace ¼ cup of the all-purpose flour with unsweetened cocoa powder for an intensely chocolatey version. Add both semi-sweet and white chocolate chips for variety. This version is essentially chocolate bread with chocolate chips, and it’s absolutely decadent.
- Peanut Butter Chocolate Chip Bread: Reduce the oil to 2 tablespoons and add ¼ cup creamy peanut butter to the wet ingredients. Fold in ½ cup peanut butter chips along with the chocolate chips. This tastes like a Reese’s cup in bread form.
- Banana Chocolate Chip Bread: Reduce the milk to ⅓ cup and add ¾ cup mashed ripe banana (about 2 medium bananas) to the wet ingredients. The banana adds moisture and a subtle fruity sweetness that pairs beautifully with chocolate.
- Orange Chocolate Chip Bread: Add the zest of 2 oranges to the wet ingredients and replace 2 tablespoons of the milk with fresh orange juice. The citrus brightens the chocolate flavor in an unexpected and delightful way.
- Espresso Chocolate Chip Bread: Add 2 tablespoons of instant espresso powder to the dry ingredients and reduce the chocolate chips to 1 cup. This is for serious coffee lovers and tastes like a café mocha in bread form.
- Mint Chocolate Chip Bread: Add 1 teaspoon of peppermint extract to the wet ingredients along with the vanilla. Use a combination of dark chocolate chips and white chocolate chips. This tastes like those thin mints cookies but in a soft, tender bread.
- S’mores Chocolate Chip Bread: Fold in ½ cup mini marshmallows and ¼ cup crushed graham crackers along with the chocolate chips. Top with extra marshmallows and graham cracker crumbs before baking. It’s messy and wonderful.
- Gluten-Free Version: Replace the all-purpose flour with a 1:1 gluten-free baking flour blend (I use Bob’s Red Mill). The texture is slightly more delicate, but still delicious. Make sure your baking powder is also gluten-free.
- Healthier Version: Use whole wheat pastry flour instead of all-purpose, replace the oil with unsweetened applesauce, use Greek yogurt instead of sour cream, and reduce the sugar to ½ cup. It’s not quite as tender, but still tasty.
- Nutty Chocolate Chip Bread: Fold in ½ cup chopped toasted walnuts, pecans, or hazelnuts along with the chocolate chips. Toast the nuts first in a dry skillet to bring out their flavor.
Read Also: Keto Banana Bread Recipe
Storage and Reheating
Proper storage is key to maintaining the bread’s tender texture and preventing it from drying out. I’ve tested various storage methods, and these techniques keep the bread fresh and delicious for days (though it rarely lasts that long in my house).
Follow these storage guidelines for the best results:
- Room temperature storage: Once completely cooled, wrap the bread tightly in plastic wrap or aluminum foil. Store at room temperature for up to 4 days. The bread will stay moist thanks to the sour cream in the batter.
- Refrigerator storage: If your kitchen is very warm or humid, you can refrigerate the wrapped bread for up to 1 week. Let slices come to room temperature before eating, or warm them slightly for the best texture and flavor.
- Freezer storage: This bread freezes beautifully for up to 3 months. Wrap the completely cooled loaf tightly in plastic wrap, then wrap again in aluminum foil. For individual portions, slice the bread first, place parchment paper between slices, then wrap and freeze. This lets you grab single slices as needed.
- Thawing frozen bread: For a whole loaf, thaw overnight in the refrigerator or for 2-3 hours at room temperature, still wrapped. Individual slices thaw in about 30 minutes at room temperature or can go straight from freezer to toaster.
- Reheating tips: To recreate that fresh-from-the-oven experience, wrap slices in aluminum foil and warm in a 300°F (150°C) oven for 10 minutes. Alternatively, microwave individual slices for 15-20 seconds, though this won’t crisp the edges like the oven does.
- Toasting slices: Day-old bread toasts beautifully. The chocolate chips get melty again, and the edges get perfectly crispy. Toast on medium heat to avoid burning the chocolate.
- Reviving stale bread: If the bread starts to dry out, brush slices lightly with melted butter and toast in a skillet until golden. The butter adds moisture back and creates a delicious crispy exterior.
- Storing leftovers: If you’ve only eaten part of the loaf, keep the remaining bread in the original loaf shape rather than separating slices. This reduces the exposed surface area and keeps it fresher longer.
For a different take on breakfast bread, try my Easy Pancake Recipe when you want something quicker.
_result.jpg "Chocolate Chip Bread Recipe | Sweet Treat for Coffee Lovers")
Nutritional Facts
Per slice (1/10 of loaf):
- Calories: 285
- Total Fat: 12g
- Saturated Fat: 5g
- Trans Fat: 0g
- Cholesterol: 45mg
- Sodium: 245mg
- Total Carbohydrates: 41g
- Dietary Fiber: 1.5g
- Sugars: 25g
- Protein: 4g
- Vitamin A: 4% DV
- Calcium: 6% DV
- Iron: 8% DV
Note: Nutritional information is approximate and calculated based on standard ingredient measurements. Values may vary depending on specific brands used and portion sizes.
Health Benefits of Key Ingredients
While this Chocolate Chip Bread is definitely a treat rather than health food, several ingredients provide nutritional benefits beyond just great taste. I think it’s worth knowing what you’re eating, even when you’re indulging.
Here’s what these ingredients offer:
- Eggs: Provide high-quality protein and essential vitamins like B12, riboflavin, and selenium. The yolks contain choline, which supports brain health and development. Each egg adds structure to the bread while contributing important nutrients.
- Sour cream: Despite its indulgent reputation, sour cream provides calcium for bone health and probiotics that support digestive health. It also contains vitamin A and several B vitamins. The fat content helps your body absorb fat-soluble vitamins from other ingredients.
- Dark chocolate chips: If you opt for chips with 60% or higher cocoa content, you’ll get flavonoids that support heart health and may help reduce inflammation. Dark chocolate also contains iron, magnesium, and copper. The key is moderation, but there are genuine benefits here.
- Milk: Contributes calcium, vitamin D, and protein. These nutrients support bone health, immune function, and muscle repair. Whole milk also provides conjugated linoleic acid (CLA), which may have metabolic benefits.
- Vanilla extract: Contains trace amounts of antioxidants and has been studied for its potential mood-enhancing properties. While you’re not using enough to get significant benefits, pure vanilla extract is preferable to artificial flavoring.
- Cinnamon: This warming spice has anti-inflammatory properties and may help regulate blood sugar levels. It’s rich in antioxidants and has been studied for its potential to support heart health and brain function.
Read Also: Vasilopita Bread Recipe
FAQs About Chocolate Chip Bread
Over the years of making and sharing this recipe, I’ve gotten tons of questions from friends, family, and readers. These are the most common questions I hear, along with detailed answers based on my experience.
1. Can I use oil instead of butter or vice versa?
This recipe calls for vegetable oil, which creates a tender, moist crumb that stays soft for days. You can absolutely substitute melted butter for the oil in a 1:1 ratio.
The flavor will be slightly richer with butter, but the bread will firm up more quickly as it cools and may dry out faster. I’ve made it both ways and prefer oil for texture, but butter for special occasions when I want extra richness.
2. Why did my chocolate chips sink to the bottom?
The most common reason is skipping the step where you toss the chocolate chips in flour before folding them into the batter. That flour coating helps the chips stay suspended throughout the batter instead of sinking during baking.
Another possibility is that your batter was too thin (possibly from overmixing or measuring flour incorrectly), which can’t support the weight of the chips. Make sure you’re spooning flour into your measuring cup and leveling it off rather than scooping directly from the bag.
3. Can I make this recipe into muffins instead of a loaf?
Yes, and I do this often when I need individual portions for breakfast meal prep. Fill standard muffin cups about ⅔ full with batter.
Bake at 350°F (175°C) for 18-22 minutes, checking for doneness with a toothpick at 18 minutes. The muffins are done when a toothpick inserted in the center comes out clean or with just a few moist crumbs.
4. How do I know when the bread is fully baked?
The toothpick test can be tricky with all those chocolate chips, so look for multiple signs of doneness. The top should be golden brown and firm to the touch, springing back when lightly pressed.
The edges should pull slightly away from the pan sides. The bread should reach an internal temperature of 200-205°F (93-96°C) if you have an instant-read thermometer, which is the most reliable method.
5. Can I reduce the sugar without affecting the texture?
You can reduce the sugar by up to ¼ cup (down to ½ cup total) without significantly affecting the bread’s structure. Below that amount, you’ll notice changes in texture because sugar doesn’t just add sweetness, it also contributes to moisture retention and browning.
If you want a less sweet version, I’d recommend reducing the sugar to ½ cup and using unsweetened dark chocolate chips instead of semi-sweet. This maintains the chocolate flavor while cutting overall sweetness.
For a fun twist on bread recipes, check out my Cracklin Bread Recipe.
Final Thoughts
This Chocolate Chip Bread Recipe has earned its place as one of my most-made recipes for good reason. It’s simple enough for a Tuesday morning yet special enough to gift to people you want to impress.
I hope this recipe brings as much joy to your kitchen as it has to mine. The first bite of warm bread with melty chocolate is pure comfort, and I promise you’ll find yourself making this again and again.
Give this recipe a try and let me know how it turns out! I’d love to hear about any variations you create or how your family enjoys it. Drop a comment below or share a photo if you make it!
Recommended:
- Einkorn Bread Recipe
- Same Day Sourdough Bread Recipe
- Dinner Rolls Recipe
- Homemade Biscuit Recipe
- Sugar Cookies Recipe
- Peanut Butter Cookies Recipe
- Oatmeal Cookies Recipe
- No Bake Cookies Recipe
- Healthy Chocolate Chip Cookies Recipe
- Gingerbread Cookie Recipe
