
I never thought I’d be the person who makes pumpkin pie from scratch. For years, I was perfectly content buying the frozen kind from the grocery store.
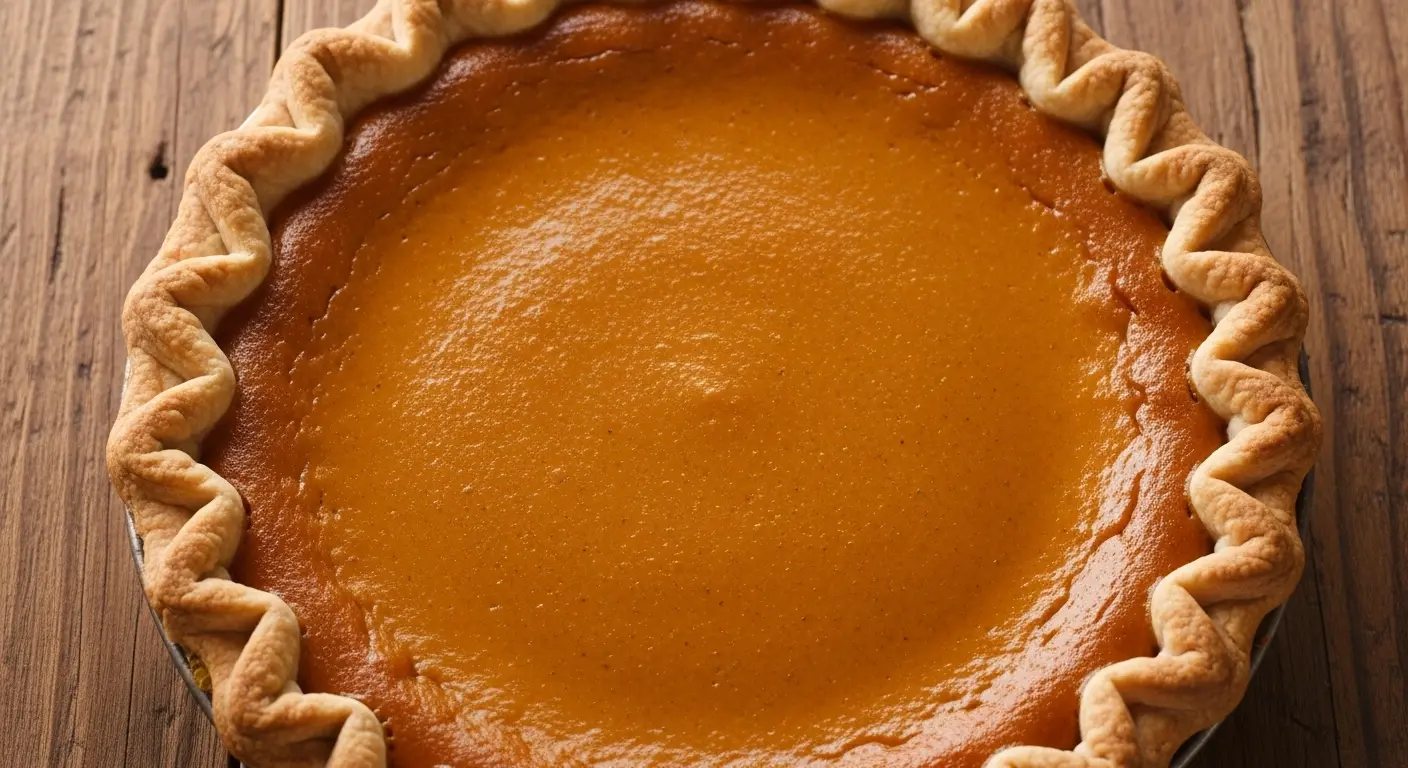
But everything changed the year my grandmother handed me her handwritten recipe card and told me it was time I learned to make it myself. That first attempt was messy, the crust shrank a bit, and I may have overmixed the filling. But when I pulled that pie out of the oven and saw the perfectly set custard with those little cracks on top, I was hooked.
Now, this pumpkin pie recipe has become my go-to every fall. I’ve made it for Thanksgiving dinners, casual Sunday brunches, and even just because I was craving that warm spice aroma filling my kitchen. The best part is that it’s actually simpler than you’d think, and the homemade version beats store-bought any day of the week.
| Quick Recipe Summary | |
|---|---|
| Prep Time | 20 minutes |
| Cook Time | 55 minutes |
| Total Time | 1 hour 15 minutes (plus cooling time) |
| Servings | 8 slices |
| Difficulty Level | Moderate |

Why You’ll Love This Pumpkin Pie Recipe
This isn’t just another pumpkin pie. It’s the kind that makes people ask for seconds and beg for the recipe.
The filling is silky smooth with the perfect balance of spices. I use a combination of cinnamon, ginger, nutmeg, and just a touch of cloves that creates this warm, cozy flavor without any single spice overpowering the others.
The texture is what really sets this apart. It’s creamy and custardy but still holds its shape when you slice it. No watery filling or soggy bottom crust here.
I’ve also figured out the trick to preventing cracks, which used to plague my early attempts. The secret is all in the baking temperature and knowing when to pull it from the oven.
Here’s why this recipe works:
- Fresh pumpkin puree option: While canned works great, I’ll show you how to use fresh pumpkin for an even more vibrant flavor
- Foolproof crust: My technique ensures a flaky, golden crust that never gets soggy
- Perfect spice blend: Years of tweaking have led to the ideal ratio that tastes like fall in every bite
- Make-ahead friendly: You can prepare components in advance, making holiday entertaining stress-free
- Consistent results: This recipe works every single time, even if you’re a beginner baker
The filling also pairs wonderfully with my pumpkin bar recipe if you’re looking to create a full pumpkin dessert spread.
Ingredients
Getting the right ingredients is half the battle with pumpkin pie. I’m particular about using pure pumpkin puree, not pumpkin pie filling, because it gives you control over the sweetness and spice levels. The evaporated milk is non-negotiable for that rich, creamy texture that heavy cream alone can’t achieve.
For the Crust:
- 1¼ cups (156g) all-purpose flour
- ½ teaspoon salt
- ½ teaspoon granulated sugar
- ½ cup (113g) cold unsalted butter, cut into small cubes
- 3-4 tablespoons ice water
For the Filling:
- 1 (15-ounce/425g) can pure pumpkin puree (not pumpkin pie filling)
- ¾ cup (150g) packed light brown sugar
- 1 teaspoon ground cinnamon
- ½ teaspoon ground ginger
- ½ teaspoon ground nutmeg
- ¼ teaspoon ground cloves
- ½ teaspoon salt
- 3 large eggs
- 1 cup (240ml) evaporated milk
- ½ cup (120ml) heavy cream
- 1 teaspoon pure vanilla extract
Kitchen Equipment Needed
You don’t need a fancy kitchen to make incredible pumpkin pie, but having the right tools makes the process so much smoother. I learned this the hard way when I tried making pie crust with a flimsy rolling pin that kept sticking.
- 9-inch pie dish (glass or ceramic works best)
- Large mixing bowl
- Medium mixing bowl
- Pastry cutter or fork (for cutting butter into flour)
- Rolling pin
- Whisk
- Measuring cups and spoons
- Plastic wrap
- Pie weights or dried beans (for blind baking)
- Parchment paper
- Cooling rack
Recommended Products for This Recipe
These are the tools and ingredients that have genuinely improved my pumpkin pie over the years. I’m not suggesting you need everything on this list, but these items have made a noticeable difference in my results.
1. Emile Henry Modern Classics Pie Dish
This ceramic pie dish is a total workhorse in my kitchen. It distributes heat beautifully, which means your crust bakes evenly without burning on the edges while the center stays pale. The fluted edges also make crimping a breeze, and it goes from oven to table looking gorgeous.
2. Libby’s 100% Pure Pumpkin
I’ve tested probably a dozen brands of canned pumpkin, and Libby’s consistently has the best texture and flavor. It’s smooth without being watery, and the color is this rich, deep orange that makes your pie look as good as it tastes. Keep a few cans in your pantry for last-minute baking emergencies.
3. Mrs. Anderson’s Baking Ceramic Pie Weights
Blind baking your crust keeps it crisp and prevents that dreaded soggy bottom. These ceramic weights work better than dried beans because they conduct heat more evenly. They’re reusable forever, and the ceramic won’t give off any weird flavors like some metal chains can.
4. Nielsen-Massey Madagascar Bourbon Vanilla Extract
Quality vanilla makes a bigger difference than you’d think in pumpkin pie. This extract has a deep, complex flavor that brings out the warm spices without tasting artificial. A little goes a long way, and one bottle lasts through dozens of baking projects.
Another fall favorite that uses similar spices is my pumpkin spice latte recipe.
Step-by-Step Instructions: How to Make Pumpkin Pie
Making pumpkin pie from scratch might seem intimidating, but I promise it’s more forgiving than you think. I’ve broken down every step so you can’t go wrong.
1. Prepare the Pie Crust
- In a large mixing bowl, whisk together the flour, salt, and sugar until well combined
- Add the cold butter cubes to the flour mixture and use a pastry cutter or fork to cut the butter into the flour until the mixture resembles coarse crumbs with some pea-sized pieces of butter remaining (this takes about 3-4 minutes of cutting)
- Drizzle 3 tablespoons of ice water over the mixture and use a fork to stir until the dough starts coming together
- If the dough seems too dry and won’t hold together when you squeeze it, add the remaining tablespoon of water one teaspoon at a time
- Turn the dough out onto a clean work surface and gently knead it 2-3 times just until it forms a cohesive ball (don’t overwork it or the crust will be tough)
- Flatten the dough into a disc about 1 inch thick, wrap it tightly in plastic wrap, and refrigerate for at least 30 minutes or up to 2 days
2. Roll Out and Blind Bake the Crust
- Preheat your oven to 375°F (190°C)
- Remove the chilled dough from the refrigerator and let it sit at room temperature for about 5 minutes to make rolling easier
- On a lightly floured surface, roll the dough from the center outward, rotating it a quarter turn after each roll, until you have a circle about 12 inches in diameter and ⅛ inch thick
- Carefully transfer the dough to your 9-inch pie dish by rolling it around your rolling pin and unrolling it over the dish
- Gently press the dough into the bottom and sides of the dish without stretching it
- Trim the excess dough hanging over the edge, leaving about a 1-inch overhang
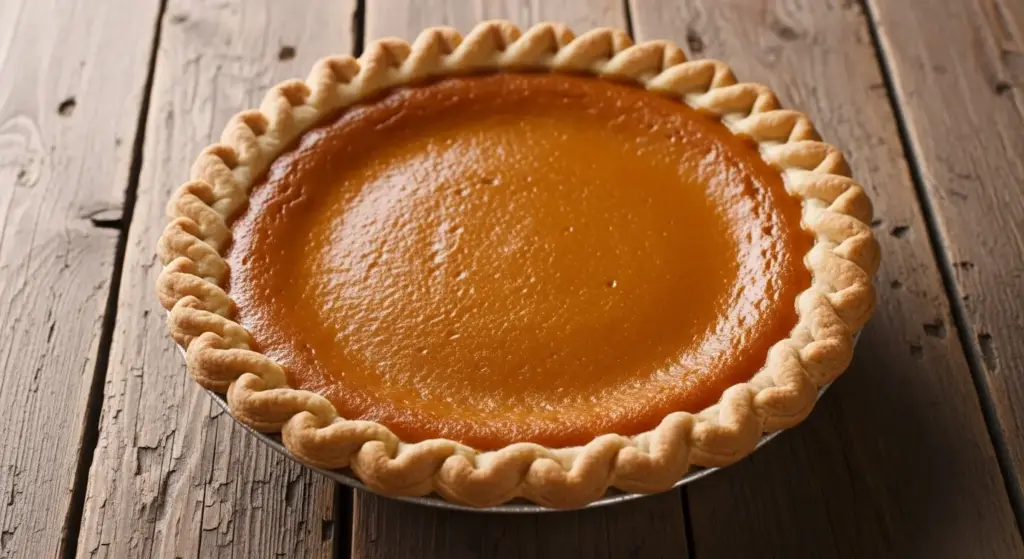
- Fold the overhang under itself and crimp the edges using your fingers or a fork to create a decorative border
- Prick the bottom of the crust all over with a fork about 10-12 times to prevent bubbling
- Line the crust with parchment paper and fill it with pie weights or dried beans
- Bake for 15 minutes, then carefully remove the parchment paper and weights
- Return the crust to the oven and bake for another 5-7 minutes until it’s just starting to turn golden
- Remove from the oven and set aside to cool slightly while you prepare the filling (reduce the oven temperature to 350°F/175°C)
3. Make the Pumpkin Filling
- In a large mixing bowl, whisk together the pumpkin puree, brown sugar, cinnamon, ginger, nutmeg, cloves, and salt until the mixture is smooth and the sugar has dissolved (about 1 minute of whisking)
- In a separate medium bowl, lightly beat the eggs with a fork just until the yolks and whites are combined
- Add the beaten eggs to the pumpkin mixture and whisk until fully incorporated
- Pour in the evaporated milk, heavy cream, and vanilla extract, then whisk everything together until the filling is completely smooth with no lumps (this should take about 30-45 seconds of vigorous whisking)
- Let the filling sit for 5 minutes, then use a spoon to skim off any foam or bubbles from the surface (this ensures a smooth top on your baked pie)
4. Assemble and Bake the Pie
- Place your partially baked pie crust on a baking sheet for easier handling and to catch any drips
- Pour the pumpkin filling into the crust, filling it to about ⅛ inch from the top edge
- Use a spoon to gently smooth the surface of the filling
- Carefully transfer the baking sheet with the pie to the preheated 350°F (175°C) oven
- Bake for 50-55 minutes, or until the edges of the filling are set but the center still has a slight jiggle when you gently shake the pan (it should wobble like jello, not slosh like liquid)
- If the crust edges start browning too quickly, tent them with aluminum foil or use a pie crust shield
- The internal temperature at the center should read 175°F (79°C) when checked with an instant-read thermometer
5. Cool and Serve
- Remove the pie from the oven and place it on a cooling rack
- Let the pie cool at room temperature for at least 2 hours (this allows the filling to finish setting)
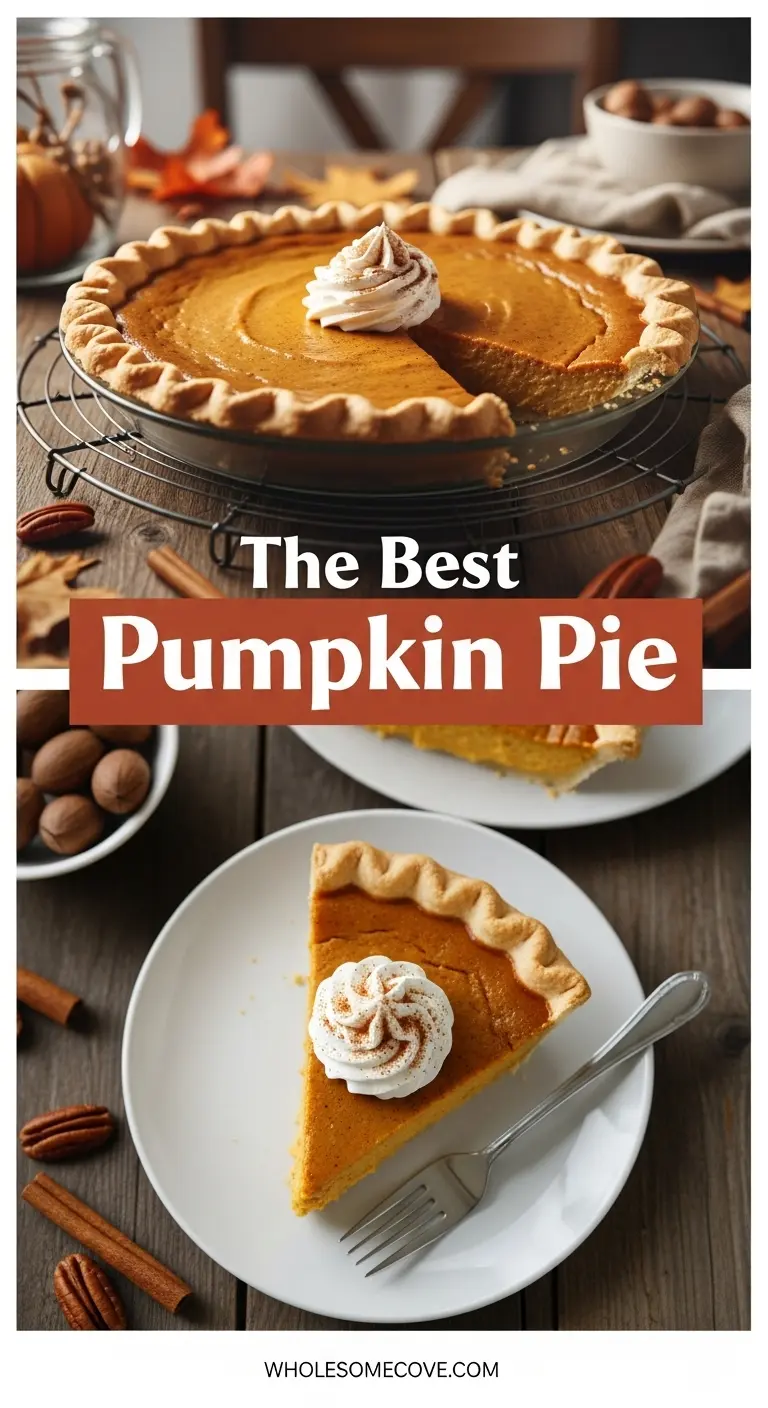
- For the cleanest slices, refrigerate the pie for at least 4 hours or overnight before serving
- When ready to serve, dip your knife in hot water and wipe it clean between each slice for neat, professional-looking cuts
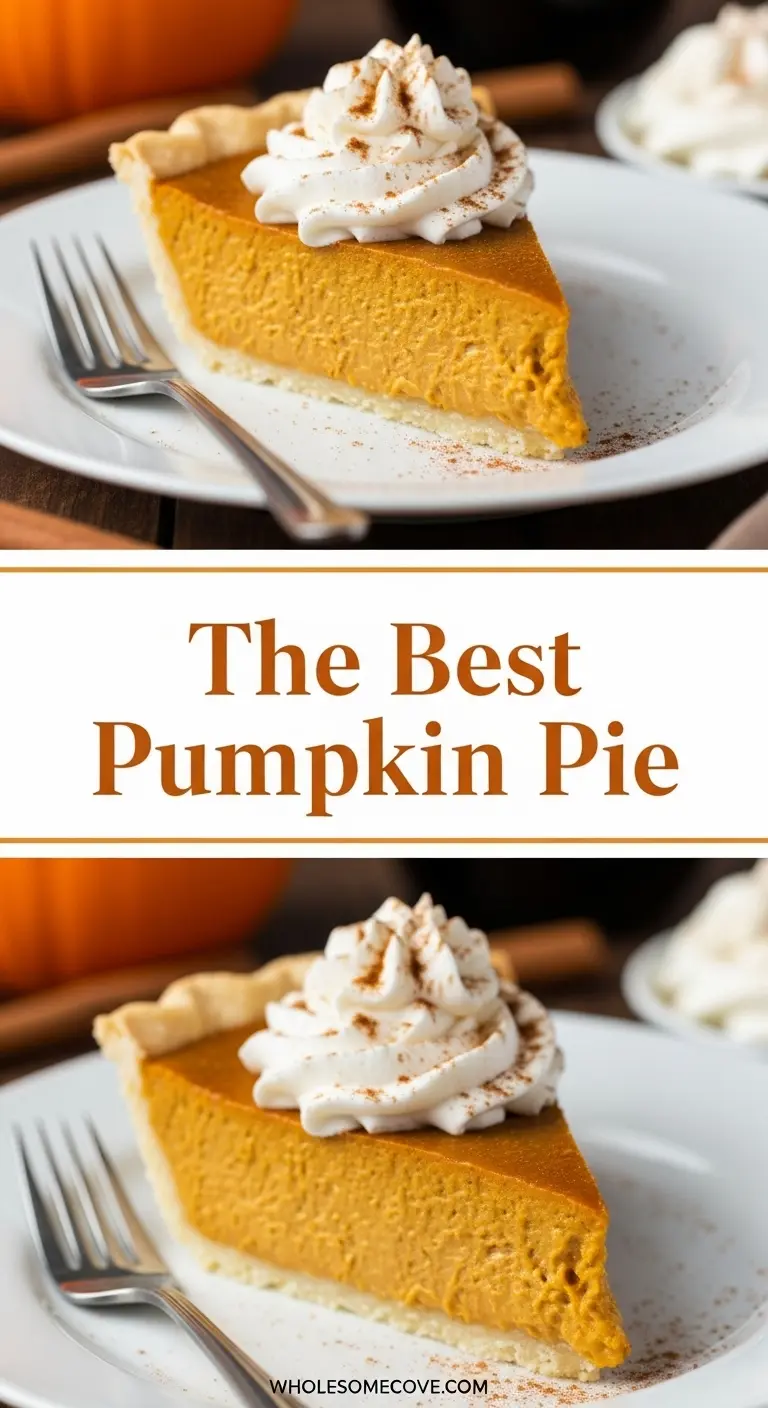
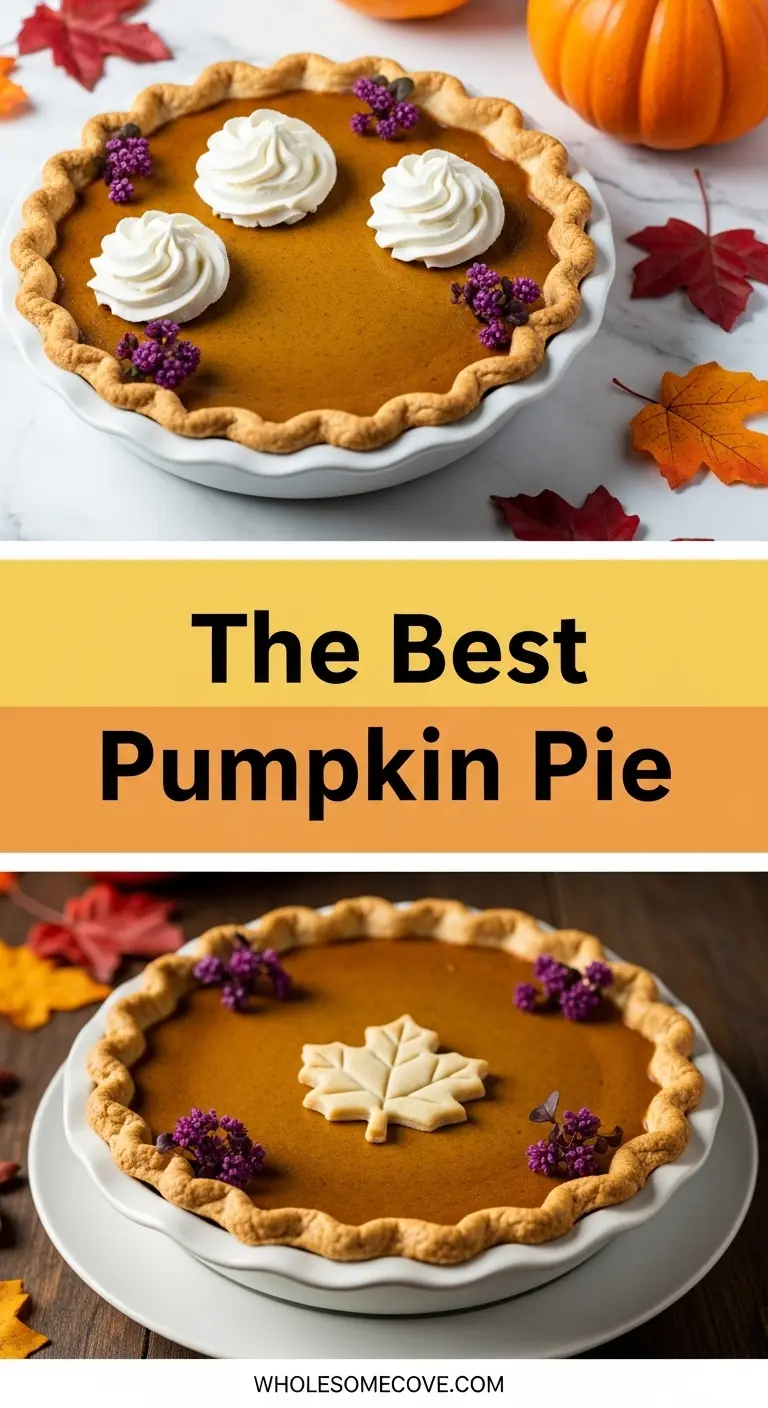
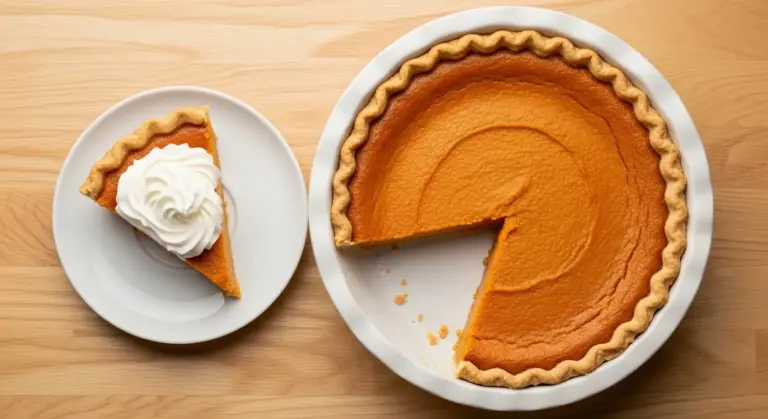
- Serve chilled or at room temperature with whipped cream or vanilla ice cream
You might also enjoy: Coconut Cream Pie Recipe
Tips for The Best Pumpkin Pie
I’ve made this pie dozens of times, and through plenty of trial and error, I’ve learned what really makes the difference between a good pie and a great one. These tips are the result of all those lessons learned.
Pro tips for perfect results:
- Use cold butter for the crust: The colder your butter, the flakier your crust will be. I sometimes even freeze my butter for 10 minutes before cutting it into cubes.
- Don’t skip the blind baking: This step prevents a soggy bottom, which was my nemesis for years. The extra 20 minutes is absolutely worth it.
- Room temperature eggs mix better: Cold eggs don’t incorporate as smoothly into the filling. Take them out of the fridge 30 minutes before you start baking.
- Watch the jiggle, not the clock: Every oven is different. Your pie is done when the edges are set but the center still jiggles slightly. It will continue cooking as it cools.
- Cool completely before slicing: I know it’s tempting to cut into a warm pie, but patience pays off. The filling needs time to set properly, or you’ll end up with a runny mess.
- Prevent cracks with gradual cooling: Turn off the oven when the pie is done and crack the door open. Let the pie cool in the oven for 15 minutes before removing it. This prevents the dramatic temperature change that causes cracks.
- Strain your filling for ultimate smoothness: If you want a restaurant-quality texture, pour your filling through a fine-mesh strainer before adding it to the crust.
- Check for doneness early: Start checking your pie at 45 minutes. Better to check early than to overbake and end up with a cracked, dry filling.
- Rotate halfway through: Turn your pie 180 degrees at the 25-minute mark to ensure even baking.
- Fresh spices matter: Spices lose potency over time. If your cinnamon or nutmeg has been sitting in your cabinet for years, invest in fresh bottles for the best flavor.
Serving Suggestions
Pumpkin pie is amazing on its own, but I love dressing it up depending on the occasion. Here are my favorite ways to serve it.
A classic dollop of freshly whipped cream is my go-to. I make mine with heavy cream, a touch of sugar, and a splash of vanilla. For something a bit different, try adding a hint of maple syrup or bourbon to your whipped cream for an adult twist.
Vanilla ice cream is another winner, especially if you’re serving the pie while it’s still slightly warm. The contrast between the warm spices and cold cream is incredible.
More serving ideas:
- Caramel drizzle: A generous pour of salted caramel sauce takes this pie to the next level
- Candied pecans: Add some crunch by sprinkling toasted or candied pecans on top
- Cinnamon whipped cream: Fold ground cinnamon into your whipped cream for extra warmth
- Maple cream: Mix equal parts maple syrup and heavy cream for a simple but elegant topping
- Coffee pairing: Serve alongside my pumpkin spice latte for the ultimate fall experience
- Breakfast leftover: Cold pumpkin pie with black coffee makes an unexpectedly perfect breakfast
This pairs beautifully with thanksgiving stuffing for a complete holiday meal.
Variations of Pumpkin Pie
Once you’ve mastered the basic recipe, it’s fun to experiment with different flavor profiles and dietary needs. I’ve tested all of these variations, and they’re just as delicious as the original.
Try these creative twists:
- Bourbon pumpkin pie: Add 2 tablespoons of bourbon to the filling for a sophisticated, warming flavor
- Maple pumpkin pie: Replace half the brown sugar with pure maple syrup for a deeper, more complex sweetness
- Chocolate swirl pumpkin pie: Melt 3 ounces of dark chocolate, pour half the pumpkin filling into the crust, drizzle the chocolate over it, add the remaining filling, and swirl with a knife
- Gingersnap crust: Replace the traditional pie crust with a crushed gingersnap cookie crust for extra spice and crunch
- Coconut pumpkin pie: Substitute coconut milk for the evaporated milk and add ½ cup of shredded coconut to the filling
- Streusel-topped: Skip the top crust and add a brown sugar, butter, and oat streusel topping for the last 15 minutes of baking
- Pumpkin cheesecake pie: Swirl 8 ounces of sweetened cream cheese into the pumpkin filling before baking
- Mini pumpkin pies: Divide the filling among individual tart pans or a muffin tin lined with pie crust for single-serving portions
- Gluten-free option: Use a gluten-free flour blend for the crust, or try an almond flour crust for a nutty flavor
- Vegan pumpkin pie: Replace the eggs with a flax egg mixture (3 tablespoons ground flaxseed mixed with 9 tablespoons water), use coconut cream instead of dairy, and ensure your crust is made with vegan butter
- Sugar-free version: Swap the brown sugar for a granulated sugar substitute like erythritol or monk fruit sweetener (though the texture may be slightly different)
- Spiced rum glaze: Brush the cooled pie with a mixture of powdered sugar, spiced rum, and a splash of milk
Read Also: Pumpkin Snickerdoodle Cookies Recipe
Storage and Reheating
Proper storage is key to keeping your pumpkin pie fresh and delicious. I’ve learned through experience that pumpkin pie actually tastes better after a day in the fridge, once the flavors have had time to meld together.
How to store your pumpkin pie:
- Room temperature: Only if serving within 2 hours. Pumpkin pie contains eggs and dairy, so it shouldn’t sit out longer than that.
- Refrigerator: Cover loosely with plastic wrap or aluminum foil and store for up to 4 days. I prefer foil because it won’t stick to the pie if it touches the surface.
- Freezer: Wrap the cooled pie tightly in plastic wrap, then in aluminum foil, and freeze for up to 2 months. Thaw overnight in the refrigerator before serving.
- Individual slices: Wrap each slice separately in plastic wrap and store in an airtight container in the fridge for easy grab-and-go portions.
- Crust protection: If your crust is getting soggy in storage, place a paper towel in the container to absorb excess moisture.
Reheating instructions:
- In the oven: Place individual slices on a baking sheet and warm at 300°F (150°C) for 10-15 minutes.
- In the microwave: Heat a slice for 20-30 seconds on medium power. Be careful not to overheat, or the filling will become watery.
- Frozen pie: Thaw completely in the refrigerator, then warm in a 300°F (150°C) oven for 20-25 minutes.
- Crust refresh: If the crust has lost its crispness, brush it lightly with melted butter and toast it in the oven at 350°F (175°C) for 5 minutes before adding it back to the pie.
For more fall baking ideas, check out my fall muffin recipes.
Nutritional Facts
Here’s the approximate nutritional breakdown per slice (based on 8 servings). Keep in mind that these numbers can vary depending on the specific brands you use and how thickly you slice the pie.
Per Slice:
- Calories: 320
- Total Fat: 16g
- Saturated Fat: 9g
- Cholesterol: 105mg
- Sodium: 280mg
- Total Carbohydrates: 39g
- Dietary Fiber: 2g
- Sugars: 24g
- Protein: 6g
- Vitamin A: 180% DV
- Calcium: 10% DV
- Iron: 8% DV
Health Benefits of Key Ingredients
While pumpkin pie is definitely a treat, it does contain some genuinely nutritious ingredients. I always feel a little less guilty about my second slice when I remember all the good stuff packed into that filling.
Pumpkin is loaded with beta-carotene, which your body converts to vitamin A. This nutrient is essential for eye health, immune function, and skin health. A single slice gives you a significant portion of your daily vitamin A needs.
Additional health benefits:
- Fiber content: Pumpkin provides dietary fiber that supports digestive health and helps you feel satisfied longer
- Antioxidant-rich spices: Cinnamon may help regulate blood sugar levels, while ginger has anti-inflammatory properties
- Protein from eggs: The eggs in the filling provide complete protein with all nine essential amino acids
- Calcium and vitamin D: The dairy ingredients contribute to bone health
- Iron from pumpkin: Helps prevent anemia and supports energy levels
- Potassium: Pumpkin is a good source of potassium, which helps regulate blood pressure
- Vitamin C: Supports immune function and collagen production
Another favorite that uses this nutritious ingredient is my pumpkin sage pasta.
FAQs About Pumpkin Pie
1. Can I use fresh pumpkin instead of canned?
Absolutely, and I actually prefer it when I have the time. You’ll need about 2 cups of pumpkin puree from a sugar pumpkin. Cut the pumpkin in half, scoop out the seeds, and roast it face-down on a baking sheet at 350°F (175°C) for about 45 minutes until soft. Let it cool, scoop out the flesh, and puree it in a food processor until completely smooth. Fresh pumpkin can be slightly more watery than canned, so you may want to drain it in a cheesecloth-lined strainer for 30 minutes before using.
2. Why did my pumpkin pie crack?
Cracks usually happen from overbaking or cooling too quickly. The filling continues to cook after you remove it from the oven, so take it out when the center still jiggles slightly. I learned to turn off the oven and let the pie cool inside with the door cracked open for 15 minutes, which prevents the dramatic temperature change that causes cracks. If your pie does crack, don’t worry – a generous dollop of whipped cream covers a multitude of baking sins.
3. How do I know when my pumpkin pie is done?
This tripped me up for years until I learned the jiggle test. Gently shake the pan – the edges should be set and firm, but the center should still jiggle like jello (about a 3-inch diameter circle in the middle). The center will firm up as it cools. If you want to be precise, use an instant-read thermometer – the center should reach 175°F (79°C).
4. Can I make pumpkin pie ahead of time?
Yes, and honestly, it’s even better when made ahead. The flavors have time to develop and meld together. You can bake it up to 2 days before serving and store it covered in the refrigerator. You can also make and freeze the unbaked crust up to 3 months in advance, or freeze the entire baked pie for up to 2 months. Just thaw it overnight in the fridge before serving.
5. Why is my pie crust soggy?
A soggy crust usually means the crust wasn’t blind-baked long enough before adding the filling. Make sure you bake the empty crust with weights for 15 minutes, then without weights for another 5-7 minutes until it’s just starting to turn golden. Also, make sure your filling isn’t too liquidy – it should be thick and smooth. If you’ve had persistent soggy crust issues, try brushing the pre-baked crust with a beaten egg white and baking it for another 2 minutes before adding the filling. This creates a moisture barrier.
Check out my healthy pumpkin pie recipe for a lighter version.
Homemade Pumpkin Pie
Ingredients
- 1¼ cups all-purpose flour - 156g
- ½ teaspoon salt
- ½ teaspoon granulated sugar
- ½ cup cold unsalted butter - 113g, cut into small cubes
- 3-4 tablespoons ice water
- 1 can pure pumpkin puree - 15-ounce/425g, not pumpkin pie filling
- ¾ cup packed light brown sugar - 150g
- 1 teaspoon ground cinnamon
- ½ teaspoon ground ginger
- ½ teaspoon ground nutmeg
- ¼ teaspoon ground cloves
- ½ teaspoon salt
- 3 large eggs - room temperature
- 1 cup evaporated milk - 240ml
- ½ cup heavy cream - 120ml
- 1 teaspoon pure vanilla extract
Equipment
- 9-inch pie dish - glass or ceramic works best
- Large mixing bowl
- Medium mixing bowl
- Pastry cutter or fork - for cutting butter into flour
- Rolling Pin
- Whisk
- Measuring cups and spoons
- Plastic wrap
- Pie weights or dried beans - for blind baking
- Parchment paper
- Cooling rack
- Baking sheet
Method
- Whisk together flour, salt, and sugar. Cut in cold butter cubes until mixture resembles coarse crumbs with pea-sized pieces.
- Drizzle 3 tablespoons ice water over mixture and stir with fork until dough comes together. Add remaining water if needed, one teaspoon at a time.
- Gently knead dough 2-3 times, flatten into 1-inch disc, wrap in plastic, and refrigerate for at least 30 minutes.
- Preheat oven to 375°F (190°C). Roll chilled dough into 12-inch circle, transfer to 9-inch pie dish, and crimp edges.
- Prick bottom with fork, line with parchment and pie weights. Bake 15 minutes, remove weights, then bake 5-7 minutes more until golden.
- Remove crust from oven and reduce temperature to 350°F (175°C).
- Whisk together pumpkin puree, brown sugar, cinnamon, ginger, nutmeg, cloves, and salt until smooth.
- Beat eggs lightly, add to pumpkin mixture and whisk. Add evaporated milk, heavy cream, and vanilla, whisking until completely smooth.
- Let filling sit 5 minutes, then skim off any foam. Pour into prepared crust on a baking sheet.
- Bake 50-55 minutes until edges are set but center still jiggles slightly. Internal temperature should reach 175°F (79°C).
- Cool on rack for at least 2 hours. For best results, refrigerate 4 hours or overnight before slicing and serving.
Nutrition
Notes
- Use cold butter and don’t overwork the dough for the flakiest crust.
- Blind baking prevents soggy bottom crust – don’t skip this step.
- Pie is done when edges are set but center still jiggles like jello (about 3-inch diameter).
- For crack prevention, turn off oven when done and let pie cool inside with door cracked for 15 minutes.
- Fresh pumpkin can be substituted: roast sugar pumpkin halves face-down at 350°F for 45 minutes, then puree and drain excess liquid.
- For ultra-smooth filling, strain through fine-mesh strainer before pouring into crust.
- Rotate pie 180 degrees at 25-minute mark for even baking.
- Store covered in refrigerator for up to 4 days, or freeze wrapped tightly for up to 2 months.
- Dip knife in hot water and wipe clean between slices for neat cuts.
- Serve with whipped cream, vanilla ice cream, or caramel drizzle.
Private Notes
Tried this recipe?
Let us know how it was!Final Thoughts
Making homemade pumpkin pie might seem like a lot of work compared to buying one from the store, but I promise the difference in flavor and texture is absolutely worth it. There’s something special about serving a pie you made from scratch, especially during the holidays when everyone gathers around the table.
This recipe has become my most-requested dessert, and I love that it’s versatile enough to dress up or keep simple depending on the occasion. I hope it becomes a favorite in your home too. Give it a try, and don’t be afraid to make it your own with some of the variations I’ve shared.
Recommended:
- Pumpkin Cookies Recipe
- Pumpkin Chocolate Chip Cookies Recipe
- Pumpkin French Toast Recipe
- Apple Crisp Recipe
- Gingerbread Cookie Recipe
- Sweet Potato Bread Recipe
- Thanksgiving Turkey Recipe
- Baked Oatmeal Recipe
- Homemade Cinnamon Applesauce Recipe
- Healthy Apple Pie Recipe
