
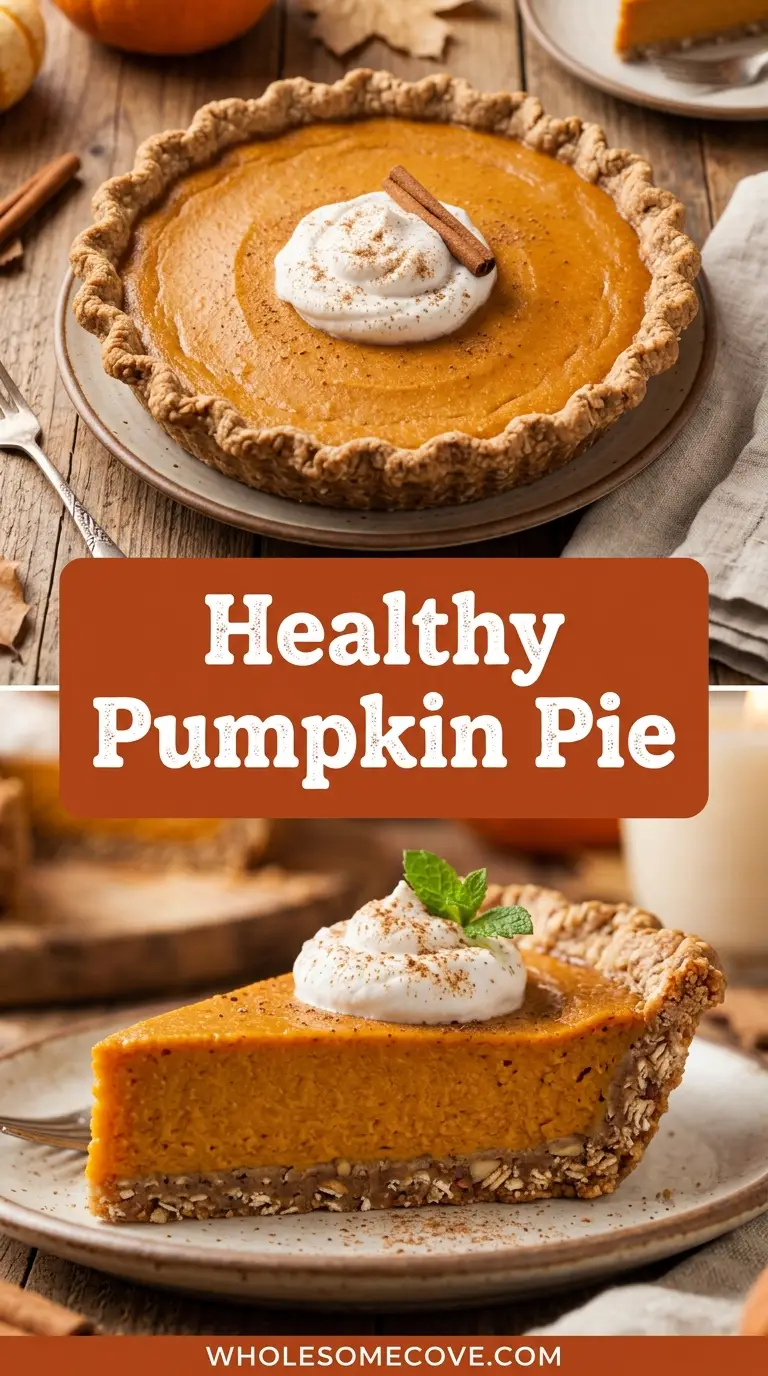
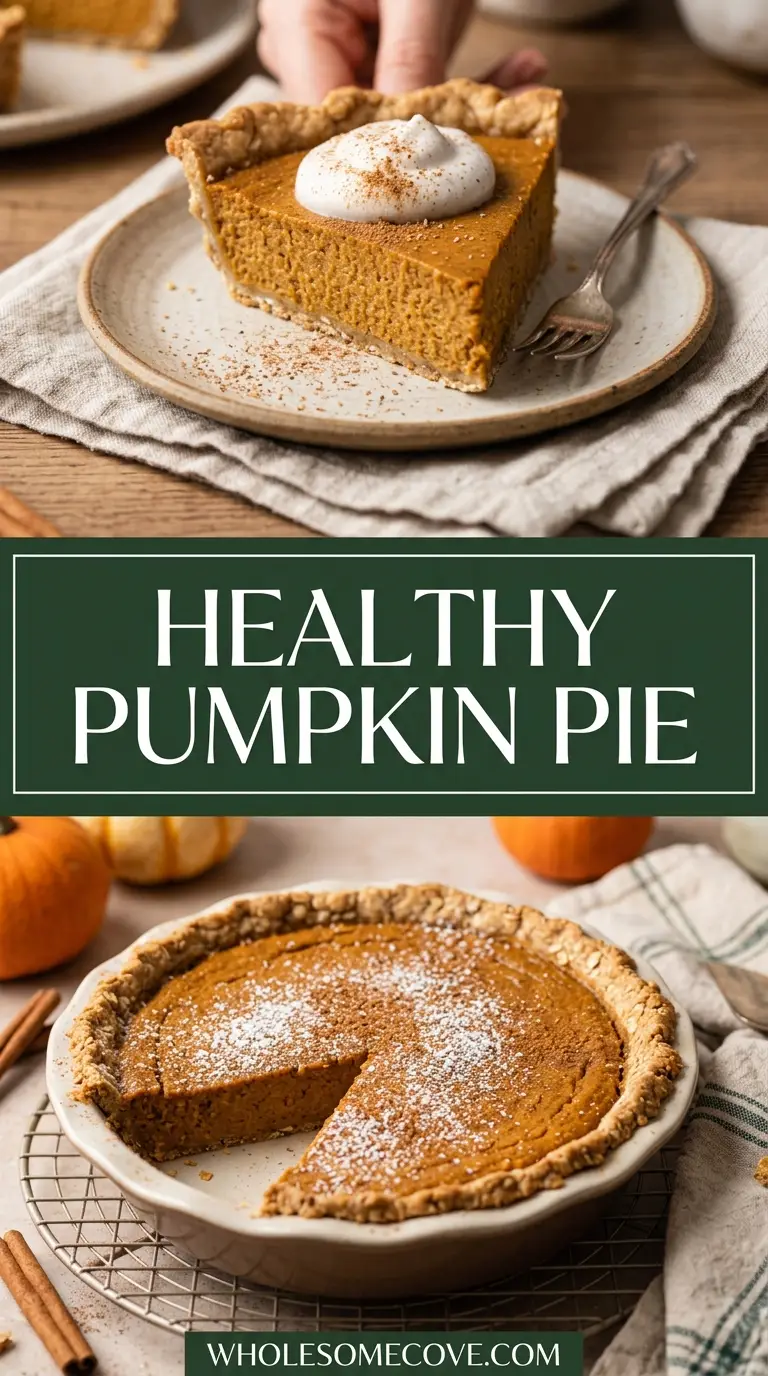
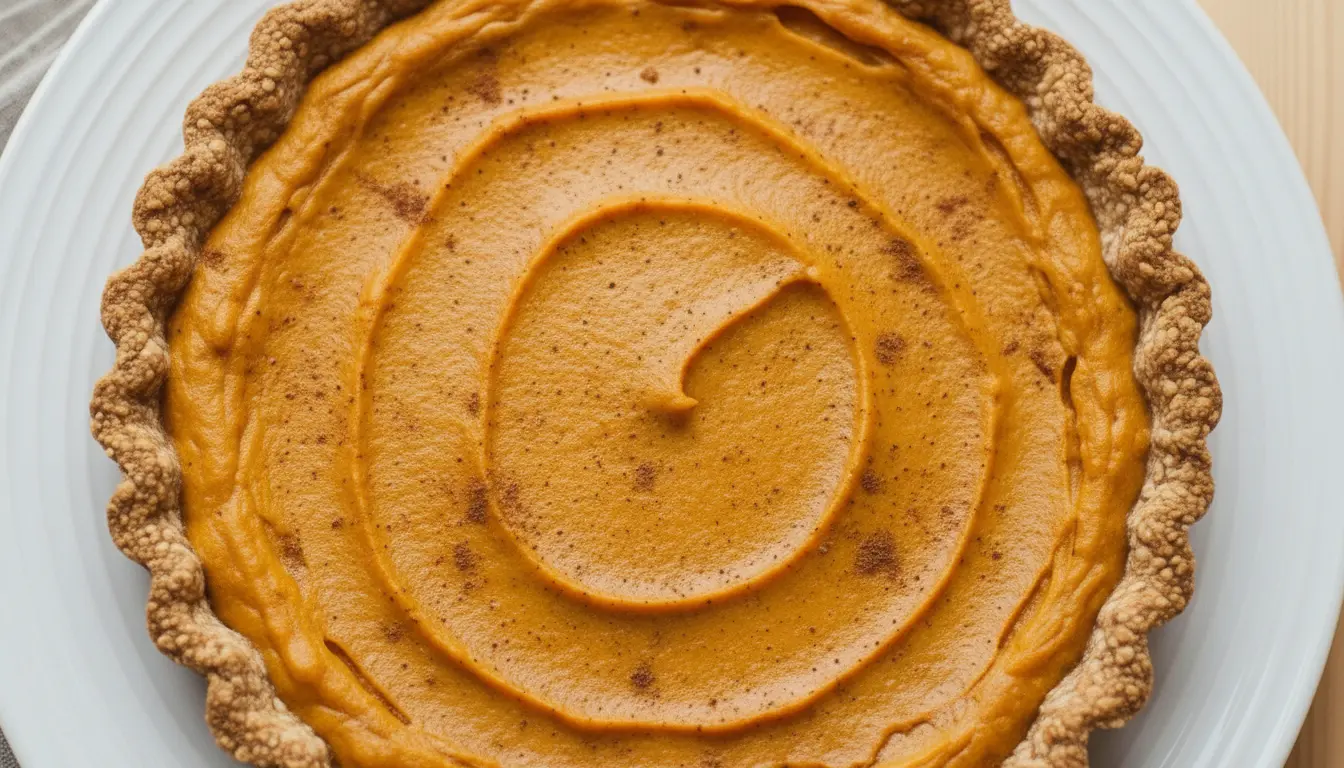
Fall baking season wouldn’t be complete without a creamy, perfectly spiced healthy pumpkin pie recipe on the table. This version skips the condensed milk and refined sugar without skipping any of the flavor — it’s lightly sweetened with pure maple syrup, made creamy with Greek yogurt, and absolutely loaded with warm pumpkin spice.
I brought this to my family’s Thanksgiving two years ago fully expecting skepticism, and by the end of the night, the pie dish was completely clean.
That experience changed how I think about “healthier” desserts. It’s not about sacrifice — it’s about finding the right swaps. The first time I made a healthy pumpkin pie, I used too much almond milk and the filling never quite set.
The second time, I over-baked it chasing a firm center, and it came out dry and cracked. This recipe is the result of learning from those mistakes.
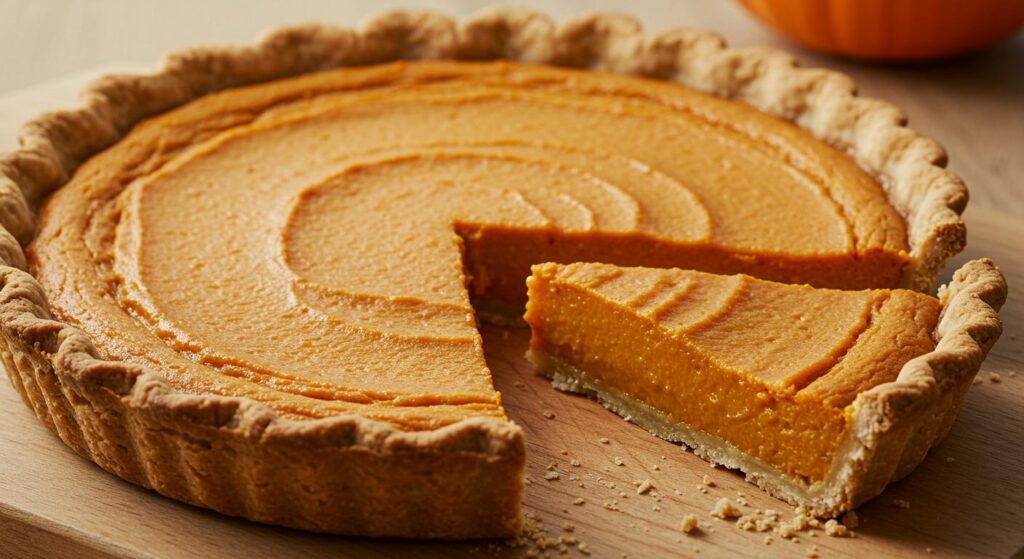
The filling in this pie is silky, custardy, and deeply spiced. It uses a regular 9-inch pie crust (store-bought works perfectly), so you’re not fussing with pastry dough unless you want to. From mixing bowl to oven, the filling comes together in about 10 minutes flat.
| Quick Recipe Summary | |
|---|---|
| Prep Time | 15 minutes |
| Cook Time | 60 minutes |
| Total Time | 1 hour 15 minutes (plus cooling time) |
| Servings | 8 slices |
| Difficulty Level | Easy |
If you love classic fall pies, you’ll also want to bookmark my Pumpkin Pie Recipe for the traditional version — it’s the perfect side-by-side comparison.
Why You’ll Love This Healthy Pumpkin Pie Recipe
This pie is proof that a lighter version of a classic can be just as satisfying as the original. It uses pure maple syrup and a touch of coconut sugar instead of refined white sugar, keeping the sweetness natural and nuanced.
Greek yogurt stands in for heavy cream or evaporated milk, adding creaminess along with a little protein boost. You’d never guess it from the texture — the filling is smooth and rich, with none of that “healthy dessert” aftertaste.
The spice blend is generous and warming, hitting every note you expect from a great pumpkin pie. Cinnamon, nutmeg, ginger, and cloves come together to create that signature cozy, fall aroma.
It’s naturally gluten-free in the filling, so anyone with dietary restrictions can enjoy it when paired with a gluten-free crust. That alone makes it a crowd-pleaser at holiday tables with mixed dietary needs.
- Naturally sweetened: Pure maple syrup and coconut sugar replace refined white sugar entirely, giving the filling a richer, more complex sweetness with a hint of caramel.
- No condensed milk needed: Greek yogurt replaces heavy cream or evaporated milk, making the filling lighter without losing any creaminess.
- Deep, warming spice flavor: A full blend of cinnamon, nutmeg, ginger, and cloves gives this pie that classic holiday fragrance and flavor.
- Simple to make: The filling comes together in one bowl with a whisk — no electric mixer, no double boiler, no complicated steps.
- Make-ahead friendly: This pie actually tastes better the next day, making it ideal for stress-free Thanksgiving prep.
- Adaptable: Easily made dairy-free by swapping Greek yogurt for full-fat coconut milk, and gluten-free by choosing the right crust.
- Crowd-pleasing: Even family members who are skeptical of “healthy” desserts have come back for seconds every single time.
For another lighter holiday dessert, try my Healthy Apple Pie — same wholesome approach, equally delicious.
Ingredients
The key to this pie is choosing high-quality, pure ingredients. The fewer additives in your pumpkin puree, the better — look for cans that list only “pumpkin” on the label. Pure maple syrup (not pancake syrup) makes a noticeable difference in both flavor and texture.
For the Pie Crust:
- 1 (9-inch / 23 cm) unbaked pie crust (store-bought or homemade)
For the Pumpkin Pie Filling:
- 1 (15 oz / 425 g) can pure pumpkin puree (not pumpkin pie filling)
- 3 large eggs, at room temperature
- 1/2 cup (120 ml) pure maple syrup
- 3 tablespoons (35 g) coconut sugar
- 1/2 cup (120 g) plain Greek yogurt (full-fat or 2%)
- 1 teaspoon vanilla extract
- 2 teaspoons pumpkin pie spice
- 1 teaspoon ground cinnamon
- 1/4 teaspoon ground nutmeg
- 1/4 teaspoon ground ginger
- 1/4 teaspoon fine sea salt
Optional Toppings:
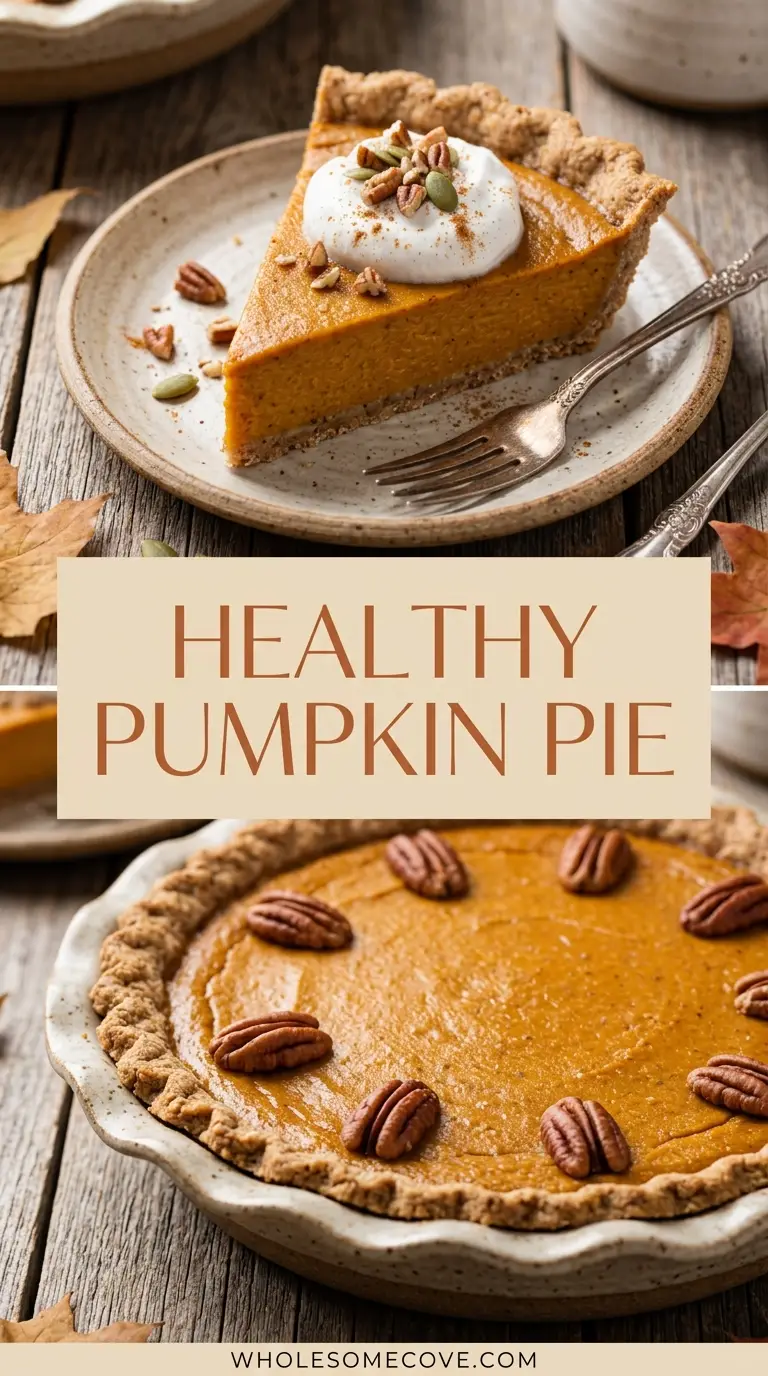
- Whipped cream or coconut whipped cream
- A sprinkle of cinnamon or pumpkin pie spice
For a different spin on fall pies, my Pumpkin Cheesecake Recipe is a total showstopper and surprisingly easy to pull off.
Kitchen Equipment Needed
You don’t need any special tools for this recipe — just the basics. A standard 9-inch (23 cm) pie dish is essential for the right depth and bake time. Using a baking sheet underneath the pie pan is a trick I always recommend — it catches any drips and promotes more even heat from the bottom.
- 9-inch (23 cm) pie dish — glass or ceramic works best for even baking
- Large mixing bowl
- Whisk
- Rubber spatula or wooden spoon
- Baking sheet — for placing under the pie for stability and even heat
- Pie crust shield or aluminum foil — to prevent the edges from over-browning
- Wire cooling rack
- Measuring cups and spoons
- Knife or toothpick for the doneness test
Another beautiful pie to add to your fall baking lineup is this Sweet Potato Pie — it’s a wonderful neighbor to pumpkin pie on any holiday dessert table.
Recommended Products for This Recipe
I’ve made this pie dozens of times, and a few specific products have made a real difference in the final result. These are the ones I actually reach for.
1. Libby’s 100% Pure Pumpkin Puree
Libby’s consistently produces a dense, rich puree with almost no excess water, which means a firmer, more flavorful filling every time. If you use a waterier brand, your filling can end up too loose and take significantly longer to set. It’s the brand I’ve trusted for years, and it shows up in this pie in the best possible way.
2. Organic Pure Maple Syrup (Grade A, Dark Robust)
The darker Grade A maple syrup has a deeper, more pronounced maple flavor that holds its own against the bold pumpkin spices. Lighter syrups can get a little lost in the filling. I use this in everything from oatmeal to pie, and it makes a noticeable difference compared to generic pancake syrup.
3. OXO Good Grips 9-Inch Pie Plate
This pie plate distributes heat beautifully and has clear glass so you can check on the crust browning without pulling it from the oven. The handles make it easy to move a full, jiggly pie in and out of the oven safely. I’ve cracked cheaper pie dishes before — this one has never let me down.
4. Norpro Adjustable Pie Crust Shield
Nothing is more frustrating than a perfectly set filling with a burnt crust edge. This adjustable silicone shield fits most 9-inch pie dishes and protects the edges without the faff of crimping foil around the rim every time. It’s a small investment that saves a lot of headaches.
If you’re planning your fall baking, you’ll love this Pumpkin Roll Recipe too — it’s a stunner for any holiday spread.
Step-by-Step Instructions: How to Make Healthy Pumpkin Pie
Step 1: Prepare Your Workspace and Preheat the Oven
- Preheat your oven to 350°F (175°C) and position a rack in the center of the oven. The center rack ensures even, consistent heat from all sides.
- Place a rimmed baking sheet on the center rack while the oven preheats. You’ll set the pie dish directly on this preheated baking sheet — it helps the bottom crust bake through fully.
- Take your eggs out of the refrigerator and let them come to room temperature for 10–15 minutes. Room temperature eggs blend more smoothly into the filling, giving it a silkier texture.
Step 2: Prepare the Pie Crust
- Remove your pie crust from the refrigerator and let it soften slightly for about 5 minutes if you’re using a refrigerated store-bought crust. This prevents cracking when you handle it.
- Gently press or roll the crust into your 9-inch (23 cm) pie dish. If the crust tears, press it back together with your fingertips — it doesn’t have to be perfect.
- Fold any overhanging dough under itself along the rim to create a thick edge, then crimp it using your thumb and forefinger or press with a fork for a simple decorative border.
- Place the prepared crust in the refrigerator while you make the filling. Keeping the crust cold before it goes into the oven helps prevent the fat from melting too quickly, which gives you flakier layers.
Step 3: Make the Pumpkin Pie Filling
- Open the can of pure pumpkin puree and scoop it into your large mixing bowl. Make sure it says “pure pumpkin” on the can and not “pumpkin pie filling” — the pre-spiced version will throw off the flavor balance entirely.
- Add the 3 large eggs to the pumpkin puree and whisk together until fully combined and smooth. Don’t rush this step — you want the eggs completely incorporated before adding the other ingredients.
- Pour in the 1/2 cup (120 ml) of pure maple syrup and stir to combine. Follow with the 3 tablespoons (35 g) of coconut sugar, and whisk until no lumps remain.
- Spoon in the 1/2 cup (120 g) of plain Greek yogurt and stir it in thoroughly. The Greek yogurt adds body and creaminess — don’t skip it, as it’s one of the key ingredients that makes this filling so silky.
- Add the 1 teaspoon vanilla extract, 2 teaspoons pumpkin pie spice, 1 teaspoon ground cinnamon, 1/4 teaspoon ground nutmeg, 1/4 teaspoon ground ginger, and 1/4 teaspoon fine sea salt. Whisk everything together until you have a smooth, uniformly combined filling with no streaks.
- Taste the filling at this point. It should be nicely sweet, warmly spiced, and smell amazing. Adjust spices if you prefer more heat — a tiny extra pinch of ginger or cinnamon is always welcome.
Step 4: Fill the Pie Crust and Bake
- Remove the prepared pie crust from the refrigerator. Pour the pumpkin filling into the crust slowly, tilting the bowl gently to avoid sloshing. Use a rubber spatula to scrape every last bit of filling out of the bowl.
- Smooth the top of the filling with the spatula so it’s level across the whole surface. A level filling bakes more evenly.
- Carefully transfer the filled pie to the preheated baking sheet in the oven. The baking sheet makes it much easier to move the pie safely — a jiggly filled pie crust can spill if you’re not careful.
- Bake at 350°F (175°C) for 55–65 minutes. At around the 30-minute mark, check the crust edges. If they are browning faster than you’d like, cover them with a pie crust shield or strips of aluminum foil.
- The pie is done when the edges are completely set and only the very center (about a 2-inch / 5 cm circle) has a slight, gentle jiggle when you nudge the pan. It will continue to firm up as it cools.
Step 5: Cool and Chill the Pie
- Remove the pie from the oven and transfer it to a wire cooling rack. Do not skip the cooling step or rush it by placing the pie in the fridge while it’s still warm — sudden temperature changes can cause the filling to crack.
- Allow the pie to cool at room temperature for at least 2 hours. This is the hardest part. I know. But a rushed pie will be loose and runny.
- Once the pie has reached room temperature, transfer it to the refrigerator and chill for at least 1–2 more hours before slicing. Overnight chilling is ideal — the filling firms up beautifully and the flavors deepen significantly.
Step 6: Serve and Enjoy
- When you’re ready to serve, use a sharp knife dipped in warm water and wiped dry between each slice for clean cuts. This prevents the filling from tearing.
- Serve each slice with a generous dollop of whipped cream or coconut whipped cream, and a light sprinkle of cinnamon or pumpkin pie spice on top.
- For the cleanest slices, serve the pie completely chilled, straight from the fridge.
Read Also: Pumpkin Bar Recipe
Tips for The Best Healthy Pumpkin Pie
A few small details make a significant difference in the final result. The most important is giving the pie enough time to cool and set — pulling it from the oven too early or cutting into it warm is the number one reason homemade pumpkin pies disappoint.
- Use pure pumpkin puree: Double-check that your can says “100% pumpkin” or “pure pumpkin” — not pumpkin pie filling, which already contains sugar and spices and will make your filling too sweet and potentially watery.
- Don’t over-mix the filling: Whisk just until everything is combined. Over-mixing can incorporate air bubbles into the filling, which leads to a puffed, cracked top as the pie bakes.
- Trust the jiggle test: The center of the pie should still jiggle slightly when you pull it from the oven. It will set fully as it cools. An over-baked pie turns dry and grainy.
- Protect those crust edges: Start checking at 30 minutes. Once the crust edges are golden, cover them with foil or a crust shield for the remainder of baking.
- Room temperature eggs matter: Cold eggs can cause the filling to cook unevenly. Pull them from the fridge 15–20 minutes before you start.
- Full-fat Greek yogurt gives the best texture: Non-fat Greek yogurt can make the filling a little watery. Stick with 2% or full-fat for a firmer, silkier result.
- Chill overnight for best results: The pie genuinely improves with overnight refrigeration. The filling firms up, the spices mellow and meld, and the slices come out beautifully clean.
- Place the pie on a baking sheet: This does two things — it makes the pie easier and safer to move in and out of the oven, and it promotes more even heat to the bottom of the crust.
- Don’t open the oven door repeatedly: Every time you peek, heat escapes and the temperature fluctuates. Set a timer and resist the urge to check until the 30-minute mark.
Another healthier take on a classic dessert worth bookmarking: Healthy Tiramisu.
What to Serve with Healthy Pumpkin Pie
Pumpkin pie is a classic holiday dessert, and it shines brightest when surrounded by complementary fall flavors. I love serving it at the end of a big Thanksgiving spread, but it honestly works just as well for a cozy Sunday dinner in October.
Here are some wonderful pairings to round out your holiday table:
- Thanksgiving Stuffing — a classic savory partner for the sweeter pie course to follow
- Sweet Potato Casserole — earthy sweetness that echoes the flavors in the pie
- Roast Chicken — a simpler alternative to turkey that pairs beautifully with pumpkin flavors
- Cranberry Sauce — the tartness is a refreshing contrast after a rich slice of pie
- Green Bean Casserole — a comforting side that completes any holiday spread
- Maple Glazed Carrots — the maple flavor ties the whole meal together beautifully
- Mashed Potatoes — warm, creamy, and a crowd-pleasing partner for any holiday dinner
- Whipped cream or coconut whipped cream — the classic, non-negotiable topping
- A scoop of vanilla ice cream or cinnamon gelato alongside each slice
- A warm mug of Pumpkin Spice Latte — truly the perfect pairing for a cozy slice
Variations of Healthy Pumpkin Pie
This recipe is flexible and lends itself beautifully to customization. If you want to make it dairy-free, swap the Greek yogurt for the same amount of full-fat coconut milk — the filling turns out just as creamy with a faint coconut undertone that pairs surprisingly well with the spices.
- Dairy-free version: Replace Greek yogurt with full-fat canned coconut milk or unsweetened coconut cream for an equally silky filling that is completely plant-based.
- Vegan version: Use full-fat coconut milk in place of Greek yogurt, and replace the eggs with 3 tablespoons (27 g) of cornstarch whisked with 1/4 cup (60 ml) of extra coconut milk to help the filling set.
- Gluten-free version: Use your favorite gluten-free pie crust — there are some excellent store-bought options now, or simply press a mixture of almond flour, coconut oil, and a pinch of salt into the pie dish for a quick crustless option.
- Crustless pumpkin pie: Pour the filling directly into a greased 9-inch pie dish and bake at 350°F (175°C) for 50–55 minutes. It slices beautifully and saves calories too.
- Honey-sweetened version: Swap the maple syrup for an equal amount of raw honey. The flavor profile shifts slightly — a little more floral and less caramelly.
- Extra-spiced version: Double the pumpkin pie spice and add an extra pinch of cardamom and black pepper for a bold, warming kick that spice lovers will adore.
- Mini pumpkin pies: Divide the filling between a 12-cup muffin tin lined with mini pie crust rounds and bake at 350°F (175°C) for 20–25 minutes for individual servings.
- Brown sugar swap: Replace coconut sugar with an equal amount of light brown sugar for a more traditional, molasses-forward sweetness.
You might also enjoy: Pumpkin Waffle Recipe
Storage and Reheating
Pumpkin pie stores very well in the refrigerator, which is part of what makes it such a convenient make-ahead dessert. Cover the pie tightly with plastic wrap or a fitted lid, or transfer individual slices to an airtight container to prevent them from absorbing other fridge odors.
- Refrigerator: Cover the pie tightly with plastic wrap or a pie keeper and store in the fridge for up to 4 days. The pie is best served chilled directly from the fridge.
- Freezer (whole pie): Wrap the cooled, baked pie tightly in two layers of plastic wrap, then in aluminum foil. Freeze for up to 2 months. Thaw overnight in the refrigerator before serving.
- Freezer (individual slices): Wrap each slice individually in plastic wrap, then place in a freezer-safe zip-top bag. Thaw in the fridge overnight or at room temperature for 1–2 hours.
- To reheat: Pumpkin pie is traditionally served chilled or at room temperature, but if you prefer it warm, place a slice on a microwave-safe plate and heat for 20–30 seconds at medium power. Avoid overheating, which can make the filling weep.
- Do not leave at room temperature for more than 2 hours: The egg-based filling is perishable. Cover and refrigerate promptly after serving.
- Make-ahead tip: Bake the pie 1–2 days before you plan to serve it. The filling firms up and the flavors develop significantly after overnight refrigeration.
Read Also: Pumpkin Overnight Oats Recipe
Nutritional Facts
Nutritional values are approximate and based on 1 slice (1/8 of the pie), using a standard store-bought pie crust and full-fat Greek yogurt.
| Nutrient | Per Slice (approx.) |
|---|---|
| Calories | ~195 kcal |
| Carbohydrates | ~28 g |
| Protein | ~5 g |
| Fat | ~7 g |
| Saturated Fat | ~2.5 g |
| Fiber | ~2 g |
| Sugar | ~14 g |
| Sodium | ~240 mg |
| Vitamin A | ~150% DV |
Compared to a traditional pumpkin pie made with sweetened condensed milk, this version has significantly less sugar and saturated fat per slice. The addition of Greek yogurt also bumps up the protein content, making it a slightly more nutritionally balanced dessert.
Another lighter dessert worth trying: Healthy Carrot Cake.
Health Benefits of Key Ingredients
This pie isn’t just delicious — several of its key ingredients are genuinely nutritious. Pumpkin is one of the most nutrient-dense vegetables you can include in your cooking, and pairing it with warming spices, eggs, and Greek yogurt creates a dessert that offers more than just sweetness.
- Pumpkin puree: An excellent source of beta-carotene (which converts to vitamin A in the body), important for immune function, eye health, and skin health. It’s also rich in fiber and very low in calories on its own.
- Eggs: Provide high-quality complete protein and essential fat-soluble vitamins including vitamins D, B12, and choline, which supports brain health and liver function.
- Greek yogurt: Rich in protein, calcium, and live probiotic cultures that support gut health. Full-fat versions also contain fat-soluble vitamins A and K2.
- Pure maple syrup: Contains antioxidants and trace minerals like zinc and manganese, with a lower glycemic index than refined white sugar, meaning a slower, more gradual rise in blood sugar.
- Coconut sugar: Retains small amounts of inulin (a prebiotic fiber) and trace minerals from the coconut palm, and has a lower glycemic index than regular sugar.
- Cinnamon: One of the most antioxidant-rich spices available, with studies suggesting it may help support healthy blood sugar regulation when consumed regularly.
- Ginger: Contains gingerol, a bioactive compound with powerful anti-inflammatory and antioxidant properties. It’s also well-established as a digestive aid.
- Nutmeg: Contains a range of antioxidants and compounds that have been studied for their antimicrobial and anti-inflammatory properties.
For more fall-inspired, wholesome cooking ideas, browse my favorite Crockpot Fall Recipes.
FAQs About Healthy Pumpkin Pie
1. Can I use pumpkin pie filling instead of pumpkin puree?
No — and this is a really important distinction. Pumpkin pie filling already contains added sugar, spices, and thickeners, which will throw off the balance of sweetness and spice in this recipe. Always look for a can that says “100% pure pumpkin” or “pumpkin puree” with only one ingredient listed.
2. Why is my pumpkin pie filling runny or not setting properly?
The most common reason is under-baking. The filling should jiggle only in the very center (about 2 inches / 5 cm) when you pull it from the oven, and it will set completely as it cools. Another possible cause is using a watery pumpkin puree brand or non-fat Greek yogurt — both can add excess moisture to the filling.
3. Can I make this pie ahead of time?
Absolutely — and this pie is actually better when made a day ahead. Overnight refrigeration allows the filling to firm up fully and the spices to meld and deepen. It’s one of the reasons pumpkin pie is such a perfect Thanksgiving dessert. Simply bake, cool, cover, and refrigerate up to 2 days in advance.
4. Can I make this dairy-free?
Yes, very easily. Replace the Greek yogurt with an equal amount of full-fat canned coconut milk. The filling will still be creamy and set properly. Just make sure to also use a dairy-free pie crust if you need the entire pie to be dairy-free.
5. How do I know when pumpkin pie is fully baked?
The edges of the filling should be completely set and firm, while the very center still has a slight wobble — similar to the way a just-set cheesecake looks. If the entire surface is wobbling like liquid, it needs more time. You can also insert a thin knife about 1 inch (2.5 cm) from the center edge — it should come out mostly clean.
For more fall dessert inspiration, browse the Fall Dinner Recipes collection.
Healthy Pumpkin Pie
Ingredients
- 1 unbaked pie crust - 9-inch (23 cm); store-bought or homemade
- 15 oz pure pumpkin puree - 425g; 1 standard can — use 100% pure pumpkin, not pumpkin pie filling
- 3 large eggs - At room temperature
- 1/2 cup pure maple syrup - 120ml; Grade A dark robust recommended for best flavor
- 3 tablespoons coconut sugar - 35g; or substitute light brown sugar
- 1/2 cup plain Greek yogurt - 120g; full-fat or 2% recommended; substitute full-fat canned coconut milk for dairy-free
- 1 teaspoon vanilla extract
- 2 teaspoons pumpkin pie spice
- 1 teaspoon ground cinnamon
- 1/4 teaspoon ground nutmeg
- 1/4 teaspoon ground ginger
- 1/4 teaspoon fine sea salt
- whipped cream or coconut whipped cream - For serving
- ground cinnamon or pumpkin pie spice - For dusting on top before serving
Equipment
- 9-inch (23 cm) pie dish - Glass or ceramic recommended for even baking
- Large mixing bowl
- Whisk
- Rubber spatula
- Rimmed baking sheet - Placed under the pie dish for stability and even heat distribution
- Pie crust shield - Or aluminum foil strips; used to prevent crust edges from over-browning
- Wire cooling rack
- Measuring cups and spoons
- Knife or toothpick - For the doneness test
Method
- Preheat your oven to 350°F (175°C) with a rack in the center position, and place a rimmed baking sheet on the rack to preheat as well. Remove the eggs from the refrigerator and let them come to room temperature for 10–15 minutes.
- Press or roll the pie crust into a 9-inch (23 cm) pie dish, fold any overhang under to create a thick edge, and crimp decoratively. Refrigerate the crust while you make the filling.
- In a large bowl, whisk together the pumpkin puree and eggs until fully combined, then whisk in the maple syrup, coconut sugar, Greek yogurt, vanilla extract, pumpkin pie spice, cinnamon, nutmeg, ginger, and salt until completely smooth with no streaks.
- Pour the filling into the chilled pie crust, smooth the top with a spatula, and carefully transfer to the preheated baking sheet in the oven. Bake at 350°F (175°C) for 55–65 minutes, covering the crust edges with foil or a pie shield at the 30-minute mark if browning too quickly.
- The pie is done when the edges are fully set and only the center 2-inch (5 cm) circle has a slight jiggle when you nudge the pan. A thin knife inserted 1 inch from the center edge should come out mostly clean.
- Transfer the pie to a wire rack and cool at room temperature for at least 2 hours, then refrigerate for a minimum of 1–2 hours (or overnight) until fully set and firm before slicing.
- Use a sharp knife dipped in warm water and wiped dry between cuts for clean slices, and serve chilled with a dollop of whipped cream and a dusting of cinnamon or pumpkin pie spice.
Nutrition
Notes
- Always use 100% pure pumpkin puree — not pumpkin pie filling, which contains added sugar and spices that will throw off the balance of this recipe.
- Do not over-mix the filling once the eggs are added; whisk just until smooth to avoid incorporating air bubbles that can cause the top to crack.
- The center of the pie should still jiggle slightly when you pull it from the oven — it will set fully as it cools. Over-baking leads to a dry, grainy filling.
- Use full-fat or 2% Greek yogurt for the best, creamiest texture. Non-fat yogurt can make the filling slightly watery and affect how firmly it sets.
- For dairy-free pumpkin pie, substitute the Greek yogurt with an equal amount of full-fat canned coconut milk and use a dairy-free pie crust.
- For a vegan version, replace the 3 eggs with 3 tablespoons (27g) of cornstarch whisked with 1/4 cup (60ml) of coconut milk, and use coconut milk in place of Greek yogurt.
- This pie is best made a day ahead — overnight refrigeration allows the filling to firm up completely and the spices to deepen in flavor.
- Leftover pie keeps covered in the refrigerator for up to 4 days, or can be frozen (wrapped tightly) for up to 2 months; thaw overnight in the fridge before serving.
- Place the filled pie dish on a preheated baking sheet in the oven — this promotes more even heat to the bottom crust and makes the pie safer and easier to handle.
- To swap the sweetener, replace the maple syrup with an equal amount of raw honey; the flavor will be slightly more floral but equally delicious.
Private Notes
Tried this recipe?
Let us know how it was!Final Thoughts
This healthy pumpkin pie recipe has genuinely become my most-requested fall dessert, and I don’t see that changing anytime soon. It’s proof that you don’t have to choose between eating well and eating something truly delicious.
The filling is luxuriously smooth, the spices are warm and generous, and the natural sweeteners give it a depth that refined sugar just can’t match. Nobody who has eaten this pie has ever guessed it was the “lighter” version.
If you make this pie, I’d love to hear how it goes — drop a comment below and let me know what you think! And if you’re sharing it at Thanksgiving or a fall gathering, feel free to tag me. Happy baking.
Recommended:
- Pumpkin Pie Recipe
- Apple Pie Recipe
- Pecan Pie Recipe
- Coconut Cream Pie Recipe
- Healthy Chocolate Chip Cookies
- Pumpkin Cookies Recipe
- Pumpkin Oatmeal Cookies
- Pumpkin Chocolate Chip Cookies
- Pumpkin French Toast
- Fall Bread Recipes