
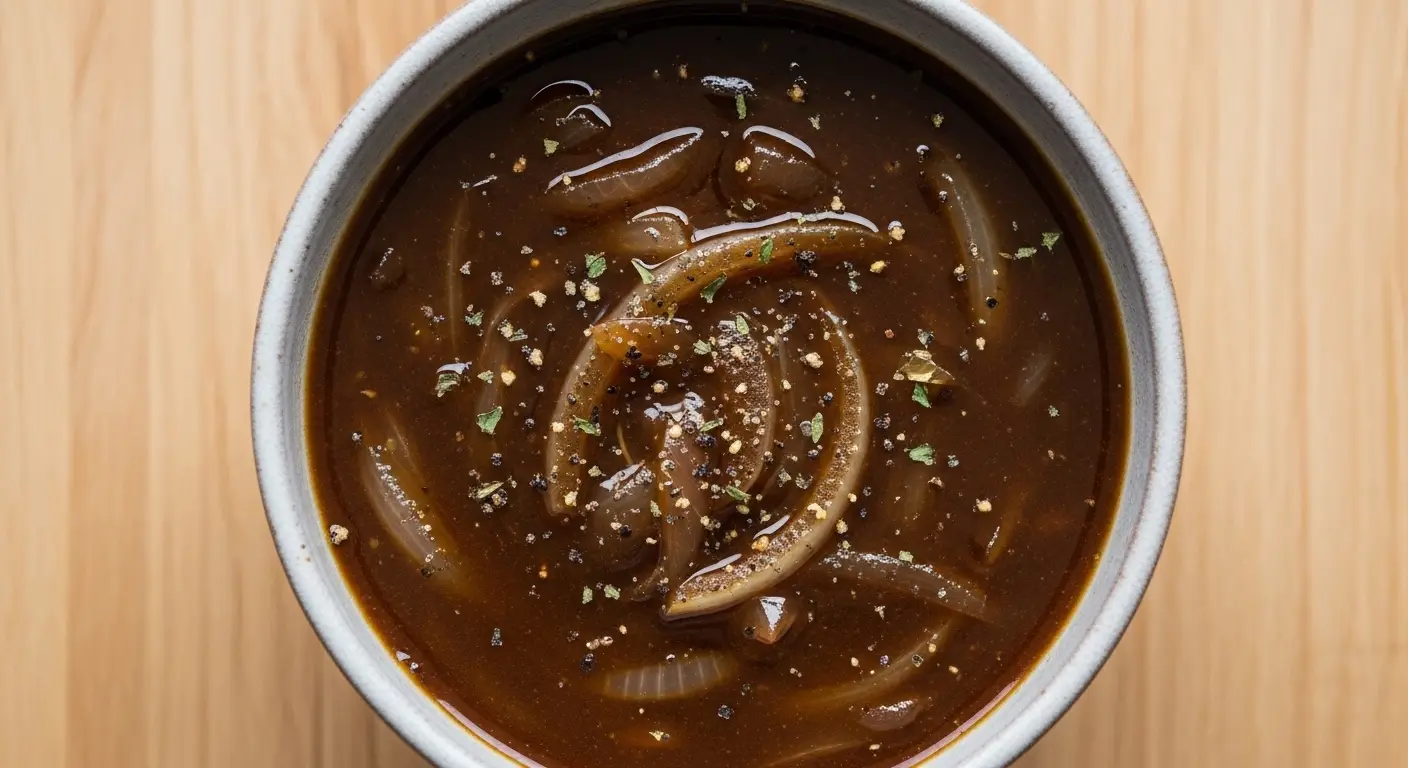
I never thought I’d be the type of person who gets excited about gravy, but here we are. My relationship with this onion gravy recipe started on a cold Sunday evening when I was trying to salvage what could have been a disaster dinner. I had accidentally over-browned my roast beef and needed something rich and flavorful to save the meal.
That’s when I remembered my grandmother’s secret weapon: a silky, onion-packed gravy that could make even the driest meat taste incredible. I threw together what I had in my kitchen, caramelized some onions until they were golden and sweet, and created what has now become my go-to sauce for just about everything.
| Quick Recipe Summary | |
|---|---|
| Prep Time | 10 minutes |
| Cook Time | 30 minutes |
| Total Time | 40 minutes |
| Servings | 6 servings (2 cups) |
| Difficulty Level | Easy |
If you’re looking for other delicious gravy options, you might enjoy my Mushroom Gravy Recipe.
Why You’ll Love This Onion Gravy Recipe
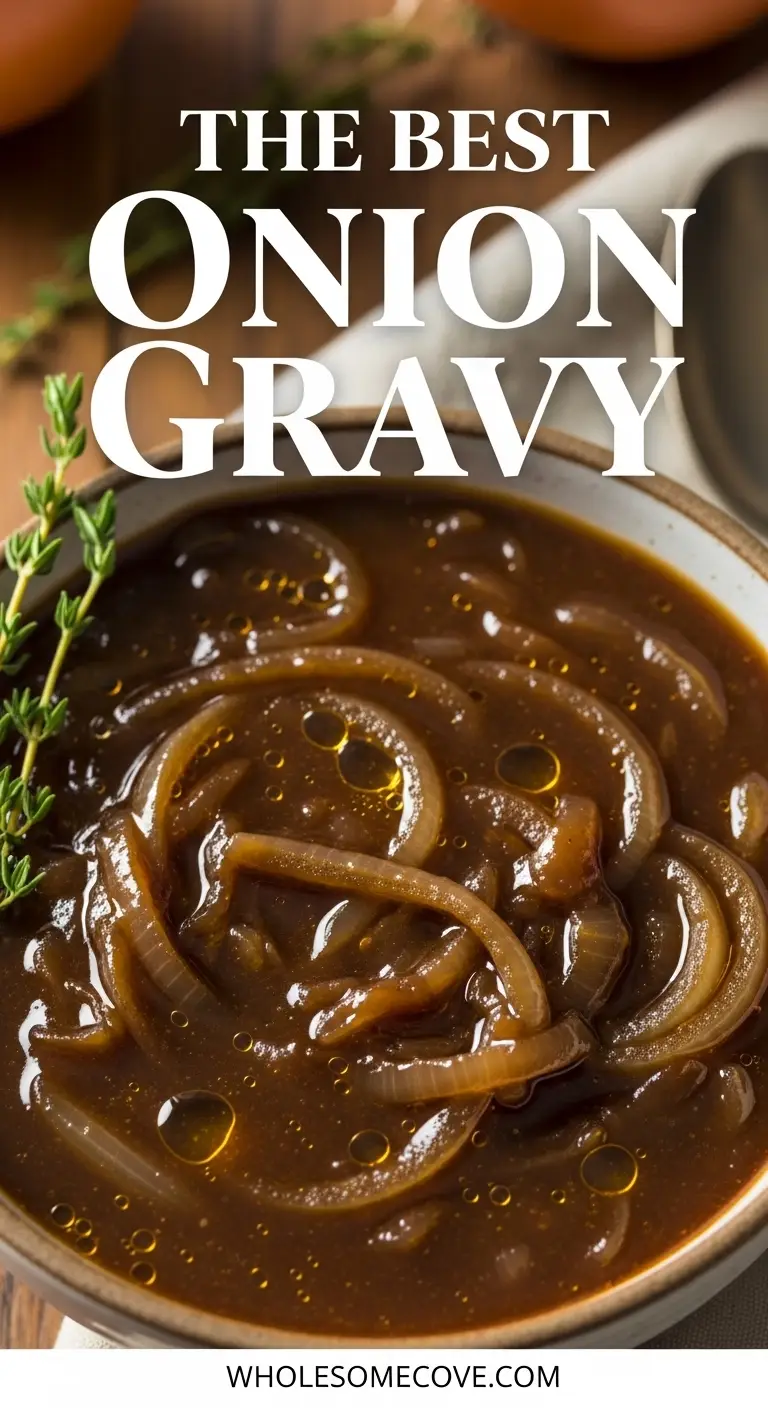
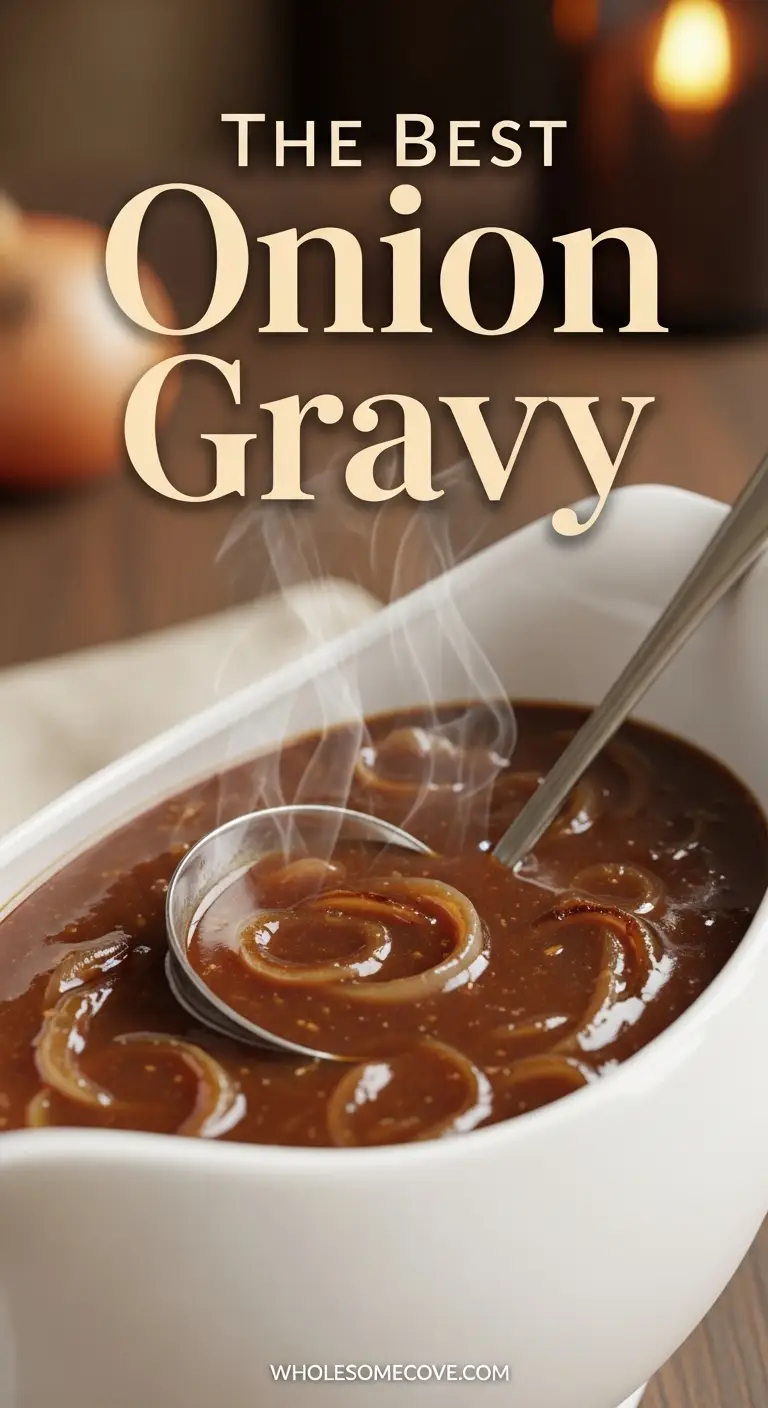
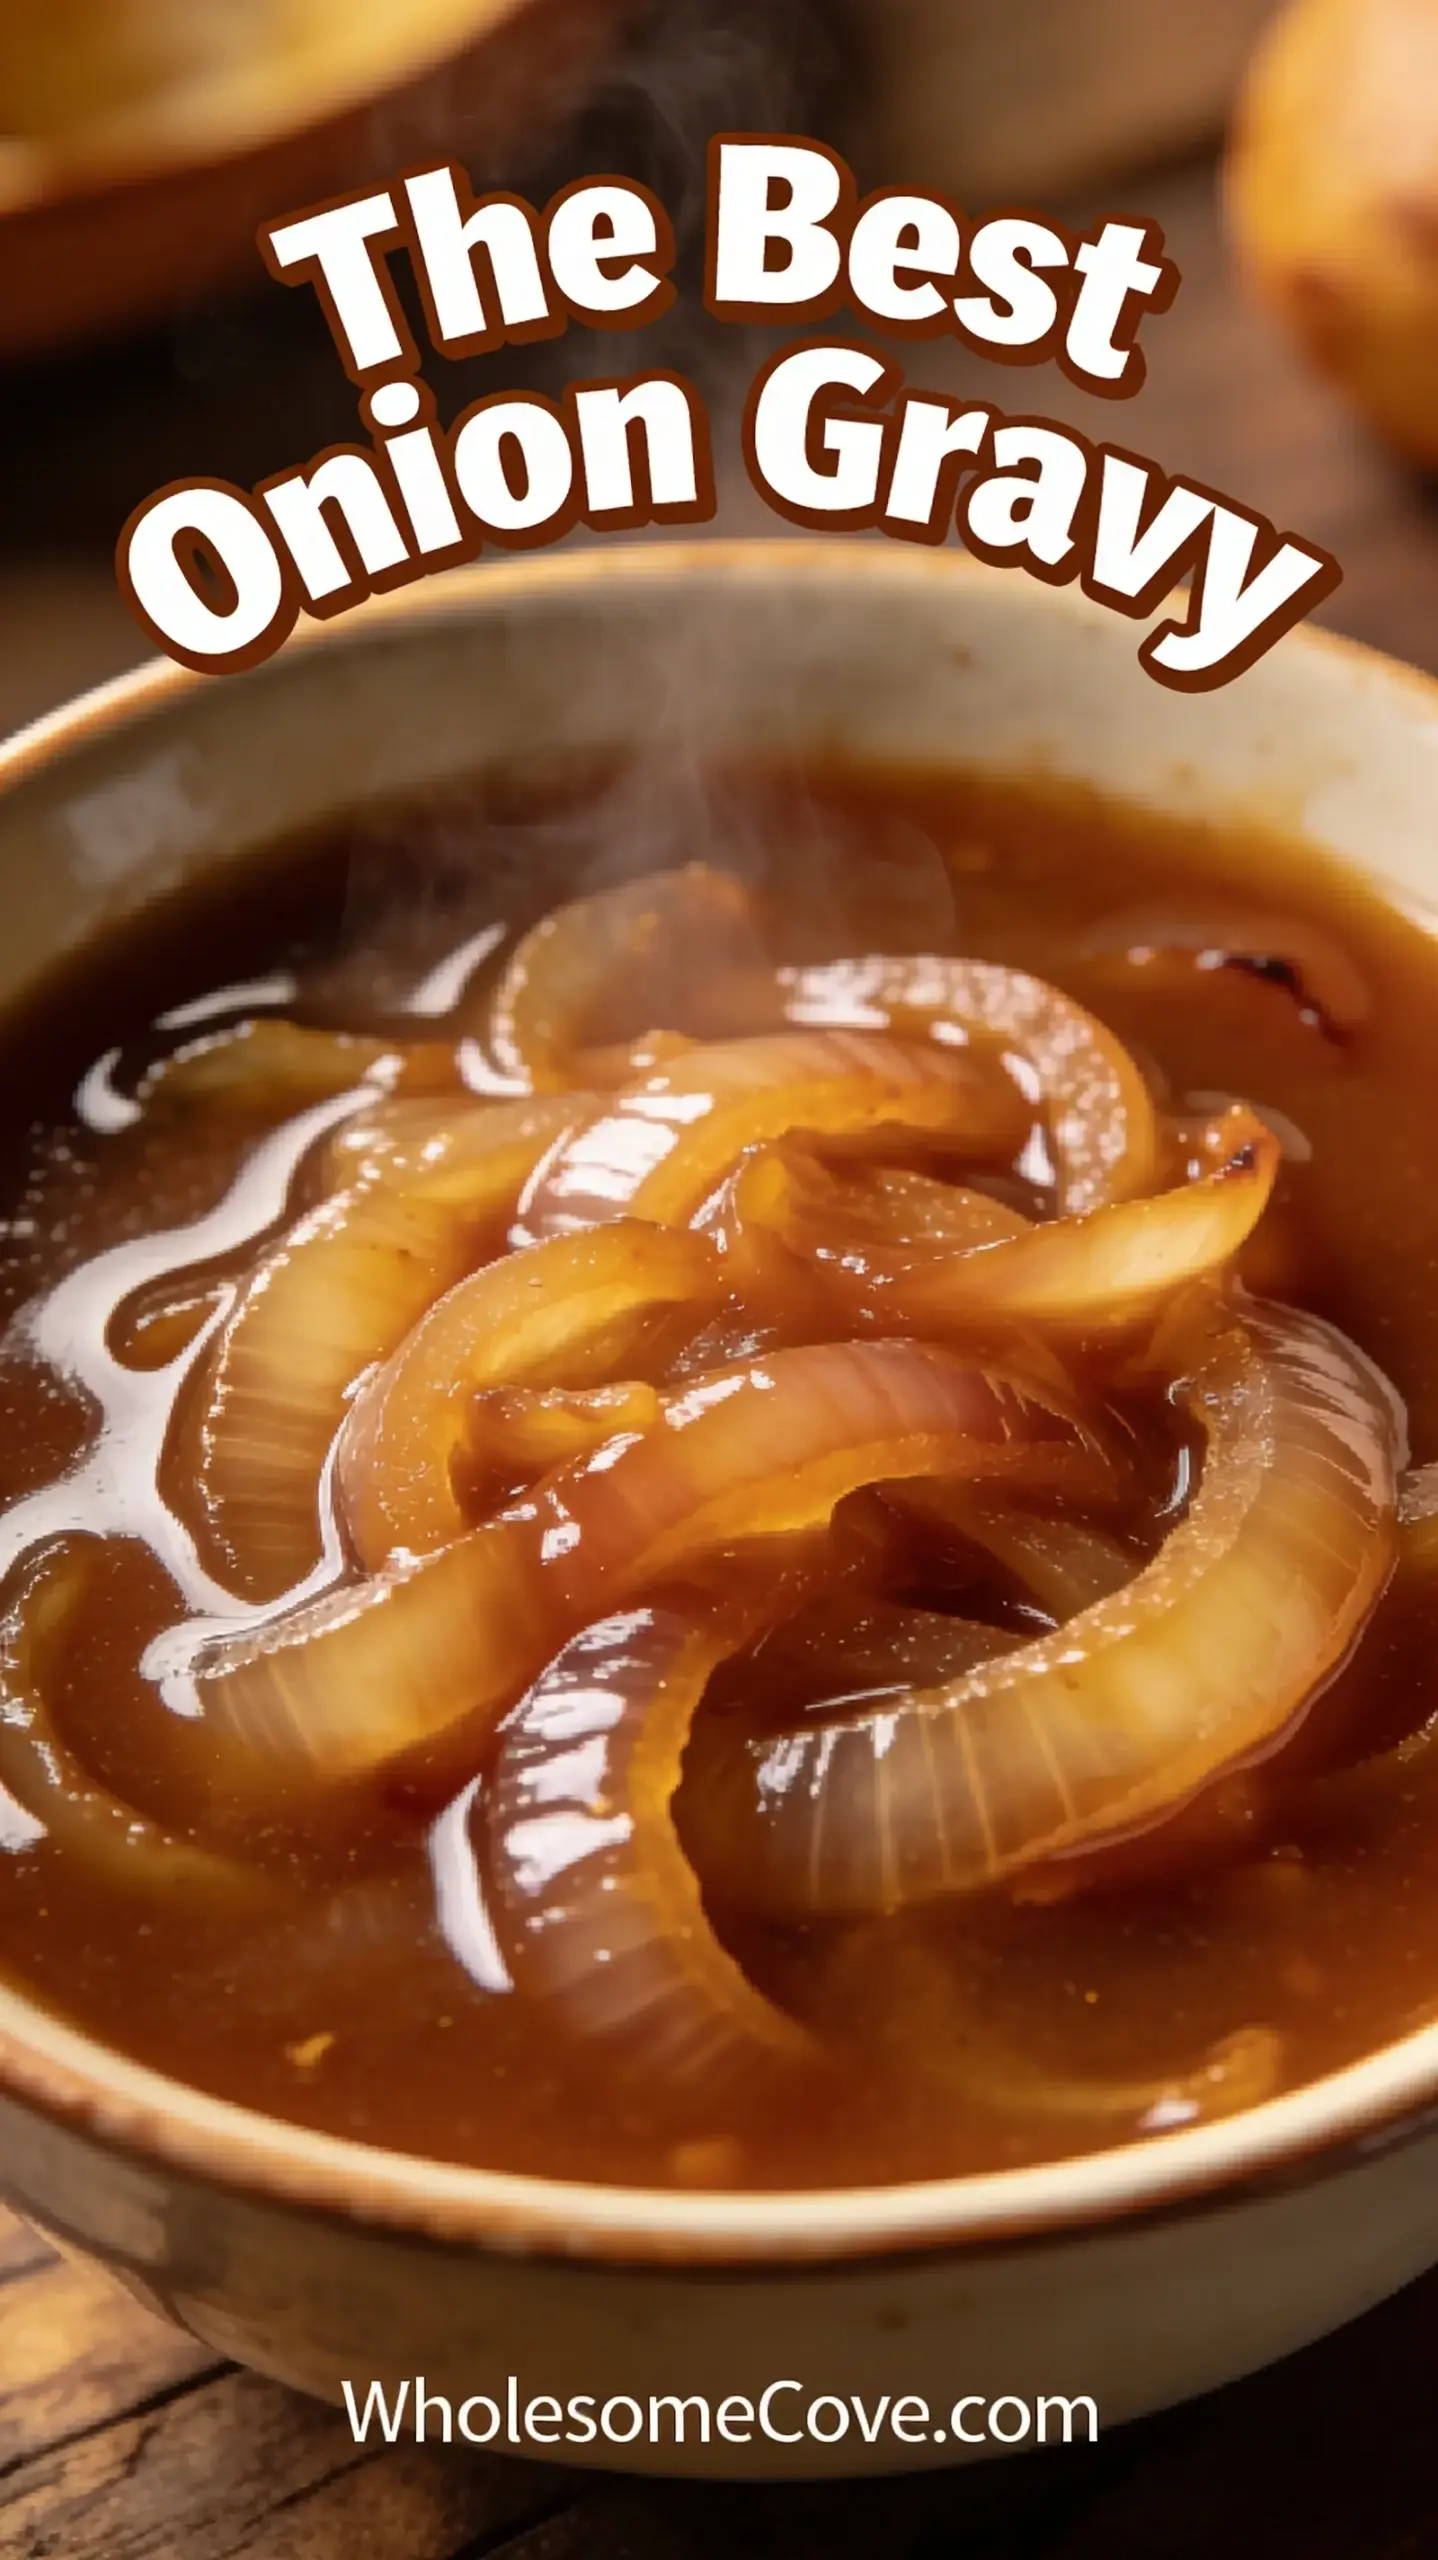
This onion gravy hits all the right notes: it’s savory, slightly sweet from the caramelized onions, and has a depth of flavor that makes everything taste better. I’ve served it over mashed potatoes, smothered it on pork chops, and even used it as a dipping sauce for roasted vegetables.
The beauty of this recipe is its simplicity. You don’t need fancy ingredients or special equipment, just patience while those onions slowly transform into something magical. I’ve made this recipe dozens of times now, tweaking it here and there, and I can confidently say this version is absolutely foolproof.
- Rich and savory flavor that comes from slowly cooked onions and quality beef stock
- Incredibly versatile and pairs perfectly with roasts, chops, steaks, and vegetables
- Budget-friendly with simple pantry staples that won’t break the bank
- Make-ahead friendly so you can prep it in advance for holiday dinners
- Freezer-friendly for those busy weeknight dinners when you need something quick
Ingredients
You’ll need just a handful of simple ingredients to create this rich, flavorful onion gravy. I always use yellow onions because they have the perfect balance of sweetness and savory depth when caramelized.
- 3 tablespoons unsalted butter (42g) – Creates a rich base for sautéing the onions
- 2 large yellow onions (about 1 pound or 450g), thinly sliced into half-moons – The star ingredient that provides sweetness and body
- 1 teaspoon sugar (4g) – Helps with caramelization and balances the savory flavors
- 3 tablespoons all-purpose flour (24g) – Thickens the gravy and creates a smooth texture
- 2 cups beef stock (480ml) – Provides a deep, savory base; you can also use chicken stock
- 1 tablespoon Worcestershire sauce (15ml) – Adds umami and depth
- 1 teaspoon Dijon mustard (5g) – Provides a subtle tang and complexity
- 1 teaspoon dried thyme (1g) – Adds an earthy, herbaceous note
- 1/2 teaspoon onion powder (1.5g) – Intensifies the onion flavor
- 1/2 teaspoon garlic powder (1.5g) – Adds aromatic depth
- 1/4 teaspoon black pepper (0.5g) – For a mild kick
- Salt to taste – Essential for bringing all the flavors together
Another fantastic sauce to have in your repertoire is Brown Gravy Recipe.
Kitchen Equipment Needed
Having the right tools makes all the difference when you’re cooking onions for extended periods. I learned this the hard way after my first attempt resulted in unevenly cooked onions and a sore arm from all that stirring.
- Large skillet or sauté pan (12-inch works best) – Provides enough surface area for even caramelization
- Wooden spoon or silicone spatula – Won’t scratch your pan and is perfect for stirring
- Sharp chef’s knife – Makes slicing onions easier and more uniform
- Cutting board – Essential for prep work
- Measuring cups and spoons – For accurate measurements
- Whisk – Helps prevent lumps when adding the stock
- Small bowl – For mixing the dry ingredients together
For a richer flavor experience, pair this gravy with my Beef Tips and Gravy Recipe.
Recommended Products for This Recipe
After making this onion gravy countless times, I’ve discovered a few products that genuinely make the process easier and improve the final result. These aren’t just random recommendations; they’re tools and ingredients I actually use in my own kitchen.
1. Le Creuset Enameled Cast Iron Skillet
This skillet distributes heat incredibly evenly, which is crucial when you’re caramelizing onions. I’ve found that the onions cook more uniformly without any hot spots that can cause burning. The enameled interior is also a dream to clean, even after all that sticky onion residue.
2. Better Than Bouillon Premium Roasted Beef Base
This beef base has transformed my gravy game. Unlike boxed stock, it has a concentrated, roasted beef flavor that adds incredible depth to the gravy. Plus, you can customize the strength to your preference, which is perfect when you want a richer or lighter gravy.
3. Wusthof Classic 8-Inch Chef’s Knife
Slicing onions uniformly is key to even cooking, and this chef’s knife makes it effortless. The sharp blade glides through onions without crushing them, and it stays sharp much longer than cheaper alternatives. It’s worth the investment if you do a lot of cooking.
4. OXO Good Grips Wooden Spoon
This might seem like a simple tool, but a good wooden spoon is essential for stirring onions without scratching your pan. The angled head gets into the corners of the pan, and the comfortable grip makes the long stirring sessions much easier on your hands.
You might also enjoy: Turkey Gravy Recipe
Step-by-Step Instructions: How to Make Onion Gravy
Making this onion gravy is straightforward, but the key is patience. Don’t rush the onions; that slow caramelization is what creates the rich, complex flavor that makes this gravy so special.
1. Prepare the Onions
- Peel your onions and slice them in half from root to tip.
- Lay each half flat-side down and slice into thin half-moon shapes, about 1/4 inch (6mm) thick.
- Try to keep the slices as uniform as possible so they cook evenly.
- If you’re sensitive to onion fumes like I am, chill your onions in the freezer for 10 minutes before cutting or run them under cold water.
2. Start Caramelizing the Onions
- Heat a large skillet over medium heat and add the butter.
- Once the butter has melted and starts to foam, add all the sliced onions at once.
- Sprinkle the sugar over the onions and stir to coat everything evenly.
- Cook the onions, stirring every 3-4 minutes, for about 20-25 minutes total.
- The onions will first release moisture, then gradually turn golden brown and reduce in volume by about half.
- If they start browning too quickly or sticking to the pan, reduce the heat to medium-low.
- The goal is deep golden onions that are soft and sweet, not burnt.
3. Add the Flour
- Once your onions are beautifully caramelized, reduce the heat to low.
- Sprinkle the flour evenly over the onions.
- Stir constantly for about 2 minutes to cook the flour and coat all the onions.
- The mixture will look like a thick, paste-like consistency, almost like wet sand.
- This step is crucial for eliminating any raw flour taste and creating a proper roux that will thicken your gravy.
4. Incorporate the Stock and Seasonings
- With the heat still on low, slowly pour in about 1/2 cup (120ml) of the beef stock while stirring constantly.
- The mixture will seize up and become very thick at first; this is normal.
- Keep stirring vigorously to prevent lumps from forming.
- Gradually add the remaining stock, about 1/2 cup at a time, stirring continuously between each addition.
- Once all the stock is incorporated, add the Worcestershire sauce, Dijon mustard, dried thyme, onion powder, garlic powder, and black pepper.
- Stir everything together until well combined.
5. Simmer and Thicken
- Increase the heat to medium-high and bring the gravy to a boil, stirring occasionally.
- Once it starts bubbling, reduce the heat to medium-low and let it simmer gently for 10-12 minutes.
- Stir every couple of minutes to prevent sticking and ensure even thickening.
- The gravy should reduce and thicken to a consistency that coats the back of a spoon.
- If it’s too thick, add a splash more stock; if it’s too thin, let it simmer a bit longer.
6. Season and Serve
- Taste the gravy and add salt as needed (start with 1/2 teaspoon and adjust from there).
- Remember that the stock and Worcestershire sauce already contain salt, so add conservatively.
- For an extra silky finish, stir in 1 tablespoon of cold butter at the very end (this is optional but makes it luxurious).
- If you prefer a smoother gravy without onion pieces, use an immersion blender to puree it to your desired consistency.
- Serve immediately while hot, or keep warm over low heat until ready to serve.
If you love rich, savory sauces, try my Sausage Gravy Recipe.
Tips for The Best Onion Gravy
I’ve made this recipe more times than I can count, and along the way, I’ve learned some tricks that ensure perfect results every time. These tips come from both my successes and a few kitchen mishaps.
- Don’t rush the onions: This is the most important tip. Caramelization takes time, usually 20-30 minutes. If you try to speed it up with high heat, you’ll end up with burnt onions instead of sweet, golden ones.
- Use a wide pan: A large skillet with plenty of surface area helps the onions cook evenly and caramelize rather than steam.
- Stir strategically: Don’t stir constantly at first; let the onions sit for a few minutes to develop color. Once they start browning, stir more frequently to prevent burning.
- Add stock gradually: Pour the stock in slowly while stirring constantly to prevent lumps. This is especially important right after adding the flour.
- Use quality stock: Since the stock is a major flavor component, using a high-quality beef or chicken stock makes a noticeable difference. I prefer Better Than Bouillon for its concentrated flavor.
- Season at the end: Don’t add salt until after the gravy has thickened and reduced. As it cooks down, the saltiness intensifies, so taste and adjust at the end.
- Customize the thickness: Like it thicker? Let it simmer longer or add a cornstarch slurry (1 teaspoon cornstarch mixed with 1 tablespoon cold water). Want it thinner? Add more stock a tablespoon at a time.
- Enhance with pan drippings: If you’re making a roast, use the same pan to make your gravy. Those browned bits (fond) add incredible flavor.
- Adjust sweetness: Some onion varieties are sweeter than others. Taste as you go and adjust with a pinch more sugar if needed.
- Store properly: Let the gravy cool completely before refrigerating. It will thicken as it cools, so you may need to add a splash of stock when reheating.
Another great option is my Chicken Gravy Recipe.
What to Serve with Onion Gravy
This versatile gravy pairs beautifully with so many dishes. I’ve served it at Sunday dinners, holiday gatherings, and casual weeknight meals, and it never disappoints.
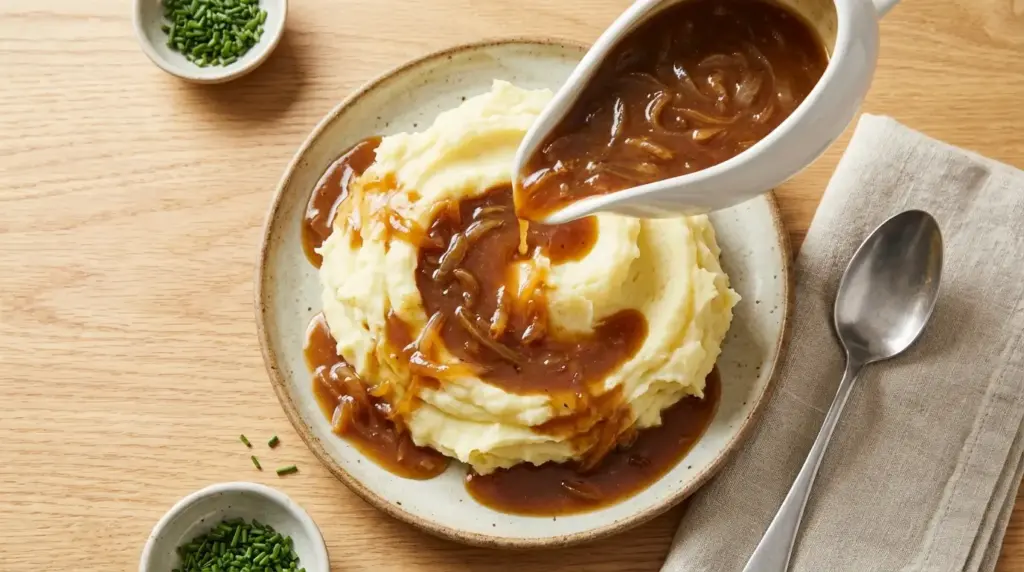
One of my favorite ways to enjoy this gravy is poured generously over a heap of creamy mashed potatoes. The rich onion flavor soaks into every fluffy bite.
- Mashed Potatoes – The classic pairing that never gets old
- Roasted Potatoes – Crispy on the outside, fluffy inside, perfect with gravy
- Shepherds Pie – Pour it over the meat layer before adding the mashed potato topping
- Roast beef, pork, or chicken – Elevates any protein with rich, savory flavor
- Sausages and mash – A British classic that’s pure comfort food
- Baked Ziti – Try it as a unique topping for pasta dishes
- Meatloaf – Adds moisture and incredible flavor to every slice
- Pork chops – Transforms simple pan-fried chops into something special
- Yorkshire puddings – Fill the center with this gravy for a traditional treat
- Beef Stew – Stir it in to enhance the savory depth
Variations of Onion Gravy
Over the years, I’ve experimented with different variations of this recipe based on what I have on hand or to match specific dishes. These twists have all been delicious in their own way.
- Caramelized onion gravy: Cook the onions for 40-45 minutes over very low heat until they’re deeply brown and sweet. This creates a richer, sweeter gravy that’s incredible with beef.
- Red wine onion gravy: After caramelizing the onions, deglaze the pan with 1/4 cup (60ml) red wine (I use Cabernet Sauvignon) before adding the flour. The wine adds complexity and depth.
- Mushroom and onion gravy: Add 8 ounces (225g) sliced mushrooms along with the onions. Sauté them together until both are golden and tender.
- Creamy onion gravy: Stir in 2-3 tablespoons of heavy cream or half-and-half at the end for a luxurious, silky texture.
- Vegetarian onion gravy: Simply swap the beef stock for vegetable stock or mushroom broth. It’s just as flavorful without the meat.
- Herb-infused gravy: Add a sprig of fresh rosemary or thyme while the gravy simmers. Remove it before serving for a subtle herbal note.
- Bacon onion gravy: Cook 3-4 strips of chopped bacon until crispy, remove, then cook the onions in the bacon fat. Stir the bacon back in at the end.
- Spicy onion gravy: Add a pinch of cayenne pepper or red pepper flakes for a subtle kick.
- Apple cider onion gravy: Replace 1/4 cup (60ml) of the stock with apple cider or apple cider vinegar mixed with apple juice for a sweet-tart note.
- Shallot gravy: Replace half the onions with thinly sliced shallots for a more delicate, refined flavor.
You might also enjoy: Tomato Gravy Recipe
Storage and Reheating
This onion gravy stores beautifully, which makes it perfect for meal prep or making ahead for holiday dinners. I often double the batch and freeze half for those busy weeknights when I need something quick.
- Refrigerator storage: Let the gravy cool to room temperature, then transfer to an airtight container. It will keep in the fridge for 3-4 days. The gravy will thicken as it cools, which is completely normal.
- Freezing: Pour cooled gravy into freezer-safe containers or heavy-duty freezer bags, leaving about 1 inch of headspace for expansion. Label with the date and freeze for up to 3 months. For convenience, freeze in smaller portions so you can thaw just what you need.
- Reheating from refrigerator: Transfer the gravy to a saucepan and reheat over medium-low heat, stirring frequently. Add a splash of stock (2-4 tablespoons) to thin it back to your desired consistency as it warms.
- Reheating from frozen: Thaw overnight in the refrigerator first, then reheat as directed above. Alternatively, you can reheat from frozen in a saucepan over very low heat, stirring frequently, but this takes longer.
- Microwave reheating: Place gravy in a microwave-safe bowl and heat in 30-second intervals, stirring between each, until hot. Add a bit of stock if needed to adjust consistency.
- Make-ahead tip: You can caramelize the onions up to 2 days in advance and store them covered in the fridge. When ready to make the gravy, reheat the onions in the pan, then proceed with the flour and stock as directed.
For another delicious gravy option, check out my Hamburger Gravy Recipe.
Nutritional Facts
Per serving (approximately 1/3 cup or 80ml, makes 6 servings):
- Calories: 95
- Total Fat: 6g
- Saturated Fat: 4g
- Trans Fat: 0g
- Cholesterol: 15mg
- Sodium: 320mg (varies based on stock used)
- Total Carbohydrates: 9g
- Dietary Fiber: 1g
- Sugars: 3g
- Protein: 2g
- Vitamin A: 5% DV
- Vitamin C: 4% DV
- Calcium: 2% DV
- Iron: 3% DV
Note: Nutritional information is an estimate based on the ingredients listed and may vary depending on the specific brands and measurements used. Values are calculated per serving assuming 6 equal servings from the recipe.
Another fantastic side dish option is this collection of Best Potato Recipes.
Health Benefits of Key Ingredients
While this onion gravy is definitely a comfort food, it actually contains several ingredients with notable health benefits. I always feel a little better knowing that something so delicious also brings some nutritional value to the table.
Onions are the star ingredient here, and they’re packed with antioxidants and beneficial compounds. They contain quercetin, which has anti-inflammatory properties and may support heart health.
- Onions: Rich in antioxidants and vitamin C, onions support immune function and contain prebiotic fiber that promotes gut health. The sulfur compounds in onions may also help reduce inflammation.
- Beef stock: Provides collagen and amino acids that support joint health, gut lining, and skin elasticity. It’s also a good source of minerals like calcium, magnesium, and phosphorus.
- Thyme: This herb contains thymol, which has antimicrobial properties. It’s also a source of vitamin K, iron, and manganese, supporting bone health and immune function.
- Garlic powder: Contains allicin compounds that may help lower blood pressure and cholesterol levels. Garlic also has antimicrobial and anti-inflammatory properties.
- Worcestershire sauce: Contains vinegar, which may help with blood sugar regulation, and provides a small amount of B vitamins and iron.
For more comfort food inspiration, try my Sunday Gravy Recipe.
FAQs About Onion Gravy
1. Can I use a different type of onion?
Yes, absolutely. Yellow onions are my preference because they offer the best balance of sweetness and savory flavor when cooked. White onions work well too and will give you a similar result.
Red onions can be used and will create a slightly sweeter gravy with a milder flavor. Shallots are another excellent option if you want a more delicate, refined taste.
2. Why is my gravy lumpy?
Lumps typically form when the stock is added too quickly to the flour mixture or isn’t stirred thoroughly. To fix lumpy gravy, use an immersion blender to smooth it out, or strain it through a fine-mesh sieve.
To prevent lumps in the first place, add the stock very gradually while stirring constantly. The mixture will be thick and pasty at first, but it will smooth out as you add more liquid.
3. How can I make this gravy gluten-free?
Replace the all-purpose flour with a gluten-free flour blend or cornstarch. If using cornstarch, you’ll need about 2 tablespoons instead of 3 tablespoons of flour. Mix the cornstarch with a few tablespoons of cold stock first to create a slurry, then add it to the simmering gravy.
Another option is to use a gluten-free flour blend cup-for-cup in place of regular flour. The texture will be very similar to the original recipe.
4. Can I make this ahead for Thanksgiving dinner?
Definitely. This gravy is perfect for making ahead, which is a lifesaver during holiday meal prep. You can make it up to 3 days in advance and store it in the refrigerator.
When you’re ready to serve, gently reheat it in a saucepan over medium-low heat, stirring frequently. Add a splash of stock to thin it to your desired consistency.
5. What’s the best way to prevent burning the onions?
The key is patience and the right heat level. Cook the onions over medium to medium-low heat, not high heat. If they start browning too quickly or sticking to the bottom of the pan, reduce the heat immediately.
Stir every 3-4 minutes to allow them to develop color without constant agitation. If you notice any sticking, add a tablespoon of water or stock to deglaze the pan and scrape up any browned bits.
Read Also: Giblet Gravy Recipe
Onion Gravy
Ingredients
- 3 tablespoons unsalted butter - 42g
- 2 large yellow onions - about 1 pound or 450g, thinly sliced into half-moons
- 1 teaspoon sugar - 4g
- 3 tablespoons all-purpose flour - 24g
- 2 cups beef stock - 480ml
- 1 tablespoon Worcestershire sauce - 15ml
- 1 teaspoon Dijon mustard - 5g
- 1 teaspoon dried thyme - 1g
- 1/2 teaspoon onion powder - 1.5g
- 1/2 teaspoon garlic powder - 1.5g
- 1/4 teaspoon black pepper - 0.5g
- salt - to taste
Equipment
- Large skillet or sauté pan - 12-inch works best
- Wooden spoon or silicone spatula
- Sharp chef’s knife
- Cutting board
- Measuring cups and spoons
- Whisk
- Small bowl
Method
- Peel onions, slice in half from root to tip, and cut into thin half-moon shapes about 1/4 inch thick. Keep slices uniform for even cooking.
- Heat butter in a large skillet over medium heat. Add onions and sugar, stirring to coat. Cook for 20-25 minutes, stirring every 3-4 minutes, until onions are deep golden brown and caramelized.
- Reduce heat to low and sprinkle flour over caramelized onions. Stir constantly for 2 minutes to cook the flour and coat all the onions.
- Slowly add beef stock 1/2 cup at a time while stirring constantly to prevent lumps. Add Worcestershire sauce, mustard, thyme, onion powder, garlic powder, and black pepper. Stir to combine.
- Increase heat to medium-high and bring to a boil. Reduce to medium-low and simmer for 10-12 minutes, stirring occasionally, until gravy thickens and coats the back of a spoon.
- Taste and add salt as needed (start with 1/2 teaspoon). Serve immediately or keep warm over low heat.
Nutrition
Notes
- Don’t rush the onion caramelization – it takes 20-30 minutes. High heat will burn them instead of creating sweet, golden onions.
- Use a wide skillet for even caramelization. Onions need space to brown rather than steam.
- Add stock gradually while stirring constantly to prevent lumps from forming.
- For vegetarian gravy, substitute vegetable stock for beef stock.
- For thicker gravy, simmer longer or add a cornstarch slurry (1 tsp cornstarch + 1 tbsp cold water).
- Store in an airtight container in the refrigerator for 3-4 days. Gravy will thicken as it cools.
- Freeze in portions for up to 3 months. Thaw overnight in the fridge before reheating.
- Reheat over medium-low heat, adding a splash of stock to thin to desired consistency.
- For extra richness, stir in 1 tablespoon of cold butter at the end.
- Caramelize onions up to 2 days ahead and store in the fridge. Reheat before proceeding with the recipe.
Private Notes
Tried this recipe?
Let us know how it was!Final Thoughts
This onion gravy has become one of those recipes I turn to again and again, especially when I want to make a simple meal feel special. There’s something deeply satisfying about transforming a handful of humble onions into something so rich and flavorful.
I love that it’s versatile enough to serve at both casual weeknight dinners and fancy holiday gatherings. Whether you’re drizzling it over mashed potatoes, spooning it onto a roast, or using it to elevate simple sausages, this gravy just makes everything taste better. Give it a try, and I think you’ll find yourself making it on repeat just like I do.
Recommended:
- Biscuits and Gravy Recipe
- Red Eye Gravy Recipe
- Scalloped Potatoes Recipe
- Twice Baked Potatoes Recipe
- Au Gratin Potatoes Recipe
- Smashed Potatoes Recipe
- Cheesy Potatoes Recipe
- Funeral Potatoes Recipe
- Breakfast Potatoes Recipe
- Chicken Stew Recipe