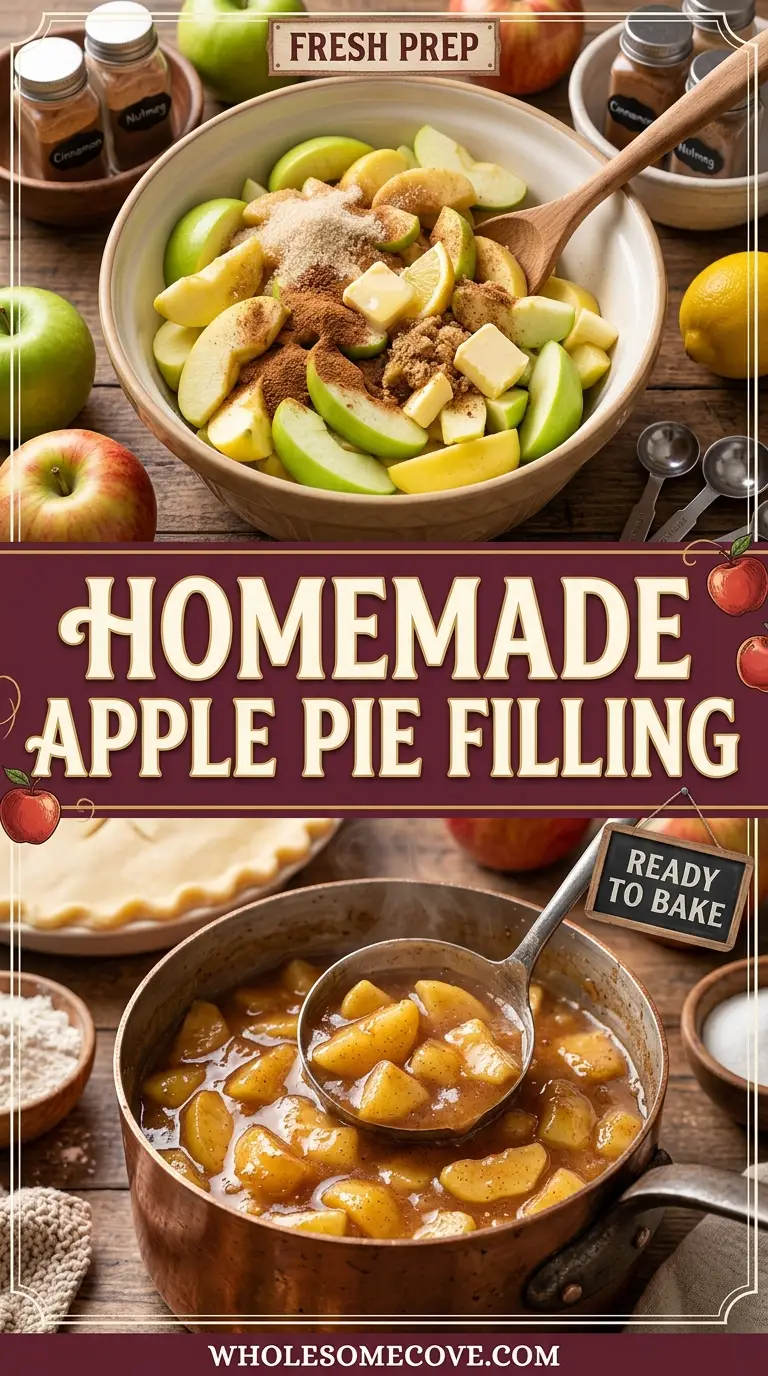
Homemade apple pie filling turns a handful of firm apples into a glossy, spiced sauce that holds its shape instead of sliding out of the crust. This apple pie filling recipe leans on a cooked cornstarch sauce, so the liquid thickens on the stove rather than flooding your pie later.
Most homemade versions turn out watery because the apples go into a thin, uncooked sauce that never gets a chance to set. Cooking the sugar, cornstarch, and spices into a glossy base first fixes that, and firm Granny Smith slices keep their edges instead of collapsing into mush.
The whole batch comes together in about 35 minutes in a single saucepan and makes roughly 4 cups (960 ml), enough for one 9-inch pie. You get tender apple slices coated in a cinnamon sauce thick enough to mound on a spoon.
| Quick Recipe Summary | |
|---|---|
| Prep Time | 20 minutes |
| Cook Time | 15 minutes |
| Total Time | 35 minutes |
| Servings | About 4 cups (fills one 9-inch pie) |
| Difficulty Level | Easy |
Read Also: Apple Butter
Why You’ll Love This Apple Pie Filling Recipe
This filling solves the two problems that ruin most from-scratch versions: a runny sauce and apples that fall apart. Here is what makes it worth keeping on hand.
- It sets instead of running. The cornstarch sauce is cooked to a glossy thickness before the apples go in, so your pie base stays intact rather than soaking through.
- The apples stay in slices. Firm baking apples simmered just to fork-tender hold their shape, giving the filling texture instead of applesauce.
- One saucepan, 35 minutes. There is no oven, no pastry, and no long chill, so you can make it while a crust rests.
- It works far beyond pie. The same 4 cups (960 ml) can top oatmeal, fill turnovers, or spoon over ice cream.
- You control the sugar and spice. Adjusting the brown sugar or swapping in apple pie spice takes seconds, unlike a sealed can.
- It stores and freezes well. A finished batch keeps for a week in the fridge and months in the freezer, so a pie is only a crust away.
For another way to use up a bag of apples, take a look at Homemade Cinnamon Applesauce.
Ingredients
Everything here is a pantry staple apart from the apples, and the quantities below make enough for a single 9-inch pie. Measurements are given in both imperial and metric.
- 3 lb (1.4 kg) firm baking apples, about 6 to 7 medium, peeled, cored, and sliced ½ inch (1.25 cm) thick (a mix of Granny Smith and Honeycrisp works well)
- 2 tablespoons (30 ml) fresh lemon juice
- ½ cup (100 g) granulated sugar
- ½ cup (110 g) packed light brown sugar
- ¼ cup (32 g) cornstarch
- 1½ teaspoons ground cinnamon
- ¼ teaspoon ground nutmeg
- ¼ teaspoon ground allspice, or ground cloves
- ¼ teaspoon salt
- 1½ cups (360 ml) water, or apple cider for deeper flavor
- 2 tablespoons (28 g) unsalted butter
- 1 teaspoon pure vanilla extract
- Optional: replace the cinnamon, nutmeg, and allspice with 2 teaspoons apple pie spice
You might also enjoy: Peach Pie Filling
Kitchen Equipment Needed
You do not need anything specialized for this filling, just a roomy pot and a way to slice apples evenly. Here is the short list.
- A large heavy-bottomed saucepan or Dutch oven, at least 3 quarts (2.8 L)
- A sharp chef’s knife for slicing apples
- A sturdy cutting board
- A silicone spatula or wooden spoon for stirring
- Measuring cups and spoons
- A vegetable peeler and an apple corer
- A large bowl for tossing apples with lemon juice
For a similar small-batch preserving project, see Crab Apple Jelly.
Recommended Products for This Recipe
These are the tools and ingredients I reach for when I make this filling, chosen because each one fixed a specific problem in my own kitchen. They are not required, but they make the process smoother and the result more consistent.
1. Enameled Cast Iron Dutch Oven
Thin pots scorch the sugar sauce before the apples soften, which leaves a burnt note running through the whole batch. A heavy enameled Dutch oven holds steady heat, so the filling simmers evenly and the cornstarch thickens without catching on the bottom.
2. Apple Peeler Corer Slicer
Peeling and coring 6 to 7 apples by hand is the slowest part of this recipe by far. A crank-style peeler corer slicer does all three jobs in one turn and gives you even slices that cook at the same rate.
3. Saigon Cinnamon
Older, generic cinnamon tastes flat and dusty, which is why some fillings need a heavy hand to register any spice. Saigon cinnamon is bolder and sweeter, so 1½ teaspoons carries the whole batch.
4. Pure Madagascar Vanilla Extract
Imitation vanilla can leave a slightly chemical aftertaste once the sauce cooks down and concentrates. A pure Madagascar extract rounds out the brown sugar and spice with a warm, honeyed depth.
5. Wide-Mouth Mason Jars
Narrow containers make it awkward to scoop thick filling without smearing the rim. Wide-mouth mason jars are easy to fill, stack in the fridge, and freeze flat if you leave headspace.
For a make-ahead dessert base in the same spirit, try: Pecan Pie
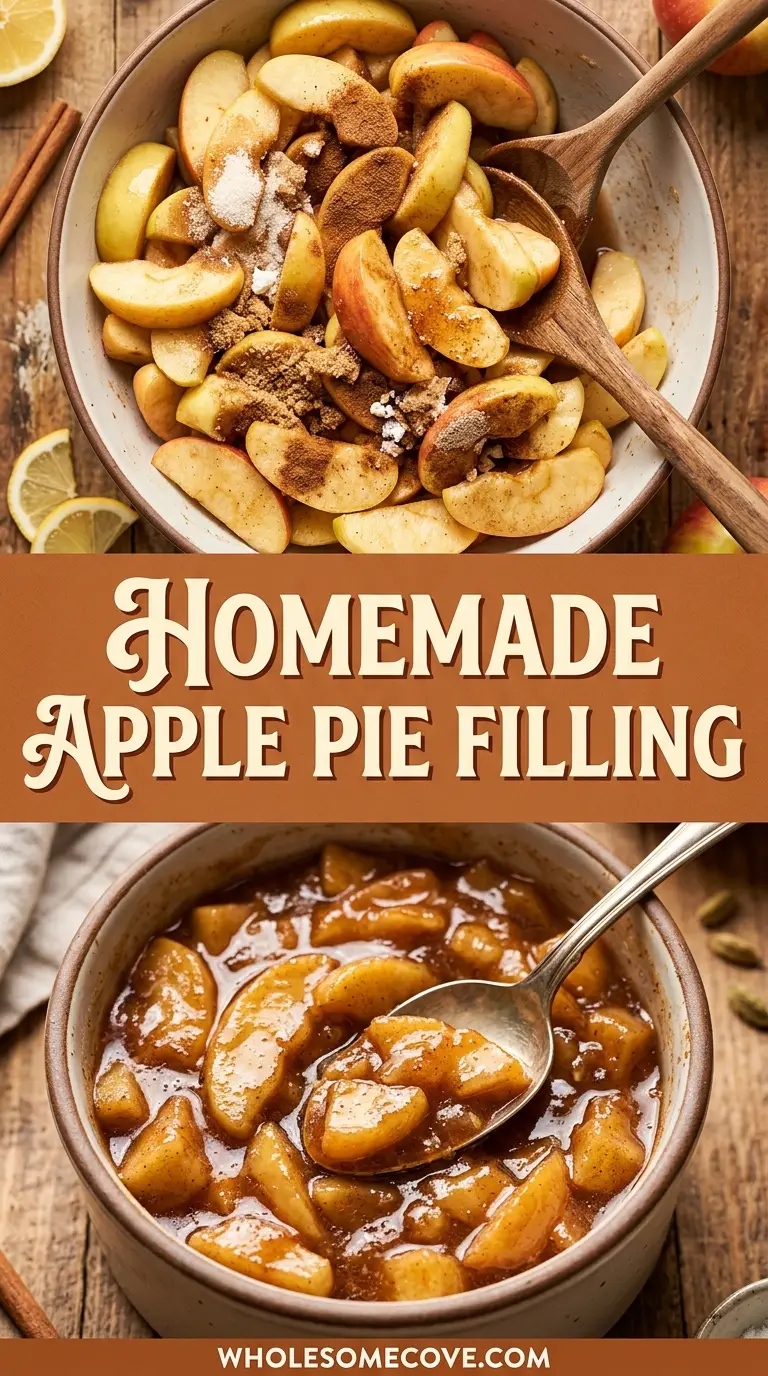
Step-by-Step Instructions: How to Make Apple Pie Filling
Follow these simple steps and you’ll have a glossy, spiced apple pie filling ready in about 35 minutes.
Step 1: Prep the Apples
- Peel all of the apples, then core and slice them into ½-inch (1.25 cm) pieces. Keep the slices as uniform as you can so they cook at the same rate.
- Place the slices in a large bowl and drizzle the 2 tablespoons (30 ml) of lemon juice over them.
- Toss to coat evenly. The lemon juice keeps the cut apples from browning and brightens the finished flavor.
Step 2: Build the Sauce Base
- In your large saucepan or Dutch oven, whisk together the granulated sugar, brown sugar, cornstarch, cinnamon, nutmeg, allspice, and salt.
- Whisk the dry mixture well so the cornstarch is fully blended with the sugars and no clumps remain.
- Pour in the 1½ cups (360 ml) of water and whisk until the mixture is completely smooth. Whisking the cornstarch in while the liquid is still cold is what prevents a lumpy sauce later.
Step 3: Cook the Sauce Until Glossy
- Set the saucepan over medium-high heat.
- Bring the mixture to a gentle boil, whisking almost constantly, and let it cook for about 2 minutes.
- The sauce is ready when it turns thick, clear, and glossy enough to coat the back of a spoon. This pre-thickening step is the difference between a filling that sets and one that runs.
Step 4: Add the Apples
- Add the lemon-coated apple slices to the pan and stir until every piece is coated in the sauce.
- Return the mixture to a gentle boil, then reduce the heat to medium-low.
- Simmer for 8 to 10 minutes, stirring often, until the apples are fork-tender but still holding their shape. Softer varieties may be ready a couple of minutes sooner, so check early.
Step 5: Finish the Filling
- Remove the pan from the heat.
- Add the 2 tablespoons (28 g) of butter and the vanilla extract.
- Stir gently until the butter melts and the filling looks glossy. The butter adds richness and a smooth finish to the sauce.
Step 6: Cool Before Using
- If you are baking a pie, let the filling cool to room temperature first. Adding hot filling to a raw crust can make the bottom soggy.
- For toppings on oatmeal, pancakes, or ice cream, the filling is best used warm.
- The sauce thickens further as it cools, so a filling that looks slightly loose in the pan will set up nicely.
For a cozy drink to sip while your pie bakes, see Mulled Apple Cider.
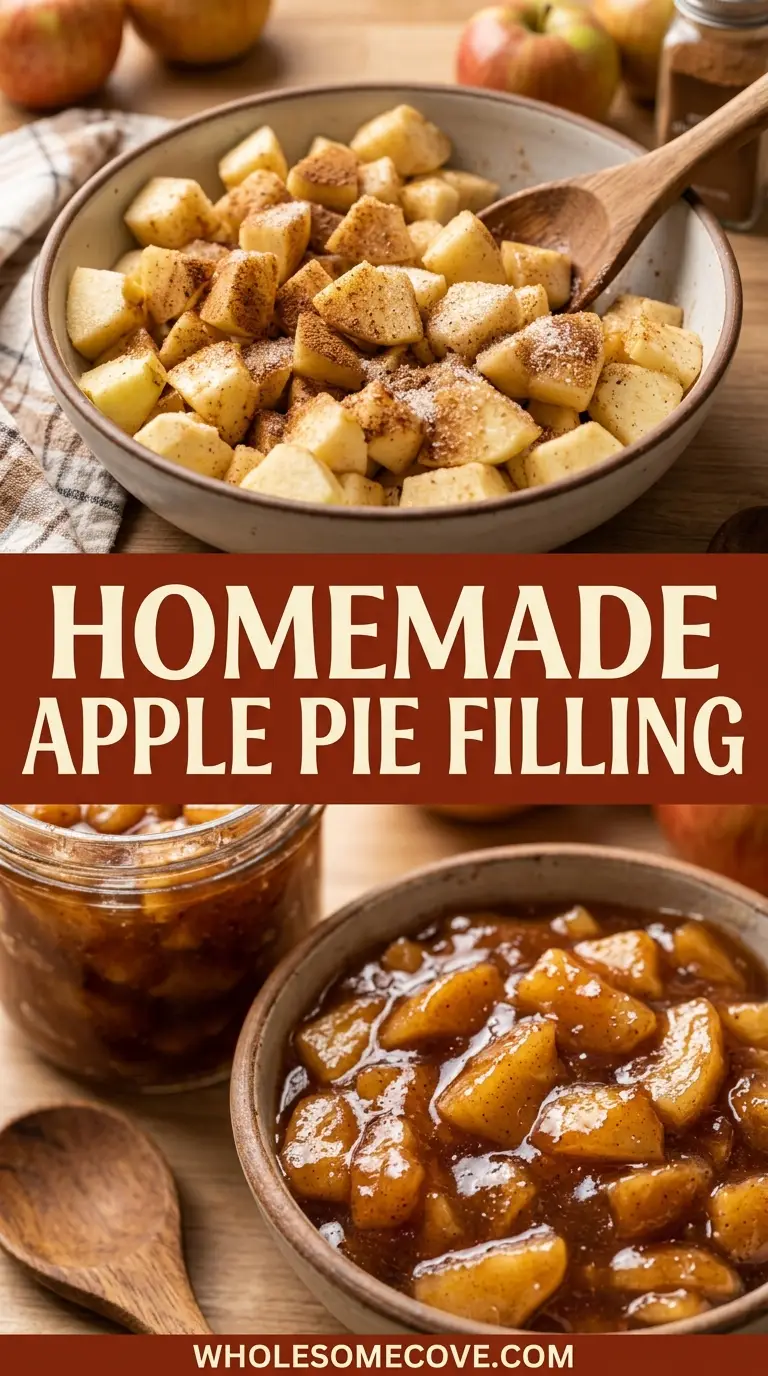
Tips for The Best Apple Pie Filling
Small adjustments make a noticeable difference here, especially around apple choice and sauce texture. These are the details worth paying attention to.
- Cook the sauce before the apples go in. I ruined my first batch by tipping raw apples into cold sauce, which left the cornstarch grainy and the filling thin, so now I let the base turn glossy first every time.
- Keep the slices uniform. Even ½-inch pieces cook at the same rate, while a mix of thick and thin slices leaves some mushy and some crunchy.
- Do not over-simmer. Pull the pan off the heat while the apples still hold their shape, since they keep softening in the residual heat.
- Trust the cool-down. Cornstarch keeps setting as the filling drops in temperature, so resist adding more thickener when the warm sauce looks loose.
- Use cider instead of water when you want a deeper apple flavor without extra sugar.
- Taste and adjust the spice before the butter goes in, adding a pinch more cinnamon if your apples are very sweet.
- Dice smaller for toppings and slice larger for pies, matching the cut to how you will use it.
For a classic apple dessert to bake next, try: Pumpkin Pie
What to Make with Apple Pie Filling
Apple pie filling is a building block, not a finished dessert, and one batch stretches across a surprising number of recipes. Here are the best ways to put it to work, with a few linked recipes where it slots right in.
- Classic apple pie: Spoon the cooled filling into a double Apple Pie crust for the most obvious and rewarding use.
- Apple crumble: Layer it under a buttery oat topping for a quick Apple Crumble with no rolling required.
- Apple crisp: Use it as the fruit base for a fast Apple Crisp when you want dessert in a hurry.
- A lighter pie: Fold it into a Healthy Apple Pie for a less sugary take.
- Spiced apple cake: Swirl it through the batter of an Amish Apple Cake for pockets of soft, saucy fruit.
- Hand pies and turnovers: Spoon a little into puff pastry squares, fold, and bake for individual pastries.
- Breakfast toppings: Warm it and pile it over pancakes, waffles, French toast, or a bowl of oatmeal.
- Ice cream and yogurt: Spoon it over vanilla ice cream or stir it into plain yogurt for an instant dessert.
- Cheesecake and pound cake: Use it as a glossy topping that dresses up a plain slice in seconds.
A related fruit dessert worth bookmarking is Poached Pear.
Variations of Apple Pie Filling
Once you have the base method down, the filling is easy to bend toward different flavors and diets. Try one of these swaps.
- Salted caramel apple: Stir a couple of tablespoons of caramel sauce into the finished filling for a richer, deeper flavor.
- Maple apple: Replace the brown sugar with an equal amount of pure maple syrup and reduce the water slightly.
- Extra-spiced: Add a pinch of ground cloves and ground ginger along with the cinnamon for a bolder, warmer profile.
- Dairy-free: Swap the butter for vegan butter or coconut oil, keeping everything else the same.
- Chunky spread: Dice the apples into ½-inch cubes instead of slices for a thicker, more jam-like texture.
- Apple-pear blend: Replace a third of the apples with firm pears for a softer, floral note.
- Boozy version: Stir in a tablespoon of bourbon or spiced rum off the heat for an adults-only filling.
For a savory way to cook with apples, see: Pork and Apple Skillet
Storage and Reheating
This filling is built for making ahead, which is half the reason to keep it around. Store it well and it will be ready whenever a dessert craving hits.
- Refrigerator: Cool the filling completely, then store it in an airtight container for up to 1 week.
- Freezer: Freeze in airtight containers or wide-mouth jars for up to 3 months, leaving about an inch of headspace for expansion. I keep a couple of jars in the freezer year-round so a pie is only a crust away on a busy weekend.
- Thawing: Move a frozen batch to the fridge overnight before using it in a pie or warming it as a topping.
- Reheating: Warm the filling gently in a saucepan over low heat, stirring, or microwave it in short bursts until heated through.
- Texture note: If the thawed filling looks slightly watery, simmer it for a minute or two to bring back the glossy consistency.
- Do not can with cornstarch: Cornstarch-thickened fillings are not safe for water-bath canning, so keep this batch in the fridge or freezer.
A related make-ahead dessert is Fruit Tart.
Nutritional Facts
Values below are estimates per serving, based on 8 servings from the full batch (about ½ cup or 120 ml each). Actual numbers will vary with apple variety and portion size.
| Nutrient | Amount per Serving |
|---|---|
| Calories | 185 kcal |
| Total Fat | 3 g |
| Saturated Fat | 1.8 g |
| Sodium | 80 mg |
| Total Carbohydrates | 41 g |
| Dietary Fiber | 3 g |
| Sugars | 33 g |
| Protein | 0.5 g |
Read Also: Apple Cider Glazed Pork Chops
Tips for Using Apple Pie Filling Like a Pro
Because this filling is a component, using it well matters as much as making it. These practical tips help it perform in whatever recipe you drop it into.
- Cool it fully before it meets raw pastry. Warm filling melts the fat in a bottom crust, which is the fastest route to a soggy base.
- Drain slightly for turnovers. Spoon in the apples and a little sauce, but leave excess liquid behind so pastry seals cleanly.
- Match the cut to the job. Larger slices read as pie, while a smaller dice packs neatly into hand pies, bars, and toppings.
- Thicken on the fly. If a batch runs loose in a recipe, whisk 1 teaspoon of cornstarch with a splash of cold water and simmer it in.
- Thin it for toppings. A splash of water or cider loosens the filling into a pourable sauce for pancakes or ice cream.
- Blind-bake for wet applications. When the filling sits in an unbaked shell, pre-bake the crust a few minutes so it firms up first.
- Layer for even pies. Arrange the apple slices in overlapping layers rather than dumping them, which removes air gaps that cause the top crust to sink.
- Brighten before serving. A tiny squeeze of fresh lemon over a reheated batch wakes up flavors that dull in storage.
For more autumn baking ideas, see Fall Muffin Recipes.
FAQs About Apple Pie Filling
1. What are the best apples for apple pie filling?
Firm baking apples work best because they soften without turning to mush. Granny Smith is the classic tart choice, and Honeycrisp, Braeburn, Pink Lady, and Golden Delicious all hold their shape well.
Many cooks use a mix of tart and sweet apples for balance. A blend of Granny Smith and Honeycrisp gives you structure and a rounded flavor.
2. Can you freeze homemade apple pie filling?
Yes, this filling freezes well for up to 3 months. Cool it completely, then pack it into airtight containers or wide-mouth jars with about an inch of headspace for expansion.
Thaw it overnight in the fridge before using. If it looks a little watery after thawing, a short simmer brings back the glossy texture.
3. How long does apple pie filling last in the fridge?
Stored in an airtight container, it keeps for up to 1 week in the refrigerator. Make sure it has cooled fully before sealing, since trapped steam can create condensation.
Give it a quick stir before using. Any liquid that separates during storage will blend back in once warmed.
4. Why is my apple pie filling runny, and how do I fix it?
The most common cause is not cooking the cornstarch sauce until it thickens before the apples go in. Bring the sugar and cornstarch mixture to a boil until glossy first, and the filling will set properly.
Remember that cornstarch continues thickening as the filling cools. If it still runs loose, whisk in a little more cornstarch slurry and simmer briefly.
5. Do I need to peel the apples?
Peeling gives the smoothest, most traditional texture, which is why most pie recipes call for it. The skins can turn chewy and separate from the flesh as the filling cooks.
That said, leaving the skins on is fine if you do not mind the texture. It also saves time and keeps a little extra fiber in the mix.
6. Can I use this filling to can apples for the pantry?
No, this particular recipe is not safe for water-bath canning because it uses cornstarch as the thickener. Cornstarch can interfere with heat penetration and safe preservation.
For shelf-stable canning, you need a tested recipe made with Clear Jel instead. For everyday use, the fridge and freezer are the safest storage options.
You might also like: Pumpkin Spice Latte
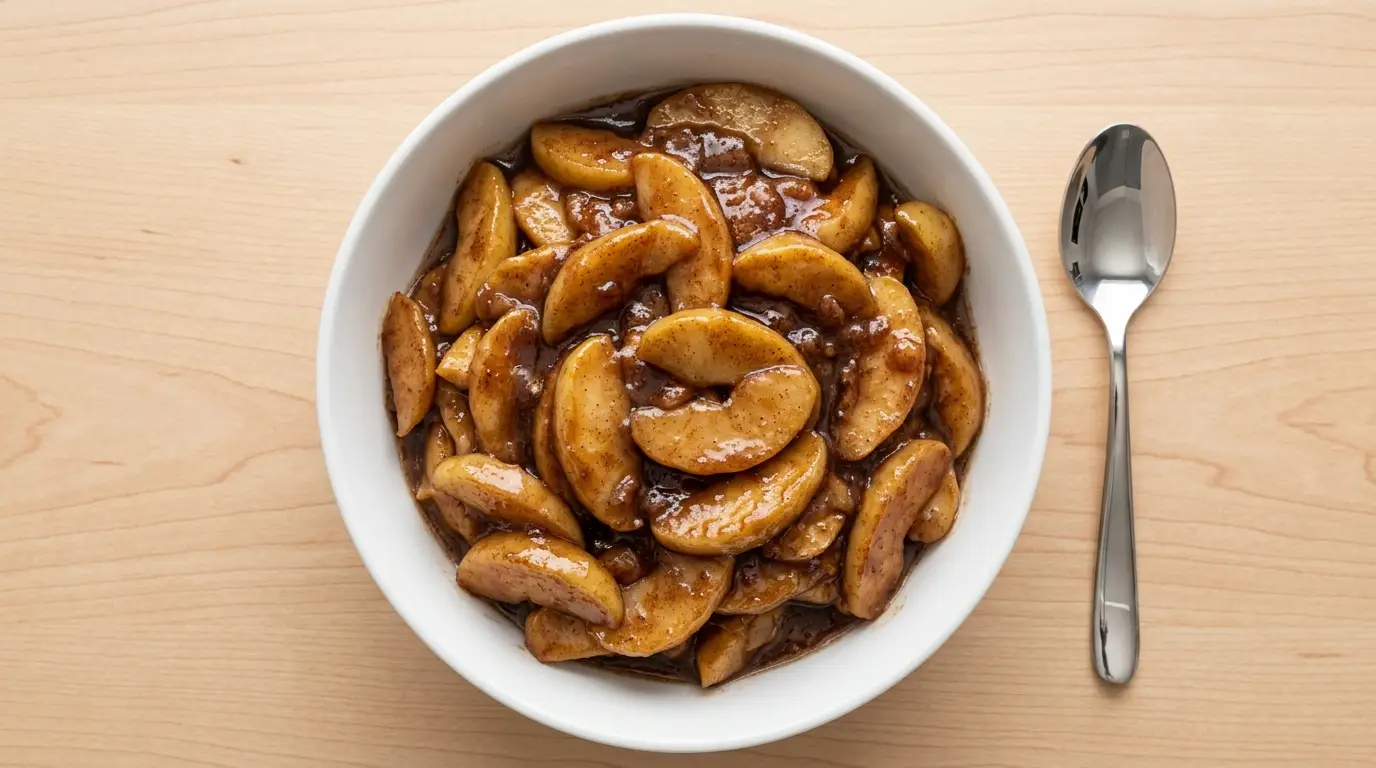
Homemade Apple Pie Filling
Ingredients
- 3 lb firm baking apples - 1.4 kg, about 6 to 7 medium, peeled, cored, and sliced ½ inch (1.25 cm) thick; a mix of Granny Smith and Honeycrisp works well
- 2 tablespoons fresh lemon juice - 30 ml
- ½ cup granulated sugar - 100 g
- ½ cup packed light brown sugar - 110 g
- ¼ cup cornstarch - 32 g
- 1½ teaspoons ground cinnamon
- ¼ teaspoon ground nutmeg
- ¼ teaspoon ground allspice - or ground cloves
- ¼ teaspoon salt
- 1½ cups water - 360 ml, or apple cider for deeper flavor
- 2 tablespoons unsalted butter - 28 g
- 1 teaspoon pure vanilla extract
- 2 teaspoons apple pie spice - Optional; replace the cinnamon, nutmeg, and allspice
Equipment
- Large heavy-bottomed saucepan or Dutch oven - At least 3 quarts (2.8 L)
- Sharp chef’s knife - For slicing apples
- Sturdy cutting board
- Silicone spatula or wooden spoon - For stirring
- Apple corer
- Large bowl - For tossing apples with lemon juice
Method
- Peel, core, and slice the apples into ½-inch (1.25 cm) pieces, keeping them uniform so they cook evenly. Place them in a large bowl, drizzle with lemon juice, and toss to coat.
- In a large saucepan or Dutch oven, whisk together the granulated sugar, brown sugar, cornstarch, cinnamon, nutmeg, allspice, and salt. Pour in the water and whisk until completely smooth.
- Set the saucepan over medium-high heat and bring to a gentle boil, whisking almost constantly. Cook for about 2 minutes, until the sauce turns thick, clear, and glossy enough to coat the back of a spoon.
- Add the lemon-coated apple slices and stir until every piece is coated. Return to a gentle boil, reduce the heat to medium-low, and simmer for 8 to 10 minutes, stirring often, until the apples are fork-tender but still hold their shape.
- Remove the pan from the heat. Add the butter and vanilla extract, stirring gently until the butter melts and the filling looks glossy.
- If baking a pie, let the filling cool to room temperature before adding it to a raw crust. For toppings, use it warm. The sauce thickens further as it cools.
Nutrition
Notes
- Cook the sauce before the apples go in. Letting the cornstarch base turn glossy first is the difference between a filling that sets and one that runs.
- Keep the slices uniform. Even ½-inch pieces cook at the same rate, while a mix of thick and thin slices leaves some mushy and some crunchy.
- Do not over-simmer. Pull the pan off the heat while the apples still hold their shape, since they keep softening in the residual heat.
- Trust the cool-down. Cornstarch keeps setting as the filling drops in temperature, so resist adding more thickener when the warm sauce looks loose.
- Use cider instead of water when you want a deeper apple flavor without extra sugar.
- Taste and adjust the spice before the butter goes in, adding a pinch more cinnamon if your apples are very sweet.
- Storage: Cool completely, then refrigerate in an airtight container for up to 1 week, or freeze for up to 3 months with about an inch of headspace.
- Do not can with cornstarch. This filling is not safe for water-bath canning; keep it in the fridge or freezer.
- Variations: Try salted caramel apple, maple apple, extra-spiced, dairy-free, chunky spread, apple-pear blend, or a boozy version with bourbon or spiced rum.
- Serving ideas: Use in classic apple pie, apple crumble, apple crisp, hand pies, turnovers, or as a topping for oatmeal, pancakes, waffles, ice cream, and yogurt.
Private Notes
Tried this recipe?
Let us know how it was!Final Thoughts
Homemade apple pie filling is one of those small kitchen wins that pays off all season. Once you see how much better it is than the canned version, it is hard to go back.
Keep a batch in the fridge or freezer and you are always one crust, one crumble, or one scoop of ice cream away from dessert. The method is forgiving, and the payoff is a glossy, spiced filling that actually sets.
Give this one a try the next time you have a bag of apples to use up. If you make it, leave a comment to share how you used your batch, and pass the recipe along to a fellow apple lover.
Recommended:
- Peach Pie
- Peach Cobbler
- Pecan Pie Dump Cake
- Coconut Cream Pie
- Old Fashioned Pumpkin Bread
- Gingerbread Cookies
- Fall Bread Recipes
- Peach Crumble
- Sugar Cookies
- Pumpkin Bars