
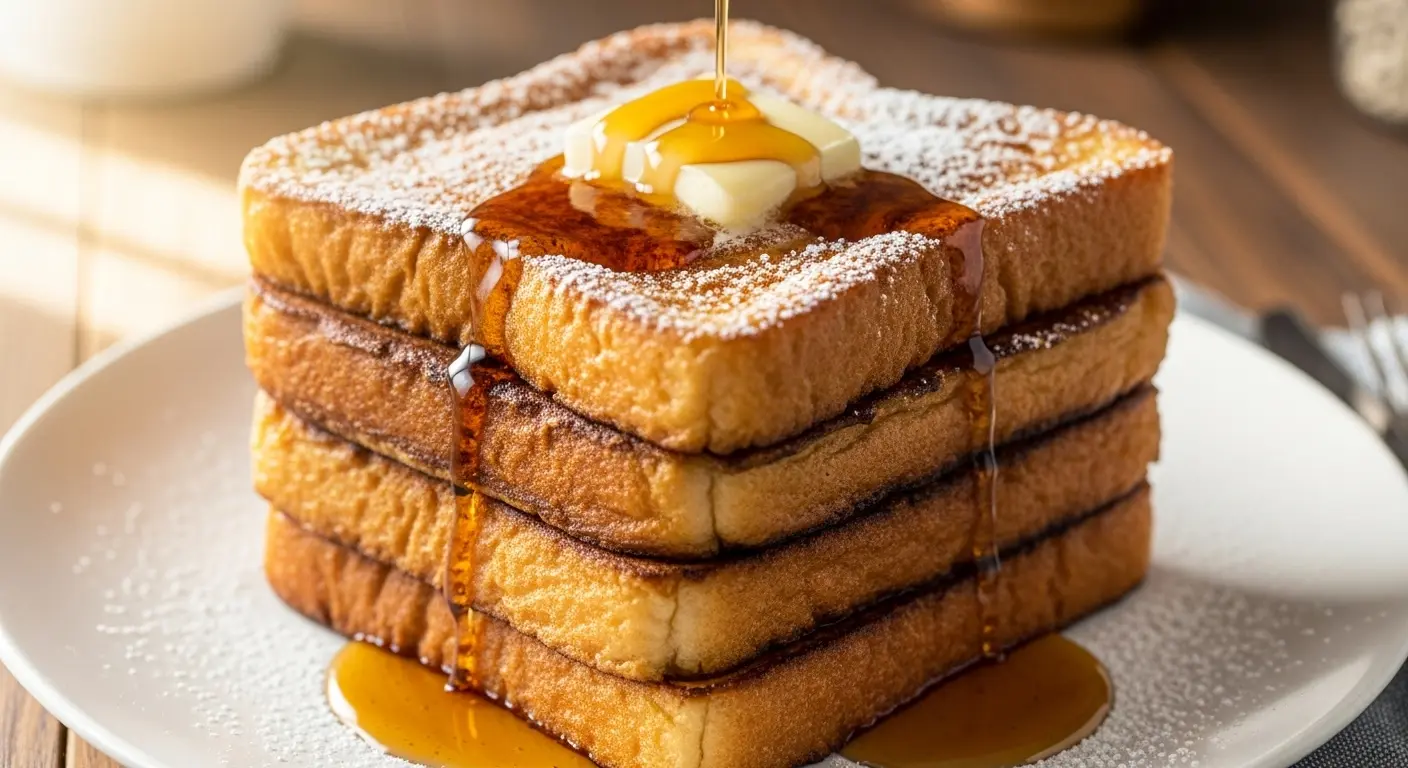
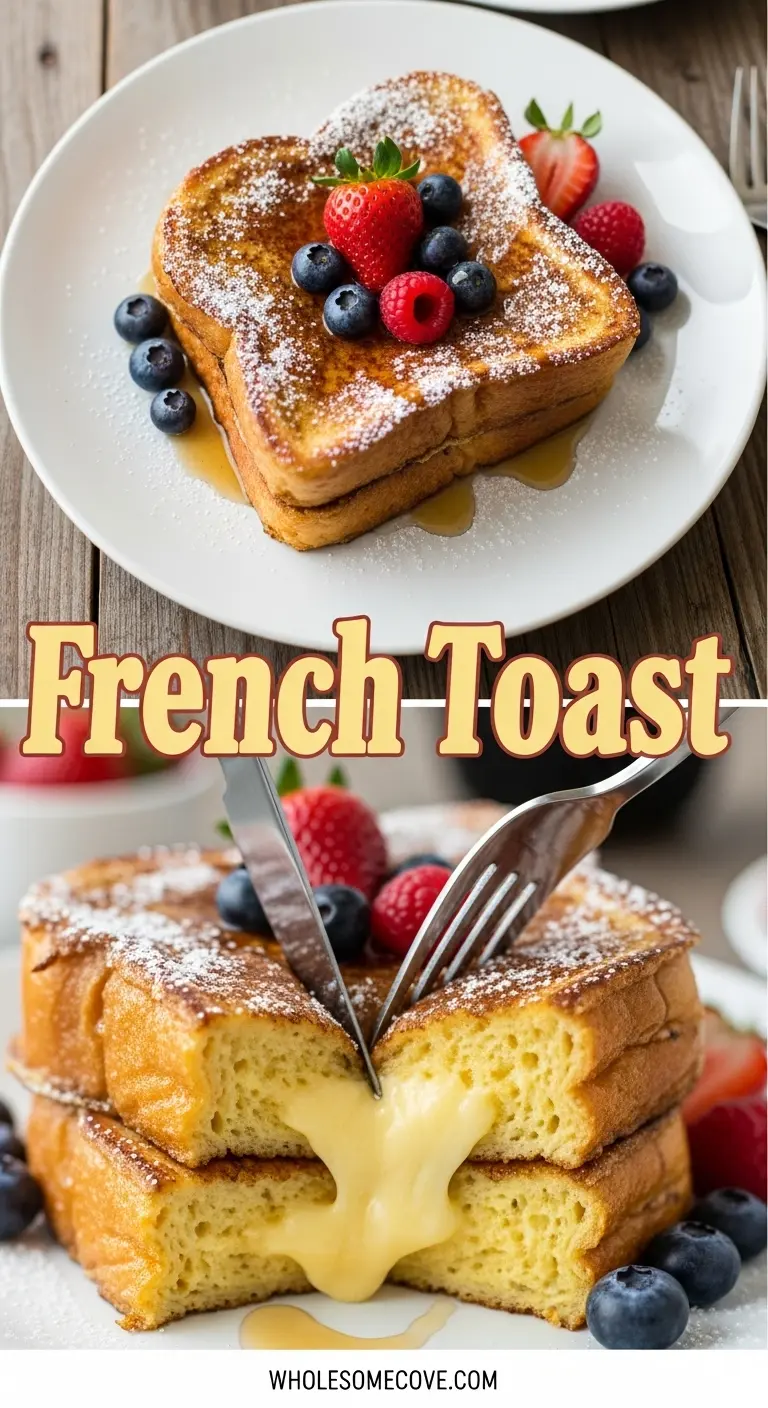
Growing up, Saturday mornings meant one thing in our house: French toast. My mom would stand at the stove, transforming ordinary slices of bread into golden, custardy perfection while my siblings and I waited impatiently at the table.
Years later, I’ve perfected my own French Toast Recipe after countless breakfasts and probably way too many experiments with different bread types and custard ratios. This isn’t just any breakfast—it’s the kind that makes you want to wake up early on weekends.
The secret? It’s all about the bread-to-egg ratio, a touch of vanilla, and knowing exactly when to flip. I learned the hard way that rushing the cooking process leaves you with soggy centers, and using fresh bread instead of day-old results in a mushy disaster.
This recipe delivers perfectly crispy edges with a soft, custardy center every single time. Trust me, once you master this technique, boxed pancake mix will collect dust in your pantry.
| Quick Recipe Summary | |
|---|---|
| Prep Time | 10 minutes |
| Cook Time | 15 minutes |
| Total Time | 25 minutes |
| Servings | 4 servings (8 slices) |
| Difficulty Level | Easy |
Why You’ll Love This French Toast Recipe
This recipe has saved me on busy mornings and impressed guests at countless brunches. It uses simple pantry staples you probably already have, which means no last-minute grocery runs when the craving hits.
The technique ensures every slice comes out perfectly golden with crispy caramelized edges. I’ve watched picky eaters go back for seconds and self-proclaimed “not breakfast people” ask for the recipe.
Here’s what makes this French toast special:
- Foolproof custard mixture that coats the bread evenly without making it soggy
- Works with various bread types, from challah to brioche to thick-cut white bread
- Ready in under 30 minutes, making it perfect for weekday breakfasts or lazy weekend mornings
- Customizable with endless toppings, from classic maple syrup to fresh berries and whipped cream
- Kid-approved and adult-loved, satisfying every palate at the breakfast table
- Makes incredible use of day-old bread, turning potential waste into something delicious
The way my air fryer pancake recipe revolutionized my breakfast routine, this French toast technique will change how you approach weekend mornings.
Ingredients
This recipe relies on quality ingredients that work together to create that perfect custard coating. I’ve tested this with everything from fancy brioche to plain sandwich bread, and the method works beautifully every time.
- 8 thick slices of day-old bread (challah, brioche, or Texas toast work best)
- 4 large eggs
- 1 cup (240ml) whole milk or half-and-half for extra richness
- 2 tablespoons (25g) granulated sugar
- 1 teaspoon vanilla extract
- 1/2 teaspoon ground cinnamon
- 1/4 teaspoon kosher salt
- Pinch of nutmeg (optional but recommended)
- 3-4 tablespoons (42-56g) unsalted butter for cooking
Optional toppings:
- Maple syrup
- Fresh berries
- Powdered sugar
- Whipped cream
- Sliced bananas
Kitchen Equipment Needed
Having the right tools makes this recipe even easier. I used to struggle with uneven cooking until I invested in a proper griddle, and it made all the difference.
- Large shallow dish or pie plate for the custard mixture (at least 9 inches wide)
- Whisk for blending the egg mixture
- Large non-stick skillet or griddle (12 inches or larger works best)
- Wide spatula for flipping
- Medium mixing bowl for easy whisking
- Measuring cups and spoons
- Plate lined with paper towels for any excess butter
Recommended Products for This Recipe
After making French toast more times than I can count, I’ve found a few products that genuinely make a difference in the final result. These aren’t necessary, but they’ll elevate your French toast experience.
1. Challah Bread
I’ve tried this recipe with countless bread varieties, but challah bread consistently produces the best texture. Its slightly sweet flavor and eggy richness create a custard-like interior that regular sandwich bread just can’t match. The thick, sturdy slices hold up beautifully to soaking without falling apart.
2. All-Clad Nonstick Griddle
This nonstick griddle changed my French toast preparation completely. The even heat distribution means no more burnt edges with raw centers, and the large surface lets you cook multiple slices at once. Cleanup is effortless, even when that sugary custard inevitably caramelizes on the surface.
3. Madagascar Vanilla Extract
The difference between imitation vanilla and real Madagascar vanilla extract is night and day in this recipe. That warm, complex vanilla flavor permeates every bite, making even simple French toast taste restaurant-quality. One bottle lasts for months and transforms all your baking.
4. Vietnamese Cinnamon
Regular cinnamon is fine, but Vietnamese cinnamon brings an intensity and sweetness that takes this recipe to another level. It’s more fragrant and flavorful than standard grocery store cinnamon, and you’ll notice the difference immediately. I use it in all my breakfast recipes now.
Another favorite: Healthy Waffle Recipe
Step-by-Step Instructions: How to Make French Toast
Follow these detailed steps for perfect French toast every time. I’ve included all the little tricks I’ve learned to ensure success, even if this is your first attempt.
1. Prepare Your Bread
- Select day-old bread that’s slightly stale. Fresh bread absorbs too much custard and becomes soggy. If your bread is fresh, leave slices out uncovered for 2-3 hours or toast them lightly for 1-2 minutes.
- Cut thick slices about 3/4 to 1 inch thick. Thin slices won’t hold up to soaking and cooking. If using a loaf, slice it yourself to control thickness.
- Arrange bread slices in a single layer on a baking sheet. This makes the dipping process more organized and prevents a messy counter.
2. Make the Custard Mixture
- Crack eggs into a shallow dish large enough to fit one slice of bread. A 9-inch pie plate or shallow baking dish works perfectly for easy dipping.
- Add milk, sugar, vanilla extract, cinnamon, salt, and nutmeg to the eggs. The sugar adds a subtle sweetness and helps with caramelization, while spices provide warmth and depth.
- Whisk vigorously for 30-45 seconds until completely combined. You want no streaks of egg white visible and the mixture should be uniform in color. The sugar should be mostly dissolved.
- Let the mixture sit for 2-3 minutes. This allows the cinnamon and nutmeg to bloom in the liquid, intensifying their flavors.
3. Heat Your Cooking Surface
- Place your skillet or griddle over medium heat. Too high and the outside burns before the inside cooks; too low and you’ll have pale, soggy French toast.
- Add 1 tablespoon of butter to the pan. Let it melt completely and swirl to coat the entire cooking surface evenly.
- Wait until the butter stops foaming but hasn’t browned yet. This is the perfect temperature indicator. The pan should be hot enough that a drop of water sizzles immediately.
- Reduce heat slightly to medium-low once butter is ready. This prevents burning during the longer cooking time needed for thick slices.
4. Soak the Bread
- Place one slice of bread into the custard mixture. Gently press down with your fingers or the back of a fork to help it absorb the liquid.
- Let it soak for 15-20 seconds on the first side. The bread should absorb custard but still hold its shape. Day-old bread can handle longer soaking than fresh.
- Flip and soak the second side for another 15-20 seconds. Press gently again to ensure even absorption throughout the slice.
- Lift the bread and let excess custard drip back into the dish. You want the bread saturated but not dripping excessively, which would make your pan too wet.
- Repeat with only as many slices as will fit comfortably in your pan. Don’t soak all slices at once or they’ll become oversaturated and fall apart.
Read Also: Easy Pancake Recipe
5. Cook the French Toast
- Carefully place soaked bread slices into the hot, buttered pan. They should sizzle gently when they hit the surface. If there’s no sizzle, your pan isn’t hot enough.
- Cook for 3-4 minutes on the first side without moving them. Resist the urge to peek or flip early. The underside should develop a deep golden-brown color with crispy edges.
- Check for readiness by gently lifting one corner with your spatula. If it’s golden brown and releases easily from the pan, it’s ready to flip.
- Add another small pat of butter to the pan if it looks dry. Tilt the pan to distribute the butter before flipping.
- Flip each slice carefully using a wide spatula. Support the entire slice to prevent breaking, especially with softer breads.
- Cook for another 3-4 minutes on the second side. This side usually cooks slightly faster since the pan is fully heated. Look for the same deep golden color.
- Press gently in the center of the slice. It should feel set and slightly firm, not squishy, indicating the custard is fully cooked through.
6. Keep Warm and Serve
- Transfer cooked slices to a baking sheet in a 200°F (95°C) oven. This keeps them warm while you cook the remaining batches without continuing to cook them.
- Add more butter to the pan between batches. Wipe out any burnt bits with a paper towel if necessary to prevent a bitter taste.
- Repeat the soaking and cooking process with remaining bread. Work in batches to maintain consistent quality rather than crowding the pan.
- Serve immediately once all slices are done. French toast is best enjoyed hot from the pan when the exterior is still crispy.
- Top with your chosen accompaniments. Dust with powdered sugar, drizzle with maple syrup, add fresh berries, or keep it simple with just butter.

Tips for The Best French Toast
These tips come from years of trial and error, and they’ll help you avoid the common pitfalls that lead to disappointing French toast.
- Always use day-old or slightly stale bread. Fresh bread becomes mushy and can fall apart when soaked. Leave bread out overnight uncovered or buy it a day ahead.
- Don’t skip the resting time after whisking the custard. Those few minutes allow the spices to bloom and the mixture to become more cohesive, resulting in better flavor distribution.
- Control your heat carefully. Medium to medium-low is ideal. Too hot burns the outside before cooking the interior; too cool leaves you with pale, greasy toast.
- Use enough butter between batches. Each batch needs fresh butter for proper browning and flavor. Don’t be stingy, but don’t let it pool either.
- Avoid oversaturating the bread. Thick slices need less soaking time than you’d think. When in doubt, start with less time and add more if needed.
- Flip only once. Multiple flips disturb the crust formation and can cause the custard coating to fall off.
- Test one slice first if you’re unsure about timing. Every stove heats differently, so use your first slice as a gauge for adjusting heat and timing.
- Keep finished slices in a low oven rather than stacking them. Stacking creates steam that makes the crispy exterior soggy.
- Add a splash of heavy cream to the custard for extra richness. Replace 1/4 cup of the milk with heavy cream for an incredibly decadent version.
- Toast your bread lightly first if it’s too soft. A minute in the toaster creates a slight crust that helps the bread hold its shape during soaking.
I discovered that using the same careful temperature control I apply to my healthy crepe recipe works perfectly for French toast too.
Serving Suggestions
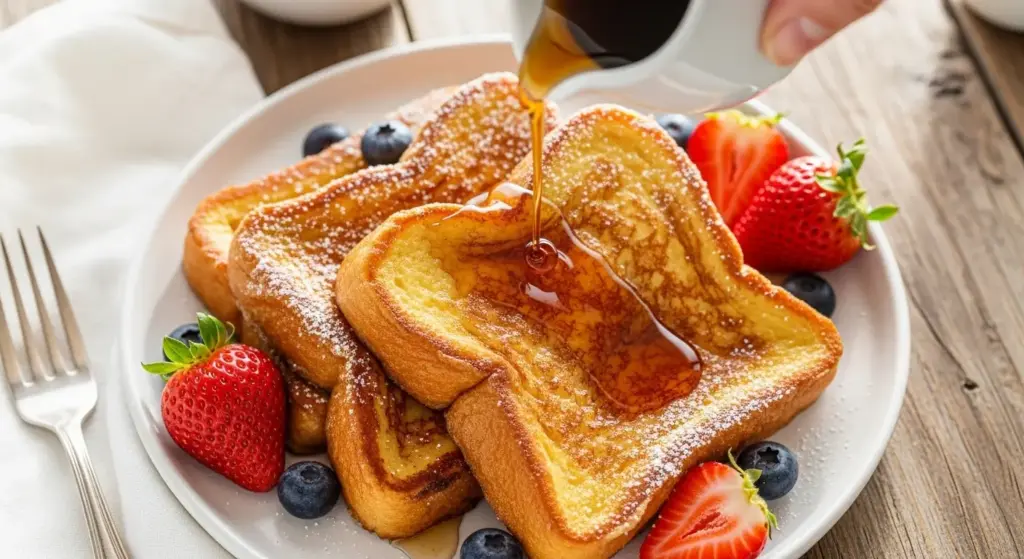
French toast is wonderfully versatile and pairs beautifully with both sweet and savory accompaniments. Here are my favorite ways to serve it, from simple to spectacular.
Classic sweet toppings:
- Warm maple syrup and a pat of butter
- Fresh berries (strawberries, blueberries, raspberries) with whipped cream
- Sliced bananas with a drizzle of honey butter
- Powdered sugar dusted over the top
- Homemade cinnamon applesauce
- Caramelized apples with cinnamon
- Berry compote made from frozen mixed berries
Savory pairings:
- Crispy bacon strips
- Breakfast sausage links or patties
- Deviled Eggs
- Fresh fruit salad on the side
- Scrambled eggs for a complete breakfast plate
- Air Fryer Bacon Wrapped Chicken Breasts for a hearty brunch
You might also enjoy: Pumpkin French Toast
Variations of French Toast
Once you master the basic technique, these variations will keep breakfast exciting for weeks. I rotate through these depending on what I’m craving or what’s in season.
- Stuffed French Toast: Cut a pocket in thick bread slices and fill with cream cheese and jam, Nutella and sliced bananas, or sweetened ricotta and berries before soaking and cooking.
- Cinnamon Roll French Toast: Use cinnamon roll dough slices instead of bread, soak briefly in the custard mixture, and cook until golden. Drizzle with cream cheese glaze.
- Banana Bread French Toast: Use thick slices of banana bread instead of regular bread for a double dose of banana flavor. Reduce the sugar in the custard since banana bread is already sweet.
- Brioche French Toast: Use brioche bread for an extra-rich, buttery version that feels incredibly indulgent. The high egg content in brioche creates an almost custard-like interior.
- Pumpkin Spice French Toast: Add 2 tablespoons of pumpkin puree and 1/2 teaspoon of pumpkin pie spice to the custard mixture for a fall-inspired version.
- Orange Zest French Toast: Add 1 tablespoon of fresh orange zest to the custard for a bright, citrusy twist. Serve with fresh berries and whipped cream.
- Coconut French Toast: Replace half the milk with coconut milk and add 1/4 teaspoon of coconut extract. Top with toasted coconut flakes and tropical fruit.
- Chocolate Chip French Toast: Press mini chocolate chips into both sides of the soaked bread before cooking. The chips melt slightly and create pockets of chocolate throughout.
- Savory Herb French Toast: Omit the sugar, vanilla, and cinnamon. Add fresh chopped herbs (thyme, chives, parsley), a pinch of black pepper, and 2 tablespoons of grated Parmesan. Serve with eggs and bacon.
- Almond French Toast: Replace vanilla extract with almond extract and top with sliced almonds and a dusting of powdered sugar.
Storage and Reheating
French toast actually stores and reheats remarkably well, making it perfect for meal prep or handling leftovers from a big brunch.
Refrigerator storage:
- Let French toast cool completely on a wire rack before storing to prevent condensation from making it soggy.
- Stack slices with parchment paper between each one to prevent sticking.
- Store in an airtight container or resealable plastic bag for up to 3-4 days.
- Keep separate from any toppings or syrup, which should be stored separately and added after reheating.
Freezer storage:
- Cool completely and arrange slices in a single layer on a baking sheet.
- Freeze for 1-2 hours until solid, then transfer to a freezer bag with parchment paper between slices.
- Label with the date and store for up to 2 months for best quality.
- No need to thaw before reheating, which actually helps maintain texture.
Reheating methods:
- Toaster or toaster oven: Place slices directly in the toaster on medium heat for crispy edges. Toast until heated through and crispy, about 2-3 minutes.
- Oven: Arrange on a baking sheet and bake at 375°F (190°C) for 8-10 minutes, flipping halfway through.
- Skillet: Heat a bit of butter in a skillet over medium heat and warm slices for 1-2 minutes per side until crispy.
- Microwave (least recommended): Heat for 20-30 seconds, but this will make the toast softer rather than crispy. Only use this method when short on time.
- Air fryer: Place slices in a single layer and heat at 350°F (175°C) for 3-4 minutes for the crispiest reheated texture.
Read Also: Air Fryer French Toast Recipe
Nutritional Facts
Here’s the approximate nutritional information per serving (2 slices with no toppings):
- Calories: 320
- Total Fat: 12g
- Saturated Fat: 6g
- Trans Fat: 0g
- Cholesterol: 195mg
- Sodium: 420mg
- Total Carbohydrates: 38g
- Dietary Fiber: 2g
- Sugars: 10g
- Protein: 12g
- Vitamin D: 15% DV
- Calcium: 12% DV
- Iron: 15% DV
- Potassium: 8% DV
Note: Nutritional values are estimates and will vary based on the specific bread and milk used. Adding toppings like maple syrup, butter, or whipped cream will increase these values significantly.
Health Benefits of Key Ingredients
While French toast is certainly an indulgent breakfast, it does provide some nutritional benefits thanks to its wholesome core ingredients.
Eggs: The foundation of the custard mixture provides high-quality protein containing all nine essential amino acids. Eggs are rich in choline, which supports brain health and development, and contain lutein and zeaxanthin for eye health. Each serving provides significant vitamin D, B vitamins (especially B12), and minerals like selenium.
Milk: Contributes calcium for strong bones and teeth, along with vitamin D which aids calcium absorption. The protein in milk helps keep you feeling full longer, and it provides potassium for heart health and blood pressure regulation.
Cinnamon: This warming spice contains powerful antioxidants and has anti-inflammatory properties. Studies suggest cinnamon may help regulate blood sugar levels and improve insulin sensitivity. It also has antimicrobial properties and has been linked to improved heart health.
Whole grain bread options: If you choose whole wheat or multigrain bread instead of white, you’ll boost the fiber content significantly. Fiber supports digestive health, helps control blood sugar spikes, and keeps you feeling satisfied longer.
For a lighter morning option, try my healthy egg salad recipe.
FAQs About French Toast
1. Can I use fresh bread instead of day-old bread?
Fresh bread can work, but it requires a different approach. Fresh bread is softer and more prone to falling apart when soaked in the custard mixture. If you only have fresh bread available, lightly toast each slice for 1-2 minutes first to create a slight crust that will hold up better during soaking. Alternatively, leave the slices out uncovered at room temperature for 2-3 hours to dry them out slightly before using.
2. Why is my French toast soggy in the middle?
Soggy French toast usually results from one of three issues: soaking the bread too long, using bread that’s too fresh and soft, or cooking at too high a temperature. When the heat is too high, the outside browns quickly while the inside remains undercooked and custard-like. Make sure you’re cooking at medium to medium-low heat for 3-4 minutes per side, which gives the interior time to set properly while developing that golden crust.
3. Can I make French toast ahead of time?
Absolutely! French toast is excellent for meal prep and reheats beautifully. Cook all the slices as directed, let them cool completely on a wire rack, then store in the refrigerator for up to 3 days or freeze for up to 2 months. Reheat in a toaster, toaster oven, or air fryer for the best texture. Some people even prefer reheated French toast because it develops an extra-crispy exterior.
4. What’s the best bread for French toast?
Thick-sliced, slightly stale bread with a sturdy structure works best. Challah is my top choice because its eggy richness and tender crumb create an incredibly custardy interior. Brioche is another excellent option for a buttery, indulgent version. Texas toast, French bread, and sourdough also work wonderfully. Avoid thin sandwich bread, which becomes too soggy, and very crusty artisan breads, which don’t absorb the custard well.
5. How do I prevent French toast from sticking to the pan?
Use enough butter and ensure your pan is properly preheated. The butter should be melted and coating the entire surface before you add the bread. A good nonstick skillet or well-seasoned cast iron pan helps tremendously. If sticking persists, your pan might not be hot enough—the bread should sizzle when it hits the surface. Adding a small amount of butter between each batch ensures a fresh nonstick surface each time.
Another favorite: Jiffy Spoon Bread Recipe
Final Thoughts
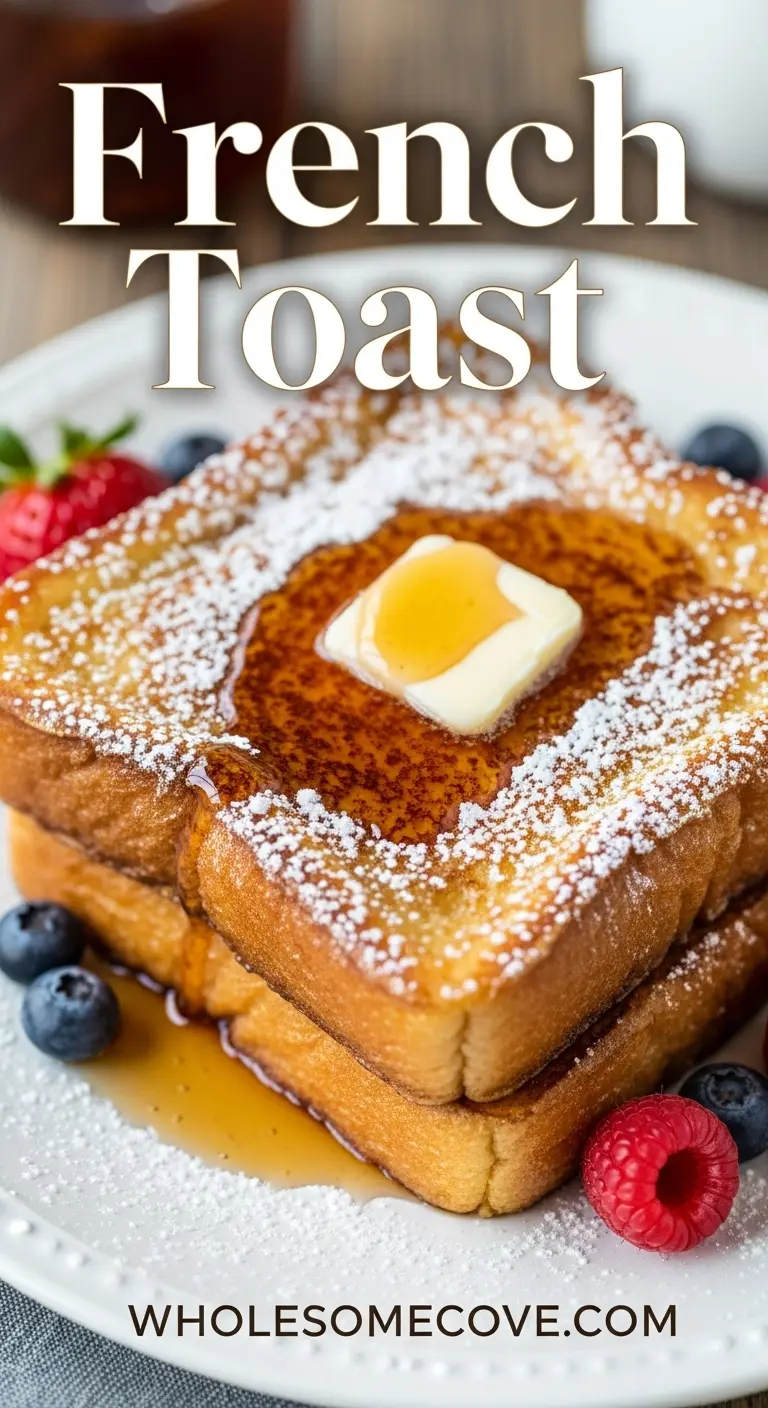
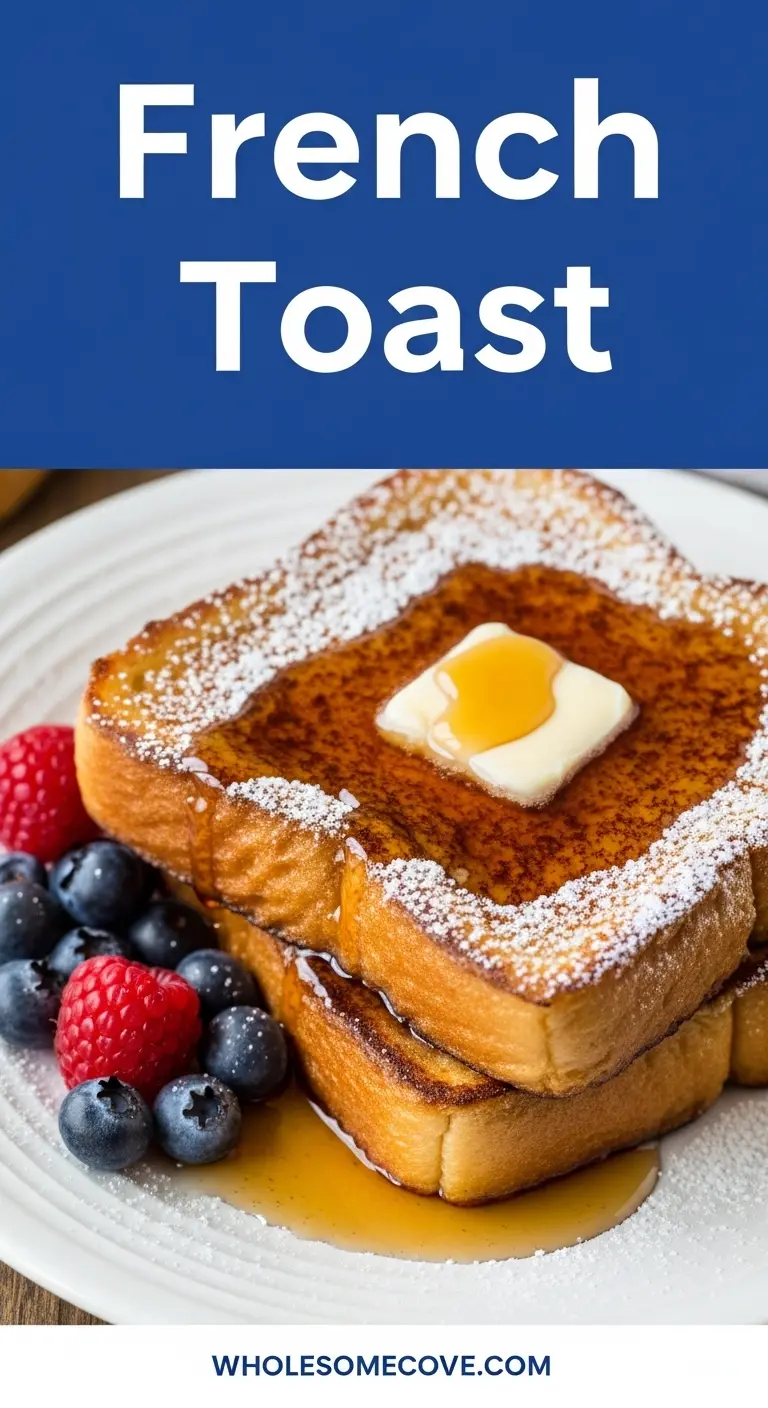
This French toast recipe has earned its place as my go-to weekend breakfast for good reason. The golden, crispy exterior and soft, custardy interior never fail to satisfy, and the simple ingredient list means I can make it without a special trip to the store.
What I love most is how forgiving this recipe is once you understand the basics. You can dress it up with fancy toppings for brunch guests or keep it simple with just butter and syrup for a quiet Saturday morning. Either way, you’re guaranteed a delicious start to your day.
I hope this recipe brings as much joy to your breakfast table as it has to mine. Give it a try this weekend, and don’t be surprised when everyone asks you to make it again next week. I’d love to hear how it turns out for you—drop a comment below with your favorite toppings or any creative variations you discover!
Recommended:
- Snickerdoodle Banana Bread Recipe
- Jamaican Bread Pudding Recipe
- Air Fryer Morning Frittata Recipe
- Air Fryer Bikini Ham Cheese Sandwich Recipe
- Air Fryer Cheddar Hash Browns Recipe
- Banana Muffin Recipe with Two Bananas
- Starbucks Banana Bread Recipe
- Healthy Banana Bread Recipe
- Keto Banana Bread Recipe
- Banana Bread Recipe with No Eggs
