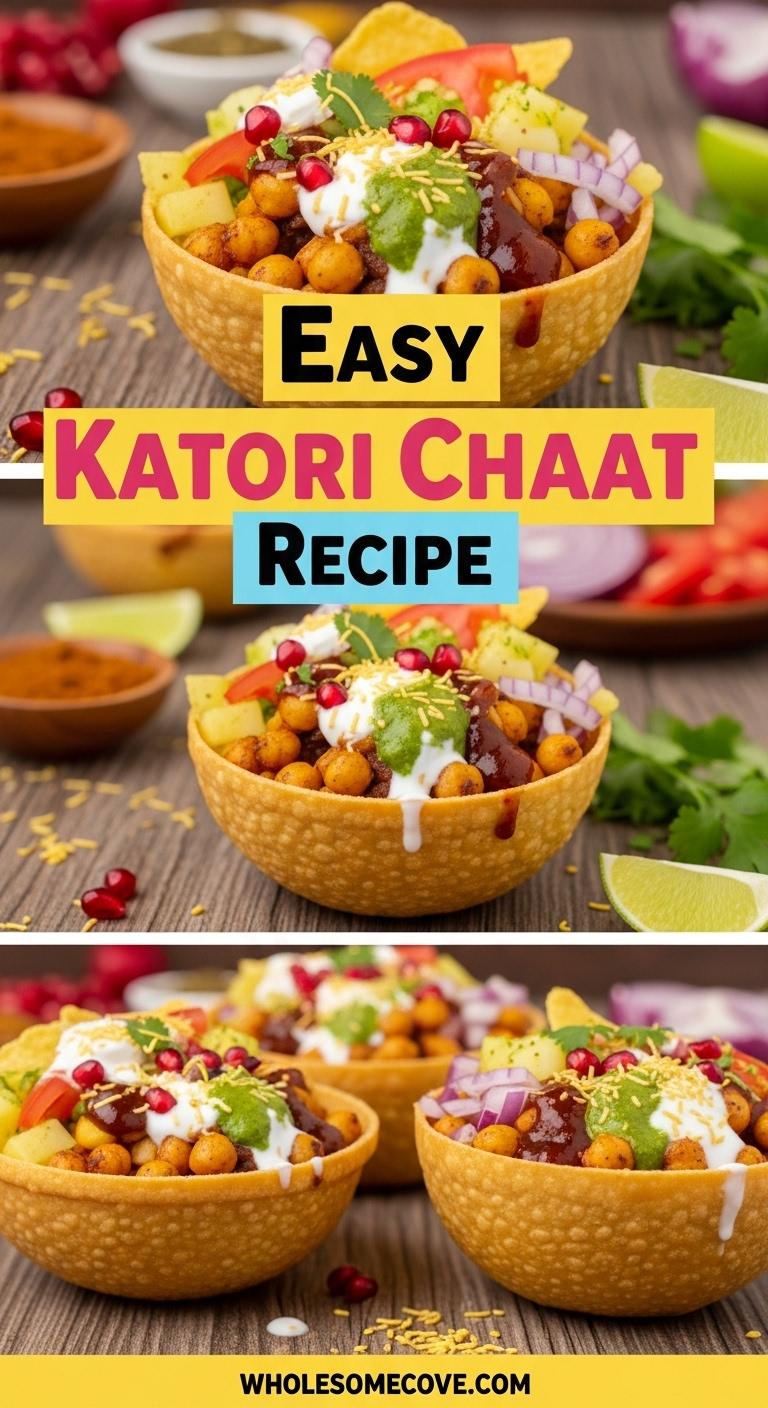
Katori chaat is my go-to when I’m craving something crispy, tangy, and bursting with flavor.
This Indian street food gem combines crunchy edible bowls with a medley of spiced fillings, making it perfect for gatherings or a fun evening snack.
I first fell in love with it at a bustling market stall, where the vibrant colors and aromas were impossible to resist.
Now, I’m excited to share my take on this beloved dish, crafted to bring that authentic chaat experience to your kitchen.
It’s surprisingly simple to make, yet feels like a festive treat every time.
Read Also: Papdi Chaat Recipe

Why You’ll Love This Katori Chaat Recipe
Katori chaat is a delightful mix of textures and tastes that transforms a simple snack into a celebration.
The crispy katori bowls, filled with creamy yogurt, spicy chutneys, and savory toppings, create a party in every bite.
It’s versatile, customizable, and ideal for impressing guests or indulging in a solo treat.
Plus, it’s a fantastic way to explore Indian flavors without needing a culinary degree.
- Flavor Explosion: Combines sweet, tangy, spicy, and savory elements for a balanced taste.
- Fun to Make: Shaping and frying the katoris is a creative, hands-on process.
- Customizable: Adjust spices or toppings to suit your preferences.
- Perfect for Sharing: Great for parties, potlucks, or family snack nights.
- Visually Stunning: Vibrant colors make it as beautiful as it is delicious.
Read Also: Fruit Chaat Recipe
Ingredients For Katori Chaat
This recipe uses pantry staples and fresh ingredients to create crispy katoris and flavorful fillings. You can find most items at your local grocery store or Indian market.
- All-purpose flour – 1 cup (120 g) for the katori dough.
- Semolina – 2 tbsp (20 g) for extra crispiness.
- Vegetable oil – 2 tbsp (30 ml) for dough, plus more for frying.
- Salt – ½ tsp (2.5 g) for dough seasoning.
- Water – ¼ cup (60 ml), adjust as needed for dough.
- Boiled potatoes – 2 medium (200 g), diced for filling.
- Chickpeas – 1 cup (240 g), cooked or canned, drained.
- Red onion – 1 small (50 g), finely chopped.
- Tomato – 1 small (50 g), finely chopped.
- Cilantro – ¼ cup (15 g), chopped for garnish.
- Yogurt – ½ cup (120 g), whisked for smoothness.
- Tamarind chutney – ¼ cup (60 ml) for tangy sweetness.
- Green chutney – ¼ cup (60 ml) for spicy kick.
- Chaat masala – 1 tsp (5 g) for seasoning.
- Cumin powder – ½ tsp (2.5 g) for earthy flavor.
- Red chili powder – ½ tsp (2.5 g) for heat.
- Sev – ¼ cup (20 g) for crunchy topping.
- Pomegranate seeds – 2 tbsp (20 g) for garnish (optional).
Read Also: Chickpea Salad Recipe
Kitchen Equipment Needed
You’ll need a few basic tools to make katori chaat, most of which you likely already have in your kitchen. These ensure your katoris are perfectly shaped and the filling is well-prepared.
- Mixing bowl for preparing the dough.
- Rolling pin to roll out the katori dough.
- Small bowls for shaping katoris (metal or heat-resistant).
- Deep frying pan or kadhai for frying katoris.
- Slotted spoon for removing katoris from oil.
- Cutting board for chopping vegetables.
- Knife for dicing potatoes, onions, and tomatoes.
- Measuring cups and spoons for accurate measurements.
- Whisk for smoothing yogurt.
Read Also: Healthy Hummus Recipe

Step-by-Step Instructions
Making katori chaat involves crafting crispy bowls and assembling a vibrant filling. Follow these detailed steps to ensure success, even if you’re new to Indian cooking.
1. Prepare the Katori Dough
In a mixing bowl, combine 1 cup (120 g) all-purpose flour, 2 tbsp (20 g) semolina, ½ tsp (2.5 g) salt, and 2 tbsp (30 ml) vegetable oil.
Mix until the oil is evenly distributed, creating a crumbly texture. Gradually add ¼ cup (60 ml) water, kneading until a smooth, firm dough forms.
If the dough feels sticky, add a pinch more flour; if too dry, add water 1 tsp at a time. Cover with a damp cloth and rest for 15 minutes.
2. Shape the Katoris
Divide the dough into 6 equal portions, about the size of a golf ball.
On a lightly floured surface, use a rolling pin to roll each portion into a 4-inch (10 cm) circle, about 1/8 inch (3 mm) thick.
Gently press each circle into a small, heat-resistant bowl, shaping it to fit the inside like a cup.
Trim excess dough from the edges for a neat finish. Alternatively, drape the dough over an inverted bowl for a deeper katori shape.
3. Fry the Katoris
Heat 2 inches (5 cm) of vegetable oil in a deep frying pan over medium heat until it reaches 350°F (175°C).
Carefully place a dough-lined bowl into the hot oil, ensuring the dough stays in place.
Fry for 2–3 minutes until golden brown and crispy, gently pressing with a slotted spoon to keep the shape.
Remove the katori, let the bowl cool slightly, and gently tap to release the katori.
Repeat for all dough portions. Drain on paper towels.
4. Prepare the Filling
On a cutting board, dice 2 medium boiled potatoes into ½-inch (1 cm) cubes.
Finely chop 1 small red onion and 1 small tomato. In a mixing bowl, combine the potatoes, 1 cup (240 g) cooked chickpeas, onion, and tomato.
Add 1 tsp (5 g) chaat masala, ½ tsp (2.5 g) cumin powder, and ½ tsp (2.5 g) red chili powder. Toss gently to coat.
5. Assemble the Katori Chaat
Place the fried katoris on a serving platter. Spoon 2–3 tbsp of the potato-chickpea mixture into each katori.
Drizzle 1 tbsp (15 ml) yogurt over the filling, followed by 1 tsp (5 ml) tamarind chutney and 1 tsp (5 ml) green chutney.
Sprinkle with 1 tbsp (5 g) sev and a pinch of chopped cilantro. Add a few pomegranate seeds for a pop of color, if using.
Serve immediately to keep the katoris crispy.
Read Also: Healthy Coleslaw Recipe
Tips for Success
To ensure your katori chaat turns out perfectly crispy and flavorful, follow these practical tips based on my trial-and-error moments in the kitchen.
- Knead the dough until smooth to avoid cracks when shaping katoris.
- Keep oil temperature steady at 350°F (175°C) to prevent soggy or burnt katoris.
- Use small, uniform bowls for consistent katori shapes.
- Prepare chutneys in advance to save time during assembly.
- Serve immediately after assembling to maintain the katoris’ crunch.
- Adjust spice levels in the filling to suit your taste.
- Drain fried katoris on paper towels to remove excess oil.
Read Also: Chickpea and Spinach Curry Recipe

Serving Suggestions
Katori chaat is a versatile dish that shines as a standalone snack or part of a larger spread.
Its bold flavors pair beautifully with complementary dishes, making it a crowd-pleaser at any gathering.
- Serve with Papdi Chaat for a chaat-themed party platter.
- Pair with Fruit Chaat for a refreshing contrast.
- Offer alongside Healthy Hummus with veggie sticks for a balanced appetizer spread.
- Enjoy with a chilled glass of Mulled Apple Cider for a cozy vibe.
- Include in a dinner menu with Chickpea and Spinach Curry for an Indian-inspired feast.
Read Also: Healthy Guacamole Recipe
Variations to Try
Katori chaat is endlessly adaptable, letting you experiment with fillings and flavors to suit your mood or dietary needs.
- Vegan Version: Swap yogurt for coconut yogurt or cashew cream.
- Spicy Twist: Add diced green chilies or extra red chili powder to the filling.
- Sweet and Savory: Include diced mango for a sweet-tangy balance.
- Protein Boost: Mix in shredded chicken or paneer cubes.
- Gluten-Free: Use gluten-free flour for the katori dough.
- Low-Carb Option: Replace potatoes with cauliflower florets.
Read Also: Mediterranean Quinoa Salad with Grilled Chicken Recipe
Storage and Reheating
Katori chaat is best enjoyed fresh, but you can prep components ahead to save time. Store elements separately to maintain texture and flavor.
- Store unfilled katoris in an airtight container at room temperature for up to 2 days.
- Keep the potato-chickpea filling in the fridge for up to 3 days in a sealed container.
- Refrigerate chutneys and yogurt in separate containers for up to 5 days.
- Do not assemble until ready to serve to prevent katoris from getting soggy.
- Reheat filling in a microwave for 30 seconds or on the stovetop over low heat.
Read Also: Healthy Shepherds Pie Recipe
Nutritional Facts
Here’s a breakdown of the nutritional content per serving (1 katori chaat, based on 6 servings):
- Calories: 180 kcal
- Protein: 5 g
- Fat: 8 g (2 g saturated)
- Carbohydrates: 22 g (3 g fiber, 4 g sugar)
- Sodium: 300 mg
- Cholesterol: 5 mg
Read Also: Healthy Banana Bread Recipe
Health Benefits of Key Ingredients
Katori chaat isn’t just delicious—it’s packed with ingredients that offer nutritional perks.
From fiber-rich chickpeas to antioxidant-packed spices, this dish brings health to the table.
- Chickpeas: High in fiber and protein, supporting digestion and muscle health.
- Potatoes: Provide potassium and vitamin C for heart and immune support.
- Yogurt: Rich in probiotics, aiding gut health and immunity.
- Cilantro: Contains antioxidants and may help detoxify the body.
- Cumin: Supports digestion and has anti-inflammatory properties.
Read Also: Healthy Pumpkin Pie Recipe
FAQs
1. Can I bake the katoris instead of frying them?
Yes, you can bake the katoris for a lighter option. Preheat your oven to 375°F (190°C), place the shaped katoris on a baking sheet, and bake for 15–20 minutes until golden and crisp. Brush lightly with oil before baking for better texture. They won’t be as crunchy as fried katoris, but they’re still delicious.
2. How do I make the katoris gluten-free?
Substitute all-purpose flour with a gluten-free flour blend, like rice flour or a 1:1 gluten-free baking mix. Ensure the semolina is replaced with a gluten-free alternative like cornmeal. The dough may need slightly more water, so add it gradually.
3. Can I prepare katori chaat in advance?
You can prep the katoris and filling up to 2 days ahead and store them separately. Assemble just before serving to keep the katoris crispy. Chutneys can be made up to a week in advance and refrigerated to save time.
4. What can I use instead of tamarind chutney?
If you don’t have tamarind chutney, try a mix of lemon juice and brown sugar for a similar tangy-sweet flavor. Alternatively, use a store-bought sweet chili sauce or mango chutney for a different twist.
5. How can I make katori chaat spicier?
To amp up the heat, add finely chopped green chilies to the filling or increase the red chili powder to 1 tsp. You can also drizzle extra green chutney or sprinkle chili flakes on top.
Read Also: Healthy Crepe Recipe
Final Thoughts
Katori chaat has a special place in my heart for its ability to bring joy to any table. The crunch of the katori, the zing of the chutneys, and the freshness of the toppings make every bite a delight.
I hope you’ll give this katori chaat a try—it’s a fun, flavorful way to spice up your snack game.
Drop a comment below to share how it turned out or let me know your favorite chaat variation!
Recommended:
- Papdi Chaat Recipe
- Fruit Chaat Recipe
- Healthy Hummus Recipe
- Chickpea and Spinach Curry Recipe
- Healthy Coleslaw Recipe
- Mediterranean Quinoa Salad with Grilled Chicken Recipe
- Healthy Shepherds Pie Recipe
- Healthy Banana Bread Recipe
- Healthy Pumpkin Pie Recipe
- Healthy Crepe Recipe


