
I used to think making hummus at home was complicated until I tried it one weekend when I ran out of my usual store-bought container. Now, I refuse to go back to the packaged stuff.

This healthy hummus recipe transformed my snacking habits completely. I make it almost weekly now, and it’s become my go-to for everything from quick lunches to party appetizers.
The beauty of homemade hummus is how incredibly fresh and customizable it is. You control the garlic level, the tahini richness, and even the texture.
I learned the hard way that not all chickpeas are created equal. My first attempt was grainy and bland because I skipped an important step I’ll share with you later.
Once I figured out the secret to ultra-creamy hummus, there was no turning back. My family actually requests it now instead of regular dips.
| Quick Recipe Summary | |
|---|---|
| Prep Time | 10 minutes |
| Cook Time | 0 minutes |
| Total Time | 10 minutes |
| Servings | 8 servings (about 2 cups) |
| Difficulty Level | Easy |
This pairs beautifully with my healthy bruschetta for a Mediterranean-inspired snack spread.
Why You’ll Love This Healthy Hummus Recipe
This hummus is ridiculously creamy without any heavy cream or excessive oil. I’ve tweaked the traditional recipe to make it lighter but just as satisfying.
It comes together in less than 10 minutes, which means you can whip it up right before guests arrive. No more last-minute grocery store runs for mediocre dip.
The flavor is bright and garlicky with just the right tang from fresh lemon juice. You can adjust every element to match your taste preferences perfectly.
- Budget-friendly: Making hummus at home costs a fraction of what you’d pay for premium store-bought versions
- Nutrient-dense: Packed with protein, fiber, and healthy fats that actually keep you full
- Incredibly versatile: Use it as a dip, spread, salad dressing base, or sandwich filling
- Allergen-friendly: Naturally vegan, dairy-free, and gluten-free for various dietary needs
- Make-ahead friendly: Tastes even better after the flavors meld in the fridge overnight
- Customizable: Add roasted red peppers, sun-dried tomatoes, or herbs for endless variations
Another favorite: Healthy Guacamole Recipe
Ingredients
This recipe uses simple, wholesome ingredients you probably already have in your pantry. I prefer using dried chickpeas that I cook myself, but canned works perfectly fine when you’re short on time.
The key to exceptional hummus is using quality tahini with a smooth, runny consistency. I learned this after buying a cheap brand that made my hummus taste bitter and gritty.
- 2 cups cooked chickpeas (480g), or one 15-ounce (425g) can, drained and rinsed
- ¼ cup fresh lemon juice (60ml), about 2 medium lemons
- ¼ cup well-stirred tahini (60ml)
- 1 small garlic clove, minced
- 2 tablespoons extra virgin olive oil (30ml), plus more for serving
- ½ teaspoon ground cumin (2.5g)
- Salt to taste
- 2 to 3 tablespoons ice water (30-45ml), or aquafaba (chickpea liquid)
- Paprika or za’atar for garnish (optional)
- Fresh parsley, chopped, for garnish (optional)
You might also enjoy: Chickpea Salad Recipe
Kitchen Equipment Needed
Having the right equipment makes all the difference in achieving that silky-smooth texture. I tried making hummus in a regular blender once, and it just didn’t have the same consistency.
- Food processor (11-cup capacity works best)
- Measuring cups and spoons
- Citrus juicer (optional but helpful)
- Rubber spatula for scraping down sides
- Serving bowl
- Small pot (if cooking dried chickpeas from scratch)
- Colander for draining and rinsing
Read Also: Air Fryer Zucchini Parmesan Chips Recipe
Recommended Products for This Recipe
These are the products that genuinely improved my hummus-making experience. I’ve tried countless brands and techniques, and these make a noticeable difference in the final result.
1. Cuisinart 14-Cup Food Processor
I upgraded to this food processor last year, and the powerful motor creates the creamiest hummus I’ve ever made. It handles large batches effortlessly and has the capacity to really blend everything smoothly. The wide feed tube also makes adding ingredients easier.
2. Soom Foods Pure Ground Sesame Tahini
This premium tahini changed everything for me. It’s incredibly smooth and has a rich, nutty flavor without any bitterness. I used to think I didn’t like tahini until I tried this brand. It’s worth every penny for the silky texture it creates.
3. California Olive Ranch Extra Virgin Olive Oil
Using high-quality olive oil makes a huge difference in the final flavor. This one has a fruity, peppery taste that elevates the hummus without overpowering it. I drizzle extra on top before serving for an authentic touch.
4. Organic Dried Chickpeas
If you have time to cook chickpeas from scratch, these organic dried chickpeas yield the creamiest results. Freshly cooked chickpeas blend smoother than canned and give you more control over the texture. Plus, you get to save that precious aquafaba for making the hummus extra silky.

Step-by-Step Instructions: How to Make Healthy Hummus
Follow these detailed steps for foolproof, restaurant-quality hummus every single time. I’ve made this recipe hundreds of times now, and these exact steps guarantee perfect results.
1. Prepare the Chickpeas
- If using canned chickpeas, drain them completely and rinse under cold water to remove excess sodium and that metallic canned taste
- For an ultra-smooth texture, remove the skins from the chickpeas by gently rubbing them between your hands or a clean kitchen towel (this step is optional but creates the silkiest hummus)
- If you removed the skins, you should have about 1½ cups of peeled chickpeas
- Reserve a few whole chickpeas for garnish if desired
- Pat the chickpeas dry with a paper towel to remove excess moisture
For a lighter option, try: Healthy Coleslaw Recipe
2. Blend the Tahini and Lemon Juice
- Add the tahini and lemon juice to your food processor first (this is crucial for achieving that creamy texture)
- Process for 1 to 1½ minutes, scraping down the sides and bottom of the bowl as needed
- The mixture will look grainy and separated at first, but keep blending
- After about a minute, it should turn into a smooth, whipped, creamy paste that’s almost doubled in volume
- This step emulsifies the tahini and creates the base for ultra-creamy hummus
3. Add Garlic, Cumin, and Salt
- Add the minced garlic clove, ground cumin, and ½ teaspoon of salt to the tahini mixture
- Process for 30 seconds to 1 minute until everything is well combined
- Scrape down the sides of the bowl to ensure even mixing
- The mixture should be aromatic and well-blended at this point
- Taste and adjust salt if needed (remember, you’ll be adding chickpeas next, so don’t oversalt)
I learned this technique while perfecting my healthy alfredo sauce.
4. Add Half the Chickpeas
- Add half of your prepared chickpeas to the food processor
- Process for 1 minute, stopping to scrape down the sides once halfway through
- The mixture will be thick and slightly grainy at this point
- This gradual addition helps create a smoother final texture
- Don’t worry if it looks too thick; we’ll be adding liquid soon
5. Add Remaining Chickpeas and Blend
- Add the rest of the chickpeas to the food processor
- Process for 1 to 2 minutes, scraping down the sides as needed
- The hummus should start looking creamy but might still be too thick
- Continue processing until the mixture is relatively smooth
- You’re aiming for a thick paste at this stage before adding the liquid
6. Stream in Ice Water and Olive Oil
- With the food processor running, slowly drizzle in 2 tablespoons of ice water (or aquafaba) through the feed tube
- Continue processing for another 1 to 2 minutes
- Add the olive oil in a slow, steady stream while the processor is still running
- Process for an additional 1 to 2 minutes until the hummus is ultra-creamy and smooth
- Add the remaining tablespoon of ice water if the hummus is still too thick
- The total processing time after adding liquid should be about 3 to 4 minutes
- The hummus should be light, fluffy, and significantly paler in color than when you started
Read Also: Mediterranean Quinoa Salad With Grilled Chicken Recipe
7. Taste and Adjust Seasonings
- Taste the hummus and adjust seasonings as needed
- Add more salt if it tastes flat, more lemon juice for brightness, or more garlic for punch
- If it’s too thick, add more ice water one tablespoon at a time while processing
- If you want it more tahini-forward, add another tablespoon and blend again
- Process for 30 seconds after any additions to fully incorporate
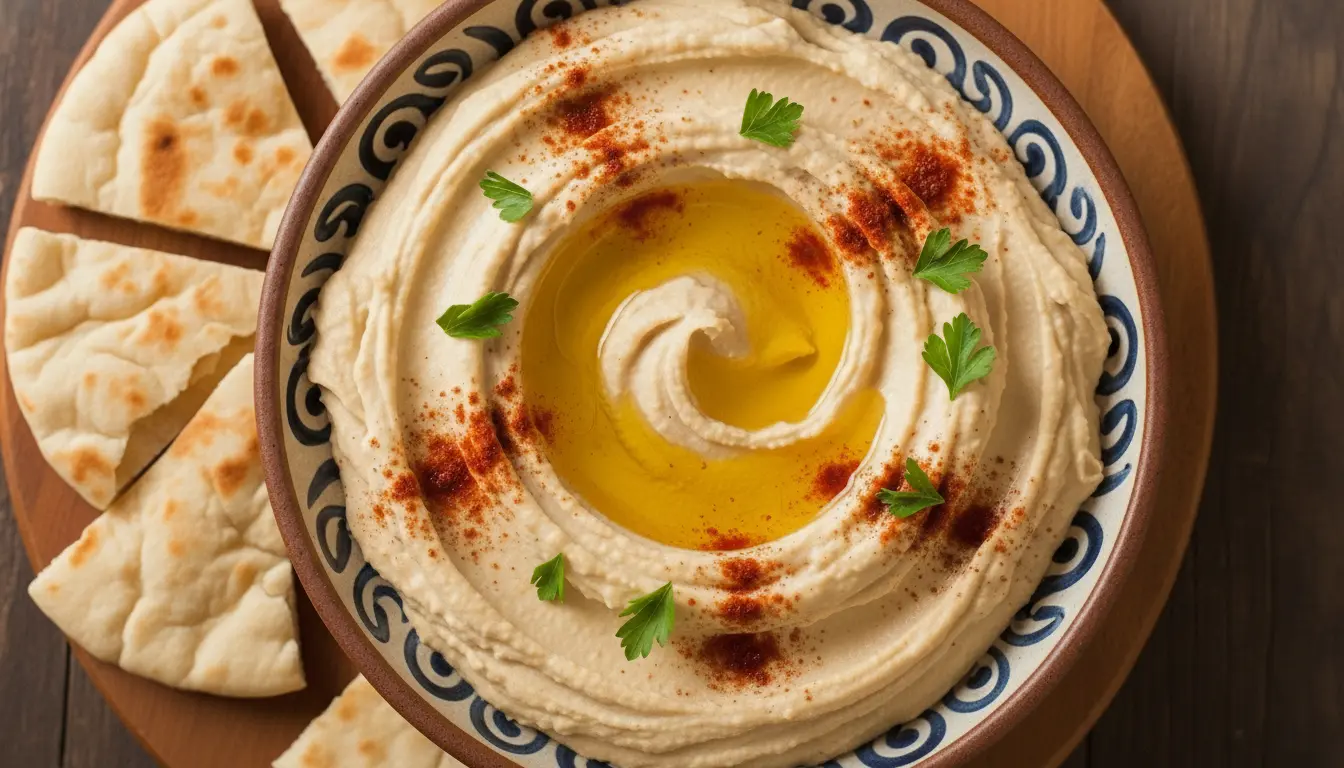
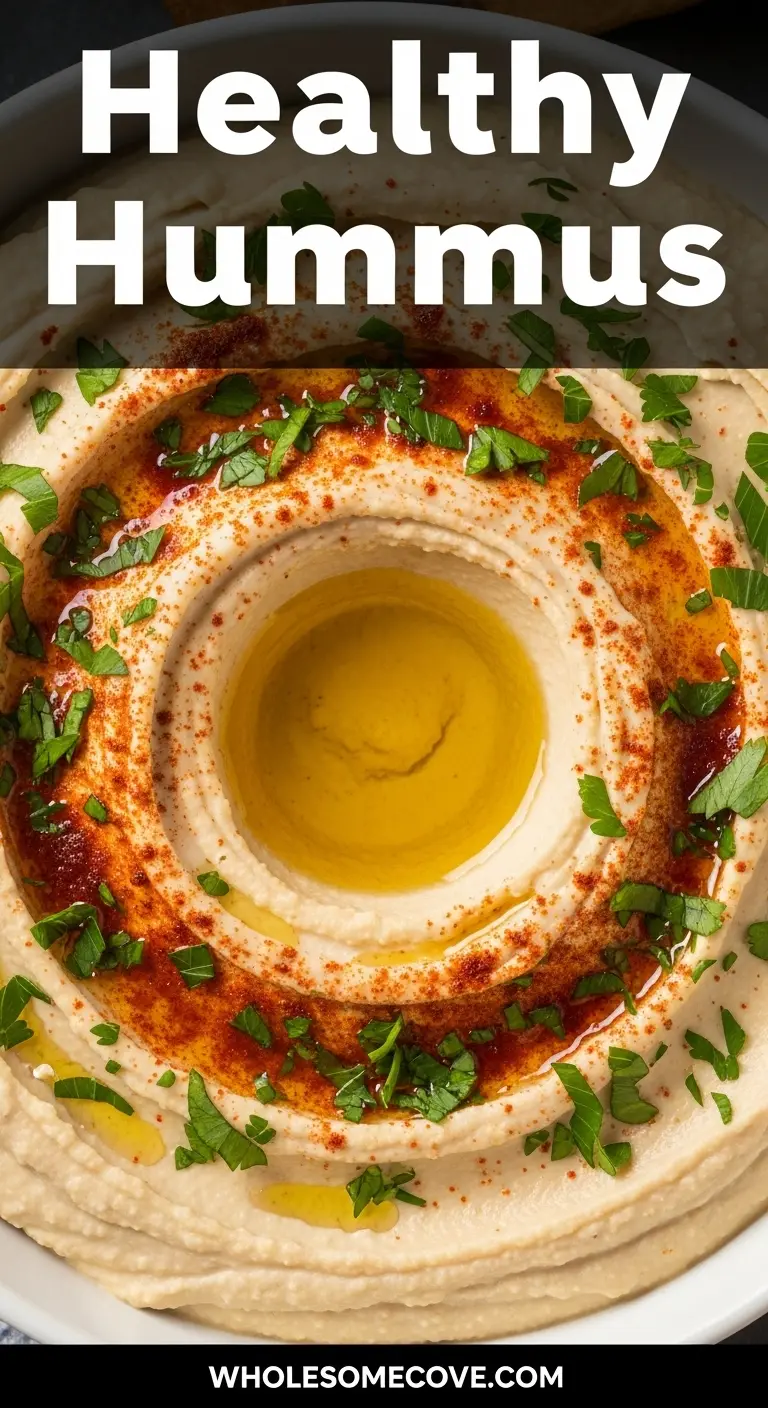
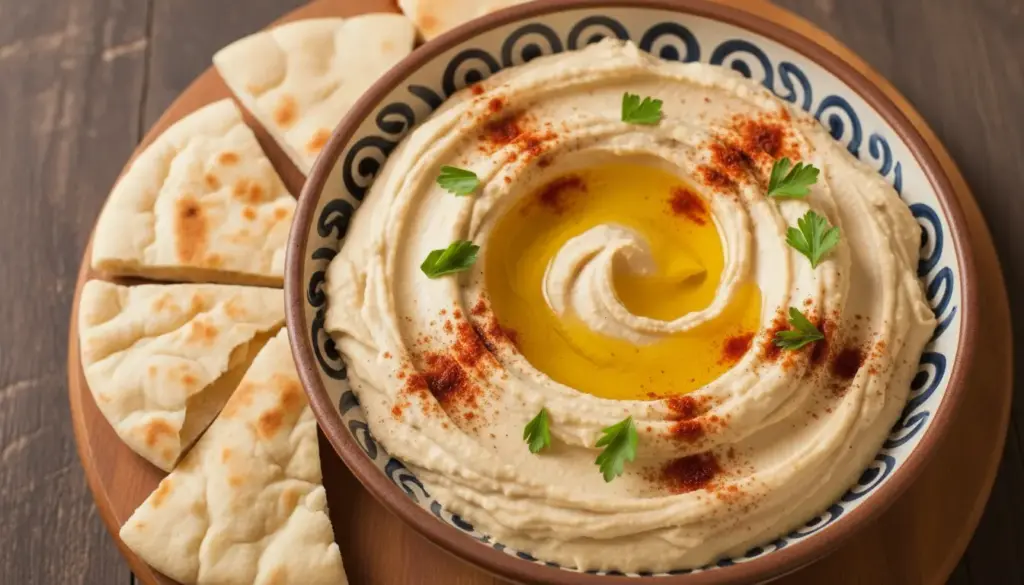
8. Serve and Garnish
- Transfer the hummus to a shallow serving bowl using a rubber spatula
- Use the back of a spoon to create a well or swirl pattern in the center
- Drizzle with extra virgin olive oil (about 1 to 2 tablespoons)
- Sprinkle with paprika, za’atar, or sumac for color and flavor
- Add chopped fresh parsley and reserved whole chickpeas if using
- Serve immediately or refrigerate until ready to use

Tips for The Best Healthy Hummus
These tips come from years of hummus-making mistakes and successes. Trust me, I’ve tried every shortcut and trick in the book.
- Always blend tahini and lemon first: This creates an emulsion that makes the final hummus incredibly creamy and prevents it from being grainy
- Use ice-cold water: The cold temperature helps create a lighter, fluffier texture (room temperature water makes it heavier)
- Don’t skimp on processing time: Blend for a full 4 to 5 minutes total for the smoothest results (most people don’t blend long enough)
- Remove chickpea skins for ultimate creaminess: Yes, it’s tedious, but it creates restaurant-quality texture (I usually do this while watching TV)
- Toast your cumin: Toasting cumin seeds in a dry pan before grinding adds incredible depth of flavor
- Let it rest: Hummus tastes significantly better after sitting in the fridge for at least 30 minutes (the flavors meld beautifully)
- Save the aquafaba: If using canned chickpeas, reserve the liquid instead of water for extra creaminess and a subtle bean flavor
- Add ice cubes: For an even airier texture, add 2 to 3 ice cubes instead of ice water while blending
- Season generously: Hummus needs more salt than you think because chickpeas are quite bland on their own
- Bring to room temperature before serving: Cold hummus is thicker and less flavorful (let it sit out for 20 to 30 minutes)
You might also enjoy: Healthy Nachos Recipe
Serving Suggestions
Hummus is incredibly versatile and works for literally any meal or occasion. I’ve served it at fancy dinner parties and packed it in school lunches with equal success.
The classic way to serve it is in a shallow bowl with a pool of olive oil in the center and warm pita bread on the side. I also love spreading it thick on toast for a protein-packed breakfast.
- With fresh vegetables: Carrots, cucumber, bell peppers, celery, cherry tomatoes, and radishes all pair beautifully
- As a sandwich spread: Replace mayo with hummus on wraps, sandwiches, or burgers for added nutrition
- With grilled vegetable skewers: Makes a perfect accompaniment for summer grilling
- Alongside air fryer falafel: Create a complete Mediterranean mezze platter
- As a salad dressing base: Thin it with extra lemon juice and water for a creamy, protein-rich dressing
- With pita chips or crackers: The obvious choice but always crowd-pleasing
- On chicken fajita lettuce wraps: Adds creamy texture and extra protein
- As a pizza base: Spread instead of tomato sauce for a unique, protein-rich alternative
Another favorite: Baked Cod With Mango Salsa Recipe
Variations of Healthy Hummus
Once you master the basic recipe, the flavor possibilities are truly endless. I probably have six different hummus variations in my regular rotation now.
The base recipe is your canvas, and you can add almost anything to create new flavors. I’ve experimented with everything from sweet to spicy variations with great success.
- Roasted Red Pepper Hummus: Add ½ cup roasted red peppers (drained and patted dry) with the chickpeas for a sweet, smoky flavor
- Roasted Garlic Hummus: Use 6 to 8 cloves of roasted garlic instead of raw for a mellow, sweet garlic flavor
- Spicy Harissa Hummus: Stir in 2 tablespoons of harissa paste for a North African-inspired kick
- Sun-Dried Tomato Hummus: Add ⅓ cup oil-packed sun-dried tomatoes for intense umami flavor
- Lemon Herb Hummus: Mix in ¼ cup fresh herbs (dill, cilantro, or parsley) and extra lemon zest for brightness
- Beet Hummus: Blend in 1 small roasted beet for gorgeous pink color and earthy sweetness
- Cilantro Jalapeño Hummus: Add ½ cup cilantro and 1 seeded jalapeño for a Southwestern twist
- Caramelized Onion Hummus: Fold in ½ cup caramelized onions for deep, sweet flavor
- Pumpkin Hummus: Replace half the chickpeas with pumpkin puree and add cinnamon for a fall-inspired version
- Avocado Hummus: Add ½ ripe avocado for extra creaminess and healthy fats
Read Also: Healthy Fried Rice Recipe
Storage and Reheating
Proper storage keeps your hummus fresh and delicious for days. I usually make a double batch because it disappears so quickly in my house.
Hummus actually improves with time as the flavors meld and develop. The texture also becomes even creamier after a day in the refrigerator.
- Refrigerator storage: Transfer hummus to an airtight container and smooth the top with a spatula
- Add an olive oil layer: Pour a thin layer of olive oil over the surface to prevent drying and oxidation
- Cover tightly: Press plastic wrap directly onto the surface before sealing with a lid for maximum freshness
- Shelf life: Properly stored hummus lasts 5 to 7 days in the refrigerator
- Freezer storage: Hummus freezes beautifully for up to 3 months in freezer-safe containers
- Freeze in portions: Use ice cube trays or small containers to freeze individual portions for easy thawing
- Thawing instructions: Move frozen hummus to the refrigerator overnight to thaw slowly
- Refresh before serving: Stir in a tablespoon of water or lemon juice and a drizzle of olive oil after thawing to restore creaminess
- Signs of spoilage: Discard if you notice any mold, off smell, or excessive liquid separation that doesn’t reincorporate
- Room temperature serving: Always let refrigerated hummus sit at room temperature for 20 to 30 minutes before serving for the best texture and flavor
Nutritional Facts
This healthy hummus is packed with nutrients that actually benefit your body. I love that I can snack on it guilt-free while still feeling satisfied for hours.
Per serving (¼ cup or approximately 60g):
- Calories: 110
- Total Fat: 6g
- Saturated Fat: 1g
- Cholesterol: 0mg
- Sodium: 150mg (varies based on salt added)
- Total Carbohydrates: 11g
- Dietary Fiber: 3g
- Sugars: 1g
- Protein: 4g
- Vitamin C: 8% DV
- Iron: 8% DV
- Calcium: 4% DV
- Potassium: 125mg
For a lighter option, try: Turkey Burger Lettuce Wraps
Health Benefits of Key Ingredients
Every ingredient in this hummus serves a nutritional purpose beyond just flavor. I started making hummus regularly when I learned just how incredibly good for you it actually is.
The combination of chickpeas and tahini creates a complete protein with all essential amino acids. This makes hummus an excellent protein source for vegetarians and vegans, plus the healthy fats help you absorb fat-soluble vitamins.
- Chickpeas: Rich in plant-based protein and fiber that supports digestive health and stabilizes blood sugar levels, plus they contain folate and iron for energy production
- Tahini: Made from sesame seeds loaded with calcium, magnesium, and healthy fats that support bone health and reduce inflammation
- Olive Oil: Contains heart-healthy monounsaturated fats and powerful antioxidants that reduce the risk of chronic diseases
- Lemon Juice: High in vitamin C which boosts immune function and enhances iron absorption from the chickpeas
- Garlic: Contains allicin, a compound with anti-inflammatory and antimicrobial properties that supports heart health
- Cumin: Aids digestion and is rich in iron and antioxidants that may help regulate blood sugar
Another favorite: Lentil And Vegetable Soup Recipe

FAQs About Healthy Hummus
1. Can I make hummus without tahini?
Yes, you absolutely can make hummus without tahini, though the flavor will be different. Replace the tahini with an equal amount of Greek yogurt, sunflower seed butter, or additional olive oil.
I’ve made tahini-free versions when I’ve run out, and while they lack that distinctive nutty flavor, they’re still creamy and delicious. Just add an extra tablespoon of olive oil to compensate for the richness that tahini provides.
2. Why is my hummus grainy instead of smooth?
Grainy hummus usually results from not blending long enough or using chickpeas with their skins on. The solution is to process the hummus for at least 4 to 5 minutes total, scraping down the sides frequently.
For the smoothest possible texture, remove the chickpea skins before blending. I know it seems tedious, but this single step makes a restaurant-quality difference in texture.
3. How can I make my hummus lighter and fluffier?
The secret to lighter hummus is using ice-cold water or ice cubes while blending and processing for several minutes. The cold temperature combined with prolonged blending incorporates air and creates that signature fluffy texture.
Also, make sure to blend the tahini and lemon juice first until very smooth and whipped before adding the chickpeas. This creates an emulsion that results in airier hummus.
4. Can I use dried chickpeas instead of canned?
Absolutely, and I actually prefer dried chickpeas when I have time to plan ahead. Soak 1 cup of dried chickpeas overnight, then cook them until very tender (about 1 to 1.5 hours).
Freshly cooked chickpeas are softer and blend more smoothly than canned ones. Plus, you can save the cooking liquid (aquafaba) to use in the recipe for extra creaminess.
5. How do I fix hummus that’s too thick or too thin?
If your hummus is too thick, simply add ice water one tablespoon at a time while the food processor is running until you reach your desired consistency. I usually need to add 3 to 4 tablespoons total for my preferred texture.
For hummus that’s too thin, add more chickpeas (about ¼ cup at a time) or an extra tablespoon of tahini and blend again. You can also let it sit in the refrigerator for 30 minutes, as it will thicken slightly as it chills.
Read Also: Sweet Potato And Black Bean Bowls Recipe
Final Thoughts
This healthy hummus recipe has become one of my most-made recipes for good reason. It’s simple, nutritious, and infinitely more delicious than anything you’ll find at the store.
The best part is how customizable it is to your personal taste preferences. Don’t be afraid to experiment with the seasonings, add your favorite ingredients, or adjust the garlic and lemon to match your palate.
I hope this recipe becomes a staple in your kitchen like it has in mine. Once you taste how fresh and creamy homemade hummus can be, there’s really no going back to the pre-packaged version.
Give it a try and let me know what you think in the comments below. I’d also love to hear about any creative variations you come up with!
Recommended:
- Healthy Pizza Dough Recipe
- Healthy Waffle Recipe
- Healthy Egg Salad Recipe
- Healthy Crepe Recipe
- Healthy Orange Chicken Recipe
- Healthy Homemade Pesto Recipe
- Healthy Mashed Potatoes Recipe
- Healthy Cornbread Recipe
- Healthy Cabbage Skillet With Quinoa And Chickpeas Recipe
- Healthy Shepherds Pie Recipe