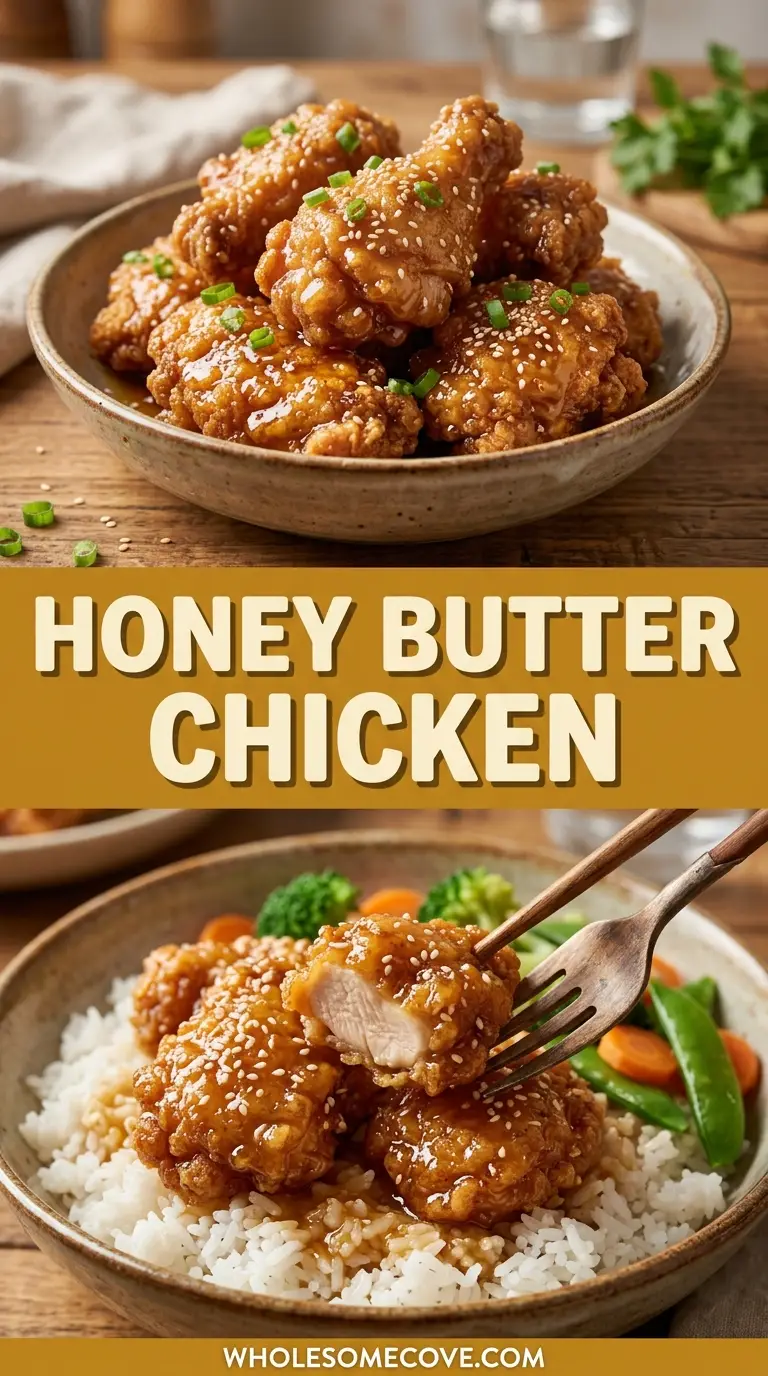
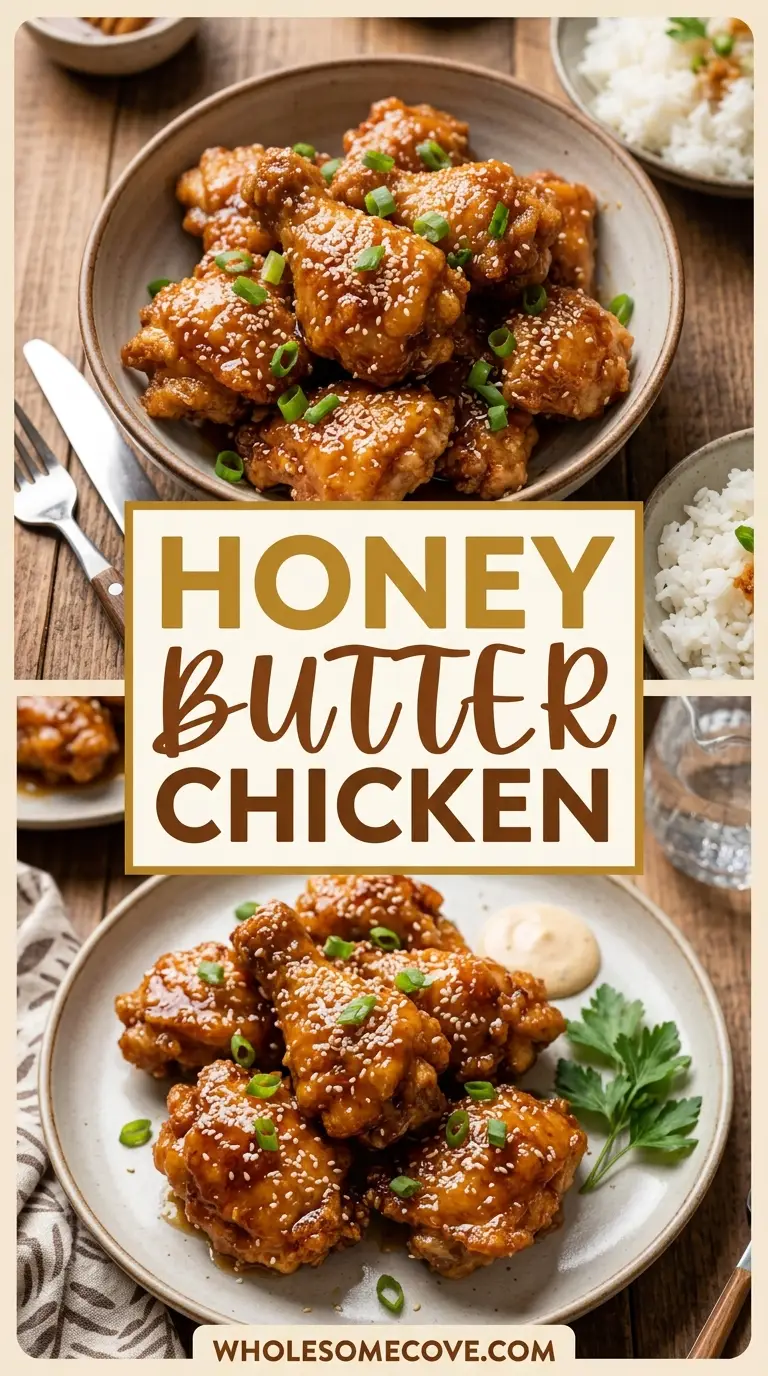
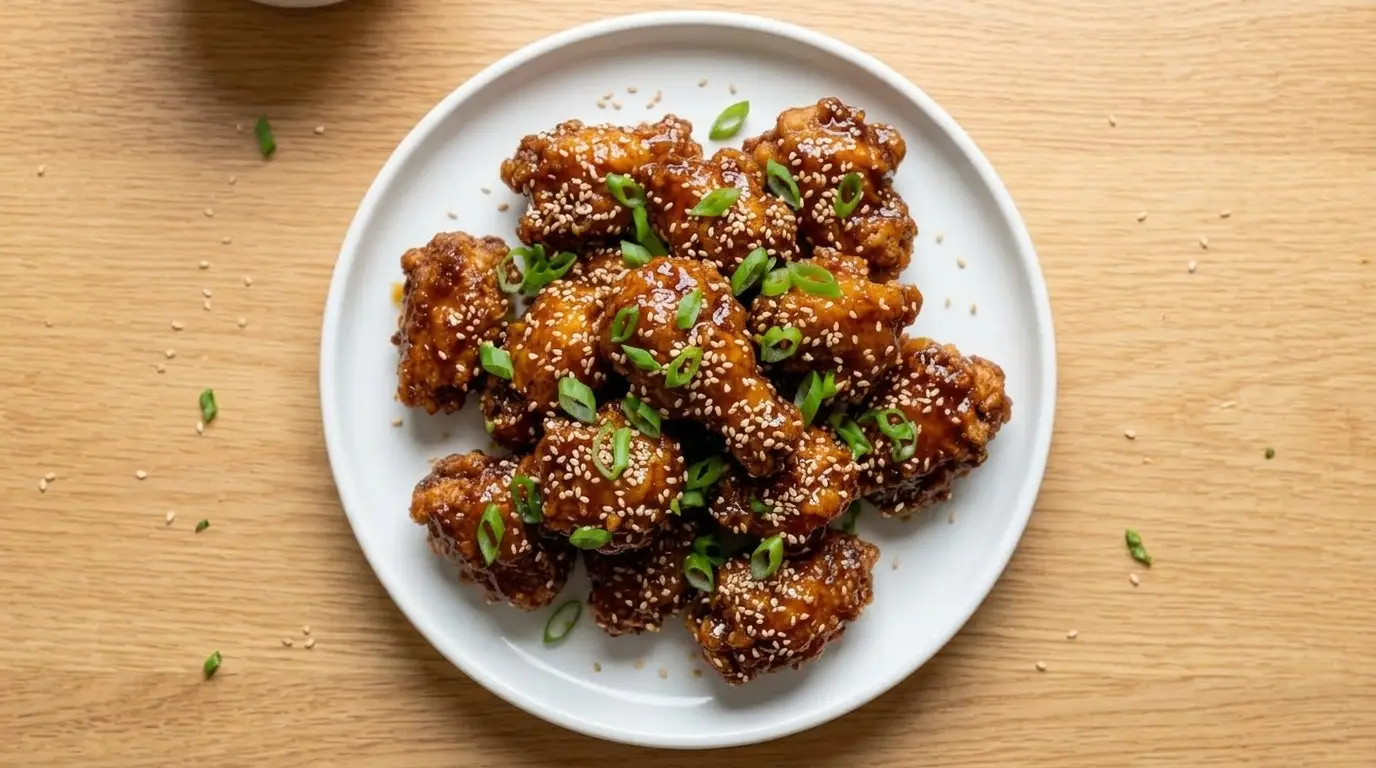
Crispy chicken pieces tossed in a glossy honey butter sauce hit the table in about twenty-five minutes with this honey butter chicken recipe.
The magic here is the coating. A mix of flour and cornstarch fries up into a crust that stays crisp instead of turning soft under the sauce.
Most versions go soggy for one reason. They thin the sauce with water and cornstarch, which soaks straight into the crust and softens it.
This sauce skips the water entirely. Butter, honey, soy sauce, and rice vinegar reduce into a sticky glaze that clings to each piece rather than sliding off.
You need five pantry ingredients for that sauce, plus a pinch of chili flakes if you want warmth. Everything cooks in one skillet, which keeps cleanup to a single pan.
The soy sauce and rice vinegar matter more than they look. They pull the honey back from cloying into a sweet, salty, faintly tangy glaze that tastes like takeout without the phone call.
| Quick Recipe Summary | |
|---|---|
| Prep Time | 10 minutes |
| Cook Time | 15 minutes |
| Total Time | 25 minutes |
| Servings | 4 servings |
| Difficulty Level | Easy |
For another way to use this sweet and savory glaze, see Honey Butter.
Why You’ll Love This Honey Butter Chicken Recipe
This is the kind of dinner that feels like a treat but comes together on a busy Tuesday. The ingredient list is short and the technique is forgiving.
Here is what makes it worth adding to your rotation:
- One pan, start to finish. You fry the chicken and build the sauce in the same skillet, so there is one pan to wash.
- Ready in about 25 minutes. From cutting board to plate, this fits inside a weeknight window.
- A crust that holds up. Flour plus cornstarch gives you a golden coating that stays crisp under the glaze.
- Sweet, salty, and a little tangy. Honey brings the sweetness, soy sauce brings the salt, and rice vinegar keeps it balanced.
- Flexible protein. Thighs or breasts both work, so you can use whatever is in the fridge.
- Kid friendly with an easy heat dial. Leave out the red pepper flakes for little ones or add extra for adults.
- Built from pantry staples. Honey, butter, soy sauce, and garlic are things most kitchens already keep on hand.
You might also enjoy: Air Fryer Honey Garlic Chicken Wings
Ingredients
The recipe splits into two short lists: a simple coating for the chicken and a pan sauce you stir together at the end. Measurements are given in both imperial and metric.
For the chicken:
- 1 lb (450 g) boneless, skinless chicken thighs or chicken breasts, cut into 1-inch (2.5 cm) pieces
- 1/4 cup (30 g) all-purpose flour for a light coating
- 2 tablespoons (16 g) cornstarch for extra crunch
- 1/2 teaspoon salt
- 1/2 teaspoon black pepper
- 1/2 teaspoon garlic powder
- 2 tablespoons (30 ml) avocado oil or olive oil, for frying
For the honey butter sauce:
- 4 tablespoons (57 g) unsalted grass-fed butter
- 1/3 cup (80 ml) honey, a neutral variety works best
- 1 tablespoon (15 ml) soy sauce or tamari
- 1 tablespoon (15 ml) rice vinegar
- 3 cloves garlic, minced
- 1/2 teaspoon red pepper flakes (optional)
- Toasted sesame seeds and sliced green onions, to garnish
For a similar sweet and sticky glaze on chicken, a related recipe is Healthy Orange Chicken.
Kitchen Equipment Needed
Nothing here is specialized. If you can fry and stir, you have the tools for this dinner.
Here is what you will reach for:
- A large cast iron skillet or heavy nonstick pan for even browning
- Mixing bowls for tossing the chicken in the coating
- Kitchen tongs for flipping each piece without tearing the crust
- A wire rack to hold the fried chicken so it stays crisp
- An instant-read thermometer to confirm the chicken hits 165°F (74°C)
- Measuring cups and spoons for the sauce
- A sharp knife and cutting board for cubing the chicken
For a similar hands-on skillet method, see Teriyaki Grilled Chicken.
Recommended Products for This Recipe
These are the items I reach for when I want this dish to come out right every time. Each one solves a specific problem I ran into while testing.
1. Enameled Cast Iron Skillet
A thin pan creates hot spots, and honey scorches the second it hits one. An enameled cast iron skillet holds steady, even heat, so the sauce reduces to a glaze without burning at the edges.
2. Hot Honey
Swapping regular honey for hot honey builds the sweet heat right into the glaze instead of relying on chili flakes alone. It gives the sauce a rounder warmth that lingers instead of hitting sharp.
3. Toasted Sesame Oil
A half-teaspoon of toasted sesame oil stirred in at the very end adds a nutty depth that reads as restaurant-quality. Add it off the heat so the aroma stays bright rather than cooking away.
4. Microplane Grater
Minced garlic can brown unevenly and turn bitter in a hot pan. A microplane turns the cloves into a paste that melts into the butter and spreads flavor through every bite.
For a different pan-fried favorite, another option worth trying is Air Fryer Chicken Breast.

Step-by-Step Instructions: How to Make Honey Butter Chicken
Follow these steps in order and you will have crispy, glazed chicken ready in under half an hour.
Step 1: Coat the Chicken
- Pat the chicken pieces dry with a paper towel so the coating sticks and the crust crisps.
- In a mixing bowl, whisk together the flour, cornstarch, salt, black pepper, and garlic powder until evenly combined.
- Add the chicken pieces to the bowl and toss until every piece is lightly and fully coated.
- Shake off the excess coating from each piece. Too much flour makes the sauce gummy later, so a thin, even layer is what you want.
Step 2: Fry Until Golden
- Heat the avocado oil in your skillet over medium-high heat until it shimmers.
- Add the chicken in a single layer, working in two batches if the pan looks crowded.
- Fry undisturbed for 3 to 4 minutes, then flip with tongs and fry the other side for another 3 to 4 minutes.
- Cook until the pieces are golden brown and reach an internal temperature of 165°F (74°C). Transfer them to a wire rack, not a plate, so steam escapes and the crust stays crisp.
Step 3: Build the Honey Butter Sauce
- Lower the heat to medium and wipe out any burnt bits, leaving the pan lightly greased.
- Add the butter and let it melt, swirling the pan as it starts to foam and turn a shade golden.
- Stir in the minced garlic and cook for about 30 seconds, just until fragrant, so it does not brown or turn bitter.
- Pour in the honey, soy sauce, rice vinegar, and red pepper flakes if using. Simmer for 1 to 2 minutes, stirring, until the sauce looks glossy and slightly thickened.
Step 4: Toss and Coat
- Return the fried chicken to the skillet.
- Toss gently with tongs or a spatula until every piece is coated in the sticky glaze.
- Let it sit in the sauce for about 30 seconds so the flavor grabs on, then remove from the heat.
Step 5: Garnish and Serve
- Scatter toasted sesame seeds and sliced green onions over the top.
- Serve right away while the crust is at its crispest, spooning any extra sauce from the pan over the chicken.
For a from-scratch sauce you can keep on hand, a similar approach works in Stir Fry Sauce.
Tips for The Best Honey Butter Chicken
Small choices make the difference between crisp, glazed chicken and a soft, greasy version. These are the habits that keep it right.
- Dry the chicken first. Moisture on the surface steams the coating instead of crisping it, so pat every piece dry before dredging.
- Do not crowd the pan. I ruined my first batch by piling everything in at once, and the pieces steamed and stayed pale, so now I fry in two batches with space between them.
- Rest on a rack. I keep the cooked pieces on a wire rack rather than a plate, because sitting on a flat surface traps steam underneath and softens the crust within minutes.
- Watch the garlic. It only needs about 30 seconds in the butter. Any longer over high heat and it turns bitter.
- Keep the sauce moving. Honey can catch and burn fast, so stir and swirl the pan the whole time it simmers.
- Sauce at the last minute. Toss the chicken in the glaze right before serving so the crust has the least time to soften.
- Taste and adjust. If the sauce leans too sweet, an extra splash of rice vinegar or soy sauce pulls it back into balance.
For a lighter herb-forward option, try: Grilled Lemon Herb Chicken
What to Serve with Honey Butter Chicken
This chicken is sweet, salty, and rich, so it pairs best with something plain to soak up the sauce or something fresh to cut through it. A bowl of rice is the classic landing spot, but there is plenty of room to build a fuller plate.
Here are pairings that work well:
- Steamed white or Basmati Rice, which catches every drop of the glaze
- Vegetable-loaded Fried Rice for a heartier, takeout-style plate
- Creamy Mashed Potatoes that turn the sauce into a gravy of sorts
- Crispy Roasted Potatoes for contrast against the sticky chicken
- Crunchy Coleslaw to add a cool, tangy bite
- Air Fryer Corn on the Cob for a sweet, summery side
- Roasted Brussels Sprouts with Bacon for a savory, salty counterpoint
- Maple Glazed Carrots that echo the honey without competing
- Simple steamed broccoli or green beans to keep the plate light
For another sweet-and-savory chicken dinner, another option worth trying is Chicken Adobo.
Variations of Honey Butter Chicken
Once you have the base method down, the sauce and coating both take well to swaps. Here are ways to change it up without losing what makes it good.
- Extra crispy air fryer version. Toss the coated chicken in a little oil and air fry at 400°F (200°C) for 13 to 15 minutes, shaking halfway, then toss in the sauce.
- Spicy honey butter. Double the red pepper flakes or add a spoonful of gochujang to the sauce for real heat.
- Garlic butter forward. Bump the garlic up to five or six cloves and cut the honey slightly for a savory lean.
- Lemon honey butter. Swap the rice vinegar for fresh lemon juice for a brighter, more citrus-forward glaze.
- Gluten-free. Use a one-to-one gluten-free flour blend and tamari in place of soy sauce.
- Boneless wings style. Cut the chicken larger and serve the glazed pieces as an appetizer with toothpicks.
- Maple swap. Out of honey? Pure maple syrup makes a slightly deeper, less floral glaze.
For a tangy-sweet twist on chicken, see Tandoori Chicken.
Storage and Reheating
Leftovers keep well, though the crust softens once it sits in the sauce. A quick reheat in dry heat brings back most of the crunch.
Here is how to store and reheat it:
- Refrigerator: Store in a shallow airtight container for up to 3 to 4 days. The sauce thickens as it chills and loosens again when warmed.
- Freezer: Freeze cooked, cooled chicken for up to 2 months. Thaw overnight in the fridge before reheating.
- Reheat in the oven: Warm at 375°F (190°C) for 8 to 10 minutes to crisp the coating back up.
- Reheat in the air fryer: A few minutes at 375°F (190°C) revives the crust better than any other method.
- Reheat in the microwave: Fastest but softest. Use short bursts if you are in a hurry and do not mind a tender crust.
- Make ahead: Mix the dry coating and whisk the sauce ingredients separately up to a day early, then fry and toss just before serving.
For another sauce to batch and keep in the fridge, a related recipe is Teriyaki Sauce.
Nutritional Facts
Values are estimates per serving, based on four servings using chicken thighs. Actual numbers vary with the exact ingredients and brands you use.
| Nutrient | Amount per Serving |
|---|---|
| Calories | 430 kcal |
| Protein | 26 g |
| Carbohydrates | 30 g |
| Sugars | 24 g |
| Fat | 22 g |
| Saturated Fat | 9 g |
| Fiber | 0.5 g |
| Sodium | 520 mg |
You might also enjoy: Marry Me Chicken Pasta
Health Benefits of Key Ingredients
This is an indulgent dinner, but several of its core ingredients bring real nutritional value to the plate. Here is what the main players contribute.
- Chicken: A lean, complete protein that supports muscle repair and keeps you full. Thighs add a little more iron and zinc than breasts.
- Honey: Contains trace antioxidants and offers a natural sweetness with a lower glycemic hit than refined white sugar.
- Garlic: Holds sulfur compounds studied for supporting heart health and immune function, even in small amounts.
- Soy sauce: Delivers savory depth with less sodium per bite than salt alone, especially if you choose a reduced-sodium version.
- Rice vinegar: Adds acidity that balances the dish and may help slow the rise in blood sugar from the honey.
- Avocado oil: A source of heart-friendly monounsaturated fats with a high smoke point that suits frying.
- Sesame seeds: A small garnish that still adds calcium, healthy fats, and a bit of plant-based protein.
For a lighter dipping sauce to pair alongside, a related recipe is Sweet and Sour Sauce.
FAQs About Honey Butter Chicken
1. Can I use chicken breasts instead of thighs?
Yes, breasts work well and cook a little faster since they are leaner. I’ve found thighs stay juicier here because the quick, high-heat fry can dry out lean breast meat if you are not watching closely.
Cut the breasts into even 1-inch pieces and reduce the fry time by a minute or two per side. Pull them the moment they hit 165°F (74°C).
2. Why did my chicken turn out soggy instead of crispy?
The most common culprit is a wet surface or a crowded pan. Both trap steam, which softens the coating before it can crisp.
Rice vinegar cuts the honey better than lemon juice for keeping the glaze sticky rather than watery, and a watery sauce is the other frequent cause. Dry the chicken, fry in batches, and toss in the sauce at the last minute.
3. Can I make this less sweet?
Absolutely. Reduce the honey to 1/4 cup and add an extra splash of soy sauce or rice vinegar to rebalance.
The sauce is easy to taste and adjust as it simmers. Nudge it toward salty or tangy until it suits you.
4. How spicy is it?
As written with a half-teaspoon of red pepper flakes, it carries a gentle background warmth. It is mild enough for most kids if you leave the flakes out entirely.
For real heat, double the flakes or stir in a spoonful of chili paste. The honey keeps even the spicy version balanced.
5. Can I double the recipe?
Yes, and it scales cleanly for a crowd. Fry the chicken in batches so the pan never gets crowded, keeping finished pieces warm on a rack.
Make the sauce in one go, then toss everything together at the end. You may need a splash more honey to coat the larger amount.
6. What kind of honey works best?
A neutral, everyday honey like clover or wildflower is ideal because it lets the other flavors show. Stronger honeys such as buckwheat can overwhelm the sauce.
Whatever you use, make sure it pours easily so it blends smoothly into the butter.
For a family-friendly weeknight lineup, see Easy Healthy Dinner Recipes for Family.
Honey Butter Chicken
Ingredients
- 1 lb boneless, skinless chicken thighs - 450 g; or chicken breasts, cut into 1-inch (2.5 cm) pieces
- 1/4 cup all-purpose flour - 30 g; for a light coating
- 2 tablespoons cornstarch - 16 g; for extra crunch
- 1/2 teaspoon salt
- 1/2 teaspoon black pepper
- 1/2 teaspoon garlic powder
- 2 tablespoons avocado oil - 30 ml; or olive oil, for frying
- 4 tablespoons unsalted grass-fed butter - 57 g
- 1/3 cup honey - 80 ml; a neutral variety works best
- 1 tablespoon soy sauce - 15 ml; or tamari
- 1 tablespoon rice vinegar - 15 ml
- 3 cloves garlic - minced
- 1/2 teaspoon red pepper flakes - optional
- toasted sesame seeds - to garnish
- sliced green onions - to garnish
Equipment
- Large cast iron skillet - or heavy nonstick pan for even browning
- Mixing bowls - for tossing the chicken in the coating
- Kitchen tongs - for flipping each piece without tearing the crust
- Wire rack - to hold the fried chicken so it stays crisp
- Instant-read thermometer - to confirm the chicken hits 165°F (74°C)
- Measuring cups and spoons - for the sauce
- Sharp knife and cutting board - for cubing the chicken
Method
- Pat the chicken pieces dry with a paper towel. In a mixing bowl, whisk together the flour, cornstarch, salt, black pepper, and garlic powder until evenly combined.
- Add the chicken pieces to the bowl and toss until every piece is lightly and fully coated. Shake off the excess coating from each piece.
- Heat the avocado oil in your skillet over medium-high heat until it shimmers. Add the chicken in a single layer, working in two batches if the pan looks crowded.
- Fry undisturbed for 3 to 4 minutes, then flip with tongs and fry the other side for another 3 to 4 minutes. Cook until golden brown and reach an internal temperature of 165°F (74°C). Transfer to a wire rack.
- Lower the heat to medium and wipe out any burnt bits, leaving the pan lightly greased. Add the butter and let it melt, swirling the pan as it starts to foam and turn a shade golden.
- Stir in the minced garlic and cook for about 30 seconds, just until fragrant. Pour in the honey, soy sauce, rice vinegar, and red pepper flakes if using. Simmer for 1 to 2 minutes, stirring, until the sauce looks glossy and slightly thickened.
- Return the fried chicken to the skillet. Toss gently with tongs or a spatula until every piece is coated in the sticky glaze. Let it sit in the sauce for about 30 seconds, then remove from the heat.
- Scatter toasted sesame seeds and sliced green onions over the top. Serve right away while the crust is at its crispest, spooning any extra sauce from the pan over the chicken.
Nutrition
Notes
- Dry the chicken first. Moisture on the surface steams the coating instead of crisping it, so pat every piece dry before dredging.
- Do not crowd the pan. Fry in two batches with space between pieces; crowding steams the chicken and keeps it pale.
- Rest on a rack. Keep cooked pieces on a wire rack rather than a plate, because sitting on a flat surface traps steam underneath and softens the crust within minutes.
- Watch the garlic. It only needs about 30 seconds in the butter. Any longer over high heat and it turns bitter.
- Keep the sauce moving. Honey can catch and burn fast, so stir and swirl the pan the whole time it simmers.
- Sauce at the last minute. Toss the chicken in the glaze right before serving so the crust has the least time to soften.
- Taste and adjust. If the sauce leans too sweet, an extra splash of rice vinegar or soy sauce pulls it back into balance.
- Storage: Store leftovers in a shallow airtight container in the refrigerator for up to 3 to 4 days. The sauce thickens as it chills and loosens again when warmed.
- Freezer: Freeze cooked, cooled chicken for up to 2 months. Thaw overnight in the fridge before reheating.
- Reheating: Warm at 375°F (190°C) in the oven for 8 to 10 minutes or in the air fryer for a few minutes to crisp the coating back up. Microwave is fastest but softest.
- Make ahead: Mix the dry coating and whisk the sauce ingredients separately up to a day early, then fry and toss just before serving.
- Variations: Try an air fryer version (400°F/200°C for 13-15 minutes), add gochujang for spicy honey butter, swap rice vinegar for lemon juice for a citrus-forward glaze, or use maple syrup in place of honey.
Private Notes
Tried this recipe?
Let us know how it was!Final Thoughts
Honey butter chicken proves that a short ingredient list can still turn out something special. Crispy, glazed, and ready fast, it earns a permanent spot in the weeknight rotation.
Give it a try the next time you want takeout flavor without leaving the kitchen. A bowl of rice and ten minutes of prep is really all it takes.
If you make it, I would love to hear how it turned out. Leave a comment with your favorite twist and share it with someone who needs an easy dinner idea.
Recommended:
- Roast Chicken
- Air Fryer Chicken Drumsticks
- Chick Fil A Grilled Chicken Nuggets
- Honey Mustard Sauce
- Bang Bang Sauce
- Instant Pot Basmati Rice
- Sweet Potato Fries
- Garlic Parmesan Sauce
- Easy Marry Me Chicken