
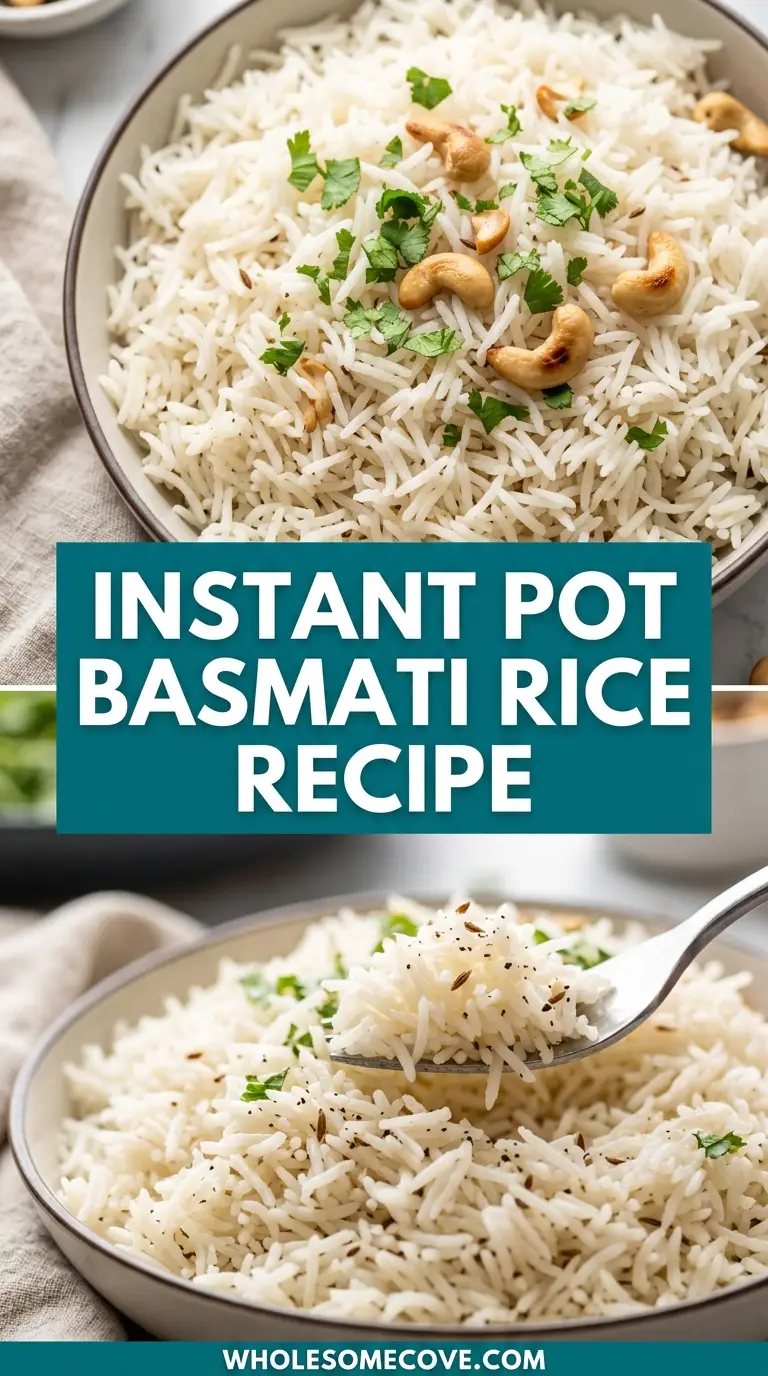
My obsession with making the perfect Instant Pot Basmati Rice Recipe started after one very frustrating dinner.
I had invited a few friends over and attempted to cook basmati rice on the stovetop, only to end up with a scorched pot bottom and half-mushy, half-undercooked grains that embarrassed me in front of everyone. That was the night I grabbed my Instant Pot off the shelf and decided to figure this out once and for all.
After testing it more times than I can count, I finally landed on a method that gives me fluffy, long, separate grains with that gorgeous jasmine-like aroma every single time. No more guessing, no more scorched pots, no more sticky clumps.
The secret turned out to be surprisingly simple: rinsing the rice really well, using a 1:1 rice-to-water ratio, cooking on high pressure for 5 minutes, and letting the pressure release naturally for 10 minutes before opening the lid.
That’s it. That’s the whole thing.
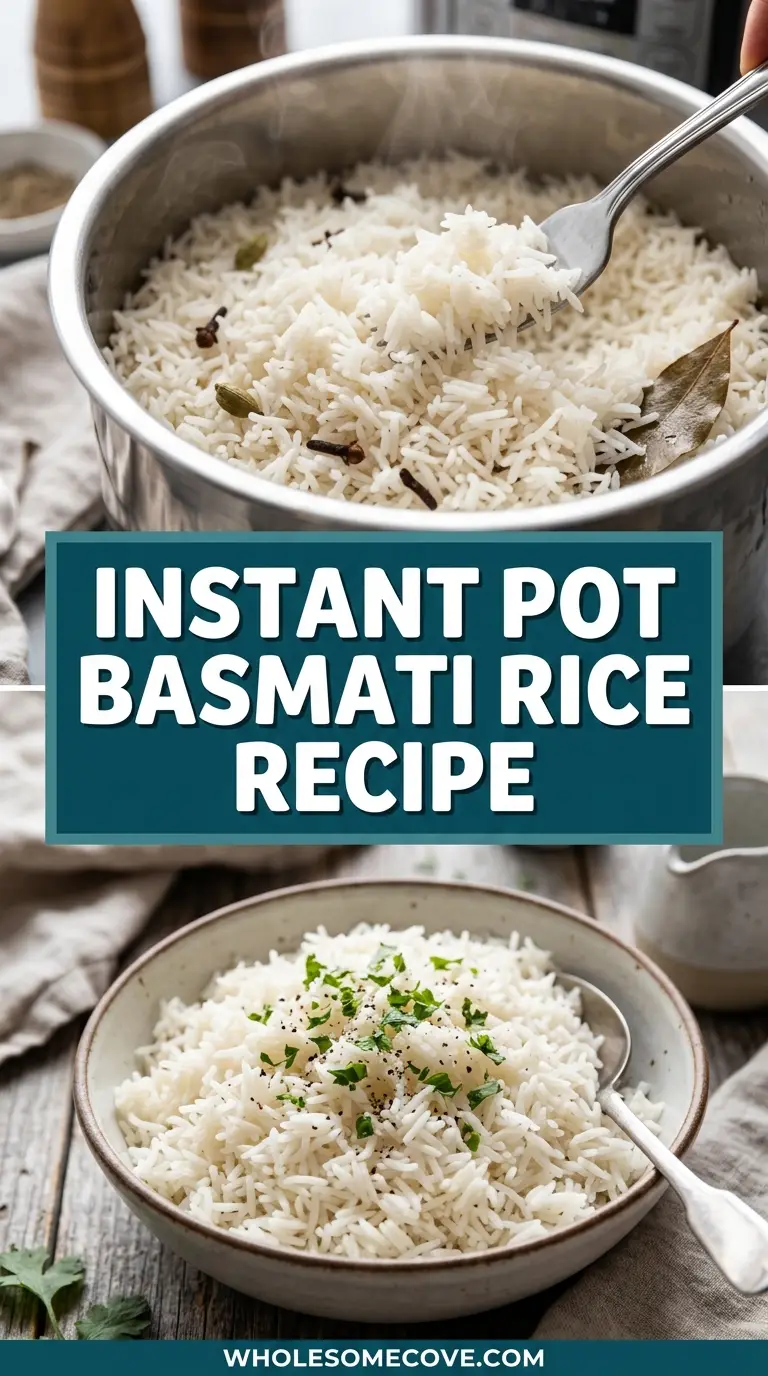
I use ghee instead of plain oil because it adds a subtle nutty richness that takes the rice from “just fine” to genuinely delicious. A pinch of salt rounds everything out.
This is now the rice I make for weeknight curries, meal prep Sundays, and every time someone asks what’s for dinner and I need a reliable, crowd-pleasing side in under 30 minutes.
| Quick Recipe Summary | |
|---|---|
| Prep Time | 5 minutes |
| Cook Time | 5 minutes (+ 10 minutes natural release) |
| Total Time | 25 minutes |
| Servings | 4 servings |
| Difficulty Level | Easy |
If you love simple, foolproof rice dishes, you’ll also want to check out the classic Basmati Rice Recipe for the traditional stovetop version.
Why You’ll Love This Instant Pot Basmati Rice Recipe
Making basmati rice this way has completely changed how I approach weeknight cooking. It removes every variable that used to trip me up on the stovetop.
Once the lid goes on, the Instant Pot handles everything. You’re free to prep a curry, set the table, or just sit down for five minutes.
The results are incredibly consistent. Whether I’m making one cup or four, the grains always come out long, fluffy, and perfectly separate.
This recipe works beautifully for meal prep. I make a big batch on Sundays and use it throughout the week in bowls, stir-fries, and leftover-friendly lunches.
The ghee in this recipe adds a flavor upgrade that feels restaurant-worthy. Once you taste basmati with ghee, plain water-only rice just doesn’t compare.
Cleanup is minimal since everything happens in one pot. The nonstick inner pot means the rice lifts right out without any stubborn stuck bits.
This is a genuinely beginner-friendly recipe. Even if you’ve never used an Instant Pot before, the steps are clear and the results are forgiving.
Read Also: Brown Basmati Rice Recipe
Ingredients
You only need a handful of pantry staples to pull this together, and the quality of the rice itself makes the biggest difference. I always reach for aged, extra-long grain basmati rice when I can find it; the grains stay firmer during pressure cooking and don’t turn mushy.
- 2 cups (370g) long-grain white basmati rice – aged, extra-long grain preferred for the best texture and aroma
- 2 cups (480ml) cold water – filtered water gives a cleaner taste, especially since there are so few ingredients
- 1 tablespoon (15ml) ghee – or neutral oil like avocado oil; ghee adds a subtle nutty flavor that makes the rice taste truly special
- 1 teaspoon (5g) fine sea salt – adjust to taste depending on what you’re serving the rice with
For the most aromatic version, you can optionally add:
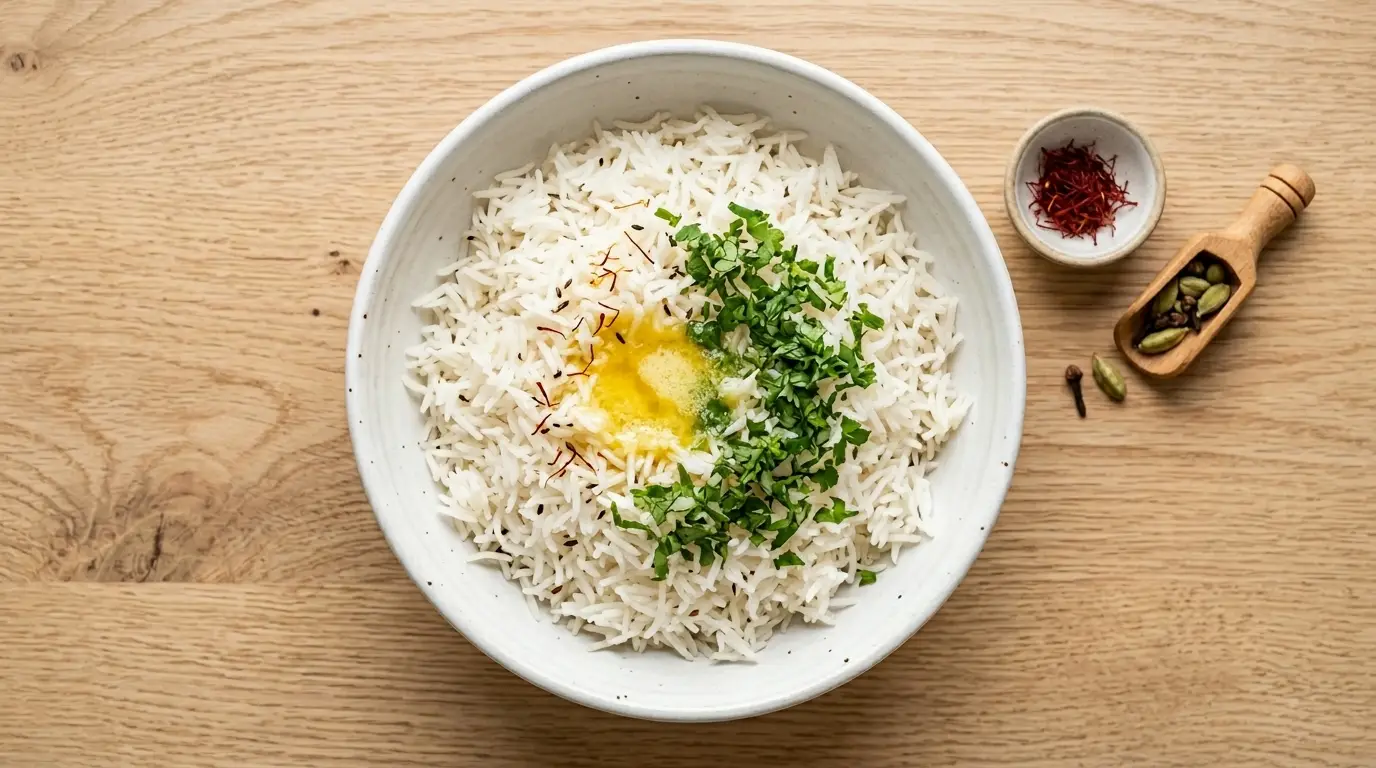
- 1 teaspoon (5ml) rose water – a classic touch used in Persian and South Asian rice dishes for a floral background note
- 2-3 whole green cardamom pods – lightly crushed; remove before serving
- 1 small cinnamon stick – adds warmth without overwhelming the dish
For a simple, everyday white basmati rice, just stick with the first four ingredients.
You might also enjoy: Healthy Fried Rice Recipe
Kitchen Equipment Needed
The right tools make the process seamless, and most of what you need is probably already in your kitchen. The only real must-have for this recipe is a good pressure cooker.
- Instant Pot 6-Quart Pressure Cooker – a 6qt is the sweet spot for this recipe; it handles up to 4 cups of dry rice comfortably without the risk of the steam release getting clogged
- Fine mesh strainer – essential for rinsing the rice properly; a colander with large holes lets too much rice fall through
- Large mixing bowl – used to soak the rice if you choose to do so
- Liquid measuring cup – for accurately measuring the water; precision matters with pressure cooking
- Dry measuring cups – for measuring the rice accurately
- Rice paddle or silicone spatula – for fluffing the rice gently without breaking the grains; a fork works too
- Pot holders or silicone mitts – the Instant Pot inner pot gets hot; always use protection when removing it
Read Also: Instant Pot Potato Soup Recipe
Recommended Products for This Recipe
These are products I personally use and genuinely recommend based on years of making rice and other pressure-cooker dishes at home.
1. Daawat Rozana Super Basmati Rice
The brand of basmati rice you use matters more than most people realize. Daawat Rozana Super is an aged, extra-long grain rice that stays firm and separate even in a pressure cooker, with that signature floral aroma that cheaper varieties lack. It’s my go-to for any rice dish where the texture really matters.
2. Ancient Organics Ghee
Not all ghee is created equal, and this one from Ancient Organics is made from grass-fed butter with a rich, nutty taste that elevates the rice from a plain side dish to something really memorable. A small spoonful goes a long way, and the jar lasts for months.
3. Instant Pot Duo 7-in-1 Electric Pressure Cooker
If you don’t already have an Instant Pot, this is the one I’d recommend for beginners and experienced cooks alike. The pressure cook function is intuitive, the natural release is predictable, and it cleans up easily after every use.
4. OXO Good Grips Fine Mesh Strainer
Rinsing rice is non-negotiable for good texture, and a quality fine mesh strainer makes the whole process fast and mess-free. This OXO version is sturdy, dishwasher-safe, and the right size for 2-4 cups of dry rice without overflow.
For more ideas on what to make in your Instant Pot, check out this Instant Pot Pork Stew Recipe that pairs perfectly with a big bowl of fluffy basmati.

Step-by-Step Instructions: How to Make Instant Pot Basmati Rice
Step 1: Measure and Rinse the Rice
- Measure out 2 cups (370g) of dry basmati rice using a dry measuring cup, leveling off the top for accuracy.
- Place the rice in your fine mesh strainer and set it over a large bowl or directly in the sink.
- Run cold water over the rice, using your fingers to gently swish the grains around as you rinse.
- Watch the water as it drains out of the strainer; it will start out very cloudy and white, which is excess starch.
- Keep rinsing until the water draining through runs mostly clear, which typically takes about 60 to 90 seconds of continuous rinsing.
- Give the strainer a few gentle shakes to help drain as much water as possible from the rice.
Step 2: Optional – Soak the Rice
- This step is optional but highly recommended if you have the time; soaking helps the grains cook more evenly and come out longer and less prone to breaking.
- Transfer the rinsed rice to a large bowl and cover with cold water by at least 2 inches (5cm).
- Let the rice soak for 15 to 30 minutes at room temperature; you don’t need to soak longer than that for this recipe.
- After soaking, drain the rice through your fine mesh strainer again and shake off excess water.
- If you soaked the rice, you can reduce the cooking water slightly to 1¾ cups (420ml) instead of 2 full cups, since the grains will have absorbed some moisture already.
- If you’re skipping the soak, keep the full 2 cups (480ml) of water.
Step 3: Add Ingredients to the Instant Pot
- Set your Instant Pot on a flat, stable surface and remove the inner pot.
- Add the 1 tablespoon (15ml) of ghee directly to the inner pot; it doesn’t need to melt ahead of time.
- Pour in the drained, rinsed rice (or soaked and drained rice) into the inner pot.
- Add the measured cold water, pouring it over the rice evenly.
- Sprinkle in the 1 teaspoon (5g) of fine sea salt and stir gently just once or twice to distribute; do not over-stir.
- If you’re using optional aromatics like cardamom pods or a cinnamon stick, add them now, pushing them slightly below the surface of the water.
- Check that the mixture looks evenly distributed in the pot and that nothing is stuck to the sides or rim.
Step 4: Seal and Pressure Cook
- Place the inner pot back into the Instant Pot base and secure the lid by aligning the arrows and twisting it into the locked position.
- Make sure the steam release valve on the top of the lid is set to the “Sealing” position; this is critical for pressure cooking.
- Select the “Pressure Cook” or “Manual” function on your Instant Pot panel.
- Set the pressure level to “High Pressure.”
- Set the cook time to 5 minutes using the plus and minus buttons.
- Press Start; the display will first show “On” while the pot builds pressure, which typically takes 5 to 10 minutes depending on how full the pot is and the temperature of your kitchen.
- Once full pressure is reached, the timer will begin counting down from 5 minutes; you’ll see the display change from “On” to counting down.
Step 5: Natural Pressure Release
- When the 5-minute cook time is up, the Instant Pot will beep and switch to “Keep Warm” mode automatically.
- Do not touch the steam release valve yet; you are going to let the pressure release naturally.
- Set a kitchen timer for 10 minutes and simply wait; resist the temptation to open the valve early as the rice continues steaming inside during this time.
- After 10 minutes of natural pressure release, carefully turn the steam release valve to the “Venting” position using a long spoon or a folded kitchen towel to protect your hand from any remaining steam.
- Let any residual steam escape completely before attempting to remove the lid; this only takes 20 to 30 seconds.
- Carefully open the lid, tilting it away from you to avoid any remaining steam.
Step 6: Fluff, Rest, and Serve
- Using a rice paddle, fork, or silicone spatula, gently fluff the rice with light lifting and folding motions rather than stirring or pressing down.
- Work from the edges inward, separating any grains that have stuck together, being gentle to avoid breaking the long basmati grains.
- If you used cardamom pods or a cinnamon stick, remove and discard them now.
- Let the rice sit uncovered in the Instant Pot for 3 to 5 minutes after fluffing; this brief rest allows any excess surface moisture to evaporate and the grains to firm up slightly.
- Taste and adjust salt if needed before serving.
- Serve immediately while hot and fluffy, or transfer to a serving bowl and cover loosely until ready to plate.
This recipe pairs wonderfully alongside the Instant Pot Chicken Noodle Soup Recipe for a warming, complete meal.
Tips for The Best Instant Pot Basmati Rice
Getting perfect pressure-cooker rice is largely about the small details, and these tips come from every mistake I’ve made along the way.
- Always rinse until the water runs clear. Skipping or rushing this step leaves excess surface starch on the grains, which makes them clump together into gummy masses instead of staying separate and fluffy. Spend the full 60 to 90 seconds on this.
- Use cold water, not hot. Starting with cold water gives the Instant Pot a more predictable pressurization time, which in turn leads to more consistent results. Hot water throws off the timing.
- Stick to the 1:1 rice-to-water ratio for rinsed, unsoaked rice. This ratio is the one that works consistently across most brands of basmati. If your rice comes out too firm, add 2 to 3 tablespoons (30 to 45ml) more water next time; if it’s too soft, reduce by the same amount.
- Never skip the natural release. Opening the valve immediately after cooking releases all the steam at once, which can cause the rice grains to blow apart and turn mushy. The 10-minute natural release is what keeps the texture intact.
- Don’t press down on the rice when fluffing. Press-and-stir breaks those beautiful long grains. Use a lifting and separating motion with your rice paddle instead.
- Ghee over oil whenever possible. Plain vegetable oil works, but ghee adds a depth of flavor that makes the rice genuinely delicious on its own. If you’re dairy-free, a good-quality avocado oil is my next best recommendation.
- Check your steam release valve before every cook. A partially clogged valve can cause undercooked rice or a Burn notice. Give it a quick check and wipe before you seal the lid.
- Let the rice rest after fluffing. Even 3 to 5 minutes of uncovered rest makes a noticeable difference in the final texture; the surface moisture evaporates and the grains tighten up slightly.
- Scale up without changing the time. You can double or triple this recipe and keep the cook time at exactly 5 minutes; the Instant Pot just takes a little longer to come to pressure with a fuller pot.
For another Instant Pot favorite, don’t miss this Instant Pot Refried Beans Recipe for an incredibly easy Mexican side dish.
What to Serve with Instant Pot Basmati Rice
Basmati rice is one of the most versatile side dishes you can have in your repertoire. It pairs beautifully with bold, saucy dishes because the grains absorb flavor without going soggy.
Here are some of my favorite things to serve alongside a pot of freshly made Instant Pot basmati rice:
- Chickpea and Spinach Curry – a thick, spiced vegetarian curry that soaks right into the rice in the best possible way; this is the pairing I reach for most often on busy weeknights.
- Tandoori Chicken – the charred, smoky, yogurt-marinated chicken is an absolute classic with fluffy basmati and a squeeze of lemon.
- Beef and Broccoli Stir Fry – the savory sauce from this Chinese-American favorite is practically made to be spooned over rice.
- Summer Vegetable Stir Fry – a light, colorful, and quick vegetarian option that feels fresh and satisfying served over a mound of basmati.
- Teriyaki Grilled Chicken – the sweet-savory glaze pairs incredibly well with plain basmati; let the rice soak up any extra sauce from the plate.
- Lemon Garlic Shrimp over Couscous – while this dish traditionally uses couscous, swapping in basmati rice is a delicious alternative that works just as well.
- Simple dal – a basic red or yellow lentil dal with turmeric and cumin is one of the most comforting, affordable meals you can put together, and basmati is the ideal base.
- Raita – a cool cucumber and yogurt sauce on the side cuts through richly spiced dishes and adds a refreshing contrast to the warm, fragrant rice.
- Chicken Adobo – the tangy, savory braising sauce from this Filipino classic is absolutely incredible absorbed into a bowl of fluffy basmati.
Read Also: Tofu and Veggie Stir Fry with Brown Rice Recipe
Variations of Instant Pot Basmati Rice
The basic recipe is wonderful on its own, but there are some easy adaptations that make it feel like an entirely different dish depending on the occasion.
One small change to the cooking liquid, fat, or aromatics can completely transform the flavor profile without adding much effort.
- Broth instead of water: Replace the water with low-sodium chicken broth, vegetable broth, or beef broth for a richer, more savory rice that tastes incredible under stews and braised dishes.
- Cumin rice (Jeera rice): Heat the ghee in the Instant Pot on the Sauté setting, add 1 teaspoon (3g) of whole cumin seeds and let them sizzle for 30 seconds until fragrant, then switch off Sauté and add the rice, water, and salt. The result is a lightly spiced, restaurant-style rice.
- Saffron basmati rice: Dissolve a large pinch of saffron threads in 2 tablespoons (30ml) of warm water, then add it to the cooking liquid for a gorgeous golden color and a delicate floral flavor.
- Coconut basmati rice: Replace half the water with full-fat coconut milk for a lightly sweet, creamy rice that pairs beautifully with Thai curries, grilled fish, and tropical-flavored dishes.
- Herb rice: After fluffing, stir in a generous handful of freshly chopped cilantro, parsley, or mint along with a squeeze of lemon juice for a bright, fresh finish.
- Brown basmati rice: If you prefer a whole-grain option, check out the Brown Basmati Rice Recipe for adjusted water ratios and cook times; brown basmati needs significantly more time in the pressure cooker.
- Pilaf-style basmati: Sauté finely diced onion and a clove of minced garlic in ghee on the Sauté setting before adding the rice and water; this adds a savory, aromatic depth similar to a classic pilaf.
- Lemon basmati rice: Add the zest of one lemon and 1 tablespoon (15ml) of lemon juice to the pot along with the water; finish with a drizzle of olive oil after fluffing for a bright Mediterranean-inspired side.
Another great variation: Cauliflower Fried Rice with Tofu Recipe for a lower-carb rice alternative.
Storage and Reheating
Leftover basmati rice stores beautifully, which makes it one of the best candidates for batch cooking. I almost always make extra on purpose because it reheats so well.
- Refrigerator storage: Transfer completely cooled rice to an airtight container and store in the refrigerator for up to 4 days; spread the rice out on a sheet pan for 10 to 15 minutes to cool quickly before transferring so it doesn’t trap steam inside the container and turn mushy.
- Freezer storage: Portion cooled rice into zip-lock freezer bags or airtight freezer containers, press out as much air as possible, and freeze for up to 3 months; label each bag with the date so you can keep track.
- Microwave reheating: Add the rice to a microwave-safe bowl, sprinkle 1 to 2 tablespoons (15 to 30ml) of water over the rice per cup, cover the bowl with a damp paper towel or a microwave-safe plate, and heat on medium-high power in 60-second intervals, fluffing in between, until steaming hot.
- Stovetop reheating: Place the rice in a small saucepan with 2 tablespoons (30ml) of water per cup of rice, cover with a tight-fitting lid, and warm over low heat for 4 to 5 minutes, stirring gently once halfway through.
- Reheating from frozen: Move the frozen rice to the refrigerator to thaw overnight, or place the sealed bag in a bowl of warm water for 20 to 30 minutes; then reheat using either the microwave or stovetop method above.
- Do not refreeze: Once thawed, do not refreeze rice; consume within 24 hours of thawing.
- Food safety note: Cooked rice can harbor bacteria if left at room temperature for more than 2 hours; always refrigerate or freeze promptly after cooling.
You might also enjoy: Stir Fry Sauce Recipe to use with your leftover basmati in a quick fried rice.
Nutritional Facts
The following nutrition information is based on one serving (approximately ½ cup dry rice / 1½ cups cooked rice) of the basic recipe with ghee and salt, serving 4 people.
| Nutritional Facts (Per Serving) | |
|---|---|
| Calories | 340 kcal |
| Total Carbohydrates | 69g |
| Dietary Fiber | 1g |
| Total Sugars | 0g |
| Total Fat | 4g |
| Saturated Fat | 2.5g |
| Cholesterol | 10mg |
| Protein | 6g |
| Sodium | 295mg |
| Potassium | 90mg |
| Iron | 1mg (6% DV) |
| Calcium | 20mg (2% DV) |
| Glycemic Index | ~50-58 (lower than regular white rice) |
Nutritional values are estimates and will vary based on the specific brand of rice and ghee used, as well as exact portion sizes.
For another healthy grain side dish idea, try this Healthy Fried Rice Recipe using leftover basmati.
Health Benefits of Key Ingredients
Basmati rice often gets lumped in with “just white rice,” but it actually has some meaningful nutritional advantages that make it a smarter choice, especially when you’re cooking it at home from scratch.
Here’s a closer look at what makes the key ingredients in this recipe worth knowing about:
- Basmati rice has a lower glycemic index than most other white rices. Studies have shown that basmati typically has a GI score between 50 and 58, compared to regular long-grain white rice at around 72, which means it causes a slower, more gradual rise in blood sugar levels. This makes it a more suitable option for people monitoring their glucose intake.
- Basmati is a good source of complex carbohydrates, which provide sustained energy without the quick crash associated with high-GI foods, making it a reliable fuel source for active people and athletes.
- The rice contains small amounts of B vitamins, particularly thiamine (B1) and niacin (B3), which support energy metabolism and healthy nerve function.
- Ghee is rich in fat-soluble vitamins, including vitamins A, D, E, and K, which support immune function, bone health, and vision; these vitamins are better absorbed when consumed with dietary fat, making ghee an excellent vehicle for them.
- Ghee contains butyric acid, a short-chain fatty acid that has been studied for its potential anti-inflammatory properties and its role in supporting healthy gut lining and digestive function.
- Ghee is naturally lactose-free, making it suitable for most people with lactose intolerance since the milk solids are removed during the clarification process.
- Basmati rice is naturally gluten-free, making this recipe a safe and satisfying option for people with celiac disease or gluten sensitivity.
- The low sodium content of this recipe (which comes entirely from the measured salt you add) means it fits comfortably into heart-healthy eating patterns when portioned appropriately.
Read Also: Chickpea and Spinach Curry Recipe
FAQs About Instant Pot Basmati Rice
1. What is the best rice-to-water ratio for Instant Pot basmati rice?
For rinsed, unsoaked basmati rice, a 1:1 ratio of rice to water is the standard starting point in the Instant Pot. If your rice comes out slightly too firm, add 2 to 3 tablespoons more water next time; if it’s too soft or mushy, reduce the water by the same amount.
2. Do I need to soak basmati rice before pressure cooking?
Soaking is optional, but it does help. A 15 to 30-minute soak allows the grains to hydrate more evenly, resulting in longer, more separate, and less brittle grains after cooking. If you soak, reduce the cooking water slightly to about 1¾ cups (420ml) per 2 cups (370g) of dry rice.
3. Why did my basmati rice come out mushy?
Mushy rice is almost always caused by too much water, opening the steam valve too quickly, or using the wrong pressure release method. Make sure you’re following the 1:1 ratio, letting the pressure release naturally for the full 10 minutes, and rinsing the rice well before cooking to remove excess surface starch.
4. Can I double or triple this recipe in the Instant Pot?
Yes, absolutely. You can scale this recipe up to 4 cups (740g) of dry rice in a 6-quart Instant Pot without changing the cook time at all. The pot will simply take a few extra minutes to build pressure with the larger volume; once the timer starts, keep it at 5 minutes on high pressure.
5. Can I use broth instead of water for Instant Pot basmati rice?
Yes, and it makes a noticeable difference in flavor. Chicken broth, vegetable broth, or even a mix of broth and water all work beautifully. Just be mindful of the sodium in your broth and reduce the added salt accordingly so the final dish doesn’t end up over-seasoned.
Read Also: Instant Pot Refried Beans Recipe
Instant Pot Basmati Rice
Ingredients
- 2 cups long-grain white basmati rice - 370g; aged, extra-long grain preferred for the best texture and aroma
- 2 cups cold water - 480ml; filtered water gives the cleanest flavor; reduce to 1¾ cups (420ml) if soaking rice first
- 1 tbsp ghee - 15ml; or neutral oil such as avocado oil for a dairy-free version
- 1 tsp fine sea salt - 5g; adjust to taste depending on what the rice is served with
- 1 tsp rose water - 5ml; culinary grade; adds a classic floral note used in Persian and South Asian rice dishes
- 2 whole green cardamom pods - lightly crushed; remove before serving
- 1 small cinnamon stick - adds warmth without overwhelming the dish; remove before serving
Equipment
- Instant Pot 6-Quart Pressure Cooker - 6qt recommended; handles up to 4 cups of dry rice comfortably
- Fine-mesh strainer - Essential for rinsing rice thoroughly; a colander with large holes is not a suitable substitute
- Large mixing bowl - Used for soaking the rice if the optional soak step is used
- Liquid measuring cup - For accurately measuring the water; precision matters with pressure cooking
- Dry measuring cups - For measuring the rice accurately
- Rice paddle or silicone spatula - For fluffing the rice gently without breaking the long grains; a fork works too
- Pot holders or silicone mitts - The Instant Pot inner pot gets very hot; always use protection when handling
Method
- Place 2 cups (370g) of basmati rice in a fine mesh strainer and rinse under cold running water, swishing the grains with your fingers, until the water draining out runs mostly clear — about 60 to 90 seconds. Shake the strainer well to drain off as much excess water as possible.
- For longer, more separate grains, transfer the rinsed rice to a bowl, cover with cold water by 2 inches (5cm), and soak for 15 to 30 minutes. Drain well through the fine mesh strainer before using, and reduce cooking water to 1¾ cups (420ml).
- Add the ghee, drained rice, cold water, and salt to the Instant Pot inner pot and stir gently just once or twice to distribute evenly. If using optional aromatics (cardamom pods, cinnamon stick, or rose water), add them now.
- Secure the Instant Pot lid, set the steam release valve to Sealing, and select Pressure Cook (or Manual) on High Pressure for 5 minutes. The pot will take 5 to 10 minutes to fully pressurize before the timer begins counting down.
- When the cook time ends, do not open the valve immediately — allow the pressure to release naturally for exactly 10 minutes. After 10 minutes, carefully turn the steam release valve to Venting using a long spoon to release any remaining pressure, then open the lid tilting it away from you.
- Remove and discard any whole aromatics, then gently fluff the rice using a rice paddle or fork with light lifting and folding motions — do not press or stir. Let the rice rest uncovered for 3 to 5 minutes to allow excess surface moisture to evaporate, then taste, adjust salt if needed, and serve.
Nutrition
Notes
- Always rinse the rice until the water runs clear — this removes excess surface starch that causes clumping and gummy texture.
- Use a strict 1:1 rice-to-water ratio for rinsed, unsoaked rice. If your rice comes out too firm, add 2 to 3 tablespoons more water next time; if it’s too soft, reduce by the same amount.
- Never skip the 10-minute natural pressure release — opening the valve immediately causes steam to escape too quickly, which blows the grains apart and creates mushy rice.
- Ghee adds a subtle nutty richness that makes the rice taste restaurant-quality. Substitute avocado oil or any neutral oil for a dairy-free version.
- To make broth rice, replace the water with low-sodium chicken or vegetable broth and reduce added salt accordingly for a richer, more savory result.
- For cumin rice (Jeera rice), use the Sauté function to toast 1 teaspoon of whole cumin seeds in the ghee for 30 seconds before switching off Sauté and adding the rice and water.
- This recipe scales up easily — you can cook up to 4 cups (740g) of dry rice in a 6-quart Instant Pot without changing the cook time at all.
- Storage: Cool rice completely and refrigerate in an airtight container for up to 4 days, or freeze in portioned bags for up to 3 months.
- To reheat, sprinkle 1 to 2 tablespoons of water per cup of rice over the top, cover with a damp paper towel, and microwave in 60-second intervals until steaming hot.
- Do not refreeze rice once it has been thawed, and never leave cooked rice at room temperature for more than 2 hours.
Private Notes
Tried this recipe?
Let us know how it was!Final Thoughts
Once you make basmati rice this way, it genuinely becomes something you look forward to rather than a chore you dread. The Instant Pot takes all the guesswork out of a dish that used to frustrate me to no end.
Whether you’re serving it under a rich curry, alongside grilled meat, or as the base for a quick weeknight bowl, this fluffy basmati rice shows up every single time. I hope it becomes as much of a kitchen staple in your home as it has in mine.
If you give this recipe a try, I’d love to hear how it went in the comments below. Did you go with ghee or oil? Did you add any aromatics? Share your results and any tips you discovered along the way!
Recommended:
- Basmati Rice Recipe
- Brown Basmati Rice Recipe
- Instant Pot Potato Soup Recipe
- Instant Pot Chicken Noodle Soup Recipe
- Chickpea and Spinach Curry Recipe
- Tandoori Chicken Recipe
- Cauliflower Fried Rice with Tofu Recipe
- Beef and Broccoli Stir Fry Recipe
- Stir Fry Sauce Recipe
- Summer Vegetable Stir Fry Recipe
