
I’ve been making meatloaf for my family for over fifteen years now, and I can honestly say this meatloaf recipe is the one that finally got everyone excited about dinner again.
My husband used to claim he didn’t like meatloaf—turns out he’d only ever had the dry, crumbly kind his college cafeteria served. The first time I made this version, with its tender, juicy texture and that sweet-tangy glaze on top, he went back for seconds without saying a word. That’s when I knew I’d cracked the code.
This isn’t your grandmother’s dense brick of ground beef. This meatloaf stays incredibly moist thanks to a few secret ingredients I stumbled upon after years of trial and error. I’ll never forget the time I accidentally added too much milk and thought I’d ruined dinner—turns out that “mistake” taught me the perfect liquid-to-meat ratio.
| Quick Recipe Summary | |
|---|---|
| Prep Time | 15 minutes |
| Cook Time | 60 minutes |
| Total Time | 1 hour 15 minutes |
| Servings | 6-8 servings |
| Difficulty Level | Easy |
Why You’ll Love This Meatloaf Recipe
This meatloaf checks every single box for what comfort food should be. It’s hearty without being heavy, flavorful without being overpowering, and it makes your house smell absolutely incredible while it bakes.
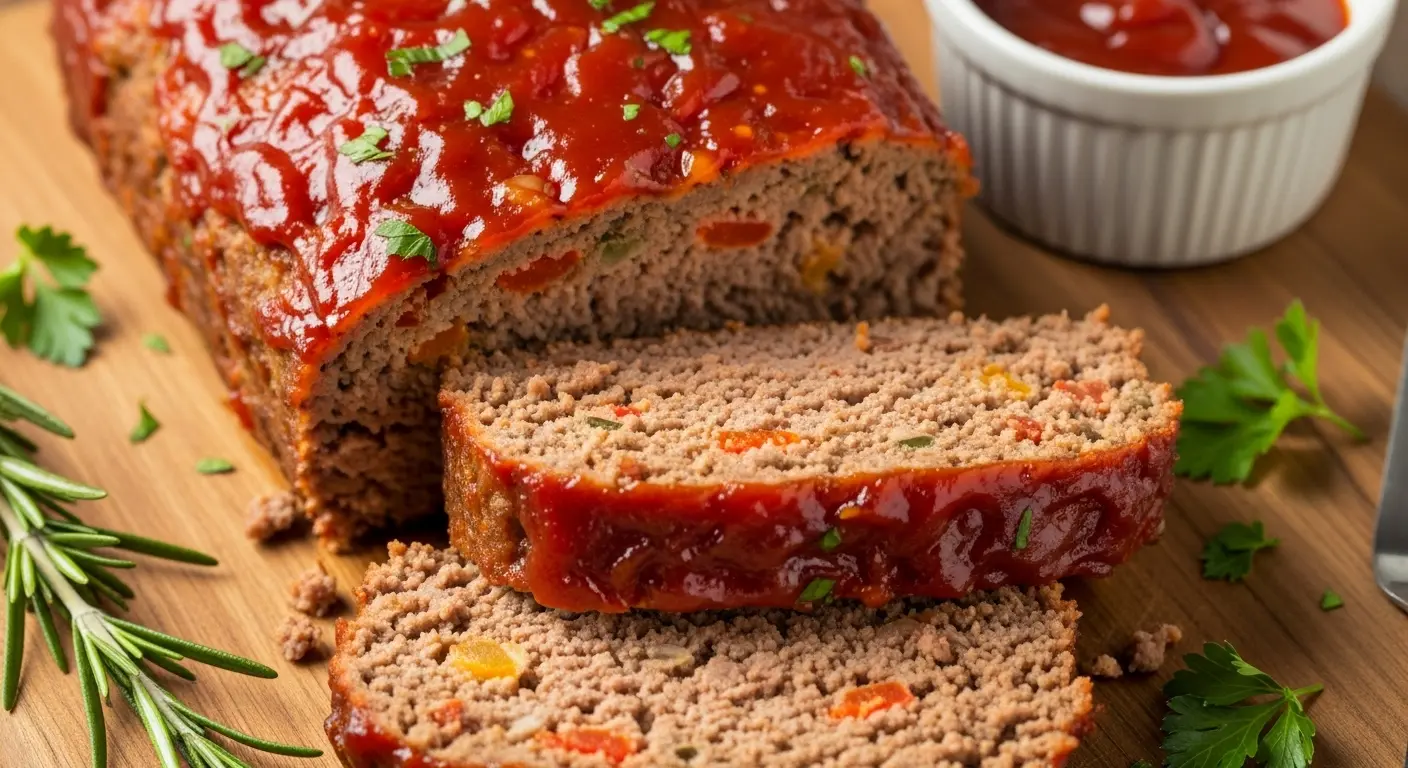
The texture is what really sets this apart—you get that perfect slice every time, no crumbling or falling apart. I use a combination of ground beef and pork, which adds so much more depth and moisture than beef alone. The glaze caramelizes beautifully in the oven, creating this sweet and tangy crust that everyone fights over.
Here’s what makes this recipe a winner:
- Incredibly moist and tender thanks to the milk-soaked breadcrumbs and the addition of sautéed vegetables
- A flavor-packed glaze made with ketchup, brown sugar, and a touch of mustard that caramelizes beautifully
- Foolproof technique that works every single time, even if you’re new to making meatloaf
- Makes amazing leftovers for sandwiches the next day (seriously, cold meatloaf sandwiches are underrated)
- Budget-friendly using simple, everyday ingredients you probably already have
- Kid-approved even my picky eater asks for this regularly
You might also enjoy: Healthy Sloppy Joe Recipe
Ingredients
This meatloaf comes together with ingredients you likely have in your kitchen right now. I’ve specified exactly what works best based on countless batches I’ve made over the years.
For the Meatloaf:
- 1 lb (450g) ground beef (85/15 lean-to-fat ratio works best)
- 1 lb (450g) ground pork (adds incredible moisture and flavor)
- 1 cup (115g) breadcrumbs (I prefer panko for lighter texture)
- 1/2 cup (120ml) whole milk (don’t use skim—you need the fat)
- 1 large egg, beaten
- 1 medium onion, finely diced (about 1 cup)
- 2 cloves garlic, minced
- 1 medium carrot, finely grated (secret ingredient for moisture!)
- 2 tablespoons Worcestershire sauce
- 1 tablespoon Dijon mustard
- 1 teaspoon salt
- 1/2 teaspoon black pepper
- 1/2 teaspoon dried thyme
- 1/4 teaspoon smoked paprika (optional but adds depth)
- 2 tablespoons olive oil for sautéing
For the Glaze:
- 1/2 cup (120ml) ketchup
- 3 tablespoons brown sugar
- 1 tablespoon apple cider vinegar
- 1 teaspoon Dijon mustard
Kitchen Equipment Needed
You don’t need any fancy equipment for this recipe, but having the right tools makes the process smoother. Here’s what I reach for every time I make this meatloaf.
- 9×5-inch loaf pan – Essential for that classic meatloaf shape; I line mine with parchment paper for easy removal
- Large mixing bowl – Needs to be big enough to comfortably mix all the meat and ingredients
- Medium skillet – For sautéing the vegetables before adding them to the meat mixture
- Small bowl – For mixing the glaze ingredients
- Box grater – For grating the carrot finely
- Wooden spoon or spatula – For mixing; I avoid using my hands too much to prevent overworking the meat
- Meat thermometer – Absolutely crucial for knowing when it’s perfectly cooked without cutting into it
- Pastry brush – For applying the glaze evenly
- Aluminum foil – For tenting if the top browns too quickly
- Cutting board – For chopping vegetables
- Sharp knife – For dicing onions and mincing garlic
Recommended Products for This Recipe
After making this meatloaf dozens of times, I’ve found a few products that genuinely make a difference in the final result. These aren’t necessities, but they’ve become staples in my kitchen.
1. USA Pan Bakeware Aluminized Steel Loaf Pan
I switched to this pan three years ago and never looked back. The aluminized steel distributes heat so evenly that you get perfect browning on all sides without any burnt spots. The nonstick coating releases the meatloaf beautifully, and cleanup takes about thirty seconds. Mine still looks brand new after hundreds of uses.
2. ThermoPro Digital Meat Thermometer
This instant-read thermometer has saved me from both undercooked and overcooked meatloaf more times than I can count. You just stick it in the center, and within two seconds you know exactly what’s happening inside. No more guessing, no more cutting into it to check. It’s completely changed how confident I feel about cooking meat.
3. Lee Kum Kee Premium Oyster Sauce
Okay, this might sound strange, but adding a tablespoon of premium oyster sauce to the meat mixture takes the umami factor through the roof. It doesn’t make it taste Asian—it just deepens all the savory flavors in a way that makes people ask what your secret is. I learned this trick from a chef friend and now I can’t make meatloaf without it.
4. Organic Grass-Fed Ground Beef
The quality of your meat directly impacts the final dish. I started using grass-fed ground beef about a year ago, and the difference in flavor is noticeable—richer, beefier, with none of that slightly metallic taste conventional beef sometimes has. It’s more expensive, but for a special dinner, it’s worth it.
Read Also: Best Ground Elk Burger Recipe
Step-by-Step Instructions: How to Make Meatloaf
Follow these detailed steps and you’ll have perfect meatloaf every single time. I’ve included all the little tricks I’ve learned along the way.
1. Prepare Your Vegetables
- Preheat your oven to 350°F (175°C) and position the rack in the center
- Line your 9×5-inch loaf pan with parchment paper, leaving some overhang on the sides for easy removal later
- Heat 2 tablespoons of olive oil in a medium skillet over medium heat until it shimmers
- Add the diced onion and cook for 4-5 minutes, stirring occasionally, until softened and translucent
- Add the minced garlic and cook for another 30-45 seconds until fragrant but not browned (burned garlic tastes bitter)
- Remove from heat and let the mixture cool for about 5 minutes—adding hot vegetables directly to the meat can start cooking it prematurely
2. Soak the Breadcrumbs
- Place 1 cup of breadcrumbs in your large mixing bowl
- Pour 1/2 cup of whole milk over the breadcrumbs and stir gently with a fork
- Let this mixture sit for 3-4 minutes until the breadcrumbs have absorbed all the milk and become soft and pastelike
- This step is crucial—the milk-soaked breadcrumbs act as a binder and keep the meatloaf incredibly moist throughout cooking
- If the mixture seems too dry, add another tablespoon of milk; it should look like wet sand
3. Mix the Meatloaf Base
- To the breadcrumb mixture, add the beaten egg and stir until fully incorporated
- Add the cooled sautéed onion and garlic mixture
- Grate the carrot using the finest holes on your box grater and add it to the bowl (I learned this trick from my Italian neighbor—the grated carrot adds natural sweetness and moisture without anyone knowing it’s there)
- Add Worcestershire sauce, Dijon mustard, salt, pepper, thyme, and smoked paprika if using
- Stir everything together with a wooden spoon until well combined—this creates your flavor base
4. Incorporate the Meat
- Add the ground beef and ground pork to the bowl with your vegetable-breadcrumb mixture
- Using your hands or a wooden spoon, gently mix everything together until just combined—this is important: overworking the meat makes it tough and dense
- Mix only until you no longer see streaks of the breadcrumb mixture; about 30-45 seconds of gentle mixing
- The mixture should be moist but still hold together when you squeeze a small handful
- If it feels too wet, add 2-3 tablespoons more breadcrumbs; if too dry, add a splash of milk
5. Shape the Meatloaf
- Transfer the meat mixture into your prepared loaf pan
- Using clean hands, press the mixture gently into the pan, making sure to push it into all the corners
- Press down firmly enough to eliminate air pockets but don’t compact it too tightly
- Smooth the top with your hands or a spatula, creating a slight dome shape in the center (this helps it cook more evenly)
- Tap the pan gently on the counter a few times to settle the mixture and release any remaining air bubbles
6. Prepare and Apply the Glaze
- In a small bowl, whisk together the ketchup, brown sugar, apple cider vinegar, and Dijon mustard until smooth
- The mixture should be thick but pourable; if it’s too thick, add a teaspoon of water
- Using a pastry brush, spread half of the glaze evenly over the top of the meatloaf
- Reserve the other half for later—you’ll apply it during the last 15 minutes of cooking
7. Bake the Meatloaf
- Place the loaf pan in the preheated oven on the center rack
- Bake for 45 minutes without opening the oven door (every time you open it, you lose heat and extend cooking time)
- After 45 minutes, remove the pan and brush the remaining glaze over the top
- Return to the oven and bake for an additional 15-20 minutes
- The meatloaf is done when an instant-read thermometer inserted into the center reads 160°F (71°C)
- If the top is browning too quickly, tent it loosely with aluminum foil during the last 10 minutes
8. Rest and Serve
- Remove the meatloaf from the oven and let it rest in the pan for 10 minutes—this is not optional, it allows the juices to redistribute
- The internal temperature will rise to about 165°F (74°C) during resting, which is perfect
- Use the parchment paper overhang to lift the meatloaf out of the pan and transfer it to a cutting board
- Slice into 1-inch thick slices using a sharp knife, wiping the blade between cuts for clean slices
- Serve immediately with your favorite sides and enjoy
Another favorite: Healthy Shepherds Pie Recipe
Tips for The Best Meatloaf
I’ve made every mistake possible with meatloaf over the years, and these tips come from hard-earned lessons. Follow these and you’ll avoid the pitfalls.
- Don’t skip sautéing the vegetables – Raw onions release moisture during cooking, which can make your meatloaf soggy and prevent proper browning; plus, cooked onions are sweeter and more flavorful
- Use a meat thermometer – This is the only way to know for certain when your meatloaf is perfectly cooked; guessing leads to dry, overcooked meat or worse, undercooked centers
- Let it rest – Cutting into the meatloaf immediately causes all the juices to run out onto the cutting board instead of staying in the meat; ten minutes of patience makes all the difference
- Choose the right fat ratio – Ground beef that’s too lean (90/10 or higher) will give you dry meatloaf; 85/15 is the sweet spot for moisture without being greasy
- Mix gently – Overworking the meat develops the proteins too much and creates a dense, rubbery texture; mix only until just combined
- Don’t pack it too tightly – Press the meat into the pan firmly enough to eliminate air pockets, but don’t compress it like you’re making a brick
- Line your pan – Parchment paper makes removal and cleanup infinitely easier, and helps prevent sticking even with nonstick pans
- Add moisture-boosting ingredients – The grated carrot, milk-soaked breadcrumbs, and combination of beef and pork all contribute to keeping this meatloaf juicy
- Make mini meatloaves – For faster cooking and more surface area for that delicious glaze, form the mixture into 4-6 individual loaves on a baking sheet instead
- Check for air pockets – Before baking, press down gently and tap the pan to eliminate any air bubbles that could create gaps in the finished loaf
- Save the drippings – The liquid that accumulates in the pan makes an incredible base for gravy; pour it into a small saucepan, whisk in a tablespoon of flour, and simmer until thickened
For a lighter option, try: Healthy Chicken Pot Pie Recipe
Serving Suggestions
Meatloaf is incredibly versatile and pairs beautifully with so many sides. Here’s how I usually serve it, along with some ideas that work wonderfully.
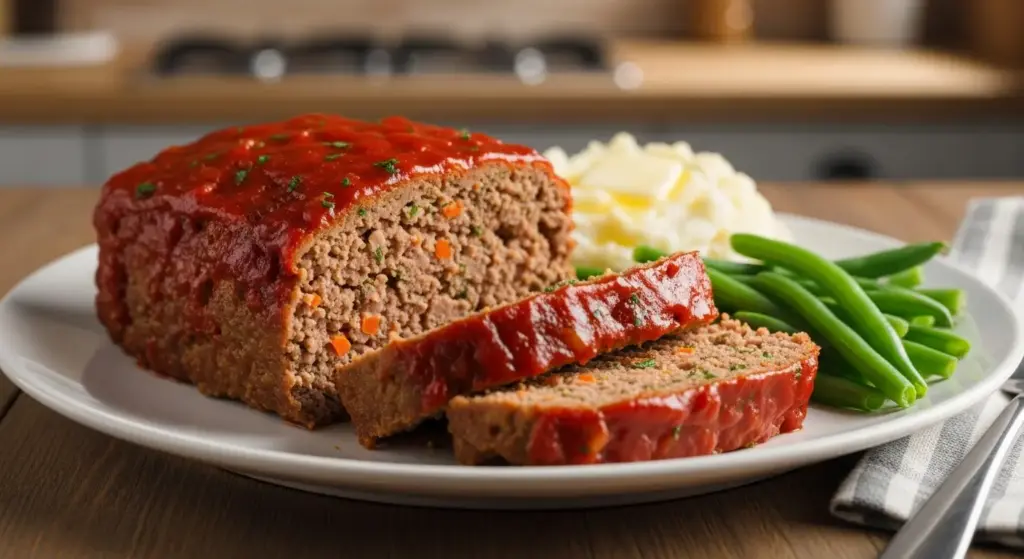
This meatloaf shines alongside classic comfort food sides. I always make mashed potatoes because they’re perfect for soaking up the glaze and any pan juices. The creamy texture contrasts beautifully with the hearty meatloaf.
For vegetables, maple glazed carrots are my go-to—the sweetness complements the tangy glaze perfectly. Green beans sautéed with garlic and butter add a fresh, crisp element that cuts through the richness.
Some of my favorite serving combinations:
- Classic Comfort: Serve with creamy mashed potatoes, buttered corn, and dinner rolls
- Lighter Fare: Pair with a simple green salad and roasted vegetables
- Southern Style: Accompany with mac and cheese, coleslaw, and cornbread
- Steakhouse Vibes: Serve alongside baked potatoes, sautéed mushrooms, and steamed broccoli
- Sandwich Leftover: Slice cold meatloaf for incredible sandwiches on toasted bread with lettuce, tomato, and mayo
Read Also: Roasted Brussels Sprouts With Bacon Recipe
Variations of Meatloaf
Once you master the basic recipe, these variations keep things interesting. I rotate through these based on what I’m craving or what I have on hand.
Italian-Style Meatloaf
- Replace the Worcestershire sauce with balsamic vinegar
- Add 1/2 cup grated Parmesan cheese to the meat mixture
- Mix in 1/4 cup chopped fresh basil and 2 tablespoons Italian seasoning
- Top with marinara sauce instead of the ketchup glaze and add mozzarella cheese during the last 10 minutes of baking
BBQ Bacon Meatloaf
- Wrap the formed meatloaf with 8-10 strips of bacon before baking, tucking the ends underneath
- Replace the ketchup glaze with your favorite BBQ sauce
- Add 1/2 cup cooked, crumbled bacon to the meat mixture
- Mix in 2 tablespoons BBQ rub for extra smoky flavor
Mexican-Inspired Meatloaf
- Add 1 cup crushed tortilla chips to replace some of the breadcrumbs
- Mix in 1/2 cup salsa, 1 diced jalapeño, and 1 tablespoon cumin
- Top with pepper jack cheese and fresh cilantro
- Serve with sour cream, guacamole, and extra salsa
Mushroom and Swiss Meatloaf
- Sauté 1 cup finely diced mushrooms with the onions
- Mix 1 cup shredded Swiss cheese into the meat mixture
- Create a cheese filling by placing a layer of Swiss slices in the middle before forming the loaf
- Top with cream of mushroom soup instead of ketchup glaze
Turkey Meatloaf (Lighter Option)
- Substitute ground turkey for the beef and pork (use 2 lbs total)
- Add an extra egg to help bind the leaner meat
- Increase the milk to 3/4 cup for added moisture
- Add 2 tablespoons of olive oil to the mixture to compensate for less fat
Breakfast Meatloaf
- Use breakfast sausage instead of ground pork
- Mix in 1 cup shredded cheddar cheese
- Add 1/4 cup maple syrup to the glaze mixture
- Serve slices with eggs and toast for brunch
Mediterranean Meatloaf
- Replace breadcrumbs with cooked quinoa
- Add 1/2 cup crumbled feta cheese, 1/4 cup chopped sun-dried tomatoes, and 2 tablespoons fresh oregano
- Mix in 1/4 cup chopped kalamari olives
- Top with a yogurt-cucumber sauce instead of ketchup glaze
This pairs beautifully with my carrot ginger soup for a complete meal.
Storage and Reheating
Proper storage keeps your meatloaf delicious for days, and knowing how to reheat it properly means you can enjoy it just as much the second time around.
Storing Leftovers
- Let the meatloaf cool completely at room temperature before storing, about 30-45 minutes after removing from oven
- Wrap individual slices tightly in plastic wrap or aluminum foil, or place in an airtight container with parchment paper between slices
- Store in the refrigerator for up to 4 days
- For longer storage, wrap slices individually in plastic wrap, then aluminum foil, and freeze for up to 3 months
- Label frozen portions with the date so you remember when you made them
Reheating Methods
- In the oven (best method): Preheat oven to 350°F (175°C), place slices in a baking dish with a tablespoon of beef broth or water, cover with foil, and heat for 15-20 minutes until warmed through
- In the microwave (quickest): Place a slice on a microwave-safe plate, cover with a damp paper towel to prevent drying, and heat on 50% power for 1-2 minutes
- In a skillet: Heat a tablespoon of butter or oil in a skillet over medium heat, add slices, and cook for 3-4 minutes per side until heated through and slightly crispy on the outside
- From frozen: Thaw overnight in the refrigerator before reheating using any of the methods above, or bake frozen slices at 350°F for 25-30 minutes covered with foil
Making Ahead
- Prepare the uncooked meatloaf completely, wrap tightly in plastic wrap and refrigerate for up to 24 hours before baking
- Add 5-10 minutes to the baking time if cooking straight from the refrigerator
- You can also freeze the uncooked meatloaf for up to 2 months; thaw in refrigerator overnight before baking
Read Also: BBQ Pulled Pork Sandwiches
Nutritional Facts
Here’s the nutritional breakdown per serving (based on 8 servings). Keep in mind these are estimates and will vary based on specific ingredients used.
Per Serving:
- Calories: 385
- Total Fat: 22g (28% Daily Value)
- Saturated Fat: 8g (40% DV)
- Cholesterol: 115mg (38% DV)
- Sodium: 580mg (25% DV)
- Total Carbohydrates: 18g (7% DV)
- Dietary Fiber: 1g (4% DV)
- Sugars: 9g
- Protein: 28g (56% DV)
- Vitamin A: 15% DV
- Vitamin C: 4% DV
- Calcium: 6% DV
- Iron: 18% DV
This meatloaf provides a substantial amount of protein, making it a satisfying main dish. The combination of beef and pork offers a good balance of nutrients including iron, zinc, and B vitamins. To reduce calories and fat, you can substitute ground turkey or chicken for some or all of the meat, though this will affect the texture and moisture.
You might also enjoy: Beef and Broccoli Stir Fry Recipe
Health Benefits of Key Ingredients
While meatloaf is definitely comfort food, several ingredients in this recipe provide genuine nutritional benefits. Here’s what’s working in your favor.
The combination of beef and pork provides complete protein with all essential amino acids your body needs for muscle maintenance and repair. Ground beef is particularly rich in iron and zinc, which support immune function and energy levels.
The carrots add more than just moisture—they’re packed with beta-carotene, which your body converts to vitamin A for eye health and immune support. Onions and garlic contribute antioxidants and compounds that may support heart health and have anti-inflammatory properties.
Key nutritional highlights:
- High-quality protein from the meat supports muscle growth, tissue repair, and keeps you feeling satisfied longer
- Iron from beef helps transport oxygen throughout your body and prevents fatigue
- Zinc supports immune function, wound healing, and healthy metabolism
- B vitamins (especially B12 from meat) are essential for energy production and nervous system health
- Selenium from the meat acts as a powerful antioxidant
- Beta-carotene from carrots supports vision, skin health, and immune function
- Allicin from garlic may help reduce blood pressure and cholesterol levels
FAQs About Meatloaf
1. Why is my meatloaf falling apart when I slice it?
This usually happens when there’s not enough binding agent or the meatloaf hasn’t rested properly. Make sure you’re using enough breadcrumbs and egg—they act as the glue holding everything together.
Also, always let the meatloaf rest for at least 10 minutes after baking. During this time, the proteins firm up and the juices redistribute, making it much easier to slice cleanly. If you’re still having issues, try adding an extra egg or reducing the amount of liquid slightly.
2. Can I make meatloaf without breadcrumbs?
Absolutely! I’ve made versions using crushed crackers, oatmeal, cooked rice, or even crushed cornflakes. Each gives a slightly different texture but all work well. If you’re going gluten-free, almond flour or gluten-free breadcrumbs are excellent substitutes.
Just keep the same proportions—you need about 1 cup of whatever binding agent you choose. Oatmeal creates a slightly heartier texture that I actually love, and it adds extra fiber too.
3. How do I know when meatloaf is done without a thermometer?
While a thermometer is definitely the most reliable method, you can check doneness by inserting a knife into the center and pressing gently on the meat beside it. If the juices run clear (not pink), it’s likely done.
The meatloaf should also feel firm to the touch and have pulled away slightly from the sides of the pan. That said, I really do recommend investing in an instant-read thermometer—they’re inexpensive and eliminate all guesswork. You’re looking for 160°F internally.
4. Can I cook meatloaf in a slow cooker or Instant Pot?
Yes to both! For the slow cooker, form your meatloaf and place it on a piece of aluminum foil in the cooker (this makes removal easier). Cook on low for 6-8 hours or high for 3-4 hours. For the Instant Pot, use a trivet to elevate the loaf pan above water, and pressure cook for 25-30 minutes with natural release.
The texture will be different—more steamed and less crusty on the outside—but it’s still delicious. You can broil it for a few minutes after cooking to crisp up the glaze.
5. What’s the best way to prevent a greasy meatloaf?
Grease comes from the fat in the meat rendering out during cooking. Using meat with the right fat ratio (85/15) helps, as does properly draining excess fat during cooking. I like to lift the meatloaf slightly after 30 minutes of baking and carefully pour off any accumulated fat.
Some people bake their meatloaf on a broiler pan or wire rack set in a baking sheet so the fat drips away, but I find this can dry it out. The parchment paper method I use makes it easy to lift out the meatloaf and drain off fat if needed.
For a complete dinner, try: Beef Barley Soup Recipe
Final Thoughts
This meatloaf recipe has become such a staple in my home that I can practically make it with my eyes closed now. It’s the meal I turn to when I want something comforting and satisfying without spending hours in the kitchen.
The beauty of meatloaf is that it’s forgiving and adaptable—you can make it your own by adjusting seasonings, trying different glazes, or incorporating vegetables your family loves. Once you get the basic technique down, you’ll find yourself experimenting and creating your own signature version.
I hope this recipe brings as much comfort and satisfaction to your dinner table as it has to mine. Give it a try this week and let me know how it turns out! I’d love to hear about any variations you create or what sides you pair it with.
Drop a comment below with your experience, and don’t forget to share this recipe with anyone who needs a reliable, delicious meatloaf in their life.
Recommended:
- Slow Cooker Chili Recipe
- Pork Tenderloin With Roasted Root Vegetables Recipe
- Baked Chicken Meatballs With Spaghetti Squash Recipe
- Easy Healthy Crockpot Chili Recipe
- Chicken Fajita Lettuce Wraps Recipe
- Teriyaki Grilled Chicken Recipe
- Grilled Lemon Herb Chicken Recipe
- Healthy Chicken Parmesan Recipe
- Pork Chop Supreme Recipe
- Ground Elk Meatballs Recipe


