
I still remember the first time I tried to make a healthy waffle recipe on a Sunday morning without a plan. I had whole wheat flour, a banana going brown on the counter, and a stubborn determination to skip the sugar crash that usually followed my usual waffle routine.
What came out of that waffle iron wasn’t perfect, but it sparked a months-long obsession with getting every detail right. Now, this recipe is the one I make every single weekend, and I genuinely look forward to it.
The base here is whole wheat flour, eggs, a touch of pure maple syrup, and a little Greek yogurt for extra protein and moisture. It’s the combination I kept coming back to after testing oat-only batters, banana-based versions, and everything in between.
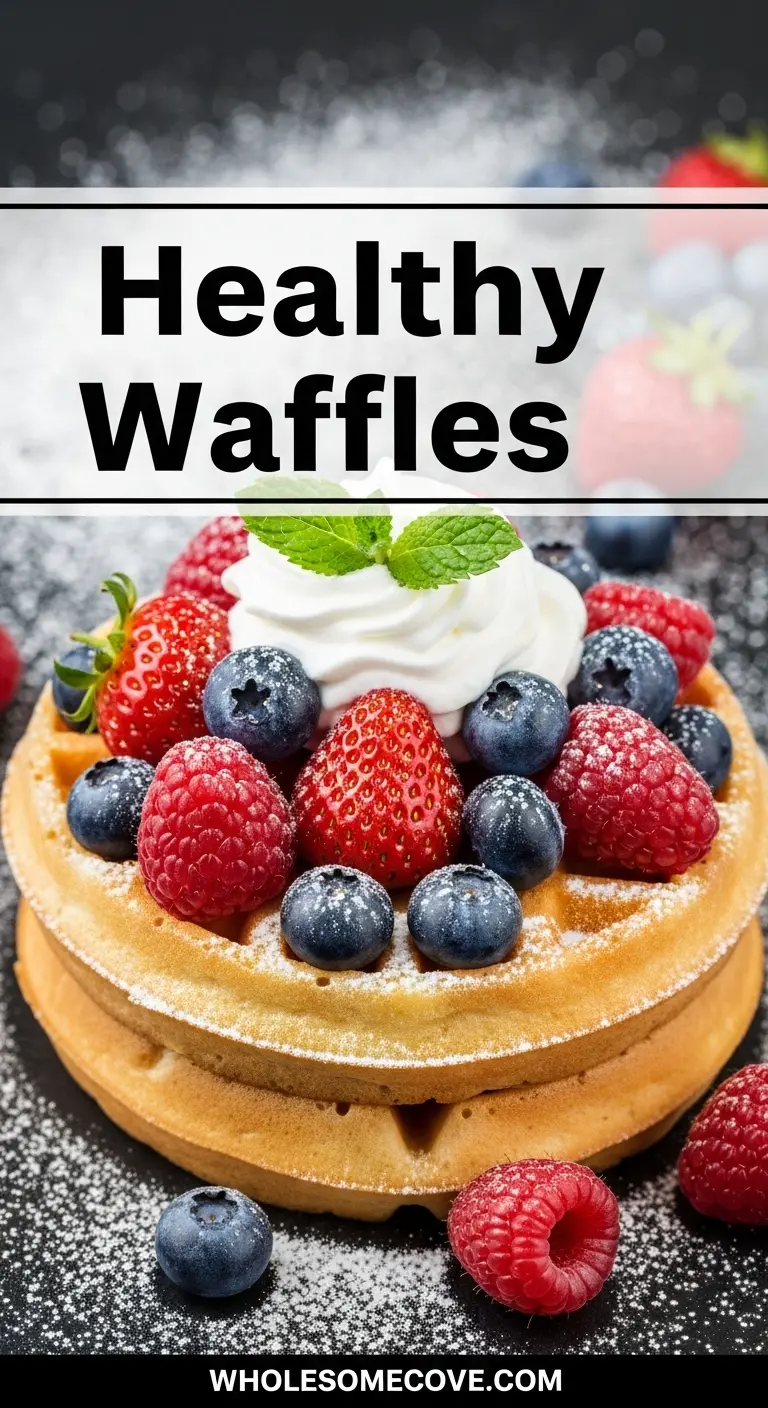
These waffles are crispy on the outside, tender on the inside, and wholesome enough to feel good about eating. They freeze beautifully too, which means a big Sunday batch carries me through the whole week.
| Quick Recipe Summary | |
|---|---|
| Prep Time | 10 minutes |
| Cook Time | 20 minutes |
| Total Time | 30 minutes |
| Servings | 6 waffles |
| Difficulty Level | Easy |
If you love classic breakfast bakes, my Waffle Recipe is also worth bookmarking for when you want the full indulgent version.

Why You’ll Love This Healthy Waffle Recipe
This healthy waffle recipe fits into real life, not just an idealized meal-prep fantasy. You can have it on the table in 30 minutes, even on a groggy weekday morning.
It uses whole wheat flour instead of refined white flour, which means more fiber, more nutrients, and a genuinely hearty bite. Greek yogurt sneaks in extra protein without changing the texture in any noticeable way.
The natural sweetness comes entirely from maple syrup and a touch of vanilla. You won’t miss the refined sugar at all, I promise.
These waffles are also incredibly versatile. Load them up with fresh berries and a drizzle of honey, or go savory with a fried egg and hot sauce on top.
They freeze like a dream. Pull one out, pop it in the toaster, and you have a hot, crispy waffle in two minutes flat.
Kids love them too. Mine have never once complained that these taste “healthy.”
Read Also: Protein Waffle Recipe
Ingredients
Keeping this ingredient list short was a priority. Everything here earns its place in the batter and nothing is just filler.
- 1 ½ cups (180g) whole wheat flour
- 2 teaspoons baking powder
- ½ teaspoon fine salt
- 1 teaspoon ground cinnamon
- 2 large eggs
- 1 cup (240ml) milk (any kind works; I use whole milk)
- ½ cup (120g) plain Greek yogurt
- 3 tablespoons pure maple syrup
- 2 tablespoons melted coconut oil or unsalted butter
- 1 teaspoon pure vanilla extract
- Cooking spray or additional oil for greasing the iron
You might also enjoy: Buttermilk Waffle Recipe
Kitchen Equipment Needed
You don’t need anything fancy here. A decent waffle iron is the one piece of equipment that actually matters for the final texture.
- Waffle iron (standard or Belgian style both work)
- Two mixing bowls (one large, one medium)
- Whisk
- Silicone spatula
- Measuring cups and spoons
- Kitchen scale (optional but helpful for accuracy)
- Ladle or ¼-cup measuring cup for pouring batter
- Wire cooling rack
- Baking sheet (for keeping finished waffles warm in the oven)
Read Also: Sourdough Waffle Recipe
Recommended Products for This Recipe
These are tools and ingredients I personally use and trust. They genuinely make a difference when it comes to getting the best results from this healthy waffle recipe.
1. Cuisinart Belgian Waffle Maker
A good waffle iron is the single biggest factor in whether your waffles come out crispy or soggy. I’ve been using this Cuisinart model for years because it heats evenly and produces deep pockets that hold toppings perfectly. The indicator light tells you exactly when it’s ready, which takes all the guesswork out of timing.
2. Bob’s Red Mill Whole Wheat Flour
Not all whole wheat flours are created equal. Bob’s Red Mill stone-ground version has a finer texture that keeps the waffles light and tender rather than dense and gummy. It’s the brand I always reach for when I want whole grain baked goods that actually taste good.
3. Organic Pure Maple Syrup
Using real, pure maple syrup in the batter (and on top) makes a noticeable difference. It has a depth of flavor that processed pancake syrups can’t match, and it comes with trace minerals your body actually uses. Go for Grade A Dark for the boldest flavor.
4. OXO Good Grips Silicone Ladle
Pouring batter cleanly into a hot waffle iron sounds simple until you’re dripping it all over the countertop. This silicone ladle makes it easy to pour just the right amount every time. The flexible tip lets you scrape every last drop of batter out of the bowl too.
Another favorite: Vegan Waffle Recipe

Step-by-Step Instructions: How to Make Healthy Waffles
1. Preheat Your Waffle Iron
- Turn on your waffle iron and set it to medium-high heat, or the highest setting if it only has one option.
- Allow it to fully preheat for at least 5 minutes before adding any batter. A properly heated iron is what creates that crispy exterior.
- If your iron has an indicator light, wait until it signals that it is ready before you begin pouring batter in.
- Do not skip the preheating step. Adding batter to a cold or lukewarm iron is the most common reason waffles come out soggy and soft.
2. Mix the Dry Ingredients
- Add the whole wheat flour (1 ½ cups / 180g) to a large mixing bowl.
- Add the baking powder (2 teaspoons), fine salt (½ teaspoon), and ground cinnamon (1 teaspoon) directly to the bowl with the flour.
- Whisk the dry ingredients together until they are evenly combined. This takes about 20 to 30 seconds of brisk whisking.
- Make sure there are no lumps or pockets of baking powder hiding at the bottom of the bowl. Uneven distribution can cause waffles to rise unevenly or taste bitter in spots.
3. Whisk the Wet Ingredients
- Crack the 2 large eggs into a medium mixing bowl and beat them lightly with a whisk until the yolks and whites are fully combined.
- Add the milk (1 cup / 240ml), plain Greek yogurt (½ cup / 120g), pure maple syrup (3 tablespoons), melted coconut oil (2 tablespoons), and vanilla extract (1 teaspoon) to the bowl with the eggs.
- Whisk everything together until the mixture is smooth and uniform. The Greek yogurt may take an extra moment to fully incorporate, so whisk vigorously until no streaks of yogurt remain.
- Make sure your coconut oil is fully melted and slightly cooled before adding it. If it is too hot, it can scramble the eggs slightly.
4. Combine Wet and Dry Ingredients
- Pour the wet ingredient mixture into the bowl of dry ingredients all at once.
- Use a silicone spatula or a large spoon to gently fold and stir everything together until just combined. This should take no more than 10 to 15 folds.
- Stop mixing as soon as you no longer see streaks of dry flour. It is okay if the batter looks slightly lumpy; those lumps will smooth out as the waffles cook.
- Do not overmix. Overmixing activates the gluten in the whole wheat flour and produces waffles that are tough and chewy rather than light and tender.
5. Rest the Batter
- Set the bowl of batter aside and let it rest for 5 minutes while your waffle iron finishes preheating.
- This resting period allows the whole wheat flour to fully absorb the liquid, which thickens the batter slightly and improves the final texture of the waffles.
- You may notice the batter thickens a little during this time. That is completely normal and a sign the recipe is working as intended.
- If after resting the batter looks extremely thick and hard to pour, stir in an additional tablespoon or two of milk to loosen it.
6. Grease the Waffle Iron and Add Batter
- Lightly spray the top and bottom plates of your preheated waffle iron with cooking spray, or brush them with a small amount of melted coconut oil using a pastry brush.
- If your waffle iron has a nonstick coating in good condition, you may not need to grease it at all. Excess oil can cause a buildup on nonstick surfaces over time.
- Use a ladle or a ¼-cup measuring cup (60ml) to pour batter onto the center of the lower waffle plate. For Belgian-style irons, you may need slightly more batter, around ⅓ cup (80ml), to fill the deeper pockets.
- Avoid overfilling the iron. The batter will spread outward as you close the lid, and overfilling causes it to spill over the edges and make a mess.
7. Cook the Waffles
- Close the lid of the waffle iron firmly and allow the waffle to cook undisturbed for 4 to 5 minutes.
- Resist the urge to open the iron early. Opening it before the waffle is ready will pull the waffle apart, since the batter is still setting.
- The waffle is done when steam stops billowing from the sides of the iron and the indicator light signals it is ready. If your iron has no indicator light, wait until the steam stops, then carefully lift the lid.
- The finished waffle should be deep golden brown and firm to the touch. If it looks pale or feels soft, close the iron and cook for another 1 to 2 minutes.
8. Keep Waffles Warm and Repeat
- Transfer the finished waffle to a wire cooling rack set over a baking sheet. Do not stack waffles on top of each other, as that traps steam and makes them soggy.
- To keep finished waffles warm while you cook the rest, place the baking sheet in an oven preheated to 200°F (93°C). They will stay crispy and warm for up to 30 minutes.
- Repeat the greasing, pouring, and cooking process with the remaining batter. This recipe makes approximately 6 standard waffles, or 4 larger Belgian-style waffles.
- Serve immediately with your favorite toppings.
I found an early mistake I kept making was opening the waffle iron too soon out of impatience. Once I started waiting for the steam to stop, the waffles came out a completely different level of crispy.
My Belgian Waffle Recipe uses a similar technique, and the patience is absolutely worth it.

Tips for The Best Healthy Waffles
These small details make a bigger difference than you might expect. I learned most of them the hard way.
- Do not overmix the batter. Stir only until the dry flour disappears. Over-stirring develops gluten and leads to dense, chewy waffles instead of light, tender ones.
- Let the batter rest. Even five minutes of resting allows the whole wheat flour to hydrate properly, which produces a noticeably better texture.
- Preheat your iron fully. A properly hot iron creates a crispy crust immediately on contact. A lukewarm iron steams the waffle instead of crisping it.
- Use room-temperature ingredients. Cold milk and cold eggs straight from the fridge can cause the melted coconut oil to solidify and create small clumps in the batter. Let them sit out for 10 minutes first.
- Do not peek too early. Opening the lid before the waffle sets is the fastest way to ruin one. Wait for the steam to stop before checking.
- Cook them a little longer than you think. Whole wheat flour takes slightly longer to cook through than white flour. An extra 30 to 60 seconds at the end makes a noticeable difference in texture.
- Keep finished waffles on a rack, not a plate. Stacking waffles traps steam under them and turns the bottoms soggy almost immediately. A wire rack lets air circulate all around.
- Adjust the batter consistency if needed. If the batter is too thick to pour easily, add milk one tablespoon at a time. If it is too thin, add a tablespoon of flour.
- Use good maple syrup. The quality of your maple syrup directly affects the flavor of the batter. Pure grade A or B maple syrup tastes completely different from imitation pancake syrup.
- Measure flour correctly. Spoon the flour into your measuring cup and level it off rather than scooping directly from the bag. Scooping packs in too much flour and makes the batter thick and dry.
You might also enjoy: Pumpkin Waffle Recipe
What to Serve with Healthy Waffles

A great waffle is only as good as its supporting cast. These pairings turn a solid breakfast into something you actually look forward to all week.
The simplest approach is always a drizzle of pure maple syrup and a handful of fresh berries. It takes 30 seconds and never disappoints.
- Fresh fruit such as sliced strawberries, blueberries, raspberries, or banana slices adds natural sweetness and color without any added sugar.
- Greek yogurt spooned on top instead of syrup adds extra protein and a pleasantly tangy contrast to the slightly sweet waffle.
- Nut butter such as almond butter or peanut butter drizzled over the top adds healthy fat and keeps you full for hours.
- Strawberry Sauce made at home takes only a few minutes and tastes completely different from the bottled version.
- Honey Butter melted slightly and spread on a warm waffle is one of the simplest and most satisfying toppings there is.
- Scrambled Eggs with Cheese served alongside make this a complete, protein-rich breakfast that keeps you going until lunch.
- Crispy bacon or turkey sausage for a classic sweet-and-savory combo that never goes out of style.
- Easy Healthy Homemade Granola sprinkled on top for crunch adds texture and a satisfying nuttiness.
- Sliced avocado and a poached egg on top for a savory take that feels more like brunch than breakfast.
- A dusting of powdered sugar and a squeeze of lemon for something that feels a little more special without adding much sugar at all.
Read Also: French Toast Recipe
Variations of Healthy Waffles
Once you have the base recipe down, it is very easy to customize. These are the versions I keep returning to.
- Banana Oat Waffles: Replace ½ cup of the whole wheat flour with rolled oats blended into a fine flour, and mash one very ripe banana into the wet ingredients. The banana adds natural sweetness and a softer crumb.
- Blueberry Waffles: Fold ½ cup (75g) of fresh or frozen blueberries into the finished batter just before cooking. Fresh blueberries hold their shape better; frozen ones release more juice and tint the batter a pale purple.
- Chocolate Chip Healthy Waffles: Stir 3 tablespoons of mini dark chocolate chips into the batter after mixing. Mini chips distribute more evenly than regular-sized ones and melt more smoothly in the finished waffle.
- Cinnamon Apple Waffles: Add ½ teaspoon of nutmeg to the dry ingredients and fold ½ cup of finely diced, peeled apple into the batter. Serve with warm cinnamon applesauce on top.
- Lemon Poppy Seed Waffles: Add 1 tablespoon of lemon zest and 1 tablespoon of poppy seeds to the batter. Serve with a light drizzle of honey and a spoonful of Greek yogurt.
- Peanut Butter Waffles: Replace the coconut oil with 2 tablespoons of natural peanut butter whisked into the wet ingredients until smooth. The flavor is subtle but unmistakably nutty.
- Gluten-Free Version: Substitute the whole wheat flour with a certified gluten-free oat flour at a 1:1 ratio. The texture will be slightly denser but still delicious.
- Dairy-Free Version: Use almond milk or oat milk in place of regular milk, and substitute the Greek yogurt with an equal amount of full-fat coconut yogurt. Use coconut oil in place of butter.
Another favorite: Mochi Waffle Recipe
Storage and Reheating
These waffles store extremely well, which is one of the main reasons I make a double batch every single time I make them.
- Refrigerator: Once the waffles have cooled completely to room temperature, stack them with a small piece of parchment paper between each waffle to prevent sticking. Store them in an airtight container or zip-top bag in the refrigerator for up to 5 days.
- Freezer: Lay the cooled waffles in a single layer on a baking sheet and freeze for 1 to 2 hours until solid. Transfer them to a freezer-safe zip-top bag, removing as much air as possible. Frozen waffles keep well for up to 3 months.
- Reheating in the toaster: This is the best method for restoring crispiness. Toast frozen waffles straight from the freezer on a medium-high setting. Refrigerated waffles usually need just one cycle.
- Reheating in the oven: Place waffles in a single layer on a baking sheet and bake at 350°F (175°C) for 8 to 10 minutes. This method works especially well when reheating multiple waffles at once.
- Reheating in the microwave: This is the fastest but least crispy method. Microwave on high for 30 to 60 seconds. The waffle will be hot and soft but not crispy. Best used when you are in a real hurry.
- Do not reheat stacked waffles. Always reheat them in a single layer so steam can escape rather than softening the exterior.
You might also enjoy: Baked Oatmeal Recipe
Nutritional Facts
The following values are estimates based on one standard waffle made with whole milk and coconut oil, with no toppings added. Exact values will vary based on specific brands and substitutions used.
| Nutrient | Per Waffle (approx.) | ||| | Calories | 215 kcal | | Carbohydrates | 30g | | Protein | 8g | | Fat | 7g | | Saturated Fat | 4g | | Fiber | 3g | | Sugar | 7g | | Sodium | 220mg | | Calcium | 120mg | | Iron | 1.5mg |
The high fiber content from whole wheat flour and the protein from eggs and Greek yogurt set this recipe apart from standard waffle recipes. This is a breakfast that actually keeps you full.
Another favorite: Healthy Crepe Recipe
Health Benefits of Key Ingredients
Every ingredient in this recipe was chosen with nutrition in mind, not just flavor. Swapping refined flour for whole wheat and adding Greek yogurt changes the entire nutritional profile of a classic breakfast.
- Whole Wheat Flour is significantly higher in fiber, B vitamins, and minerals like magnesium and iron compared to refined white flour. The fiber content helps regulate blood sugar and keeps you feeling full for longer after eating.
- Greek Yogurt contributes a meaningful amount of protein to each waffle without adding a noticeable taste. It also contains live active cultures that support gut health.
- Eggs provide complete protein, meaning they contain all nine essential amino acids. They also supply choline, a nutrient important for brain function that many people do not get enough of.
- Pure Maple Syrup contains trace amounts of zinc and manganese and has a lower glycemic index than refined white sugar. Using a naturally sweet ingredient means you can use less overall sweetener.
- Coconut Oil contains medium-chain triglycerides, a type of fat that the body processes differently from long-chain fats found in most oils. It adds a subtle richness to the batter without a strong flavor.
- Cinnamon has been studied for its ability to help moderate blood sugar levels, making it a genuinely useful addition to a breakfast recipe rather than just a flavoring.
- Milk provides calcium and vitamin D when fortified, both of which are important for bone health. It also adds moisture and richness to the batter that water simply cannot replicate.
Read Also: Healthy Banana Bread Recipe
FAQs About Healthy Waffles
1. Can I make this healthy waffle recipe without a waffle iron?
You can cook this batter in a nonstick skillet over medium heat like a pancake. You won’t get the classic waffle shape or crispy pockets, but the flavor will be identical.
2. Can I use all-purpose flour instead of whole wheat flour?
Yes, and the waffles will be lighter in color and slightly less dense. The swap is 1:1, though you may need slightly less milk since whole wheat flour absorbs more liquid.
3. How do I know when the waffle is done cooking?
The clearest sign is that the steam from the sides of the iron has slowed dramatically or stopped entirely. Opening the iron before the steam stops almost always results in a torn waffle.
4. Can I make the batter the night before?
You can mix the dry ingredients and wet ingredients in separate bowls and refrigerate the wet mixture overnight. Combine them in the morning and let the batter rest 5 minutes before cooking. Do not store mixed batter for more than a few hours as the baking powder loses potency.
5. Why are my waffles coming out soggy?
Soggy waffles are almost always caused by one of three things: the waffle iron was not hot enough when the batter went in, the waffles were stacked on top of each other right after cooking, or they were removed from the iron too early. Addressing any of these three issues usually solves the problem completely.
Read Also: Easy Pancake Recipe

Healthy Waffles
Ingredients
- 1 1/2 cups whole wheat flour - 180g; spooned and leveled, not scooped
- 2 tsp baking powder
- 1/2 tsp fine salt
- 1 tsp ground cinnamon
- 2 large eggs - room temperature preferred
- 1 cup milk - 240ml; any kind works, whole milk recommended; room temperature preferred
- 1/2 cup plain Greek yogurt - 120g; full-fat or low-fat both work
- 3 tbsp pure maple syrup - Grade A Dark recommended for best flavor
- 2 tbsp coconut oil - melted and slightly cooled; or unsalted butter
- 1 tsp pure vanilla extract
- cooking spray - or additional melted coconut oil for greasing the iron
- pure maple syrup - for drizzling on top
- fresh berries - strawberries, blueberries, or raspberries
- Greek yogurt - for topping
- nut butter - almond butter or peanut butter, for drizzling
Equipment
- Waffle iron - Standard or Belgian style both work
- Large mixing bowl - For dry ingredients
- Medium mixing bowl - For wet ingredients
- Whisk
- Silicone spatula - For folding batter and scraping bowls
- Measuring cups and spoons
- Kitchen scale - (optional) For more accurate measurements
- Ladle or quarter-cup measuring cup - For pouring batter evenly into the iron
- Wire cooling rack - Keeps finished waffles crispy while you cook the rest
- Baking sheet - For keeping finished waffles warm in the oven
Method
- Turn on your waffle iron and set it to medium-high heat. Allow it to fully preheat for at least 5 minutes before adding batter — a properly heated iron is what creates a crispy exterior.
- Add the whole wheat flour, baking powder, salt, and cinnamon to a large mixing bowl. Whisk together for 20 to 30 seconds until evenly combined with no pockets of baking powder remaining.
- In a medium bowl, beat the eggs until combined, then add the milk, Greek yogurt, maple syrup, melted coconut oil, and vanilla extract. Whisk vigorously until smooth with no streaks of yogurt remaining.
- Pour the wet mixture into the dry ingredients and fold together with a silicone spatula until just combined, about 10 to 15 folds. Stop as soon as no dry flour is visible — a few lumps are fine, and overmixing leads to tough waffles.
- Set the batter aside for 5 minutes while the waffle iron finishes preheating. This allows the whole wheat flour to fully hydrate and improves the final texture.
- Lightly spray the waffle iron plates with cooking spray or brush with melted coconut oil, then pour about ¼ cup (60ml) of batter per standard waffle, or ⅓ cup (80ml) for Belgian-style irons. Avoid overfilling to prevent spillover.
- Close the lid and cook undisturbed for 4 to 5 minutes, until steam stops coming from the sides and the waffle is deep golden brown and firm. Do not open the iron early or the waffle may tear.
- Transfer each finished waffle to a wire rack set over a baking sheet and keep warm in a 200°F (93°C) oven. Repeat with remaining batter to make approximately 6 standard or 4 Belgian-style waffles, then serve with your favorite toppings.
Nutrition
Notes
- Do not overmix the batter. Stir only until the dry flour disappears — overmixing develops gluten and produces dense, chewy waffles.
- Always let the batter rest for 5 minutes before cooking. This allows the whole wheat flour to fully absorb the liquid for better texture.
- Wait for steam to stop before opening the iron. This is the most reliable sign that the waffle is fully set and ready to release cleanly.
- Use room-temperature milk and eggs. Cold dairy can cause the melted coconut oil to solidify and form lumps in the batter.
- If the batter thickens too much after resting, stir in 1 to 2 tablespoons of extra milk to loosen it before cooking.
- Never stack cooked waffles directly on top of each other. Always cool on a wire rack to keep them crispy on both sides.
- To freeze: cool completely, freeze in a single layer on a baking sheet for 1 to 2 hours, then transfer to a freezer bag. Keeps for up to 3 months. Reheat straight from frozen in a toaster for best crispiness.
- To substitute: swap whole wheat flour 1:1 with certified gluten-free oat flour for a gluten-free version. Use coconut yogurt and plant-based milk for a dairy-free version.
- For extra protein, add 2 tablespoons of your favorite unflavored or vanilla protein powder to the dry ingredients and increase milk by 2 tablespoons to compensate.
- Leftover waffles keep in an airtight container in the refrigerator for up to 5 days. Reheat in a toaster or 350°F (175°C) oven for 8 to 10 minutes to restore crispiness.
Private Notes
Tried this recipe?
Let us know how it was!Final Thoughts
This healthy waffle recipe has genuinely changed the way I think about weekend breakfast. It proves that eating well does not have to mean eating something that tastes like a compromise.
The crispy edges, the tender center, the warm hint of cinnamon and maple syrup. All of it comes together in about 30 minutes with ingredients you likely already have in your kitchen.
I hope this becomes a regular part of your breakfast rotation. Give it a try this weekend and let me know in the comments how yours turned out.
If you topped yours with something unexpected or made any fun variations, I would absolutely love to hear about it. Share this recipe with someone who could use a better morning.
Recommended:
- Belgian Waffle Recipe
- Air Fryer Pancake Recipe
- Overnight Oats Recipe
- Best Overnight Oats Recipes
- Healthy Cornbread Recipe
- Healthy Chocolate Chip Cookies Recipe
- Caramel Sauce Recipe
- Scrambled Eggs with Cottage Cheese Recipe
- Air Fryer French Toast Recipe
- Healthy Egg Salad Recipe