
I’ll never forget the first time I tried to make cheese sauce from scratch.
It was for a family dinner, and I thought, “How hard could it be?” I melted some cheese, added milk, and ended up with a grainy, separated mess that looked more like curdled disaster than anything edible. My kids took one look and asked if we could just order pizza instead.
That embarrassing moment sent me on a mission to master the perfect cheese sauce recipe. After countless attempts, burned pans, and way too many batches that turned into clumps, I finally cracked the code.
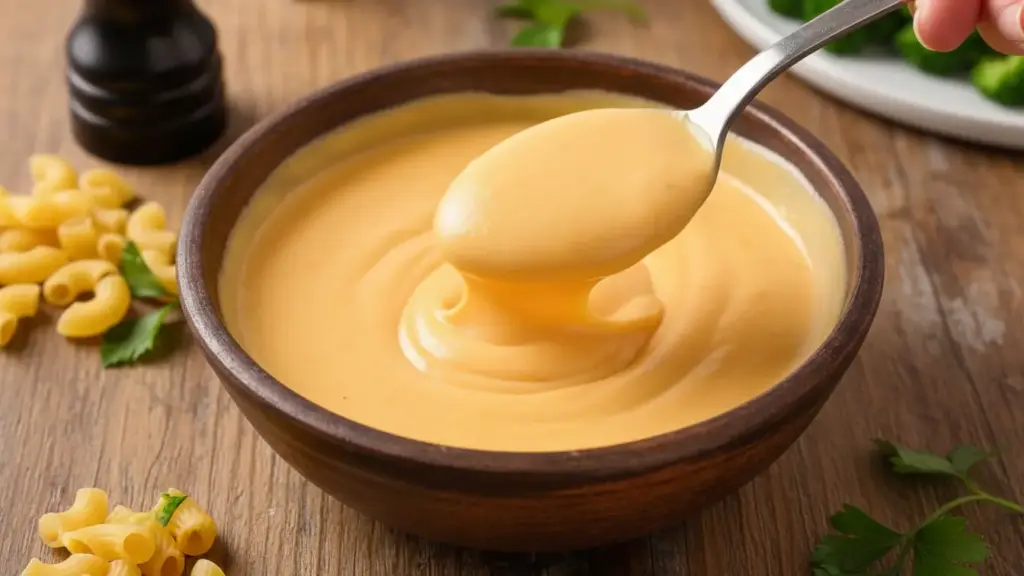
The secret? It’s all about the roux, the temperature, and adding the cheese gradually. Now, this silky smooth cheese sauce is my go-to for everything from mac and cheese to loaded nachos.
This recipe creates a velvety, restaurant-quality sauce that clings beautifully to pasta, vegetables, or whatever you’re craving. It takes just minutes to whip up, uses simple ingredients you probably already have, and never separates or gets grainy.
| Quick Recipe Summary | |
|---|---|
| Prep Time | 5 minutes |
| Cook Time | 10 minutes |
| Total Time | 15 minutes |
| Servings | 4 cups |
| Difficulty Level | Easy |

Why You’ll Love This Cheese Sauce Recipe
This isn’t just any cheese sauce. It’s the kind that makes people ask for seconds and beg for the recipe.
The texture is impossibly smooth and creamy, without any of that grainy or separated texture that plagues so many homemade versions. Once you master this basic technique, you’ll find yourself making it for everything from weeknight dinners to holiday gatherings.
- Foolproof method: The roux-based technique ensures your sauce stays silky smooth every single time, even if you’re a complete beginner
- Ready in 15 minutes: From start to finish, you’ll have hot, creamy cheese sauce ready faster than you can boil pasta
- Incredibly versatile: Use it as a base for mac and cheese, pour it over steamed broccoli, drizzle it on nachos, or mix it into casseroles
- Budget-friendly: Made with basic pantry staples and just a few dollars worth of cheese, this beats store-bought sauce any day
- Customizable flavor: Start with this classic recipe, then add your favorite seasonings, spices, or mix in different cheese varieties
This has become such a staple in my house that I sometimes make a double batch just to have extra in the fridge. My kids will literally eat vegetables if I promise to smother them in this sauce.
For another creamy favorite, check out my Healthy Alfredo Sauce.
Ingredients
Getting the right ingredients is half the battle when making perfect cheese sauce. I’ve learned through trial and error that quality matters here, especially when it comes to the cheese.
- 3 tablespoons (42g) unsalted butter: Forms the base of your roux and adds richness
- 3 tablespoons (24g) all-purpose flour: Thickens the sauce and prevents separation
- 2 cups (480ml) whole milk: Creates that creamy, smooth texture; don’t substitute with skim or you’ll get a thin, watery sauce
- 1 cup (240ml) heavy cream: Adds extra richness and helps the cheese melt smoothly
- 3 cups (340g) sharp cheddar cheese, freshly grated: The star of the show; pre-shredded cheese has anti-caking agents that prevent smooth melting
- 1/2 teaspoon (3g) salt: Enhances all the flavors
- 1/4 teaspoon (0.5g) black pepper: Adds a subtle kick
- 1/4 teaspoon (0.5g) garlic powder: Provides depth without overpowering the cheese
- 1/4 teaspoon (0.5g) paprika: Gives a hint of color and mild smokiness
- 1/8 teaspoon (pinch) cayenne pepper (optional): For those who like a little heat
- 1/2 teaspoon (2.5ml) Dijon mustard: My secret ingredient that adds tanginess and helps emulsify the sauce
Kitchen Equipment Needed
Having the right tools makes this recipe so much easier. Here’s what I always reach for when making cheese sauce.
- Medium-sized heavy-bottomed saucepan: Distributes heat evenly and prevents hot spots that can burn your roux
- Whisk: Essential for creating a smooth roux and preventing lumps
- Box grater or food processor: For grating your own cheese, which melts so much better than pre-shredded
- Wooden spoon or silicone spatula: For stirring in the cheese
- Measuring cups and spoons: Accuracy matters in sauce-making
- Instant-read thermometer (optional): Helps ensure you don’t overheat the sauce
Recommended Products for This Recipe
After making this cheese sauce hundreds of times, I’ve found a few products that genuinely make a difference in the final result. These aren’t necessary, but they’ll definitely upgrade your sauce game.
1. Tillamook Extra Sharp Cheddar Cheese
This is hands-down my favorite cheese for making cheese sauce. The extra sharp variety has incredible flavor that shines through even after being melted, and Tillamook’s cheese melts like a dream with no graininess. I always grate my own from a block rather than buying pre-shredded.
2. All-Clad Stainless Steel Saucepan
I resisted buying an expensive saucepan for years, but this one completely changed my sauce-making game. The heavy bottom distributes heat so evenly that I’ve never once burned a roux since I started using it. It’s truly a lifetime investment.
3. OXO Good Grips Box Grater
Freshly grated cheese is non-negotiable for smooth cheese sauce, and this grater makes quick work of it. The non-slip base keeps it stable while you’re grating, and it’s sturdy enough to handle even hard, aged cheeses.
4. Organic Valley Heavy Whipping Cream
Not all heavy cream is created equal. This organic version has a higher fat content and richer flavor that makes your cheese sauce taste restaurant-quality. It’s worth the extra dollar or two.
You might also enjoy: Easy Alfredo Sauce

Step-by-Step Instructions: How to Make Cheese Sauce
Follow these detailed steps and you’ll have perfect cheese sauce every single time. I’ve broken down each step so even complete beginners can master this.
1. Prepare Your Ingredients
- Grate your cheese using the large holes of a box grater and set it aside at room temperature
- Measure out all your other ingredients and have them within arm’s reach
- Let your butter sit out for about 10 minutes so it’s not ice cold
- Keep your milk and cream in the refrigerator until you’re ready to use them
Having everything prepped before you start cooking is crucial because once you begin making the roux, things move quickly and you won’t have time to hunt for ingredients.
2. Make the Roux
- Place your saucepan over medium heat and add the butter
- Allow the butter to melt completely, swirling the pan occasionally to coat the bottom evenly
- Once melted and foamy, sprinkle in the flour all at once
- Immediately begin whisking vigorously to combine the butter and flour into a smooth paste
- Continue cooking and whisking constantly for 2-3 minutes until the mixture turns a light golden color and smells slightly nutty
- The roux should bubble gently but not brown too much
This step is absolutely critical. The roux needs to cook long enough to eliminate that raw flour taste, but not so long that it browns too much. I learned this the hard way after making several batches that tasted like paste.
3. Add the Milk and Cream
- Reduce the heat to medium-low
- Pour in about 1/4 cup of the milk while whisking constantly
- The mixture will seize up and look lumpy at first, but keep whisking and it will smooth out
- Gradually add the remaining milk in a steady stream, whisking continuously
- Once all the milk is incorporated, add the heavy cream the same way
- Continue whisking until the mixture is completely smooth with no lumps
The key here is patience and constant whisking. Don’t dump all the liquid in at once, or you’ll end up with a lumpy mess that’s almost impossible to smooth out.
4. Season and Thicken the Base
- Add the salt, black pepper, garlic powder, paprika, cayenne (if using), and Dijon mustard
- Whisk everything together until well combined
- Increase the heat slightly to medium and bring the mixture to a gentle simmer
- Continue cooking and stirring frequently for 3-4 minutes until the sauce thickens enough to coat the back of a spoon
- You should be able to draw a line through the sauce on the spoon and have it stay separated
The sauce should be thick but still pourable at this stage. It will thicken more once you add the cheese.
Another favorite: Marinara Sauce
5. Add the Cheese
- Remove the saucepan from the heat completely
- Add the grated cheese in three separate additions, stirring well between each addition
- Use a wooden spoon or silicone spatula to stir gently but thoroughly
- Wait until the first batch of cheese is completely melted and incorporated before adding the next
- Continue until all the cheese is melted and the sauce is silky smooth
Never add cheese over direct heat or at too high a temperature. This is the number one mistake I see people make, and it causes the cheese to seize up and become grainy. Taking the pan off the heat ensures gentle melting.
6. Final Adjustments and Serve
- Return the pan to very low heat for just 30 seconds to warm through if needed
- Taste and adjust seasonings, adding more salt, pepper, or mustard as desired
- If the sauce is too thick, whisk in a tablespoon or two of warm milk until you reach your preferred consistency
- If it’s too thin, let it simmer very gently for another minute or two
- Serve immediately while hot for the best texture and flavor

Tips for The Best Cheese Sauce
After making this recipe more times than I can count, I’ve picked up some tricks that take it from good to absolutely incredible.
- Always grate your own cheese: Pre-shredded cheese contains anti-caking agents that prevent it from melting smoothly; block cheese gives you that silky texture you’re after
- Use full-fat dairy: Skim milk or low-fat cream just don’t cut it; the fat is essential for richness and proper emulsification
- Remove from heat before adding cheese: This is the most important tip; adding cheese over direct heat causes it to break and become grainy
- Add cheese gradually: Dumping all the cheese in at once can cause clumping; three additions ensures smooth incorporation
- Keep the heat low: High heat is the enemy of smooth cheese sauce; patience is your friend here
- Whisk constantly during roux-making: Lumps in the roux equal lumps in your final sauce, so don’t walk away from that whisk
- Don’t let it boil once cheese is added: Boiling cheese sauce causes separation; keep it at a gentle simmer or lower
- Use room temperature cheese: Cold cheese takes longer to melt and can cool your sauce too much, affecting texture
- Add a splash of wine: A tablespoon of white wine adds incredible depth; add it with the milk for adult-only versions
- Reheat gently: If you need to reheat, do so over very low heat, whisking constantly, and add a splash of milk to restore consistency
If you love creamy pasta sauces, try my Olive Garden Alfredo Sauce.
Serving Suggestions
This cheese sauce is ridiculously versatile. Here are my favorite ways to use it, plus what I’ve learned about pairing it with different foods.
Once you have a batch of this sauce ready, the possibilities are endless. I keep a list on my fridge of all the ways we’ve used it.
- Classic mac and cheese: Toss with cooked pasta (shells, elbows, or cavatappi work beautifully) and bake for 15 minutes
- Vegetable topping: Pour over steamed Roasted Brussels Sprouts with Bacon, cauliflower, or asparagus to get kids to actually eat their veggies
- Loaded nachos: Drizzle over tortilla chips with jalapeños, black beans, and all your favorite toppings
- Baked potato bar: Set up a DIY potato bar with this sauce as the star topping alongside bacon bits and chives
- Breakfast enhancement: Pour over scrambled eggs or French Toast for an indulgent weekend brunch
- Casserole base: Use it as the creamy component in chicken and rice casseroles or Green Bean Casserole
- Dipping sauce: Serve alongside soft pretzels, breadsticks, or Pigs in a Blanket
- Burger topping: Spoon over burgers for a gourmet twist that beats any fast-food version
- Sandwich spread: Use it in place of regular cheese on grilled cheese sandwiches for next-level melty goodness
Variations of Cheese Sauce
The beauty of this base recipe is how easily you can customize it. Here are variations I make regularly depending on what I’m craving or what I have on hand.
- Extra sharp variation: Replace half the cheddar with Gruyère cheese for a more sophisticated, nutty flavor that’s perfect for grown-up mac and cheese
- Jalapeño popper sauce: Stir in 2-3 tablespoons of diced pickled jalapeños and 1/4 cup cream cheese at the end for a spicy, tangy version
- Beer cheese sauce: Replace 1/2 cup of the milk with your favorite beer (I love a good IPA) for a pub-style sauce that’s fantastic with pretzels
- Smoked cheese sauce: Use smoked cheddar or gouda instead of regular cheddar for a barbecue-friendly version
- Bacon cheese sauce: Cook 4-5 strips of bacon, crumble them, and fold into the finished sauce along with a tablespoon of bacon grease
- Herb-infused sauce: Add 1 teaspoon each of fresh thyme and rosemary for an elegant variation perfect for holiday sides
- Mexican-style cheese sauce: Add 1 teaspoon cumin, 1/2 teaspoon chili powder, and a handful of pepper jack cheese
- Blue cheese variation: Replace 1 cup of cheddar with crumbled blue cheese for a bold sauce that’s incredible on steaks
- Truffle cheese sauce: Stir in 1 teaspoon truffle oil at the very end for an upscale touch
- Vegan version: Use vegan butter, plant-based milk, and nutritional yeast with vegan cheese for a dairy-free alternative
For more sauce inspiration, check out my Buffalo Sauce.
Storage and Reheating
Proper storage is essential for maintaining that silky texture when you want to use leftover cheese sauce.
I almost always make extra because having cheese sauce in the fridge is like having liquid gold ready to transform any meal.
- Refrigerator storage: Transfer cooled sauce to an airtight container and refrigerate for up to 5 days; it will thicken considerably as it cools
- Freezing: Pour into freezer-safe containers or zip-top bags (leave some room for expansion), freeze for up to 3 months
- Reheating from refrigerated: Place in a saucepan over low heat, whisking frequently and adding 2-3 tablespoons of milk to restore the consistency
- Reheating from frozen: Thaw overnight in the refrigerator first, then reheat as above; never reheat from frozen as this can cause separation
- Microwave method: Heat in 30-second intervals, stirring between each, and adding milk as needed; I don’t love this method as it’s easy to overheat
- Preventing skin formation: Press plastic wrap directly onto the surface of the sauce before refrigerating to prevent a skin from forming
- Emergency fixes: If reheated sauce looks separated or grainy, blend it with an immersion blender for 30 seconds to re-emulsify

Nutritional Facts
Here’s the approximate nutritional breakdown per 1/2 cup serving (based on the base recipe with sharp cheddar):
- Calories: 285
- Total Fat: 23g
- Saturated Fat: 14g
- Cholesterol: 70mg
- Sodium: 420mg
- Total Carbohydrates: 8g
- Dietary Fiber: 0g
- Sugars: 4g
- Protein: 11g
- Calcium: 280mg
- Vitamin A: 15% DV
- Vitamin D: 8% DV
Keep in mind that these numbers can vary based on the specific brands of cheese and dairy products you use. If you’re watching your intake, you can reduce the heavy cream and use more milk, though the texture won’t be quite as luxurious.
Try this with my Velveeta Mac and Cheese.
Health Benefits of Key Ingredients
While cheese sauce isn’t exactly a health food, the ingredients do offer some nutritional benefits worth noting.
I’m not going to pretend this is a superfood, but it’s not all bad either. Everything in moderation, right?
- Cheese: Excellent source of calcium for strong bones and teeth, provides high-quality protein for muscle maintenance, contains vitamin B12 which supports nervous system function, and offers conjugated linoleic acid which may have anti-cancer properties
- Milk: Rich in calcium and vitamin D for bone health, contains potassium which helps regulate blood pressure, provides protein and B vitamins, and the fat content helps your body absorb fat-soluble vitamins
- Butter: Contains vitamin A for eye health and immune function, provides vitamin K2 which is important for bone and heart health, includes conjugated linoleic acid, and contains butyrate which supports gut health
- Garlic powder: Has antimicrobial and antiviral properties, may help lower blood pressure and cholesterol, contains antioxidants that protect cells from damage, and supports immune system function
- Mustard: Contains selenium and magnesium, has anti-inflammatory properties, may help boost metabolism slightly, and provides omega-3 fatty acids
FAQs About Cheese Sauce
1. Why did my cheese sauce turn out grainy?
The most common cause is adding cheese while the base is too hot or over direct heat. Cheese proteins seize up when exposed to high temperatures, creating that grainy texture nobody wants. Always remove your pan from the heat before stirring in the cheese, and add it gradually while the sauce is warm but not boiling.
2. Can I use pre-shredded cheese?
You technically can, but I really don’t recommend it. Pre-shredded cheese is coated with cellulose (an anti-caking agent) that prevents the cheese from melting smoothly into your sauce. You’ll likely end up with a grainy or separated texture no matter how carefully you follow the recipe. Grating your own cheese from a block takes just an extra minute and makes a world of difference.
3. How do I fix separated or broken cheese sauce?
If your sauce has separated, remove it from heat immediately and whisk in 1-2 tablespoons of cold milk or cream. You can also try adding a teaspoon of cornstarch mixed with a tablespoon of cold milk, then whisking vigorously. If that doesn’t work, transfer the sauce to a blender and blend on high for 30 seconds to re-emulsify it.
4. Can I make this cheese sauce ahead of time?
Absolutely! Make it up to 2 days ahead and store it covered in the refrigerator. When you’re ready to use it, reheat very gently over low heat, whisking constantly and adding splashes of milk until it reaches your desired consistency. The sauce will thicken as it cools, so expect to add 1/4 to 1/2 cup of milk when reheating.
5. What’s the best cheese to use for cheese sauce?
Sharp or extra sharp cheddar is my go-to because it has bold flavor that doesn’t get lost when melted. However, you can use any good melting cheese like Gruyère, fontina, Monterey Jack, or a combination. Avoid using only hard cheeses like Parmesan, as they can make the sauce grainy. A blend of 70% cheddar and 30% Monterey Jack creates an incredibly smooth, flavorful sauce.
Read Also: Peanut Sauce
Homemade Cheese Sauce
Ingredients
- 3 tbsp unsalted butter - 42g; let sit at room temperature for 10 minutes before using
- 3 tbsp all-purpose flour - 24g
- 2 cups whole milk - 480ml; do not substitute skim or low-fat milk
- 1 cup heavy cream - 240ml
- 3 cups sharp cheddar cheese, freshly grated - 340g; grated from a block — do not use pre-shredded
- 1/2 tsp salt - 3g; adjust to taste
- 1/4 tsp black pepper - 0.5g
- 1/4 tsp garlic powder - 0.5g
- 1/4 tsp paprika - 0.5g
- 1/8 tsp cayenne pepper - pinch; optional, for added heat
- 1/2 tsp Dijon mustard - 2.5ml; adds tanginess and helps emulsify the sauce
Equipment
- Medium heavy-bottomed saucepan - Distributes heat evenly and prevents hot spots
- Whisk - Essential for smooth roux and lump-free sauce
- Box grater or food processor - For grating cheese from a block
- Wooden spoon or silicone spatula - For stirring in the cheese
- Measuring cups and spoons
- Instant-read thermometer - (optional) Helps ensure sauce doesn’t overheat
Method
- Grate the cheese using the large holes of a box grater and let it sit at room temperature. Measure out all remaining ingredients and have them within arm’s reach before you begin.
- Melt butter in a medium heavy-bottomed saucepan over medium heat, then add flour all at once and whisk vigorously for 2–3 minutes until the mixture is light golden and smells slightly nutty.
- Reduce heat to medium-low and pour in the milk ¼ cup at a time, whisking constantly after each addition until smooth, then add the heavy cream in a steady stream and whisk until fully combined.
- Add salt, pepper, garlic powder, paprika, cayenne (if using), and Dijon mustard, then increase heat slightly to medium and cook, stirring frequently, for 3–4 minutes until the sauce thickens enough to coat the back of a spoon.
- Remove the pan from heat completely and stir in the grated cheese in three separate additions, waiting until each batch is fully melted before adding the next, until the sauce is silky smooth.
- Return to very low heat for 30 seconds if needed to warm through, then taste and adjust seasoning; whisk in warm milk a tablespoon at a time if the sauce is too thick, and serve immediately.
Nutrition
Notes
- Always grate your own cheese: Pre-shredded cheese contains anti-caking agents that prevent smooth melting — block cheese is non-negotiable for a silky sauce.
- Remove from heat before adding cheese: This is the most critical step; adding cheese over direct heat causes it to seize up and turn grainy.
- Add cheese in three additions: Dumping it all in at once can cause clumping; gradual additions ensure smooth incorporation.
- Use full-fat dairy: Skim milk and low-fat cream don’t have enough fat for proper emulsification — the richness is essential to the texture.
- Don’t let it boil after cheese is added: Boiling will cause the sauce to break and separate; keep heat at a gentle simmer or lower.
- Fix a broken sauce: If the sauce separates, whisk in 1–2 tablespoons of cold milk or cream off the heat, or blend with an immersion blender for 30 seconds to re-emulsify.
- Make ahead: Store in an airtight container in the refrigerator for up to 5 days; reheat over very low heat, whisking constantly, with splashes of milk to restore consistency.
- Freezing: Pour into freezer-safe containers and freeze for up to 3 months; thaw overnight in the refrigerator before reheating — never reheat from frozen.
- Cheese variations: Substitute up to half the cheddar with Gruyère, Monterey Jack, fontina, or smoked gouda for different flavor profiles; avoid using only hard cheeses like Parmesan.
- Prevent skin formation: Press plastic wrap directly onto the surface of stored sauce to prevent a skin from forming in the refrigerator.
Private Notes
Tried this recipe?
Let us know how it was!Final Thoughts
There’s honestly nothing quite like homemade cheese sauce. Once you master this basic recipe, you’ll find yourself making it constantly and wondering why you ever bought the jarred stuff.
The best part? You probably have everything you need in your kitchen right now. No special ingredients, no fancy equipment, just good technique and a little patience. My family requests this sauce at least twice a week, and I never get tired of making it because it’s so quick and versatile.
Give this recipe a try and I promise you’ll be amazed at how restaurant-quality cheese sauce you can make at home. Drop a comment below and let me know how it turned out for you, or share your favorite way to use cheese sauce!
Recommended:
- Tzatziki Sauce
- Pizza Sauce
- Enchilada Sauce
- BBQ Sauce
- Teriyaki Sauce
- Spaghetti Sauce
- Yum Yum Sauce
- Cocktail Sauce

