
I learned to make tiramisu the hard way. After years of following recipes that called for whipped cream, I finally traveled to Rome and discovered my versions had been all wrong. A small café owner near the Trevi Fountain set me straight when I complimented her tiramisu and mentioned I made mine with heavy cream at home.
She looked horrified. “No cream!” she insisted, shaking her head. “Only mascarpone, eggs, and coffee.”
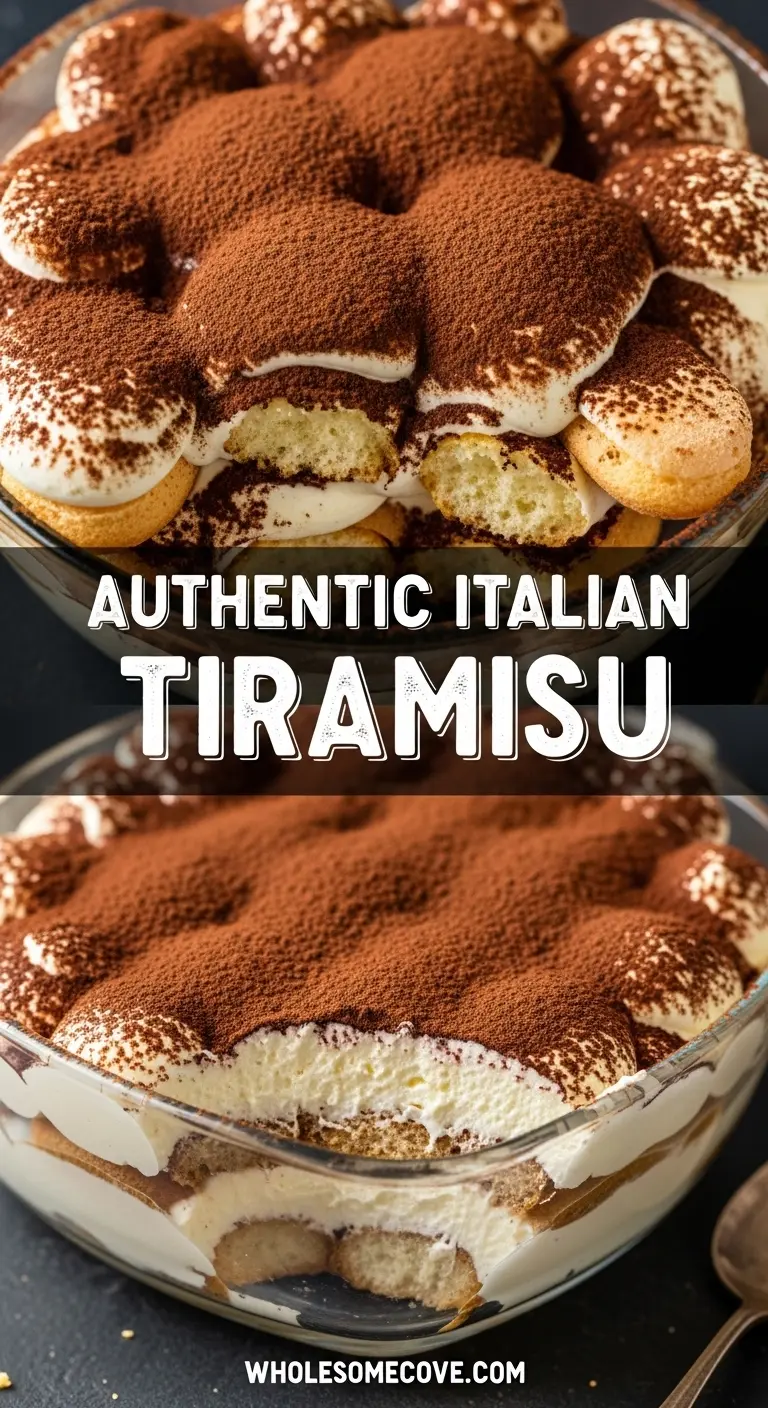
That conversation changed everything. Real Authentic Italian Tiramisu uses just a handful of ingredients, and when you make it the traditional way, the flavors shine through in a way that cream-based versions simply can’t match.
The name “tiramisu” literally means “pick me up” in Italian, referring to the energizing espresso that soaks into every layer. This no-bake dessert has become famous worldwide, but the authentic version remains surprisingly simple.
| Quick Recipe Summary | |
|---|---|
| Prep Time | 30 minutes |
| Chill Time | 4 hours |
| Total Time | 4 hours 30 minutes |
| Servings | 12 servings |
| Difficulty Level | Medium |
Why You’ll Love This Authentic Italian Tiramisu Recipe
This is the real deal, the way Italians have been making it for generations. No shortcuts, no heavy cream, just pure coffee-soaked bliss.
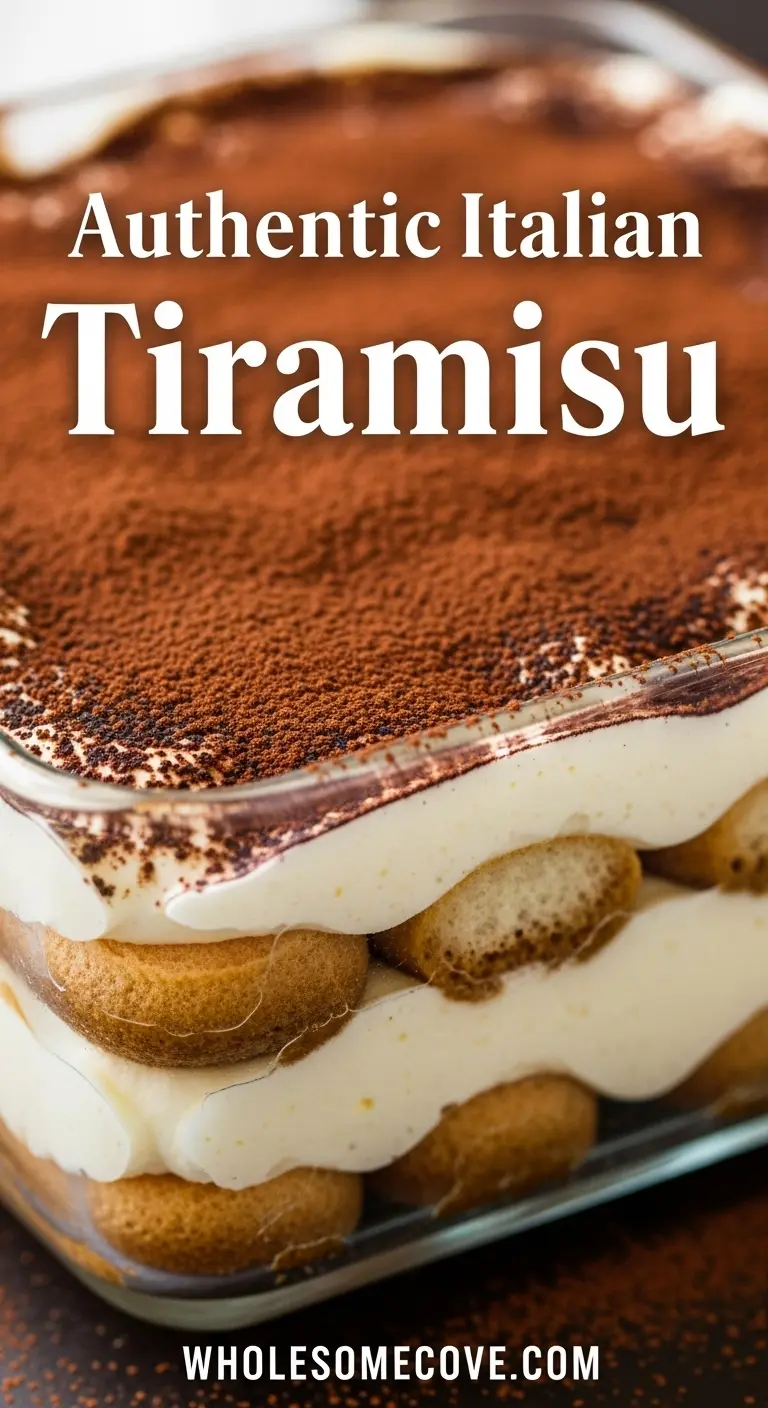
The texture is what sets authentic tiramisu apart. Light yet creamy, it melts on your tongue without feeling heavy or overly rich like cream-based versions.
Here’s what makes this recipe special:
- Authentic flavor profile: The balance between bitter espresso, sweet mascarpone, and cocoa creates layers of flavor that complement rather than overwhelm
- Perfect texture: Whipped egg whites provide airiness while mascarpone delivers richness without being cloying
- Traditional technique: Following centuries-old Italian methods ensures the best possible result
- Impressive presentation: This elegant dessert looks like you spent hours in the kitchen, yet it requires no baking
- Make-ahead friendly: It actually tastes better after chilling overnight, making it perfect for entertaining
Another favorite: Creme Brulee Recipe
Ingredients
To make authentic tiramisu exactly as they do in Italy, you’ll need fresh, high-quality ingredients. Don’t substitute or add anything beyond this list.
- 6 large egg yolks
- 3/4 cup (150g) granulated sugar, divided
- 1 1/3 cups (320g) mascarpone cheese, at room temperature
- 4 large egg whites
- 1 3/4 cups (420ml) strong brewed espresso or very strong coffee, cooled
- 3 tablespoons coffee liqueur (such as Kahlúa) or dark rum, optional
- 40-48 Italian ladyfinger cookies (savoiardi)
- 2-3 tablespoons unsweetened cocoa powder, for dusting
- Dark chocolate shavings for garnish, optional
Kitchen Equipment Needed
Having the right tools makes the process smooth and ensures your tiramisu turns out perfectly every time. Most of these items are kitchen staples you likely already own.
- Stand mixer or electric hand mixer
- Large mixing bowls (at least 3)
- Whisk
- Rubber spatula
- 9×13 inch (23x33cm) baking dish or similar size
- Shallow bowl or pie dish for dipping ladyfingers
- Fine-mesh sieve or small strainer for dusting cocoa
- Measuring cups and spoons
Recommended Products for This Recipe
After making tiramisu dozens of times, I’ve learned that a few quality ingredients and tools make all the difference in achieving that authentic Italian taste and texture.
1. Authentic Italian Mascarpone Cheese
The mascarpone is the heart of tiramisu, and Italian imports have a richer, creamier texture than domestic versions. BelGioioso makes an excellent authentic mascarpone that’s widely available and has that silky consistency you need for the perfect cream layer.
2. Imported Savoiardi Ladyfingers
Not all ladyfingers are created equal. Italian savoiardi are drier and more porous than American varieties, which means they soak up espresso beautifully without falling apart. The Vicenzi brand consistently delivers the right texture.
3. High-Quality Dutch Process Cocoa Powder
For that final dusting, Dutch process cocoa gives you the deep, dark color and smooth flavor that defines traditional tiramisu. Droste or Valrhona cocoa powders are worth the investment.
4. KitchenAid Stand Mixer
While you can make tiramisu with a hand mixer, a stand mixer frees up your hands and gives you more consistent results when beating egg whites to stiff peaks. This is my most-used kitchen tool.
Step-by-Step Instructions: How to Make Authentic Italian Tiramisu
Follow these detailed steps carefully. The technique matters as much as the ingredients when making traditional tiramisu.
1. Prepare the Egg Yolk Mixture
This custard-like base forms the foundation of your tiramisu cream.
- Separate the eggs, placing yolks in one large bowl and whites in another clean, dry bowl
- Add 1/2 cup (100g) sugar to the egg yolks
- Beat the yolk and sugar mixture with an electric mixer on medium-high speed for 3-4 minutes until it becomes thick, pale yellow, and forms ribbons when you lift the beaters
- The mixture should nearly triple in volume and look like a thick custard
2. Incorporate the Mascarpone
Adding mascarpone properly ensures a smooth, lump-free cream.
- Make sure your mascarpone is at room temperature (this is crucial for smooth mixing)
- Add the mascarpone to the egg yolk mixture all at once
- Beat on low speed for 30 seconds, then increase to medium speed
- Mix for 1-2 minutes until completely smooth with no lumps visible
- Scrape down the sides of the bowl with a rubber spatula to ensure everything is incorporated
- Set this mixture aside while you prepare the egg whites
Read Also: Healthy Tiramisu Recipe
3. Whip the Egg Whites
Properly beaten egg whites create the signature lightness in authentic tiramisu.
- Make absolutely certain your mixing bowl and beaters are completely clean and dry (any grease or moisture will prevent proper whipping)
- Begin beating the egg whites on medium speed until they become foamy, about 1 minute
- Gradually add the remaining 1/4 cup (50g) sugar, one tablespoon at a time, while continuing to beat
- Increase speed to medium-high and beat until stiff peaks form, about 3-4 minutes
- The peaks should stand straight up when you lift the beaters and not droop over
- Don’t overbeat or the whites will become dry and grainy
4. Fold Together the Cream
This is the most delicate step. Gentle folding preserves the airiness you’ve created.
- Add about one-third of the beaten egg whites to the mascarpone mixture
- Using a rubber spatula, gently fold them together using a circular motion, cutting down through the center and sweeping up and over
- This first addition lightens the mascarpone mixture and makes it easier to fold in the remaining whites
- Add the remaining egg whites in two more additions, folding gently each time
- Fold just until no white streaks remain, being careful not to deflate the mixture
- The final cream should be light, fluffy, and mousse-like in texture
5. Prepare the Coffee Mixture
The coffee is what transforms ladyfingers into tiramisu.
- Brew 1 3/4 cups of very strong espresso or coffee (it should be much stronger than you’d normally drink)
- Allow it to cool to room temperature (hot coffee will make the ladyfingers soggy and fall apart)
- Stir in the coffee liqueur or rum if using
- Pour the mixture into a shallow bowl or pie dish that’s wide enough to fit a ladyfinger laid flat
You might also enjoy: Creme Brulee Cheesecake Recipe
6. Assemble the First Layer
Building the layers properly ensures every bite has the perfect balance.
- Quickly dip one ladyfinger at a time into the coffee mixture, turning it over once
- The dip should take only 2-3 seconds total (ladyfingers absorb liquid quickly)
- They should be moistened but not soggy or falling apart
- Arrange the dipped ladyfingers in a single layer in the bottom of your 9×13 inch dish
- Place them side by side, fitting them snugly together
- You’ll need about 20-24 ladyfingers for the bottom layer, depending on your dish size
- Break ladyfingers as needed to fill any gaps
7. Add the First Cream Layer
Spreading the cream evenly ensures consistent texture throughout.
- Spoon half of the mascarpone cream mixture over the ladyfinger layer
- Use an offset spatula or the back of a spoon to spread it evenly
- Make sure to spread all the way to the edges and corners
- The cream layer should be smooth and even, about 1 inch thick
8. Create the Second Layer
Repeating the process creates the classic tiramisu layers.
- Dip the remaining ladyfingers in coffee using the same quick-dip method
- Arrange them over the cream layer in a single layer, fitting snugly
- Spread the remaining mascarpone cream over the top
- Smooth it out carefully, making sure the entire surface is covered
- The top should be as level and smooth as possible
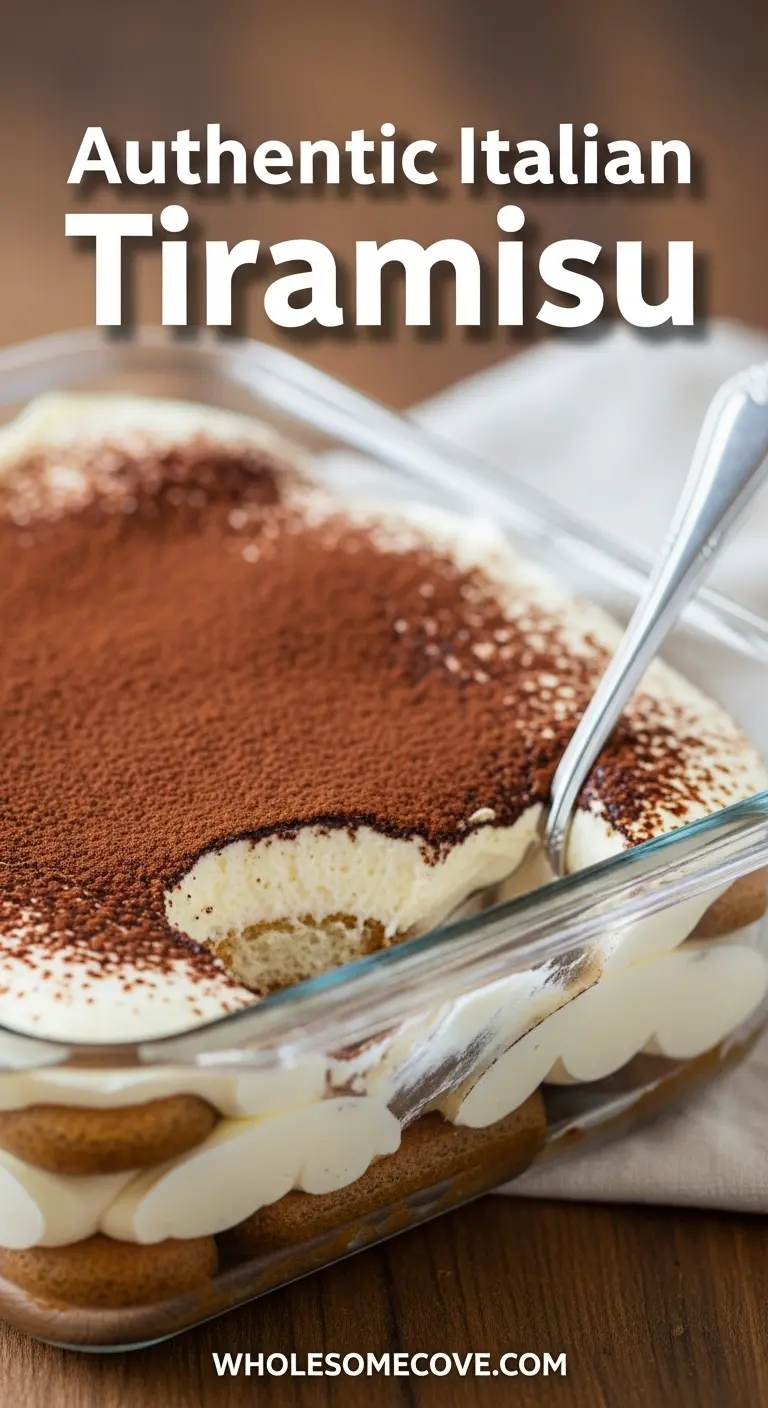
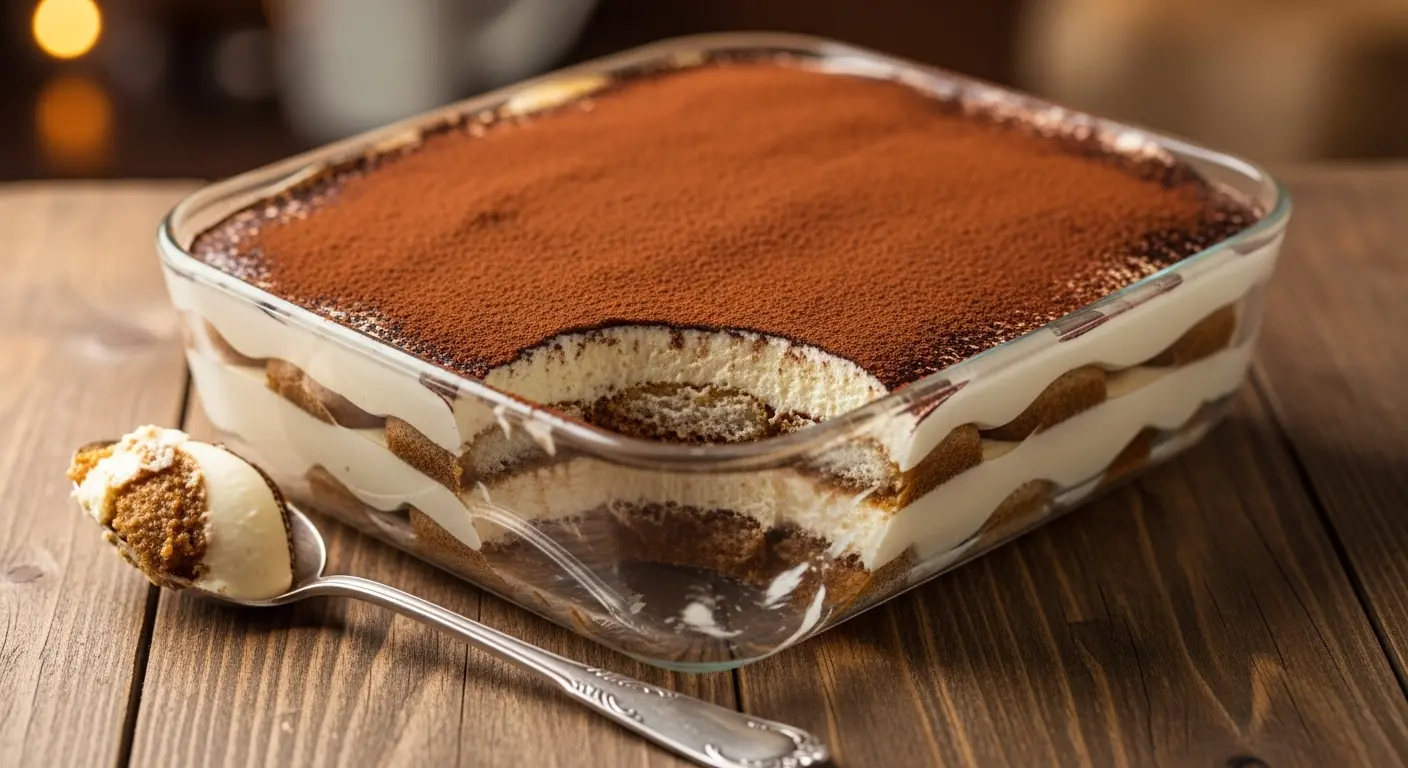
9. Dust with Cocoa and Chill
The final touches complete your authentic tiramisu.
- Place a fine-mesh sieve over the tiramisu
- Spoon cocoa powder into the sieve
- Tap the side of the sieve gently to create an even dusting across the entire surface
- The cocoa layer should be generous but not so thick that it’s powdery
- Cover the dish tightly with plastic wrap (try not to let it touch the cocoa surface)
- Refrigerate for at least 4 hours, but preferably overnight
- The flavors meld and improve dramatically with time
- Just before serving, add chocolate shavings if desired

Tips for The Best Authentic Italian Tiramisu
These insider tricks will take your tiramisu from good to extraordinary. I learned most of them through trial and error.
- Room temperature mascarpone is non-negotiable: Cold mascarpone will seize up and form lumps when beaten. Let it sit out for 30-45 minutes before starting.
- Don’t oversoak the ladyfingers: This is the number one mistake people make. A quick 2-3 second dip is all you need. Oversaturated ladyfingers turn to mush and make the whole dessert watery.
- Beat egg yolks until truly ribbony: When you lift the beaters, the mixture should fall in thick ribbons that hold their shape on the surface for several seconds before disappearing. This takes longer than you think.
- Use a clean bowl for egg whites: Even a trace of grease or egg yolk will prevent whites from whipping properly. Wipe your bowl with a paper towel and a bit of lemon juice or vinegar to be absolutely sure.
- Fold gently but thoroughly: You want to maintain the airiness while ensuring no streaks of egg white remain. Use broad, sweeping motions and rotate the bowl as you work.
- Let it rest overnight: While 4 hours is the minimum, tiramisu reaches its peak after 12-24 hours in the refrigerator. The flavors marry and the texture becomes sublime.
- Serve it cold: Tiramisu should be enjoyed straight from the refrigerator. The mascarpone cream softens quickly at room temperature.
- Use strong coffee: Your espresso should be bold enough that you’d never drink it straight. Weak coffee creates weak tiramisu.
Another favorite: Pumpkin Cheesecake Recipe
What to Serve with Authentic Italian Tiramisu

Tiramisu is rich and satisfying on its own, but these pairings can round out your Italian meal or coffee service beautifully.
This dessert shines as the finale to an Italian feast or as the centerpiece of an elegant coffee service. Since tiramisu contains coffee, it pairs wonderfully with espresso, cappuccino, or an after-dinner liqueur.
- Espresso or cappuccino (the classic Italian pairing)
- Amaretto or limoncello for sipping
- Fresh berries to cut through the richness
- Biscotti for an extra Italian touch
- Sparkling water with lemon
Variations of Authentic Italian Tiramisu
While purists insist on the classic version, these variations respect the traditional technique while adding interesting twists.
- Chocolate Tiramisu: Add 3 tablespoons of unsweetened cocoa powder to the mascarpone mixture and layer with chocolate shavings between the cream layers.
- Amaretto Tiramisu: Replace the coffee liqueur with amaretto and add a handful of crushed amaretti cookies to each layer.
- Lemon Tiramisu: Replace coffee with limoncello mixed with lemon juice and add lemon zest to the cream. Dust with powdered sugar instead of cocoa.
- Strawberry Tiramisu: Use Chambord or other berry liqueur in place of coffee liqueur, and layer fresh sliced strawberries with the ladyfingers.
- Individual Servings: Assemble in wine glasses or small jars for elegant single portions.
- Tiramisu Cake: Make the recipe as directed but use it to fill layers of sponge cake instead of ladyfingers.
You might also enjoy: Creme Brulee Cookies Recipe
Storage and Reheating
Proper storage keeps your tiramisu fresh and delicious for several days.
- Refrigerator Storage: Cover tightly with plastic wrap or aluminum foil and refrigerate for up to 3 days. The texture is best within the first 48 hours.
- Freezing: Tiramisu freezes surprisingly well. Wrap individual portions or the whole dish tightly in plastic wrap, then aluminum foil. Freeze for up to 2 months. Thaw overnight in the refrigerator.
- Make-Ahead Tips: Tiramisu is an ideal make-ahead dessert. Prepare it completely up to 2 days before serving. The flavors actually improve with time.
- Serving from Cold: Always serve tiramisu straight from the refrigerator. Don’t let it sit at room temperature for more than 20-30 minutes, as the mascarpone cream will soften.
- Leftover Tips: If you have leftovers, dust with fresh cocoa powder before serving again, as the original dusting will have absorbed moisture.
Nutritional Facts
Per serving (based on 12 servings):
- Calories: 285
- Total Fat: 15g
- Saturated Fat: 8g
- Cholesterol: 165mg
- Sodium: 75mg
- Total Carbohydrates: 28g
- Dietary Fiber: 1g
- Sugars: 18g
- Protein: 7g
Note: Nutritional values are approximate and may vary based on specific ingredients used.
Health Benefits of Key Ingredients
While tiramisu is undeniably an indulgence, its ingredients do offer some nutritional value worth noting.
Mascarpone cheese provides calcium and protein, supporting bone health and muscle maintenance. It also contains vitamin A, which benefits vision and immune function.
- Eggs: Rich in high-quality protein, vitamin D, and choline for brain health
- Coffee: Provides antioxidants and may boost metabolism and mental alertness
- Cocoa powder: Contains flavonoids that support heart health and provides minerals like iron and magnesium
- Mascarpone: Offers calcium for bone strength and vitamins A and B12
Read Also: Baked Ziti Recipe
FAQs About Authentic Italian Tiramisu
1. Can I make tiramisu without raw eggs?
Traditional tiramisu does contain raw eggs, which concerns some people. If you’re worried about food safety, use pasteurized eggs, which are heat-treated to kill bacteria but remain raw in texture. You can also make a cooked custard version by gently heating the egg yolks with sugar in a double boiler until they reach 160°F (71°C), though this changes the texture slightly.
2. What can I substitute for mascarpone cheese?
Honestly, nothing perfectly replicates mascarpone’s creamy texture and mild flavor. In a pinch, you can blend 8 ounces of cream cheese with 1/4 cup heavy cream until smooth, but the result will be tangier and denser. For authentic results, I strongly recommend finding real mascarpone.
3. Can I make tiramisu without alcohol?
Absolutely. The coffee liqueur or rum adds depth but isn’t essential. Simply omit it from the coffee mixture, or replace it with 1-2 tablespoons of vanilla extract for extra flavor. Many Italian grandmothers make tiramisu without alcohol for family gatherings.
4. Why did my tiramisu turn out watery?
Watery tiramisu usually results from over-soaking the ladyfingers or not beating the egg yolks long enough. The yolk mixture should be thick and ribbony before adding mascarpone. Also ensure you’re using Italian savoiardi, not softer American ladyfingers, which absorb too much liquid.
5. How far in advance can I make tiramisu?
Tiramisu is perfect for advance preparation. Make it 1-2 days ahead for the best flavor and texture. I wouldn’t go beyond 3 days, as the ladyfingers can become too soft and the cream can start to separate slightly. Don’t add the final cocoa dusting until the day of serving if making it more than 24 hours ahead.
Authentic Italian Tiramisu
Ingredients
- 6 large egg yolks - separated from whites
- 3/4 cup granulated sugar - 150g, divided
- 1 1/3 cups mascarpone cheese - 320g, at room temperature
- 4 large egg whites - from separated eggs
- 1 3/4 cups strong brewed espresso or very strong coffee - 420ml, cooled to room temperature
- 3 tablespoons coffee liqueur or dark rum - such as Kahlúa, optional
- 40-48 Italian ladyfinger cookies - savoiardi
- 2-3 tablespoons unsweetened cocoa powder - for dusting
- dark chocolate shavings - for garnish, optional
Equipment
- Stand mixer or electric hand mixer
- Large mixing bowls - at least 3
- Whisk
- Rubber spatula
- 9×13 inch baking dish - 23x33cm
- Shallow bowl or pie dish - for dipping ladyfingers
- Fine-mesh sieve or small strainer - for dusting cocoa
- Measuring cups and spoons
Method
- Separate eggs, placing yolks in one large bowl and whites in another clean, dry bowl. Add 1/2 cup (100g) sugar to yolks and beat with electric mixer on medium-high for 3-4 minutes until thick, pale yellow, and forming ribbons.
- Add room temperature mascarpone to egg yolk mixture all at once. Beat on low for 30 seconds, then medium speed for 1-2 minutes until completely smooth with no lumps, scraping down sides as needed.
- In clean, dry bowl, beat egg whites on medium speed until foamy (1 minute). Gradually add remaining 1/4 cup (50g) sugar, then increase to medium-high and beat until stiff peaks form (3-4 minutes).
- Add one-third of beaten egg whites to mascarpone mixture and fold gently with rubber spatula. Add remaining whites in two more additions, folding just until no white streaks remain without deflating the mixture.
- Brew 1 3/4 cups very strong espresso or coffee and cool to room temperature. Stir in coffee liqueur or rum if using, then pour into shallow bowl wide enough to fit a ladyfinger.
- Quickly dip each ladyfinger into coffee mixture for only 2-3 seconds total, turning once. Arrange 20-24 dipped ladyfingers in single layer in bottom of 9×13 inch dish, breaking as needed to fill gaps.
- Spoon half of mascarpone cream over ladyfinger layer and spread evenly with offset spatula or spoon, making sure to reach edges and corners. Layer should be smooth and about 1 inch thick.
- Dip remaining ladyfingers in coffee using same quick-dip method and arrange over cream layer. Spread remaining mascarpone cream over top, smoothing surface as evenly as possible.
- Place fine-mesh sieve over tiramisu, add cocoa powder, and tap gently to create even dusting. Cover tightly with plastic wrap and refrigerate at least 4 hours, preferably overnight. Add chocolate shavings before serving if desired.
Nutrition
Notes
- Room temperature mascarpone is essential – let it sit out 30-45 minutes before starting to prevent lumping when beaten
- Don’t oversoak ladyfingers – a quick 2-3 second dip is all you need or they’ll turn to mush
- Beat egg yolks until truly ribbony – mixture should fall in thick ribbons that hold their shape for several seconds
- Use clean, dry bowl for egg whites – wipe with lemon juice or vinegar to remove any grease that prevents whipping
- Tiramisu reaches peak flavor after 12-24 hours in refrigerator – the flavors marry beautifully overnight
- Always serve straight from refrigerator – mascarpone cream softens quickly at room temperature
- Use Italian savoiardi ladyfingers, not American varieties – they’re drier and more porous for better coffee absorption
- Coffee should be strong enough that you’d never drink it straight – weak coffee creates weak tiramisu
- For food safety concerns, use pasteurized eggs or heat egg yolks with sugar to 160°F (71°C) in double boiler
- Store covered in refrigerator up to 3 days, or freeze up to 2 months wrapped tightly in plastic wrap then foil
Private Notes
Tried this recipe?
Let us know how it was!Final Thoughts
Making Authentic Italian Tiramisu the traditional way truly makes a difference. Once you taste the light, airy texture and pure flavors of the real thing, you’ll understand why Italians have been making it this way for generations.
The technique takes a bit of practice, but it’s absolutely worth mastering. My family now requests this dessert for every special occasion, and guests are always amazed when I tell them there’s no cream involved. Give this authentic version a try, and I promise you’ll never go back to cream-based recipes. Share your results in the comments below, and let me know if you try any of the variations!
Recommended:
- Lasagna Recipe
- Chicken Parmesan Recipe
- Marinara Sauce Recipe
- Stuffed Shells Recipe
- Italian Wedding Soup
- Pasta Fagioli Recipe
- Zuppa Toscana Recipe
- Creme Brulee French Toast Recipe

