
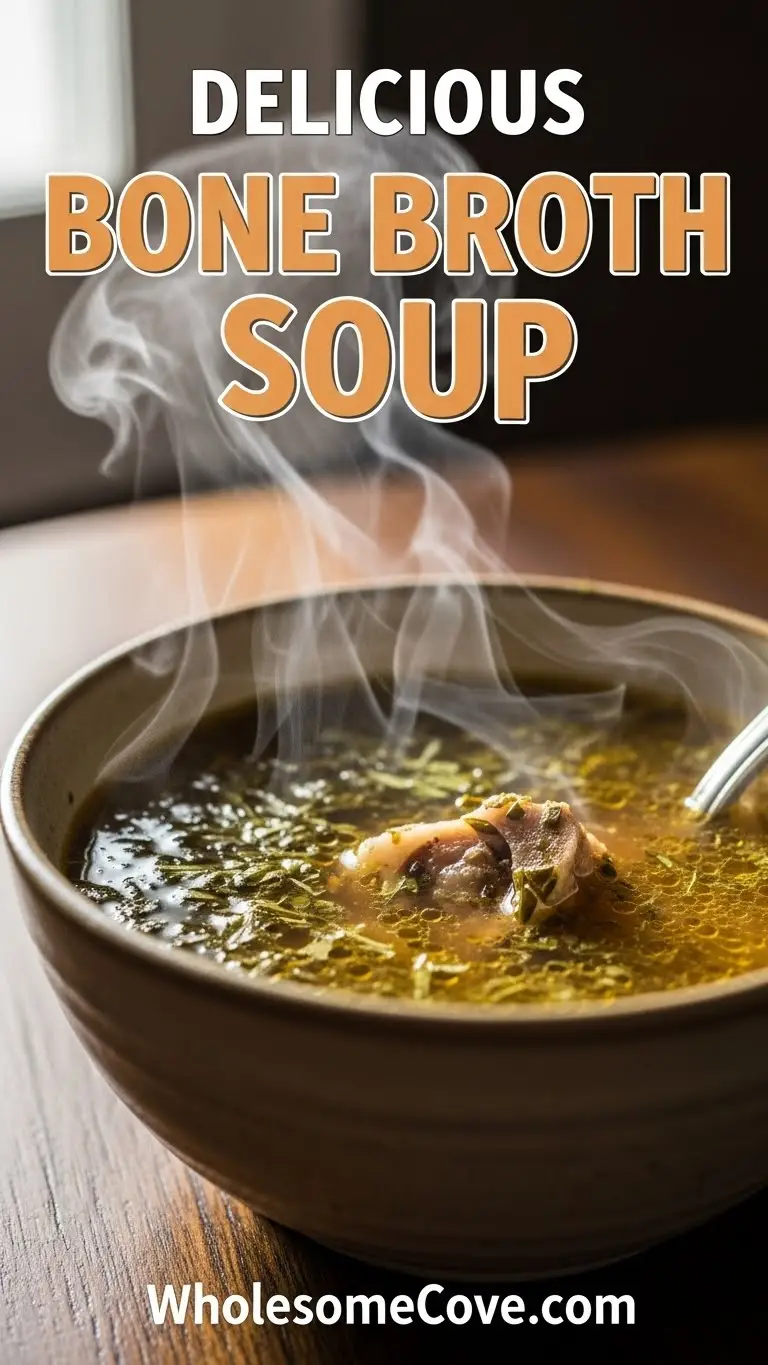
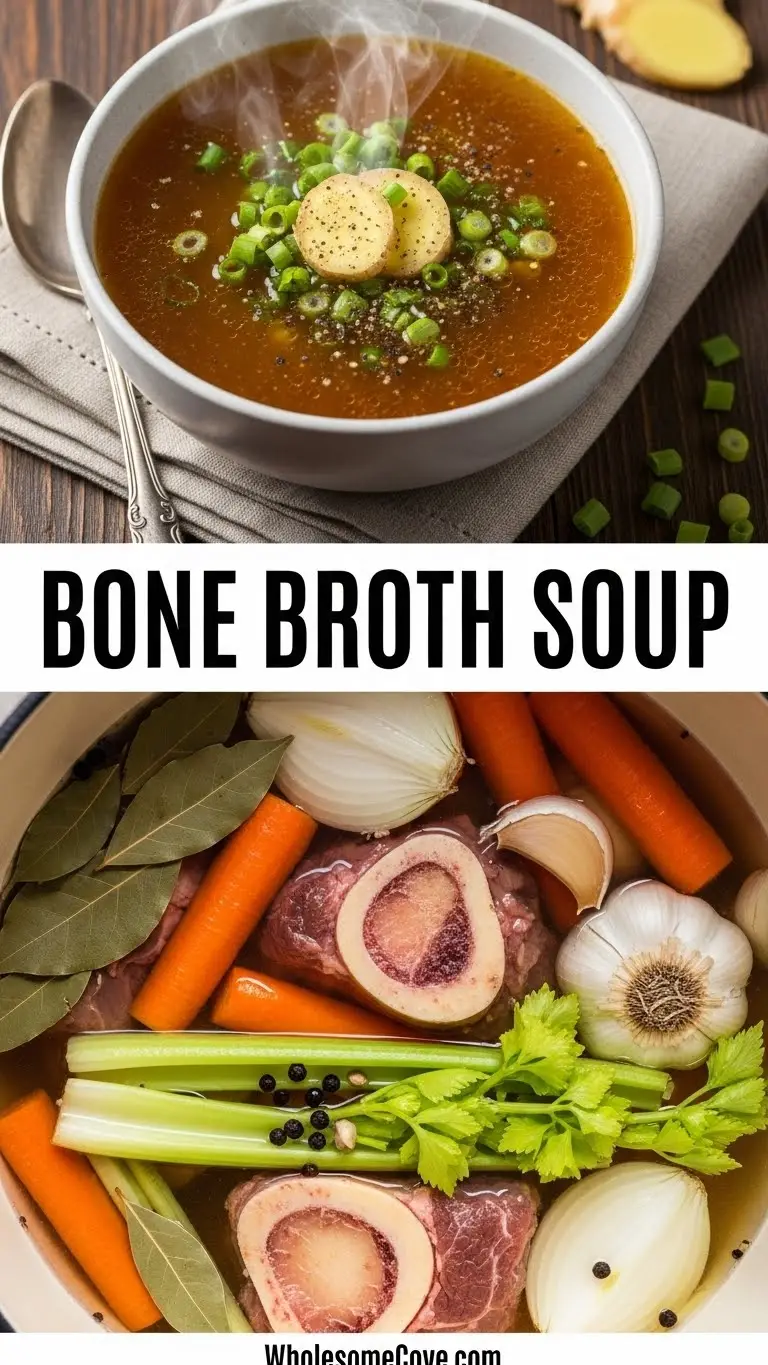
I’ve been making bone broth soup for years, and it’s become one of those recipes I turn to whenever I need something deeply nourishing and comforting. The first time I made this Bone Broth Soup Recipe was during a particularly brutal winter when I was recovering from a cold, and honestly, nothing else seemed to help quite like a steaming bowl of this rich, golden broth.
What started as a simple attempt to use up leftover chicken bones transformed into a weekly ritual in my kitchen. I remember simmering my first batch overnight, waking up to the most incredible aroma filling my entire house, and thinking I’d discovered something magical.
The beauty of this recipe is in its simplicity and the way it makes you feel from the inside out. Sure, it takes time, but it’s mostly hands-off, and the result is absolutely worth every minute.
| Quick Recipe Summary | |
|---|---|
| Prep Time | 15 minutes |
| Cook Time | 12-24 hours |
| Total Time | 12-24 hours 15 minutes |
| Servings | 8-10 cups |
| Difficulty Level | Easy |
If you’re looking for something equally comforting but quicker to prepare, my Chicken Gnocchi Soup is another family favorite.
Why You’ll Love This Bone Broth Soup Recipe
This bone broth soup is incredibly versatile and forgiving, making it perfect for both beginners and experienced home cooks. You can use whatever bones you have on hand, adjust the seasonings to your taste, and even freeze it in batches for future use.
The health benefits alone make this recipe worth your time. Bone broth is packed with collagen, minerals, and amino acids that support gut health, joint function, and immune system strength.
Plus, the rich, savory flavor creates the perfect base for countless other soups and dishes.
- Nutrient-dense and healing: Full of collagen, gelatin, and essential minerals that nourish your body from within
- Budget-friendly: Uses bones that are often inexpensive or leftover from other meals
- Incredibly versatile: Drink it plain, use it as a soup base, or add it to sauces and gravies
- Freezer-friendly: Makes a large batch that you can portion and freeze for up to 6 months
- Minimal active time: Most of the cooking is hands-off simmering while you go about your day
Another favorite: Zuppa Toscana
Ingredients
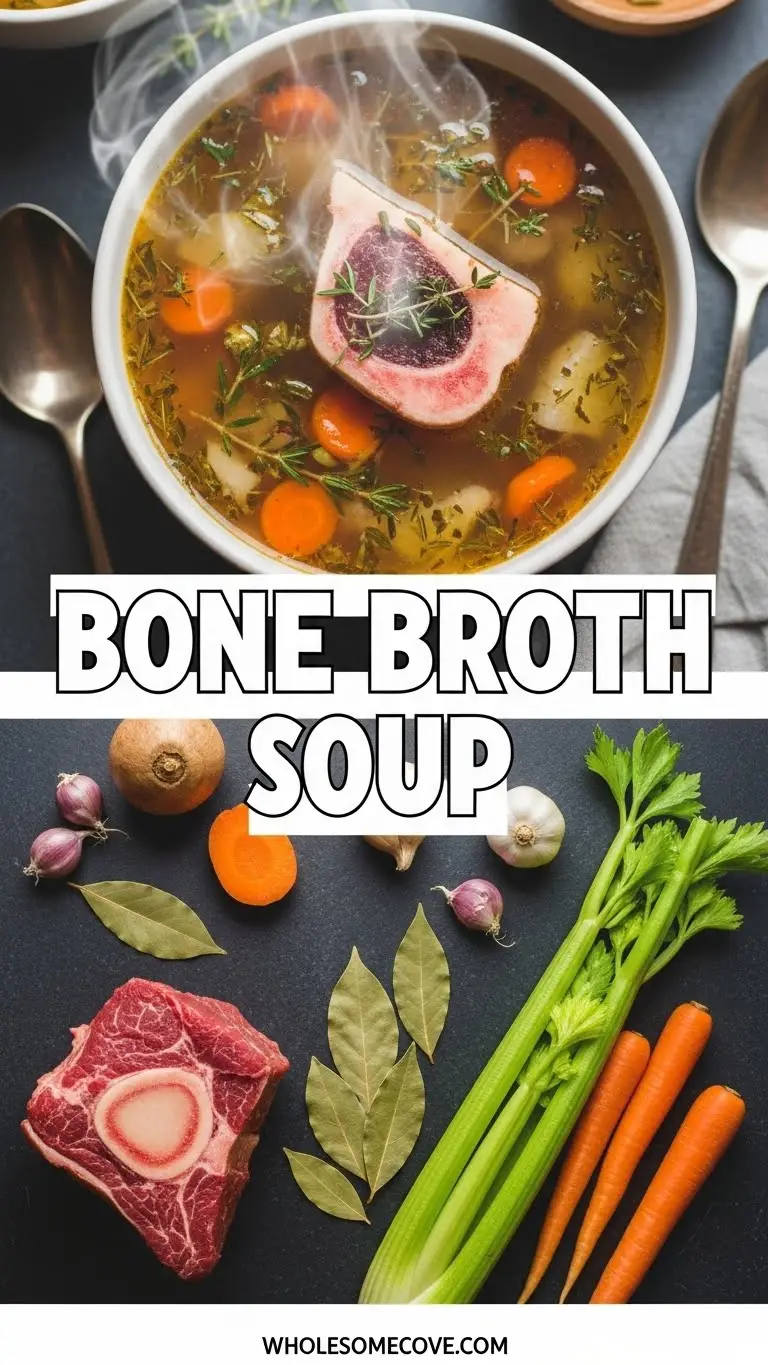
This bone broth soup requires simple, wholesome ingredients that work together to create a deeply flavorful and nourishing broth. The key is using high-quality bones and giving them plenty of time to release all their goodness into the liquid.
- 3-4 pounds (1.4-1.8 kg) beef bones, chicken bones, or a mix: I prefer a combination of marrow bones and knuckle bones for the best gelatin content
- 2 tablespoons (30 ml) apple cider vinegar: This helps extract minerals from the bones
- 1 large onion, roughly chopped: No need to peel, just quarter it
- 2 large carrots, roughly chopped: I leave the peels on for extra nutrients
- 3 celery stalks, roughly chopped: Include the leaves for added flavor
- 4 cloves garlic, smashed: Don’t worry about peeling them perfectly
- 2 bay leaves: Essential for that classic soup aroma
- 1 tablespoon (15 ml) whole black peppercorns: These add a subtle spice without overpowering
- Fresh herbs (optional): I love adding a few sprigs of thyme and parsley
- 12-16 cups (3-4 liters) cold filtered water: Enough to cover the bones by about 2 inches
- 1-2 teaspoons sea salt: I add this at the end to taste
You might also enjoy: Pasta Fagioli
Kitchen Equipment Needed
Having the right equipment makes preparing bone broth soup much easier and ensures the best results. While you don’t need anything fancy, a few key tools will make the process smoother.
- Large stockpot or Dutch oven (8-12 quart capacity): Big enough to hold all the bones and water with room to spare
- Fine-mesh strainer or cheesecloth: For removing all the solids and getting crystal-clear broth
- Slow cooker or Instant Pot (optional): Alternative cooking methods if you prefer
- Large spoon or ladle: For skimming impurities during cooking
- Storage containers: I use mason jars or freezer-safe containers
- Sharp knife and cutting board: For chopping vegetables
- Tongs: Helpful for handling hot bones
Recommended Products for This Recipe
After making bone broth hundreds of times, I’ve found a few products that genuinely make the process better and the results more delicious. These aren’t just nice-to-haves; they actually improve the quality of your broth.
1. Grass-Fed Beef Marrow Bones
The quality of your bones directly impacts the flavor and nutritional content of your broth. I switched to grass-fed bones a few years ago, and the difference is remarkable – richer flavor, better gelatin content, and more nutrients.
2. Le Creuset Enameled Cast Iron Stockpot
This pot distributes heat so evenly that you never get hot spots or scorching, which can ruin the delicate flavor of bone broth. It’s expensive, but I’ve had mine for over a decade and use it weekly.
3. Bragg Organic Apple Cider Vinegar
Not all vinegars are created equal when it comes to extracting minerals from bones. Bragg’s raw, unfiltered vinegar with “the mother” works best and adds beneficial probiotics to your broth.
4. Ultra-Fine Mesh Strainer
A really good strainer makes the difference between cloudy broth and crystal-clear, restaurant-quality stock. The ultra-fine mesh catches even the tiniest particles without needing cheesecloth.
Read Also: Italian Wedding Soup
Step-by-Step Instructions: How to Make Bone Broth Soup
Making bone broth is straightforward, but attention to detail at each step ensures the richest, most flavorful result. Don’t rush the process – the long, slow simmer is what creates that incredible depth of flavor and extracts all the nutrients from the bones.
1. Prepare and Roast the Bones (Optional but Recommended)
Roasting the bones before simmering creates a deeper, more complex flavor that you just can’t get from raw bones.
- Preheat your oven to 400°F (200°C)
- Spread the bones in a single layer on a large rimmed baking sheet
- Roast for 30-40 minutes, turning once halfway through, until the bones are deeply browned and fragrant
- Don’t skip this step if you’re using beef bones – it makes a huge difference in the final flavor
- For chicken bones, this step is optional but still adds nice depth
2. Combine Bones and Aromatics in Pot
Setting up your pot properly ensures even cooking and maximum flavor extraction throughout the long simmer.
- Transfer the roasted bones to your large stockpot or Dutch oven
- Add the roughly chopped onion, carrots, and celery directly to the pot (no need to be precise with the chopping)
- Toss in the smashed garlic cloves, bay leaves, and peppercorns
- Pour the apple cider vinegar over everything – this is crucial for drawing out the minerals from the bones
- Let the mixture sit for 20-30 minutes before adding water to allow the vinegar to start working on the bones
3. Add Water and Bring to Initial Boil
The way you start the cooking process affects the clarity and quality of your final broth.
- Add enough cold filtered water to cover the bones by about 2 inches (5 cm)
- Don’t overfill the pot – you need room for the liquid to move as it simmers
- Place the pot over high heat and bring to a rolling boil
- This initial boil will bring impurities to the surface, which you’ll skim off
- It usually takes 15-20 minutes to reach a full boil depending on your pot size
4. Skim the Foam and Reduce Heat
Removing the foam creates a cleaner, clearer broth with better flavor.
- As the broth reaches a boil, you’ll notice gray or brown foam rising to the surface
- Use a large spoon or ladle to carefully skim off and discard this foam
- Continue skimming for the first 10-15 minutes until very little foam appears
- Once most of the foam is removed, reduce the heat to low
- The broth should maintain a very gentle simmer with just a few bubbles breaking the surface occasionally
5. Simmer the Broth
This is where the magic happens – the long, slow simmer extracts all the nutrients and creates that rich, gelatinous texture.
- For chicken bones: Simmer for 12-24 hours
- For beef bones: Simmer for 24-48 hours (the longer the better for maximum gelatin)
- Check the pot every few hours to ensure it’s maintaining a gentle simmer
- Add more water if needed to keep the bones covered, though some evaporation is normal
- You’ll know it’s ready when the bones are soft and crumbly, and the broth has a rich golden color
- The house will smell absolutely amazing throughout this process
6. Add Fresh Herbs (Optional Final Touch)
Adding delicate herbs at the end preserves their bright flavor without overcooking them.
- About 30 minutes before you finish cooking, add any fresh herbs like thyme, parsley, or rosemary
- This timing prevents the herbs from becoming bitter or losing their aromatic qualities
- I usually add a small handful of fresh parsley and a few sprigs of thyme
- You can skip this step entirely if you prefer a more neutral broth for various uses
7. Strain the Broth
Proper straining removes all solids and creates that beautiful, clear liquid gold.
- Turn off the heat and let the broth cool for 15-20 minutes (this makes it safer to handle)
- Place your fine-mesh strainer or cheesecloth over a large bowl or second pot
- Carefully ladle or pour the broth through the strainer
- Discard all the solids (the bones should be soft and crumbly, having given up all their goodness)
- For extra-clear broth, strain a second time through cheesecloth
- Let the strained broth cool to room temperature before refrigerating
8. Skim the Fat and Season
The final steps prepare your broth for immediate use or storage.
- Refrigerate the broth overnight, and a layer of fat will solidify on top
- You can remove this fat for a leaner broth, or leave some for extra richness and flavor
- I usually remove most but leave a thin layer for flavor
- Once defatted, taste the broth and add sea salt to your preference
- Start with 1 teaspoon and add more as needed – remember, you can always add more salt later when using the broth
For another warming soup option, try: Tomato Egg Drop Soup
Tips for The Best Bone Broth Soup
These tips come from years of trial and error, and they’ll help you avoid common mistakes while achieving the most flavorful, nutrient-dense broth possible.
- Use a mix of bone types: Combining marrow bones, knuckle bones, and some meaty bones creates the perfect balance of flavor and gelatin
- Don’t skip the vinegar: The acid is essential for extracting minerals from the bones, though you won’t taste it in the final product
- Maintain a gentle simmer: Boiling too hard creates a cloudy, greasy broth, while too low heat won’t extract enough flavor
- Roast beef bones first: This extra step adds incredible depth to beef broth (less critical for chicken)
- Add vegetables halfway through for beef broth: For very long cooking times (24+ hours), add vegetables after 12 hours to prevent them from becoming bitter
- Save and reuse bones: You can use beef bones for a second batch – just simmer them even longer the second time
- Cool quickly and safely: Divide large batches into smaller containers for faster cooling if you’re storing it
- The jiggle test: When refrigerated, good bone broth should gel firmly, indicating high gelatin content
- Don’t salt during cooking: Season at the end so you can control the saltiness based on how you plan to use the broth
- Use filtered water: The quality of your water affects the final taste, especially with such a simple recipe
You might also enjoy: Roasted Tomato Soup
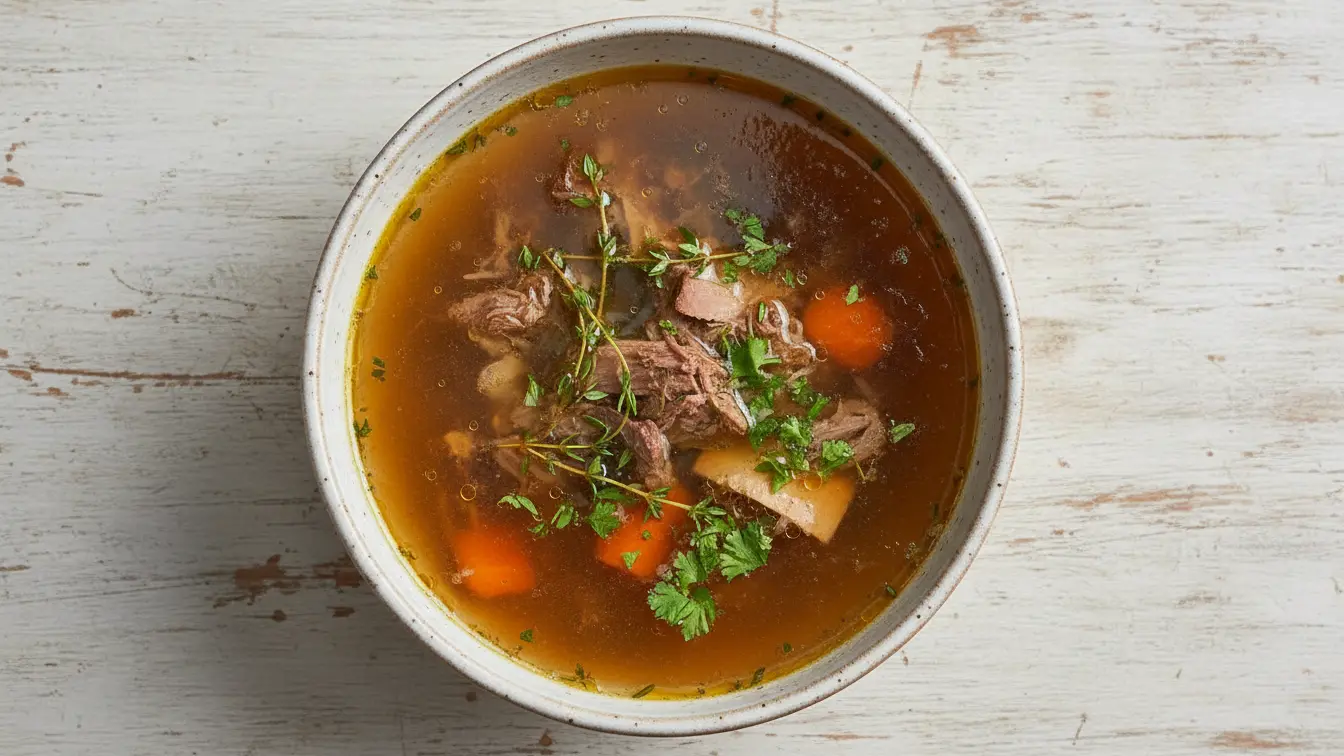
What to Serve with Bone Broth Soup
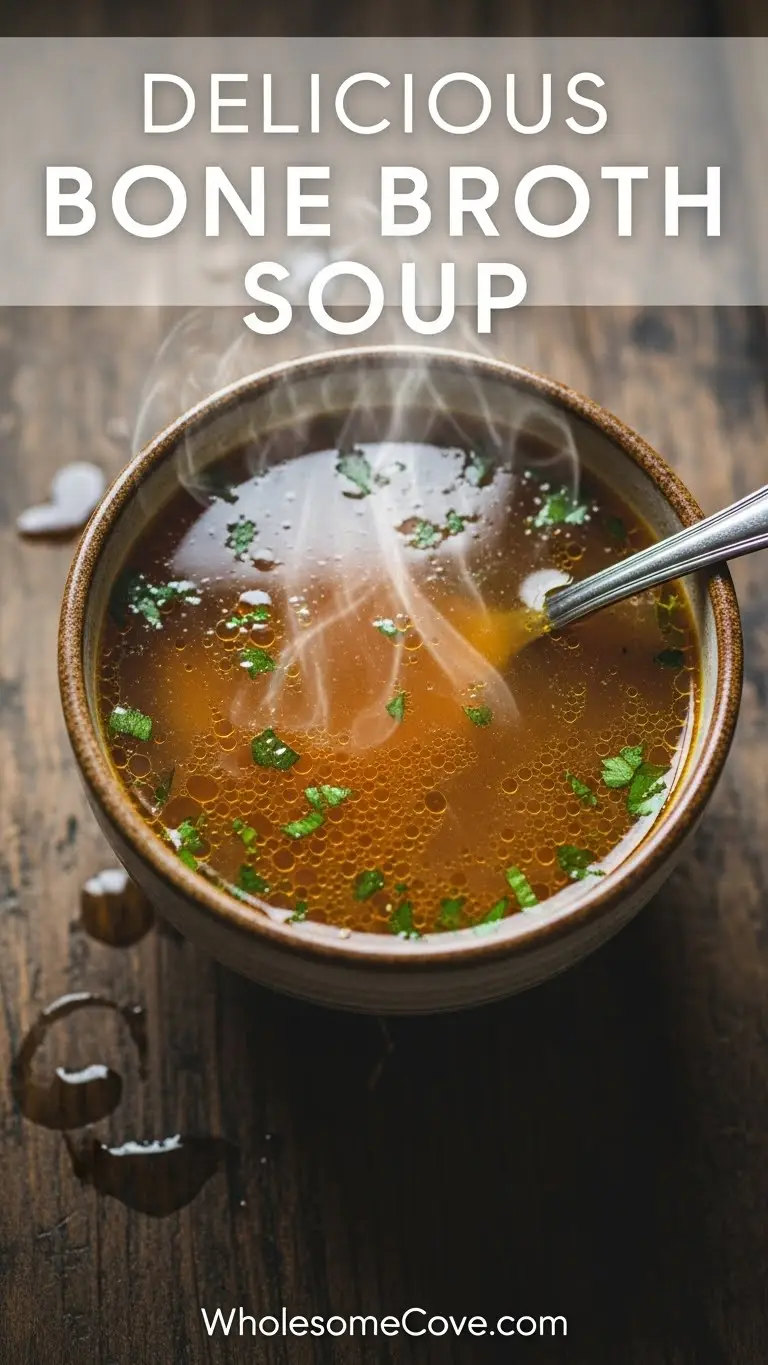
Bone broth is incredibly versatile and can be enjoyed in many ways, from sipping it plain to using it as a base for more elaborate dishes.
When drinking it as is, I love adding a squeeze of fresh lemon juice, a pinch of sea salt, and sometimes a dash of hot sauce for a warming, restorative drink. On its own, it’s perfect for when you’re feeling under the weather or just need something nourishing.
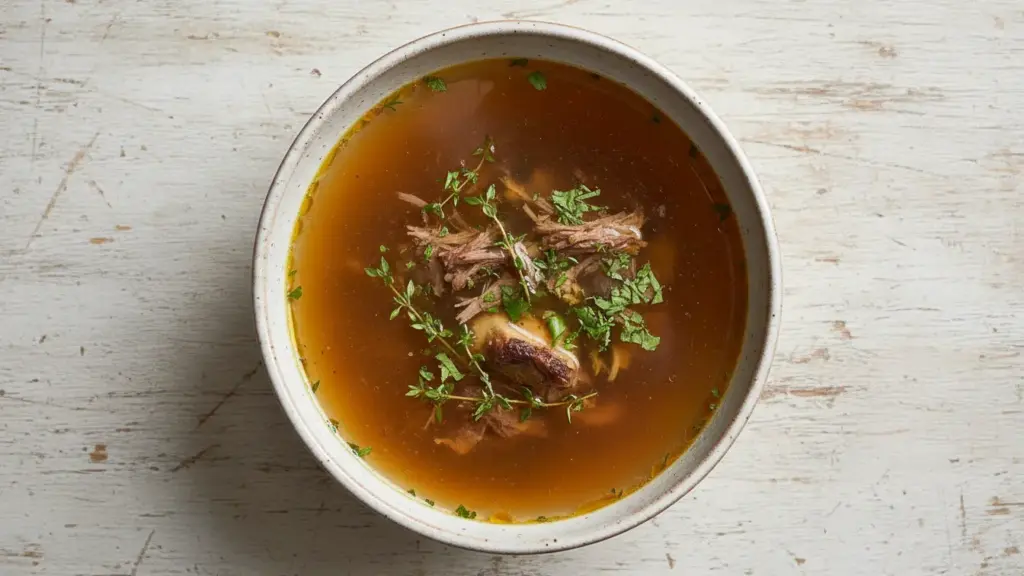
As a soup base, it elevates everything from simple vegetable soups to more complex recipes. The rich flavor means you need fewer additions to create something delicious.
- Crusty bread or homemade biscuits for dipping
- Mashed Potatoes made with bone broth instead of milk
- Fresh vegetables like mushrooms, bok choy, or spinach added to make a quick soup
- Deviled Eggs as a protein-rich side
- Avocado Toast for a light, healthy meal
- Use it as cooking liquid for rice, quinoa, or other grains
- Green Bean Casserole made with homemade broth
- Shepherds Pie using bone broth in the filling
Another favorite: Egg Drop Soup
Variations of Bone Broth Soup
The basic bone broth recipe is endlessly adaptable, allowing you to customize it based on what you have available or your nutritional goals.
- Asian-inspired broth: Add fresh ginger, star anise, scallions, and a splash of soy sauce during the last hour of cooking
- Herbed chicken broth: Use only chicken bones and add extra fresh herbs like sage, tarragon, and dill
- Spicy bone broth: Include dried chilies, jalapeños, or a spoonful of chili paste for a warming kick
- Mushroom bone broth: Add dried shiitake or porcini mushrooms for an earthy, umami-rich variation
- Instant Pot version: Pressure cook on high for 120 minutes for chicken, 180 minutes for beef (though longer is always better)
- Slow cooker method: Cook on low for 24-48 hours, which is incredibly convenient for hands-off preparation
- Fish bone broth: Use fish heads and bones with fennel and lemon for a lighter, delicate broth (simmer only 4-6 hours)
- Turmeric golden broth: Add fresh turmeric and black pepper for anti-inflammatory benefits
- Mineral-boosting broth: Include seaweed like kombu for extra minerals and iodine
- Vegetable scrap addition: Save and freeze vegetable scraps to add extra flavor and nutrition
For a different take on comfort soup, try: Taco Soup
Storage and Reheating
Proper storage ensures your bone broth stays fresh and safe to consume, while also making it convenient to use whenever you need it.
- Refrigerator storage: Store in airtight containers for up to 5 days in the fridge
- Freezer storage: Freeze in portions for up to 6 months in freezer-safe containers or bags
- Ice cube tray method: Freeze in ice cube trays for small portions, then transfer to freezer bags
- Leave headspace: When freezing in jars, leave 1-2 inches at the top as liquid expands when frozen
- Label everything: Include the date and type of bones used so you can track freshness
- Reheating from refrigerated: Warm gently over medium heat, stirring occasionally until steaming hot
- Reheating from frozen: Thaw overnight in the fridge, then reheat on the stovetop
- Microwave option: Heat in 1-minute intervals, stirring between each, until hot throughout
- Quick thaw method: Place frozen container in a bowl of warm water to speed thawing
- Use within 3 days after thawing: Once thawed, treat it like fresh broth and use promptly
Read Also: Potato Leek Soup
Nutritional Facts
Per 1 cup (240 ml) serving of bone broth (approximate values):
- Calories: 40-50
- Protein: 6-10g
- Fat: 1-3g
- Carbohydrates: 0-2g
- Fiber: 0g
- Collagen: 6-12g (varies based on cooking time and bone type)
- Calcium: 10-20mg
- Magnesium: 5-10mg
- Phosphorus: 30-50mg
- Sodium: Variable depending on added salt
Note: Nutritional content varies significantly based on bone type, cooking time, and whether fat is skimmed. Longer cooking times extract more nutrients, particularly collagen and minerals.
Another warming option: Chicken Chowder
Health Benefits of Key Ingredients
Bone broth isn’t just delicious – it’s packed with nutrients that support overall health and wellness in remarkable ways.
The collagen and gelatin from the bones support joint health, improve skin elasticity, and promote gut healing. I’ve noticed a real difference in my skin and digestion since making bone broth a regular part of my diet.
The minerals extracted during the long cooking process – including calcium, magnesium, and phosphorus – are in highly absorbable forms that your body can easily use.
- Collagen and gelatin: Support joint health, reduce inflammation, improve skin elasticity, and heal the gut lining
- Amino acids (glycine, proline, glutamine): Aid in detoxification, support immune function, and promote better sleep
- Minerals (calcium, magnesium, phosphorus): Strengthen bones, support muscle function, and improve nerve transmission
- Glucosamine and chondroitin: Natural compounds that reduce joint pain and support cartilage health
- Apple cider vinegar: Helps extract minerals and adds beneficial enzymes and probiotics
- Aromatic vegetables: Provide antioxidants and anti-inflammatory compounds
- Bone marrow: Rich in healthy fats, vitamin A, and iron
- Gelatin: Improves digestion, reduces inflammation, and supports healthy hair and nails
You might also enjoy: Seafood Chowder
FAQs About Bone Broth Soup
1. Why didn’t my bone broth gel in the refrigerator?
The gelatin content depends on the type and amount of bones used, as well as cooking time. Use more joint bones, knuckles, or chicken feet, which contain the most collagen.
Make sure you’re simmering long enough (at least 12 hours for chicken, 24 for beef) to extract the gelatin. Even if it doesn’t gel completely, the broth is still nutritious and flavorful.
2. Can I reuse bones to make a second batch of broth?
Absolutely, especially with beef bones. After the first batch, you can add fresh water and vegetables and simmer again, though for a longer time (36-48 hours).
The second batch will be lighter in flavor and color but still nutritious. Chicken bones typically don’t hold up well for a second batch as they become too soft.
3. How do I know when the bone broth is done cooking?
The bones should be soft and crumbly when pressed, and the broth should have a rich, golden color. For chicken, the bones might even fall apart when you stir them.
The best test is refrigerating a small amount – if it gels firmly, you’ve extracted plenty of gelatin. However, even non-gelled broth can be perfectly cooked if the bones are soft and the flavor is rich.
4. Why is my bone broth cloudy instead of clear?
Cloudiness usually comes from boiling the broth too hard, which emulsifies the fat into the liquid. Always maintain a gentle simmer with just occasional bubbles breaking the surface.
Skimming the foam thoroughly at the beginning and straining well at the end also helps create clearer broth. Some cloudiness is normal and doesn’t affect flavor or nutrition.
5. Can I make bone broth without apple cider vinegar?
You can, but the vinegar helps extract minerals from the bones, making the broth more nutritious. If you don’t have apple cider vinegar, you can substitute lemon juice or white wine vinegar.
The amount of acid is small enough that you won’t taste it in the final product. If you skip it entirely, the broth will still be flavorful but may contain fewer minerals.
For another hearty soup, try: Crockpot Beef Stew
Bone Broth Soup
Ingredients
- 3-4 lbs beef bones, chicken bones, or a mix - 1.4–1.8 kg; prefer a combination of marrow bones and knuckle bones for best gelatin content
- 2 tbsp apple cider vinegar - 30 ml; raw, unfiltered with ‘the mother’ preferred
- 1 large onion, roughly chopped - No need to peel, just quarter it
- 2 large carrots, roughly chopped - Peels on for extra nutrients
- 3 celery stalks, roughly chopped - Include the leaves for added flavor
- 4 garlic cloves, smashed - No need to peel perfectly
- 2 bay leaves
- 1 tbsp whole black peppercorns - 15 ml
- fresh thyme and parsley sprigs - Optional; add in the last 30 minutes of cooking
- 12-16 cups cold filtered water - 3–4 liters; enough to cover bones by about 2 inches
- 1-2 tsp sea salt - Add at the end to taste
Equipment
- Large stockpot or Dutch oven - 8–12 quart capacity
- Rimmed baking sheet - For roasting bones
- Fine-mesh strainer or cheesecloth - For straining solids from broth
- Slow cooker - (optional) Alternative cooking method
- Instant Pot - (optional) Alternative pressure cooking method
- Large spoon or ladle - For skimming foam and serving
- Storage containers - Mason jars or freezer-safe containers
- Sharp knife and cutting board - For chopping vegetables
- Tongs - For handling hot bones
Method
- Preheat oven to 400°F (200°C). Spread bones in a single layer on a rimmed baking sheet and roast for 30–40 minutes, turning once halfway, until deeply browned and fragrant. (Optional for chicken; highly recommended for beef.)
- Transfer roasted bones to a large stockpot and add the chopped onion, carrots, celery, smashed garlic, bay leaves, peppercorns, and apple cider vinegar. Let sit for 20–30 minutes before adding water.
- Add enough cold filtered water to cover bones by about 2 inches (5 cm), then bring to a rolling boil over high heat, which usually takes 15–20 minutes.
- As the broth boils, skim off any gray or brown foam with a ladle for the first 10–15 minutes, then reduce heat to low to maintain a very gentle simmer.
- Simmer chicken bones for 12–24 hours, or beef bones for 24–48 hours, checking every few hours and adding water as needed to keep the bones submerged.
- About 30 minutes before finishing, add a small handful of fresh parsley and a few sprigs of thyme if desired for a brighter, aromatic flavor.
- Turn off heat, let cool 15–20 minutes, then ladle broth through a fine-mesh strainer into a large bowl; discard all solids and strain a second time through cheesecloth for extra clarity.
- Refrigerate broth overnight, then remove the solidified fat layer from the top, taste, and season with sea salt starting with 1 teaspoon, adding more as needed.
Nutrition
Notes
- Use a mix of bone types (marrow, knuckle, and meaty bones) for the best balance of flavor and gelatin content.
- Don’t skip the apple cider vinegar — the acid is essential for drawing minerals out of the bones; you won’t taste it in the final broth.
- Always maintain a gentle simmer; hard boiling creates a cloudy, greasy broth and diminishes flavor.
- For very long beef broth cooking times (24+ hours), add the vegetables after the first 12 hours to prevent them from turning bitter.
- The jiggle test: when properly refrigerated, good bone broth should gel firmly, indicating high collagen and gelatin content.
- Don’t salt during cooking — season only at the end so you can control saltiness based on how you plan to use the broth.
- Beef bones can be reused for a second batch; simmer for 36–48 hours the second time. Chicken bones are too soft for reuse.
- Refrigerate in airtight containers for up to 5 days, or freeze in portions for up to 6 months. Leave 1–2 inches of headspace in jars before freezing.
- For an Instant Pot version, pressure cook on high for 120 minutes (chicken) or 180 minutes (beef).
- Use filtered water for the best-tasting broth, as water quality noticeably affects this simple recipe.
Private Notes
Tried this recipe?
Let us know how it was!Final Thoughts
Making your own bone broth soup is one of those deeply satisfying kitchen projects that nourishes both body and soul. The gentle bubbling on the stove, the incredible aroma filling your home, and the pride of creating something so wholesome from simple ingredients – it’s truly special.
I hope you give this recipe a try and experience the comfort and healing power of homemade bone broth. Feel free to share your results in the comments below, and let me know if you come up with your own creative variations!
Recommended:
- Tomato Soup
- New England Clam Chowder
- Corn Chowder
- Manhattan Clam Chowder
- Matzo Ball Soup
- Brunswick Stew
- Slow Cooker Pot Roast
- Irish Stew
- Avgolemono Soup
- Mississippi Pot Roast
