
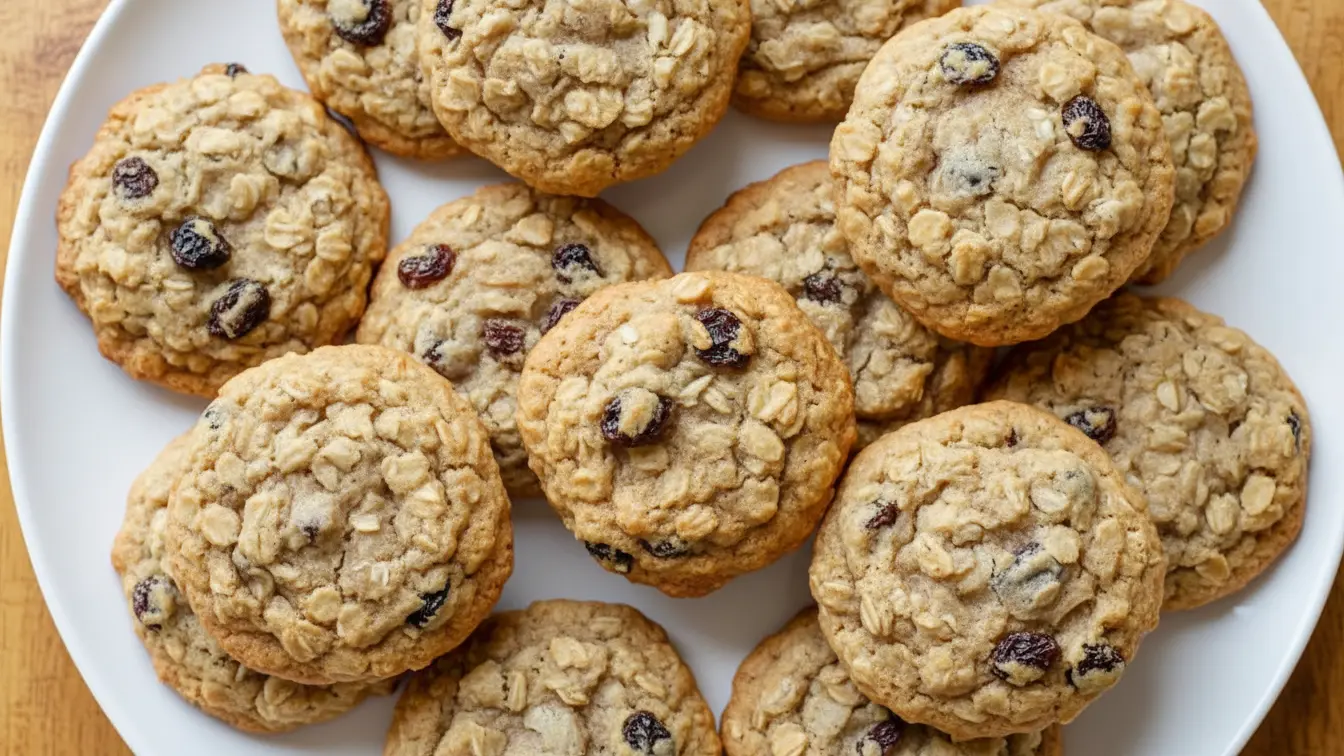
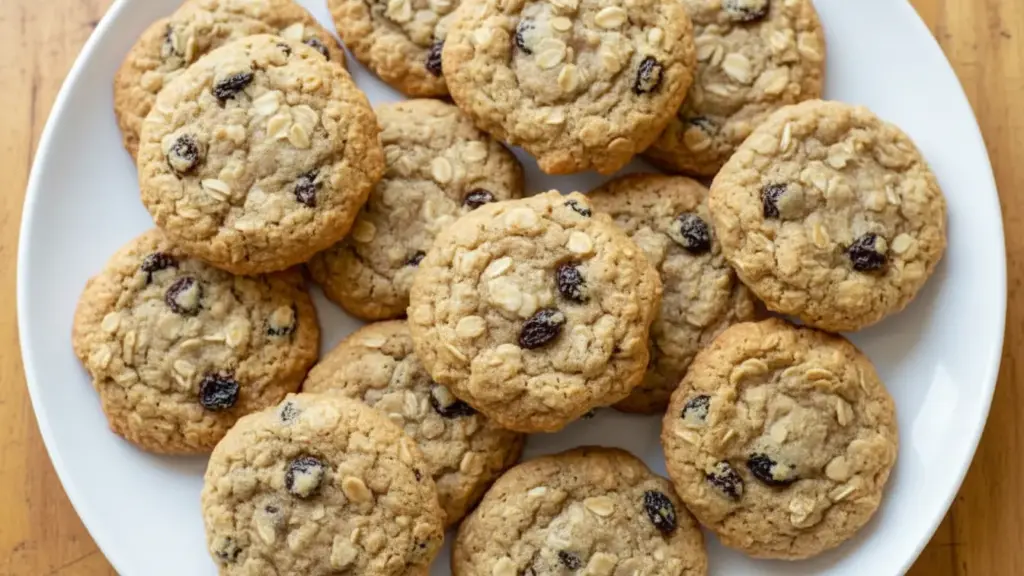
I’ve been baking cookies since I was tall enough to reach the counter, standing on a wobbly wooden stool in my grandmother’s kitchen. But it wasn’t until I burned my third batch of chocolate chip cookies that I discovered the magic of oatmeal raisin cookies.

The beauty of this oatmeal raisin cookie recipe is in its simplicity and forgiving nature. Unlike finicky French macarons or temperamental souffles, these cookies welcome you with open arms, even if you accidentally add an extra egg or forget to set a timer.
My first successful batch came on a rainy Tuesday afternoon when I had nothing but old fashioned oats, a box of raisins, and determination. The house filled with the smell of cinnamon and brown sugar, and by the time my kids came home from school, they devoured half the batch before dinner.
That’s when I knew I’d found something special.
| Quick Recipe Summary | |
|---|---|
| Prep Time | 15 minutes |
| Cook Time | 12 minutes |
| Total Time | 27 minutes |
| Servings | 24 cookies |
| Difficulty Level | Easy |

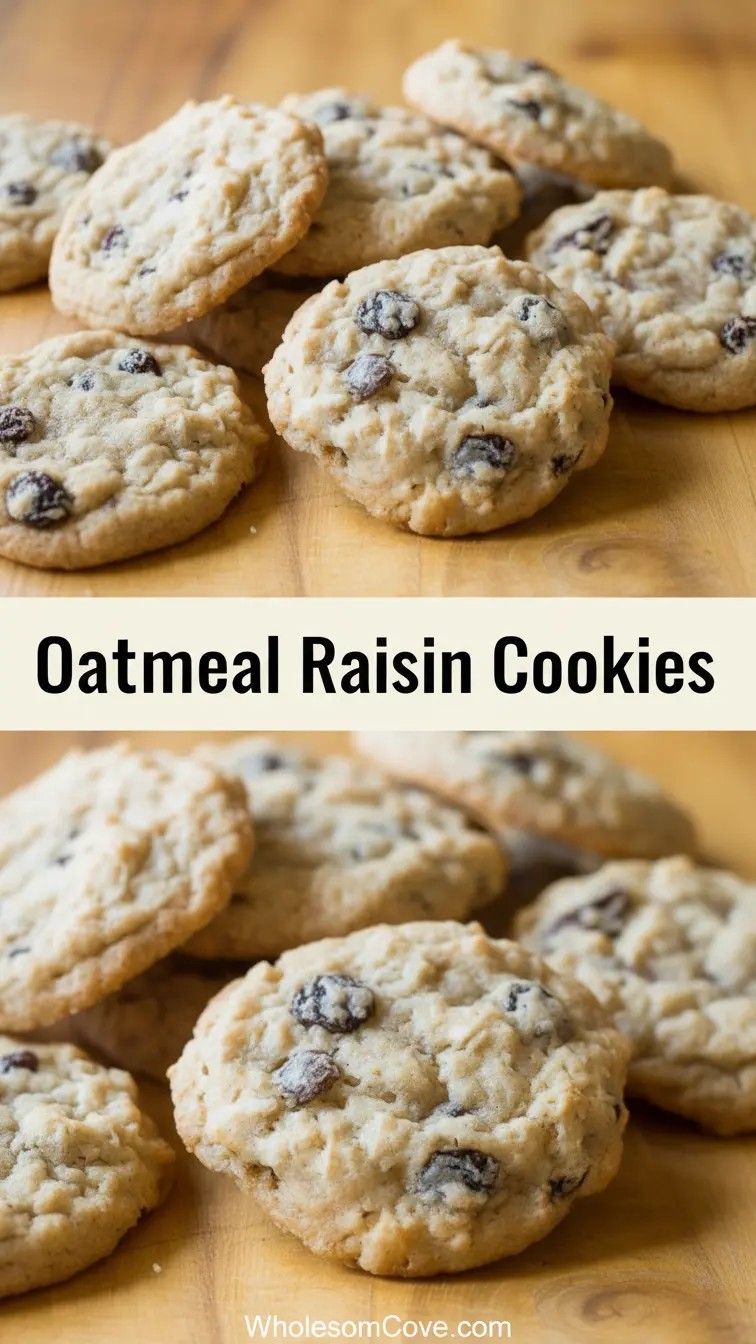
Why You’ll Love This Oatmeal Raisin Cookie Recipe
These cookies strike that perfect balance between chewy and slightly crisp around the edges. They’re substantial enough to feel like a proper snack, not just empty sugar calories.
The warmth of cinnamon and nutmeg makes every bite feel like a hug from the inside. I’ve watched countless friends who claim to “hate raisins” change their minds after trying these cookies.
- Perfectly chewy texture: The oats create this incredible chewiness that stays soft for days, unlike cookies that turn rock-hard overnight. I’ve kept these in an airtight container for up to a week, and they’re just as good on day seven as they are fresh from the oven.
- Balanced sweetness: The natural sweetness of raisins pairs beautifully with brown sugar, creating layers of flavor instead of just hitting you with one note. My sister, who usually avoids desserts, keeps these in her office desk drawer.
- Wholesome ingredients: With oats, cinnamon, and real butter, these cookies feel less guilty than other treats. Not that I’m saying they’re health food, but when my kids ask for a snack, I don’t cringe handing them one of these.
- Beginner-friendly: No special equipment, no complicated techniques, no tempering chocolate or whipping egg whites to stiff peaks. Just mix, scoop, and bake.
- Makes your kitchen smell amazing: Seriously, light a cinnamon candle and it doesn’t even come close to the real thing. My neighbor once knocked on my door asking if I was running a bakery.
You might also enjoy: Peanut Butter Cookies Recipe
Ingredients
Every ingredient here serves a purpose, learned through years of trial and error. I’ve tried swapping things out, and while some substitutions work, others lead to disappointing results.
- 1 cup (227g) unsalted butter, softened: Room temperature is key here. Cold butter won’t cream properly, and melted butter changes the texture completely. I leave mine on the counter for about an hour before baking.
- 1 cup (220g) packed brown sugar: Dark brown sugar gives deeper flavor, but light brown works too. The molasses in brown sugar adds moisture and that signature chewy texture.
- ½ cup (100g) granulated sugar: This balances the brown sugar and helps create those slightly crispy edges I love.
- 2 large eggs, room temperature: Cold eggs straight from the fridge don’t incorporate as smoothly. I set mine out when I start preheating the oven.
- 2 teaspoons vanilla extract: Don’t skimp on this. Cheap imitation vanilla tastes like chemicals. Spring for the pure vanilla extract.
- 1½ cups (190g) all-purpose flour: I use the spoon and level method, never scooping directly from the bag, which packs in too much flour and makes dry cookies.
- 1 teaspoon baking soda: This is what gives the cookies their rise and slightly crispy edges.
- 1 teaspoon ground cinnamon: Fresh ground cinnamon makes a huge difference. If yours has been sitting in the cabinet since 2019, get a new jar.
- ½ teaspoon salt: Never skip the salt. It enhances all the other flavors and prevents the cookies from tasting flat.
- ¼ teaspoon ground nutmeg: This is my secret weapon. It adds a subtle warmth that people can’t quite identify but love.
- 3 cups (270g) old fashioned oats: Not instant oats, not steel cut oats. Old fashioned rolled oats are the goldilocks choice for texture.
- 1½ cups (240g) raisins: I prefer regular raisins, but golden raisins work if you prefer a milder flavor. Once I tried dried cranberries instead and got rave reviews.
If you enjoy wholesome breakfast treats, my Baked Oatmeal uses similar warming spices.
Kitchen Equipment Needed
You don’t need a fancy kitchen to make these cookies. Most of this equipment is probably already in your cabinets.
- Stand mixer or hand mixer: While you can mix by hand, a mixer makes the job much easier and ensures everything is properly combined. I use my stand mixer for the butter and sugar, then fold in the oats by hand.
- Large mixing bowls: You’ll need at least two, one for wet ingredients and one for dry ingredients before combining.
- Measuring cups and spoons: Baking is chemistry, so accurate measurements matter more here than in cooking.
- Baking sheets: I use two so I can have one batch baking while I’m scooping the next. Light colored sheets work better than dark ones, which can cause over-browning.
- Parchment paper or silicone baking mats: These prevent sticking and make cleanup a breeze. I’ve been using the same silicone baking mats for three years.
- Cookie scoop: A 2-tablespoon scoop gives you uniformly sized cookies that bake evenly. This was a game changer for me.
- Wire cooling rack: Essential for preventing soggy bottoms. Leaving cookies on the hot pan continues cooking them.
- Rubber spatula: For scraping down the bowl and folding in the oats and raisins.
Another favorite: Sugar Cookies Recipe
Recommended Products for This Recipe
After making these cookies more times than I can count, I’ve found a few products that genuinely make a difference in the final result.
1. KitchenAid Stand Mixer
This has been my baking workhorse for years, and it creams butter and sugar to perfect fluffy peaks without breaking a sweat. The powerful motor handles thick cookie dough better than any hand mixer I’ve owned. Yes, it’s an investment, but mine has lasted over a decade and still works like new.
2. Nielsen-Massey Pure Vanilla Extract
I used to think all vanilla extract was the same until I tried this Madagascar bourbon vanilla. The depth of flavor it adds to these cookies is noticeable, and a little goes a long way. Once you bake with quality vanilla, you can’t go back to the imitation stuff.
3. OXO Good Grips Cookie Scoop
This medium cookie scoop makes perfectly portioned cookies every single time, which means they all bake evenly and look professional. The spring-loaded release works smoothly even with thick dough, and it’s dishwasher safe for easy cleanup.
4. Silpat Premium Non-Stick Silicone Baking Mat
I stopped using parchment paper years ago once I discovered these reusable baking mats. They create the perfect non-stick surface, and the cookies slide right off without any sticking. I’ve put mine through hundreds of baking sessions and they still look great.
5. Bob’s Red Mill Old Fashioned Rolled Oats
Not all oats are created equal, and these thick-cut rolled oats give the cookies that perfect chewy texture. They hold up beautifully in baking without turning mushy, and they’re always fresh and high quality.

Step-by-Step Instructions: How to Make Oatmeal Raisin Cookies
Take your time with these steps. Baking isn’t a race, and rushing leads to mistakes I’ve made too many times.
1. Preheat and Prepare
- Preheat your oven to 350°F (175°C). This gives it time to reach the proper temperature while you mix the dough.
- Line two baking sheets with parchment paper or silicone baking mats. Make sure they lay flat without any wrinkles that could affect cookie shape.
- Take your butter and eggs out of the refrigerator if you haven’t already. Room temperature ingredients blend together much more smoothly than cold ones.
2. Cream Butter and Sugars
- In your stand mixer bowl fitted with the paddle attachment, or in a large bowl with a hand mixer, add the softened butter, brown sugar, and granulated sugar.
- Beat on medium speed for 3 to 4 minutes until the mixture is light, fluffy, and pale in color. This incorporates air that helps the cookies rise and creates that perfect texture.
- Stop the mixer and scrape down the sides of the bowl with a rubber spatula at least once during this process. Sugar and butter love to hide in the corners.
- The mixture should look almost like frosting when it’s ready. If it looks grainy or separated, keep beating for another minute.
3. Add Eggs and Vanilla
- Add the eggs one at a time, beating well after each addition. Wait until the first egg is fully incorporated before adding the second one.
- Pour in the vanilla extract and mix until everything is well combined and smooth.
- The mixture might look slightly curdled at this point. That’s normal and will smooth out once you add the dry ingredients.
- Scrape down the bowl again to ensure everything is evenly mixed.
4. Combine Dry Ingredients
- In a separate medium bowl, whisk together the flour, baking soda, cinnamon, salt, and nutmeg.
- Whisk for at least 30 seconds to ensure all the dry ingredients are evenly distributed. This prevents pockets of baking soda or spices in your cookies.
- Breaking up any lumps in the flour now prevents them from showing up in your finished cookies.
5. Mix Dry Ingredients into Wet
- With your mixer on low speed, gradually add the dry ingredient mixture to the butter mixture.
- Mix just until you no longer see streaks of flour. Don’t overmix or your cookies will be tough and cake-like instead of chewy.
- The dough will be quite thick at this point. That’s exactly what you want.
- If you’re using a stand mixer, stop it as soon as the flour disappears. Hand mixers give you more control for this step.
6. Fold in Oats and Raisins
- Remove the bowl from the mixer if you’re using a stand mixer. This step is best done by hand.
- Add the oats and raisins to the dough.
- Using a sturdy wooden spoon or rubber spatula, fold them in until they’re evenly distributed throughout the dough.
- This takes some muscle because the dough is thick. I usually do about 20 to 30 good folds to get everything incorporated.
- Check the bottom of the bowl to make sure no oats or raisins are hiding down there.
7. Scoop the Cookie Dough
- Using a 2-tablespoon cookie scoop or a regular spoon, portion out the dough onto your prepared baking sheets.
- Leave about 2 inches (5 cm) between each cookie. They spread as they bake, and cookies that touch become one giant cookie.
- I can usually fit 12 cookies per standard baking sheet with proper spacing.
- If any raisins are poking out at odd angles, gently press them back into the dough so they don’t burn.
- For more uniform cookies, you can gently flatten each dough ball slightly with your palm, but I usually skip this step.
8. Bake the Cookies
- Place one baking sheet in the center of your preheated oven.
- Bake for 10 to 12 minutes, until the edges are golden brown but the centers still look slightly underdone.
- The cookies will continue cooking on the hot pan after you remove them from the oven, so slightly underbaking is better than overbaking.
- If you’re baking two sheets at once, rotate them halfway through baking and switch their positions on the racks for even baking.
- Every oven is different. Start checking at 10 minutes, and go by appearance rather than just time.
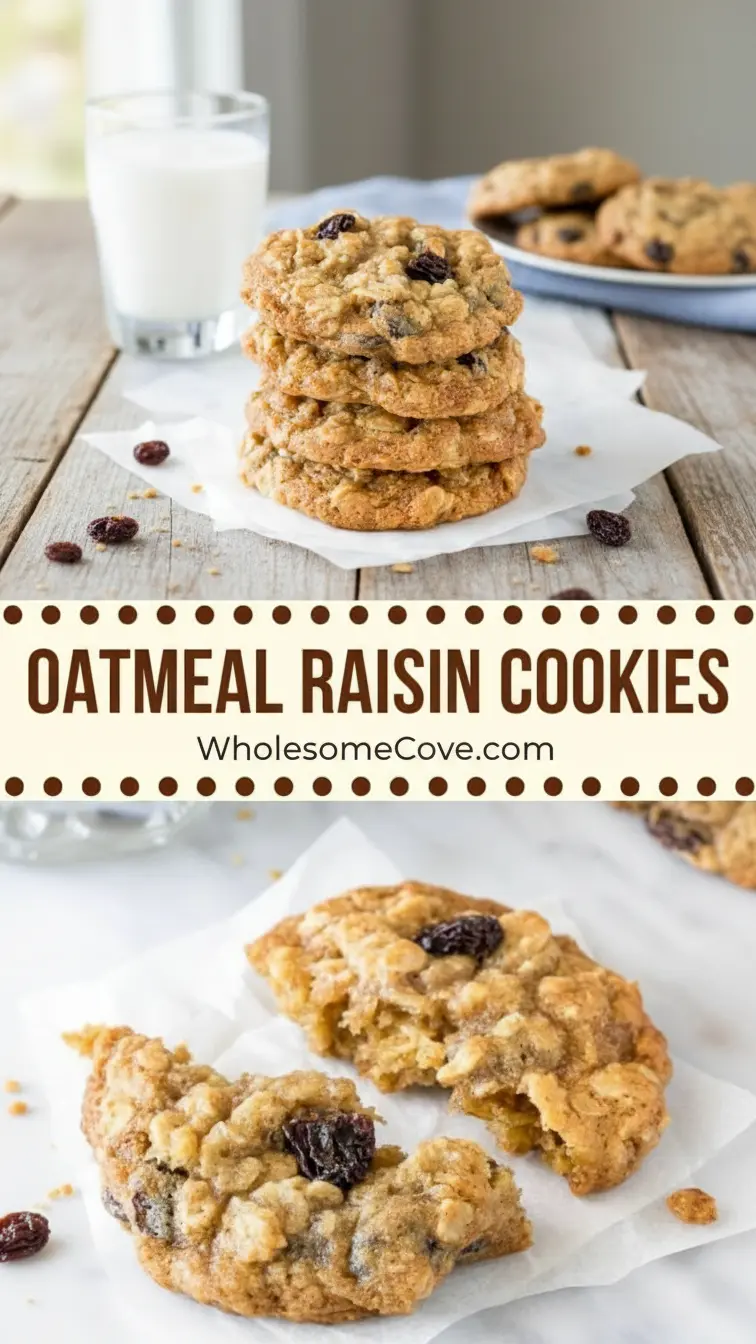
9. Cool and Enjoy
- Let the cookies cool on the baking sheet for 5 minutes. They’re too soft to move immediately and will fall apart if you try.
- After 5 minutes, use a spatula to carefully transfer the cookies to a wire cooling rack.
- Let them cool completely if you can resist. Warm cookies are delicious but messier to eat and store.
- The cookies will firm up as they cool but remain chewy in the center.
- If you want to speed up cooling, you can place the entire baking sheet in the refrigerator for a few minutes, then transfer to the rack.
Read Also: Gingerbread Cookie Recipe
Tips for The Best Oatmeal Raisin Cookies
These are the lessons I’ve learned from countless batches, including plenty of failures that taught me what not to do.
- Don’t skip the resting time for butter: Room temperature butter should leave a slight indent when you press it but not be so soft it’s greasy. This usually takes about an hour at room temperature.
- Measure flour correctly: Spoon the flour into your measuring cup and level it off with a knife. Scooping directly from the bag packs in up to 25% more flour, which makes dry cookies.
- Use fresh spices: Ground cinnamon and nutmeg lose their potency over time. If you can’t remember when you bought yours, it’s probably time for new ones.
- Plump the raisins: For extra soft raisins, soak them in hot water for 10 minutes, then drain and pat dry before adding to the dough. I discovered this trick after getting a bag of particularly dry raisins.
- Chill the dough for better flavor: While not required, chilling the dough for 30 minutes to 2 hours in the refrigerator allows the flour to hydrate and the flavors to develop. The cookies also spread less.
- Watch the baking time closely: The difference between perfect and overbaked is literally one minute. Set a timer and don’t walk away.
- Rotate your pan: Halfway through baking, rotate the pan 180 degrees so the cookies in the back move to the front. This ensures even browning.
- Let them cool on the pan: I know it’s tempting to move them immediately, but they need those 5 minutes to set. Trust me on this.
- Use parchment or silicone mats: Greasing the pan with butter or cooking spray can cause the cookies to spread too much and brown too quickly on the bottom.
- Add a pinch of cardamom: For a subtle complexity, add ¼ teaspoon of ground cardamom along with the other spices. It’s not traditional, but it’s delicious.
- Toast the oats first: For deeper flavor, spread the oats on a baking sheet and toast them at 350°F (175°C) for 5 to 7 minutes until fragrant. Let them cool before adding to the dough.
For another comforting treat, try my Pumpkin Oatmeal Cookies which use similar techniques.
Serving Suggestions
These cookies are fantastic on their own, but pairing them with the right accompaniments takes them to another level.
- With coffee or tea: The spices in these cookies pair beautifully with a strong cup of coffee or chai tea. The slight bitterness balances the sweetness perfectly.
- Ice cream sandwiches: Use two cookies to sandwich a scoop of vanilla or cinnamon ice cream. Roll the edges in mini chocolate chips or chopped nuts for extra decadence.
- Crumbled over yogurt: Break up a cookie and sprinkle it over Greek yogurt with fresh berries for a breakfast that feels like dessert.
- With a cold glass of milk: Classic for a reason. The milk cuts through the sweetness and makes the cookies even more enjoyable.
- Alongside Hot Chocolate: During winter months, nothing beats dunking these cookies in rich, creamy hot chocolate.
- Packed in lunch boxes: These cookies hold up well and don’t crumble easily, making them perfect for school or work lunches.
- At holiday gatherings: Arrange them on a platter with other cookies for a dessert spread. They’re always the first to disappear at my holiday parties.
- With Homemade Cinnamon Applesauce: The warm spices complement each other beautifully, making this a cozy fall combination.
Variations of Oatmeal Raisin Cookies
Once you’ve mastered the basic recipe, these variations keep things interesting without straying too far from what makes these cookies special.
- Chocolate chip oatmeal cookies: Replace half or all of the raisins with semi-sweet or dark chocolate chips. This wins over the raisin skeptics every time.
- Cranberry walnut: Substitute dried cranberries for raisins and add ¾ cup chopped walnuts. The tartness and crunch add wonderful contrast.
- Apple cinnamon: Replace raisins with ¾ cup finely diced dried apples and increase the cinnamon to 1½ teaspoons. These taste like apple pie in cookie form.
- Tropical version: Use dried mango or pineapple instead of raisins, and add ½ cup shredded coconut. Swap the nutmeg for ½ teaspoon ground ginger.
- Maple pecan: Replace ¼ cup of brown sugar with pure maple syrup, and swap raisins for chopped pecans. Add ½ teaspoon maple extract with the vanilla.
- Peanut butter oatmeal: Add ½ cup creamy peanut butter when creaming the butter and sugar. Reduce the butter to ¾ cup to compensate.
- Chai spiced: Add ¼ teaspoon ground ginger, ¼ teaspoon ground cardamom, and a pinch of ground cloves along with the cinnamon and nutmeg.
- Cherry almond: Use dried cherries instead of raisins and add ½ teaspoon almond extract. Fold in ½ cup sliced almonds for crunch.
- Monster cookies: Add ½ cup M&Ms and ½ cup mini chocolate chips along with the raisins for a fun, colorful version kids love.
- Breakfast cookies: Add ½ cup ground flax seed and ¼ cup wheat germ for extra nutrition. Replace half the butter with unsweetened applesauce.
For more cookie inspiration, check out my Pumpkin Chocolate Chip Cookies.
Storage and Reheating
Proper storage keeps these cookies fresh and delicious for days, though they rarely last that long in my house.
- Room temperature storage: Store cooled cookies in an airtight container at room temperature for up to 5 days. Place a piece of bread in the container to keep them soft. The cookies absorb moisture from the bread.
- Refrigerator storage: For longer storage, keep them in an airtight container in the refrigerator for up to 2 weeks. Let them come to room temperature before eating, or warm them briefly.
- Freezing baked cookies: Freeze cooled cookies in a single layer on a baking sheet until solid, then transfer to a freezer bag or container. They’ll keep for up to 3 months. Thaw at room temperature for 30 minutes.
- Freezing cookie dough: Scoop the dough into balls and freeze on a baking sheet until solid. Transfer to a freezer bag and freeze for up to 3 months. Bake from frozen, adding 2 to 3 minutes to the baking time.
- Reheating cookies: Warm cookies in a 300°F (150°C) oven for 5 minutes to recreate that fresh-baked texture. A few seconds in the microwave works too, but the oven is better.
- Preventing cookies from sticking together: Layer cookies with parchment paper between each layer in your storage container to keep them from sticking.
- Reviving stale cookies: If cookies get hard, place them in a container with a damp paper towel (not touching the cookies) overnight. They’ll absorb the moisture and soften up.
- Shipping cookies: These cookies ship well. Wrap them individually in plastic wrap, then pack tightly in a sturdy container with bubble wrap. They’ll arrive intact and delicious.
Another fall favorite: Pumpkin Cookies Recipe
Nutritional Facts
Per Cookie (based on 24 cookies):
- Calories: 185
- Total Fat: 8g
- Saturated Fat: 4.5g
- Cholesterol: 30mg
- Sodium: 125mg
- Total Carbohydrates: 27g
- Dietary Fiber: 1.5g
- Sugars: 16g
- Protein: 2.5g
Note: Nutritional values are approximate and will vary based on specific ingredients used and cookie size.
Health Benefits of Key Ingredients
While these are definitely a treat, several ingredients offer genuine nutritional benefits that make me feel a bit better about eating three in one sitting.
- Oats: Rich in soluble fiber, particularly beta-glucan, which helps lower cholesterol and supports digestive health. Oats also provide sustained energy without the blood sugar spike you get from refined grains. I always feel more satisfied after eating these cookies than after eating cookies made with just white flour.
- Raisins: Packed with iron, potassium, and antioxidants. Despite being dried fruit, they retain most of their nutrients and add natural sweetness that allows us to use less refined sugar. They also provide quick energy, which is why I often grab one of these cookies before a workout.
- Cinnamon: Contains powerful antioxidants and has anti-inflammatory properties. Some studies suggest it may help regulate blood sugar levels and improve insulin sensitivity. Beyond health benefits, it just makes everything taste better.
- Eggs: Provide high-quality protein and essential nutrients like vitamin D, B vitamins, and choline. The fat in egg yolks helps your body absorb fat-soluble vitamins from other ingredients.
- Butter: Contains fat-soluble vitamins A, E, and K2. While it’s high in saturated fat, using real butter instead of margarine means you’re eating actual food, not processed oils. Everything in moderation, including moderation.
For a heartier breakfast option, try my Overnight Oats.
FAQs About Oatmeal Raisin Cookies
1. Can I use quick oats instead of old fashioned oats?
You can, but the texture won’t be quite the same. Quick oats are cut smaller and will absorb more moisture, making the cookies denser and less chewy.
If quick oats are all you have, reduce them to 2½ cups and add an extra 2 tablespoons of flour. The cookies will still taste good, just with a slightly different texture.
2. Why are my cookies spreading too much?
Overly soft butter is usually the culprit. If your butter was too warm when you mixed the dough, the cookies will spread excessively during baking.
Other causes include too much sugar, not enough flour, or an oven temperature that’s too low. Try chilling the dough for 30 minutes before baking, and make sure your oven is properly preheated.
3. Can I make these cookies vegan?
Absolutely! Replace the butter with vegan butter or coconut oil in equal amounts. Substitute each egg with a flax egg (1 tablespoon ground flaxseed mixed with 3 tablespoons water, let sit for 5 minutes).
The texture will be slightly different, but I’ve made vegan versions for friends and they’ve been delicious. Make sure your sugar is vegan, as some brands use bone char in processing.
4. How do I know when the cookies are done?
Look for golden brown edges with centers that still look slightly underdone and soft. They should be puffed up but not fully set in the middle.
The cookies will continue baking on the hot pan after you remove them from the oven. If you wait until they look completely done, they’ll end up overbaked and hard.
5. Can I reduce the sugar in this recipe?
You can reduce the granulated sugar by up to ¼ cup without drastically affecting the texture. I wouldn’t recommend reducing the brown sugar as much, since its moisture content affects the chewiness.
Keep in mind that reducing sugar will result in less sweet cookies that don’t spread as much and may be slightly drier. The raisins provide natural sweetness, so these cookies handle reduced sugar better than many recipes.
For more breakfast treats, explore my French Toast Recipe.
Final Thoughts
After years of baking these oatmeal raisin cookies, they’ve become more than just a recipe to me. They’re the smell of home, the taste of comfort, and the perfect thing to share with people you care about.
Every time I pull a tray from the oven, I remember that rainy Tuesday when I discovered this recipe, and how something so simple brought so much joy. Whether you’re baking these for the first time or the hundredth time, I hope they bring you the same warmth they’ve brought to my kitchen.
Give this recipe a try and see why oatmeal raisin cookies deserve more love than they usually get. I’d love to hear how they turn out for you, so drop a comment below and let me know what you think!
Recommended:
- Oatmeal Cookies Recipe
- Eggnog Cookies Recipe
- Fudge Brownie Recipe
- Apple Crisp Recipe
- Pumpkin Snickerdoodle Cookies Recipe
- Healthy Chocolate Chip Cookies Recipe
- Caramel Sauce Recipe
- Fruit Tart Recipe
- Coconut Cream Pie Recipe
- Pumpkin Bar Recipe