
I learned to make this coleslaw recipe from my grandmother during a family barbecue when I was twelve years old. She had this way of slicing cabbage so thin you could almost see through it, and her dressing had just the right balance of tang and sweetness.
Fast forward twenty years, and I’ve tweaked her original recipe based on countless summer cookouts, potlucks, and family gatherings. The biggest lesson I learned came from a picnic disaster where my coleslaw turned into a watery mess because I didn’t properly drain the cabbage—never making that mistake again!
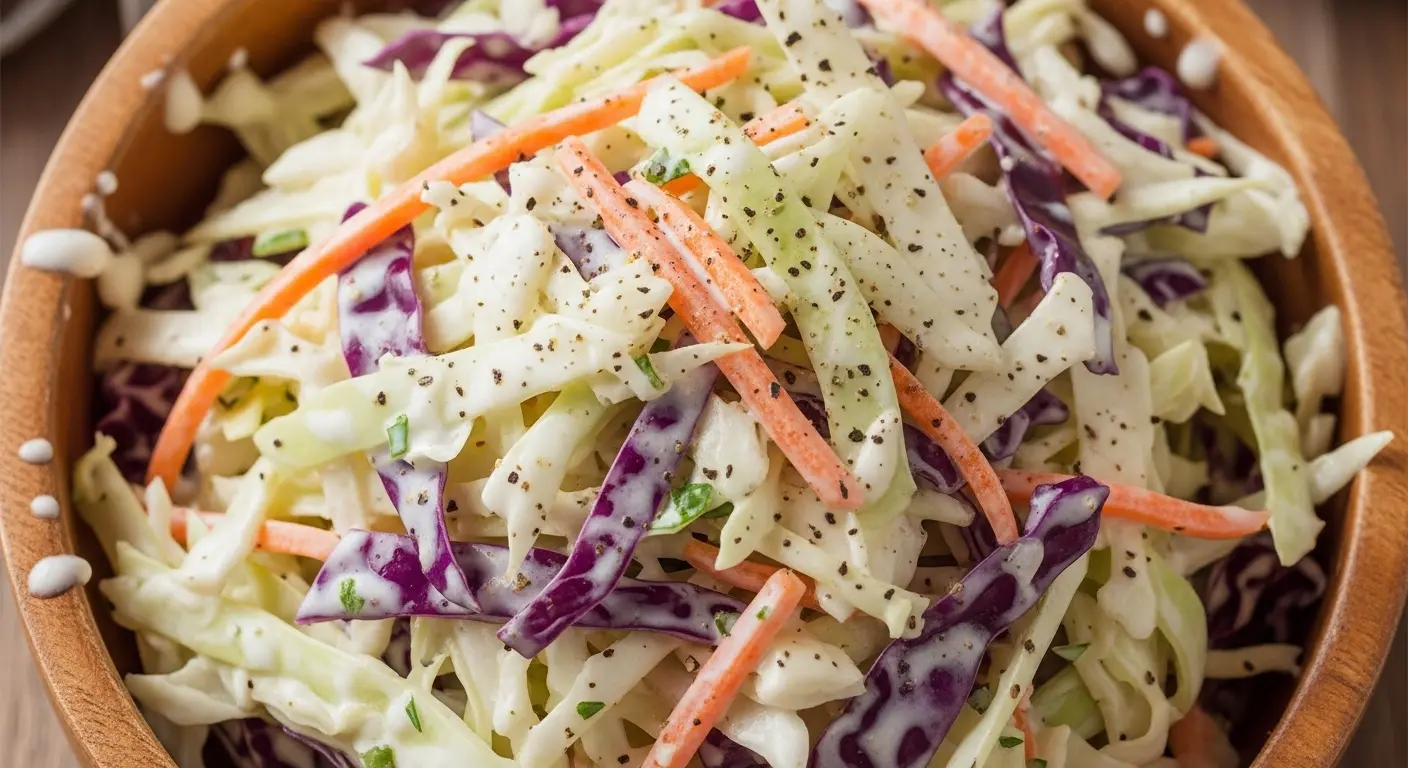
This coleslaw recipe delivers that perfect crunch with a creamy, tangy dressing that doesn’t overwhelm the vegetables. It’s become my go-to side dish for everything from backyard barbecues to weeknight dinners.
| Quick Recipe Summary | |
|---|---|
| Prep Time | 15 minutes |
| Cook Time | 0 minutes |
| Total Time | 15 minutes (plus 2 hours chilling) |
| Servings | 8 servings |
| Difficulty Level | Easy |
Why You’ll Love This Coleslaw Recipe
This isn’t your typical soggy, mayo-heavy coleslaw that sits untouched at potlucks. I’ve spent years perfecting the vegetable-to-dressing ratio so every bite has that satisfying crunch without being dry.
The dressing strikes that elusive balance between creamy and tangy, with just a hint of sweetness to round out the flavors. It’s light enough that you won’t feel weighed down, but flavorful enough that people always ask for the recipe.
Here’s what makes this coleslaw recipe stand out:
- Stays crispy for hours – The salt-and-drain method I use pulls excess moisture from the cabbage, preventing that dreaded watery pool at the bottom of your bowl
- Customizable heat level – Add more or less pepper depending on your preference; I like mine with a gentle kick
- Make-ahead friendly – Actually tastes better after sitting in the fridge for a few hours as the flavors meld together
- Works with any protein – I’ve served this alongside everything from grilled chicken to pulled pork, and it complements them all beautifully
- Budget-friendly – Uses simple, inexpensive ingredients that you probably already have in your kitchen
- Crowd-pleaser – Even people who claim they don’t like coleslaw end up going back for seconds
I love pairing this with my BBQ Pulled Pork Sandwiches for the ultimate comfort food combo.
Ingredients
This coleslaw recipe uses straightforward ingredients that create layers of flavor and texture. I’ve learned that the quality of your cabbage makes a huge difference—look for heads that feel heavy for their size with tightly packed leaves.
- 1 medium head green cabbage (about 2 pounds or 900g), finely shredded
- 2 medium carrots (about 8 ounces or 225g), peeled and grated
- 1 teaspoon kosher salt, for draining the vegetables
- 1 cup mayonnaise (240ml)
- 2 tablespoons apple cider vinegar (30ml)
- 1 tablespoon Dijon mustard (15ml)
- 2 tablespoons granulated sugar (25g)
- 1 tablespoon honey (15ml)
- ½ teaspoon celery seed
- ½ teaspoon freshly ground black pepper
- ¼ teaspoon garlic powder
- ¼ teaspoon onion powder
Kitchen Equipment Needed
Having the right tools makes preparing this coleslaw recipe much easier and faster. I used to struggle with uneven cabbage shreds until I invested in a proper mandoline slicer—it was a total transformation.
- Large mixing bowl – You need plenty of room to toss everything together without making a mess
- Mandoline slicer or sharp chef’s knife – For getting those perfectly thin, uniform cabbage shreds
- Box grater – Essential for grating the carrots to the right texture
- Colander – For draining the salted vegetables thoroughly
- Medium mixing bowl – To prepare the dressing separately
- Whisk – For emulsifying the dressing ingredients smoothly
- Measuring cups and spoons – Accuracy matters, especially with the dressing components
- Kitchen towel or paper towels – For pressing out excess moisture from the vegetables
- Plastic wrap or airtight container – For storing the coleslaw while it chills
Recommended Products for This Recipe
After making coleslaw countless times, I’ve found a few products that genuinely make the process easier and the results better. These aren’t just nice-to-haves—they’ve become essential tools in my kitchen.
1. OXO Good Grips Mandoline Slicer
This mandoline changed everything about how I prep cabbage for coleslaw. The adjustable thickness settings let you get those restaurant-quality thin shreds, and the hand guard keeps your fingers safe. I used to spend 20 minutes hacking away with a knife; now it takes me less than 5 minutes to shred an entire head of cabbage perfectly.
2. Pyrex Glass Mixing Bowl Set
These glass bowls are my go-to for making coleslaw because they’re non-reactive (important with acidic dressings) and large enough to toss everything without spillage. The set comes in multiple sizes, so I use the large one for mixing and a medium one for the dressing. They’re also microwave and dishwasher safe, making cleanup effortless.
3. Bragg Organic Raw Apple Cider Vinegar
Not all vinegars are created equal, and this one makes a noticeable difference in the dressing’s flavor. It has a cleaner, more complex tang than regular vinegar, and the raw, unfiltered quality adds subtle depth. I always keep a bottle in my pantry for dressings and marinades.
4. Chef’s Choice ProntoPro Diamond Hone Knife Sharpener
If you’re using a knife instead of a mandoline, it absolutely must be sharp. This sharpener keeps my chef’s knife in perfect condition, making cabbage shredding safer and more precise. Dull knives slip and crush the cabbage instead of cleanly slicing through it, which can make your coleslaw soggy.
Another favorite: Healthy Coleslaw Recipe

Step-by-Step Instructions: How to Make Coleslaw
Follow these detailed steps to create perfectly crispy, flavorful coleslaw. I’ve included all the little tricks I’ve learned over the years to help you avoid common mistakes.
1. Prepare and Salt the Vegetables
- Remove any damaged outer leaves from the cabbage head and rinse it under cold water.
- Cut the cabbage into quarters, then carefully cut out the tough core from each quarter.
- Using your mandoline slicer or a sharp knife, shred the cabbage as thinly as possible—aim for shreds about 1/8 inch (3mm) thick or thinner.
- Peel your carrots and grate them using the large holes of your box grater; you want long, thin shreds that match the cabbage texture.
- Place all the shredded cabbage and grated carrots in your large mixing bowl.
- Sprinkle the kosher salt evenly over the vegetables and toss everything together with your hands, really working the salt into the vegetables.
- Let the salted vegetables sit at room temperature for 30-45 minutes—this crucial step draws out excess moisture that would otherwise dilute your dressing.
2. Make the Creamy Dressing
- While your vegetables are draining, grab your medium mixing bowl and add the mayonnaise.
- Pour in the apple cider vinegar and add the Dijon mustard to the bowl.
- Add the granulated sugar and honey, then sprinkle in the celery seed, black pepper, garlic powder, and onion powder.
- Whisk everything together vigorously for about 30 seconds until the dressing is completely smooth and slightly thickened.
- Taste the dressing and adjust if needed—I sometimes add an extra splash of vinegar if I want more tang or a pinch more sugar for sweetness.
- Cover the bowl with plastic wrap and refrigerate the dressing while the vegetables finish draining; chilling helps the flavors meld together.
Read Also: Healthy Hummus Recipe
3. Drain and Dry the Vegetables
- After 30-45 minutes, you’ll notice the vegetables have released quite a bit of liquid and softened slightly—this is exactly what you want.
- Transfer the salted vegetables to your colander and press down firmly to squeeze out as much liquid as possible.
- Rinse the vegetables under cold running water for about 30 seconds to remove excess salt; don’t skip this step or your coleslaw will be too salty.
- Shake the colander vigorously to remove as much water as possible, then spread the vegetables on a clean kitchen towel or several layers of paper towels.
- Gather the towel around the vegetables and squeeze hard, wringing out every last bit of moisture you can.
- The vegetables should feel almost dry to the touch before you proceed—this is the secret to coleslaw that stays crispy instead of becoming watery.
4. Combine and Chill
- Return the dried vegetables to your large mixing bowl (make sure it’s clean and dry first).
- Pour the chilled dressing over the vegetables and use clean hands or a large spoon to toss everything together thoroughly.
- Make sure every strand of cabbage and carrot is coated with dressing—I like to use a folding motion rather than stirring to keep the vegetables from breaking down.
- Taste your coleslaw and adjust the seasoning if needed; sometimes I add an extra pinch of black pepper or a tiny drizzle of honey.
- Cover the bowl tightly with plastic wrap or transfer everything to an airtight container.
- Refrigerate for at least 2 hours before serving—this chilling time is essential for the flavors to develop and meld together properly.
- Give the coleslaw a good toss right before serving, as some liquid may have settled at the bottom.

Tips for The Best Coleslaw
These are the hard-earned lessons from years of making coleslaw for everything from casual dinners to big family gatherings. Trust me, these tips make all the difference.
- Shred uniformly – Take your time cutting the cabbage into consistently thin shreds; uneven pieces mean some will be crunchy while others are soggy, and nobody wants that
- Don’t skip the salting step – I know it seems fussy, but salting and draining the vegetables prevents that watery mess that ruins so many coleslaws; this one step is absolutely crucial
- Keep everything cold – Use chilled ingredients and work quickly, especially on hot days; warm mayo can break and make your dressing oily and separated
- Adjust the sweetness – Some people prefer their coleslaw sweeter while others like it more tangy; start with the amount I’ve listed, then taste and tweak to your preference
- Use fresh cabbage – Old, wilted cabbage will never give you that crispy texture you’re looking for; the cabbage should feel heavy and firm when you buy it
- Press out moisture thoroughly – I can’t stress this enough—the drier your vegetables after draining, the crispier your finished coleslaw will be
- Make it ahead – Coleslaw actually improves after sitting for a few hours or even overnight; the flavors meld beautifully, though I don’t recommend making it more than 24 hours ahead
- Reserve some dressing – If you’re making coleslaw for a party that will sit out for a while, toss with only three-quarters of the dressing and add the rest just before serving
- Massage gently – When mixing the vegetables with dressing, be gentle to avoid bruising the cabbage, which can make it turn soggy and lose its bright color
You might also enjoy: Grilled Vegetable Skewers Recipe
Serving Suggestions
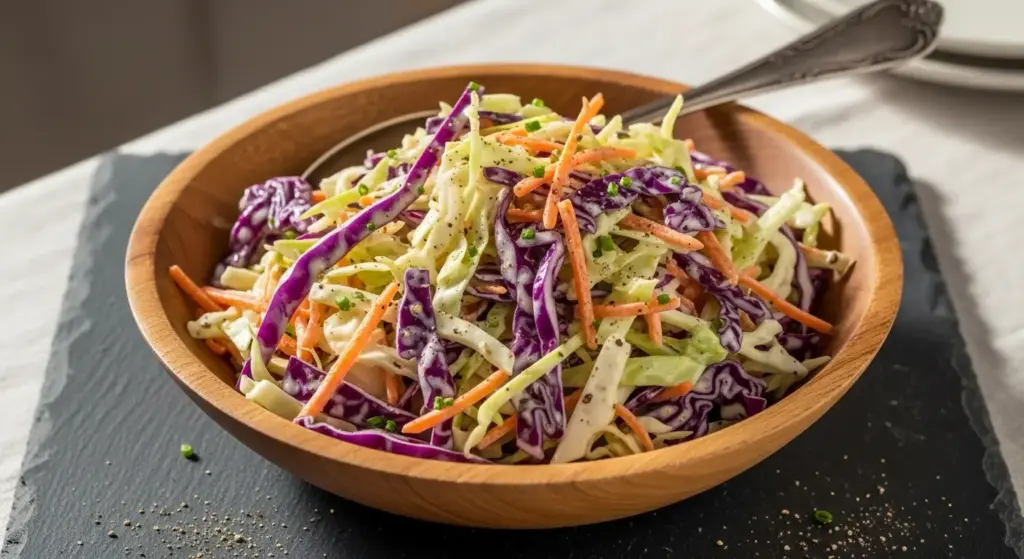
This coleslaw recipe shines as a versatile side dish that complements so many different meals. I’ve served it countless ways over the years, and it never disappoints.
Coleslaw is the perfect cooling counterpoint to rich, smoky meats at barbecues. I always make a big batch when we’re grilling because people go back for seconds and thirds.
Here are my favorite ways to serve this coleslaw:
- On pulled pork sandwiches – Pile it high right on top of the meat for incredible texture contrast and to cut through the richness
- With fried chicken – The creamy, tangy slaw balances the crispy, salty coating beautifully; try it alongside Air Fryer Chicken Breast
- At summer cookouts – Serve it in a big bowl next to burgers, hot dogs, and grilled steaks as a classic picnic side
- With fish tacos – Swap the traditional cabbage slaw for this dressed version in Baja Fish Tacos
- Alongside ribs – The crisp vegetables provide relief from the sticky, sweet barbecue sauce
- As a topping for burgers – Add a generous scoop right on top of your patty for extra crunch and flavor
- With Sloppy Joe – The cool, crisp slaw cuts through the sweet, savory meat sauce perfectly
- At potlucks – This coleslaw travels well and can sit out longer than mayo-only slaws without separating
Read Also: Deviled Eggs Recipe
Variations of Coleslaw
Once you’ve mastered this classic coleslaw recipe, it’s easy to customize it to suit different tastes or occasions. I love experimenting with these variations depending on what I’m serving it with.
- Memphis-style coleslaw – Reduce the mayo to ½ cup and add ¼ cup of yellow mustard for a tangier, more mustardy flavor that’s perfect with barbecue
- Asian-inspired slaw – Replace the mayo-based dressing with a mixture of rice vinegar, sesame oil, soy sauce, ginger, and a touch of honey; add some toasted sesame seeds on top
- Spicy jalapeño coleslaw – Stir in 1-2 finely diced jalapeños (seeds removed if you want less heat) and add a pinch of cayenne pepper to the dressing
- Apple coleslaw – Toss in 1 cup of julienned crisp apple (like Granny Smith or Honeycrisp) for a sweet-tart crunch that’s especially good in fall
- Red cabbage version – Swap half or all of the green cabbage for red cabbage; the flavor is similar but you get gorgeous purple color
- Southwestern coleslaw – Add 1 cup of corn kernels, diced red bell pepper, and cilantro, then mix in some lime juice and a touch of cumin to the dressing
- Buttermilk ranch slaw – Replace half the mayo with buttermilk and add fresh dill and chives for a ranch-flavored twist
- Creamy blue cheese slaw – Fold in ¼ cup of crumbled blue cheese and add a tablespoon of blue cheese dressing to the mix
- Pineapple coleslaw – Mix in ½ cup of drained crushed pineapple and a tablespoon of lime juice for a tropical variation that’s amazing with grilled shrimp
- German-style slaw – Use white vinegar instead of apple cider, reduce the mayo, add caraway seeds, and increase the sugar for a sweeter, more pickled flavor
For a lighter option, try: Healthy Guacamole Recipe
Storage and Reheating
Proper storage is key to keeping your coleslaw fresh and crispy. I’ve learned these storage tips through trial and error, including one memorable occasion when I accidentally froze leftover coleslaw—don’t do that!
- Refrigerator storage – Transfer coleslaw to an airtight container and store in the refrigerator for up to 3 days; it actually tastes best after the first day when the flavors have fully melded
- Drain before storing – If you notice excess liquid has accumulated at the bottom of your bowl, drain it off before transferring to storage containers to keep the slaw from getting soggy
- Keep dressing separate – If you know you’ll have leftovers, consider storing undressed cabbage and the dressing separately, then combining portions as needed for maximum crispness
- Don’t freeze – Freezing completely destroys the texture of coleslaw; the vegetables become mushy and the dressing separates in an unappetizing way
- Refresh before serving – If your coleslaw has been sitting for a day or two, give it a good stir and taste it; you might want to add a splash of vinegar or a pinch of salt to brighten the flavors
- Store in glass – I prefer glass containers over plastic because they don’t absorb odors and keep the coleslaw fresher longer
- Press plastic wrap – If using a bowl rather than a container, press plastic wrap directly onto the surface of the coleslaw before sealing to minimize air exposure
- Keep cold – Always store coleslaw in the coldest part of your refrigerator (usually the back of the bottom shelf) to maintain maximum crispness
- No reheating needed – Coleslaw is served cold or at cool room temperature; never attempt to warm it up
Another favorite: Watermelon Feta Salad with Mint
Nutritional Facts
Here’s the approximate nutritional information per serving (based on 8 servings):
- Calories: 145
- Total Fat: 11g
- Saturated Fat: 2g
- Cholesterol: 8mg
- Sodium: 285mg
- Total Carbohydrates: 12g
- Dietary Fiber: 3g
- Sugars: 8g
- Protein: 2g
- Vitamin A: 85% DV
- Vitamin C: 65% DV
- Calcium: 6% DV
- Iron: 4% DV
Note that these values are estimates and can vary based on the specific brands and quantities of ingredients you use. If you’re watching your calorie intake, you can reduce the mayonnaise and replace some of it with Greek yogurt for a lighter version.
Health Benefits of Key Ingredients
This coleslaw recipe isn’t just delicious—it’s actually packed with nutritious ingredients that offer real health benefits. I love that I can enjoy comfort food while still getting plenty of vitamins and fiber.
The humble ingredients in coleslaw provide more nutrition than you might expect:
- Cabbage – An excellent source of vitamin C and K, cabbage is also rich in antioxidants and has been linked to reduced inflammation; the fiber content supports digestive health and helps you feel full
- Carrots – These orange beauties are loaded with beta-carotene, which your body converts to vitamin A for healthy vision, skin, and immune function; they also provide antioxidants that may help protect against certain diseases
- Apple cider vinegar – May help regulate blood sugar levels and support healthy digestion; it also adds tangy flavor without adding significant calories
- Celery seed – Contains beneficial compounds that may have anti-inflammatory properties and support bone health; it also aids digestion and adds depth of flavor
- Garlic and onion powder – Both contain compounds that may support heart health and have antimicrobial properties; they boost flavor without requiring fresh ingredients that can go bad quickly
You might also enjoy: Chickpea Salad Recipe
FAQs About Coleslaw
1. How long does homemade coleslaw last in the refrigerator?
Homemade coleslaw will stay fresh in an airtight container in the refrigerator for up to 3 days. After that, the vegetables start to break down and release more water, making the slaw soggy and less appetizing.
2. Can I make coleslaw ahead of time?
Yes, and I actually recommend it! Making coleslaw 2-4 hours ahead or even the night before allows the flavors to meld together beautifully. Just keep it refrigerated until you’re ready to serve, and give it a quick stir before bringing it to the table.
3. Why is my coleslaw watery?
Watery coleslaw usually happens when you skip the salting and draining step, or when you don’t press out enough moisture from the vegetables after draining. Always salt your cabbage and carrots, let them sit for at least 30 minutes, then thoroughly squeeze out the liquid before adding the dressing.
4. Can I use a food processor to shred the cabbage?
You can, but I don’t recommend it for this recipe. Food processors tend to chop rather than slice, giving you uneven pieces and actually bruising some of the cabbage, which releases excess moisture. A mandoline slicer or sharp knife gives you much better texture and control.
5. What’s the best cabbage to use for coleslaw?
Green cabbage is the classic choice and what I use most often because it has the best crunch and mild flavor. Red cabbage works too and adds beautiful color, though it has a slightly stronger taste. Avoid savoy cabbage for coleslaw—it’s too delicate and wilts quickly.
Read Also: Mexican Chicken Salad Recipe
Final Thoughts
This coleslaw recipe has become such a staple in my kitchen that I can practically make it with my eyes closed. There’s something deeply satisfying about creating a dish that’s both simple and incredibly flavorful, one that brings people together around the table.
The beauty of this recipe is its versatility—it works just as well at a casual weeknight dinner as it does at a summer barbecue with fifty guests. I hope you’ll make it your own, adjusting the sweetness or tang to suit your taste and trying out some of the variations I’ve shared.
Give this coleslaw recipe a try at your next meal, and I bet it’ll become one of your go-to sides too. I’d love to hear how it turns out for you—drop a comment below with your thoughts, any tweaks you made, or your favorite way to serve it!
Recommended:
- BLT Pasta Salad Recipe
- Shrimp Macaroni Salad Recipe
- Cranberry Jello Salad Recipe
- Air Fryer Corn on the Cob Recipe
- Healthy Mashed Potatoes Recipe
- Grilled Lemon Herb Chicken Recipe
- Air Fryer Simple Baked Potatoes Recipe
- Roasted Brussels Sprouts with Bacon Recipe
- Maple Glazed Carrots Recipe
- Air Fryer Balsamic Brussels Sprouts Recipe

