
I used to dread cooking chicken breast because it always turned out dry and bland, no matter how carefully I timed it.
Then one evening, I decided to try my air fryer, and everything changed. This Air Fryer Chicken Breast Recipe has become my go-to for busy weeknights when I need protein that’s both juicy and flavorful.
The first time I made it, I was skeptical. How could circulating hot air produce better results than my trusty skillet?
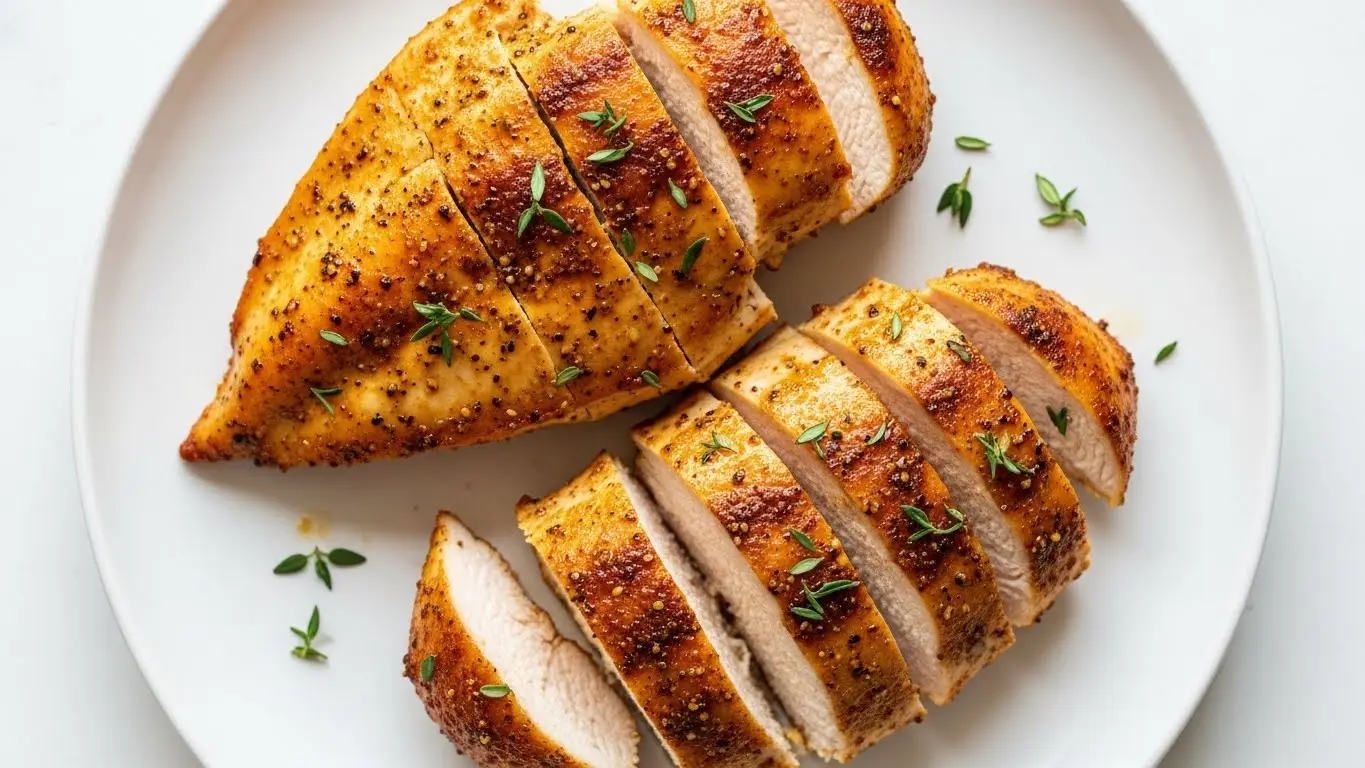
But when I sliced into that first piece and saw the juices run clear while the inside stayed incredibly tender, I was hooked. My husband took one bite and immediately asked if I’d marinated it overnight (I hadn’t).
| Quick Recipe Summary | |
|---|---|
| Prep Time | 10 minutes |
| Cook Time | 15 minutes |
| Total Time | 25 minutes |
| Servings | 4 breasts |
| Difficulty Level | Easy |
If you’re looking for more air fryer chicken options, my Air Fryer Honey Garlic Chicken Wings are always a crowd favorite at parties.
_result.jpg "Air Fryer Chicken Breast Recipe – Clean Eating Made Simple")
Why You’ll Love This Air Fryer Chicken Breast Recipe
This recipe solves the biggest problem with chicken breast: dryness. The air fryer creates a perfect environment where the outside gets beautifully golden while the inside stays moist and tender.
I’ve tested this recipe at least thirty times, adjusting temperatures and timing until I found the sweet spot. You don’t need any fancy ingredients or complicated techniques.
Here’s what makes this recipe special:
- Incredibly juicy results – The high heat locks in moisture while creating a gorgeous exterior
- Ready in 25 minutes – Perfect for those nights when you need dinner fast
- Minimal cleanup – Just the air fryer basket and a plate
- Versatile protein base – Works beautifully sliced over salads, in wraps, or alongside any side dish
- Budget-friendly – Chicken breast goes on sale regularly, and this method ensures you never waste a piece
- Consistent results – No more guessing games with stovetop cooking
- Healthier option – Uses minimal oil compared to pan-frying or deep-frying
You might also enjoy: Air Fryer Popcorn Chicken
Ingredients
This simple ingredient list comes together to create perfectly seasoned chicken that tastes anything but basic. I’ve learned that quality matters here, especially with the spices.
- 4 boneless, skinless chicken breasts (about 6-8 oz/170-225g each)
- 2 tablespoons olive oil
- 1 teaspoon garlic powder
- 1 teaspoon onion powder
- 1 teaspoon paprika
- 1 teaspoon Italian seasoning
- 1 teaspoon salt
- ½ teaspoon black pepper
- ½ teaspoon dried parsley
- Optional: ¼ teaspoon cayenne pepper for heat
Read Also: Grilled Lemon Herb Chicken
Kitchen Equipment Needed
Having the right tools makes this recipe even easier. I’ve tried various equipment combinations, and these items consistently give the best results.
- Air fryer (3.5-quart or larger)
- Meat thermometer (digital is best for accuracy)
- Small mixing bowl
- Tongs
- Basting brush or paper towel
- Cutting board
- Sharp knife
Another favorite: Teriyaki Grilled Chicken
Recommended Products for This Recipe
After years of making air fryer chicken, I’ve found a few products that genuinely make a difference in the final result. These aren’t necessary, but they’ll elevate your cooking experience.
1. Instant Pot Vortex Plus Air Fryer
This has been my workhorse for the past two years. The even heat distribution means every chicken breast cooks at the same rate, and the digital controls make it foolproof. The 6-quart capacity is perfect for families.
2. ThermoPro Digital Meat Thermometer
I cannot stress enough how much this changed my chicken game. No more cutting into breasts to check doneness and losing all those juices. This thermometer gives instant readings and has saved me from both undercooked and overcooked chicken countless times.
3. Organic Chicken Breasts
The quality of your chicken matters tremendously. I switched to organic, air-chilled chicken breasts last year, and the difference in texture and flavor is remarkable. They’re more expensive, but worth it for special meals.
4. High-Quality Extra Virgin Olive Oil
A good extra virgin olive oil makes a noticeable difference in the browning and flavor. I use California Olive Ranch, and the fruity notes complement the seasonings beautifully.
For a lighter option, try: Chicken Fajita Lettuce Wraps
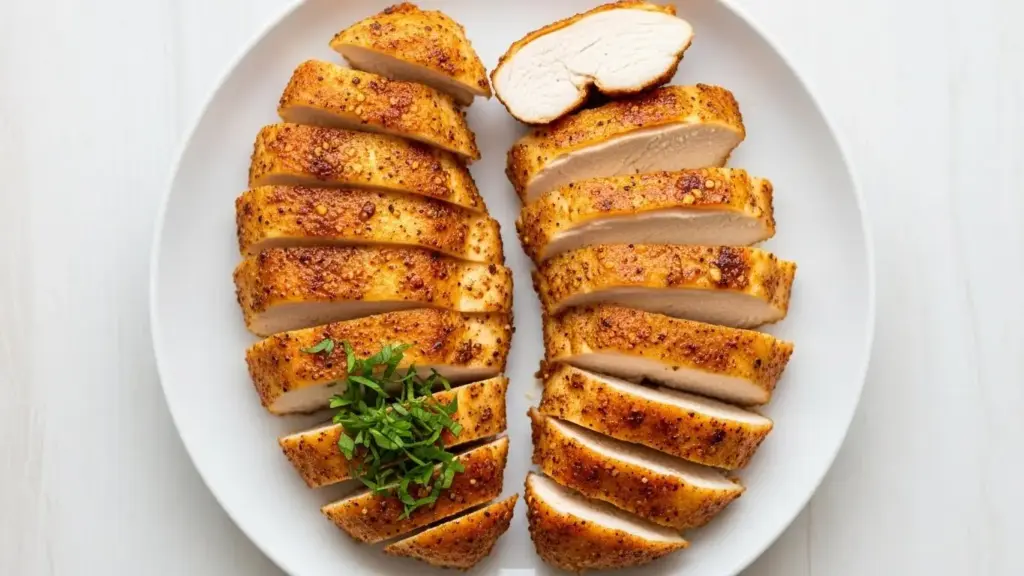
_result.jpg "Air Fryer Chicken Breast Recipe – Quick & Healthy Dinner")
Step-by-Step Instructions: How to Make Air Fryer Chicken Breast
Follow these detailed steps for perfectly cooked chicken every single time. I’ve broken down each step based on all the questions I’ve received from readers over the years.
1. Prepare the Chicken Breasts
- Remove the chicken breasts from the refrigerator and let them sit at room temperature for 15-20 minutes before cooking (this ensures even cooking throughout)
- Pat each breast completely dry with paper towels (excess moisture prevents proper browning)
- If your breasts are thicker than 1 inch (2.5 cm), use a meat mallet to pound them to an even thickness (I learned this after too many unevenly cooked pieces)
- Trim any excess fat or tendons with a sharp knife
2. Create the Seasoning Mix
- In a small bowl, combine the garlic powder, onion powder, paprika, Italian seasoning, salt, black pepper, and dried parsley
- Whisk together until fully blended (I like to make extra and store it in a jar for future batches)
- If using cayenne pepper, add it now and mix thoroughly
3. Oil and Season the Chicken
- Drizzle 1 tablespoon of olive oil over all the chicken breasts
- Use your hands or a basting brush to rub the oil all over each breast, coating both sides completely
- Sprinkle the seasoning mixture generously over both sides of each chicken breast
- Gently press the seasonings into the meat so they adhere properly (don’t be shy here – you want good coverage)
- Let the seasoned chicken rest for 5 minutes while you preheat the air fryer
4. Preheat the Air Fryer
- Set your air fryer to 375°F (190°C)
- Allow it to preheat for 3-5 minutes (this step is crucial for getting that golden exterior)
- While waiting, prepare your cooking spray or brush the air fryer basket lightly with the remaining olive oil
5. Arrange Chicken in the Air Fryer
- Place the seasoned chicken breasts in a single layer in the air fryer basket
- Make sure they’re not touching or overlapping (air needs to circulate around each piece)
- If your air fryer is smaller, cook in batches rather than crowding the basket
- Leave at least ½ inch (1.3 cm) of space between each breast
6. Cook the First Side
- Cook at 375°F (190°C) for 7 minutes without opening the air fryer
- During this time, resist the temptation to check on them (opening the basket releases heat and extends cooking time)
- You should start smelling the seasonings and hearing gentle sizzling
7. Flip and Continue Cooking
- Carefully open the air fryer basket and use tongs to flip each breast
- The top should be golden brown with crispy edges
- Cook for an additional 6-8 minutes, depending on thickness
- For breasts around 6 oz (170g), start checking at 6 minutes
- For larger 8 oz (225g) breasts, you’ll likely need the full 8 minutes
8. Check Internal Temperature
- Insert a meat thermometer into the thickest part of the largest breast
- The internal temperature should read 165°F (74°C) for safe consumption
- If it hasn’t reached 165°F, continue cooking in 2-minute increments, checking after each interval
- Remember that the temperature will rise another 3-5 degrees as it rests
9. Rest Before Slicing
- Transfer the cooked chicken breasts to a clean plate or cutting board
- Tent loosely with aluminum foil
- Let rest for 5 minutes before cutting (this is when I prep my sides or set the table)
- During resting, the juices redistribute throughout the meat, ensuring every bite is moist
10. Slice and Serve
- Use a sharp knife to slice against the grain at a slight diagonal
- Cut into ½-inch (1.3 cm) thick slices for the best presentation
- Serve immediately while still warm
- Drizzle any accumulated juices from the resting plate over the sliced chicken
This pairs beautifully with my Air Fryer Balsamic Brussels Sprouts for a complete meal.
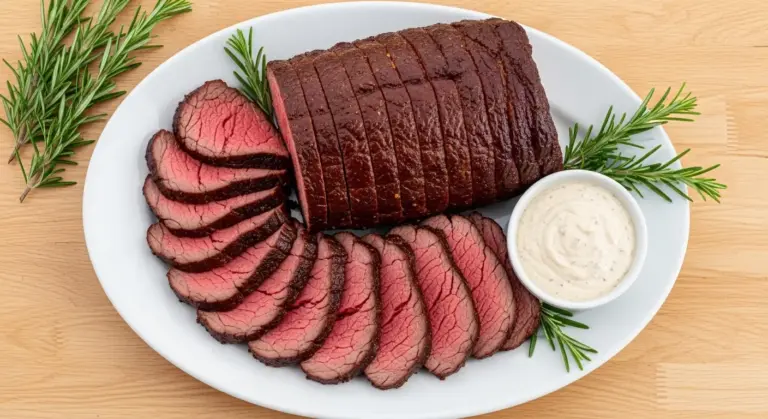
_result.jpg "Air Fryer Chicken Breast Recipe – Juicy & Flavorful Every Time")
Tips for The Best Air Fryer Chicken Breast
These tips come from countless batches and plenty of trial and error. Following them will save you from the mistakes I made when I first started.
- Don’t skip the room temperature step – Cold chicken from the fridge cooks unevenly, with the outside overdone before the center reaches temperature
- Pound to even thickness – This single step changed everything for me; even thickness means even cooking
- Use a meat thermometer – Guessing leads to dry chicken; a thermometer guarantees perfection every time
- Don’t overcrowd the basket – I learned this the hard way when my first batch steamed instead of crisped
- Flip halfway through – Turning ensures both sides get that gorgeous golden color
- Let it rest – Slicing immediately releases all those precious juices onto the cutting board instead of staying in the meat
- Adjust for size – Smaller breasts (4-6 oz) need about 12-13 minutes total, while larger ones (8-10 oz) need 15-16 minutes
- Check at the thickest part – Always insert your thermometer into the thickest portion for accurate reading
- Don’t reuse marinade – If you decide to marinate beforehand, discard the used marinade to avoid cross-contamination
- Experiment with seasonings – Once you master the basic method, try different spice blends like Cajun, lemon pepper, or BBQ rubs
- Spray the basket – A light coating of oil prevents sticking and makes cleanup easier
You might also enjoy: Healthy Chicken Parmesan
What to Serve with Air Fryer Chicken Breast
This versatile protein pairs well with virtually anything. Here are my family’s favorite combinations that create complete, satisfying meals.
I’ve served this chicken breast hundreds of times, and these sides never disappoint. Mix and match based on what you’re craving or what’s already in your fridge.
- Mashed Potatoes – Creamy and comforting alongside juicy chicken
- Green Bean Casserole – A classic pairing that never gets old
- Scalloped Potatoes – Rich and cheesy to complement the lean protein
- Air Fryer Corn on the Cob – Sweet summer corn cooked in the same appliance
- Broccoli Salad – Fresh crunch balances the tender chicken
- Healthy Coleslaw – Light and tangy for a refreshing contrast
- Air Fryer Simple Baked Potatoes – Cook these first, then the chicken
- Grilled Vegetable Skewers – Colorful and nutritious
Another favorite: Chicken Caprese Skillet
Variations of Air Fryer Chicken Breast
Once you master the basic recipe, these variations keep things interesting. I rotate through these depending on my mood and what I’m serving alongside the chicken.
- Lemon Herb Chicken – Add 2 tablespoons fresh lemon juice and 1 tablespoon chopped fresh rosemary to the oil before coating (my summer go-to)
- Cajun Spiced – Replace the Italian seasoning with 2 teaspoons Cajun seasoning and add ½ teaspoon smoked paprika for a Louisiana-style kick
- Parmesan Crusted – After oiling, press a mixture of ½ cup grated Parmesan cheese and ¼ cup panko breadcrumbs onto the chicken before air frying
- Honey Garlic Glaze – Brush with a mixture of 3 tablespoons honey, 2 cloves minced garlic, and 1 tablespoon soy sauce during the last 2 minutes of cooking
- Buffalo Style – Toss the cooked chicken in buffalo sauce and return to the air fryer for 2 minutes to set the coating
- Mediterranean – Season with oregano, thyme, and lemon zest, then top with crumbled feta after cooking
- Teriyaki – Brush with teriyaki sauce in the last 3 minutes of cooking and garnish with sesame seeds
- Ranch Seasoned – Use ranch seasoning mix instead of the Italian herbs for kid-friendly flavor
- Barbecue – Coat with your favorite BBQ rub before cooking and brush with sauce during the last 2 minutes
- Pesto Topped – Spread a thin layer of basil pesto on the chicken during the last minute of cooking
- Balsamic Glazed – Drizzle with balsamic reduction after cooking for an elegant presentation
For something completely different, try my BBQ Chicken Wrap.
Storage and Reheating
Proper storage keeps this chicken delicious for days. I usually make extra on Sunday to have protein ready for the busy week ahead.
Refrigerator Storage:
- Allow the chicken to cool completely before storing (about 30 minutes at room temperature)
- Place in an airtight container with a paper towel underneath to absorb any moisture
- Store for up to 4 days in the refrigerator
- Keep sliced and whole pieces separate if possible, as sliced chicken dries out faster
- Write the date on the container so you know when you made it
Freezer Storage:
- Wrap each breast individually in plastic wrap, then place in a freezer-safe bag
- Remove as much air as possible before sealing
- Label with the date and freeze for up to 3 months
- For best results, freeze whole breasts rather than sliced
- Thaw overnight in the refrigerator before reheating
Reheating Instructions:
- Air fryer method (best for maintaining texture): Preheat to 350°F (175°C), cook for 3-4 minutes until warmed through
- Microwave method: Place on a microwave-safe plate, cover with a damp paper towel, heat in 30-second intervals until warm (tends to dry out the chicken)
- Oven method: Wrap in foil and heat at 350°F (175°C) for 10-12 minutes
- Skillet method: Add a splash of chicken broth to a covered pan over medium-low heat for 5-6 minutes
- Always reheat to an internal temperature of 165°F (74°C) for food safety
You might also enjoy: Chicken Chesapeake
Nutritional Facts
Per serving (1 chicken breast, approximately 6 oz/170g cooked):
- Calories: 285
- Total Fat: 9g
- Saturated Fat: 1.5g
- Cholesterol: 125mg
- Sodium: 680mg
- Total Carbohydrates: 2g
- Dietary Fiber: 0.5g
- Sugars: 0g
- Protein: 48g
- Vitamin A: 6% DV
- Vitamin C: 2% DV
- Calcium: 2% DV
- Iron: 8% DV
Nutritional values are approximate and may vary based on specific ingredients used and portion sizes.
Another favorite: Easy Marry Me Chicken
Health Benefits of Key Ingredients
This recipe isn’t just delicious; it’s packed with nutritional benefits. Understanding what each ingredient brings to the table makes me feel even better about serving this regularly.
Chicken breast stands out as one of the leanest protein sources available, supporting muscle growth and repair while keeping you satisfied for hours. The high protein content also helps stabilize blood sugar levels and supports a healthy metabolism.
- Chicken Breast – Excellent source of lean protein with all nine essential amino acids, supports muscle growth, aids in weight management, provides B vitamins for energy metabolism, contains selenium for immune function
- Olive Oil – Rich in heart-healthy monounsaturated fats, contains antioxidants that fight inflammation, supports brain health, may help reduce risk of chronic diseases
- Garlic Powder – Offers immune-boosting properties, contains compounds that may lower blood pressure, supports cardiovascular health, has antimicrobial properties
- Paprika – Provides vitamin A for eye health, contains antioxidants like carotenoids, supports skin health, may have anti-inflammatory benefits
- Italian Seasoning – Blend of herbs rich in antioxidants, supports digestive health, may have antimicrobial properties, adds flavor without sodium
- Black Pepper – Contains piperine which enhances nutrient absorption, has anti-inflammatory properties, supports digestive health, may improve brain function
For a vegetarian option, try: Grilled Portobello Mushrooms
FAQs About Air Fryer Chicken Breast
1. Can I cook frozen chicken breast in the air fryer?
Yes, you can cook frozen chicken breast in the air fryer, though I recommend thawing for best results. If cooking from frozen, increase the cooking time to 20-25 minutes at 360°F (182°C), flipping halfway through. The chicken won’t brown as beautifully, and the seasonings won’t adhere as well, but it’s perfectly safe.
Just make sure the internal temperature reaches 165°F (74°C) before serving.
2. Why is my air fryer chicken breast dry?
Dry chicken usually means overcooking. Chicken breast has very little fat, so even a few extra minutes can turn it from juicy to sawdust. Invest in a meat thermometer and remove the chicken the moment it hits 165°F (74°C).
Also, make sure you’re not skipping the resting period, which allows juices to redistribute throughout the meat.
3. Do I need to flip the chicken breast?
Yes, flipping ensures even browning on both sides. The air fryer circulates hot air, but the side facing the heating element will always cook faster. I flip at the halfway point for consistently golden, crispy results.
It takes just 10 seconds and makes a noticeable difference.
4. Can I marinate the chicken before air frying?
Absolutely! Marinating adds extra flavor and can help tenderize the meat. Just make sure to pat the chicken dry before placing it in the air fryer, as excess marinade can cause smoking and prevent proper crisping.
I usually marinate for 2-4 hours in the refrigerator, though even 30 minutes makes a difference.
5. How do I prevent the chicken from sticking to the basket?
Lightly spray or brush the air fryer basket with oil before adding the chicken. I also make sure to coat the chicken itself with oil, which creates a barrier between the meat and the basket. If sticking still occurs, your basket might need a good cleaning, as buildup can cause food to adhere.
Some air fryers come with non-stick baskets that work better than others.
You might also enjoy: Baked Chicken Meatballs with Spaghetti Squash
Final Thoughts
This Air Fryer Chicken Breast Recipe has genuinely transformed how I approach weeknight dinners. What used to stress me out now feels effortless.
The beauty of this recipe lies in its simplicity and reliability. Once you nail the timing for your specific air fryer, you’ll have perfectly cooked chicken every single time. I hope this becomes a staple in your kitchen like it has in mine.
Give it a try this week and let me know how it turns out! Drop a comment below with your favorite seasoning variation or what you served alongside it.
Recommended:
- Chick Fil A Grilled Chicken Nuggets
- Mexican Chicken Thigh Recipes
- Leftover Smoked Chicken Recipes
- Carrabbas Chicken Noodle Soup
- Easy Chicken Noodle Soup
- Air Fryer Spicy Buffalo Chicken Wings
- Chicken Chowder
- Chicken Corn Chowder
- Panera Bread Chicken Salad
- Buffalo Chicken Salad