
I’ll never forget the first time I made bacon mac and cheese for my family. It was a chilly Sunday evening, and I was tired of our usual rotation of dinners.
I had some leftover bacon from breakfast and thought, “Why not throw it into mac and cheese?” That simple decision turned into what’s now our most requested comfort food.
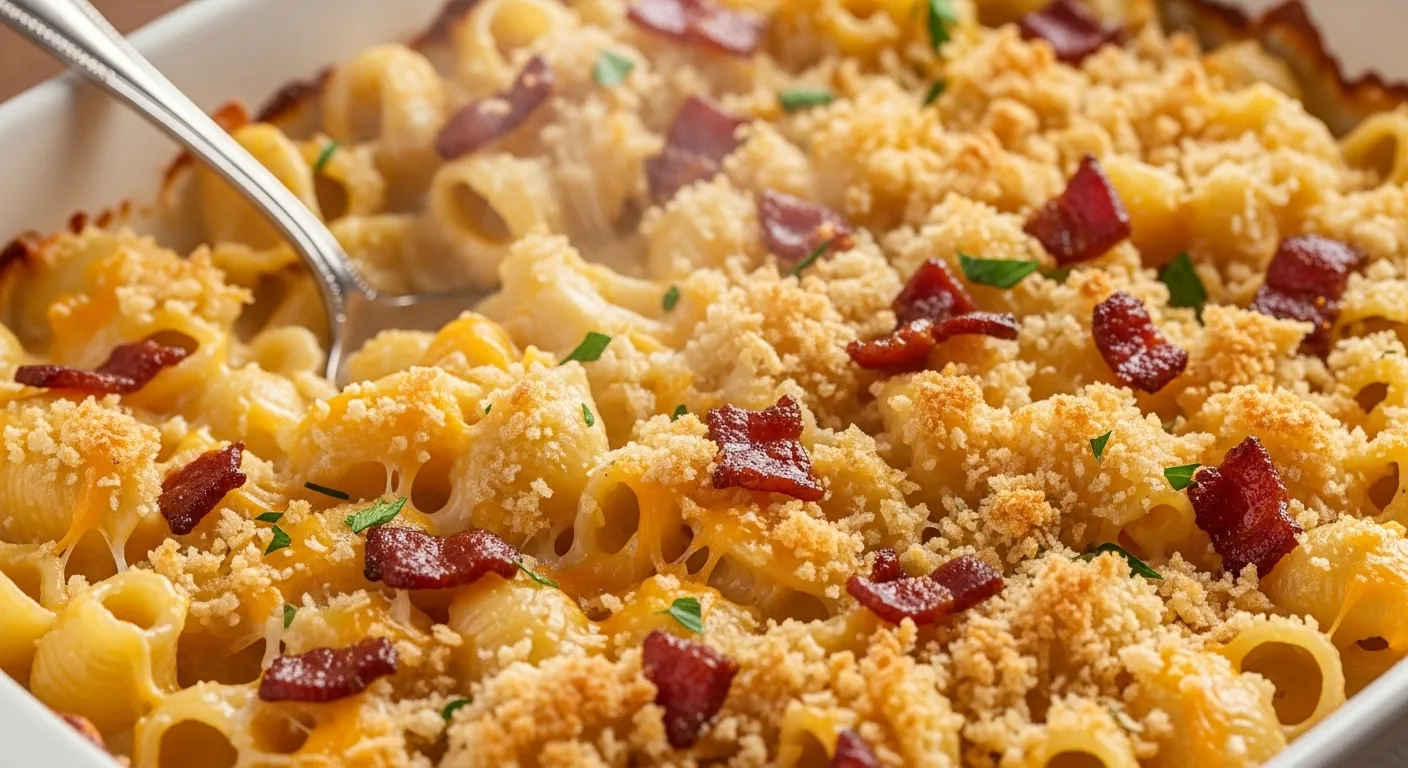
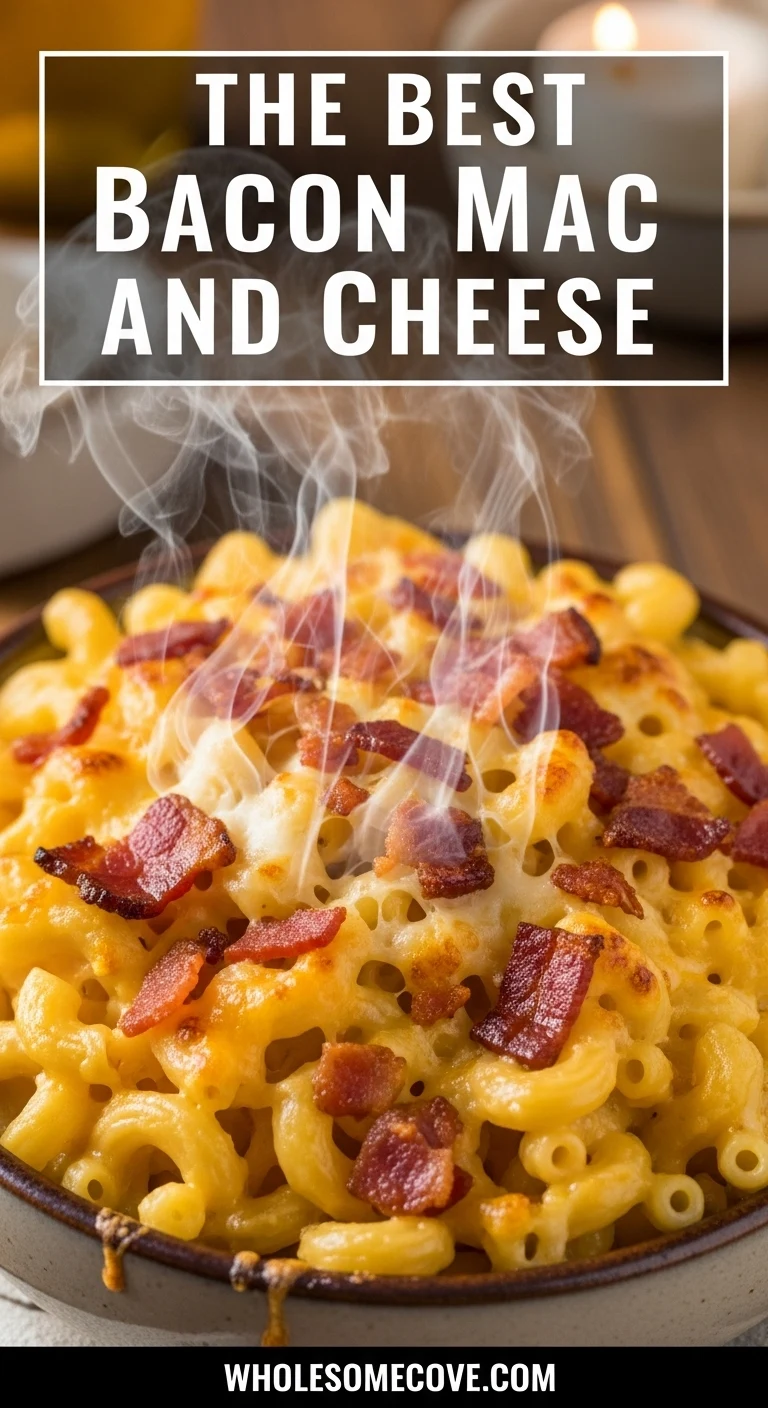
This best bacon mac and cheese recipe combines creamy, perfectly cooked pasta with crispy bacon and a rich cheese sauce that’ll have everyone coming back for seconds.
I’ve spent years tweaking this recipe—too much flour once made it gluey, and undercooking the bacon was a soggy disaster—but I’ve finally nailed the perfect balance.
| Quick Recipe Summary | |
|---|---|
| Prep Time: | 15 minutes |
| Cook Time: | 35 minutes |
| Total Time: | 50 minutes |
| Servings: | 8 servings |
| Difficulty Level: | Easy |

Why You’ll Love This Best Bacon Mac and Cheese Recipe
After making this dish dozens of times for potlucks, family dinners, and even a few impromptu gatherings, I can confidently say it never disappoints.
The smoky bacon adds a savory crunch that perfectly contrasts with the creamy cheese sauce, while baking it creates a golden, bubbly top that’s absolutely irresistible.
I’ve watched picky eaters clean their plates and adults sneak second helpings when they think no one’s looking.
- Ultimate comfort food: Combines two beloved classics—mac and cheese and bacon—into one indulgent dish
- Crowd-pleasing: I’ve never met anyone who didn’t love this recipe, from kids to grandparents
- Make-ahead friendly: You can prep it the night before and bake it when you’re ready
- Customizable: Add jalapeños for heat, swap cheeses for different flavors, or throw in some veggies
- Perfect for gatherings: This recipe easily doubles or triples for larger crowds
- Balanced textures: Crispy bacon, creamy sauce, tender pasta, and a crunchy topping create the perfect bite every time
This pairs beautifully with my roasted brussels sprouts with bacon for a bacon-lover’s dream meal.
Ingredients
The ingredient list might look long, but most of these are pantry staples you probably already have.
I’ve learned that using a combination of cheeses creates the best flavor—sharp cheddar for tang, gruyere for nuttiness, and cream cheese for extra creaminess.
Don’t skimp on the bacon quality either; thick-cut bacon makes a world of difference in both texture and flavor.
For the Mac and Cheese:
- 1 pound (450g) elbow macaroni or cavatappi pasta
- 12 ounces (340g) thick-cut bacon, chopped into bite-sized pieces
- 4 tablespoons (56g) unsalted butter
- 1/4 cup (30g) all-purpose flour
- 3 cups (720ml) whole milk, warmed
- 1 cup (240ml) heavy cream
- 3 cups (340g) sharp cheddar cheese, shredded
- 1 cup (113g) gruyere cheese, shredded
- 4 ounces (113g) cream cheese, softened and cubed
- 1 teaspoon garlic powder
- 1 teaspoon onion powder
- 1/2 teaspoon smoked paprika
- 1/4 teaspoon cayenne pepper (optional, but adds a nice kick)
- 1 teaspoon Dijon mustard
- Salt and black pepper to taste
For the Topping:
- 1 cup (100g) panko breadcrumbs
- 3 tablespoons (42g) melted butter
- 1/2 cup (57g) parmesan cheese, grated
- 2 tablespoons fresh parsley, chopped (optional, for garnish)
Kitchen Equipment Needed
Having the right tools makes this recipe so much easier. I learned this the hard way when I tried using a small pot for the sauce and ended up with flour lumps everywhere.
Trust me, invest in quality equipment—it makes all the difference.
- Large pot for boiling pasta (at least 6 quarts/5.7 liters)
- Heavy-bottomed saucepan or Dutch oven for making the cheese sauce
- 9×13-inch baking dish (preferably ceramic or glass)
- Large skillet for cooking bacon
- Whisk for smooth sauce
- Colander for draining pasta
- Wooden spoon or silicone spatula
- Measuring cups and spoons
- Box grater or food processor for shredding cheese
- Small mixing bowl for breadcrumb topping
- Aluminum foil (optional, for covering during initial baking)
Recommended Products for This Recipe
After years of making this bacon mac and cheese, I’ve found a few products that genuinely elevate the final dish and make the cooking process smoother.
These aren’t necessary, but they’re definitely worth considering if you make this recipe regularly.
Le Creuset Enameled Cast Iron Baking Dish
I switched to this baking dish three years ago, and it’s been a game-changer. The cast iron distributes heat incredibly evenly, so you get that perfect golden crust on top without any burnt corners.
Plus, the enameled surface makes cleanup surprisingly easy, even with all that baked-on cheese. It goes from oven to table beautifully too.
Premium Thick-Cut Applewood Smoked Bacon
The quality of bacon makes or breaks this recipe. I prefer applewood-smoked, thick-cut bacon because it stays crispy even after baking and adds that authentic smoky flavor. Thin bacon tends to get chewy and doesn’t provide the same textural contrast.
Aged Gruyere Cheese
While you can use pre-shredded gruyere, buying a block of aged gruyere and shredding it yourself makes a noticeable difference in flavor and texture.
The aged variety has those delicious crystalline bits and melts into the smoothest, most flavorful sauce. Pre-shredded cheese has anti-caking agents that can make your sauce grainy.
Lodge Cast Iron Skillet
For cooking the bacon perfectly crispy, nothing beats a cast iron skillet. It heats evenly and retains that heat, giving you beautifully rendered bacon with crispy edges. I’ve been using the same Lodge skillet for a decade.
Step-by-Step Instructions: How to Make the Best Bacon Mac and Cheese
I’m going to walk you through every single step in detail because I remember how intimidating making a cheese sauce seemed when I first started.
Don’t worry—if you follow these instructions, you’ll have perfect, creamy mac and cheese every time. The key is patience and not rushing the sauce.
1. Cook the Bacon to Crispy Perfection
- Preheat your oven to 375°F (190°C) so it’s ready when you need it
- Place the chopped bacon in a large, cold skillet (starting with a cold pan helps render the fat more evenly)
- Turn the heat to medium and cook the bacon, stirring occasionally, for about 10-12 minutes
- You’re looking for the bacon to be crispy and golden brown, with most of the fat rendered out
- Watch carefully toward the end—bacon can go from perfect to burnt in seconds
- Use a slotted spoon to transfer the cooked bacon to a paper towel-lined plate
- Reserve about 2 tablespoons of the bacon fat if you want extra flavor (you can use this to butter your baking dish)
- Pat the bacon dry with paper towels to remove excess grease—this prevents your mac and cheese from being too oily
2. Boil the Pasta Al Dente
- Fill your large pot with water (about 4-6 quarts/3.8-5.7 liters) and add 2 tablespoons of salt
- Bring the water to a rolling boil over high heat
- Add the elbow macaroni and stir immediately to prevent sticking
- Cook the pasta according to package directions, but reduce the cooking time by 2 minutes (it should be al dente, not fully cooked)
- This is crucial because the pasta will continue cooking in the oven, and you don’t want mushy mac and cheese
- Stir the pasta occasionally to ensure even cooking
- Before draining, reserve 1 cup of pasta water (this can help adjust sauce consistency if needed)
- Drain the pasta in a colander but do NOT rinse it—the starch helps the sauce cling to the pasta
- Set the drained pasta aside while you make the cheese sauce
3. Create the Roux for a Smooth Sauce
- In your heavy-bottomed saucepan, melt the 4 tablespoons of butter over medium heat
- Once the butter is completely melted and starting to foam, add the flour all at once
- Whisk constantly and vigorously for about 2-3 minutes, making sure the flour and butter combine into a smooth paste
- The mixture should turn a light golden color and smell slightly nutty—this means the raw flour taste is cooking out
- This step is called making a roux, and it’s the foundation of your smooth, lump-free cheese sauce
- Keep the heat at medium; if it’s too high, the roux will brown too quickly and taste burnt
- Make sure to scrape the bottom and corners of the pan while whisking to prevent scorching
4. Add Milk and Cream for Creaminess
- Slowly pour in the warmed milk (warming it prevents lumps), about 1/2 cup at a time, while whisking constantly
- After each addition, whisk until the mixture is completely smooth before adding more milk
- The sauce will look thin at first, but don’t worry—it’ll thicken
- Once all the milk is incorporated, add the heavy cream and continue whisking
- Bring the mixture to a gentle simmer, stirring frequently
- Let it simmer for about 5-7 minutes until it thickens enough to coat the back of a spoon
- If you draw your finger through the sauce on the spoon, it should leave a clear line
- Season with garlic powder, onion powder, smoked paprika, cayenne pepper (if using), Dijon mustard, and a generous pinch of salt and black pepper
- The sauce should taste well-seasoned at this point because cheese will mellow the flavors
5. Melt in the Cheese for Ultra-Creamy Sauce
- Remove the saucepan from heat (this is important—cheese can become grainy if added over direct heat)
- Add the cream cheese cubes first, whisking until they’re completely melted and incorporated
- Add the shredded cheddar cheese in three batches, stirring well after each addition until completely melted
- Do the same with the gruyere cheese, adding it gradually and stirring until smooth
- The sauce should be silky, smooth, and coat the back of your spoon thickly
- Taste the sauce and adjust seasoning if needed—this is your last chance to perfect the flavor
- If the sauce seems too thick, add a splash of the reserved pasta water to thin it out
- If it’s too thin, let it sit for a few minutes off the heat; it will continue to thicken
6. Combine Pasta, Sauce, and Most of the Bacon
- Add the cooked, drained pasta to the cheese sauce
- Gently fold the pasta into the sauce using a large spatula or wooden spoon until every piece is coated
- Reserve about 1/3 of the crispy bacon for topping
- Fold the remaining 2/3 of the bacon into the pasta and cheese mixture, distributing it evenly
- Be gentle while mixing to avoid breaking the pasta, but make sure everything is well combined
- The mixture should look creamy, glossy, and absolutely delicious at this point
7. Transfer to Baking Dish and Add Topping
- Grease your 9×13-inch baking dish with butter or bacon fat
- Pour the mac and cheese mixture into the prepared baking dish, spreading it evenly with a spatula
- In a small bowl, combine the panko breadcrumbs, melted butter, and grated parmesan cheese
- Mix with a fork until the breadcrumbs are evenly coated with butter
- Sprinkle the breadcrumb mixture evenly over the top of the mac and cheese
- Scatter the reserved crispy bacon pieces over the breadcrumb topping
- This creates layers of texture that make every bite interesting
8. Bake Until Golden and Bubbly
- Place the baking dish in the preheated 375°F (190°C) oven
- Bake uncovered for 25-30 minutes, until the top is golden brown and the sauce is bubbling around the edges
- If the top is browning too quickly but the inside isn’t hot enough, tent loosely with aluminum foil and continue baking
- You’ll know it’s done when the edges are bubbling vigorously and the breadcrumb topping is crispy and golden
- Remove from the oven and let it rest for 5-10 minutes before serving—this allows the sauce to thicken slightly and makes serving easier
- Garnish with fresh chopped parsley if desired for a pop of color
- Serve while hot and watch it disappear
Another favorite: Air Fried Mac Cheese

Tips for The Best Bacon Mac and Cheese
I’ve made plenty of mistakes with this recipe over the years—from grainy cheese sauce to burnt breadcrumbs—so learn from my errors and follow these tips for guaranteed success.
- Shred your own cheese: Pre-shredded cheese contains anti-caking agents that prevent it from melting smoothly. Buy blocks of cheese and shred them yourself for the creamiest sauce. It takes an extra five minutes but makes a huge difference.
- Don’t skip the cream cheese: I initially thought this was unnecessary, but it adds an incredible silky texture and tangy richness that you can’t get from just cheddar and gruyere.
- Warm your milk: Cold milk added to a hot roux can cause lumps and slow down the cooking process. I heat mine in the microwave for about 2 minutes until it’s warm but not boiling.
- Undercook your pasta: This is critical. The pasta continues cooking in the oven, so if you cook it to perfect tenderness beforehand, you’ll end up with mushy mac and cheese. Aim for al dente, even slightly firm.
- Make sure bacon is crispy: Undercooked, chewy bacon ruins the texture of this dish. Take the time to cook it until it’s truly crispy—it’ll hold up better when mixed into the pasta and baked.
- Remove from heat before adding cheese: Direct heat can cause cheese proteins to separate and become grainy or stringy. Always remove your sauce from the burner before stirring in the cheese.
- Let it rest before serving: I know it’s tempting to dig in immediately, but letting it sit for 5-10 minutes helps the sauce thicken and makes serving much cleaner.
- Adjust seasoning before baking: Once everything is mixed together, taste a small spoonful of the mac and cheese. The flavors will mellow slightly during baking, so make sure it’s well-seasoned now.
- Use a combination of cheeses: Each cheese brings something different—cheddar for sharpness, gruyere for nuttiness, cream cheese for creaminess, and parmesan in the topping for a salty kick. Don’t substitute with just one type.
- Toast the breadcrumbs: If you have time, toast the panko breadcrumbs in butter in a skillet before adding them to the top. This extra step creates an even crunchier topping.
Serving Suggestions
This bacon mac and cheese is substantial enough to be a main dish, but it also works beautifully as a side for special occasions.
I’ve served it alongside everything from simple grilled chicken to elaborate holiday roasts, and it always fits right in.
Main Dish Pairings:
- Serve with a crisp green salad dressed with a light vinaigrette to cut through the richness
- Pair with grilled chicken and veggie skewers for a complete meal
- Add some steamed broccoli or roasted brussels sprouts on the side for a nutritious balance
- Serve alongside barbecue pulled pork for an indulgent comfort food feast
- Pair with baked cod with mango salsa for a surf and turf twist
Perfect for These Occasions:
- Holiday dinners (Thanksgiving, Christmas, Easter)
- Potlucks and family gatherings
- Game day parties
- Casual weeknight dinners
- Birthday celebrations
- Funeral receptions and comfort food occasions
You might also enjoy: Healthy Alfredo Sauce
Variations of Bacon Mac and Cheese
One of my favorite things about this recipe is how easily it adapts to different tastes and dietary needs.
I’ve experimented with countless variations over the years, and here are the ones that have become regular requests in my household.
- Jalapeño Popper Mac and Cheese: Dice 3-4 jalapeños (seeded for less heat) and sauté them with the bacon. Mix in 8 ounces of cream cheese for extra tanginess. Top with crushed jalapeño chips instead of breadcrumbs.
- Lobster Bacon Mac and Cheese: Fold in 8 ounces of cooked, chopped lobster meat with the bacon for an ultra-luxurious version. I made this for a special anniversary dinner, and it was absolutely worth the splurge.
- Buffalo Bacon Mac and Cheese: Mix 1/4 cup of buffalo sauce into the cheese sauce and top with crumbled blue cheese. Add some diced celery for crunch and authenticity.
- Mushroom and Bacon Mac: Sauté 8 ounces of sliced mushrooms until golden, then fold them into the mac and cheese with the bacon. This adds an earthy, umami flavor that complements the cheese beautifully.
- Three Cheese Version: Replace the gruyere with fontina and add 1/2 cup of gorgonzola for a bolder, more complex cheese flavor. This is for the true cheese lovers.
- Caramelized Onion and Bacon: Slowly caramelize 2 large sliced onions in butter (this takes about 30 minutes but is so worth it) and fold them into the mac and cheese. The sweetness perfectly balances the salty bacon.
- Tomato Bacon Mac: Add 1 cup of diced tomatoes (drained) and fresh basil to the mixture before baking. This brightens up the dish and adds freshness.
- Spinach and Bacon: Fold in 2 cups of fresh spinach leaves just before baking. They’ll wilt into the hot pasta and add nutrients and color.
- BBQ Bacon Mac: Replace half the bacon with pulled pork and swirl in 2 tablespoons of your favorite BBQ sauce before baking. Top with crispy fried onions instead of breadcrumbs.
- Lighter Version: Use 2% milk instead of whole milk, skip the heavy cream, and reduce the cheese to 3 cups total. It won’t be quite as decadent, but it’s still delicious and significantly lighter.
Storage and Reheating
I always make a full batch of this even when I’m cooking for just a few people because the leftovers are fantastic—sometimes even better than the original dish since the flavors have more time to meld together.
Storing Leftovers:
- Let the mac and cheese cool completely to room temperature before storing (this prevents condensation and sogginess)
- Transfer to an airtight container or cover the baking dish tightly with plastic wrap or aluminum foil
- Store in the refrigerator for up to 4 days
- For best results, store in individual portions so you can reheat only what you need
- The mac and cheese may look a bit dry after refrigeration—this is normal; the sauce thickens as it cools
Freezing Instructions:
- This recipe freezes beautifully for up to 3 months
- Cool completely, then wrap the entire baking dish (or portions) tightly in plastic wrap, followed by a layer of aluminum foil
- Label with the date and contents
- For easier portions, freeze in individual serving containers
- Thaw overnight in the refrigerator before reheating (don’t thaw at room temperature)
Reheating Methods:
- Oven (best method): Preheat oven to 350°F (175°C). Add a splash of milk or cream to the mac and cheese, cover with foil, and bake for 20-25 minutes until heated through. Remove foil for the last 5 minutes to re-crisp the topping.
- Microwave (quickest method): Place a portion in a microwave-safe bowl, add a tablespoon of milk, cover loosely, and heat in 1-minute intervals, stirring between each, until hot throughout. The topping won’t be as crispy, but it’s still delicious.
- Stovetop: Add the mac and cheese to a saucepan with 1/4 cup of milk or cream. Heat over medium-low, stirring frequently, until warmed through. This works great for smaller portions.
Read Also: Creamy Tomato Basil Soup

Nutritional Facts
Per serving (based on 8 servings):
- Calories: 680
- Total Fat: 42g
- Saturated Fat: 24g
- Cholesterol: 125mg
- Sodium: 890mg
- Total Carbohydrates: 45g
- Dietary Fiber: 2g
- Sugars: 6g
- Protein: 28g
- Calcium: 450mg
- Iron: 2mg
Note: Nutritional information is approximate and will vary based on specific brands and measurements used.
Health Benefits of Key Ingredients
While this bacon mac and cheese is definitely an indulgent comfort food, it does contain some ingredients that offer nutritional benefits. I’m not going to pretend this is health food, but it’s not nutritionally void either.
Cheese:
- Excellent source of calcium for strong bones and teeth
- Provides high-quality protein for muscle maintenance
- Contains vitamin A for eye health and immune function
- Rich in phosphorus, which works with calcium for bone health
- Contains beneficial probiotics if using aged cheeses
- Good source of vitamin K2, important for heart and bone health
Bacon:
- Provides B vitamins, particularly B1, B2, B3, B6, and B12
- Contains protein that helps with satiety
- Rich in selenium, an important antioxidant mineral
- Provides zinc for immune function
Milk and Cream:
- Excellent calcium and vitamin D source for bone health
- Contains potassium, which helps regulate blood pressure
- Provides riboflavin for energy metabolism
- Good source of vitamin B12 for nervous system health
Whole Wheat Pasta (if substituted):
- Higher in fiber than regular pasta, supporting digestive health
- Contains more vitamins and minerals, including B vitamins and iron
- Provides steady energy from complex carbohydrates
FAQs About Bacon Mac and Cheese Recipe
1. Can I make this bacon mac and cheese ahead of time?
Absolutely! This is one of my favorite make-ahead dishes. Prepare the entire recipe through step 7 (before baking), cover tightly with plastic wrap or aluminum foil, and refrigerate for up to 24 hours.
When you’re ready to bake, let it sit at room temperature for 30 minutes, then bake as directed, adding an extra 10-15 minutes to the baking time since it’s starting cold.
You can also add the breadcrumb topping right before baking if you’re worried about it getting soggy.
I do this all the time for holiday dinners so I’m not stuck in the kitchen while guests arrive.
2. Why is my cheese sauce grainy or separated?
This happened to me early on, and I was so frustrated! Grainy cheese sauce usually occurs for one of three reasons: the heat was too high when adding the cheese, the cheese was added too quickly without proper stirring, or you used pre-shredded cheese with anti-caking agents.
Always remove the sauce from direct heat before adding cheese, add it gradually while stirring constantly, and use freshly shredded cheese from a block.
If your sauce does separate, try whisking in a tablespoon of cold milk or a small splash of cream—sometimes this brings it back together.
3. Can I use different types of pasta?
Definitely! While I prefer elbow macaroni or cavatappi because their shape holds the sauce so well, you can use shells, penne, rigatoni, or even rotini.
Just avoid delicate pasta like angel hair or thin spaghetti—they don’t hold up well to baking and can become mushy.
I’ve even made this with pasta shells and it was wonderful because each shell becomes a little pocket of cheesy, bacon-y goodness.
Whatever pasta you choose, make sure to undercook it slightly since it continues cooking in the oven.
4. How can I make this recipe vegetarian?
I’ve made a vegetarian version for my sister countless times, and it’s still incredibly delicious.
Simply omit the bacon and add 2 tablespoons of butter or olive oil to sauté some mushrooms, caramelized onions, or roasted vegetables like butternut squash.
You can also add smoked paprika or liquid smoke to mimic that smoky bacon flavor. For extra protein, fold in some cooked white beans or chickpeas.
The cheese sauce remains the star, so you’re still getting that rich, creamy comfort food experience.
5. What’s the best way to reheat mac and cheese without drying it out?
Great question! The key to reheating is adding moisture back in. When I reheat in the oven, I always add 2-3 tablespoons of milk or cream over the top, cover it tightly with foil, and bake at 350°F (175°C) for about 20 minutes until heated through.
Remove the foil for the last 5 minutes to re-crisp the topping. For microwave reheating, add a tablespoon of milk to each portion, cover loosely, and heat in short 1-minute bursts, stirring between each one.
The pasta absorbs moisture as it sits, so you’re just replenishing what was lost.
Honestly, I sometimes think the reheated version tastes even better because the flavors have had time to develop overnight.
Read Also: Best Lobster Mac and Cheese
Final Thoughts
This best bacon mac and cheese recipe has become more than just a dish in my kitchen—it’s become a tradition.
It’s what I make when my kids have had a tough week at school, what I bring to every potluck, and what I crave on cold winter evenings when nothing else will do.
The combination of crispy bacon, creamy cheese sauce, tender pasta, and crunchy breadcrumb topping creates something truly special that brings people together around the table.
I hope you’ll give this recipe a try and experience the same joy it’s brought to my family over the years.
Don’t be intimidated by the steps—just take your time with the cheese sauce, and the rest falls into place beautifully.
Once you make it a few times, it’ll become second nature, and you might even find yourself tweaking it to create your own signature version.
I’d love to hear how your bacon mac and cheese turns out! Drop a comment below telling me about any variations you tried or how your family reacted to this dish.
Happy cooking, and enjoy every creamy, bacon-filled bite!
Recommended:
- Pumpkin Sage Pasta
- Butternut Squash Risotto
- Slow Cooker Chili
- Apple Cider Glazed Pork Chops
- Beef Barley Soup
- Stuffed Acorn Squash
- Maple Glazed Carrots
- Healthy Shepherds Pie
- Chicken Caprese Skillet
- Easy Alfredo Sauce

