
My grandmother used to make hot cross buns every spring, and the smell of warm spices filling the kitchen is one of those memories I’ve held onto forever. I finally decided to recreate her recipe, and after a few batches, some overproofed disasters, and one truly glorious Sunday morning, I landed on this version that I genuinely can’t stop making.
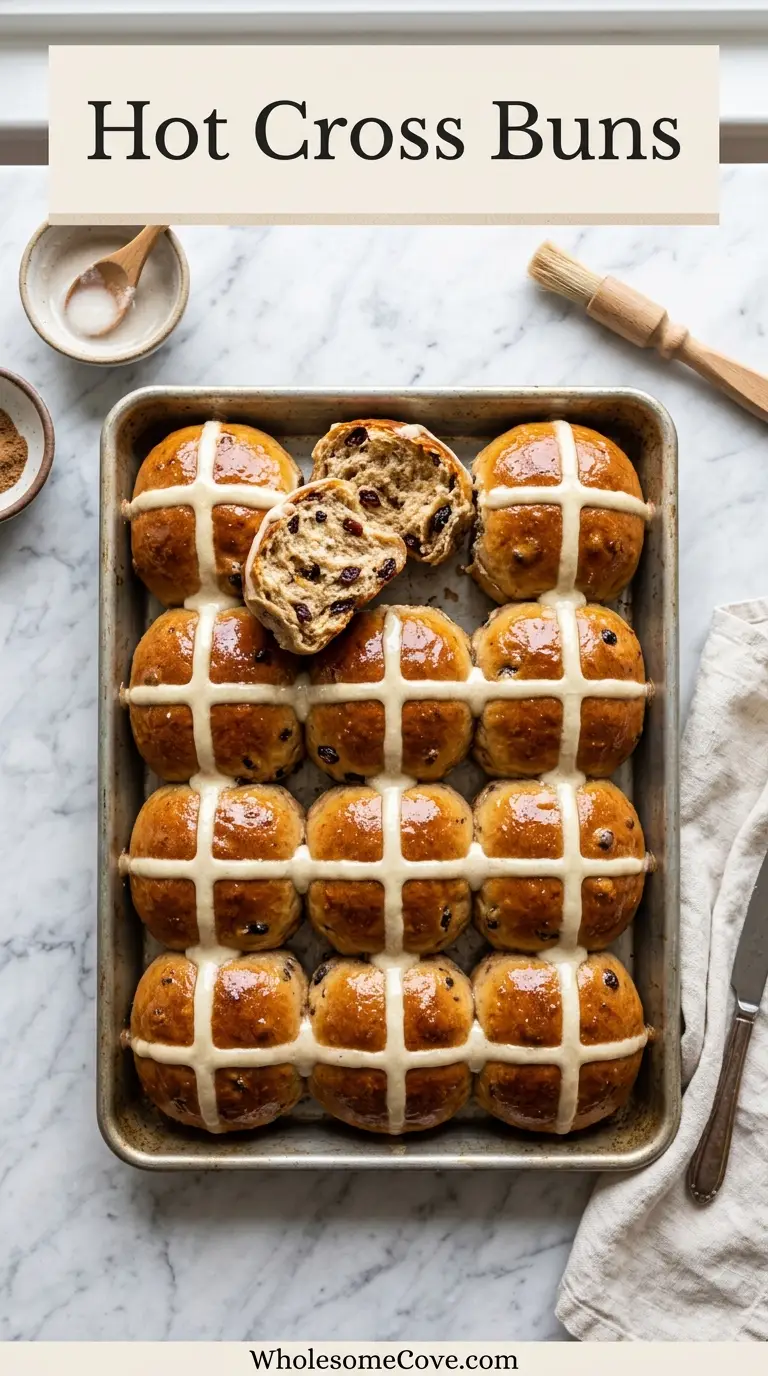
This hot cross buns recipe gives you soft, pillowy, beautifully spiced buns with plump raisins, a flour paste cross baked right on top, and a sweet sugar glaze that makes them shine fresh out of the oven. They do take time because of the yeast proofing steps, but none of it is difficult.
They’re the kind of bake that makes your whole home smell like a bakery for hours.
| Quick Recipe Summary | |
|---|---|
| Prep Time | 30 minutes |
| Rise Time | 2 hours 30 minutes |
| Cook Time | 20 minutes |
| Total Time | About 3 hours 20 minutes |
| Servings | 12 buns |
| Difficulty Level | Intermediate |
If you love baking homemade bread, you’ll also enjoy these Dinner Rolls that use a similar soft, enriched dough.
Why You’ll Love This Hot Cross Buns Recipe
These homemade hot cross buns are genuinely special, and once you try them fresh from the oven, store-bought will never quite measure up.
- Perfectly soft and pillowy. The enriched dough made with butter, eggs, and whole milk creates a tender crumb that stays soft for days.
- Just the right amount of spice. A blend of cinnamon, allspice, and nutmeg gives these buns their classic warmth without being overpowering.
- Plump, juicy raisins in every bite. Soaking the raisins before adding them to the dough makes sure they stay soft and juicy rather than dry and chewy.
- That flour cross bakes right on top. Piping the cross before baking is the traditional method, and it gives you that iconic look without any fussy decorating after the fact.
- A glossy sugar glaze finishes them beautifully. Brushed on hot from the oven, the glaze makes the buns look bakery-worthy and adds just the right touch of sweetness.
- Make-ahead friendly. You can prep the dough the night before and do the second rise the next morning, making them doable even on a busy Easter morning.
- A recipe with real history. Hot cross buns have been made for centuries, and there’s something wonderful about baking something so deeply tied to tradition.
For another classic springtime bake, check out this Vasilopita Bread Recipe, a Greek celebration bread that’s equally meaningful and delicious.
Ingredients
The ingredient list is traditional and straightforward. Every component plays a real role in the final texture and flavor of these buns, so I’d encourage you not to skip anything, especially the spices.
For the Dough:
- 4 cups (500g) all-purpose flour, plus more for kneading
- 2 1/4 teaspoons (7g) instant yeast (1 packet)
- 1/4 cup (50g) granulated sugar
- 1 teaspoon ground cinnamon
- 1/2 teaspoon ground allspice
- 1/4 teaspoon ground nutmeg
- 1 teaspoon fine salt
- 1 cup (240ml) whole milk, warmed to 110°F (43°C)
- 4 tablespoons (57g) unsalted butter, softened
- 2 large eggs, room temperature
- 1 teaspoon pure vanilla extract
- 1 tablespoon finely grated orange zest (from 1 orange)
- 1 cup (150g) raisins or sultanas, soaked and drained
For the Flour Cross:
- 1/2 cup (60g) all-purpose flour
- 5 to 6 tablespoons water
For the Sugar Glaze:
- 3 tablespoons granulated sugar
- 3 tablespoons water
For the Egg Wash:
- 1 large egg
- 1 tablespoon whole milk
Read Also: Fall Bread Recipes
Kitchen Equipment Needed
Having the right tools makes the process much smoother, especially when working with enriched yeasted dough. Here’s everything you’ll need.
- Stand mixer with dough hook attachment (or a large bowl for hand kneading)
- Large mixing bowl
- Digital kitchen scale (highly recommended for accuracy)
- Instant-read thermometer
- 9×13 inch baking pan
- Plastic wrap or clean kitchen towel (for covering rising dough)
- Pastry brush (for the egg wash and glaze)
- Piping bag or zip-lock bag (for piping the flour cross)
- Wire cooling rack
- Small saucepan (for the glaze)
- Bench scraper or sharp knife (for dividing the dough)
You might also enjoy: Baked Oatmeal Recipe
Recommended Products for This Recipe
These are products I’ve personally used and stand behind. They make the process easier and the results noticeably better.
1. KitchenAid Stand Mixer with Dough Hook
A quality stand mixer takes all the effort out of kneading enriched dough, which can be quite sticky and sticky doughs are notoriously hard to knead by hand to the right consistency. The dough hook develops the gluten beautifully in just five minutes, giving you that smooth, elastic dough that makes fluffy buns possible. It’s an investment piece that will pay off every time you bake bread.
2. OXO Good Grips Silicone Pastry Brush
Brushing the egg wash evenly before baking and the sugar glaze right after is what gives these buns their gorgeous golden color and sticky-sweet shine. A quality silicone pastry brush applies both coatings smoothly without leaving bristles behind. It’s also easy to clean and holds up well over time.
3. Ateco Disposable Piping Bags
Piping the flour cross precisely requires a piping bag with a small tip or a bag with a tiny corner snipped off. Ateco’s disposable bags are reliable and easy to use, even for beginners, and they give you a clean, even cross every single time.
4. ThermoPro Digital Instant Read Thermometer
Getting your milk to exactly the right temperature (110°F/43°C) is the key to activating yeast properly without killing it. Too cold and it won’t activate; too hot and you’ll kill it entirely. A reliable digital thermometer takes the guesswork out completely and is one of those tools that will save you from failed bakes.
For another beautifully spiced bake, try this Pumpkin Roll Recipe that uses a lot of the same warm spice profile.

Step-by-Step Instructions: How to Make Hot Cross Buns
Step 1: Soak the Raisins
- Place 1 cup (150g) of raisins in a small heat-proof bowl.
- Pour enough boiling water over the raisins to fully submerge them.
- Let them soak for 15 to 20 minutes. This step plumps the raisins so they stay soft and juicy inside the baked buns rather than becoming dry or chewy.
- Once soaked, drain the raisins through a fine mesh strainer and spread them on a few layers of paper towels.
- Pat the raisins gently with another paper towel to remove as much surface moisture as possible. Excess water in the raisins can make the dough too wet.
- Set the drained raisins aside while you prepare the dough.
Step 2: Warm the Milk and Check the Temperature
- Pour 1 cup (240ml) of whole milk into a small saucepan over low heat or into a microwave-safe measuring cup.
- Gently heat the milk until it reaches 110°F (43°C). You can check this with an instant-read thermometer.
- The milk should feel comfortably warm to the touch, similar to warm bath water, but not hot. If the milk is too hot (above 120°F/49°C), it will kill the yeast. If it’s too cold (below 100°F/38°C), the yeast won’t activate properly.
- Remove from heat and set aside.
Step 3: Combine the Dry Ingredients
- In the bowl of a stand mixer (or a large mixing bowl if kneading by hand), add 4 cups (500g) of all-purpose flour.
- Add 2 1/4 teaspoons (7g) of instant yeast and 1/4 cup (50g) of granulated sugar.
- Add 1 teaspoon of ground cinnamon, 1/2 teaspoon of ground allspice, 1/4 teaspoon of ground nutmeg, and 1 teaspoon of fine salt.
- Add 1 tablespoon of finely grated orange zest.
- Whisk the dry ingredients together briefly with a fork or spatula to distribute the yeast, sugar, and spices evenly through the flour. This helps ensure the yeast is evenly distributed so the buns rise evenly.
Step 4: Add the Wet Ingredients and Mix the Dough
- Fit your stand mixer with the dough hook attachment.
- Add the warmed milk (from Step 2), 4 tablespoons (57g) of softened butter, 2 large eggs (room temperature), and 1 teaspoon of pure vanilla extract to the bowl with the dry ingredients.
- Turn the mixer on to low speed (speed 2) and mix until the ingredients start to come together into a shaggy dough, about 1 to 2 minutes. Scrape down the sides of the bowl if needed.
- Once the dough comes together, increase the speed to medium (speed 4) and knead for 5 minutes. The dough should become smooth and elastic.
- If the dough is sticking to the sides of the bowl after 2 minutes of kneading, add flour one tablespoon at a time, just enough to help the dough pull away from the sides. You don’t want to add too much flour or the buns will be dense.
Step 5: Incorporate the Raisins
- Reduce the mixer speed to low.
- Add the drained and dried raisins from Step 1 gradually, a handful at a time.
- Mix on low speed for an additional 2 minutes until the raisins are evenly distributed throughout the dough. The raisins may cause the dough to look slightly torn at this point because they’re being pushed into the gluten structure, but that is completely normal.
- To check if the dough is ready, poke it with a floured finger. It should spring back slowly. It will be slightly tacky but should not stick to your hands.
Step 6: First Rise (Bulk Fermentation)
- Lightly grease a large clean bowl with a little softened butter or neutral cooking spray.
- Shape the dough into a smooth ball by folding the edges underneath, then place it in the greased bowl with the smooth side facing up.
- Cover the bowl tightly with plastic wrap or a clean, damp kitchen towel.
- Place the bowl somewhere warm to rise. A good trick is to heat your oven to the lowest setting for 2 minutes, then turn it off and place the covered bowl inside. The residual warmth creates ideal proofing conditions.
- Let the dough rise for 1 to 1.5 hours until it has doubled in size. The exact time will depend on the warmth of your kitchen. In a cool kitchen, it may take closer to 2 hours.
Step 7: Divide and Shape the Buns
- Once the dough has doubled, turn it out onto a lightly floured work surface.
- Gently punch the dough down to deflate it, then fold it over a couple of times to redistribute the yeast.
- Using a bench scraper or sharp knife, divide the dough into 12 equal pieces. The easiest way to ensure equal pieces is to shape the dough into a rough log first, then cut it into 12 portions. Each piece should weigh approximately 80 to 85 grams (2.8 to 3 oz) if you want to be precise.
- To shape each bun: cup one piece of dough in your hand and place it on the work surface. Use the palm of your hand to roll the dough in a circular motion, applying gentle downward pressure. This creates surface tension that helps the bun hold its round shape and bake up with a smooth top.
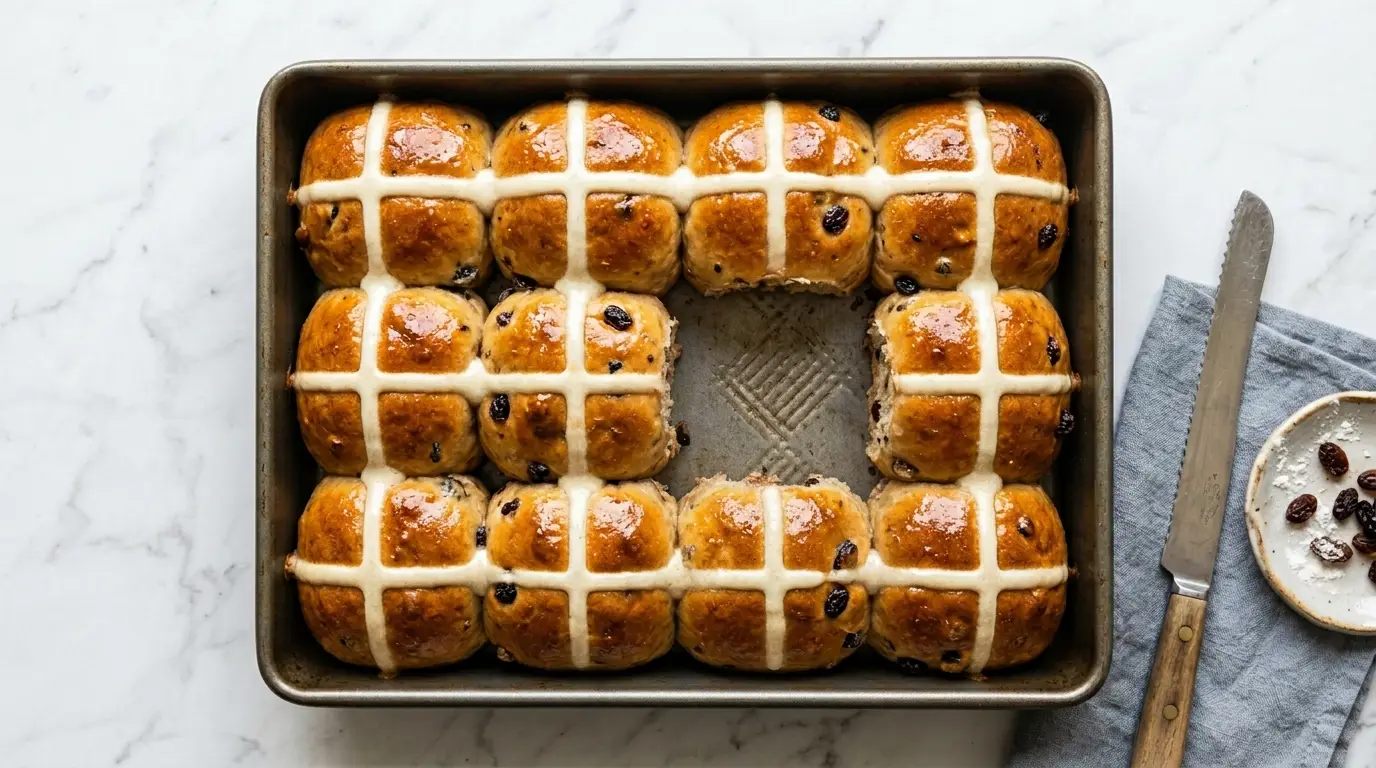
- Grease a 9×13 inch baking pan generously with butter.
- Arrange the shaped buns in the pan in a 3×4 grid, leaving a small gap between each bun. They will grow and touch each other during the second rise and baking, which helps them stay soft on the sides.
Step 8: Second Rise
- Cover the pan loosely with plastic wrap or a clean towel.
- Let the buns rise again in a warm place for 45 minutes to 1 hour, until they have puffed up and are touching each other at the sides.
- Do not rush this step. A proper second rise is what gives the buns their light, airy texture. You’ll know they’re ready when you gently poke one with a floured finger and the indentation springs back slowly.
- While the buns are doing their second rise, preheat your oven to 375°F (190°C) and position the rack in the center.
Step 9: Make the Flour Cross Paste
- In a small bowl, whisk together 1/2 cup (60g) of all-purpose flour and 5 to 6 tablespoons of water.
- Start with 5 tablespoons and add more water one teaspoon at a time until you get a smooth, thick paste. The consistency should be similar to thick glue or thick pancake batter; it should hold its shape when piped but flow easily out of the bag.
- If the paste is too runny, the cross will spread out and lose its definition during baking. If it’s too thick, it won’t pipe cleanly.
- Transfer the paste to a piping bag or a zip-lock bag with a small corner snipped off (about 3mm or 1/8 inch opening).
Step 10: Make the Egg Wash and Apply the Cross
- In a small bowl, whisk together 1 egg and 1 tablespoon of whole milk until fully combined and smooth.
- Once the buns have completed their second rise, brush the tops and sides of all the buns generously with the egg wash using a pastry brush. Make sure to reach into the gaps between the buns too. The egg wash creates that beautiful golden-brown color when the buns bake.
- Immediately after applying the egg wash, pipe a straight line of flour paste down each row of buns, then pipe straight lines across each column. You’re creating one continuous cross over the entire pan rather than doing each bun individually. This is the traditional method and gives more even, consistent crosses.
- Make sure the flour paste reaches from edge to edge so each bun has a full cross.
Step 11: Bake the Buns
- Place the baking pan in the center of the preheated 375°F (190°C) oven.
- Bake for 18 to 22 minutes, until the tops are a deep golden brown and the internal temperature of the buns registers 190°F (88°C) on an instant-read thermometer.
- If the tops are browning too quickly before the buns are fully cooked through, you can loosely tent the pan with a piece of aluminum foil for the final 5 minutes of baking.
- The buns are done when they feel firm to the touch on top and sound hollow when tapped on the bottom.
Step 12: Make the Sugar Glaze and Finish
- While the buns are in their last few minutes of baking, make the sugar glaze. Combine 3 tablespoons of granulated sugar and 3 tablespoons of water in a small saucepan.
- Bring to a boil over medium heat, stirring to dissolve the sugar. Once boiling, let it simmer for 1 to 2 minutes until slightly syrupy. Remove from heat.
- As soon as the buns come out of the oven (while they’re still hot), brush the glaze generously over the tops of all the buns using the pastry brush.
- The heat from the buns helps the glaze soak in slightly and creates that gorgeous, sticky shine you see on bakery hot cross buns.
- Let the buns cool in the pan for 10 minutes before serving. They’re best enjoyed still slightly warm.
Another recipe you might love: Homemade Biscuit Recipe
Tips for The Best Hot Cross Buns
Getting hot cross buns just right comes down to a few key details. Nail these and your buns will be soft, fragrant, and genuinely impressive.
- Use whole milk. The fat content in whole milk makes the dough significantly richer and more tender than lower-fat alternatives. It really does make a difference to the final texture.
- Don’t skip soaking the raisins. Dry raisins will pull moisture out of the dough during baking, leading to a drier texture. Soaked raisins stay plump and juicy throughout.
- Check your yeast before starting. If your yeast is old or suspect, dissolve it in the warm milk with a pinch of sugar before mixing it into the dry ingredients. If it doesn’t bubble and foam within 10 minutes, your yeast is dead and you’ll need a fresh packet.
- Don’t add too much flour. The dough will feel stickier than you expect, and that’s okay. Resist the temptation to add too much flour, as this is what leads to dense buns. A slightly sticky dough produces a lighter, fluffier bun.
- Room temperature eggs matter. Cold eggs straight from the fridge can cause the butter in the dough to seize up into small lumps. Take your eggs out of the fridge 30 minutes before starting.
- The second rise is non-negotiable. If you rush the second rise, your buns won’t have the same light, airy texture. Give them the full time they need to puff up properly.
- Pipe the cross from edge to edge. A cross that stops halfway across the bun will look unfinished. Make sure your line extends all the way to the edge of the pan.
- Glaze while still hot. The sugar glaze absorbs into the surface of the buns best when they’re fresh out of the oven. Apply it within the first few minutes after baking.
- Bake until deeply golden. Pale buns often mean underbaked buns with a doughy interior. You want a rich, golden-brown top.
Read Also: Sourdough Focaccia Recipe
What to Serve with Hot Cross Buns
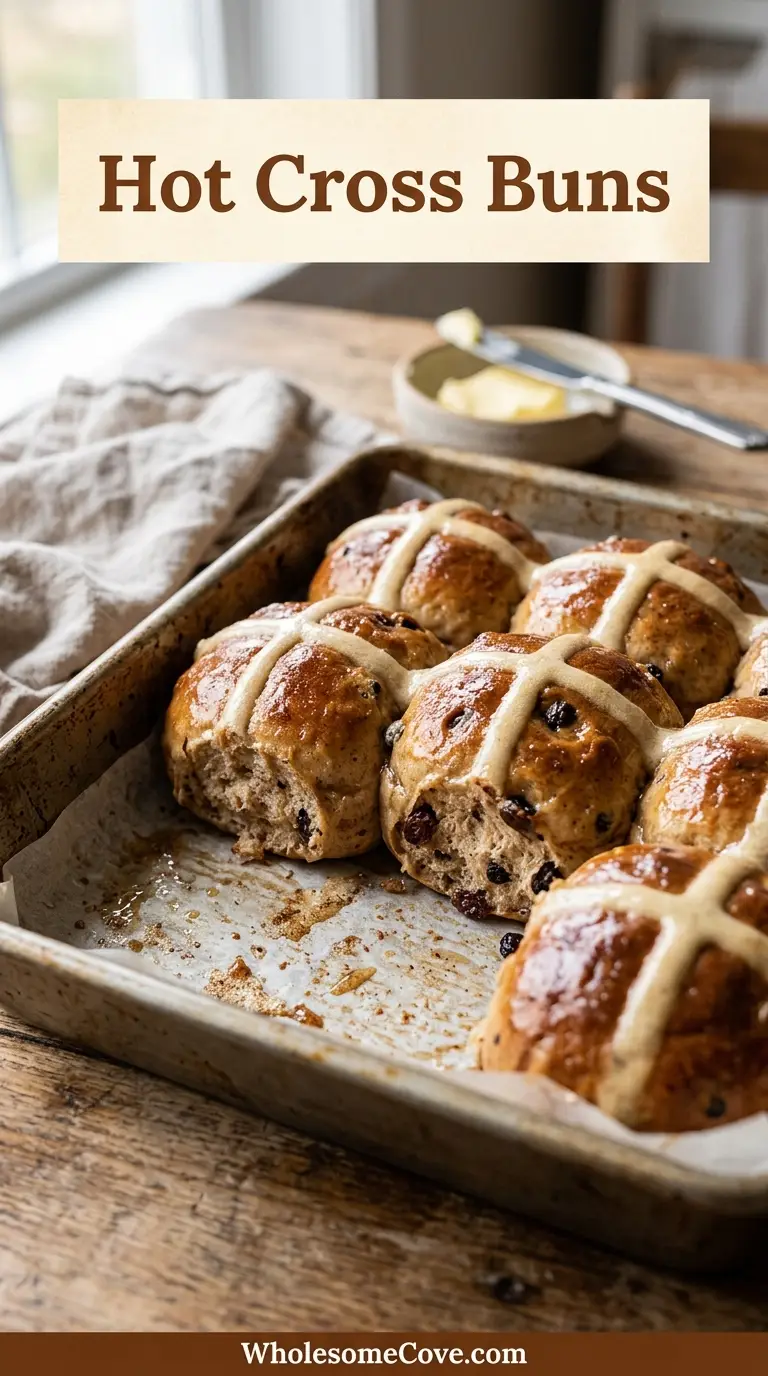
Hot cross buns are honestly wonderful on their own, still slightly warm with just a generous smear of good butter letting it melt into all the nooks and crannies.
- Salted butter – The classic pairing. Slice the bun in half while still warm, add a thick pat of salted butter, and eat it before the butter fully melts.
- Honey Butter – A whipped honey butter takes things up a notch and plays beautifully off the spices in the bun.
- Clotted cream and jam – The traditional British approach. A spoonful of strawberry or raspberry jam alongside a generous amount of clotted cream is absolutely luxurious.
- Strawberry Sauce – A simple homemade strawberry sauce spooned over a split bun makes for a stunning, easy dessert.
- Cream cheese – Slightly tangy, creamy, and rich, cream cheese pairs surprisingly well with the warmth of the spiced buns.
- Hot Chocolate – Warm hot cross buns alongside a mug of rich hot chocolate is a cozy pairing that works beautifully for Easter morning or an afternoon treat.
- Cups of tea – A strong cup of English breakfast tea is the most traditional accompaniment, and there’s a reason this combination has been popular for centuries.
Variations of Hot Cross Buns
The classic version is hard to beat, but there are several wonderful ways to change up the recipe depending on your preferences or what you have on hand.
- Chocolate chip hot cross buns. Swap out the raisins for semi-sweet or dark chocolate chips. This version is particularly popular with kids and turns the bun into something closer to a dessert. Use the same quantity (1 cup/150g) and don’t soak them since chips don’t need hydrating.
- Cranberry and orange. Replace the raisins with dried cranberries and increase the orange zest to 2 tablespoons. The tartness of the cranberries cuts through the richness of the dough beautifully.
- Mixed peel and currants. For the most traditional British-style hot cross bun, use a combination of currants and candied mixed peel (orange and lemon peel). The candied peel adds a wonderful citrusy chew and is the version you’d most commonly find at a British bakery.
- Apple and cinnamon. Fold in 1 cup of finely diced dried apple along with an extra 1/2 teaspoon of ground cinnamon. This variation is especially lovely in autumn and tastes a little like biting into a spiced apple pie.
- Icing cross instead of flour cross. Some bakers prefer to pipe a thick white icing cross after baking rather than the flour paste cross before baking. Use 1 cup of powdered sugar, 1 to 2 tablespoons of milk, and a 1/4 teaspoon of vanilla extract to make a thick, pipeable icing. Let the buns cool completely before piping or the icing will melt.
- No-knead overnight hot cross buns. If you want a more hands-off approach, you can mix the dough the night before and let it do a long, slow rise in the refrigerator overnight. The next morning, shape the buns, let them do their second rise at room temperature for about 1.5 to 2 hours, then bake as normal. The overnight cold fermentation actually develops more flavor in the dough.
You might also enjoy: Easy Banana Bread Recipe
Storage and Reheating
Hot cross buns are best on the day they’re made, but they store reasonably well with a little care. Here’s how to keep them fresh and how to revive them if they’ve gone a bit firm.
- Room temperature: Store baked hot cross buns in an airtight container or zip-lock bag at room temperature for up to 2 days. Make sure they’re fully cooled before sealing, or condensation will make them soggy.
- Refrigerator: You can refrigerate buns for up to 5 to 6 days in an airtight container. Note that the cold air will make them firm up more quickly, so they really do benefit from a quick warm-up before eating.
- Freezer (baked buns): Allow the buns to cool completely (without the glaze if possible), then wrap each bun individually in plastic wrap and store in a zip-lock freezer bag. They’ll keep for up to 3 months. To serve, thaw overnight in the refrigerator or at room temperature for a few hours.
- Freezer (unbaked dough): After shaping the buns and arranging them in the baking pan, cover tightly and freeze for up to 2 months. When ready to bake, place the frozen pan in the refrigerator overnight to thaw slowly, then let the buns rise at room temperature for 1.5 to 2 hours before applying the cross paste, egg wash, and baking.
- Reheating: The best way to reheat a hot cross bun is to slice it in half and place it cut-side down in a dry skillet over medium-low heat for about 2 minutes. This gives you a lightly toasted, warm bun with a slightly crisp cut side. Alternatively, wrap a bun in a damp paper towel and microwave for 15 to 20 seconds to warm it through without drying it out.
Read Also: Chocolate Chip Bread Recipe
Nutritional Facts
Values are approximate per bun (recipe makes 12), including the flour cross and sugar glaze. Calculated based on standard ingredient amounts.
| Nutrient | Per Bun | ||| | Calories | ~270 kcal | | Carbohydrates | ~48g | | Protein | ~7g | | Fat | ~6g | | Saturated Fat | ~3g | | Fiber | ~2g | | Sugar | ~12g | | Sodium | ~210mg | | Cholesterol | ~55mg |
Nutritional values are estimates and will vary depending on exact ingredients and brands used.
Another bread recipe worth bookmarking: Same Day Sourdough Bread Recipe
Health Benefits of Key Ingredients
While hot cross buns are certainly a treat, several of their key ingredients bring some genuine nutritional value to the table.
It’s worth noting that these buns offer a bit more than just indulgence, especially when you look at the spices and fruit that go into them.
- Raisins are a concentrated source of iron, potassium, and antioxidants. They contain natural sugars for quick energy and a small amount of dietary fiber, which supports digestive health.
- Cinnamon has been studied for its potential anti-inflammatory properties and its role in supporting healthy blood sugar levels. Even in small amounts, it adds meaningful antioxidants to the buns.
- Allspice contains compounds like eugenol, which has natural antimicrobial and anti-inflammatory properties. It also provides small amounts of vitamins C and A.
- Nutmeg contains antioxidants and has traditionally been used to support digestion. Like the other spices, it adds both flavor and a small antioxidant boost.
- Eggs contribute high-quality complete protein, essential B vitamins including B12 and riboflavin, and choline, which is important for brain function and liver health.
- Whole milk provides calcium, phosphorus, vitamin D (if fortified), and complete protein. Using whole milk in baking also means the fat-soluble vitamins are more bioavailable.
- Orange zest is rich in flavonoids and vitamin C. The zest contains significantly more of these beneficial compounds than the juice, making it a nutritious flavoring addition.
- All-purpose flour provides carbohydrates for energy as well as B vitamins and iron, particularly in enriched flour varieties.
You might also like: Gingerbread Overnight Oats Recipe for another warming, spiced breakfast option packed with wholesome ingredients.
FAQs About Hot Cross Buns
1. Can I use active dry yeast instead of instant yeast?
Yes, you can substitute active dry yeast, but you’ll need to activate it first. Combine the active dry yeast with the warmed milk and a pinch of sugar and let it sit for 10 minutes until it becomes foamy. If it doesn’t foam, the yeast is no longer active and should be replaced. Use the same total quantity (2 1/4 teaspoons) and proceed with the rest of the recipe as written.
2. My dough isn’t rising. What went wrong?
The most likely culprits are yeast that is too old, milk that was too hot (which kills yeast), or a kitchen that’s too cold for proofing. Check that your milk temperature is between 100°F and 115°F (38°C to 46°C) and that your yeast is fresh. If your kitchen is cool, try placing the covered dough in your oven with just the oven light on, which typically creates a warm enough environment for yeast dough to rise.
3. Can I make the dough ahead of time?
Absolutely, and many bakers find the flavor is even better when the dough is allowed a slow, cold fermentation overnight. After the first rise, punch the dough down, shape it into a ball, cover tightly, and refrigerate overnight. The next morning, remove it from the fridge, allow it to come to room temperature for 30 minutes, then shape the buns and proceed with the second rise and baking.
4. Why do my hot cross buns come out dense?
Dense buns are almost always caused by one of three things: too much flour added during kneading, insufficient proofing time during the rises, or overproofing which exhausts the yeast. Trust the process and resist adding flour unless the dough is truly unworkable. Also make sure your buns have genuinely doubled in size during both rises before moving on.
5. Can I make these without raisins?
Absolutely. Plain spiced hot cross buns are delicious and very much a valid option. Simply omit the raisins entirely, or substitute something you do enjoy, such as chocolate chips, dried cranberries, or finely diced candied orange peel. Keep the quantity the same (around 1 cup/150g) so the dough-to-mix-in ratio stays balanced.
For a similarly cozy seasonal bake, check out this Pumpkin Chocolate Chip Cookies Recipe.
Hot Cross Buns
Ingredients
- 4 cups all-purpose flour - 500g, plus more for kneading
- 2 1/4 tsp instant yeast - 7g, 1 standard packet
- 1/4 cup granulated sugar - 50g
- 1 tsp ground cinnamon
- 1/2 tsp ground allspice
- 1/4 tsp ground nutmeg
- 1 tsp fine salt
- 1 cup whole milk - 240ml, warmed to 110°F (43°C)
- 4 tbsp unsalted butter - 57g, softened to room temperature
- 2 large eggs - room temperature
- 1 tsp pure vanilla extract
- 1 tbsp orange zest - finely grated, from 1 orange
- 1 cup raisins or sultanas - 150g, soaked in boiling water for 15-20 minutes then drained and patted dry
- 1/2 cup all-purpose flour - 60g
- 5-6 tbsp water - added one tablespoon at a time until a thick, pipeable paste forms
- 1 large egg
- 1 tbsp whole milk
- 3 tbsp granulated sugar
- 3 tbsp water
Equipment
- Stand mixer with dough hook attachment - Or a large bowl for hand kneading
- Large mixing bowl
- Digital kitchen scale - Highly recommended for accuracy
- Instant-read thermometer - For checking milk temperature and doneness
- 9×13 inch baking pan - Greased generously with butter
- Plastic wrap or clean kitchen towel - For covering dough during rising
- Pastry brush - For applying egg wash and sugar glaze
- Piping bag or zip-lock bag - For piping the flour cross; snip a small 3mm corner if using a zip-lock bag
- Wire cooling rack
- Small saucepan - For making the sugar glaze
- Bench scraper or sharp knife - For dividing dough into equal portions
- Fine-mesh strainer - For draining soaked raisins
Method
- Place 1 cup (150g) of raisins in a bowl, cover with boiling water, and soak for 15 to 20 minutes. Drain through a fine mesh strainer and pat dry thoroughly with paper towels to remove excess moisture.
- Gently heat 1 cup (240ml) of whole milk until it reaches 110°F (43°C) — it should feel comfortably warm but not hot to the touch. Set aside.
- In the bowl of a stand mixer, whisk together the flour, instant yeast, sugar, cinnamon, allspice, nutmeg, salt, and orange zest until evenly combined.
- Add the warmed milk, softened butter, eggs, and vanilla extract to the dry ingredients. Mix on low with the dough hook until a shaggy dough forms, then increase to medium speed and knead for 5 minutes until smooth and elastic.
- Reduce mixer speed to low and add the drained raisins gradually, mixing for an additional 2 minutes until evenly distributed. The dough should be slightly tacky but not sticky to the hands.
- Shape the dough into a smooth ball, place in a lightly greased bowl, cover with plastic wrap, and let rise in a warm place for 1 to 1.5 hours until doubled in size.
- Turn the risen dough onto a lightly floured surface, punch down, and divide into 12 equal pieces (about 80-85g each). Roll each piece into a smooth ball using a cupped palm with gentle circular pressure, then arrange in a greased 9×13 inch pan in a 3×4 grid.
- Cover the pan loosely and let the buns rise in a warm place for 45 minutes to 1 hour until puffed and touching at the sides. Meanwhile, preheat the oven to 375°F (190°C).
- Whisk together 1/2 cup (60g) flour and 5 to 6 tablespoons of water until a smooth, thick paste forms. Transfer to a piping bag with a small opening (about 3mm).
- Whisk together the egg and 1 tablespoon of milk, then brush generously over the tops of all risen buns. Immediately pipe straight lines of flour paste across all rows and columns to form a cross on each bun.
- Bake at 375°F (190°C) for 18 to 22 minutes until deeply golden brown and the internal temperature reads 190°F (88°C). Tent loosely with foil in the final 5 minutes if tops are browning too quickly.
- Simmer 3 tablespoons each of sugar and water in a small saucepan for 1 to 2 minutes to make a glaze, then brush generously over the hot buns immediately out of the oven. Cool in the pan for 10 minutes before serving.
Nutrition
Notes
- Soak the raisins before adding them to the dough — this keeps them plump and juicy during baking and prevents them from drawing moisture out of the dough.
- Check your milk temperature with a thermometer. Milk above 120°F (49°C) will kill the yeast; below 100°F (38°C) it won’t activate properly. 110°F (43°C) is the sweet spot.
- Don’t over-flour the dough. Enriched doughs are naturally stickier than lean doughs, and adding too much flour results in dense buns. Only add flour one tablespoon at a time if the dough is genuinely unworkable.
- Room temperature eggs are important — cold eggs can cause the softened butter in the dough to seize into lumps. Remove eggs from the fridge 30 minutes before starting.
- Make-ahead tip: After the first rise, shape the buns, place in the pan, cover tightly, and refrigerate overnight. The next morning, allow them to rise at room temperature for 1.5 to 2 hours before baking.
- Swap raisins for chocolate chips, dried cranberries, currants, or finely diced candied mixed peel — use the same quantity (1 cup/150g). No need to soak chocolate chips.
- For an icing cross instead of a flour cross, let the baked buns cool completely and pipe with a thick icing made from 1 cup powdered sugar, 1-2 tablespoons milk, and 1/4 teaspoon vanilla extract.
- Store baked buns in an airtight container at room temperature for up to 2 days, in the refrigerator for up to 6 days, or freeze individually wrapped for up to 3 months.
- To reheat, slice in half and toast cut-side down in a dry skillet over medium-low heat for 2 minutes, or microwave wrapped in a damp paper towel for 15 to 20 seconds.
- Apply the sugar glaze while the buns are still hot from the oven so it absorbs into the surface and creates the classic sticky, shiny finish.
Private Notes
Tried this recipe?
Let us know how it was!Final Thoughts
There is something incredibly satisfying about pulling a pan of freshly baked hot cross buns out of the oven and watching the glaze sink into those golden tops. Making them from scratch is a genuine labor of love, but it’s one of those baking projects that rewards your patience in the most delicious way.
Whether you make them for Easter, a lazy spring Sunday, or honestly any time the craving strikes, this recipe will not let you down. Give them a try, and I’d love to know how they turn out for you.
Drop a comment below with any questions, or share a photo if you make them! Nothing makes my day more than seeing your bakes.
Recommended:
- Dinner Rolls Recipe
- Oatmeal Raisin Cookie Recipe
- Gingerbread Cookie Recipe
- Fresh Milled Flour Bread Recipe
- Sweet Potato Bread Recipe
- Einkorn Bread Recipe
- Old Fashioned Pumpkin Bread Recipe
- Fruit Tart Recipe
- Fruitcake Recipe
- Cranberry Orange Overnight Oats Recipe