
I burned my first batch of dinner rolls so badly that my smoke alarm went off, and my dog refused to come back into the kitchen for two days. But that kitchen disaster turned out to be a blessing because it forced me to figure out exactly what I was doing wrong.
Fast forward five years, and this dinner rolls recipe has become my absolute go-to for every family gathering, holiday meal, and Sunday dinner. My teenage son requests them at least twice a month, and I’ve had neighbors knock on my door asking what smells so good when I’m baking them.
The secret? It’s all about the timing and temperature of your ingredients, plus a little trick with steam that I learned from my grandmother.
| Quick Recipe Summary | |
|---|---|
| Prep Time | 20 minutes |
| Rise Time | 1 hour 30 minutes |
| Cook Time | 15 minutes |
| Total Time | 2 hours 5 minutes |
| Servings | 24 rolls |
| Difficulty Level | Easy |

Why You’ll Love This Dinner Rolls Recipe
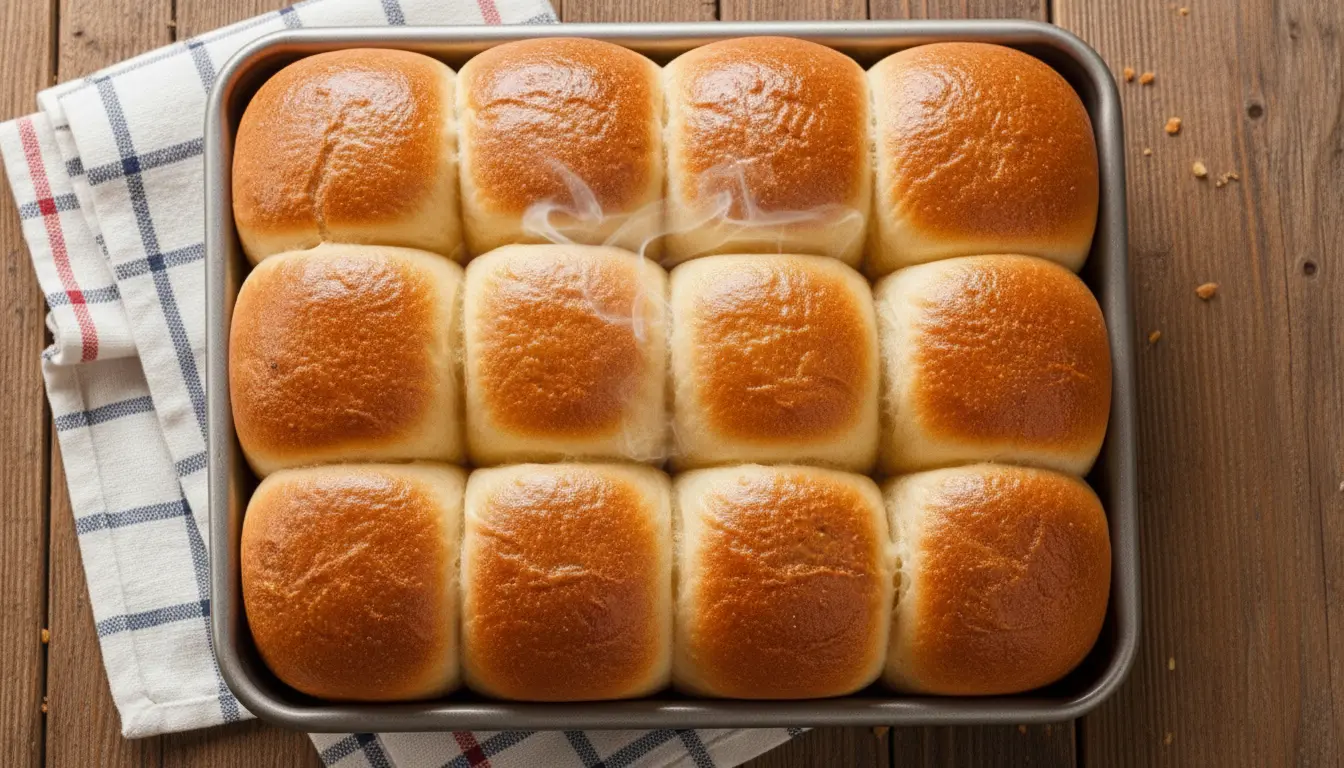
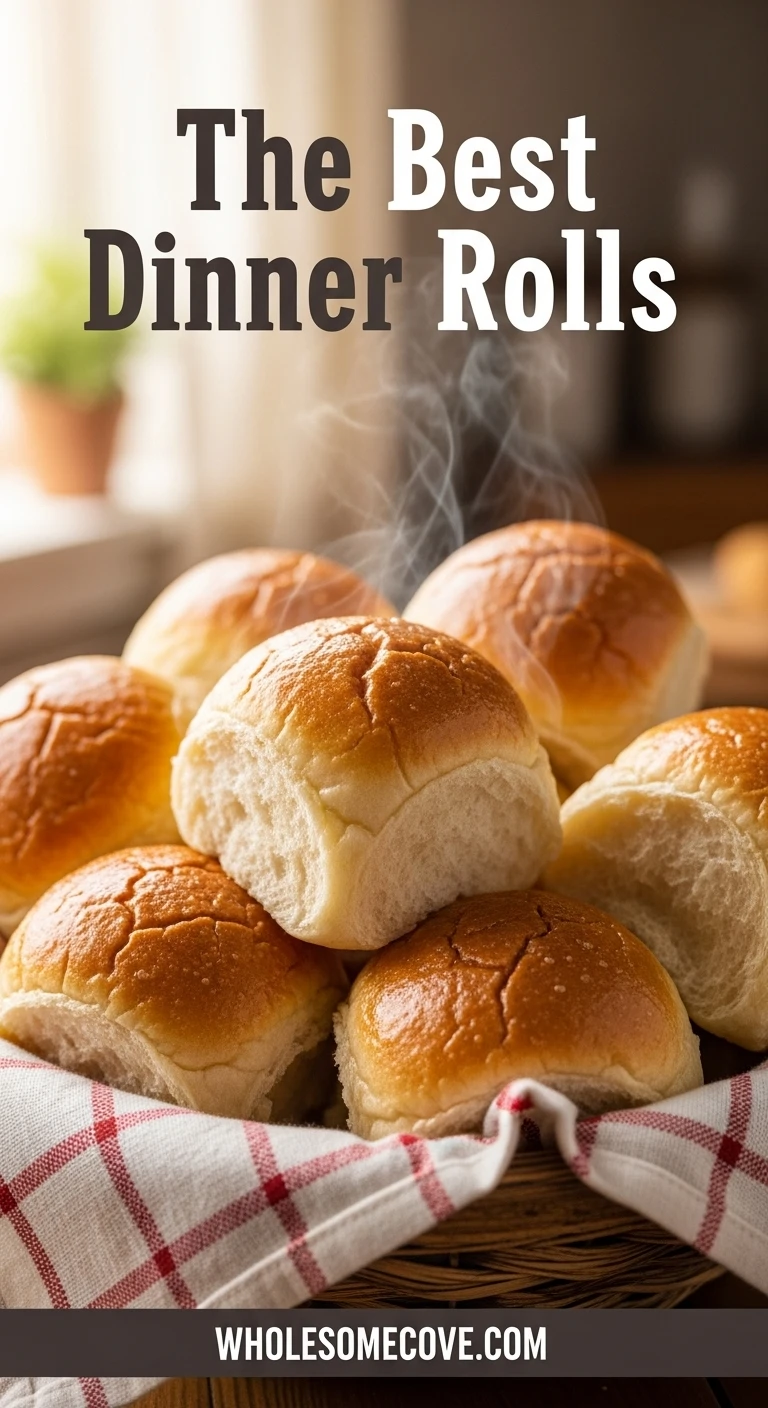
These rolls are impossibly soft with a golden, slightly sweet crust that practically melts in your mouth. They’re pillowy inside but sturdy enough to hold up to a generous pat of butter without falling apart.
The dough is surprisingly forgiving, which means even if you’re new to bread baking, you’ll still end up with beautiful results. I’ve made these rolls on humid summer days and dry winter mornings, and they always turn out fantastic.
They fill your kitchen with the most incredible aroma that’ll have everyone hovering around the oven asking when they’ll be ready. These rolls also freeze beautifully, so you can make a double batch and have fresh-tasting rolls ready in minutes whenever you need them.
Here’s what makes them special:
- Incredibly soft texture that stays fresh for days (if they last that long)
- Lightly sweet flavor that complements both savory and sweet dishes
- Perfect size for sliders, sandwiches, or eating plain with butter
- Makes 24 rolls so there’s plenty for a crowd or leftovers for breakfast
- Beginner-friendly with clear steps that guarantee success every time
- Versatile dough that you can shape into various forms or add herbs and cheese
For a complete holiday spread, these pair wonderfully with my thanksgiving turkey.
Ingredients
This recipe uses simple pantry staples that you probably already have at home. The key is using warm (not hot) liquids to activate the yeast properly without killing it.
For the Dough:
- 1 cup (240ml) whole milk, warmed to 110°F (43°C)
- 1/3 cup (67g) granulated sugar
- 2 1/4 teaspoons (7g) active dry yeast (one standard packet)
- 1/3 cup (76g) unsalted butter, melted and slightly cooled
- 1 large egg, room temperature
- 1 teaspoon (6g) salt
- 4 cups (500g) all-purpose flour, plus extra for dusting
For the Topping:
- 3 tablespoons (43g) unsalted butter, melted
- 1 tablespoon (15ml) honey (optional, for extra shine)
Kitchen Equipment Needed
Having the right tools makes this recipe much easier to execute. You don’t need anything fancy, but a few key items will help you achieve professional-looking results.
Essential Equipment:
- Stand mixer with dough hook attachment (or you can knead by hand)
- Large mixing bowl
- Digital kitchen thermometer for checking liquid temperature
- Clean kitchen towel or plastic wrap
- 9×13-inch baking pan
- Pastry brush for applying butter
- Measuring cups and spoons
- Kitchen scale (optional but helpful for accuracy)
- Small saucepan for warming milk
- Cooling rack
Recommended Products for This Recipe
I’ve tested countless products while perfecting these rolls, and these are the ones that genuinely make a difference in your results.
1. KitchenAid Stand Mixer with Dough Hook
This has been my workhorse for bread baking for over a decade. The powerful motor handles thick dough without straining, and the dough hook kneads perfectly every time. While you can absolutely make these rolls by hand, this mixer saves you at least 10 minutes of kneading time and gives you more consistent results.
2. ThermoPro Digital Instant Read Thermometer
Getting your milk to exactly 110°F is critical for activating yeast without killing it. This thermometer gives you a reading in 3 seconds, which means you’re not standing there waiting while your milk temperature changes. I’ve killed so many batches of yeast before I invested in a good thermometer.
3. USA Pan Bakeware Aluminized Steel Rectangular Cake Pan
This pan distributes heat incredibly evenly, which means all your rolls brown at the same rate. The aluminized steel prevents hot spots that can cause some rolls to burn while others are still pale. It’s also naturally nonstick, so your rolls release beautifully without sticking.
4. Red Star Active Dry Yeast
Not all yeast is created equal, and I learned this the hard way. This brand is consistently fresh and reliable, with a long shelf life. Store it in your refrigerator after opening, and it’ll stay active for months. I always buy the jar instead of packets because it’s more economical and I bake bread frequently.
You might also love this homemade biscuit recipe for more bread options.

Step-by-Step Instructions: How to Make Dinner Rolls
Follow these detailed steps carefully, especially if this is your first time making yeast bread. The process is straightforward, but precision matters when working with yeast.
1. Activate the Yeast
- Warm the milk in a small saucepan over low heat until it reaches 110°F (43°C), checking with your thermometer
- Pour the warm milk into your stand mixer bowl or large mixing bowl
- Add the sugar and yeast to the warm milk, stirring gently with a spoon to combine
- Let the mixture sit undisturbed for 5-10 minutes until it becomes foamy and bubbly on top (this means your yeast is alive and active)
- If the mixture doesn’t foam, your yeast is dead or your milk was too hot, and you’ll need to start over with fresh yeast
2. Mix the Wet Ingredients
- Add the melted butter to the yeast mixture, ensuring the butter isn’t too hot (it should be just warm to the touch)
- Crack in the egg and whisk everything together until well combined and the egg is fully incorporated
- The mixture should look creamy and slightly frothy at this point
3. Add the Dry Ingredients
- Add the salt directly to your wet mixture and stir briefly to distribute
- Add 2 cups of flour first, mixing on low speed if using a stand mixer, or stirring with a wooden spoon if mixing by hand
- Once the first 2 cups are incorporated, gradually add the remaining 2 cups of flour, about 1/2 cup at a time
- Mix until a shaggy dough forms and pulls away from the sides of the bowl (you may need slightly more or less flour depending on humidity)
4. Knead the Dough
- If using a stand mixer, attach the dough hook and knead on medium-low speed for 8-10 minutes until the dough is smooth, elastic, and slightly tacky but not sticky
- If kneading by hand, turn the dough out onto a lightly floured surface and knead for 10-12 minutes, adding small amounts of flour if the dough sticks to your hands
- To test if you’ve kneaded enough, press your finger into the dough; it should slowly spring back
- The dough should feel soft and supple, similar to your earlobe in texture
5. First Rise
- Lightly grease a large bowl with butter or cooking spray
- Form the dough into a smooth ball by tucking the edges underneath
- Place the dough ball in the greased bowl, turning it once to coat all sides with oil
- Cover the bowl tightly with a clean kitchen towel or plastic wrap
- Place in a warm, draft-free spot (I use my oven with just the light on, or on top of my dryer during a cycle)
- Let rise for 45-60 minutes until doubled in size (the time varies based on room temperature)
6. Shape the Rolls
- Punch down the risen dough with your fist to release the air bubbles
- Turn the dough out onto a lightly floured surface
- Use a knife or bench scraper to divide the dough into 24 equal pieces (I cut it in half, then in half again, then divide each quarter into 6 pieces)
- Roll each piece into a smooth ball by cupping your hand over it and moving in a circular motion on the counter
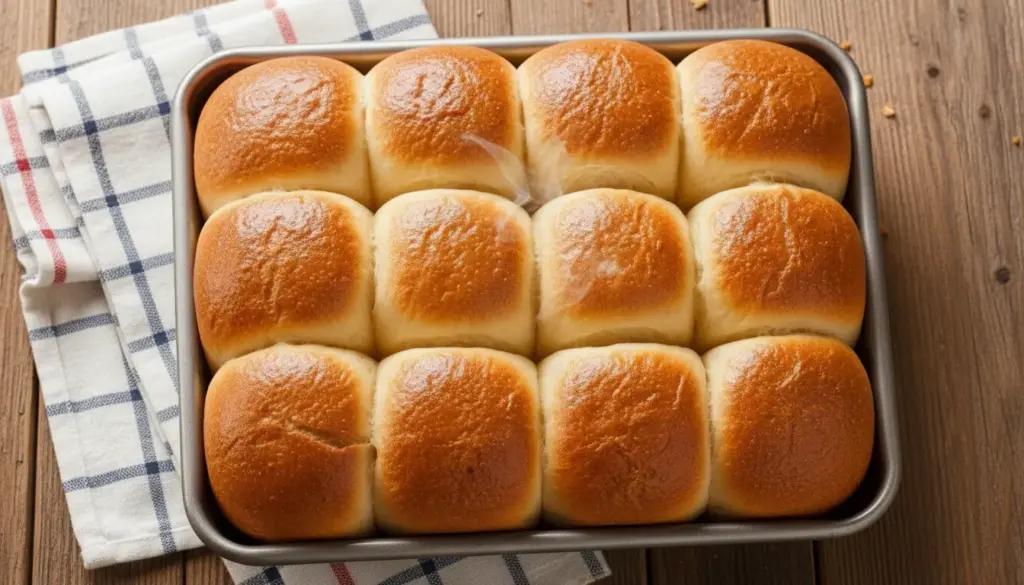
- Place the balls in a greased 9×13-inch baking pan, arranging them in 4 rows of 6 (they should be touching slightly)
7. Second Rise
- Cover the pan loosely with plastic wrap or a kitchen towel
- Let the rolls rise again for 30-45 minutes until puffy and nearly doubled in size
- They should be touching each other and filling most of the pan
- About 15 minutes before the second rise is complete, preheat your oven to 375°F (190°C)
8. Bake the Rolls
- Remove the cover from your rolls
- Place the pan on the center rack of your preheated oven
- Bake for 15-18 minutes until the tops are golden brown (rotate the pan halfway through if your oven has hot spots)
- The rolls are done when they reach an internal temperature of 190°F (88°C) or sound hollow when tapped
- Remove from the oven immediately when done to prevent over-baking
9. Add the Butter Topping
- Mix the melted butter with honey if using
- Immediately brush the hot rolls generously with the butter mixture while they’re still in the pan
- The butter will soak into the tops and create a beautiful glossy finish
- Let the rolls cool in the pan for 5-10 minutes before serving
Read Also: Thanksgiving Stuffing Recipe
Tips for The Best Dinner Rolls
These insider tips will help you avoid the mistakes I made when I was learning to perfect this recipe.
Pro Tips:
- Check your yeast expiration date before starting because expired yeast won’t rise no matter how perfectly you follow the recipe
- Temperature is everything when it comes to yeast, so invest in a thermometer rather than guessing if your liquids are the right warmth
- Don’t add too much flour during kneading because the dough should be slightly tacky but not sticky (too much flour makes tough, dense rolls)
- Create a warm environment for rising by turning on your oven to the lowest setting for 1 minute, then turning it off and placing your covered bowl inside
- Space your rolls correctly in the pan because they need to touch slightly to create those signature soft sides
- Brush butter immediately after baking while the rolls are still hot so it soaks in properly rather than sitting on top
- Use room temperature ingredients whenever possible because cold ingredients can slow down yeast activation and rising times
- Don’t rush the rises because proper fermentation time develops the flavor and texture (hurrying this step results in dense rolls)
- Test doneness properly by tapping the top of a roll; it should sound hollow rather than dense
- Cover during the second rise loosely so the plastic doesn’t stick to the dough as it expands upward
Another favorite bread option is this sourdough focaccia.
Serving Suggestions
These versatile rolls work with virtually any meal, from casual weeknight dinners to elegant holiday gatherings.
Perfect Pairings:
Serve these warm rolls alongside hearty soups like potato leek soup or zuppa toscana for a comforting meal. They’re also perfect for soaking up the rich gravy from Mississippi pot roast or slow cooker pot roast.
For holiday dinners, these rolls are essential alongside cranberry sauce and your main course. Turn them into sliders by filling them with BBQ pulled pork or leftover turkey. They also make fantastic breakfast sandwiches when split and filled with scrambled eggs and cheese.
More serving ideas:
- Slice them horizontally and toast with garlic butter for homemade garlic bread
- Use them as hamburger buns for sliders at your next party
- Serve with honey butter for a sweet treat
- Pair with creamed spinach for an elegant side dish combination
- Fill with chicken salad for lunch
- Toast and spread with jam for breakfast
Try serving these with roasted brussels sprouts with bacon for a complete meal.
Variations of Dinner Rolls
This basic recipe is incredibly versatile and welcomes countless variations to suit different tastes and occasions.
Delicious Variations:
- Garlic Herb Rolls: Add 2 teaspoons garlic powder and 2 tablespoons mixed dried herbs (rosemary, thyme, oregano) to the flour
- Cheese Rolls: Fold in 1 cup shredded cheddar or parmesan cheese during the final minute of kneading
- Honey Wheat Rolls: Replace 1 cup all-purpose flour with whole wheat flour and increase honey to 3 tablespoons
- Sweet Rolls: Increase sugar to 1/2 cup and add 1 teaspoon vanilla extract to the wet ingredients
- Buttery Top Knot Rolls: Instead of balls, roll dough into 8-inch ropes, tie into knots, and place on a baking sheet
- Pull-Apart Rolls: Brush melted butter between layers when shaping for extra flaky, pull-apart texture
- Onion Rolls: Sauté 1 cup finely diced onions until caramelized and knead into the dough
- Everything Bagel Rolls: Brush with egg wash and sprinkle with everything bagel seasoning before baking
- Cinnamon Sugar Rolls: Roll dough in cinnamon sugar before shaping into balls for a sweet breakfast variation
- Jalapeño Cheddar Rolls: Add 1/4 cup diced jalapeños and 1/2 cup shredded cheddar to the dough
- Rosemary Sea Salt Rolls: Top with fresh rosemary leaves and flaky sea salt before baking
- Cranberry Orange Rolls: Add 1/2 cup dried cranberries and 2 tablespoons orange zest to the dough
Storage and Reheating
Proper storage keeps these rolls fresh and delicious for days, and they also freeze beautifully for future meals.
Storage Instructions:
- Room Temperature: Store completely cooled rolls in an airtight container or resealable plastic bag at room temperature for up to 3 days
- Refrigerator: Place rolls in an airtight container and refrigerate for up to 1 week (though they may lose some softness)
- Freezer: Wrap individual rolls in plastic wrap, then place in a freezer-safe bag and freeze for up to 3 months
- Make-Ahead Option: Shape the rolls and place in the pan, cover tightly with plastic wrap, and refrigerate overnight; bring to room temperature and let rise before baking
Reheating Instructions:
- Oven Method: Wrap rolls in aluminum foil and warm at 350°F (175°C) for 10-12 minutes until heated through
- Microwave Method: Wrap a roll in a damp paper towel and microwave for 15-20 seconds (be careful not to overheat or they’ll become tough)
- From Frozen: Let rolls thaw at room temperature for 2-3 hours, then reheat using the oven method
- To Refresh Day-Old Rolls: Brush lightly with water or butter and warm in a 300°F (150°C) oven for 5-7 minutes
- Air Fryer Method: Heat individual rolls at 320°F (160°C) for 2-3 minutes for a slightly crispy exterior
For a different bread experience, check out my fresh milled flour bread.

Nutritional Facts
Per roll (based on 24 servings):
- Calories: 118
- Total Fat: 4g
- Saturated Fat: 2g
- Cholesterol: 18mg
- Sodium: 115mg
- Total Carbohydrates: 18g
- Dietary Fiber: 1g
- Sugars: 3g
- Protein: 3g
Note: Nutritional information is approximate and may vary based on specific ingredients used and serving size.
Health Benefits of Key Ingredients
While dinner rolls are certainly an indulgence, several ingredients offer nutritional benefits when enjoyed as part of a balanced diet.
Nutritional Highlights:
All-purpose flour provides carbohydrates for energy and contains some B vitamins that support metabolism. Whole milk adds calcium for strong bones and teeth, plus protein for muscle maintenance and vitamin D for immune function.
Eggs contribute high-quality protein with all essential amino acids and contain choline, which is important for brain health. The yeast itself is a source of B vitamins, particularly folate and niacin, which support cellular function.
Additional benefits:
- Butter provides fat-soluble vitamins A, D, E, and K that support various bodily functions
- The sugar feeds the yeast but also provides quick energy for active individuals
- Salt helps regulate fluid balance and supports proper nerve and muscle function
- Making bread at home allows you to control ingredients and avoid preservatives found in store-bought varieties
FAQs About Dinner Rolls
1. Can I use instant yeast instead of active dry yeast?
Yes, you can substitute instant yeast in equal amounts for active dry yeast. The main difference is that instant yeast doesn’t require proofing in warm liquid first. You can add it directly to your dry ingredients and proceed with the recipe, though I still prefer activating it with the liquid to ensure it’s working properly.
2. Why didn’t my rolls rise?
The most common reasons for rolls not rising include using expired or dead yeast, liquid that was too hot (above 120°F kills yeast) or too cold (below 105°F doesn’t activate it properly), placing dough in a cold or drafty location, or not giving the dough enough time to rise. Always check your yeast’s expiration date and use a thermometer to verify your liquid temperature.
3. Can I make the dough ahead of time?
Absolutely! You can prepare the dough through the first rise, then punch it down, shape the rolls, and place them in your baking pan. Cover tightly with plastic wrap and refrigerate for up to 24 hours. When ready to bake, remove from the refrigerator, let them come to room temperature (about 30-45 minutes), allow them to complete their second rise, then bake as directed.
4. How do I know when my rolls are fully baked?
Perfectly baked rolls should be golden brown on top and sound hollow when you tap them lightly. The most accurate method is using an instant-read thermometer; the internal temperature should reach 190°F (88°C). If you’re unsure, it’s better to slightly overbake than underbake, as underbaked rolls will be gummy inside.
5. Can I make these rolls dairy-free?
Yes, you can substitute the milk with any plant-based milk like almond, soy, or oat milk, and replace the butter with vegan butter or coconut oil. The texture will be slightly different but still delicious. Make sure your plant-based milk is unsweetened and unflavored for the best results.
Read Also: Homemade Cinnamon Applesauce
Final Thoughts
These homemade dinner rolls have become such a staple in my kitchen that I can’t imagine a holiday meal or family dinner without them. The soft, pillowy texture and slightly sweet flavor make them universally loved by everyone who tries them.
Don’t be intimidated by working with yeast – this recipe is truly beginner-friendly, and the more you make them, the more confident you’ll become. I’d love to hear how your rolls turn out, so feel free to leave a comment below with any questions or share a photo if you make them!
Recommended:
- Pumpkin Bar Recipe
- Sausage Balls Recipe
- Gingerbread Cookie Recipe
- Baked Oatmeal Recipe
- Swedish Meatball Recipe
- Stuffed Shells Recipe
- Cheese Ball Recipe
- Apple Crisp Recipe
- Jiffy Spoon Bread Recipe
- Chocolate Chip Bread Recipe
