
My grandmother taught me how to make biscuits when I was seven years old, standing on a wooden stool in her farmhouse kitchen. I can still remember the feeling of cold butter between my fingers and the smell of those golden beauties baking in her old oven.
That early lesson stuck with me, and over the years, I’ve made countless batches of this homemade biscuit recipe. I’ve learned through trial and error what makes biscuits rise tall, what keeps them tender, and why some batches turn out flaky while others fall flat.
The secret isn’t complicated, but it does require a gentle touch and cold ingredients. I’ve tweaked my grandmother’s original recipe just slightly to make it foolproof, even on your first try.
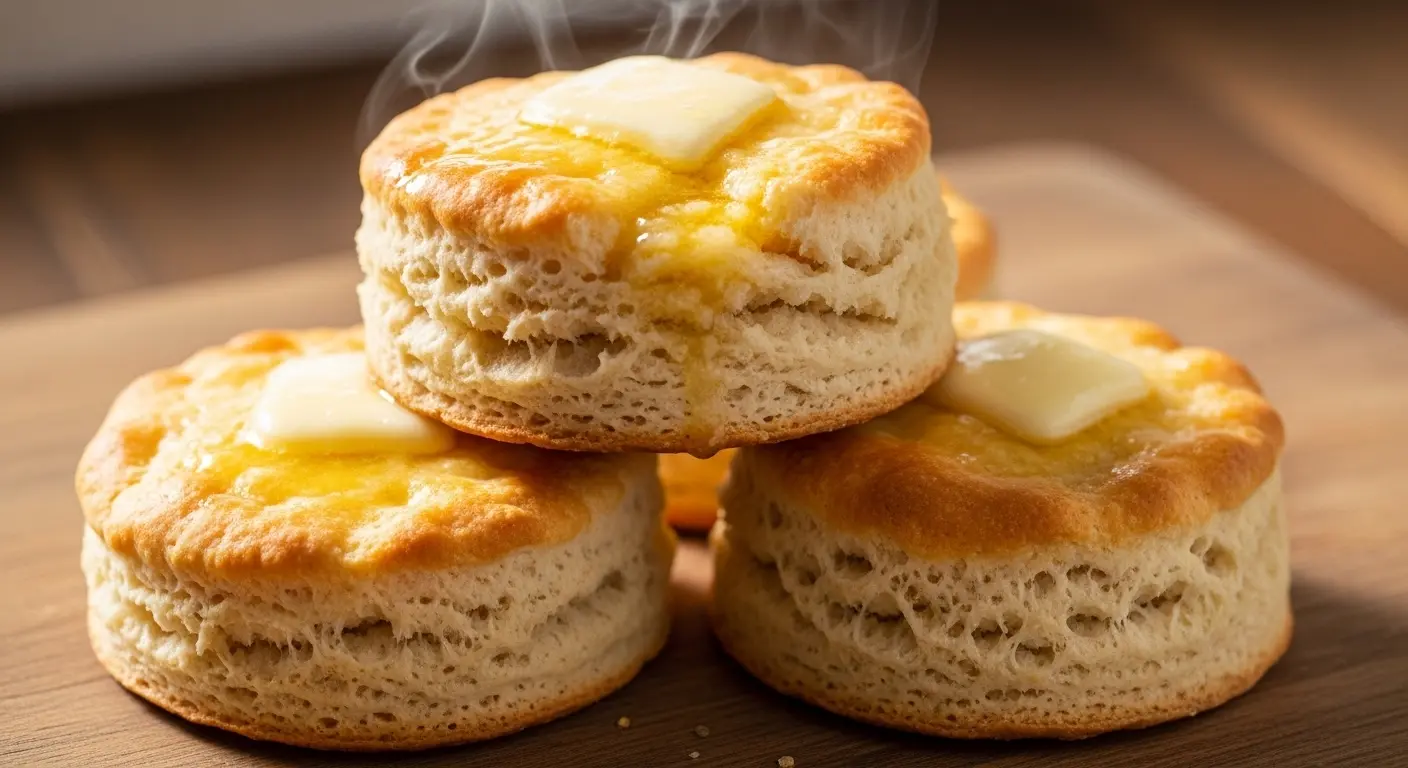
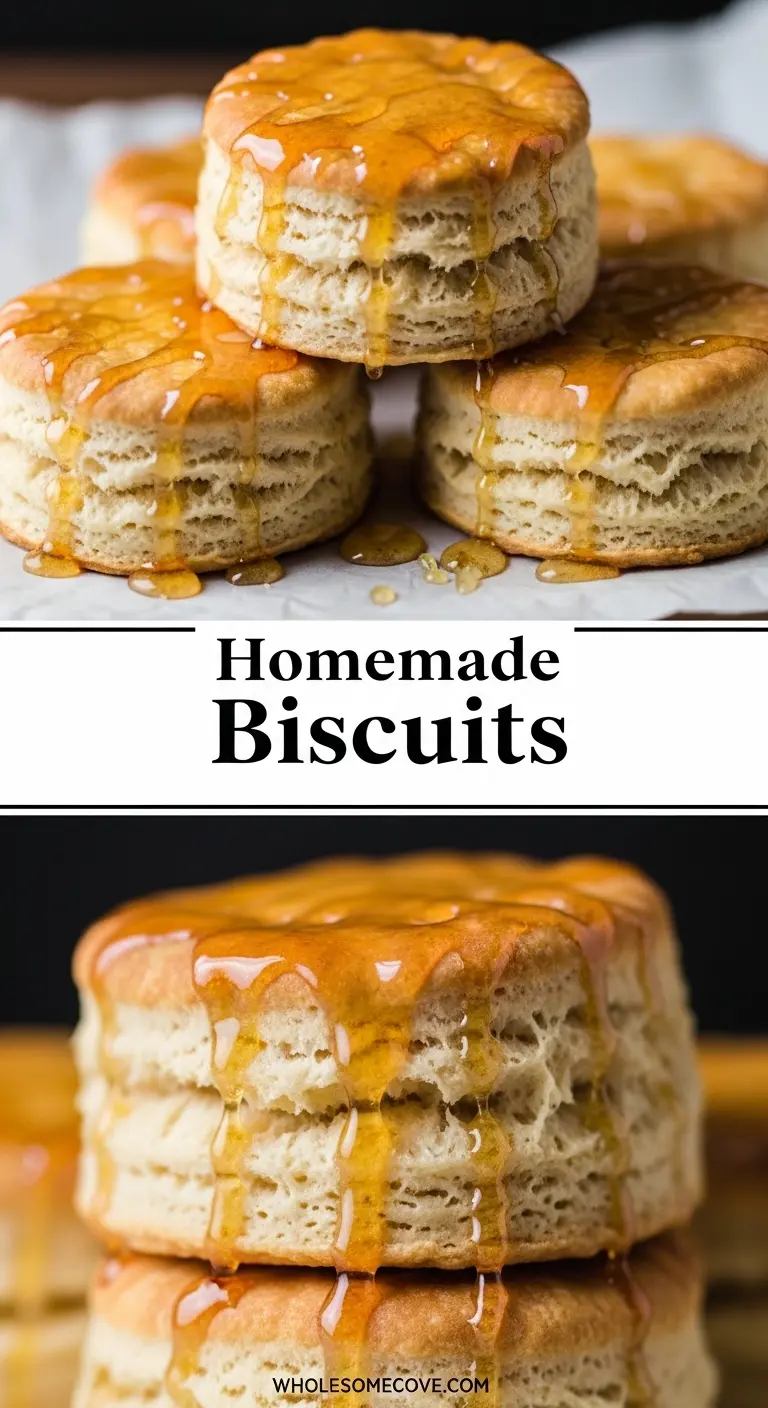
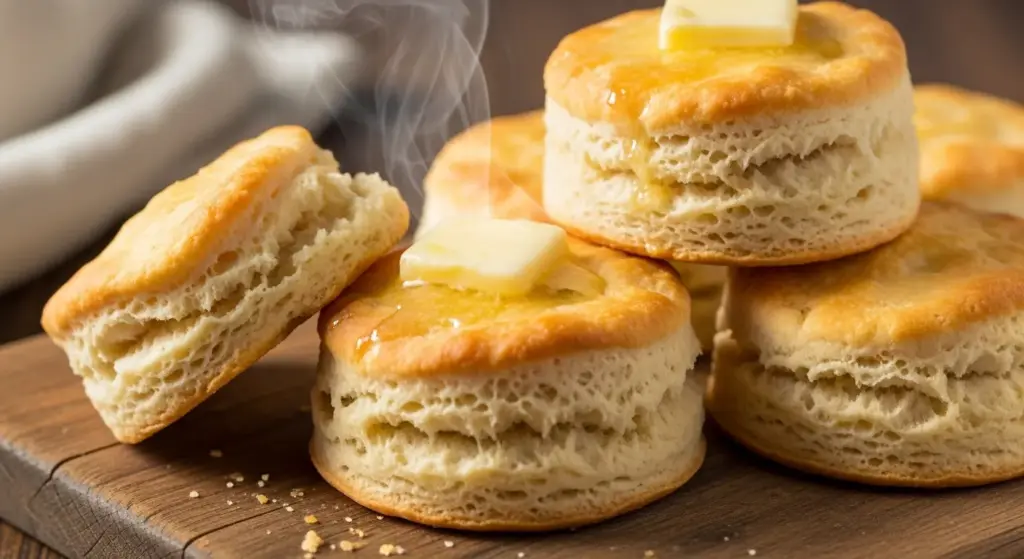
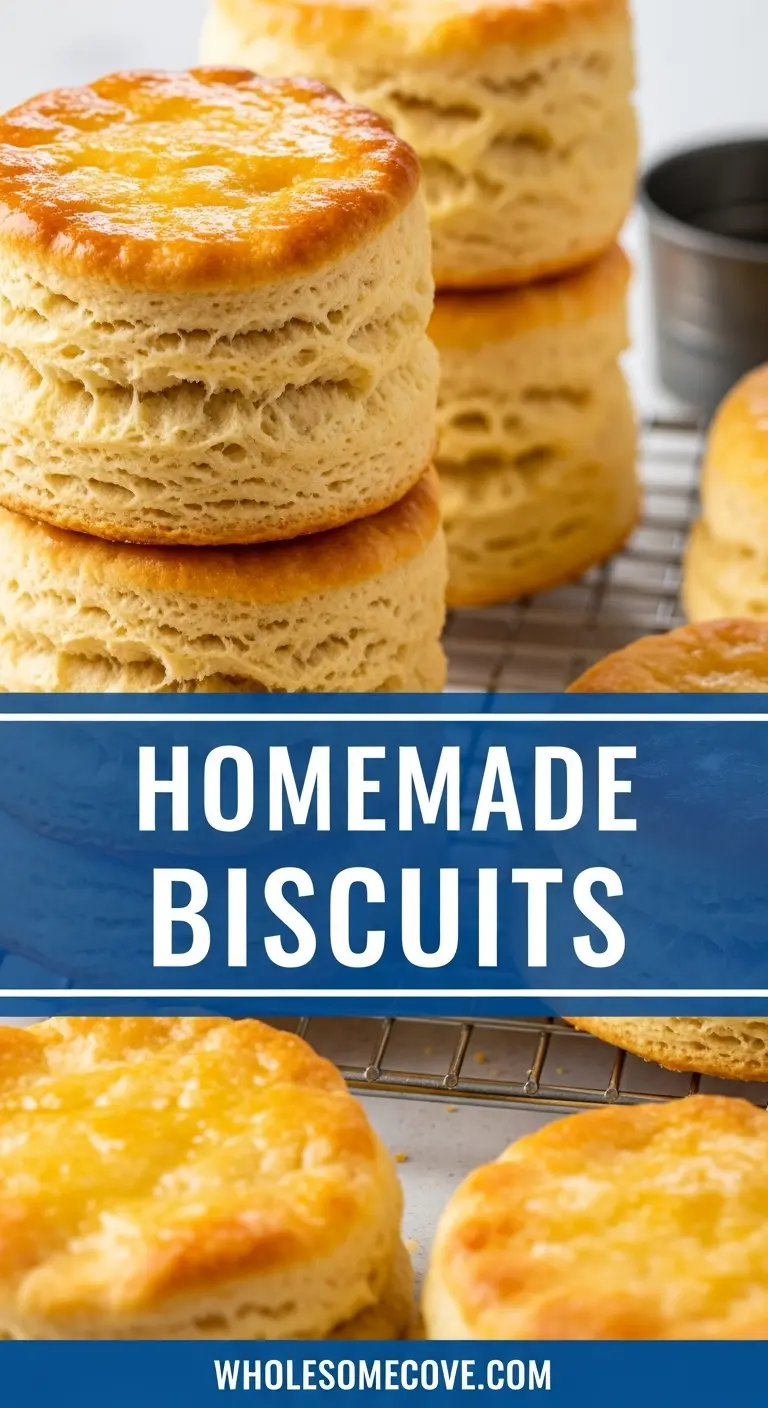
These biscuits are everything you want them to be: tall, flaky layers that pull apart easily, a golden-brown top with a soft interior, and that unmistakable buttery flavor that makes you reach for a second (or third) one.
| Quick Recipe Summary | |
|---|---|
| Prep Time | 15 minutes |
| Cook Time | 12 minutes |
| Total Time | 27 minutes |
| Servings | 12 biscuits |
| Difficulty Level | Easy |
Why You’ll Love This Homemade Biscuit Recipe
I’ve made biscuits for Sunday breakfast, for weeknight dinners alongside soup, and for holiday gatherings where they disappear faster than I can bake them. This recipe has never let me down.
The ingredients are simple and probably already in your pantry. You don’t need a fancy mixer or any special equipment, just your hands and a little confidence.
Here’s what makes these biscuits special:
- Incredibly flaky texture – The layers separate beautifully when you pull them apart, creating those classic buttery pockets
- Perfect rise every time – These biscuits puff up to about 2 inches tall with a nice dome top
- Buttery flavor without being greasy – Just the right amount of butter for richness
- Versatile for any meal – Serve them for breakfast with jam, lunch with soup, or dinner with gravy
- Ready in under 30 minutes – From mixing bowl to table faster than ordering takeout
- Freezer-friendly – Make a double batch and freeze half for busy mornings
My friend Sarah, who claimed she couldn’t bake to save her life, followed this recipe and sent me a photo of her first batch with the caption “I can’t believe I made these!” That’s exactly the kind of success I want for you.
Ingredients
The beauty of biscuits lies in their simplicity. You need just seven ingredients, and I’m willing to bet you have most of them right now.
I always use all-purpose flour rather than self-rising because I like to control exactly how much leavening goes into my biscuits.
- 2 cups (240g) all-purpose flour – Provides structure without making the biscuits tough
- 1 tablespoon (12g) baking powder – This is your main rising agent for tall, fluffy biscuits
- 1 teaspoon (6g) salt – Enhances all the flavors and balances the richness
- 1/2 teaspoon (2g) baking soda – Works with the buttermilk to create extra lift
- 1/2 cup (113g) cold unsalted butter, cubed – Must be cold for flaky layers; I cut mine into small cubes and pop them back in the fridge
- 3/4 cup (180ml) cold buttermilk – The acidity tenderizes the dough and adds tangy flavor
- 2 tablespoons (28g) melted butter – For brushing on top after baking
You might also enjoy: Air Fryer French Toast Recipe
Kitchen Equipment Needed
Having the right tools makes the process smoother, though you can absolutely make these biscuits with minimal equipment. I’ve made them in tiny apartment kitchens and on camping trips with just a bowl and a fork.
Here’s what I recommend having on hand:
- Large mixing bowl – You need room to work the butter into the flour without making a mess
- Pastry cutter or fork – For cutting cold butter into the flour; I prefer a pastry cutter but a fork works in a pinch
- Measuring cups and spoons – Accuracy matters in baking, especially with leavening agents
- Rolling pin – Any type works; I use a simple wooden one
- Biscuit cutter or round cookie cutter – A 2.5-inch cutter is ideal; avoid twisting when you cut
- Baking sheet – I line mine with parchment paper for easy cleanup
- Pastry brush – For brushing melted butter on the finished biscuits
- Bench scraper – Optional but helpful for folding the dough
Read Also: Healthy Waffle Recipe
Recommended Products for This Recipe
I’ve tested dozens of tools and ingredients over the years while perfecting my biscuit technique. These are the products that genuinely make a difference in the final result.
1. USA Pan Bakeware Half Sheet Pan
This commercial-grade baking sheet distributes heat evenly, so every biscuit bakes at the same rate without any burnt bottoms. The aluminized steel construction means it won’t warp in a hot oven, and the nonstick coating makes cleanup incredibly easy. I’ve been using mine for five years, and it still looks nearly new.
2. Ateco Plain Edge Round Cutters Set
Sharp, clean cuts are essential for biscuits that rise properly. This set includes multiple sizes, but I use the 2.5-inch cutter most often. The stainless steel edges stay sharp, and the handles make pressing through dough effortless. No more twisting and sealing the edges by accident.
3. Kate’s Homemade Butter Unsalted
If you want to take your biscuits from good to extraordinary, European-style butter makes all the difference. Kate’s has a higher fat content than regular butter, which creates richer flavor and flakier layers. I keep it specifically for baking projects where butter is the star ingredient.
4. OXO Good Grips Dough Blender
This pastry cutter has sturdy blades that cut through cold butter quickly without warming it up from your hands. The soft grip handle is comfortable even when you’re making multiple batches. It’s easier to clean than those wire-style cutters and much more durable.

Step-by-Step Instructions: How to Make Homemade Biscuit
I’ll walk you through every detail of this process. Follow these steps exactly as written for your first batch, and you’ll understand why people say homemade biscuits are easier than they thought.
1. Prepare Your Ingredients and Workspace
- Start by placing your butter in the freezer for 10 minutes before you begin; it needs to be very cold
- Preheat your oven to 450°F (232°C) and position the rack in the center
- Line a baking sheet with parchment paper or a silicone baking mat
- Measure out your buttermilk and keep it in the refrigerator until you’re ready to use it
- Cut your cold butter into small cubes, about 1/2 inch each, and return them to the fridge
This preparation step is crucial because temperature control makes or breaks biscuit texture. Cold butter creates steam pockets when it hits the hot oven, and those pockets become your flaky layers.
2. Mix the Dry Ingredients
- Add the flour, baking powder, salt, and baking soda to your large mixing bowl
- Whisk these ingredients together for about 30 seconds until they’re evenly combined
- Make sure there are no clumps of baking powder, as these can create bitter spots in your finished biscuits
I once skipped this whisking step when I was in a hurry, and my biscuits had an uneven rise with some tasting more salty than others. It only takes a moment and makes a real difference.
3. Cut in the Butter
- Retrieve your cold butter cubes from the refrigerator
- Add them to the flour mixture and toss them gently with your hands to coat each piece
- Using your pastry cutter or two forks, cut the butter into the flour with a pressing and twisting motion
- Continue until the mixture resembles coarse crumbs with some pea-sized pieces of butter still visible
- This should take about 3-4 minutes; don’t rush it, but also don’t overwork it
The key here is visible butter pieces. Some recipes tell you to work the butter until it disappears completely, but those pea-sized chunks are what create flaky layers. I aim for a mixture that looks like wet sand with some larger butter pebbles scattered throughout.
If you’re having trouble making this delicious breakfast treat, you can pair these biscuits with Healthy Homemade Pesto for a savory option.
4. Add the Buttermilk
- Create a well in the center of your flour mixture
- Pour in the cold buttermilk all at once
- Using a fork or wooden spoon, stir gently from the center outward until the dough just comes together
- The mixture will look shaggy and rough, with some dry flour still visible in the bottom of the bowl
- Use your hands to gently press the dough against the sides of the bowl to incorporate the last bits of flour
Stop mixing the moment the dough holds together. I learned this lesson the hard way after making hockey pucks instead of biscuits when I stirred too enthusiastically.
5. Knead and Fold the Dough
- Turn the shaggy dough out onto a lightly floured surface
- Gently pat or press it into a rough rectangle about 1 inch thick
- Fold the dough in half like a book, then turn it 90 degrees
- Pat it out again to 1 inch thickness and fold it once more
- Repeat this folding process 4-5 times total, working quickly to keep the butter cold
- After the final fold, pat the dough into a rectangle about 3/4 inch thick
This folding technique is what creates distinct, flaky layers. Each fold creates dozens of thin butter layers between sheets of dough. When I first started making biscuits, I skipped this step, and while they were still good, they didn’t have that impressive pull-apart quality.
Read Also: Breakfast Burrito Recipe
6. Cut Out the Biscuits
- Dip your biscuit cutter in flour to prevent sticking
- Press straight down through the dough without twisting; twisting seals the edges and prevents rising
- Cut biscuits as close together as possible to minimize scraps
- Place cut biscuits on your prepared baking sheet with sides touching for soft-sided biscuits, or 2 inches apart for biscuits with crispy sides
- Gently press the scraps together, pat them out once more, and cut additional biscuits
I prefer placing my biscuits touching each other because they rise taller when they support each other, and the soft sides are perfect for pulling apart at the table.
7. Bake to Golden Perfection
- Place the baking sheet in your preheated 450°F (232°C) oven
- Bake for 10-12 minutes until the tops are golden brown
- Watch carefully after 10 minutes; ovens vary, and you want them golden but not burnt
- The biscuits are done when they’ve risen tall, the tops are golden, and they spring back lightly when touched
Resist opening the oven door during the first 8 minutes. Every time you open it, you release heat and moisture, which can affect the rise. I keep the oven light on and peek through the window instead.
8. Brush with Butter and Serve
- Remove the baking sheet from the oven immediately
- Brush the tops generously with melted butter while they’re still hot
- Let them cool for just 2-3 minutes before serving
- Serve warm for the best texture and flavor
That final butter brush isn’t just for flavor, though it definitely adds richness. It also keeps the tops soft instead of developing a hard crust as they cool.

Tips for The Best Homemade Biscuit
I’ve made every possible mistake with biscuits over the years, and each one taught me something valuable. These tips come from real experience, not just theory.
Here’s what I’ve learned about making consistently excellent biscuits:
- Keep everything cold – This is the golden rule; freeze your butter beforehand, use cold buttermilk, and work quickly so the heat from your hands doesn’t warm the dough
- Don’t twist the cutter – Press straight down and lift straight up; twisting seals the edges and prevents the biscuits from rising properly
- Avoid overmixing – Handle the dough as little as possible; shaggy and rough is perfect, smooth means you’ve developed too much gluten
- Use a light touch when kneading – You’re folding, not kneading like bread dough; gentle pats and folds are all you need
- Measure flour correctly – Spoon flour into your measuring cup and level it off; scooping directly from the bag packs in too much flour
- Place biscuits touching – They’ll push against each other as they rise, creating taller biscuits with soft sides
- Brush with butter immediately – Don’t wait until they cool; the hot biscuits absorb the butter for maximum flavor
- Use fresh baking powder – Old baking powder loses its effectiveness; test it by adding 1 teaspoon to hot water, and it should bubble vigorously
- Don’t overwork the scraps – The second cutting will never be quite as tender as the first, so try to get most of your biscuits from the initial cutting
- Freeze shaped biscuits – You can freeze unbaked biscuits on a tray, then transfer to a freezer bag and bake directly from frozen (add 2-3 minutes to baking time)
The temperature tip is the one I emphasize most when teaching friends. I once made biscuits on a hot summer day in a kitchen without air conditioning, and they turned out flat and tough because everything got too warm too quickly.
Another favorite: French Toast Recipe
Serving Suggestions
These biscuits are incredibly versatile, and I’ve served them dozens of different ways depending on the meal and occasion. My family has strong opinions about which serving style is best, though we can never agree.
For breakfast, split them open while they’re warm and spread with butter and honey, or try them with homemade cinnamon applesauce for a sweet morning treat.
Here’s how I love to serve them:
- Classic Southern style – Smothered in sausage gravy for a hearty breakfast that sticks with you all morning
- With soup or stew – Perfect for soaking up the broth from creamy tomato basil soup or any hearty stew
- Breakfast sandwich – Slice them in half and fill with scrambled eggs, cheese, and bacon
- Alongside fried chicken – A classic pairing that never goes out of style
- With jam or preserves – My grandmother’s favorite was strawberry preserves with a pat of salted butter
- As dinner rolls – Serve them warm with any dinner in place of regular bread
- With honey butter – Mix softened butter with honey for a sweet spread that melts into every layer
- For biscuits and gravy – The ultimate comfort food breakfast
- With deviled eggs – Makes a fantastic brunch spread
- Topped with country ham – A Southern tradition that’s simple and delicious
My personal favorite is splitting a warm biscuit and topping it with a fried egg and a slice of sharp cheddar cheese. It’s become my weekend breakfast ritual.
Variations of Homemade Biscuit
Once you’ve mastered the basic recipe, it’s fun to experiment with different flavors and add-ins. I’ve tried countless variations, and these are the ones I make repeatedly.
The key to successful variations is not adding so much extra stuff that you weigh down the dough and prevent proper rising.
Try these delicious twists:
- Cheddar and chive biscuits – Fold in 1 cup shredded sharp cheddar cheese and 2 tablespoons chopped fresh chives after cutting in the butter
- Herb biscuits – Add 2 tablespoons fresh herbs (rosemary, thyme, or sage work beautifully) to the dry ingredients
- Garlic parmesan biscuits – Mix 1/2 cup grated Parmesan and 1 teaspoon garlic powder into the flour, then brush with garlic butter after baking
- Sweet cream biscuits – Replace buttermilk with heavy cream for an even richer, slightly sweeter biscuit
- Black pepper and bacon biscuits – Add 1/2 cup crumbled cooked bacon and 1 teaspoon coarse black pepper to the dough
- Jalapeño cheddar biscuits – Fold in 1/2 cup shredded cheese and 2 tablespoons diced pickled jalapeños
- Whole wheat biscuits – Replace 1/2 cup of all-purpose flour with whole wheat flour for a nuttier flavor
- Drop biscuits – Add an extra 1/4 cup buttermilk to make a wetter dough, then drop spoonfuls onto the baking sheet instead of cutting them out
- Honey biscuits – Add 2 tablespoons honey to the buttermilk before mixing
- Everything bagel biscuits – Brush tops with butter and sprinkle with everything bagel seasoning before baking
My current obsession is the cheddar and chive version. I make them for Sunday breakfast alongside scrambled eggs, and my kids ask for them every single week.
If you’re looking for more breakfast ideas, check out this Shakshuka Recipe.
Storage and Reheating
Freshly baked biscuits are always best, but leftovers are still delicious if you store and reheat them properly. I’ve tested every storage method to find what keeps them closest to fresh-baked quality.
Here’s how to keep your biscuits at their best:
- Room temperature storage – Place cooled biscuits in an airtight container or resealable bag for up to 2 days; they’ll stay soft but won’t be quite as fluffy as when fresh
- Refrigerator storage – Store in an airtight container for up to 5 days; the cold will make them slightly drier, so reheating is essential
- Freezer storage for baked biscuits – Wrap individually in plastic wrap, then place in a freezer bag for up to 3 months; this is great for meal prep
- Freezer storage for unbaked biscuits – Freeze cut, unbaked biscuits on a baking sheet until solid, then transfer to a freezer bag for up to 2 months; bake from frozen, adding 2-3 minutes to the cooking time
- Reheating in the oven – Wrap biscuits in foil and warm at 350°F (177°C) for 10 minutes; this is the best method for maintaining texture
- Reheating in the microwave – Wrap in a damp paper towel and microwave for 15-20 seconds; quick but can make them slightly rubbery
- Reheating in the air fryer – Place biscuits in the air fryer at 320°F (160°C) for 3-4 minutes for a crispy exterior
- Split and toast – For day-old biscuits, split them in half and toast cut-side down in a skillet with butter until golden and crispy
- Refresh with steam – Place slightly stale biscuits in a steamer basket over simmering water for 2-3 minutes to restore moisture
I usually freeze half the batch when I’m baking for just my immediate family. Having unbaked biscuits in the freezer means I can bake fresh ones for breakfast without any morning prep work.
Nutritional Facts
Here’s the nutritional breakdown per biscuit, based on a recipe yielding 12 biscuits. These values are approximate and may vary depending on specific ingredients used.
Per Serving (1 biscuit):
- Calories: 165
- Total Fat: 9g
- Saturated Fat: 5.5g
- Cholesterol: 23mg
- Sodium: 285mg
- Total Carbohydrates: 18g
- Dietary Fiber: 0.6g
- Sugars: 1g
- Protein: 3g
- Calcium: 85mg
- Iron: 1.2mg
- Potassium: 75mg
These biscuits are a treat rather than an everyday health food, but they’re made with simple, recognizable ingredients. The buttermilk provides calcium and probiotics, while the moderate portion size keeps calories reasonable.
For a lighter option, consider making my Air Fryer Cheddar Hash Browns on the side.
Health Benefits of Key Ingredients
While biscuits are definitely a comfort food, several ingredients do offer nutritional value. I like knowing what I’m putting in my body, even when I’m indulging.
Here’s what the main ingredients contribute:
- Buttermilk – Contains probiotics that support digestive health, provides calcium for strong bones, and offers protein for satiety; the lactic acid also helps tenderize baked goods naturally
- Butter – Supplies fat-soluble vitamins A, D, E, and K, contains conjugated linoleic acid which may have health benefits, and provides quick energy; using real butter instead of margarine avoids trans fats
- All-purpose flour – Provides energy through carbohydrates, contains small amounts of iron and B vitamins (especially if enriched), and contributes to the protein content when combined with other ingredients
- Baking powder and baking soda – While not nutritionally significant, they help create the light, airy texture that makes biscuits easier to digest than dense breads
I’m not suggesting biscuits are health food, but choosing quality ingredients does make a difference. Real butter and cultured buttermilk beat artificial ingredients any day.
FAQs About Homemade Biscuit
1. Why are my biscuits not flaky?
The most common reason is that your butter wasn’t cold enough when you mixed the dough. When butter melts before baking, it combines with the flour instead of creating distinct layers.
Make sure to freeze your butter for 10 minutes before starting, work quickly, and don’t overhandle the dough. Those visible pea-sized butter chunks in your dough are what create flaky layers when they steam in the hot oven.
2. Can I make biscuit dough ahead of time?
Yes, but with some limitations for best results. You can prepare the dough up to cutting the biscuits, then freeze the unbaked cut biscuits on a tray.
Once frozen solid, transfer them to a freezer bag and bake directly from frozen when needed. I don’t recommend refrigerating the dough overnight because the leavening agents start working immediately when they get wet, and you’ll lose some rise.
3. What’s the difference between buttermilk biscuits and regular biscuits?
Buttermilk biscuits use buttermilk as the liquid, which makes them more tender and adds a slight tangy flavor. The acid in buttermilk reacts with baking soda to create extra rise and a lighter texture.
Regular biscuits might use milk or cream instead. You can substitute regular milk for buttermilk by adding 1 tablespoon of lemon juice or vinegar to 3/4 cup milk and letting it sit for 5 minutes, though the flavor won’t be quite as rich.
4. Why did my biscuits turn out tough and dense?
This usually happens from overmixing or overworking the dough. When you mix or knead too much, you develop gluten strands that make the texture tough instead of tender.
Mix just until the ingredients come together, handle the dough gently during the folding process, and avoid re-rolling scraps more than once. Using warm ingredients instead of cold can also create dense biscuits because the butter melts into the flour.
5. Can I use a food processor to make biscuits?
Absolutely, and it’s actually faster and keeps the butter colder. Pulse the dry ingredients together, add the cold butter cubes and pulse until you have pea-sized pieces, then add the buttermilk and pulse just until the dough comes together.
Be careful not to overprocess, as this can overwork the dough. I use this method when I’m making multiple batches or when I’m short on time.
Read Also: Easy Banana Bread Recipe
Final Thoughts
Making homemade biscuits is one of those skills that seems intimidating until you try it once. After that first successful batch, you’ll wonder why you ever bought the canned kind.
These biscuits have become a staple in my kitchen for good reason. They’re quick enough for busy weekday breakfasts, impressive enough for holiday gatherings, and delicious enough that my family requests them constantly.
I hope this recipe brings as much joy to your table as it has to mine. Start with the basic version to get comfortable with the technique, then have fun experimenting with different flavors and serving styles.
Give this homemade biscuit recipe a try this weekend and let me know how they turn out! Drop a comment below with your favorite way to serve them, or tag me on social media with photos of your beautiful biscuits.
Recommended:
- Hashbrown Casserole Recipe
- Sourdough Focaccia Recipe
- Jiffy Spoon Bread Recipe
- Honey Butter Recipe
- Easy Pancake Recipe
- Air Fryer Pancake Recipe
- Healthy Cornbread Recipe
- Same Day Sourdough Bread Recipe
- Cracklin Bread Recipe
- Fresh Milled Flour Bread Recipe
