
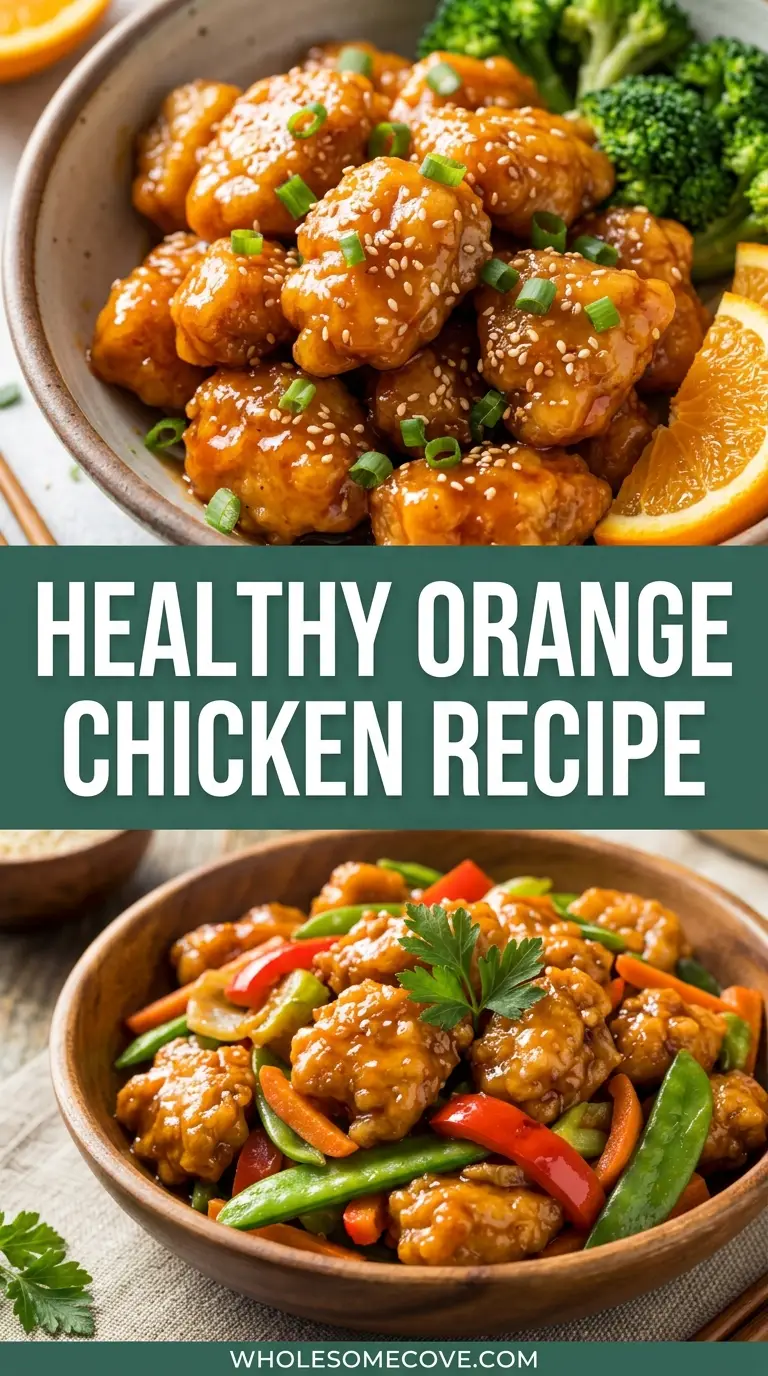
I fell hard for orange chicken the first time I ordered it from a Chinese takeout spot years ago. That sweet, tangy, sticky sauce clinging to perfectly tender chicken pieces — I was hooked instantly.
But the Healthy Orange Chicken Recipe I’m sharing today is what I actually make now, and honestly? I like it even more than the original. It skips the deep frying and cuts back on the sugar without sacrificing a single drop of that bold, citrusy flavor.
My first attempt at making a healthier version was, let’s just say, a learning experience. I used bottled orange juice that had been sitting in my fridge for a week, forgot to coat the chicken in cornstarch, and dumped everything in the pan at once.
The result was a soggy, watery mess that my husband politely ate while clearly suffering. Since then, I’ve tested this recipe more times than I can count, and I’ve finally nailed every detail.
Fresh orange zest is my secret weapon. Adding zest to the sauce gives it that extra burst of real orange flavor that no amount of bottled juice can replicate on its own.
I also coat the chicken in a light dusting of cornstarch before cooking, which creates a lightly crisped exterior that holds up beautifully when tossed in the sauce.
This is the kind of weeknight dinner that feels indulgent without derailing your goals. It comes together in about 30 minutes, uses simple pantry ingredients, and is so good that even my most skeptical dinner guests have asked for seconds.
| Quick Recipe Summary | |
|---|---|
| Prep Time | 10 minutes |
| Cook Time | 20 minutes |
| Total Time | 30 minutes |
| Servings | 4 servings |
| Difficulty Level | Easy |
If you love quick, better-for-you takeout-style dinners, you’ll also want to try my Healthy Fried Rice to serve alongside this chicken for a complete meal.
Why You’ll Love This Healthy Orange Chicken Recipe
This recipe proves that eating healthy doesn’t mean eating boring. The sauce is layered with real orange juice, fresh zest, garlic, ginger, and a touch of honey that creates something genuinely addictive.
You get all the sticky, saucy, takeout-style goodness without the greasy deep-fry regret that follows. The chicken is pan-seared until golden and then coated in the most vibrant orange sauce you’ve ever tasted.
It’s genuinely faster than calling for delivery. From the time you start cutting the chicken to plating it takes just 30 minutes.
The ingredient list is short and most of it lives in your pantry already. You won’t need to hunt down anything unusual or expensive.
It’s naturally adaptable to a bunch of dietary needs. The recipe can easily be made gluten-free with a simple swap.
The leftovers are incredible. Unlike fried chicken dishes that go soggy overnight, this version reheats beautifully the next day.
It’s a crowd-pleaser with kids and adults alike. My pickiest dinner guests always clean their plates.
Read Also: Beef and Broccoli Stir Fry Recipe
Ingredients
Everything in this recipe works together to build those classic sweet-tangy-savory orange chicken flavors you know and love. Using fresh orange zest alongside orange juice makes a huge difference — don’t skip it.
For the Chicken:
- 1.5 lbs (680g) boneless, skinless chicken breasts or thighs, cut into 1-inch bite-sized pieces
- 3 tablespoons (24g) cornstarch
- 2 tablespoons (30ml) low-sodium soy sauce (or tamari for gluten-free)
- 1 tablespoon (15ml) avocado oil or vegetable oil
For the Orange Sauce:
- 1/2 cup (120ml) fresh orange juice (from about 2 medium oranges)
- 1 tablespoon orange zest (from 1 large orange)
- 3 tablespoons (45ml) low-sodium soy sauce (or tamari)
- 2 tablespoons (30ml) honey (or pure maple syrup)
- 1 tablespoon (15ml) rice vinegar
- 3 cloves garlic, minced
- 1 teaspoon fresh ginger, grated (or 1/4 teaspoon ground ginger)
- 1 tablespoon (8g) cornstarch
- 1/4 teaspoon red pepper flakes (optional, for a mild kick)
- 1 teaspoon toasted sesame oil
For Garnish:
- Sesame seeds
- Sliced green onions (scallions)
- Orange slices (optional)
For a similarly bold homemade Asian-inspired sauce, my Stir Fry Sauce is another pantry staple worth bookmarking.
Kitchen Equipment Needed
You don’t need any specialized equipment to pull this recipe off. A good heavy-bottomed skillet is the most important tool here, as it allows the chicken to sear properly and get that lightly crisped exterior.
- Large skillet or wok (12-inch/30cm or larger) — essential for cooking the chicken in a single layer without steaming it
- Cutting board — for cutting the chicken into uniform bite-sized pieces
- Sharp chef’s knife — for clean, even cuts on the chicken
- Citrus juicer or reamer — for extracting fresh orange juice efficiently
- Microplane or fine grater — for zesting the orange; this is a must-have for this recipe
- Small mixing bowl — for whisking together the orange sauce ingredients
- Whisk — for combining the sauce so the cornstarch dissolves evenly
- Large zip-top bag or medium bowl — for coating the chicken in cornstarch and soy sauce
- Tongs or spatula — for turning the chicken pieces as they sear
- Measuring cups and spoons — for accurate sauce ratios
- Serving bowl or platter — for presenting the finished dish
You might also enjoy: Teriyaki Sauce Recipe
Recommended Products for This Recipe
These are a few products I personally use and genuinely recommend when making this dish. They’ve made a real difference in how the recipe turns out.
1. Lodge Pre-Seasoned Carbon Steel Skillet
A carbon steel skillet gets screaming hot and distributes heat evenly, which is exactly what you need to get a beautiful sear on the chicken without steaming it. It’s lighter than cast iron, heats up fast, and develops a natural nonstick surface over time. This is the pan I reach for every single time I make this recipe.
2. Microplane Premium Zester Grater
Orange zest is what separates a good orange chicken from a truly great one, and a quality microplane makes zesting fast, fine, and painless. You get the flavorful outer layer without any of the bitter white pith. It’s one of those small tools that absolutely earns its drawer space.
3. Kikkoman Less Sodium Soy Sauce
Reducing sodium in a recipe like this doesn’t mean reducing flavor, and Kikkoman’s low-sodium version is proof. It still has that deep, savory umami quality but won’t overpower the bright orange notes in the sauce. This is my go-to soy sauce for all Asian-inspired cooking at home.
4. Marukan Seasoned Rice Vinegar
The rice vinegar in this sauce adds a gentle acidity that balances the sweetness of the honey and orange juice. Marukan is consistently mild, clean-tasting, and doesn’t have the harsh edge that some cheaper brands carry. A small splash goes a long way.
5. Raw Unfiltered Honey
Honey is the natural sweetener that pulls this sauce together without the refined-sugar spike of regular orange chicken recipes. Using raw, unfiltered honey gives a more complex, floral sweetness that plays beautifully with the citrus and ginger.
Another favorite in the same flavor family: Asian Chicken Lettuce Cups
Step-by-Step Instructions: How to Make Healthy Orange Chicken
Step 1: Prep and Coat the Chicken
- Start by patting the chicken dry with paper towels. Removing excess moisture is key to getting a good sear — wet chicken steams instead of browns.
- Cut the chicken into uniform 1-inch (2.5cm) bite-sized pieces. Keeping the pieces similar in size ensures they cook evenly.
- Place the chicken pieces into a large zip-top bag or a medium bowl.
- Add 3 tablespoons (24g) of cornstarch and 2 tablespoons (30ml) of low-sodium soy sauce to the bag or bowl.
- Seal the bag and shake well, or toss with your hands, until every piece of chicken is evenly coated in the cornstarch and soy sauce mixture. The coating should look slightly tacky and opaque, not wet.
- Set aside while you prepare the sauce. The cornstarch will start to form a light crust as the chicken sits.
Step 2: Make the Orange Sauce
- Add all sauce ingredients to a small mixing bowl: 1/2 cup (120ml) fresh orange juice, 1 tablespoon of orange zest, 3 tablespoons (45ml) low-sodium soy sauce, 2 tablespoons (30ml) honey, 1 tablespoon (15ml) rice vinegar, 3 cloves of minced garlic, 1 teaspoon of grated fresh ginger, 1 tablespoon (8g) of cornstarch, 1/4 teaspoon red pepper flakes if using, and 1 teaspoon of toasted sesame oil.
- Whisk the mixture thoroughly until the cornstarch is completely dissolved and no lumps remain. This is important — undissolved cornstarch will create a lumpy sauce.
- Taste the sauce and adjust if needed. If you prefer it sweeter, add a bit more honey. If you want more tang, add a tiny splash more of rice vinegar.
- Set the sauce aside within easy reach of the stove. Once the chicken hits the pan, things move quickly.
Step 3: Sear the Chicken in Batches
- Heat a large skillet or wok over medium-high heat. Let it get fully hot before adding the oil — this usually takes about 1 to 2 minutes.
- Add 1 tablespoon (15ml) of avocado oil or vegetable oil and swirl to coat the pan.
- Add the chicken in a single layer. Do not overcrowd the pan. If your skillet is smaller, cook in two batches. Overcrowding drops the temperature and causes the chicken to steam rather than sear.
- Cook the chicken for 3 to 4 minutes without moving it. Let a golden crust form on the bottom before flipping.
- Flip each piece and cook for another 2 to 3 minutes on the other side until lightly golden and cooked through. The internal temperature should reach 165°F (74°C).
- Transfer the first batch to a clean plate and repeat with remaining chicken if needed, adding a small drizzle of oil if the pan looks dry.
Step 4: Add the Garlic and Ginger (If Not in Sauce)
- Note: For this recipe, the garlic and ginger are whisked directly into the sauce in Step 2, so you don’t need a separate sauté step.
- Once all the chicken is cooked and set aside, reduce the heat in the skillet to medium.
- The pan should still have some good fond (those browned bits) at the bottom, which will add richness to the sauce.
Step 5: Pour In the Orange Sauce and Coat the Chicken
- Give the orange sauce one final whisk to make sure the cornstarch hasn’t settled at the bottom.
- Pour the sauce directly into the hot skillet over medium heat.
- Stir the sauce continuously as it heats. You’ll notice it starting to thicken and become glossy within 1 to 2 minutes.
- Return all the cooked chicken to the skillet and toss to coat every piece thoroughly in the orange sauce.
- Continue cooking for another 1 to 2 minutes, stirring occasionally, until the sauce is thick, sticky, and clings to the chicken beautifully. If the sauce thickens too quickly, add a splash of water or additional orange juice to loosen it.
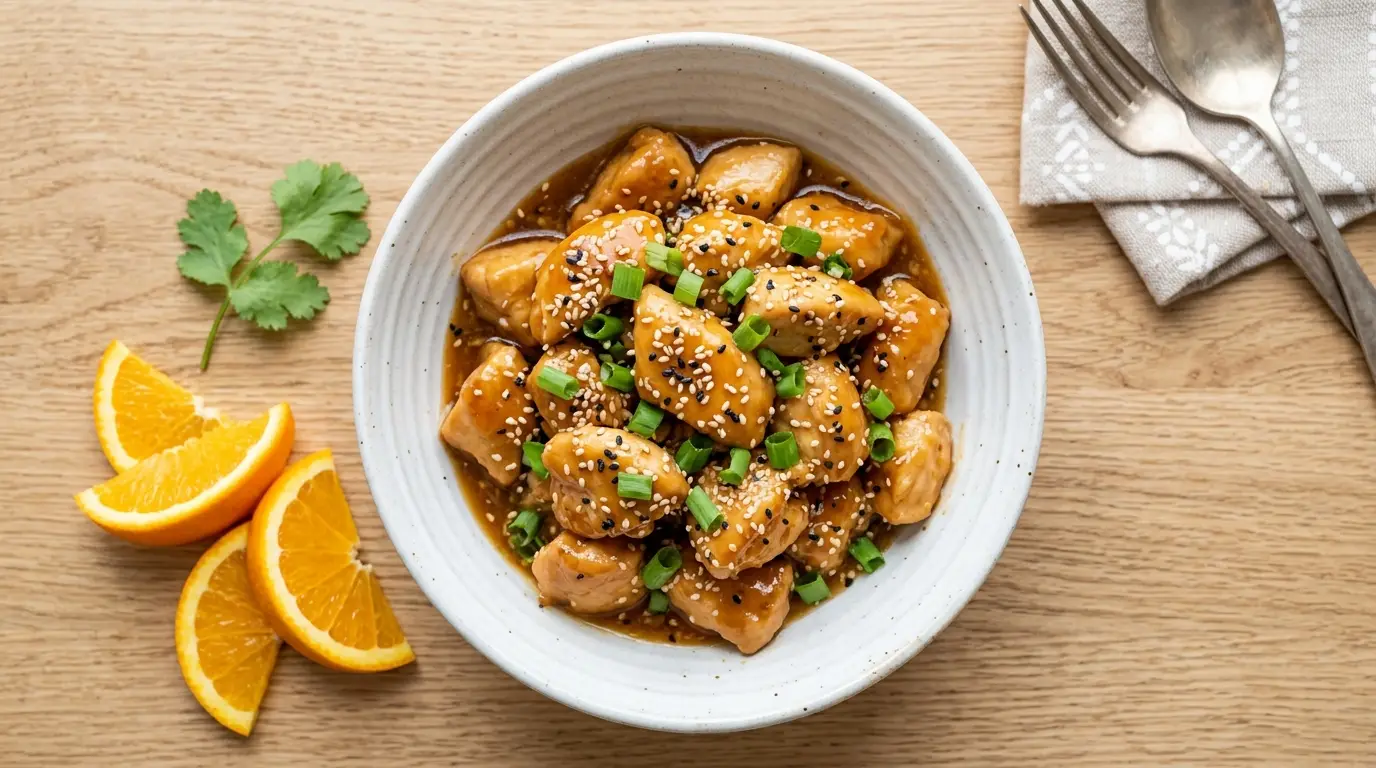
Step 6: Garnish and Serve
- Remove the skillet from heat.
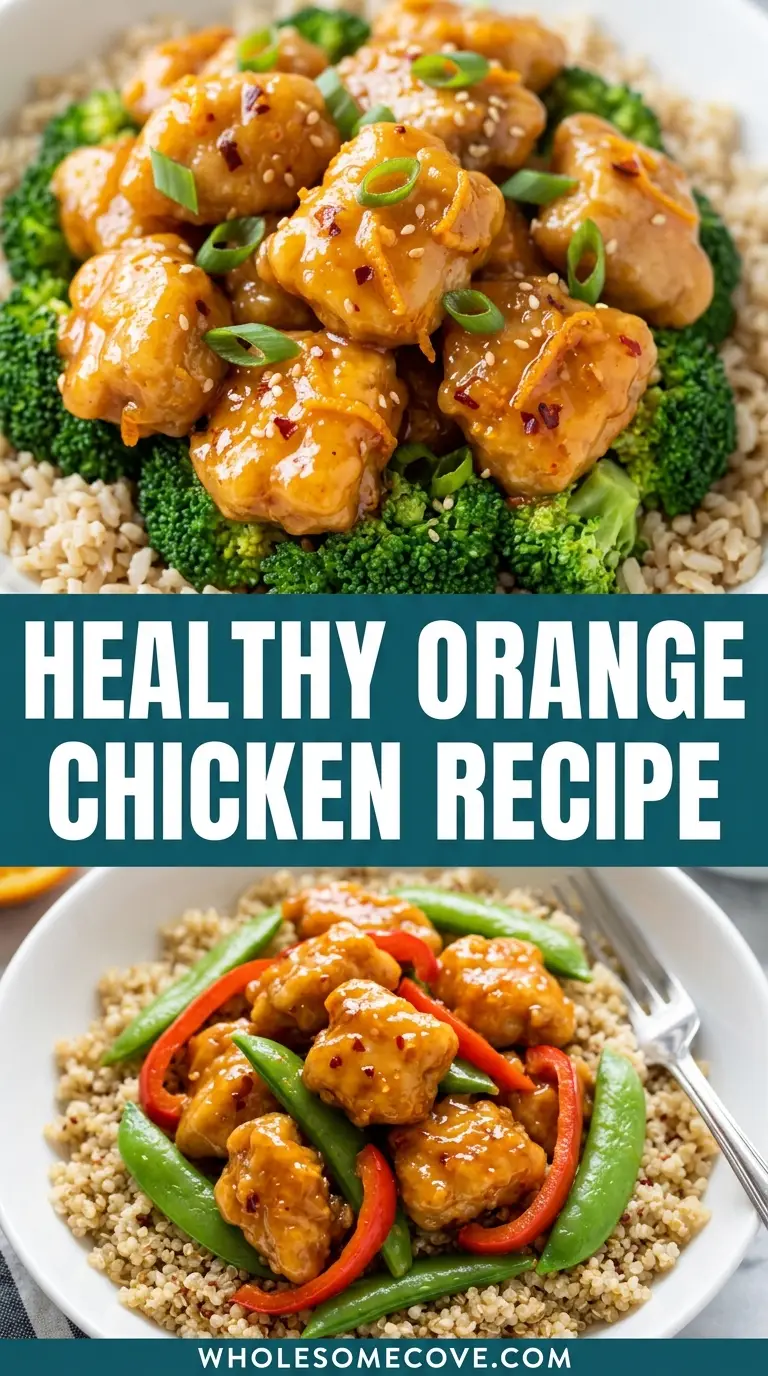
- Transfer the orange chicken to a serving bowl or plate it directly over steamed rice, brown rice, or cauliflower rice.
- Garnish with a sprinkle of sesame seeds and sliced green onions.
- Add a few fresh orange slices on the side if you’d like a pop of color and extra citrus fragrance on the table.
- Serve immediately for the best texture and flavor.
For another fast, healthy Asian-inspired dinner, my Cauliflower Fried Rice with Tofu pairs perfectly with this chicken.

Tips for The Best Healthy Orange Chicken
A few small tricks make the difference between good orange chicken and absolutely incredible orange chicken. These are all lessons I learned the hard way so you don’t have to.
- Dry the chicken thoroughly before coating it. Paper towels are your best friend here. Moisture on the surface of the chicken prevents the cornstarch from forming a crust and leads to a pale, soft exterior instead of a golden sear.
- Use fresh orange juice when possible. Bottled juice works in a pinch, but fresh-squeezed orange juice has a brightness and natural sweetness that makes the sauce taste noticeably better.
- Don’t skip the zest. Orange zest is packed with fragrant citrus oils that deepen the orange flavor far beyond what juice alone can do. Use a microplane for the finest, most evenly distributed zest.
- Cook the chicken in batches. Resist the urge to dump everything in at once. A crowded pan traps steam and gives you pale, chewy chicken instead of beautifully seared pieces.
- Whisk the sauce right before adding it to the pan. Cornstarch settles quickly, so give it a good stir right before it goes into the skillet.
- Control your heat. Once the sauce goes in, medium heat is ideal. Too high and the sauce can scorch or reduce too fast; too low and it won’t thicken properly.
- Taste and adjust. Before coating the chicken, taste the sauce and make any tweaks. More honey for sweetness, more rice vinegar for tang, more red pepper flakes for heat.
- Use chicken thighs for extra juiciness. Chicken breasts are leaner, but thighs are more forgiving and harder to overcook. Both work great in this recipe.
- Let the sauce cling. After adding the chicken back to the sauce, let it bubble and reduce for a minute or two. That’s what gives you that glossy, sticky restaurant-style coating.
Read Also: Healthy Chicken Parmesan Recipe
What to Serve with Healthy Orange Chicken
This dish is incredibly versatile when it comes to sides. It works just as well over a simple bowl of rice as it does alongside an assortment of roasted or stir-fried vegetables.
Here are some of my favorite pairings:
- Steamed jasmine or brown rice — the classic base that soaks up the extra sauce beautifully
- Cauliflower rice — a great low-carb option that keeps the dish light
- Summer Vegetable Stir Fry — vibrant, colorful, and cooks in the same amount of time
- Steamed or roasted broccoli — the slightly bitter, earthy flavor of broccoli cuts through the sweetness of the sauce perfectly
- Healthy Coleslaw — a crunchy, refreshing contrast to the warm, saucy chicken
- Grilled Vegetable Skewers — perfect for summer evenings when you want to fire up the grill
- Steamed snap peas or green beans — quick to cook and add a satisfying crunch
- Healthy Mashed Potatoes — a surprisingly delicious fusion pairing that my family discovered by accident and now requests regularly
- Quinoa — a protein-packed grain that pairs beautifully with the savory-sweet sauce
- Simple cucumber salad — thin slices of cucumber in a light rice vinegar dressing are a refreshing palate cleanser alongside the bold orange sauce
You might also enjoy: Chicken Fajita Lettuce Wraps
Variations of Healthy Orange Chicken
One of the best things about this recipe is how easily it adapts. The base sauce is incredibly versatile and takes well to additions and swaps.
Here are some ways to make it your own:
- Orange Chicken with Broccoli: Add steamed or stir-fried broccoli florets directly to the skillet when you return the chicken to the sauce. The broccoli soaks up the orange sauce and becomes absolutely irresistible.
- Spicy Orange Chicken: Double the red pepper flakes or add 1 to 2 teaspoons of sriracha or chili garlic sauce to the orange sauce for a fiery kick. This version is a real crowd favorite for heat lovers.
- Orange Chicken with Bell Peppers: Slice red, orange, and yellow bell peppers into strips and stir-fry them in the skillet before adding the sauce. The peppers add sweetness, color, and a satisfying crunch.
- Baked Healthy Orange Chicken: Toss the cornstarch-coated chicken in the orange sauce and spread on a parchment-lined baking sheet. Bake at 400°F (200°C) for 20 to 25 minutes, flipping halfway, for a hands-off version.
- Air Fryer Orange Chicken: Spray the coated chicken pieces with oil and air fry at 390°F (200°C) for 10 to 12 minutes, shaking halfway, then toss in the sauce. Check out my Air Fryer Popcorn Chicken for similar technique inspiration.
- Sesame Orange Chicken: Add an extra teaspoon of toasted sesame oil and a generous handful of sesame seeds to the finished dish for a nutty twist.
- Orange Chicken Lettuce Wraps: Spoon the finished chicken into butter lettuce leaves and top with shredded carrots, cucumber, and sesame seeds for a fresh, low-carb serving option.
- Gluten-Free Orange Chicken: Use tamari or coconut aminos in place of soy sauce and use arrowroot powder instead of cornstarch. The end result is just as delicious.
- Vegan Orange “Chicken”: Substitute the chicken with extra-firm tofu, cubed and pressed dry, or use cauliflower florets. The orange sauce works beautifully on plant-based proteins too.
Read Also: Teriyaki Grilled Chicken Recipe
Storage and Reheating
This recipe stores and reheats exceptionally well, which makes it one of my favorite meal prep options. Unlike fried chicken dishes that turn rubbery and sad after a day in the fridge, this pan-seared version holds up beautifully.
- Refrigerator: Store leftovers in an airtight container in the refrigerator for up to 4 to 5 days. The sauce may thicken further as it cools — that’s completely normal.
- Freezer: Transfer cooled chicken and sauce to a freezer-safe container or zip-top freezer bag and freeze for up to 3 months. Thaw overnight in the refrigerator before reheating.
- Reheating on the stovetop (recommended): Add the chicken to a skillet over medium heat with a splash of water or additional orange juice to loosen the sauce. Stir and heat for 3 to 5 minutes until warmed through. This method best preserves the texture of the chicken.
- Reheating in the microwave: Place the chicken in a microwave-safe bowl, add a splash of water, cover loosely, and heat in 60-second intervals, stirring between each, until heated through.
- Reheating from frozen: Thaw completely in the refrigerator overnight, then reheat using the stovetop method above.
- Meal prep tip: Cook a double batch of the sauce and store it separately in a small jar in the refrigerator for up to one week. It’s fantastic drizzled over roasted vegetables, rice bowls, or grilled protein throughout the week.
For another meal prep-friendly dinner idea, I love making a big batch of Sweet Potato and Black Bean Bowls to keep in the fridge alongside this chicken.
Nutritional Facts
The following values are approximate and based on one serving (one-quarter of the full recipe, without rice or additional sides).
| Nutrient | Per Serving |
|---|---|
| Calories | 285 kcal |
| Protein | 33g |
| Total Carbohydrates | 18g |
| Dietary Fiber | 0.5g |
| Sugars | 10g |
| Total Fat | 8g |
| Saturated Fat | 1g |
| Sodium | 520mg |
| Cholesterol | 85mg |
| Vitamin C | 20% DV |
| Iron | 6% DV |
Nutritional values are estimates based on the specific ingredients listed above. Actual values will vary depending on brands used and exact measurements.
You might also enjoy: Easy Healthy Dinner Recipes for Family
Health Benefits of Key Ingredients
Every ingredient in this recipe pulls double duty — delivering flavor and genuine nutritional value. It’s one of the reasons this dish has become a permanent fixture in my weekly rotation.
Here’s what each key ingredient brings to the table:
- Chicken breast (or thighs): An excellent source of lean protein that supports muscle maintenance, satiety, and overall energy levels. A single serving of chicken breast provides roughly 26 to 31 grams of protein, making it one of the most efficient protein sources available.
- Fresh orange juice and orange zest: Oranges are rich in vitamin C, a powerful antioxidant that supports immune function, skin health, and iron absorption. Orange zest contains concentrated flavonoids, which have anti-inflammatory properties.
- Garlic: Beyond its incredible flavor contribution, garlic contains allicin, a compound linked to cardiovascular benefits, immune support, and anti-inflammatory effects. Fresh garlic also delivers manganese and vitamin B6.
- Fresh ginger: Ginger has been used for centuries for its digestive and anti-inflammatory properties. The active compound gingerol supports gut health, reduces nausea, and may help lower blood sugar levels.
- Honey (in place of refined sugar): Unlike white sugar, raw honey contains trace antioxidants, enzymes, and minerals. It has a slightly lower glycemic impact when used in moderation and adds complex sweetness that white sugar simply cannot replicate.
- Low-sodium soy sauce (or tamari): Provides umami depth and savory flavor with significantly less sodium than regular soy sauce. Tamari in particular is often gluten-free and slightly richer in taste.
- Rice vinegar: Contains acetic acid, which may support digestion, blood sugar regulation, and appetite control. It adds brightness and balance to the sauce without adding fat or significant calories.
- Toasted sesame oil: Rich in healthy unsaturated fats and antioxidants like sesamol and sesamin, toasted sesame oil adds a small but mighty dose of heart-healthy fats to the dish.
- Cornstarch (for coating): Used in a minimal amount, cornstarch gives the chicken its light, slightly crispy exterior while keeping the dish gluten-optional. It adds very few calories overall.
For another nutrient-packed dinner built on whole ingredients, my Grilled Chicken and Veggie Skewers are a summer favorite worth bookmarking.
FAQs About Healthy Orange Chicken
1. Can I use chicken thighs instead of chicken breasts?
Absolutely, and in many ways I actually prefer thighs for this recipe. Boneless, skinless chicken thighs are slightly higher in fat than breasts, but they’re far more forgiving if you accidentally cook them a minute or two longer. They stay juicy and tender even with a bit of extra heat, which makes them ideal for beginners.
2. How do I make this recipe gluten-free?
The two swaps you need are tamari or coconut aminos in place of regular soy sauce, and arrowroot powder in place of cornstarch. Both substitutions work at a 1:1 ratio, and the finished dish tastes virtually identical to the original version.
3. Can I make the orange sauce ahead of time?
Yes, and I actually recommend it if you’re meal prepping. Whisk all the sauce ingredients together, store in a small jar or airtight container in the refrigerator, and it will keep well for up to one week. Give it a good shake or stir before using, as the cornstarch will settle to the bottom.
4. Why isn’t my sauce thickening?
A few things can cause this. First, make sure the cornstarch is fully dissolved before the sauce goes into the pan — any lumps will prevent it from thickening evenly. Second, the heat needs to be high enough. Medium heat is ideal. If the sauce isn’t thickening after a couple of minutes, increase the heat slightly and stir constantly until it reaches that glossy, sticky consistency.
5. Can I add vegetables directly to the skillet?
Definitely, and it’s one of my favorite ways to make this an all-in-one meal. Broccoli florets, sliced bell peppers, snap peas, and shredded carrots all work beautifully. Stir-fry the vegetables in the skillet for 3 to 4 minutes before adding the sauce, then add the cooked chicken and toss everything together to coat.
Read Also: Sweet and Sour Sauce Recipe
Healthy Orange Chicken
Ingredients
- 1.5 lbs boneless skinless chicken breasts or thighs - 680g, cut into 1-inch bite-sized pieces
- 3 tbsp cornstarch - 24g
- 2 tbsp low-sodium soy sauce - 30ml; or tamari for gluten-free
- 1 tbsp avocado oil or vegetable oil - 15ml
- 1/2 cup fresh orange juice - 120ml; from about 2 medium oranges
- 1 tbsp orange zest - from 1 large orange
- 3 tbsp low-sodium soy sauce - 45ml; or tamari for gluten-free
- 2 tbsp honey - 30ml; or pure maple syrup
- 1 tbsp rice vinegar - 15ml
- 3 cloves garlic - minced
- 1 tsp fresh ginger - grated; or 1/4 tsp ground ginger
- 1 tbsp cornstarch - 8g
- 1/4 tsp red pepper flakes - optional, for a mild kick
- 1 tsp toasted sesame oil
- sesame seeds - to taste
- green onions (scallions) - sliced, to taste
- orange slices - optional, for garnish
Equipment
- Large skillet or wok - 12-inch/30cm or larger; essential for searing chicken in a single layer
- Cutting board - For cutting chicken into uniform bite-sized pieces
- Sharp chef’s knife - For clean, even cuts on the chicken
- Citrus juicer or reamer - For extracting fresh orange juice efficiently
- Microplane or fine grater - For zesting the orange; essential for this recipe
- Small mixing bowl - For whisking together the orange sauce ingredients
- Whisk - For combining the sauce so cornstarch dissolves evenly
- Large zip-top bag or medium bowl - For coating the chicken in cornstarch and soy sauce
- Tongs or spatula - For turning chicken pieces as they sear
- Measuring cups and spoons - For accurate sauce ratios
- Serving bowl or platter - For presenting the finished dish
Method
- Pat the chicken dry with paper towels, then cut into uniform 1-inch pieces. Toss in a zip-top bag or bowl with 3 tbsp cornstarch and 2 tbsp soy sauce until every piece is evenly coated and slightly tacky.
- Whisk together all sauce ingredients — orange juice, zest, soy sauce, honey, rice vinegar, garlic, ginger, cornstarch, red pepper flakes, and sesame oil — until the cornstarch is fully dissolved with no lumps.
- Heat a large skillet or wok over medium-high heat, add oil, then cook chicken in a single layer (in batches if needed) for 3–4 minutes per side until golden and cooked through to 165°F (74°C). Transfer to a plate.
- Reduce heat to medium, give the sauce a final whisk, then pour into the skillet and stir continuously for 1–2 minutes until the sauce turns glossy and thick.
- Return all the cooked chicken to the skillet and toss to coat thoroughly; cook for another 1–2 minutes until the sauce is sticky and clings to every piece. If it thickens too quickly, add a splash of water or orange juice.
- Remove from heat and serve over rice, brown rice, or cauliflower rice, garnished with sesame seeds, sliced green onions, and optional fresh orange slices.
Nutrition
Notes
- Dry the chicken thoroughly before coating — moisture prevents the cornstarch from forming a golden crust and leads to steaming instead of searing.
- Use fresh orange juice when possible; bottled juice works but fresh-squeezed delivers noticeably brighter flavor and natural sweetness.
- Don’t skip the orange zest — it contains fragrant citrus oils that deepen the orange flavor far beyond what juice alone can provide.
- Always cook the chicken in batches; overcrowding the pan traps steam and results in pale, chewy chicken instead of golden seared pieces.
- Whisk the sauce again right before pouring it into the pan — cornstarch settles quickly and needs to be redistributed.
- For gluten-free, substitute tamari or coconut aminos for soy sauce and arrowroot powder for cornstarch at a 1:1 ratio.
- Chicken thighs are more forgiving than breasts — they stay juicy even if slightly overcooked, making them ideal for beginners.
- The sauce can be made up to 1 week ahead and stored in a sealed jar in the refrigerator; shake well before using as the cornstarch will settle.
- Store leftovers in an airtight container in the refrigerator for up to 4–5 days, or freeze for up to 3 months. Reheat on the stovetop with a splash of water for best texture.
- To add vegetables, stir-fry broccoli, bell peppers, or snap peas in the skillet for 3–4 minutes before adding the sauce, then toss with the cooked chicken.
Private Notes
Tried this recipe?
Let us know how it was!Final Thoughts
If you’ve been craving orange chicken but want something that doesn’t leave you feeling heavy afterward, this is the recipe for you. It has everything you love about the classic dish: that sticky, citrusy, sweet-and-savory sauce, tender chicken with a lightly crisped exterior, and those irresistible aromatics from garlic and ginger.
Give this Healthy Orange Chicken a try this week — I genuinely think it’ll earn a permanent spot in your dinner rotation.
Drop a comment below and let me know how it turned out, or tag me on social media so I can see your beautiful plates!
Recommended:
- Hoisin Sauce Recipe
- Tofu and Veggie Stir Fry with Brown Rice
- Peanut Sauce Recipe
- Mashed Sweet Potato Recipe
- Healthy Alfredo Sauce Recipe
- Lemon Garlic Shrimp Over Couscous
- Zucchini Noodles with Pesto and Shrimp Bowls
- Chickpea and Spinach Curry
- Healthy Homemade Pesto
- Turkey and Quinoa Stuffed Peppers
