
Summer cookouts used to mean standing over a hot grill, constantly turning corn to avoid burning it while sweat dripped down my face. Then I discovered how to make perfect corn in my air fryer, and everything changed.
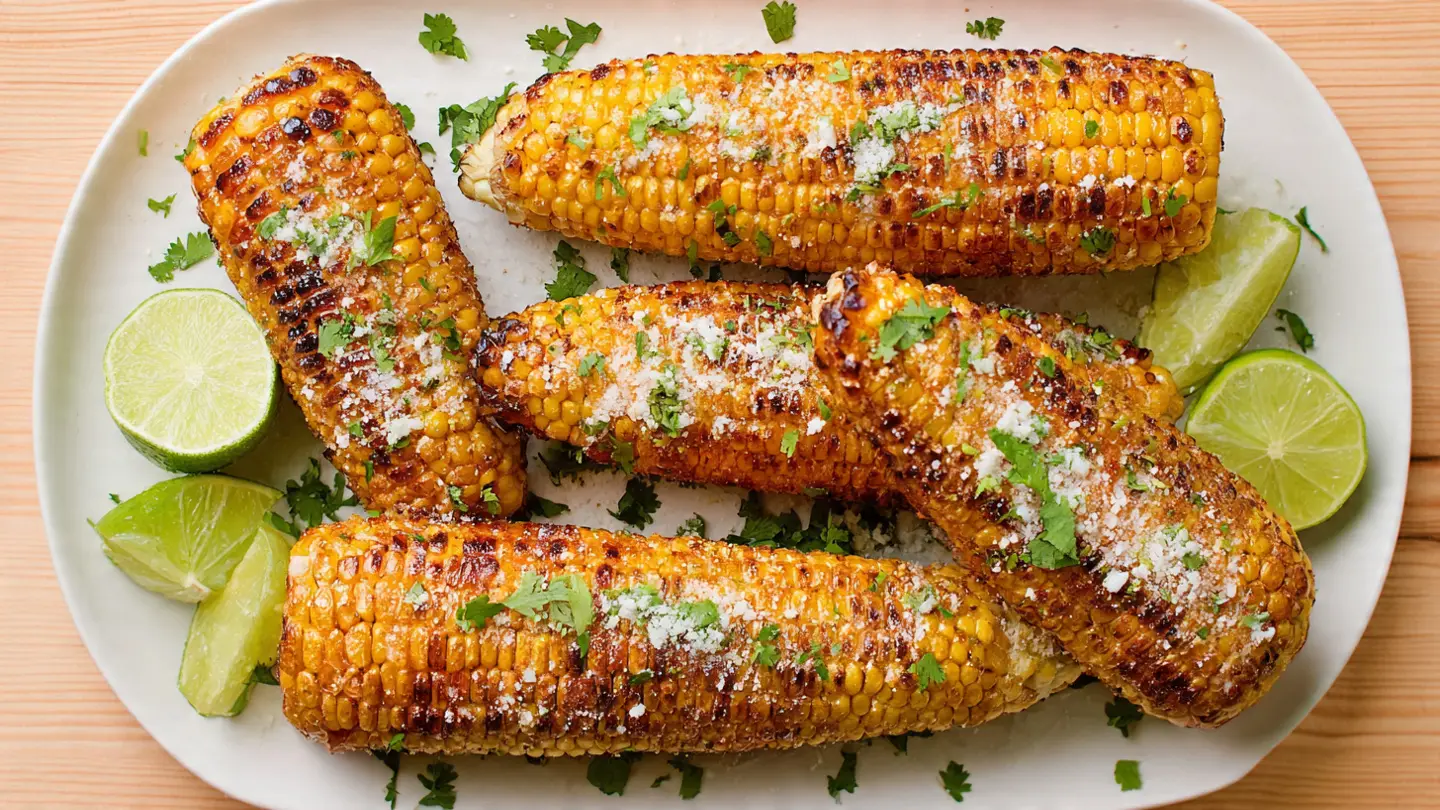
This Air Fryer Corn on the Cob Recipe delivers tender, juicy kernels with those beautiful golden char marks in just 12 minutes. No boiling water, no hot grill, no mess.
I’ll never forget the first time I tried making corn in the air fryer. I was skeptical that it would actually work without the traditional methods I grew up with. But after one bite of that perfectly cooked, buttery corn, I was completely hooked.
| Quick Recipe Summary | |
|---|---|
| Prep Time | 5 minutes |
| Cook Time | 12 minutes |
| Total Time | 17 minutes |
| Servings | 4 ears |
| Difficulty Level | Easy |
For a complete summer meal, serve this alongside my Grilled Vegetable Skewers.
_result.jpg "Air Fryer Corn on the Cob Recipe – Perfect Every Time!")
Why You’ll Love This Air Fryer Corn on the Cob Recipe
The air fryer transforms ordinary corn into something extraordinary. The high heat creates a slight caramelization on the kernels that you just can’t get from boiling.
My kids actually prefer this method now over any other way I’ve made corn. They love how each kernel stays plump and juicy while getting those crispy edges.
Here’s what makes this recipe so special:
- Quick cooking time: Just 12 minutes from raw to perfectly done
- No water needed: The natural moisture in the corn is all you need
- Easy cleanup: No pots to scrub or grill grates to clean
- Consistent results: Every ear comes out perfectly cooked
- Room for customization: Add your favorite seasonings and butter
- Energy efficient: Uses less power than heating up your oven or grill
- Perfect texture: Tender kernels with a slight char that adds incredible flavor
This pairs beautifully with BBQ Pulled Pork Sandwiches for a complete summer feast.
Ingredients
This recipe uses simple ingredients that let the natural sweetness of fresh corn shine through. I learned the hard way that fresh corn makes all the difference after trying this with corn that had been sitting in my fridge for a week.
The result was okay, but nothing compared to corn bought the same day or within 24 hours of cooking.
- 4 ears of fresh corn, husks and silk removed
- 2 tablespoons (30g) unsalted butter, melted
- 1/2 teaspoon (3g) salt
- 1/4 teaspoon (1g) black pepper
- Optional: 1/4 teaspoon (1g) garlic powder
- Optional: 1/4 teaspoon (1g) smoked paprika
- Optional: 2 tablespoons (30g) grated Parmesan cheese
- Optional: 1 tablespoon (15ml) fresh lime juice
- Optional: 2 tablespoons (8g) chopped fresh cilantro or parsley
Another favorite: Mexican Street Corn.
Kitchen Equipment Needed
Having the right tools makes this recipe even easier. I used to struggle with a cheap air fryer that had hot spots, but investing in a quality one made a huge difference.
The basket needs to be large enough to hold 4 ears of corn without overcrowding, or you’ll need to cook in batches.
- Air fryer (at least 5-quart capacity)
- Pastry brush or silicone basting brush
- Small mixing bowl
- Sharp knife
- Cutting board
- Kitchen tongs
- Measuring spoons
- Optional: Corn holders for serving
Read Also: Air Fryer Balsamic Brussels Sprouts Recipe
Recommended Products for This Recipe
After testing this recipe dozens of times, I’ve found a few products that truly make a difference in the final result. These aren’t just random recommendations but items I actually use in my own kitchen.
1. Ninja Air Fryer Max XL
This air fryer has been my go-to for over two years now. The large 5.5-quart basket fits four ears of corn perfectly without overcrowding, and the temperature stays incredibly consistent throughout cooking. I’ve never had unevenly cooked corn since I started using it.
2. Kerrygold Pure Irish Butter
The richness of good butter makes such a noticeable difference on corn. Kerrygold has that perfect creamy texture and slightly sweet flavor that complements the corn’s natural sugars. I’ve tested this recipe with generic butter and with Kerrygold, and my family can taste the difference every time.
3. OXO Good Grips Silicone Basting Brush
This brush makes coating the corn with butter so much easier than trying to spread it with a regular brush. The silicone bristles don’t absorb the butter, so you use less and get better coverage. Plus, it’s dishwasher safe, which is a huge bonus.
4. Maldon Sea Salt Flakes
While regular salt works fine, finishing the corn with these flaky sea salt crystals adds an extra layer of texture and flavor. The flakes don’t completely dissolve, giving you little bursts of saltiness with each bite. It’s become my secret weapon for making this corn taste restaurant-quality.
You might also enjoy: Air Fryer Simple Baked Potatoes Recipe.
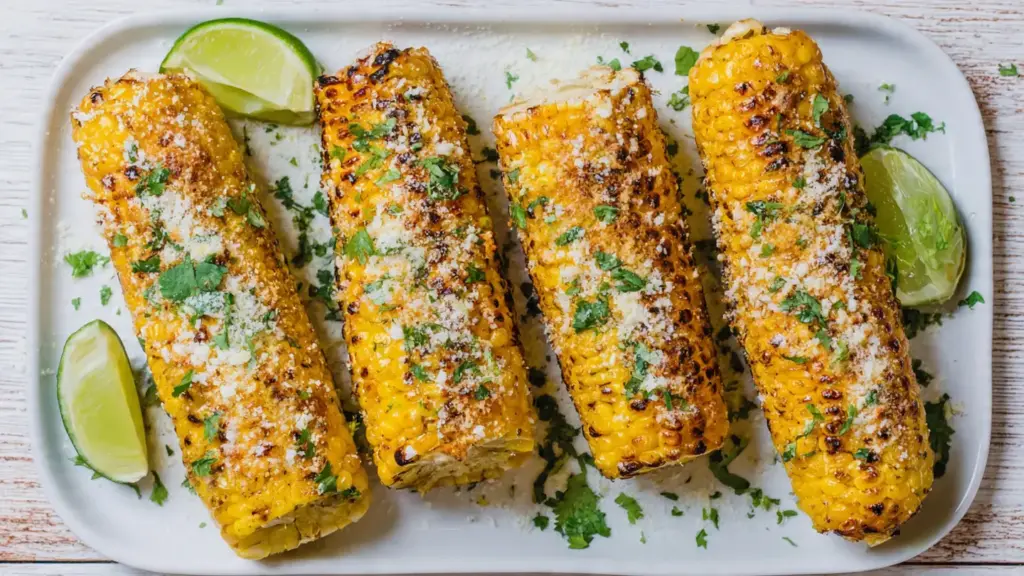
_result.jpg "Air Fryer Corn on the Cob Recipe – Buttered and Crispy Every Time")
Step-by-Step Instructions: How to Make Air Fryer Corn on the Cob
Follow these detailed steps to create perfect corn every time. I’ve broken down each step to make this foolproof, even if you’ve never used an air fryer before.
The key is not to overcrowd the basket and to rotate the corn halfway through cooking.
1. Prepare the Corn
- Remove all the husks and silk from each ear of corn, making sure to get every strand of silk (I use a vegetable brush to get the stubborn pieces stuck between kernels).
- Rinse the corn under cold water to remove any remaining silk or debris.
- Pat each ear completely dry with paper towels or a clean kitchen towel (excess moisture will prevent proper browning).
- Trim the ends if they look dry or brown using a sharp knife.
- Let the corn sit at room temperature for about 5 minutes if it was refrigerated (this helps it cook more evenly).
2. Make the Butter Mixture
- In a small mixing bowl, combine the melted butter with salt, black pepper, and any optional seasonings you’re using.
- Whisk or stir until the salt is fully dissolved and everything is well combined.
- If using garlic powder or smoked paprika, make sure there are no clumps in the mixture.
- Set aside the butter mixture but keep it in a warm spot so it doesn’t solidify.
3. Coat the Corn
- Using a pastry brush or silicone basting brush, generously coat each ear of corn with the butter mixture.
- Make sure to rotate the corn as you brush to get all sides evenly coated.
- Don’t skip any spots, as the uncoated areas won’t develop that nice golden color.
- Reserve about 1 tablespoon of the butter mixture for brushing on after cooking.
4. Preheat the Air Fryer
- Preheat your air fryer to 400°F (200°C) for 3-5 minutes.
- This step ensures even cooking from the moment the corn goes in.
- If your air fryer doesn’t have a preheat setting, just run it empty at 400°F for 5 minutes.
5. Arrange the Corn in the Basket
- Place the corn ears in a single layer in the air fryer basket.
- Make sure they’re not touching each other if possible (this allows hot air to circulate around each ear).
- If your air fryer is smaller, you may need to cook in batches rather than overcrowding.
- Position the corn so that any thicker ends are toward the outside of the basket where it tends to be slightly hotter.
6. Air Fry the Corn
- Set the timer for 12 minutes at 400°F (200°C).
- After 6 minutes, use tongs to carefully rotate each ear of corn 180 degrees.
- This rotation ensures even cooking and browning on all sides.
- If you notice any ears browning too quickly, move them to a cooler spot in the basket.
- Continue cooking for the remaining 6 minutes.
7. Check for Doneness
- At the 12-minute mark, use tongs to remove one ear and test a kernel with a fork.
- The kernels should be tender and easily pierced but still have a slight bite.
- If you prefer softer corn, cook for an additional 2-3 minutes.
- For slightly charred kernels with more bite, remove at 10 minutes.
8. Final Seasoning and Serving
- Transfer the cooked corn to a serving plate using tongs.
- Immediately brush with the reserved butter mixture while the corn is still hot (this helps the butter soak into the kernels).
- If using Parmesan cheese, sprinkle it over the corn right away so it melts slightly.
- Add a squeeze of fresh lime juice if desired, and garnish with chopped cilantro or parsley.
- Serve immediately while hot for the best flavor and texture.
For a lighter option, try: Healthy Coleslaw Recipe.
_result.jpg "Air Fryer Corn on the Cob Recipe – Tasty in Under 15 Minutes")
Tips for The Best Air Fryer Corn on the Cob
These tips come from my own trial and error over many batches of corn. I’ve made every mistake so you don’t have to.
The biggest lesson I learned was not to skip the rotation step, which made a huge difference in even cooking.
- Choose the freshest corn possible: Look for bright green husks and moist silk. The kernels should be plump and milky when pierced.
- Don’t overcrowd the basket: If you can’t fit all the corn in one layer, cook in batches. Overcrowding leads to steaming instead of air frying.
- Adjust cooking time for corn size: Smaller, thinner ears may need only 10 minutes, while jumbo ears might need 14-15 minutes.
- Rotate halfway through: This is non-negotiable for even browning. Set a timer so you don’t forget.
- Pat the corn completely dry: Any water on the surface will turn to steam and prevent that beautiful golden color.
- Let butter come to room temperature: If using cold butter, it won’t brush on evenly and will solidify on contact with the corn.
- Try different butter flavors: Compound butters with herbs, chili powder, or honey add amazing variety.
- Don’t skip the preheat: A preheated air fryer gives you better results from the start.
- Check your air fryer’s hot spots: Every model is different. Note which areas cook faster and adjust corn placement accordingly.
- Season generously: Corn can handle a lot of flavor, so don’t be shy with your butter and seasonings.
- Serve immediately: Corn tastes best right out of the air fryer while it’s still piping hot.
Read Also: Air Fryer French Fries Recipe
What to Serve with Air Fryer Corn on the Cob
This corn is incredibly versatile and pairs well with just about any main dish. I love serving it at summer cookouts alongside grilled meats and fresh salads.
It’s also perfect for weeknight dinners when you need a quick, healthy side.
Here are my favorite pairings:
- Prime Rib for a special occasion dinner
- Crack Burger for a casual summer meal
- Grilled Lemon Herb Chicken for a healthy weeknight option
- Healthy Sloppy Joe for a family-friendly feast
- Baked Salmon with Asparagus and Lemon for an elegant pairing
- Potato Salad and Broccoli Salad for the ultimate picnic spread
- Swedish Meatball for a unique flavor combination
- Air Fryer Pork Bites for an all-air-fryer meal
Another favorite: Chimichurri Steak Tacos Recipe.
Variations of Air Fryer Corn on the Cob
One of my favorite things about this recipe is how easily you can customize it. I experiment with different flavor combinations all the time, depending on what I’m serving or what I’m craving.
My husband’s favorite is the Mexican street corn version, while my kids prefer it simple with just butter and salt.
- Mexican Street Corn (Elote): After cooking, brush with mayo mixed with lime juice, then roll in crumbled cotija cheese, chili powder, and chopped cilantro.
- Garlic Parmesan: Mix melted butter with minced fresh garlic, then coat the cooked corn and sprinkle generously with grated Parmesan and Italian herbs.
- Cajun Spiced: Add 1 tablespoon of Cajun seasoning to the butter mixture before coating the corn.
- Herb Butter: Mix softened butter with fresh chopped basil, thyme, and rosemary, then brush on the cooked corn.
- Sweet and Spicy: Combine melted butter with honey and a pinch of cayenne pepper for a sweet heat combination.
- Asian-Inspired: Brush with a mixture of melted butter, soy sauce, sesame oil, and a sprinkle of sesame seeds.
- BBQ Style: Brush with your favorite BBQ sauce during the last 2 minutes of cooking for a caramelized coating.
- Lemon Pepper: Use lemon-infused butter and add extra cracked black pepper and lemon zest.
- Truffle Corn: Finish with truffle oil and shaved Parmesan for an upscale version.
- Buffalo Style: Toss the cooked corn in buffalo sauce and serve with a drizzle of ranch dressing.
You might also enjoy: Air Fryer Classic Zucchini Fries Recipe.
Storage and Reheating
While this corn is definitely best fresh from the air fryer, life happens and sometimes you have leftovers. I’ve figured out the best ways to store and reheat it so it stays as delicious as possible.
The key is to store it properly so the kernels don’t dry out.
- Refrigerator Storage: Let the corn cool completely, then wrap each ear individually in aluminum foil or plastic wrap. Store in an airtight container for up to 3 days.
- Freezer Storage: For longer storage, cut the kernels off the cob and freeze in freezer bags for up to 3 months. Whole ears don’t freeze well after cooking.
- Reheating in Air Fryer: Preheat to 350°F (175°C) and reheat for 3-4 minutes, brushing with fresh butter first.
- Reheating in Microwave: Wrap in a damp paper towel and microwave on high for 1-2 minutes, rotating halfway through.
- Reheating on Stovetop: Heat a skillet over medium heat with a tablespoon of butter, then roll the corn for 2-3 minutes until warmed through.
- Room Temperature: Don’t leave cooked corn at room temperature for more than 2 hours to prevent bacterial growth.
- Repurposing Leftovers: Cut the kernels off and add to salads, soups, quesadillas, or grain bowls for a quick flavor boost.
Read Also: Corn Chowder Recipe
Nutritional Facts
Here’s the nutritional breakdown per ear of corn (based on 4 servings):
- Calories: 142
- Total Fat: 6.5g
- Saturated Fat: 3.8g
- Trans Fat: 0g
- Cholesterol: 15mg
- Sodium: 310mg
- Total Carbohydrates: 19g
- Dietary Fiber: 2.5g
- Sugars: 6g
- Protein: 3.5g
- Vitamin C: 10% of Daily Value
- Vitamin A: 8% of Daily Value
- Calcium: 2% of Daily Value
- Iron: 4% of Daily Value
Note: These values are estimates and can vary based on the size of the corn and exact amounts of butter and seasonings used. Adding optional toppings like Parmesan cheese will increase the calorie and fat content.
For a complete summer meal, serve this alongside my Grilled Peach and Burrata Salad.
Health Benefits of Key Ingredients
Despite being sweet and delicious, corn is actually packed with nutrients that benefit your health. I was surprised to learn just how nutritious it is when I first started researching for this recipe.
The combination of fiber, antioxidants, and vitamins makes this more than just a tasty side dish.
- Corn: Rich in fiber for digestive health, contains lutein and zeaxanthin which support eye health, provides B vitamins for energy metabolism, and offers antioxidants that fight inflammation.
- Butter: Contains fat-soluble vitamins A, E, and K, provides conjugated linoleic acid which may have health benefits, and helps your body absorb the nutrients in corn more effectively.
- Black Pepper: Contains piperine which enhances nutrient absorption, has anti-inflammatory properties, and may boost metabolism.
- Garlic Powder: Supports immune function, has antimicrobial properties, may help lower blood pressure, and contains compounds that support heart health.
- Cilantro: Rich in antioxidants, may help remove heavy metals from the body, supports digestive health, and provides vitamin K.
- Lime Juice: High in vitamin C for immune support, aids in iron absorption from other foods, and provides citric acid which may help prevent kidney stones.
Another favorite: Healthy Cornbread Recipe.
FAQs About Air Fryer Corn on the Cob
1. Can I cook frozen corn on the cob in the air fryer?
Yes, you absolutely can cook frozen corn in the air fryer. Add 3-4 minutes to the cooking time and there’s no need to thaw first.
Just brush the frozen corn with butter and season as directed, then cook at 400°F for 15-16 minutes, rotating halfway through.
2. Do I need to soak the corn before air frying?
No, soaking isn’t necessary for air fryer corn. In fact, I recommend avoiding it because excess moisture prevents the corn from getting those nice golden char marks.
Just rinse the corn and pat it completely dry before brushing with butter.
3. Can I cook corn still in the husk?
I don’t recommend cooking corn in the husk in the air fryer. The husks can burn and create smoke, plus you won’t get the beautiful caramelization on the kernels.
If you want to try it anyway, soak the corn in water for 30 minutes first and reduce the temperature to 375°F.
4. How do I know when the corn is done?
The corn is done when the kernels are tender when pierced with a fork and have golden brown spots. Most ears will be perfect at 12 minutes, but you can adjust based on your preference.
For softer corn, cook an additional 2-3 minutes. For more char, reduce cooking time by 2 minutes.
5. Can I make this recipe dairy-free?
Absolutely! Replace the butter with olive oil, coconut oil, or vegan butter. The corn will still turn out delicious with that nice golden color.
I’ve made this with olive oil many times when cooking for dairy-free friends, and it’s just as tasty.
Read Also: Air Fryer Curly Fries with Paprika Recipe
Final Thoughts
This Air Fryer Corn on the Cob has become my go-to method for cooking corn all year round. It’s quick, it’s easy, and it delivers perfectly cooked corn every single time without heating up my kitchen.
I hope you’ll give this recipe a try at your next cookout or weeknight dinner. The tender kernels with those beautiful char marks will have everyone asking how you made such perfect corn.
Let me know in the comments which variation you tried first, and don’t forget to share this recipe with friends who love easy side dishes!
Recommended:
- Air Fryer Onion Rings Recipe
- Air Fryer Breaded Mushrooms Recipe
- Air Fryer Herb Cheese Stuffed Mushrooms Recipe
- Air Fryer Mozzarella Cheese Sticks Recipe
- Air Fryer Spicy Buffalo Chicken Wings Recipe
- Air Fryer Honey Garlic Chicken Wings Recipe
- Air Fryer Popcorn Chicken Recipe
- Chicken Corn Chowder Recipe
- Green Bean Casserole Recipe
- Scalloped Potatoes Recipe
