
I first tasted real tzatziki sauce at a tiny Greek restaurant in Athens, and it completely changed my understanding of what this sauce could be. The version I’d been making at home was watery and bland, nothing like the thick, garlicky, cucumber-packed wonder I devoured with warm pita bread that evening.

After that trip, I became obsessed with perfecting my tzatziki sauce recipe at home. I’ve tested every cucumber-draining method, experimented with different yogurt brands, and learned the hard way that fresh dill makes all the difference. What you’re about to read is the result of dozens of batches, countless taste tests, and a few kitchen disasters along the way.
This authentic Greek tzatziki sauce is the kind that clings to your gyro meat, doesn’t make your pita soggy, and tastes so good you’ll want to eat it straight with a spoon. It’s become my go-to for everything from Mediterranean dinner parties to simple weeknight meals, and I’m confident it’ll become yours too.
| Quick Recipe Summary | |
|---|---|
| Prep Time | 15 minutes (plus 30 minutes draining) |
| Cook Time | 0 minutes |
| Total Time | 45 minutes |
| Servings | 6-8 servings (about 2 cups) |
| Difficulty Level | Easy |
Why You’ll Love This Tzatziki Sauce Recipe
This isn’t just another yogurt and cucumber dip. This is the real deal, thick enough to spread, tangy enough to cut through rich meats, and refreshing enough to cool down the spiciest dishes.
I’ve watched friends who claimed they didn’t like tzatziki absolutely devour this version.
Here’s what makes this tzatziki sauce special:
- Authentically thick texture: No watery mess here. The cucumber draining technique I’ll teach you ensures your tzatziki has that signature Greek restaurant consistency.
- Bold garlic flavor without the bite: Raw garlic can be harsh, but my method mellows it just enough while keeping that punch you crave.
- Stays fresh for days: Unlike store-bought versions that separate and turn bland, this homemade tzatziki actually tastes better the next day as the flavors meld together.
- Versatile beyond belief: Sure, it’s perfect with greek chicken gyros, but wait until you try it as a salad dressing or veggie dip.
- Budget-friendly ingredients: You probably have most of what you need already. The only specialty item is Greek yogurt, and even that’s become a pantry staple for most people.
- Quick prep with impressive results: 15 minutes of active work gives you something that tastes like you spent hours in the kitchen.
Ingredients
The secret to exceptional tzatziki lies in using the right ingredients and treating them properly. Each component plays a crucial role in achieving that perfect balance of creamy, tangy, and fresh.
After making countless batches, I’ve learned that quality matters here more than in most recipes.
- 2 cups (480g) Greek yogurt (full-fat or 2% for best texture)
- 1 large English cucumber (about 12 oz/340g) or 2 regular cucumbers, peeled and seeded
- 3-4 cloves fresh garlic, minced or grated (adjust to your preference)
- 2 tablespoons (30ml) fresh lemon juice (from about 1 lemon)
- 2 tablespoons (8g) fresh dill, finely chopped
- 2 tablespoons (30ml) extra virgin olive oil, plus more for drizzling
- 1 tablespoon (15ml) white wine vinegar (or red wine vinegar)
- 1 teaspoon (6g) fine sea salt, plus more to taste
- ½ teaspoon freshly ground black pepper
- Optional: ¼ teaspoon ground cumin for a subtle earthy note
Notes on ingredients:
- Greek yogurt: Don’t substitute regular yogurt unless you strain it overnight. The thick consistency is non-negotiable. I prefer full-fat for the richest flavor, but 2% works beautifully too.
- Cucumber choice: English cucumbers have fewer seeds and thinner skin, making them ideal. If using regular cucumbers, definitely peel and seed them thoroughly.
- Garlic intensity: Start with 2 cloves if you’re sensitive to garlic. I’m a garlic lover and always use 4 cloves. You can always add more, but you can’t take it away.
- Fresh vs. dried dill: Please use fresh. Dried dill tastes completely different and won’t give you that authentic Greek flavor.
Read Also: Healthy Hummus Recipe
Kitchen Equipment Needed
You don’t need fancy equipment to make perfect tzatziki, but having the right tools makes the process smoother and helps achieve that ideal consistency. Here’s what I keep on hand whenever I’m making a batch.
Most of these items are kitchen basics you likely already own.
- Box grater or food processor: For shredding the cucumber. The box grater gives you more control over texture.
- Fine-mesh strainer or colander: Essential for draining the cucumber properly.
- Cheesecloth or clean kitchen towel: Critical for squeezing out excess moisture from the cucumber.
- Garlic press or microplane grater: Makes quick work of the garlic and creates a smooth texture.
- Medium mixing bowl: For combining all the ingredients.
- Measuring cups and spoons: For accurate proportions.
- Citrus juicer: Optional but helpful for getting every drop from your lemon.
- Sharp chef’s knife: For chopping fresh dill finely.
- Small whisk or fork: To thoroughly mix everything together.
- Airtight container: For storing your finished tzatziki in the refrigerator.
Another favorite: Healthy Guacamole Recipe
Recommended Products for This Recipe
After years of making tzatziki, I’ve found a few products that genuinely make a difference in the final result. These aren’t just nice-to-haves; they actually impact the texture and flavor of your sauce.
I’ve tested cheaper alternatives, and these are the ones worth the investment.
1. Fage Total Greek Yogurt
This is hands-down the best Greek yogurt for tzatziki. The texture is incredibly thick and creamy, with just the right amount of tang that doesn’t overpower the other flavors. I’ve tried at least a dozen brands, and Fage consistently gives me that authentic Greek restaurant texture without any graininess or excess liquid.
2. Microplane Premium Zester Grater
This tool changed my tzatziki game completely. It creates a super-fine garlic paste that distributes evenly throughout the sauce, eliminating those harsh garlic chunks that some people find off-putting. It’s also perfect for zesting the lemon if you want to add a little extra citrus punch.
3. OXO Good Grips Box Grater
The cucumber texture makes or breaks tzatziki, and this grater gives you perfect control. The medium holes create cucumber shreds that are small enough to integrate well but large enough to provide pleasant texture. The non-slip base means you can grate one-handed while holding the cucumber, which speeds up the process considerably.
4. Extra Virgin Olive Oil from Greece
Since olive oil is one of the finishing touches that adds richness and authentic flavor, using a quality Greek olive oil makes a noticeable difference. Look for something fruity and peppery rather than mild. I drizzle it on top just before serving, and it elevates the whole dish.
Step-by-Step Instructions: How to Make Tzatziki Sauce
Making tzatziki is straightforward, but the details matter. Follow these steps carefully, especially the cucumber draining process, and you’ll have perfect tzatziki every time.
I’ve broken down each step to show you exactly what to do and what to look for.
1. Prepare and Drain the Cucumber
The single most important step in making tzatziki is removing excess moisture from the cucumber. This is where most homemade versions go wrong.
- Peel the cucumber completely using a vegetable peeler. Even English cucumbers benefit from peeling for the smoothest texture.
- Cut the cucumber in half lengthwise and use a spoon to scoop out all the seeds. The seeds contain most of the water and a slightly bitter flavor.
- Grate the cucumber using the medium holes of your box grater or pulse it briefly in a food processor until you have small, even pieces.
- Place the grated cucumber in a fine-mesh strainer set over a bowl. Sprinkle with ½ teaspoon of salt and toss to distribute.
- Let it sit for at least 30 minutes. You’ll be amazed at how much liquid drains out.
- After 30 minutes, transfer the cucumber to the center of a clean kitchen towel or several layers of cheesecloth.
- Gather the edges of the towel and twist firmly, squeezing out as much liquid as possible. Really put some muscle into it. You should extract at least ¼ cup of liquid.
- Keep squeezing until almost no liquid comes out. This aggressive draining is what creates that thick, clingy texture that makes tzatziki so special.
Read Also: Marinara Sauce Recipe
2. Prepare the Garlic
Raw garlic can be harsh and overpowering, but this technique mellows it while keeping the flavor bold.
- Peel your garlic cloves and cut off any brown or tough ends.
- Using a garlic press or microplane, create a fine garlic paste. The finer you can get it, the better it will distribute throughout the sauce.
- If you want to reduce the sharpness even further, mix the minced garlic with a pinch of salt and let it sit for 5 minutes. The salt draws out some of the harsh oils.
- Alternatively, you can gently smash the garlic cloves with the flat side of a knife before mincing. This breaks down the cell walls and creates a smoother flavor.
- Taste a tiny bit of the raw garlic paste. If it’s too intense for your liking, start with half the amount and add more later.
3. Combine the Yogurt Base
Getting the yogurt mixture right sets the foundation for everything else. This is where all those tangy, creamy flavors come together.
- Scoop your Greek yogurt into a medium mixing bowl. If there’s any liquid on top, stir it back in rather than pouring it off.
- Add the prepared garlic paste to the yogurt and mix thoroughly with a fork or small whisk.
- Pour in the lemon juice and white wine vinegar. The combination of these two acids creates a more complex tang than either one alone.
- Drizzle in the olive oil and mix until everything is smooth and well combined.
- Season with salt and black pepper. Start with the full teaspoon of salt; tzatziki needs generous seasoning to balance the richness of the yogurt.
- At this point, taste the yogurt mixture before adding the cucumber. It should taste slightly over-seasoned because the cucumber will dilute the flavors.
You might also enjoy: Enchilada Sauce Recipe
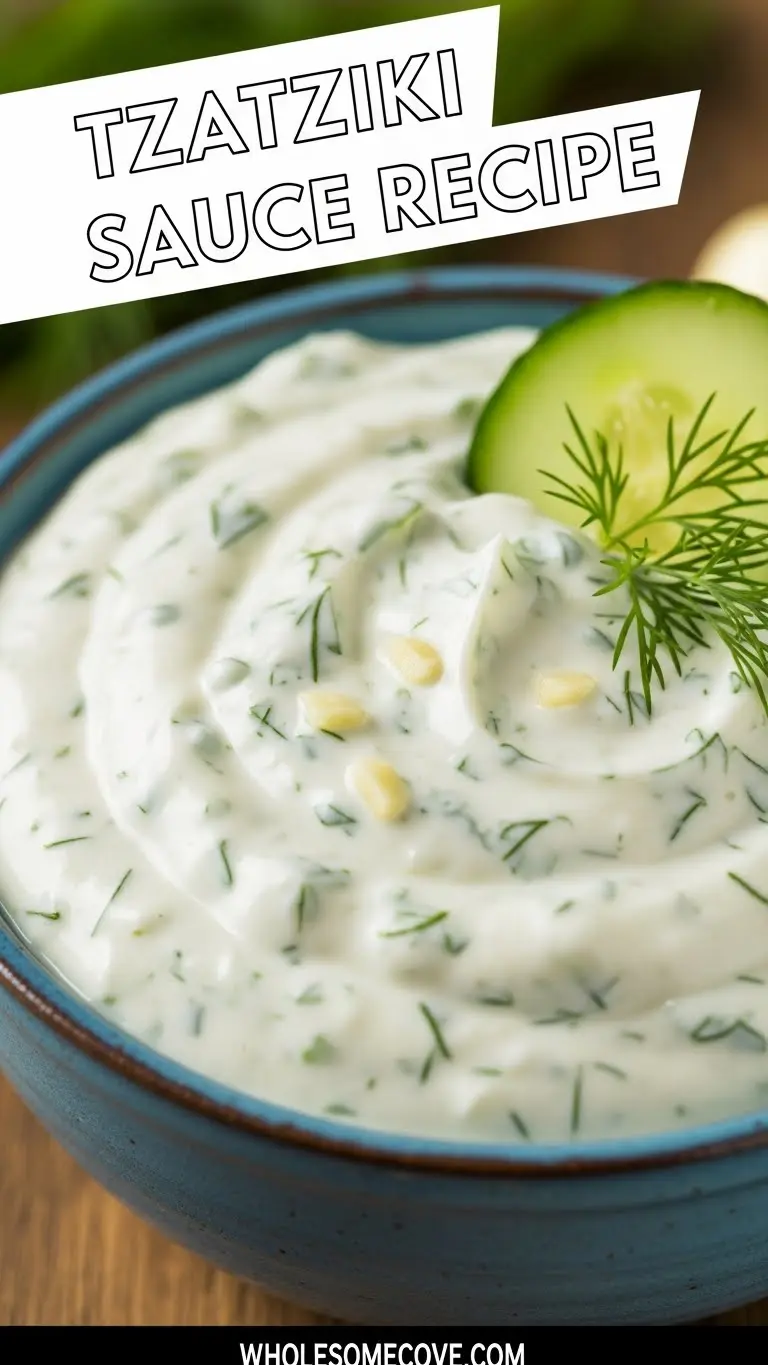
4. Add the Cucumber and Dill
Now we bring everything together. This is where your tzatziki transforms from yogurt sauce to something truly special.
- Add the thoroughly drained cucumber to the yogurt mixture. Make sure you’ve squeezed out as much liquid as possible.
- Finely chop your fresh dill, discarding the thick stems. You want just the feathery fronds.
- Add the chopped dill to the bowl and stir everything together gently but thoroughly.
- Mix until the cucumber and dill are evenly distributed throughout the yogurt. I like to use a folding motion rather than aggressive stirring to keep the cucumber pieces intact.
- If you’re adding the optional cumin, stir it in now. It adds a subtle earthiness that’s traditional in some Greek regions.
- Check the consistency. It should be thick enough to hold its shape on a spoon. If it seems at all watery, you didn’t drain the cucumber enough, but don’t worry, it will thicken as it rests.
5. Chill and Let the Flavors Develop
This step requires patience, but it’s what transforms good tzatziki into great tzatziki. The flavors need time to meld and mellow.
- Transfer the tzatziki to an airtight container and smooth the top with a spoon.
- Cover tightly and refrigerate for at least 1 hour before serving. I actually prefer to make it 4-6 hours ahead or even the night before.
- During this resting period, the garlic mellows, the dill infuses throughout, and all the flavors marry together beautifully.
- The tzatziki will also thicken further as it sits. If it seems loose when you first mix it, the refrigeration time will help it firm up.
- Before serving, give it a good stir to recombine everything. If any liquid has separated on top, just mix it back in.
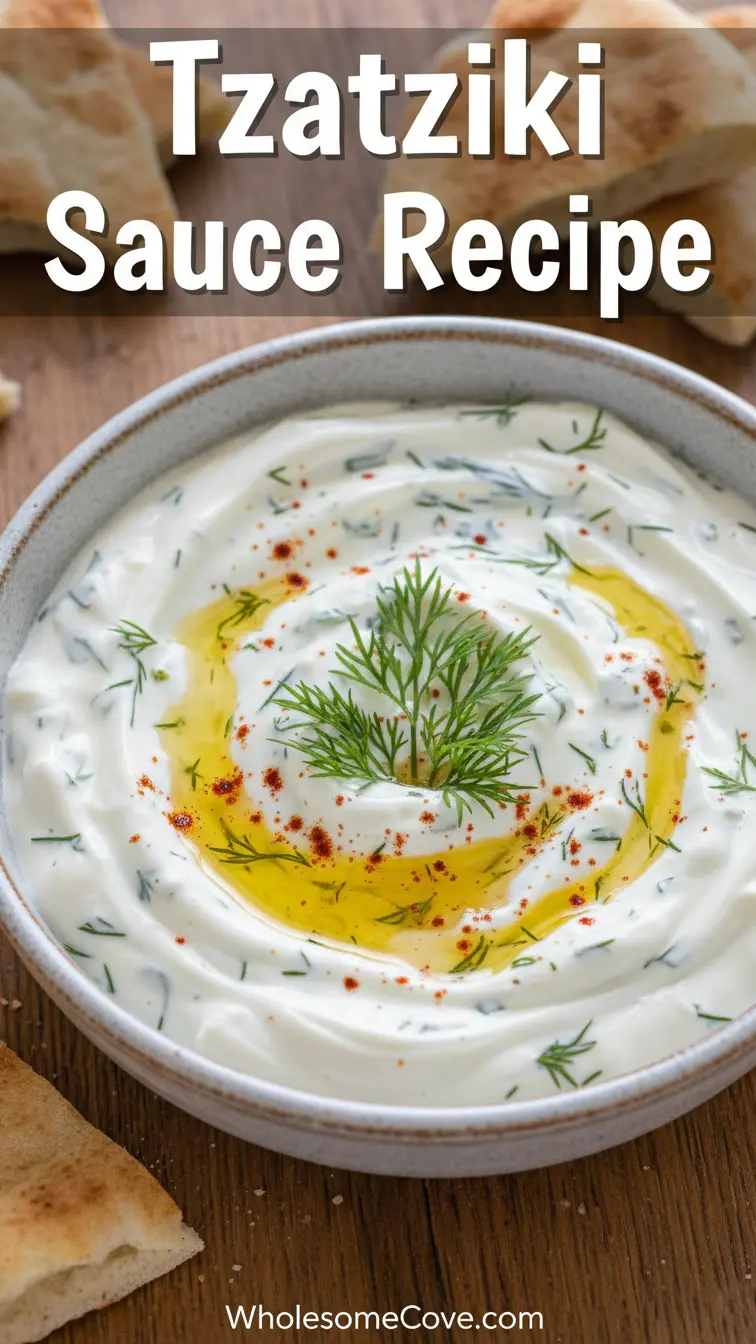
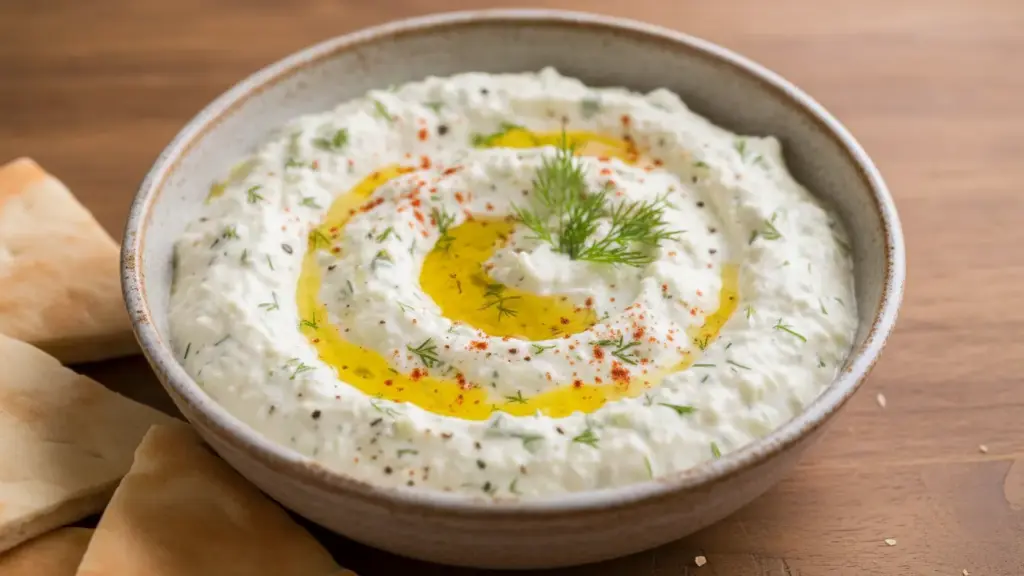
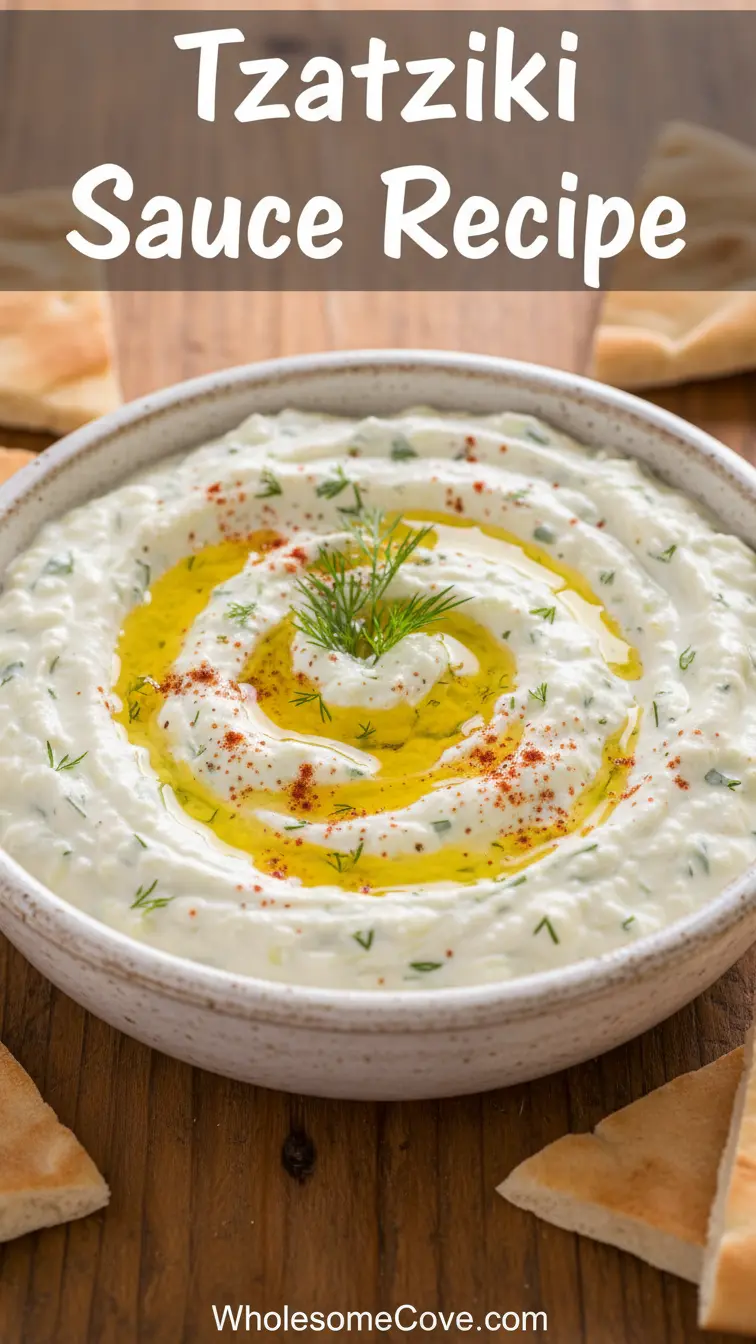
6. Finish and Serve
The final presentation touches make your tzatziki look as good as it tastes. This is your moment to make it shine.
- Transfer the tzatziki to your serving bowl. Use a shallow bowl rather than a deep one for the best presentation.
- Use the back of a spoon to create a shallow well or swirl pattern in the center of the tzatziki.
- Drizzle a tablespoon of good quality extra virgin olive oil into that well. The oil pools beautifully and adds richness.
- Sprinkle a pinch of paprika or sumac over the top for color and a subtle flavor boost.
- Add a small sprig of fresh dill as garnish in the center.
- If serving at a gathering, serve with warm pita bread, fresh vegetables, or as a sauce for grilled meats.
- Always serve tzatziki cold. If it’s been sitting out, refrigerate it again before serving the next round.
For a lighter option, try: Healthy Alfredo Sauce Recipe

Tips for The Best Tzatziki Sauce
These are the lessons I learned through trial and error. Following these tips will help you avoid the common pitfalls and create restaurant-quality tzatziki every single time.
Trust me, I’ve made all the mistakes so you don’t have to.
- Always use full-fat or 2% Greek yogurt: Low-fat versions create a thin, less flavorful sauce. The fat content is essential for that creamy, luxurious texture.
- Don’t skip the cucumber draining: This is the number one mistake people make. Inadequately drained cucumber creates watery, runny tzatziki that separates and looks unappetizing. Spend the extra time squeezing out every drop.
- Grate, don’t chop the cucumber: Finely grated cucumber integrates much better than chunks. You want each bite to have cucumber in it, not occasional large pieces.
- Use fresh dill, never dried: Dried dill tastes medicinal and completely changes the flavor profile. Fresh dill is bright, slightly sweet, and aromatic in a way dried just can’t match.
- Let it rest before serving: Freshly made tzatziki tastes good, but tzatziki that’s rested for several hours tastes incredible. The flavors need time to develop and mellow.
- Adjust garlic to your preference: Garlic intensity is personal. Start conservative and add more if needed. Remember, the garlic flavor intensifies over time.
- Add acid gradually: Different lemons have different acidity levels. Start with less lemon juice and vinegar, taste, and adjust. You can always add more.
- Season generously: Tzatziki needs more salt than you think. The yogurt and cucumber are both mild and need bold seasoning to shine.
- Keep it cold: Tzatziki is a cold sauce. Never serve it at room temperature, and definitely don’t heat it. The yogurt will separate and become grainy.
- Store properly: Always keep tzatziki in an airtight container. Exposure to air causes it to dry out and develop off-flavors. It keeps beautifully for 3-4 days when stored correctly.
This pairs beautifully with my teriyaki sauce recipe for an international flavor combination.
Serving Suggestions
Tzatziki is incredibly versatile. While it’s traditionally served with Greek dishes, I’ve found dozens of creative ways to use it that go far beyond gyros and pita bread.
Here are my favorite ways to enjoy this creamy, tangy sauce:
Traditional Greek pairings:
- Spread generously on warm pita bread or flatbread as an appetizer
- Serve alongside grilled lemon herb chicken or lamb kebabs
- Use as a sauce for Greek chicken gyros
- Pair with crispy falafel and fresh vegetables
- Serve with Greek meatballs (keftedes) as a cooling counterpoint
- Offer as part of a mezze platter with olives, feta, and hummus
As a vegetable dip:
- Create a crudité platter with carrots, cucumbers, bell peppers, cherry tomatoes, and celery
- Serve with roasted vegetables like cauliflower, zucchini, or eggplant
- Use as a dip for air fryer zucchini parmesan chips
- Pair with crispy pita chips for a satisfying snack
Creative modern uses:
- Thin it slightly with lemon juice and use as a salad dressing
- Spread on sandwiches and wraps instead of mayonnaise
- Use as a topping for baked potatoes or sweet potatoes
- Serve alongside grilled salmon with dill sauce
- Use as a sauce for fish tacos or shrimp tacos with mango salsa
- Dollop on top of soups like lentil or tomato for added richness
- Use as a base for a Mediterranean grain bowl with quinoa, chickpeas, and roasted vegetables
Another favorite: BBQ Sauce Recipe
Variations of Tzatziki Sauce
Once you master the classic version, it’s fun to experiment with different flavors and ingredients. These variations keep things interesting while maintaining that signature tzatziki character.
I rotate through these depending on what I’m serving it with.
- Mint tzatziki: Replace half or all of the dill with fresh mint leaves for a brighter, more refreshing flavor. This version is spectacular with lamb dishes.
- Spicy tzatziki: Add 1-2 teaspoons of harissa paste, sriracha, or finely minced jalapeño for heat. The cool yogurt base balances the spice perfectly.
- Roasted garlic tzatziki: Replace raw garlic with 4-5 roasted garlic cloves for a sweeter, mellower garlic flavor. Simply wrap garlic in foil with olive oil and roast at 400°F (200°C) for 30 minutes.
- Avocado tzatziki: Mash half an avocado and fold it into the finished tzatziki for extra creaminess and a subtle buttery flavor.
- Feta tzatziki: Crumble ¼ cup of feta cheese into the sauce for added saltiness and tang. This creates a richer, more complex flavor profile.
- Herb-loaded tzatziki: Add fresh parsley, cilantro, or chives along with the dill for a more herbaceous version.
- Lemon zest tzatziki: Add the zest of one lemon along with the juice for an extra citrus punch. The oils in the zest provide a bright, aromatic quality.
- Tahini tzatziki: Stir in 2 tablespoons of tahini for a nutty undertone that bridges Greek and Middle Eastern flavors.
- Cucumber-free tzatziki: Sounds strange, but replace cucumber with finely grated zucchini (drained the same way) for a milder vegetable flavor that still provides texture.
- Vegan tzatziki: Use coconut yogurt or cashew yogurt instead of Greek yogurt. The texture won’t be quite as thick, but the flavors translate surprisingly well.
Read Also: Pizza Sauce Recipe
Storage and Reheating
Proper storage keeps your tzatziki fresh and delicious for days. The good news is that unlike many sauces, tzatziki actually improves with a day or two in the refrigerator as the flavors continue to develop.
Here’s everything you need to know about storing and handling your homemade tzatziki.
Refrigerator storage:
- Transfer tzatziki to an airtight container immediately after making it
- Press plastic wrap directly onto the surface before sealing the container to prevent a skin from forming
- Store in the coldest part of your refrigerator, typically the back of the middle shelf
- Properly stored tzatziki keeps for 3-4 days without any quality loss
- After 4 days, the garlic flavor intensifies significantly and the cucumber may start to release water
- Always use a clean spoon when serving to avoid introducing bacteria
- If any liquid separates on top, simply stir it back in before serving
- Give it a quick stir each time before serving to recombine the ingredients
Freezing (not recommended but possible):
- I generally don’t recommend freezing tzatziki because the yogurt separates when thawed
- If you must freeze it, do so in small portions for up to 1 month
- Thaw overnight in the refrigerator, never at room temperature
- After thawing, drain off any separated liquid and stir vigorously
- The texture will be grainier and less smooth than fresh, but the flavor remains
- Use thawed tzatziki as a cooking ingredient rather than as a fresh sauce
Signs it’s gone bad:
- Sour or unpleasant smell beyond the normal tangy yogurt scent
- Any signs of mold (discard the entire batch)
- Very watery consistency that doesn’t improve with stirring
- Pinkish or grayish discoloration
- Separation that won’t recombine even with vigorous mixing
Note on reheating:
- Never reheat tzatziki. This is a cold sauce and should always be served chilled. Heating causes the yogurt to separate and become grainy, completely ruining the texture. If you want a warm element, heat the food you’re serving it with, not the tzatziki itself.
You might also enjoy: Spaghetti Sauce Recipe
Nutritional Facts
Tzatziki is not only delicious but also relatively healthy compared to many other sauces and dips. The Greek yogurt base provides protein and probiotics, while the cucumber adds vitamins and minerals with very few calories.
Here’s the nutritional breakdown per ¼ cup (60g) serving:
Calories: 45 | Fat: 2.5g | Saturated Fat: 0.5g | Carbohydrates: 3g | Fiber: 0.5g | Sugar: 2g | Protein: 3g | Sodium: 180mg | Calcium: 50mg | Vitamin C: 2mg
Nutritional highlights:
- High in protein from Greek yogurt, which helps with satiety and muscle maintenance
- Good source of calcium for bone health
- Contains probiotics from the yogurt that support digestive health
- Low in calories compared to mayo-based dips or cream-based sauces
- Provides healthy fats from olive oil
- Rich in vitamin K from fresh dill
- Contains allicin from garlic, which has anti-inflammatory properties
Dietary considerations:
- Naturally gluten-free
- Vegetarian-friendly
- Can be made keto-friendly (already quite low in carbs)
- Not vegan due to dairy content, but can be adapted with plant-based yogurt
- Contains dairy, so not suitable for those with lactose intolerance (though Greek yogurt is lower in lactose than regular yogurt)
Another favorite: Healthy Homemade Pesto Recipe
Health Benefits of Key Ingredients
Beyond just tasting amazing, the ingredients in tzatziki offer impressive health benefits. This is one of those rare cases where something that tastes indulgent is actually good for you.
Here’s what each main ingredient brings to the table nutritionally:
Greek yogurt:
- Contains live probiotics that support gut health and digestion. These beneficial bacteria help maintain a healthy microbiome.
- High in protein, which promotes satiety and helps maintain stable blood sugar levels throughout the day.
- Rich in calcium and vitamin B12, both essential for bone health and energy metabolism.
- Lower in lactose than regular yogurt, making it easier to digest for those with mild lactose sensitivity.
- Contains conjugated linoleic acid (CLA), which some studies suggest may help with weight management.
Cucumber:
- Extremely hydrating due to its high water content (about 95% water), which helps maintain overall hydration.
- Contains antioxidants including vitamin C, beta-carotene, and manganese that fight inflammation.
- Provides vitamin K, which is crucial for blood clotting and bone metabolism.
- Very low in calories while providing volume and satisfying crunch to the sauce.
- Contains silica, which supports healthy skin, hair, and nails.
Garlic:
- Contains allicin, a powerful compound with antibacterial and antiviral properties.
- May help lower blood pressure and cholesterol levels according to numerous studies.
- Rich in antioxidants that protect cells from oxidative damage.
- Supports immune system function, particularly when consumed regularly.
- Has anti-inflammatory properties that may help reduce chronic inflammation.
Fresh dill:
- Excellent source of vitamin A, which supports eye health and immune function.
- Contains calcium and magnesium, both important for bone health.
- Has been traditionally used to aid digestion and reduce bloating.
- Provides antioxidants that help protect against cellular damage.
- Contains monoterpenes, compounds that may have antimicrobial properties.
Olive oil:
- Rich in monounsaturated fats that support heart health and may help lower bad cholesterol.
- Contains powerful antioxidants including oleocanthal, which has anti-inflammatory properties similar to ibuprofen.
- May help improve insulin sensitivity and blood sugar control.
- Supports brain health and may reduce the risk of cognitive decline.
- Provides vitamin E, which protects cells from oxidative stress.
Read Also: Creamy Tomato Basil Soup Recipe
FAQs About Tzatziki Sauce
1. Can I use regular yogurt instead of Greek yogurt?
Regular yogurt is too thin for traditional tzatziki and will create a watery sauce that runs everywhere instead of clinging nicely to your food. If Greek yogurt isn’t available, you can strain regular whole-milk yogurt overnight in a cheesecloth-lined strainer set over a bowl in the refrigerator.
You’ll lose about half the volume to whey, but what remains will have the thick consistency you need. Alternatively, look for “strained yogurt” or “labneh,” which have similar thick textures to Greek yogurt.
2. Why is my tzatziki watery?
Watery tzatziki almost always comes down to inadequately drained cucumber. Cucumber contains an enormous amount of water, and if you don’t remove it, your sauce will be thin and separated.
Make sure you’re salting the grated cucumber, letting it sit for at least 30 minutes, and then really squeezing it hard in a kitchen towel until barely any liquid comes out. Also ensure you’re using Greek yogurt, not regular yogurt, as regular yogurt is naturally thinner and will make the problem worse.
3. How far in advance can I make tzatziki?
Tzatziki is actually one of those magical dishes that tastes better the next day. I regularly make it 24 hours before I need it, and it’s perfect every time.
The flavors meld together beautifully, and the garlic mellows slightly, creating a more balanced sauce. You can safely make it up to 3 days ahead, though I find day 1 or day 2 is the sweet spot for optimal flavor and texture.
4. Can I substitute dried dill for fresh dill?
I really don’t recommend it. Dried dill has a completely different flavor profile that’s more medicinal and less bright than fresh dill.
If you absolutely must use dried dill, use only 1 teaspoon (instead of 2 tablespoons fresh) and add a bit more lemon juice to compensate for the lost brightness. Better alternatives would be fresh mint, parsley, or even cilantro, which while not traditional, are still fresh herbs that will give you a better result than dried dill.
5. Is tzatziki supposed to be eaten hot or cold?
Tzatziki is always served cold or at cool room temperature, never hot. It’s a yogurt-based sauce, and heating it causes the yogurt to separate and become grainy, completely ruining the smooth, creamy texture.
The cold temperature is also what makes it so refreshing and such a perfect counterpoint to warm grilled meats or spicy dishes. If your tzatziki has been refrigerated and seems too cold, let it sit out for about 10-15 minutes before serving to take the chill off, but never heat it.
For a lighter option, try: Healthy Coleslaw Recipe

Authentic Greek Tzatziki Sauce
Ingredients
- 2 cups Greek yogurt - 480g, full-fat or 2% for best texture
- 1 large English cucumber - about 12 oz or 340g, or 2 regular cucumbers, peeled and seeded
- 3-4 cloves fresh garlic - minced or grated, adjust to preference
- 2 tablespoons fresh lemon juice - 30ml, from about 1 lemon
- 2 tablespoons fresh dill - 8g, finely chopped
- 2 tablespoons extra virgin olive oil - 30ml, plus more for drizzling
- 1 tablespoon white wine vinegar - 15ml, or red wine vinegar
- 1 teaspoon fine sea salt - 6g, plus more to taste
- ½ teaspoon freshly ground black pepper
- ¼ teaspoon ground cumin - optional, for subtle earthy note
Equipment
- Box grater or food processor - For shredding cucumber
- Fine-mesh strainer or colander
- Cheesecloth or clean kitchen towel - For squeezing cucumber
- Garlic press or microplane grater
- Medium mixing bowl
- Measuring cups and spoons
- Airtight container - For storage
Method
- Peel cucumber, halve lengthwise, and scoop out seeds. Grate using medium holes on box grater, place in strainer, sprinkle with ½ teaspoon salt, and let drain 30 minutes.
- Transfer grated cucumber to clean kitchen towel and squeeze firmly to remove as much liquid as possible (at least ¼ cup). This step is crucial for proper texture.
- Using garlic press or microplane, create fine garlic paste. Optional: mix with pinch of salt and let sit 5 minutes to mellow sharpness.
- In medium bowl, combine Greek yogurt, garlic paste, lemon juice, vinegar, olive oil, remaining salt, and black pepper. Stir until smooth and well combined.
- Add squeezed cucumber and chopped fresh dill to yogurt mixture. Fold gently until evenly distributed throughout.
- Transfer to airtight container and refrigerate at least 1 hour (preferably 4-6 hours) to allow flavors to meld. Stir before serving and drizzle with additional olive oil.
Nutrition
Notes
- Use full-fat or 2% Greek yogurt for best texture – low-fat versions create thin, less flavorful sauce
- Don’t skip the cucumber draining step – inadequately drained cucumber creates watery tzatziki that separates
- Fresh dill is essential; dried dill tastes medicinal and completely changes the flavor profile
- Adjust garlic to preference; start with 2 cloves if sensitive, use 4 for bolder flavor
- Tzatziki tastes even better the next day as flavors develop and mellow together
- Store in airtight container for up to 3-4 days in refrigerator
- Never heat tzatziki – always serve cold as heating causes yogurt to separate and become grainy
- If liquid separates on top during storage, simply stir it back in before serving
- For thinner consistency to use as salad dressing, add 1-2 tablespoons lemon juice
- English cucumbers are ideal due to fewer seeds and thinner skin; if using regular cucumbers, peel and seed thoroughly
Private Notes
Tried this recipe?
Let us know how it was!Final Thoughts
Making your own tzatziki sauce at home is one of those simple pleasures that transforms everyday meals into something special. Once you taste the difference between this fresh, homemade version and store-bought varieties, you’ll never go back.
The beauty of this recipe is in its simplicity and the way each ingredient contributes to creating something greater than the sum of its parts. Give it a try this week, and I promise it’ll become a regular in your kitchen rotation.
I’d love to hear how your tzatziki turns out! Drop a comment below telling me what you served it with, or share any creative variations you tried.
Recommended:
- Avgolemono Soup Recipe
- Shakshuka Recipe
- Chickpea Salad Recipe
- Tandoori Chicken Recipe
- Mediterranean Quinoa Salad with Grilled Chicken Recipe
- Baked Cod with Mango Salsa Recipe
- Grilled Vegetable Skewers Recipe
- Caprese Stuffed Avocados Recipe
- Lemon Garlic Shrimp Over Couscous Recipe
- Watermelon Feta Salad with Mint Recipe