
I’ve been making coconut cream pie for over a decade now, and I can honestly say this recipe has become the gold standard in my kitchen. My grandmother used to make a version of this every Easter, but hers always seemed to weep liquid and turn soggy by the second day.
After countless batches and more than a few kitchen disasters, I finally cracked the code to a coconut cream pie recipe that stays perfectly creamy and holds its shape beautifully. The secret lies in the cooking technique for the custard and letting everything cool completely before assembly.
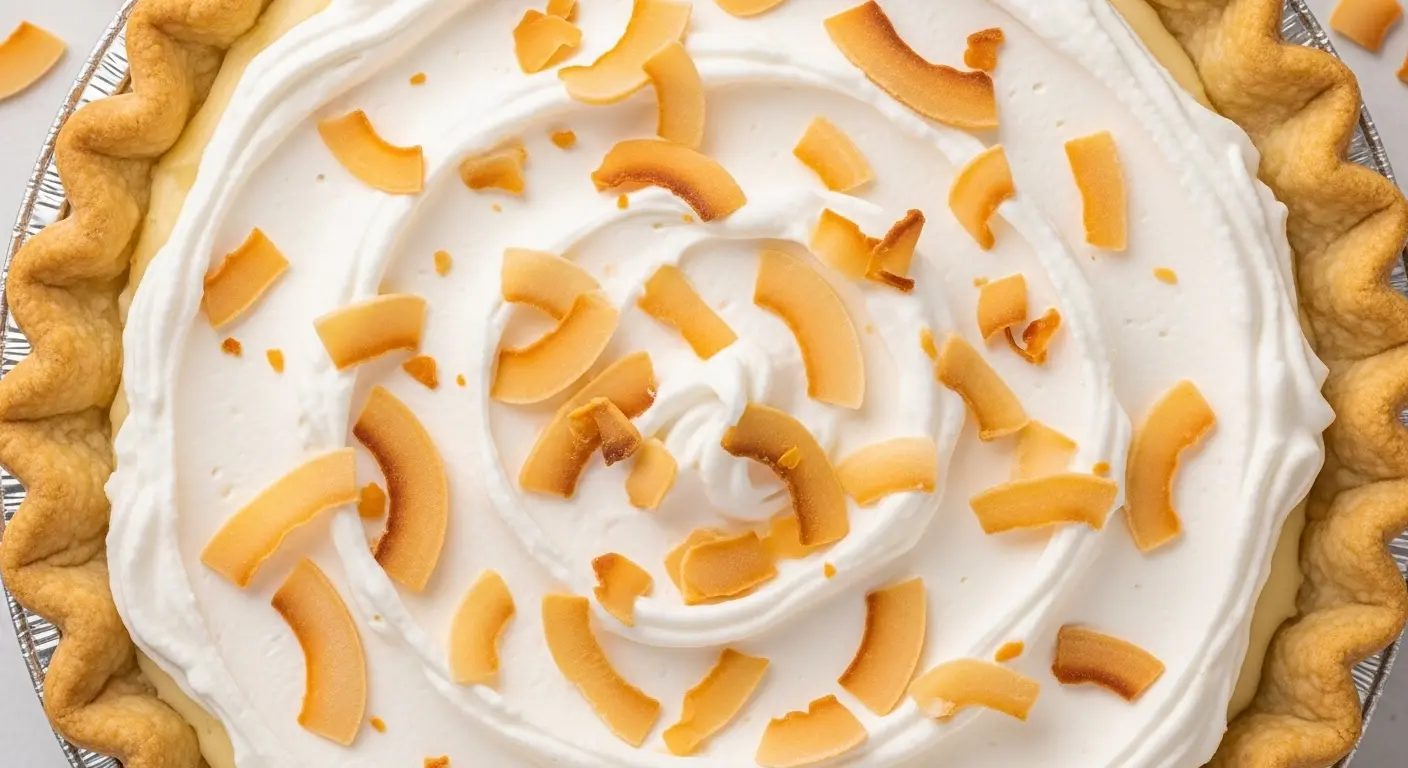
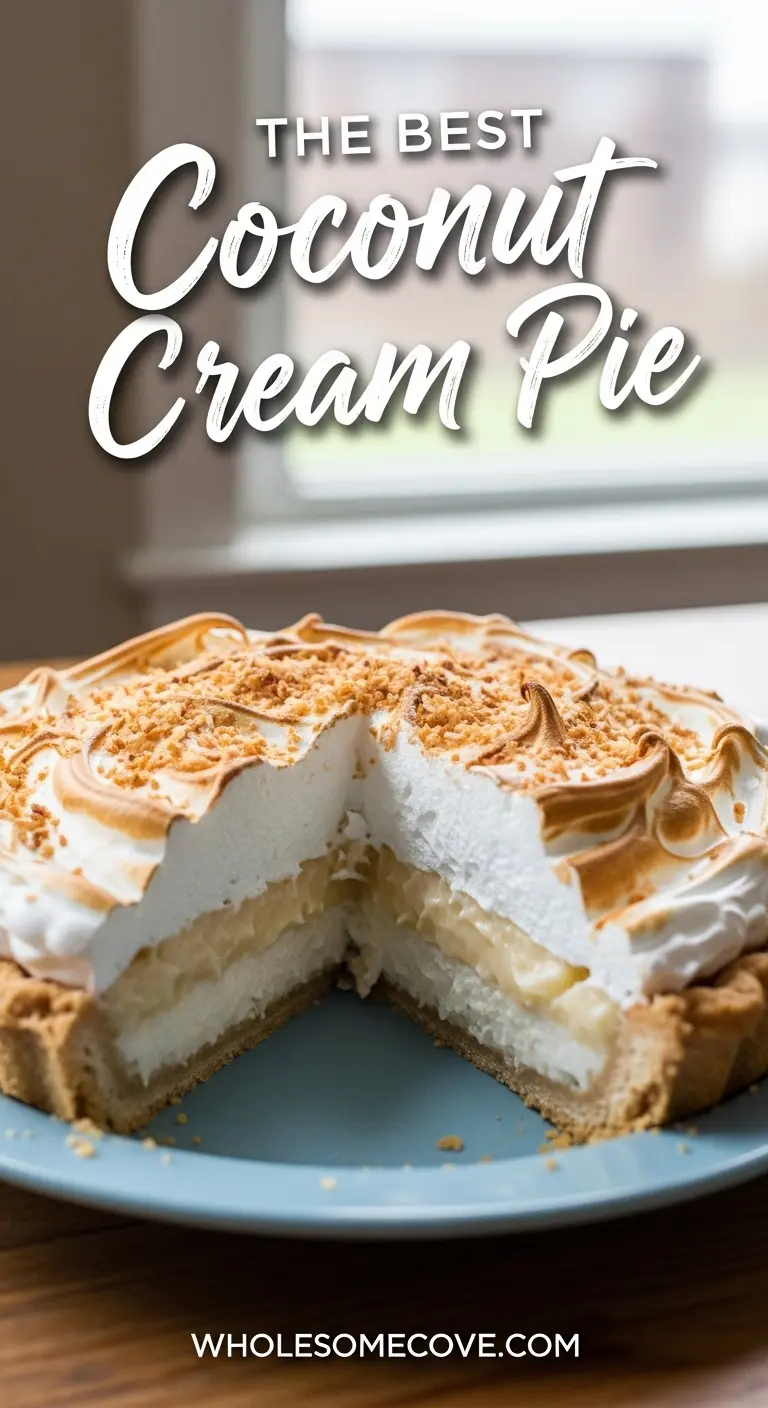
This pie features a buttery, flaky crust filled with silky vanilla-coconut custard and topped with clouds of homemade whipped cream. Every bite delivers that perfect balance of sweet coconut flavor and rich, velvety texture that makes this dessert absolutely irresistible.
| Quick Recipe Summary | |
|---|---|
| Prep Time | 30 minutes |
| Cook Time | 45 minutes |
| Total Time | 5 hours 15 minutes (including chilling) |
| Servings | 8 slices |
| Difficulty Level | Intermediate |

Why You’ll Love This Coconut Cream Pie Recipe
This coconut cream pie delivers everything you want in a classic dessert without any of the common pitfalls. The filling stays smooth and creamy, never grainy or watery, even after a day in the fridge.
I love that this recipe uses both coconut milk and shredded coconut for a double dose of tropical flavor. The combination creates depth that you just can’t get from coconut extract alone.
Here’s what makes this recipe a winner:
- Foolproof custard technique that prevents lumps and ensures silky smoothness every single time
- Make-ahead friendly so you can prepare it the day before your gathering without stress
- Impressive presentation that looks like it came from a fancy bakery but costs a fraction of the price
- Perfectly balanced sweetness that lets the coconut flavor shine without being cloying
- Stable filling that slices cleanly and doesn’t run all over the plate
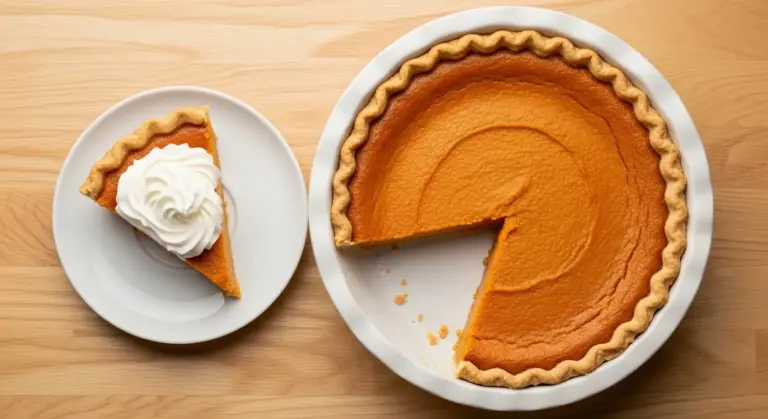
For another comforting dessert, try my healthy pumpkin pie recipe.
Ingredients
This recipe comes together with simple ingredients you probably already have in your pantry, plus a few special touches that make all the difference. I’ve tested this with various brands of coconut products, and quality really does matter here.
For the Crust:
- 1¼ cups (156g) all-purpose flour
- ½ teaspoon salt
- ½ cup (113g) cold unsalted butter, cubed
- 3-4 tablespoons (45-60ml) ice water
For the Coconut Cream Filling:
- 1 cup (240ml) full-fat coconut milk
- 2 cups (480ml) whole milk
- ¾ cup (150g) granulated sugar
- ⅓ cup (43g) cornstarch
- ¼ teaspoon salt
- 4 large egg yolks
- 2 tablespoons (28g) unsalted butter
- 1½ teaspoons pure vanilla extract
- 1 cup (80g) sweetened shredded coconut
For the Whipped Cream Topping:
- 1½ cups (360ml) heavy whipping cream
- 3 tablespoons (38g) powdered sugar
- ½ teaspoon vanilla extract
For Garnish:
- ½ cup (40g) toasted coconut flakes
Kitchen Equipment Needed
Having the right tools makes this recipe so much easier to execute perfectly. I learned this the hard way after ruining a batch because I tried to improvise with the wrong pan.
- 9-inch pie dish (glass or ceramic works best)
- Food processor or pastry cutter for the crust
- Medium heavy-bottomed saucepan (at least 2-quart capacity)
- Whisk (both balloon and flat whisks are helpful)
- Fine-mesh strainer
- Rolling pin
- Pie weights or dried beans for blind baking
- Parchment paper or aluminum foil
- Stand mixer or hand mixer for whipped cream
- Rubber spatula
- Plastic wrap
- Medium mixing bowls
- Measuring cups and spoons
Recommended Products for This Recipe
I’ve tested this recipe with countless products over the years, and these are the ones that consistently deliver the best results.
1. Thai Kitchen Organic Coconut Milk
This brand has the perfect fat content for creating that ultra-rich, creamy filling that makes this pie unforgettable. I’ve tried cheaper coconut milk brands, and they just don’t have the same luxurious texture or authentic coconut flavor. The consistency is always reliable, which means your custard will turn out perfectly every time.
2. Emile Henry Modern Classics Pie Dish
I switched to this ceramic pie dish three years ago and haven’t looked back. It distributes heat evenly so your crust bakes to golden perfection without any burnt spots, and the glazed interior makes cleanup incredibly easy even with sticky coconut filling. The fluted edges also give your pie that professional bakery look.
3. Nielsen-Massey Madagascar Bourbon Pure Vanilla Extract
Real vanilla extract makes a massive difference in custard-based desserts like this one. This particular brand has a rich, complex flavor that enhances the coconut without overpowering it. I used to buy cheaper vanilla, but once I tried this, there was no going back.
4. Bob’s Red Mill Sweetened Coconut Flakes
The texture and sweetness level of these coconut flakes is perfect for both mixing into the filling and toasting for garnish. They’re consistently fresh and have just the right amount of moisture so they incorporate smoothly into the custard without clumping.
You might also enjoy: Authentic Italian Tiramisu Recipe
Step-by-Step Instructions: How to Make Coconut Cream Pie
1. Prepare and Blind Bake the Pie Crust
The foundation of any great cream pie is a perfectly baked crust that stays crisp even after you add the filling.
- Combine the flour and salt in a food processor and pulse a few times to mix.
- Add the cold cubed butter and pulse 10-12 times until the mixture resembles coarse crumbs with pea-sized pieces of butter still visible.
- Drizzle in 3 tablespoons of ice water through the feed tube while pulsing, adding more water one teaspoon at a time if needed until the dough just begins to come together.
- Turn the dough out onto a clean work surface and gather it into a ball, then flatten it into a disk about 1 inch thick.
- Wrap the disk tightly in plastic wrap and refrigerate for at least 30 minutes (this rest period is crucial for preventing shrinkage).
- Preheat your oven to 375°F (190°C) while the dough chills.
- On a lightly floured surface, roll out the chilled dough into a 12-inch circle about ⅛ inch thick, rotating the dough and adding more flour as needed to prevent sticking.
- Carefully transfer the dough to your 9-inch pie dish by rolling it around your rolling pin, then unrolling it over the dish.
- Gently press the dough into the bottom and up the sides of the dish, being careful not to stretch it.
- Trim the excess dough to about ½ inch beyond the rim, then fold the overhang under itself and crimp the edges decoratively using your fingers or a fork.
- Line the crust with parchment paper or aluminum foil and fill it with pie weights or dried beans, making sure to cover the entire bottom surface.
- Bake for 20 minutes with the weights, then carefully remove the parchment and weights and bake for another 10-12 minutes until the crust is golden brown all over.
- Remove from the oven and let it cool completely on a wire rack before filling.
2. Toast the Coconut for Garnish
Getting ahead on this step means one less thing to worry about when you’re assembling the finished pie.
- Spread the coconut flakes in a single layer on a rimmed baking sheet while the oven is still at 375°F (190°C).
- Toast for 5-7 minutes, stirring every 2 minutes, until the coconut is golden brown and fragrant (watch it carefully as it can burn quickly).
- Transfer the toasted coconut to a plate to cool completely and set aside for later.
3. Make the Coconut Cream Filling
This is where the magic happens, and proper technique here makes the difference between silky perfection and lumpy disappointment.
- In your medium saucepan, whisk together the coconut milk, whole milk, sugar, cornstarch, and salt until the cornstarch is completely dissolved with no lumps remaining.
- Place the saucepan over medium heat and cook, whisking constantly, until the mixture comes to a boil and thickens noticeably (this usually takes 8-10 minutes).
- Once boiling, continue cooking for 2 more minutes while whisking constantly to ensure the cornstarch is fully cooked and the mixture won’t taste starchy.
- In a separate medium bowl, whisk the egg yolks until smooth and slightly lightened in color.
- Very slowly drizzle about 1 cup of the hot milk mixture into the egg yolks while whisking constantly (this tempering process prevents the eggs from scrambling).
- Pour the egg yolk mixture back into the saucepan with the remaining hot milk mixture, whisking constantly to combine.
- Return the saucepan to medium heat and cook, whisking constantly, for 2-3 minutes until the custard is very thick and coats the back of a spoon.
- Remove from heat and immediately whisk in the butter, vanilla extract, and shredded coconut until the butter is completely melted and everything is well combined.
- Pour the hot custard through a fine-mesh strainer into a clean bowl to remove any lumps and ensure perfect smoothness.
4. Fill the Pie and Chill
Proper cooling is essential for achieving that perfect sliceable texture.
- Pour the strained custard into your cooled pie crust, using a rubber spatula to scrape every bit from the bowl.
- Smooth the top of the filling with the spatula, working from the center outward to eliminate any air pockets.
- Press a piece of plastic wrap directly onto the surface of the custard to prevent a skin from forming (this is really important).
- Refrigerate the pie for at least 4 hours or overnight until the filling is completely set and cold throughout.
Another favorite: Healthy Apple Pie Recipe
5. Make the Whipped Cream Topping
Homemade whipped cream takes this pie from good to absolutely spectacular.
- Chill your mixing bowl and beaters in the freezer for 10 minutes before starting (cold equipment helps the cream whip faster and hold its shape better).
- Pour the heavy cream into the chilled bowl and beat on medium speed until it begins to thicken.
- Add the powdered sugar and vanilla extract, then increase the speed to medium-high.
- Continue beating until stiff peaks form (the cream should stand up straight when you lift the beaters, but be careful not to overbeat or it will become grainy).
6. Assemble and Garnish the Pie
This is the fun part where everything comes together beautifully.
- Remove the plastic wrap from the chilled pie filling.
- Spread or pipe the whipped cream over the entire surface of the pie, creating decorative swirls or peaks if desired.
- Sprinkle the toasted coconut evenly over the whipped cream, pressing it gently so it adheres.
- Refrigerate the finished pie for at least 30 minutes before serving to let everything set together.
- When ready to serve, use a sharp knife dipped in hot water and wiped dry between cuts for the cleanest slices.
Tips for The Best Coconut Cream Pie
After making this pie more times than I can count, these tips have proven invaluable for consistent success.
- Use full-fat coconut milk, not light because the fat content is crucial for achieving that rich, creamy texture and deep coconut flavor.
- Don’t skip tempering the egg yolks or you’ll end up with scrambled eggs in your custard (I learned this the hard way my first time).
- Whisk constantly while cooking the custard to prevent scorching on the bottom of the pan and ensure even thickening.
- Strain the custard even if it looks smooth because there are almost always tiny lumps you can’t see that will affect the final texture.
- Cool the custard completely before adding whipped cream because warm filling will melt the cream and create a soupy mess.
- Toast the coconut for garnish until deeply golden because that caramelization adds incredible flavor that pale coconut just can’t match.
- Chill your mixing bowl and beaters before whipping cream to help it whip faster and achieve more stable peaks.
- Don’t overbeat the whipped cream or it will turn grainy and eventually separate into butter.
- Press plastic wrap directly on the custard surface while cooling to prevent that unappetizing skin from forming.
- Let the pie chill for the full 4 hours minimum because rushing this step results in a filling that’s too soft to slice cleanly.
- Clean your knife between slices by dipping it in hot water and wiping it dry for picture-perfect pieces every time.
Serving Suggestions
This coconut cream pie is stunning enough to stand alone, but pairing it with complementary flavors takes the experience to another level.
Serve each slice with a drizzle of warm chocolate sauce for a coconut-chocolate combo that tastes like an Almond Joy candy bar. The bittersweet chocolate cuts through the sweetness perfectly.
A scoop of vanilla bean ice cream or a dollop of whipped cream flavored with rum adds an extra layer of indulgence. I also love serving this alongside a strong cup of coffee or espresso to balance the richness.
For a tropical theme party, pair it with:
- Fresh pineapple slices or mango chunks for brightness
- Grilled Peach and Burrata Salad as a light starter
- Macadamia nuts scattered around the plate for crunch
- A splash of coconut rum in your coffee for the adults
- Tropical fruit salad to complement the coconut
Read Also: Healthy Tiramisu Recipe
Variations of Coconut Cream Pie
Once you’ve mastered the basic recipe, these variations let you customize the pie to your preferences or dietary needs.
- Chocolate Coconut Cream Pie: Add ¼ cup cocoa powder to the custard with the cornstarch and fold in ½ cup mini chocolate chips after straining for a decadent twist.
- Toasted Coconut Cream Pie: Toast all the shredded coconut before adding it to the custard for deeper, more caramelized coconut flavor throughout.
- Coconut Banana Cream Pie: Layer sliced bananas over the cooled crust before adding the custard for a classic tropical combination.
- Rum-Spiked Coconut Cream Pie: Add 2 tablespoons of dark rum to the finished custard along with the vanilla for grown-up flavor.
- Gluten-Free Version: Use your favorite gluten-free pie crust or a graham cracker crust made with gluten-free graham crackers.
- Dairy-Free Version: Replace the whole milk with additional coconut milk and use coconut cream in place of heavy whipping cream for the topping.
- No-Bake Version: Use a graham cracker crust that doesn’t require baking and chill everything thoroughly for an easier summer dessert.
- Individual Portions: Make this in mason jars or small glasses for a portable, party-friendly presentation.
- Lime Coconut Cream Pie: Add 2 teaspoons of lime zest to the custard and a tablespoon of lime juice for a Key lime pie meets coconut cream hybrid.
- Coconut Cream Tart: Use a tart pan instead of a pie dish for a more elegant presentation and shallower filling.
Storage and Reheating
Proper storage keeps this pie tasting fresh and prevents the crust from getting soggy.
Store the finished pie covered loosely with plastic wrap or in an airtight container in the refrigerator for up to 3 days. I don’t recommend covering it too tightly because that can smash the whipped cream topping.
The whipped cream will hold up best for the first 24 hours, so if you’re making this more than a day ahead, consider adding the whipped cream shortly before serving. The custard filling keeps beautifully for up to 4 days on its own.
Storage guidelines:
- Refrigerate immediately after assembly and keep cold until serving
- Cover loosely to protect the topping without crushing it
- Store leftover slices in an airtight container for up to 3 days
- Keep away from strongly flavored foods in the fridge that might transfer odors
- For best texture, consume within 2 days of adding the whipped cream
- The custard filling can be made 2 days ahead and stored in an airtight container before assembling
This pie doesn’t freeze well once assembled because the custard becomes watery and the whipped cream deflates when thawed. However, you can freeze the baked crust (wrapped tightly) for up to 2 months and the unwhipped heavy cream in its original container.
This dessert is best served cold straight from the refrigerator, so no reheating is needed or recommended.
Nutritional Facts
Per Serving (1 slice, based on 8 servings):
- Calories: 485
- Total Fat: 28g
- Saturated Fat: 18g
- Cholesterol: 145mg
- Sodium: 245mg
- Total Carbohydrates: 52g
- Dietary Fiber: 2g
- Sugars: 32g
- Protein: 6g
Please note that these values are approximate and will vary based on specific brands used and exact portion sizes.
Health Benefits of Key Ingredients
While this is definitely an indulgent dessert, several ingredients do offer some nutritional benefits worth mentioning.
Coconut provides medium-chain triglycerides (MCTs) that some research suggests may support metabolism and provide quick energy. The shredded coconut also contains dietary fiber that aids digestion.
Here are some benefits from the main ingredients:
- Coconut milk: Rich in lauric acid, which may support immune function and heart health when consumed in moderation
- Eggs: Excellent source of high-quality protein, choline for brain health, and vitamins A, D, and B12
- Whole milk: Provides calcium for bone health, vitamin D, and protein for muscle maintenance
- Butter: Contains fat-soluble vitamins A, E, and K2, plus beneficial fatty acids when consumed in reasonable amounts
- Vanilla extract: Contains small amounts of antioxidants and may have calming aromatherapy effects
For a lighter option with fruit, consider my Grilled Peach and Burrata Salad.
FAQs About Coconut Cream Pie
1. Can I use coconut extract instead of coconut milk?
While you technically can substitute coconut extract for some of the coconut flavor, I strongly recommend against replacing the coconut milk entirely. The coconut milk provides essential fat and richness that makes the custard perfectly creamy and luxurious. If you must substitute, use an equal amount of additional whole milk plus 1-2 teaspoons of coconut extract, but know that the texture and flavor won’t be quite as exceptional.
2. Why did my custard turn out lumpy?
Lumpy custard usually happens from one of three issues: not whisking constantly while cooking, cooking over heat that’s too high, or adding the hot liquid to the eggs too quickly. Always whisk continuously once the mixture starts heating, use medium heat (never high), and add the hot milk to the egg yolks very slowly in a thin stream while whisking vigorously. Straining the finished custard through a fine-mesh sieve will catch any lumps you might have missed.
3. How do I prevent my pie crust from getting soggy?
The key to a crisp crust is blind baking it completely until golden brown before adding the filling. Make sure your crust is entirely cooled before adding the custard, and always let the custard cool to at least room temperature as well. Adding hot custard to the crust creates steam that makes everything soggy.
4. Can I make this pie ahead of time?
Absolutely, and it actually tastes better when the flavors have time to meld. Make the entire pie up to 2 days ahead, but for the best texture, add the whipped cream topping no more than 6-8 hours before serving. The custard filling stays perfect in the crust for up to 3 days, so you can prepare everything except the whipped cream well in advance.
5. What’s the best way to toast coconut without burning it?
The trick is constant attention and frequent stirring. Spread the coconut in a thin, even layer on a baking sheet and toast at 350°F (175°C), stirring every 2 minutes. It goes from perfectly golden to burnt in seconds, so don’t walk away from the oven during those final minutes.
Read Also: Coffee Cake Recipe Using Cake Mix
Final Thoughts
This coconut cream pie recipe has earned its place as one of my most cherished desserts, and I hope it becomes a favorite in your kitchen too. The combination of buttery crust, silky coconut custard, and billowy whipped cream creates pure bliss in every bite.
The best part is watching people’s faces light up when they taste that first forkful. It’s rich without being heavy, sweet without being cloying, and impressive without requiring professional pastry skills.
I’d love to hear how your coconut cream pie turns out! Drop a comment below with your experience, any creative variations you tried, or questions you might have. If you loved this recipe as much as my family does, please share it with your friends who appreciate a truly spectacular dessert.
Recommended:
- Healthy Chocolate Chip Cookies Recipe
- Healthy Carrot Cake Recipe
- Apple Crisp Recipe
- Amish Apple Cake Recipe
- Cannoli Poke Cake Recipe
- Pumpkin Cookies Recipe
- Funnel Cake Bites Recipe
- Starbucks Banana Bread Recipe
- Gingerbread Cookie Recipe
- Easy Carrot Cake Recipe

