
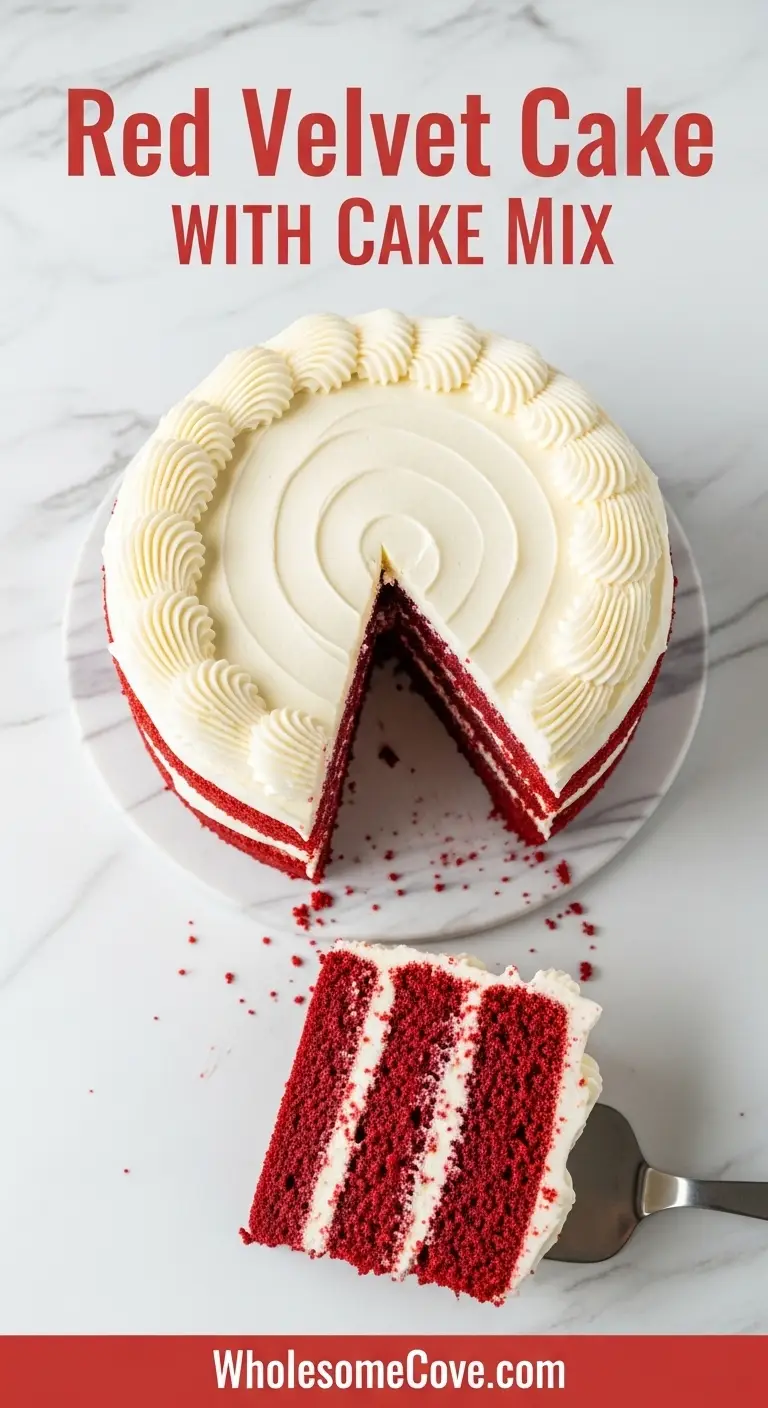
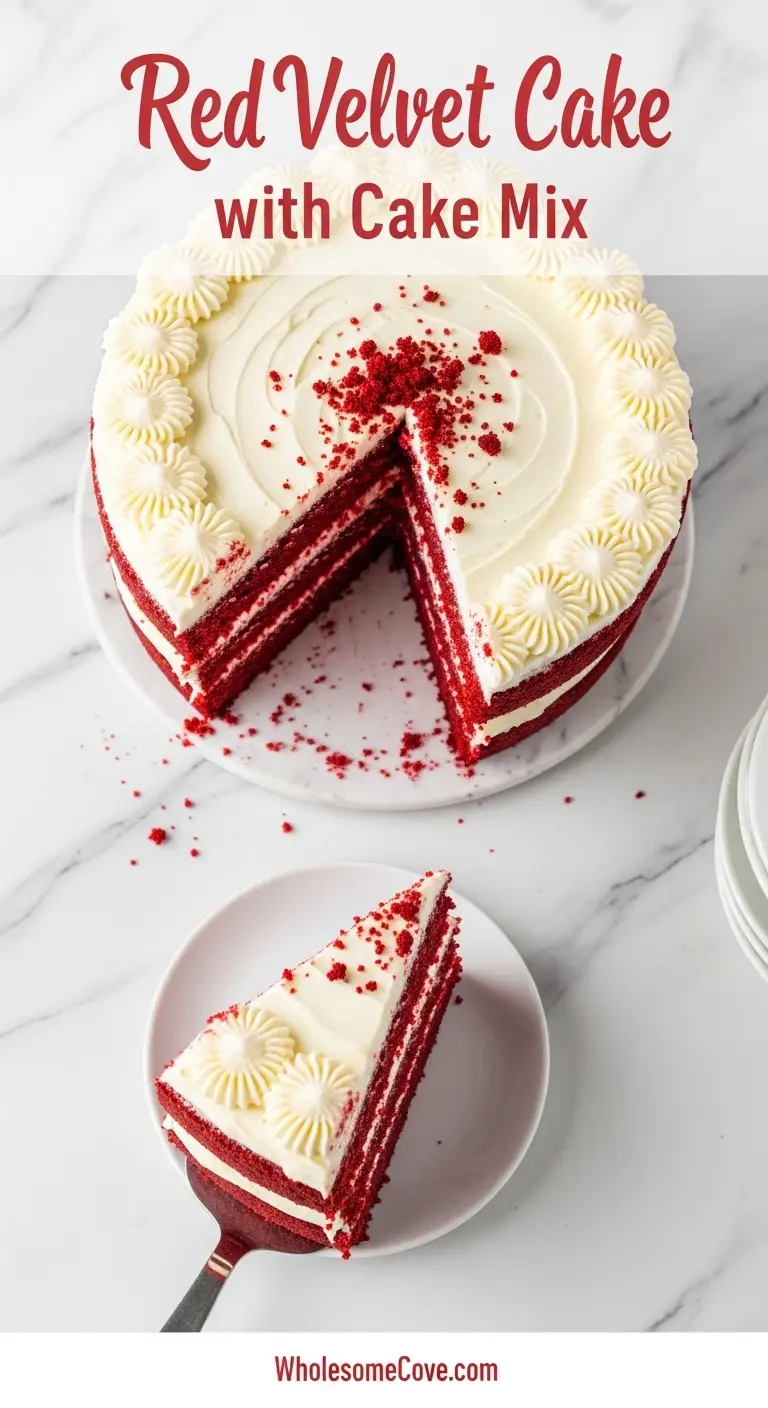
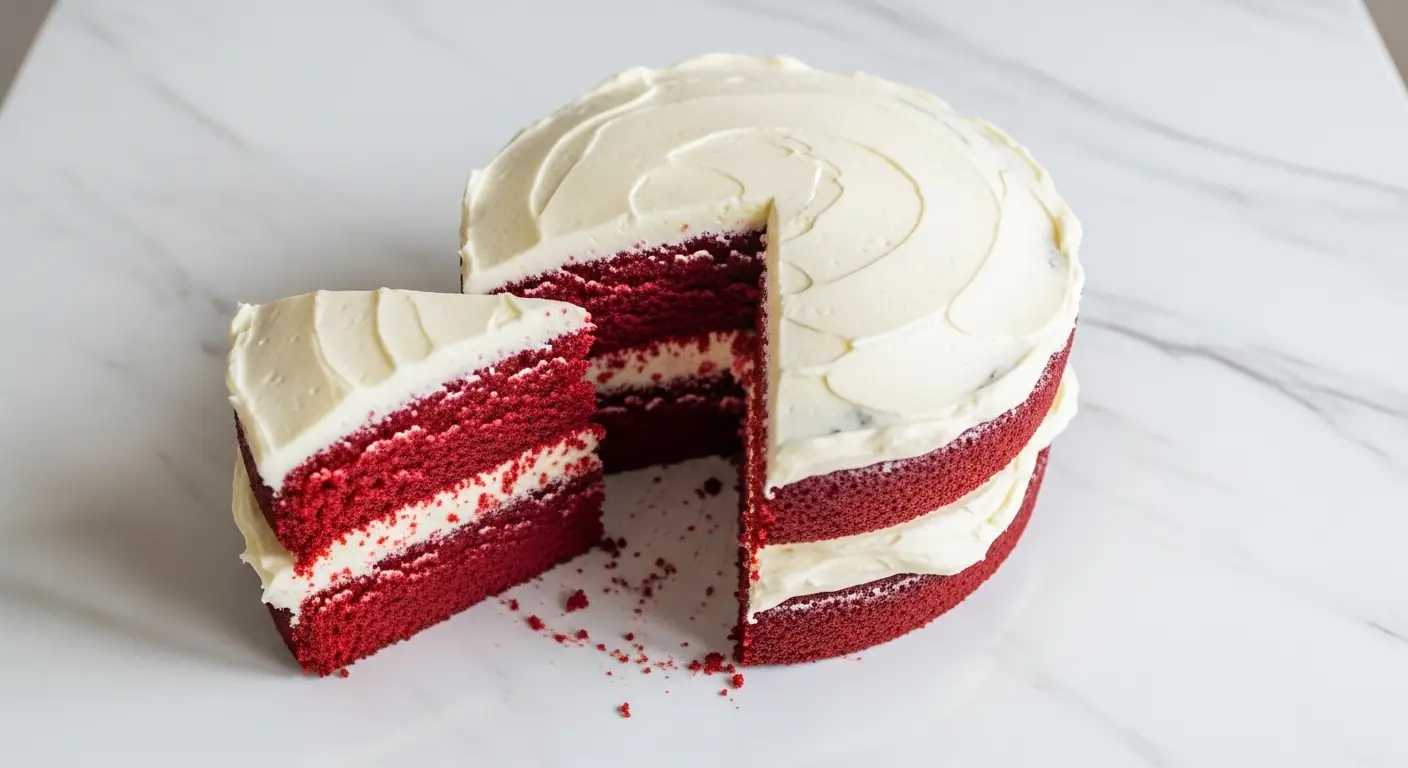
Making a Red Velvet Cake Recipe with Cake Mix transformed my baking life. I used to spend hours mixing from scratch, but after discovering this method, I get the same rich, velvety texture and gorgeous red color in half the time. This doctored box mix delivers bakery-quality results every single time.
The first time I tried this, I was skeptical about using a box mix. I’d always been taught that from-scratch was the only way.
But my mother-in-law shared her secret: a doctored cake mix with a few key ingredients creates an incredibly moist, tender crumb that rivals any bakery cake. Now I make this for every celebration, and no one ever guesses it started with a box.
| Quick Recipe Summary | |
|---|---|
| Prep Time | 15 minutes |
| Cook Time | 30 minutes |
| Total Time | 45 minutes |
| Servings | 12 slices |
| Difficulty Level | Easy |
You might also enjoy: Red Velvet Cake Recipe
Why You’ll Love This Red Velvet Cake Recipe with Cake Mix
This recipe takes all the guesswork out of baking red velvet cake. The box mix provides the perfect base, while the added ingredients give you that signature tender crumb and rich chocolate-vanilla flavor.
- Incredibly moist: The addition of sour cream and extra eggs creates a cake that stays soft for days
- Foolproof results: Perfect texture every time without worrying about ingredient ratios
- Saves time: Ready in under an hour from start to finish
- Rich flavor: Tastes like you spent all day baking from scratch
- Beautiful color: That stunning deep red hue photographs beautifully for special occasions
- Budget-friendly: Uses affordable pantry staples and a simple box mix
Another favorite: Red Velvet Cheesecake Cake Recipe
Ingredients
Here’s everything you need to transform a basic cake mix into an extraordinary red velvet cake. Each ingredient plays a crucial role in creating that signature texture and flavor.
- 1 box (15.25 oz/432g) red velvet cake mix (Duncan Hines or Betty Crocker)
- 1 package (3.4 oz/96g) instant chocolate pudding mix
- 4 large eggs, room temperature
- 1 cup (240ml) whole milk
- 1 cup (240g) sour cream
- 1/2 cup (120ml) vegetable oil
- 2 tablespoons (30ml) vanilla extract
- 1 tablespoon (15ml) white vinegar
- 1-2 tablespoons red food coloring (optional, for deeper color)
For the Cream Cheese Frosting:
- 16 oz (454g) cream cheese, softened
- 1 cup (226g) unsalted butter, softened
- 6 cups (720g) powdered sugar
- 2 teaspoons vanilla extract
- 1/4 teaspoon salt
For a different take: Blue Velvet Cake Recipe
Kitchen Equipment Needed
Having the right tools makes this recipe even easier. Here are the essentials I reach for every time I make this cake.
- Two 9-inch round cake pans
- Stand mixer or electric hand mixer
- Large mixing bowls
- Rubber spatula
- Wire cooling racks
- Cake leveler or serrated knife
- Offset spatula for frosting
- Parchment paper
- Measuring cups and spoons
- Toothpicks for testing doneness
Read Also: Black Velvet Cake Recipe
Recommended Products for This Recipe
After making this cake countless times, I’ve discovered a few products that genuinely make a difference in the final result.
1. Duncan Hines Red Velvet Cake Mix
This brand consistently produces the best color and flavor. The mix has just the right amount of cocoa and creates a tender crumb that holds up beautifully for layer cakes.
2. Wilton Cake Pans Professional Set
These heavyweight pans distribute heat evenly, preventing burnt edges and ensuring your layers bake perfectly flat. I’ve used mine for years and they still look brand new.
3. Philadelphia Cream Cheese
For the frosting, Philadelphia brand makes all the difference. It’s consistently smooth without any graininess, and it holds its shape beautifully for decorating.
4. Ateco Offset Spatula Set
These professional-grade spatulas make frosting a breeze. The angled design gives you perfect control for smooth sides and crisp edges.
You might also enjoy: Coffee Cake Recipe Using Cake Mix
Step-by-Step Instructions: How to Make Red Velvet Cake with Cake Mix
Follow these detailed steps for perfect results every time. I’ve included all the tips I’ve learned from making this cake dozens of times.
1. Prepare Your Pans and Preheat Oven
- Preheat your oven to 325°F (163°C).
- Generously spray two 9-inch round cake pans with baking spray (the kind with flour in it).
- Cut circles of parchment paper to fit the bottom of each pan.
- Press the parchment into the greased pans and spray the top of the parchment too.
- This double-layer of protection ensures your cakes release perfectly every time.
2. Mix the Dry Ingredients
- In a large mixing bowl, combine the red velvet cake mix and instant chocolate pudding mix.
- Whisk these together thoroughly to break up any lumps.
- The pudding mix is the secret ingredient that adds incredible moisture and a richer chocolate flavor.
- Set this bowl aside while you prepare the wet ingredients.
3. Combine the Wet Ingredients
- In another large bowl or the bowl of your stand mixer, add the eggs.
- Pour in the whole milk, sour cream, vegetable oil, and vanilla extract.
- Add the white vinegar (this reacts with the cocoa to enhance the red color).
- If your cake mix doesn’t produce a deep enough red color, add 1-2 tablespoons of red food coloring now.
- Use the paddle attachment on low speed to combine these ingredients for about 30 seconds until just mixed.
4. Combine Wet and Dry Ingredients
- Add the dry cake mix and pudding mixture to the wet ingredients.
- Mix on low speed for about 30 seconds to bring everything together.
- Scrape down the sides and bottom of the bowl with your rubber spatula.
- Increase speed to medium and beat for exactly 2 minutes.
- The batter should be smooth and well-combined, but don’t overmix or your cake will be tough.
- The batter will be thinner than a typical cake batter, which is exactly what you want.
5. Pour and Bake
- Divide the batter evenly between your two prepared pans.
- I like to use a kitchen scale to ensure each pan has the same amount for even layers.
- Tap the pans gently on the counter a few times to release any air bubbles.
- Place the pans on the middle rack of your preheated oven.
- Bake for 28-32 minutes, until a toothpick inserted in the center comes out with just a few moist crumbs.
- The cakes should spring back lightly when touched in the center.
- Don’t overbake or the cake will be dry.
6. Cool the Cakes
- Remove the pans from the oven and place them on wire cooling racks.
- Let the cakes cool in the pans for exactly 15 minutes.
- Run a thin knife around the edges of each pan.
- Place a wire rack on top of one pan, then flip it over confidently.
- Gently lift off the pan and peel away the parchment paper.
- Flip the cake right-side up onto another cooling rack.
- Repeat with the second cake.
- Allow the cakes to cool completely before frosting, at least 1 hour.
7. Make the Cream Cheese Frosting
- In the bowl of your stand mixer fitted with the paddle attachment, beat the softened cream cheese and butter together on medium speed.
- Beat for 3-4 minutes until the mixture is light, fluffy, and completely smooth with no lumps.
- Stop and scrape down the bowl.
- Add the vanilla extract and salt.
- With the mixer on low speed, gradually add the powdered sugar, one cup at a time.
- Once all the sugar is incorporated, increase to medium-high speed.
- Beat for 2-3 minutes until the frosting is fluffy and spreadable.
- If the frosting seems too thick, add 1-2 tablespoons of heavy cream.
- If it’s too thin, add more powdered sugar 1/4 cup at a time.
8. Level the Cakes
- Place one cake layer on your work surface.
- Using a cake leveler or a long serrated knife, carefully slice off any domed top to create a flat surface.
- Repeat with the second layer.
- These scraps are the baker’s treat (you’ve earned them!).
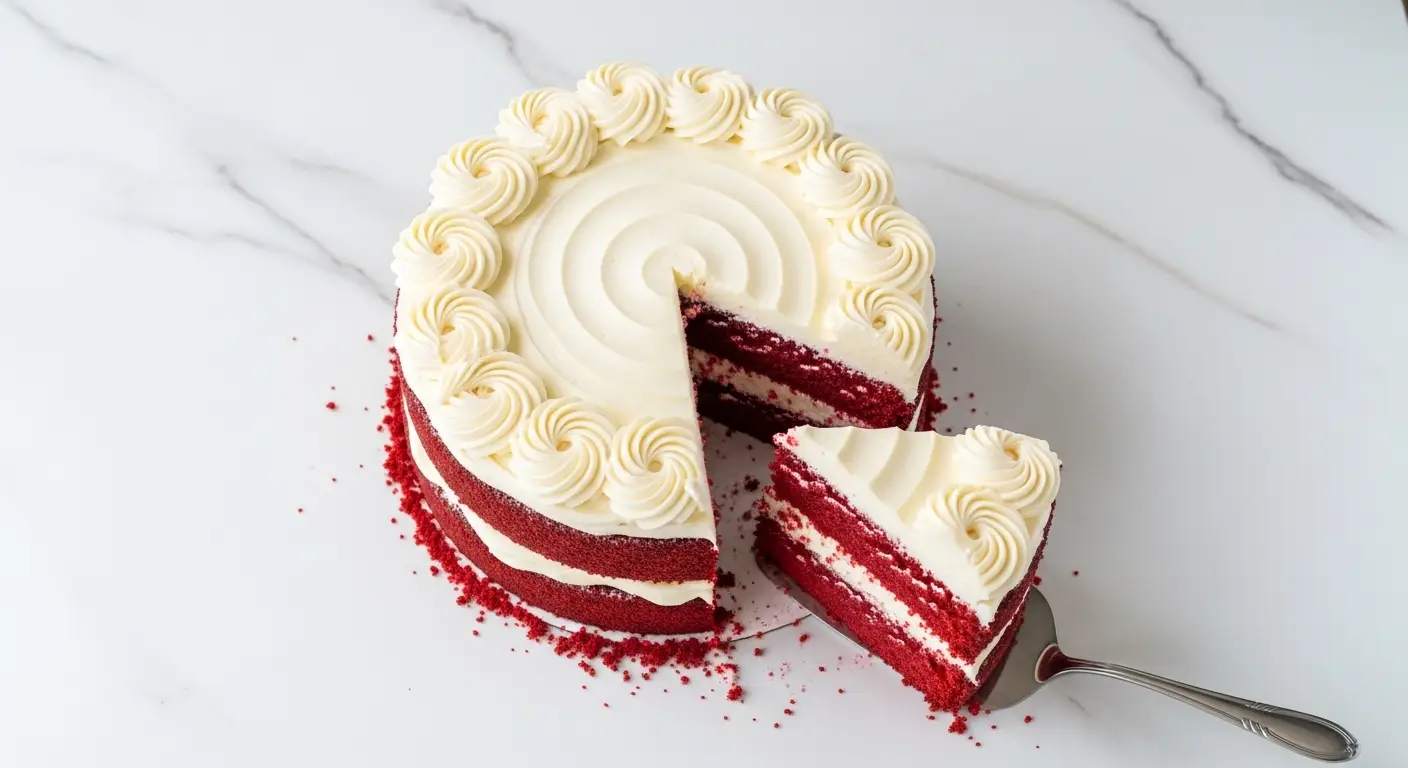
9. Assemble and Frost the Cake
- Place your first cake layer on a cake stand or serving plate.
- Put strips of parchment paper under the edges to keep the plate clean.
- Scoop about 1 1/2 cups of frosting onto the center of the first layer.
- Use your offset spatula to spread it evenly to the edges, creating a layer about 1/2-inch thick.
- Carefully place the second cake layer on top, flat side up.
- Press down gently to secure.
- Apply a thin layer of frosting all over the cake (this is your crumb coat).
- Refrigerate for 30 minutes to set the crumb coat.
- Remove from the fridge and apply the remaining frosting, working from top to sides.
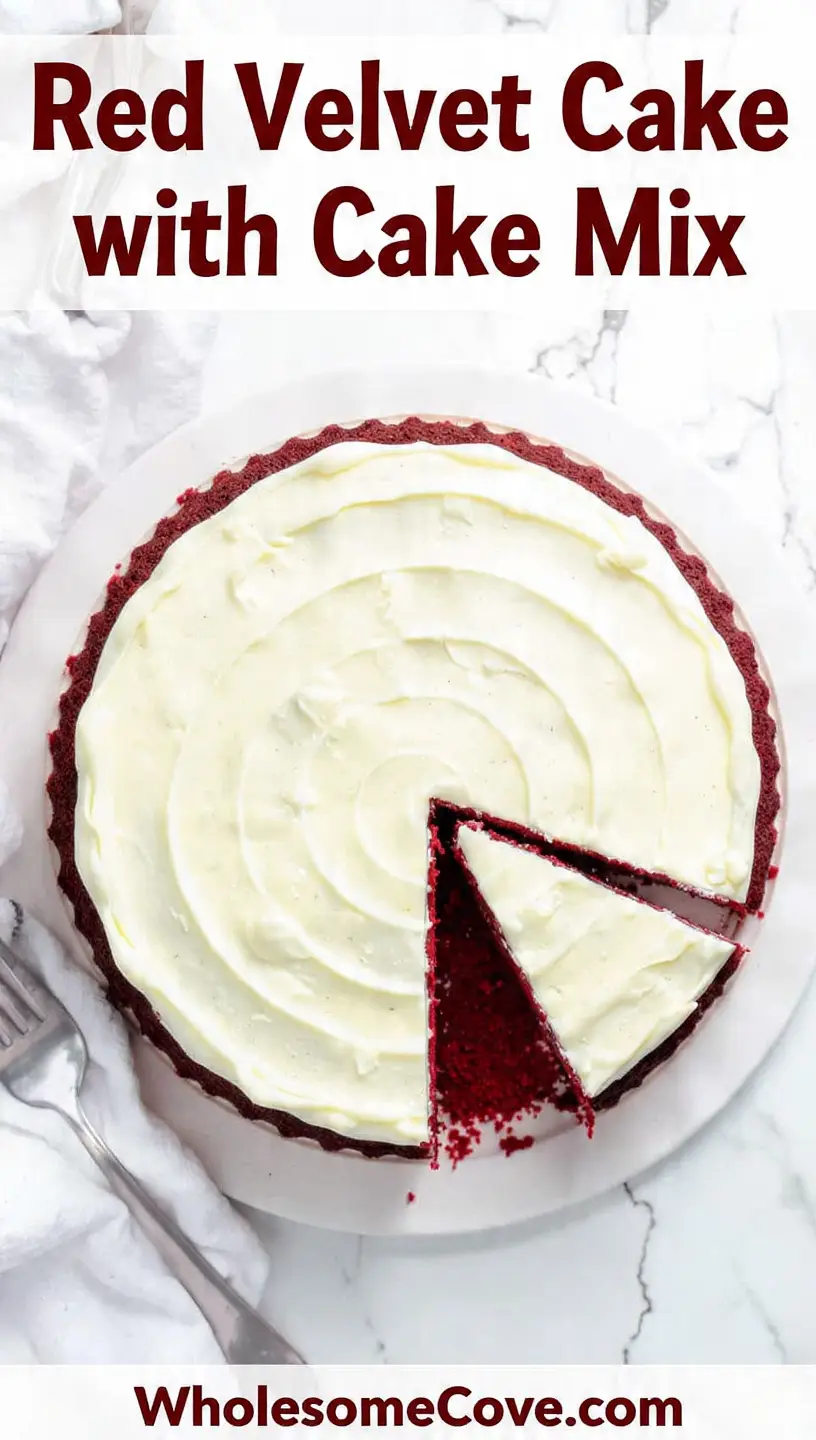
- Use the offset spatula to create smooth sides or a textured finish as desired.
- Remove the parchment paper strips carefully.
Read Also: Easy Carrot Cake Recipe with Cake Mix
Tips for The Best Red Velvet Cake with Cake Mix
These tips come from years of trial and error. Follow them for bakery-quality results every single time.
- Room temperature ingredients: Let your eggs, milk, and sour cream sit out for 30 minutes before mixing. This helps everything combine smoothly and creates a more tender crumb.
- Don’t skip the pudding mix: This is what transforms the cake mix from good to extraordinary. It adds moisture and intensifies the chocolate flavor.
- Measure sour cream correctly: Pack it firmly into your measuring cup and level it off. Too little and your cake will be dry.
- Use gel food coloring: If you need to add extra color, gel food coloring is more concentrated than liquid and won’t affect the batter’s consistency.
- Test for doneness carefully: Start checking at 28 minutes. The toothpick should come out with a few moist crumbs, not completely clean, or your cake will be overbaked.
- Cool completely before frosting: If the cake is even slightly warm, your frosting will melt and slide off. Patience pays off here.
- Chill between coats: That 30-minute crumb coat chill makes all the difference in achieving smooth, professional-looking sides.
- Beat the frosting thoroughly: Take the full 3-4 minutes to beat the cream cheese and butter. This creates that silky, smooth texture that spreads beautifully.
- Use fresh cream cheese: Check the expiration date. Old cream cheese can have a grainy texture that won’t smooth out no matter how much you beat it.
- Trim the layers level: Even if they look flat, leveling ensures a stable, professional-looking cake that won’t lean.
For a different take: Fruit Cocktail Cake Recipe
What to Serve with Red Velvet Cake with Cake Mix
This stunning cake deserves equally impressive accompaniments. Here are my favorite pairings that complement the rich, tangy flavors.
Red velvet cake is rich and sweet, so it pairs beautifully with beverages and sides that offer contrast or complement its flavors.
- Hot Chocolate for a cozy dessert experience
- Freshly brewed coffee to cut through the sweetness
- Eggnog during the holiday season
- Fresh raspberries scattered around the plate for tartness
- Vanilla ice cream for a classic combination
- Whipped cream with a hint of vanilla
- Creme Brulee for an elegant dessert spread
- Champagne or sparkling wine for celebrations
- Sweet tea for a Southern-style presentation
- Fresh mint leaves as a garnish
Another favorite: Pumpkin Cheesecake Recipe
Variations of Red Velvet Cake with Cake Mix
Once you master the basic recipe, these variations let you customize this cake for different occasions and preferences.
- Red Velvet Cupcakes: Divide the batter among 24 lined muffin cups and bake at 350°F (177°C) for 18-22 minutes.
- Red Velvet Bundt Cake: Pour all the batter into a greased bundt pan and bake at 325°F (163°C) for 45-55 minutes.
- Red Velvet Sheet Cake: Use a 9×13-inch pan and bake for 30-35 minutes for easy serving at potlucks.
- Extra Chocolate Version: Add 2 tablespoons of cocoa powder to the dry ingredients for a deeper chocolate flavor.
- Buttermilk Variation: Replace the sour cream with buttermilk for a tangier flavor profile.
- Cream Cheese Swirl: Reserve 1/2 cup of batter, mix with 4 oz softened cream cheese and 1/4 cup sugar, then swirl into the pans before baking.
- Red Velvet Brownies: Pour the batter into a 9×13 pan and underbake slightly for fudgy brownies.
- Mini Layer Cakes: Use 6-inch pans to create adorable individual cakes.
- White Chocolate Chips: Fold 1 cup of white chocolate chips into the batter before baking.
- Coconut Red Velvet: Add 1 cup of sweetened shredded coconut to the batter and sprinkle more on the frosting.
You might also enjoy: Amish Apple Cake Recipe
Storage and Reheating
Proper storage keeps this cake fresh and delicious for days. Here’s exactly how to store and serve it at its best.
At Room Temperature:
- Keep the frosted cake covered with a cake dome or large bowl.
- Store for up to 2 days in a cool room (below 70°F/21°C).
- The cream cheese frosting can start to soften in warm temperatures.
In the Refrigerator:
- Place the cake in an airtight container or cover tightly with plastic wrap.
- Store for up to 5 days.
- Bring slices to room temperature 30 minutes before serving for the best flavor and texture.
- The frosting may firm up in the fridge, but it will soften as it warms.
In the Freezer:
- Wrap individual slices or the whole cake tightly in plastic wrap, then in aluminum foil.
- Freeze for up to 3 months.
- For best results, freeze the cake layers unfrosted and add frosting after thawing.
- Thaw in the refrigerator overnight, then bring to room temperature before serving.
- Frozen cake actually slices more cleanly than fresh cake, making it perfect for neat presentation.
Reheating Tips:
- This cake is best served at room temperature, not warm.
- If you prefer a slightly warm cake, microwave individual slices for 10-15 seconds.
- Don’t reheat frosted cake in the oven as the cream cheese frosting will melt.
Read Also: Healthy Carrot Cake Recipe
Nutritional Facts
Here’s the nutritional breakdown per slice (1/12 of cake) based on the recipe as written.
Per Slice:
- Calories: 520
- Total Fat: 26g
- Saturated Fat: 13g
- Cholesterol: 110mg
- Sodium: 380mg
- Total Carbohydrates: 68g
- Dietary Fiber: 1g
- Sugars: 52g
- Protein: 5g
Note: Nutritional values are approximate and will vary based on specific brands and any modifications you make to the recipe. These calculations include the cream cheese frosting.
For a lighter option: Healthy Chocolate Chip Cookies Recipe
Health Benefits of Key Ingredients
While this is definitely an indulgent dessert, some of the ingredients do offer nutritional value. Here’s what’s working in your favor.
- Eggs: Provide high-quality protein, vitamins A, D, E, and B12, plus essential amino acids that support muscle health and brain function.
- Sour Cream: Contains probiotics that support digestive health, along with calcium for bone strength and vitamin K2.
- Milk: Excellent source of calcium, vitamin D, and protein for bone health and muscle maintenance.
- Cocoa Powder: Rich in antioxidants called flavonoids that may support heart health and reduce inflammation.
- Cream Cheese: Provides vitamin A for eye health, calcium for bones, and conjugated linoleic acid which may have health benefits.
- Vanilla Extract: Contains small amounts of antioxidants and has been shown to have calming properties.
- Eggs: The choline in eggs supports brain health and liver function.
Another favorite: Pumpkin Roll Recipe
FAQs About Red Velvet Cake with Cake Mix
1. Can I make this cake without the pudding mix?
Yes, you can omit the pudding mix, though your cake won’t be quite as moist and rich. If you skip it, reduce the milk to 3/4 cup (180ml) to maintain the right batter consistency.
The pudding mix really does make a noticeable difference in texture.
2. Why is my red velvet cake turning out brown instead of red?
This usually happens when there’s too much cocoa powder or when the baking temperature is too high. Make sure your oven temperature is accurate (use an oven thermometer).
If your cake mix doesn’t produce a vibrant red color, add 1-2 tablespoons of gel food coloring to boost the color. Some brands naturally produce a deeper red than others.
3. Can I use buttermilk instead of sour cream?
Absolutely! Buttermilk is a traditional ingredient in red velvet cake.
Replace the sour cream with an equal amount (1 cup/240ml) of buttermilk. The cake will have a slightly tangier flavor and a marginally less dense texture, but it will still be delicious.
4. How do I know when my cake is done baking?
The best test is inserting a toothpick into the center of the cake. It should come out with just a few moist crumbs attached, not wet batter, but not completely clean either.
The cake should also spring back lightly when you touch the center. Start checking at 28 minutes to avoid overbaking.
5. Can I make this cake ahead of time?
Yes, this cake is actually perfect for making ahead! Bake the layers up to 2 days in advance, wrap them tightly in plastic wrap, and store at room temperature.
You can also freeze unfrosted layers for up to 3 months. Frost the cake the day you plan to serve it for the freshest appearance and best texture.
You might also enjoy: Eggnog Cake Recipe
Red Velvet Cake with Cake Mix
Ingredients
- 1 box red velvet cake mix - 15.25 oz or 432g, Duncan Hines or Betty Crocker
- 1 package instant chocolate pudding mix - 3.4 oz or 96g
- 4 large eggs - room temperature
- 1 cup whole milk - 240ml
- 1 cup sour cream - 240g
- 1/2 cup vegetable oil - 120ml
- 2 tablespoons vanilla extract - 30ml
- 1 tablespoon white vinegar - 15ml
- 1-2 tablespoons red food coloring - optional, for deeper color
- 16 oz cream cheese - 454g, softened
- 1 cup unsalted butter - 226g, softened
- 6 cups powdered sugar - 720g
- 2 teaspoons vanilla extract - 10ml
- 1/4 teaspoon salt
Equipment
- Two 9-inch round cake pans
- Stand mixer or electric hand mixer
- Large mixing bowls
- Rubber spatula
- Wire cooling racks
- Offset spatula - For frosting
- Parchment paper
- Cake leveler or serrated knife
- Measuring cups and spoons
- Toothpicks - For testing doneness
Method
- Preheat oven to 325°F (163°C). Spray two 9-inch round cake pans with baking spray, line with parchment paper, and spray again.
- In a large bowl, whisk together the red velvet cake mix and instant chocolate pudding mix until well combined.
- In another bowl or stand mixer, combine eggs, milk, sour cream, oil, vanilla extract, white vinegar, and food coloring (if using). Mix on low speed for 30 seconds.
- Add dry mixture to wet ingredients. Mix on low for 30 seconds, scrape bowl, then beat on medium for 2 minutes until smooth.
- Divide batter evenly between prepared pans. Bake for 28-32 minutes until a toothpick inserted in center comes out with moist crumbs.
- Cool cakes in pans for 15 minutes on wire racks, then invert onto racks, remove parchment, and cool completely (about 1 hour).
- Beat cream cheese and butter on medium speed for 3-4 minutes until fluffy. Add vanilla and salt, then gradually add powdered sugar. Beat on medium-high for 2-3 minutes.
- Level cake layers with a cake leveler or serrated knife to remove any domed tops.
- Place first layer on serving plate, spread 1½ cups frosting on top. Add second layer, apply thin crumb coat, refrigerate 30 minutes, then frost with remaining frosting.
Nutrition
Notes
- Let eggs, milk, and sour cream come to room temperature for 30 minutes before mixing for best results.
- The instant pudding mix is essential for creating the signature moist texture – don’t skip it.
- Use gel food coloring if you need extra color, as it won’t thin the batter like liquid coloring.
- Don’t overbake – the toothpick should have a few moist crumbs, not come out completely clean.
- Cakes must be completely cool before frosting or the cream cheese frosting will melt.
- The 30-minute crumb coat chill makes a huge difference in achieving smooth, professional sides.
- Store frosted cake covered at room temperature for up to 2 days, or refrigerate for up to 5 days.
- Unfrosted cake layers can be frozen for up to 3 months – wrap tightly in plastic wrap then foil.
- For cupcakes, divide batter among 24 lined muffin cups and bake at 350°F for 18-22 minutes.
- Replace sour cream with buttermilk for a tangier flavor profile.
Private Notes
Tried this recipe?
Let us know how it was!Final Thoughts
This Red Velvet Cake Recipe with Cake Mix has become my go-to for every special occasion. The doctored box mix method gives you that from-scratch taste and texture without the hassle of measuring ten different ingredients.
The combination of the pudding mix, sour cream, and extra eggs creates a cake that’s impossibly moist and tender with that signature red velvet flavor everyone loves. Whether you’re celebrating a birthday, Valentine’s Day, Christmas, or just craving something special, this cake never disappoints.
Give this recipe a try and I promise you’ll never go back to plain box mix again. Tag me in your photos when you make it, I love seeing your beautiful creations!
Recommended:
- Cannoli Poke Cake Recipe
- Mastros Butter Cake Recipe
- Icebox Fruitcake Recipe
- Chocolate Chip Cookies Recipe
- Creme Brulee Cheesecake Recipe
- No Bake Cookies Recipe
- Peanut Butter Cookies Recipe
- Oatmeal Cookies Recipe
- Are You Kidding Me Cake Recipe
