
I’m going to be honest with you: my first attempt at making this Chicken Parmesan Recipe was a complete disaster. The breading fell off in sad, soggy clumps, the cheese refused to melt properly, and the chicken somehow managed to be both burnt on the outside and undercooked in the middle.
But that kitchen catastrophe taught me everything I needed to know about getting it right. After dozens of trials (and a lot of taste-testing from very patient family members), I finally cracked the code to crispy, golden chicken cutlets topped with bubbling marinara and melted cheese that stretches for days.
Now this Chicken Parmesan Recipe is my go-to for impressing dinner guests or treating my family to something special on a regular weeknight. The secret isn’t some fancy technique or hard-to-find ingredient—it’s all about understanding a few key steps that make all the difference.
| Quick Recipe Summary | |
|---|---|
| Prep Time | 20 minutes |
| Cook Time | 25 minutes |
| Total Time | 45 minutes |
| Servings | 4 servings |
| Difficulty Level | Intermediate |
If you’re looking for more Italian comfort food, try my Lasagna Recipe for another family favorite.
Why You’ll Love This Chicken Parmesan Recipe
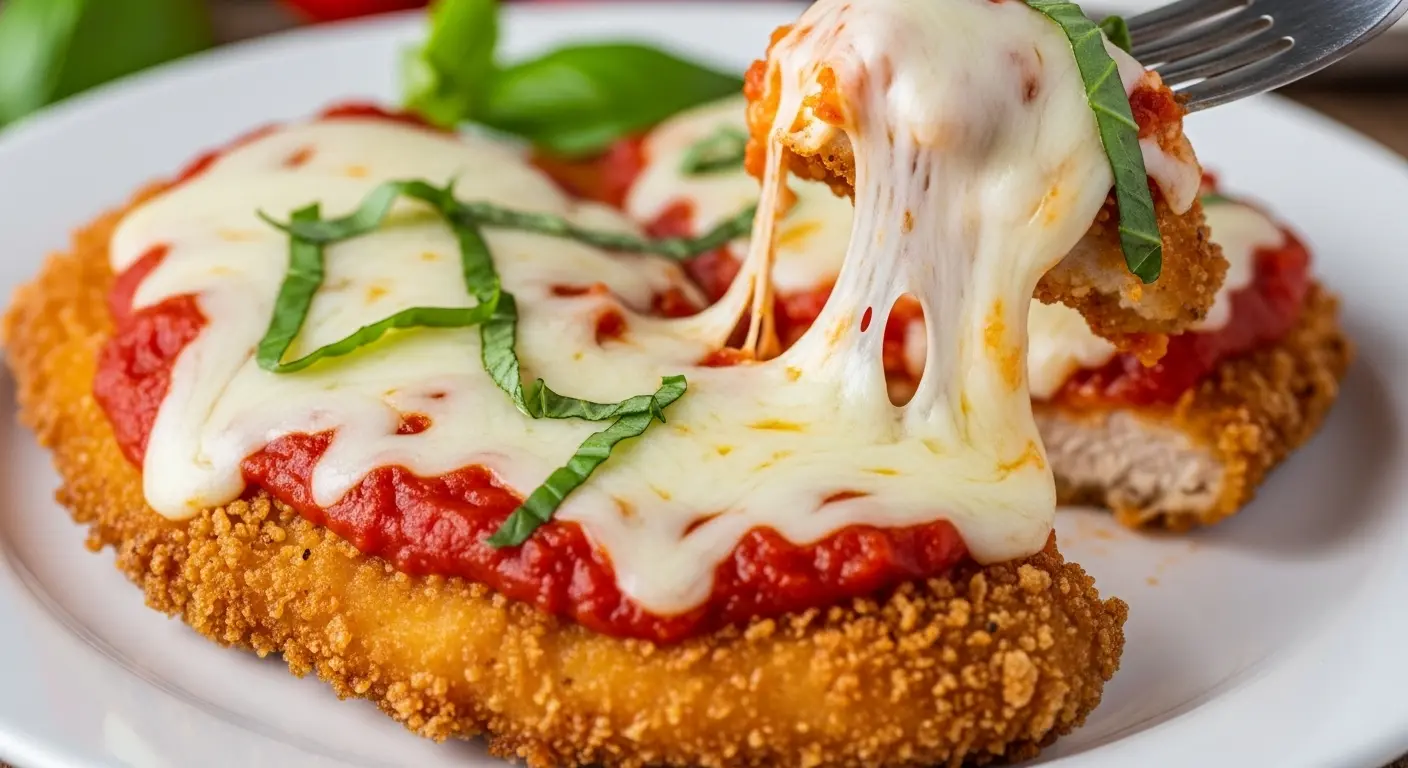
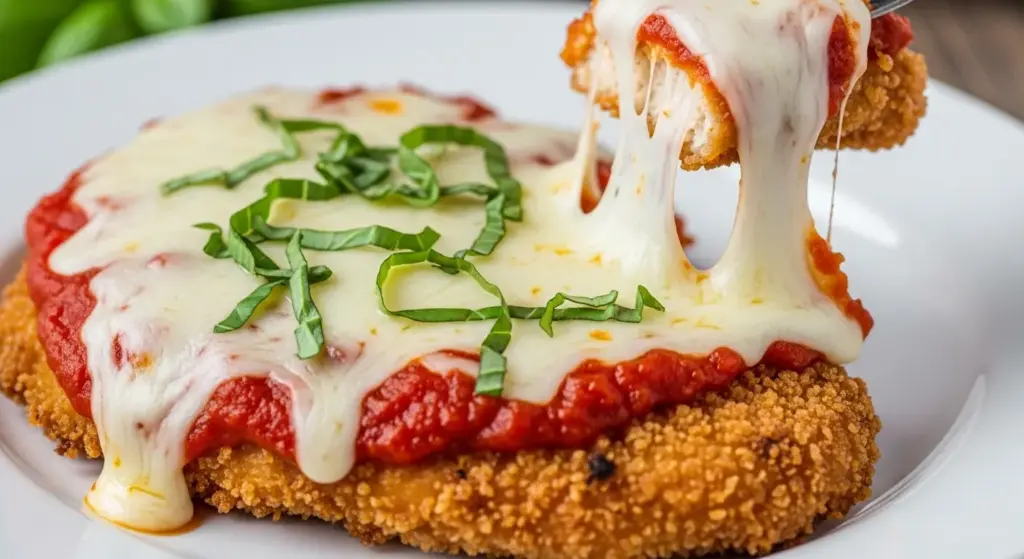
This isn’t your average frozen chicken patty situation. This is the real deal—tender chicken breast pounded thin, coated in a perfectly seasoned breading that stays crispy even under all that sauce and cheese.
The beauty of this recipe is that it’s completely customizable to your taste. Want extra cheese? Go for it. Prefer a thicker marinara layer? Load it on. Need to make it ahead for a dinner party? It reheats beautifully.
Here’s what makes this version stand out:
- Stays crispy: The double-coating technique and quick pan-fry ensure the breading doesn’t get soggy
- Restaurant-quality results: That golden-brown crust and gooey cheese pull rivals anything you’d pay $20 for at an Italian restaurant
- Adaptable protein: Works beautifully with chicken, but you can also use this method for veal, pork, or even eggplant
- Make-ahead friendly: Prep the breaded cutlets in advance and freeze them for quick weeknight dinners
- Budget-friendly: Costs a fraction of dining out but tastes just as impressive
- Crowd-pleaser: I’ve never met anyone who doesn’t love this dish—it’s perfect for picky eaters and food lovers alike
Ingredients
Getting the right ingredients makes all the difference in this recipe. I learned the hard way that not all breadcrumbs are created equal—Italian-seasoned panko gives you that extra-crispy texture that regular breadcrumbs just can’t match.
For the Chicken:
- 4 boneless, skinless chicken breasts (about 1.5-2 lbs / 680-900g total)
- 1 cup (120g) all-purpose flour
- 2 large eggs
- 2 tablespoons (30ml) milk
- 1½ cups (150g) Italian-seasoned breadcrumbs
- ½ cup (50g) grated Parmesan cheese
- 1 teaspoon garlic powder
- 1 teaspoon dried oregano
- 1 teaspoon dried basil
- ½ teaspoon salt
- ½ teaspoon black pepper
- ½ cup (120ml) olive oil (for frying)
For the Topping:
- 2 cups (480ml) marinara sauce (homemade or your favorite jar)
- 1½ cups (170g) shredded mozzarella cheese
- ½ cup (50g) grated Parmesan cheese
- Fresh basil leaves for garnish
- Red pepper flakes (optional, for heat)
Kitchen Equipment Needed
Having the right tools makes this recipe so much easier. Trust me, I tried making this without a meat mallet once, and let’s just say the chicken was chewy enough to be a workout for my jaw.
- Meat mallet or rolling pin: Essential for pounding the chicken to an even thickness
- Three shallow bowls or dishes: For your breading station setup
- Large skillet or frying pan: A 12-inch (30cm) pan works best for frying multiple pieces
- Baking dish: 9×13 inch (23x33cm) for finishing in the oven
- Tongs: For flipping chicken safely
- Paper towels: For draining excess oil
- Meat thermometer: To ensure chicken reaches 165°F (74°C) internal temperature
- Cutting board: Preferably plastic for raw chicken
- Kitchen scissors or sharp knife: For trimming chicken if needed
- Wire cooling rack: Optional but helpful for keeping breaded chicken crispy before baking
Another favorite side dish: Roasted Brussels Sprouts with Bacon.
Recommended Products for This Recipe
After making this Chicken Parmesan Recipe countless times, I’ve found a few products that genuinely make the process easier and the results better. These aren’t just random recommendations—they’re tools and ingredients I actually use in my own kitchen.
1. San Marzano Tomatoes for Marinara
If you’re making your own sauce (which I highly recommend), San Marzano tomatoes are worth every penny. They’re sweeter and less acidic than regular canned tomatoes, which means your sauce won’t need as much sugar to balance the flavors. I switched to these a few years ago and never looked back.
2. Lodge Cast Iron Skillet
A heavy-bottomed cast iron skillet distributes heat so evenly that you won’t get those frustrating hot spots that burn one side of your chicken while leaving the other pale. Mine is at least 15 years old and still performs like new. The heat retention also means your oil temperature stays consistent even when you add cold chicken.
3. Parmigiano Reggiano
Real Parmigiano Reggiano tastes completely different from the pre-grated stuff in the green can. It’s got this nutty, complex flavor that elevates the whole dish. I buy a wedge and grate it myself—it takes an extra two minutes but makes such a noticeable difference. Plus, you can eat the leftover rinds in soup!
4. Instant-Read Meat Thermometer
This was a game-changer for me because I used to constantly overcook chicken out of paranoia. Now I can check the internal temperature in seconds and pull the chicken right when it hits 165°F (74°C). No more dry, rubbery cutlets. It’s also useful for a million other recipes.
5. Norpro Grip-EZ Meat Pounder
If you don’t have a good meat mallet, you need one. This dual-sided pounder has both a flat side for evening out thickness and a textured side for tenderizing. The grip is comfortable even when you’re pounding away at stubborn thick chicken breasts. My old wooden mallet gave me blisters—this one doesn’t.
Step-by-Step Instructions: How to Make Chicken Parmesan
The key to perfect Chicken Parmesan is taking your time with each step. Rushing through the breading process was my biggest mistake early on—now I treat it like a meditation and the results are consistently excellent.
1. Prepare the Chicken Breasts
- Place one chicken breast on a cutting board and cover it with plastic wrap or parchment paper to prevent splattering
- Using a meat mallet or rolling pin, pound the chicken from the center outward until it’s an even ½-inch (1.25cm) thickness throughout—this ensures even cooking
- Pay special attention to the thick end of the breast, which often needs more pounding than the tapered end
- Repeat with remaining chicken breasts, making sure each piece is uniform in thickness
- Pat the chicken completely dry with paper towels—any moisture will prevent the breading from sticking properly
- Season both sides of each chicken breast lightly with salt and pepper
- Let the chicken sit at room temperature for about 10 minutes while you set up your breading station (this helps it cook more evenly)
2. Set Up Your Breading Station
- Place the flour in the first shallow bowl or dish and season it with a pinch of salt and pepper
- In the second bowl, whisk together the eggs and milk until completely combined with no streaks—this egg wash helps the breading adhere
- In the third bowl, combine the breadcrumbs, Parmesan cheese, garlic powder, oregano, basil, salt, and pepper, mixing thoroughly with a fork
- Make sure the breadcrumb mixture is well-distributed so every piece gets the same seasoning
- Line up your three bowls in order: flour, egg wash, breadcrumb mixture
- Place a wire rack over a baking sheet next to your breading station to hold the breaded chicken (or use a clean plate)
- Keep one hand designated for dry ingredients and one for wet to prevent clumpy “club fingers”
3. Bread the Chicken
- Take one chicken breast and dredge it completely in the flour, shaking off any excess—the flour creates a dry surface for the egg to cling to
- Dip the floured chicken into the egg wash, letting any excess drip back into the bowl
- Press the chicken firmly into the breadcrumb mixture, making sure to coat it completely and pressing the crumbs into the meat so they adhere well
- Flip and repeat on the other side, adding more breadcrumb mixture to bare spots if needed
- Place the breaded chicken on your wire rack or plate and repeat with remaining chicken breasts
- Let the breaded chicken rest for 5-10 minutes before cooking—this helps the coating set and reduces the chance of it falling off during cooking
- If you have time, refrigerate the breaded chicken for 30 minutes uncovered for an even better coating
You might also love this Marinara Sauce Recipe for a homemade touch.
4. Pan-Fry the Chicken
- Heat the olive oil in your large skillet over medium-high heat until it shimmers—you want it hot enough that a breadcrumb sizzles immediately when dropped in
- Carefully place 2 chicken breasts in the hot oil, making sure not to overcrowd the pan (work in batches if needed)
- Cook for 3-4 minutes without moving the chicken—resist the urge to flip too early or you’ll tear off the breading
- You should see golden-brown color creeping up the sides of the chicken when it’s ready to flip
- Carefully flip with tongs and cook the other side for another 3-4 minutes until golden brown and the internal temperature reaches 165°F (74°C)
- Transfer the cooked chicken to a paper towel-lined plate to drain excess oil
- Repeat with remaining chicken breasts, adding more oil to the pan if needed
- The chicken doesn’t need to be fully cooked through at this point since it will finish in the oven
5. Assemble and Bake
- Preheat your oven to 400°F (200°C) while the chicken is frying
- Spread about ½ cup of marinara sauce in the bottom of your 9×13-inch baking dish to prevent sticking
- Arrange the pan-fried chicken breasts in a single layer in the prepared baking dish
- Spoon about ½ cup of marinara sauce over each chicken breast, spreading it evenly but not drowning the crispy coating
- Sprinkle the shredded mozzarella cheese generously over each piece of chicken
- Top with the additional grated Parmesan cheese for extra flavor
- Bake for 12-15 minutes until the cheese is melted, bubbly, and starting to turn golden in spots
- If you want extra-melty cheese, turn on the broiler for the last 1-2 minutes, watching carefully to prevent burning
- Remove from the oven and let rest for 5 minutes before serving—this allows the cheese to set slightly so it doesn’t all slide off
6. Garnish and Serve
- Transfer each chicken breast to a serving plate using a spatula to keep the cheese topping intact
- Spoon some of the extra marinara sauce from the baking dish around the chicken
- Tear fresh basil leaves and scatter them over the top for a pop of color and fresh flavor
- Add a sprinkle of red pepper flakes if you like a little heat
- Serve immediately while the cheese is still gooey and the coating is at its crispiest
- Pass extra marinara sauce and grated Parmesan at the table for anyone who wants more
Tips for The Best Chicken Parmesan
These are the hard-won lessons from all my kitchen experiments. Following these tips will save you from the mistakes I made when I was learning.
- Pound it even: Uneven chicken thickness is enemy number one. The thin parts will dry out before the thick parts finish cooking, so take the time to get everything to a uniform ½-inch thickness.
- Don’t skip the resting time: Letting the breaded chicken rest before frying gives the coating time to adhere. It’s the difference between breading that stays put and breading that floats away in the pan.
- Use enough oil: Skimping on oil leads to uneven browning and breading that sticks to the pan. You need about ¼ inch of oil in the pan for proper frying.
- Check your oil temperature: If the oil isn’t hot enough, the breading will absorb oil and get soggy instead of crispy. Test it by dropping in a breadcrumb—it should sizzle immediately.
- Don’t overcrowd the pan: Cook chicken in batches if needed. Overcrowding lowers the oil temperature and creates steam, which makes everything soggy.
- Flip only once: Moving the chicken around prevents a good crust from forming. Let it cook undisturbed until it’s golden, then flip just once.
- Use quality mozzarella: Pre-shredded cheese is coated with anti-caking agents that prevent good melting. Shred a block of mozzarella yourself for that perfect cheese pull.
- Don’t drown in sauce: Too much marinara will make the breading soggy. Use just enough to get good tomato flavor without compromising the crispy texture.
- Fresh is best: Freshly grated Parmesan and torn basil make a noticeable difference. The pre-grated and dried versions just don’t have the same impact.
- Let it rest: Cutting into the chicken immediately after cooking releases all the juices. Give it 5 minutes to rest and you’ll have juicier meat.
- Save your oil: If you plan to make this regularly, strain the cooled frying oil through a coffee filter and store it in the fridge for next time.
- Make extra: Breaded chicken freezes beautifully. Make a double batch and freeze the extras uncooked for an even faster meal next time.
For a lighter side, consider my Grilled Vegetable Skewers.
Serving Suggestions
This Chicken Parmesan is filling on its own, but I love pairing it with sides that complement all that rich, cheesy goodness. The classic Italian-American steakhouse approach works perfectly here.
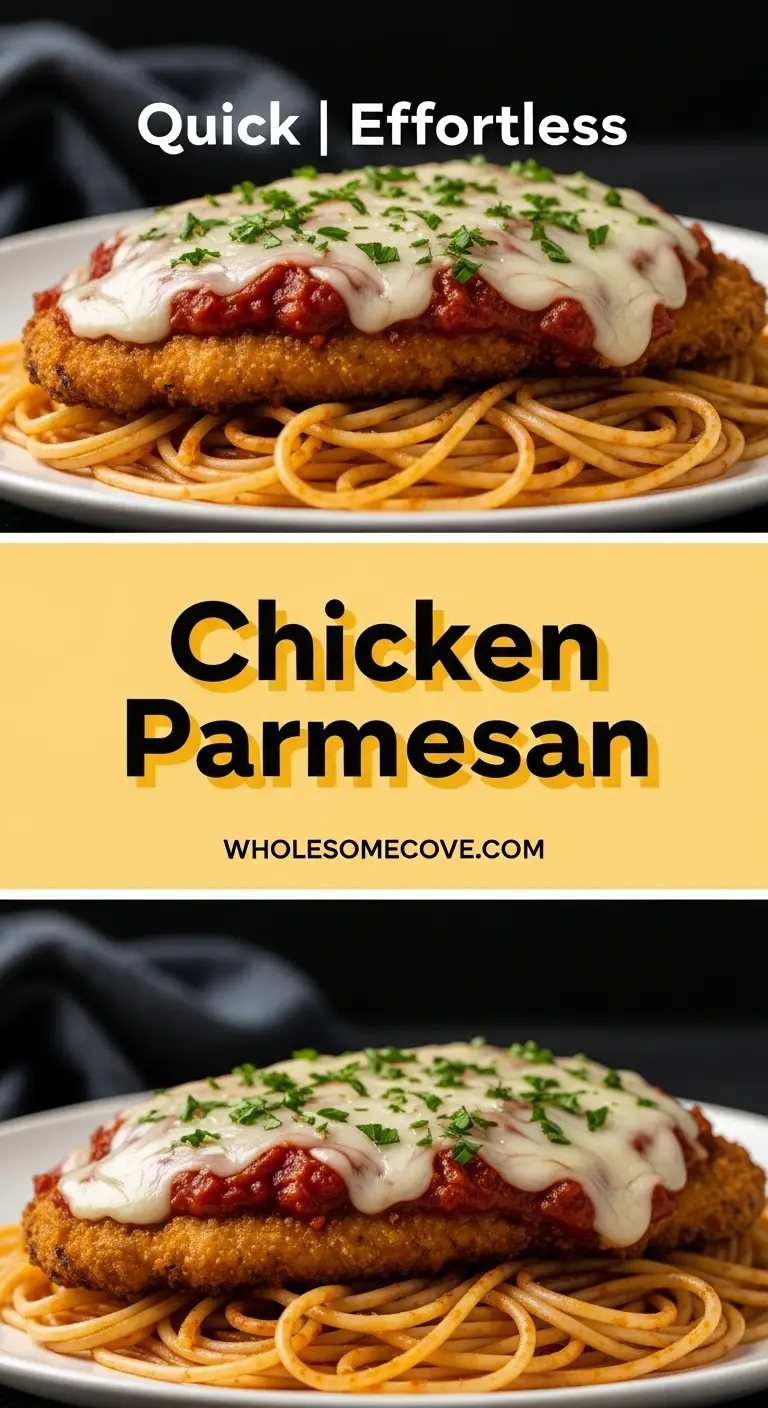
My absolute favorite way to serve this is over a bed of spaghetti or your favorite pasta, with extra marinara sauce ladled over everything. The pasta soaks up all the delicious juices from the chicken and cheese.
Other serving ideas that work beautifully:
- Simple side salad: A crisp green salad with vinaigrette cuts through the richness perfectly
- Garlic bread: Essential for sopping up every last bit of that marinara sauce
- Roasted vegetables: Zucchini, bell peppers, or asparagus roasted with olive oil and garlic
- Caesar salad: The tangy dressing and crunchy romaine balance the heavy main dish
- Risotto: Creamy parmesan or mushroom risotto makes this meal extra special
- Polenta: Creamy or grilled polenta is an underrated companion that adds great texture contrast
- Caprese salad: Fresh tomatoes, mozzarella, and basil echo the flavors in the main dish
- Steamed broccoli: Simple and classic, plus it adds some green to the plate
- Crusty Italian bread: For making little sandwich bites with leftover chicken
Variations of Chicken Parmesan
Once you’ve mastered the basic technique, it’s fun to experiment with different flavors and approaches. I’ve tried all of these variations with great success.
- Eggplant Parmesan: Substitute sliced eggplant for the chicken, salting and draining the eggplant first to remove excess moisture and bitterness
- Veal Parmesan: Use thin veal cutlets instead of chicken for the traditional Italian-American version (though it’s pricier)
- Pork Parmesan: Thin pork cutlets work wonderfully with this same method and cooking time
- Turkey Parmesan: Turkey cutlets are a leaner option that still deliver great flavor
- Baked version: Skip the pan-frying entirely and bake breaded chicken on a wire rack at 425°F for 20-25 minutes, then add sauce and cheese for the last 10 minutes (less crispy but much easier)
- Air fryer method: Spray breaded chicken with oil and air fry at 400°F for 10-12 minutes, flipping halfway, then add toppings and cook 2-3 more minutes
- Spicy version: Add cayenne pepper to your breadcrumb mixture and use spicy arrabbiata sauce instead of marinara
- Gluten-free: Replace flour with gluten-free flour blend and breadcrumbs with gluten-free panko or crushed gluten-free crackers
- Keto-friendly: Use crushed pork rinds or almond flour instead of breadcrumbs and reduce the marinara sauce amount
- Stuffed version: Cut a pocket in thick chicken breasts, stuff with mozzarella and basil, then bread and cook as directed
- Extra herbs: Add fresh chopped parsley, thyme, or Italian seasoning to your breadcrumb mixture for more complexity
- Different cheeses: Try provolone, fontina, or a mix of Italian cheeses instead of just mozzarella for different flavor profiles
Try this with my Healthy Alfredo Sauce Recipe for a creamy twist.
Storage and Reheating
Proper storage keeps this dish delicious for days. I’ve tested every reheating method so you don’t have to.
Refrigerator Storage:
- Let the chicken cool completely before storing to prevent condensation
- Store chicken in an airtight container with paper towels between layers to absorb moisture
- Keep marinara sauce separate if possible to maintain the crispy coating
- Properly stored, cooked Chicken Parmesan lasts 3-4 days in the refrigerator
- Store any extra breaded but uncooked chicken for up to 24 hours before cooking
Freezer Storage:
- Freeze breaded but uncooked chicken breasts on a baking sheet until solid, then transfer to freezer bags
- Frozen breaded chicken keeps for up to 3 months and can go straight from freezer to pan (add 2-3 minutes to cooking time)
- You can also freeze fully cooked Chicken Parmesan, though the coating won’t be quite as crispy when reheated
- Wrap cooled, cooked chicken tightly in plastic wrap, then aluminum foil, then place in a freezer bag
- Label with the date and use within 2-3 months for best quality
Reheating Methods:
- Oven (best method): Place chicken on a wire rack over a baking sheet and reheat at 350°F for 15-20 minutes until warmed through
- Air fryer: Reheat at 350°F for 8-10 minutes for the crispiest results
- Stovetop: Heat a skillet over medium, add chicken, cover, and warm for 5-7 minutes, flipping once
- Microwave (quick but not ideal): Heat on 50% power in 30-second intervals to prevent rubbery texture, though the coating will soften
- Avoid reheating more than once as the quality deteriorates and food safety becomes a concern
Nutritional Facts
This nutritional information is approximate for one serving (one chicken breast with sauce and cheese), based on the recipe as written. Values will vary depending on specific ingredients and portion sizes used.
Per Serving:
- Calories: 520
- Total Fat: 24g
- Saturated Fat: 9g
- Cholesterol: 185mg
- Sodium: 980mg
- Total Carbohydrates: 28g
- Dietary Fiber: 2g
- Sugars: 5g
- Protein: 48g
- Vitamin A: 15% DV
- Vitamin C: 8% DV
- Calcium: 35% DV
- Iron: 18% DV
Notes on nutrition:
- This is a special occasion meal rather than an everyday dinner due to the frying method
- You can reduce calories and fat by baking instead of frying the chicken
- Using part-skim mozzarella cuts about 40 calories per serving
- The protein content makes this a satisfying meal that keeps you full for hours
- Serving with whole wheat pasta or vegetables instead of regular pasta adds fiber and nutrients
Health Benefits of Key Ingredients
While this isn’t exactly health food, several ingredients do offer genuine nutritional benefits. I like to focus on those rather than feeling guilty about the indulgence.
Chicken breast is an excellent source of lean protein, providing all the essential amino acids your body needs for muscle maintenance and repair. It’s also rich in B vitamins, particularly niacin and B6, which support energy metabolism and brain function.
Tomatoes in the marinara sauce are packed with lycopene, a powerful antioxidant that’s been linked to heart health and reduced cancer risk. Cooked tomatoes actually have more bioavailable lycopene than raw ones, so that marinara is doing you favors. They’re also a good source of vitamin C and potassium.
Olive oil contains heart-healthy monounsaturated fats and antioxidants called polyphenols. While we’re using it for frying here, it’s still a better choice than many other frying oils.
Garlic, even in powder form, retains some of its beneficial compounds including allicin, which has antimicrobial and anti-inflammatory properties. Fresh garlic would provide even more benefits.
Parmesan cheese is rich in calcium for bone health and protein. It’s also naturally lower in lactose than many other cheeses, making it easier to digest for some people.
Basil contains compounds with anti-inflammatory and antibacterial properties, plus antioxidants like beta-carotene. Fresh herbs add nutrition along with flavor.
Oregano is one of the most antioxidant-rich herbs available, with compounds that have antimicrobial and anti-inflammatory effects. Even dried oregano packs a nutritional punch.
Another Italian classic: Eggplant Parmesan with Zucchini.
FAQs About Chicken Parmesan
1. Can I use chicken thighs instead of chicken breasts?
Absolutely! Boneless, skinless chicken thighs work wonderfully in this recipe and stay even more moist than breasts. They have a bit more fat, which makes them more forgiving if you slightly overcook them.
Just pound them to an even thickness and follow the same breading and cooking method. The cooking time might be a minute or two less since thighs are usually thinner.
2. Why is my breading falling off during cooking?
This usually happens for one of three reasons: the chicken was too wet when you breaded it, the oil wasn’t hot enough, or you flipped the chicken too soon. Make sure to pat the chicken completely dry before breading, let the breaded chicken rest for 5-10 minutes before cooking to help the coating set, and wait until the first side is deeply golden before flipping.
Also ensure your oil is properly heated—it should shimmer and immediately sizzle when you add a breadcrumb.
3. Can I make Chicken Parmesan ahead of time?
Yes, and it’s perfect for meal prep! You can bread the chicken up to 24 hours in advance and keep it refrigerated, which actually helps the coating adhere better. You can also bread and freeze uncooked chicken for up to 3 months—just cook it straight from frozen, adding a few extra minutes to the frying time.
For fully cooked chicken, assemble everything and refrigerate for up to 24 hours, then bake until heated through when ready to serve.
4. What’s the best store-bought marinara sauce to use?
I’ve tried dozens of jarred sauces, and my favorites are Rao’s Homemade (worth the splurge), Victoria Marinara (great value), and Classico Tomato & Basil.
Look for sauces with short ingredient lists and no added sugar if possible—the best ones taste like they’re made from real tomatoes, olive oil, garlic, and herbs. That said, this recipe is forgiving, so use whatever marinara you enjoy eating straight from the jar.
5. How do I keep the chicken crispy with all that sauce and cheese?
The key is not overloading with sauce—use just enough to add flavor without drowning the breading. I spread sauce only on top of the chicken, not underneath it, and leave the edges exposed so they stay crispy.
Baking at a high temperature (400°F) helps too, as the heat keeps things from steaming and getting soggy. If you’re really concerned about crispiness, serve the chicken with sauce spooned around it rather than on top, letting everyone add their own.
Final Thoughts
This Chicken Parmesan Recipe has earned its place as a regular feature at my dinner table. From those early disasters to the perfectly crispy, cheesy masterpiece I can make today, this dish has taught me so much about the importance of technique in cooking.
The best part? Watching my family’s faces light up when I pull this out of the oven, that cheese still bubbling and the smell of garlic and tomato filling the kitchen. It never gets old.
Give this recipe a try and don’t be discouraged if your first attempt isn’t perfect—mine certainly wasn’t! I’d love to hear how it turns out for you, so drop a comment below with your results or any questions.
Recommended:
- Best Sausage Tortellini Soup Recipe
- Velveeta Mac and Cheese Recipe
- Best Bacon Mac and Cheese Recipe
- Creamy Tomato Basil Soup Recipe
- Baked Chicken Meatballs with Spaghetti Squash Recipe
- Chicken Caprese Skillet Recipe
- Easy Marry Me Chicken Recipe
- Grilled Lemon Herb Chicken Recipe
- Air Fryer Lasagna Recipe
- Pork Chop Supreme Recipe
