
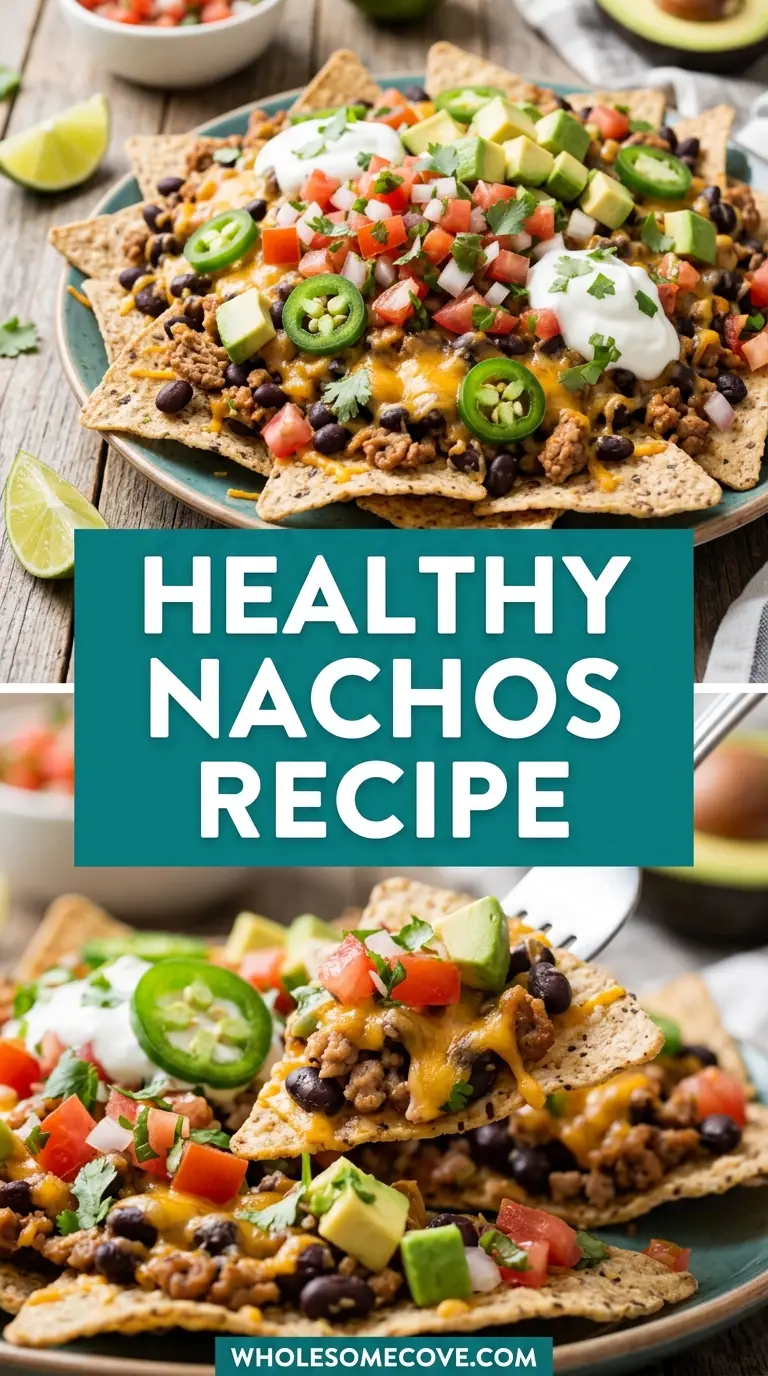
If you have been searching for a crowd-pleasing snack that does not derail your clean-eating goals, this healthy nachos recipe is exactly what you need.
Loaded with baked tortilla chips, lean protein, black beans, colorful vegetables, and a light sprinkle of sharp cheese, these nachos deliver all the bold, satisfying flavors you love in a lighter, nutrient-packed package.
| Quick Recipe Summary | |
|---|---|
| Prep Time | 15 minutes |
| Cook Time | 12 minutes |
| Total Time | 27 minutes |
| Servings | 4 |
| Difficulty Level | Easy |
For another wholesome crowd-pleaser that pairs wonderfully with game-day spreads, try my Easy Healthy Crockpot Chili.
Why You’ll Love This Healthy Nachos Recipe
These nachos prove that healthy eating and indulgent snacking are not mutually exclusive.
- High in protein and fiber: Black beans and lean ground turkey keep you full and satisfied without a post-snack slump.
- Ready in under 30 minutes: From prepping the toppings to pulling the tray from the oven, this recipe comes together faster than ordering takeout.
- Completely customizable: You can swap proteins, adjust the heat level, or pile on extra vegetables to suit your tastes and dietary needs.
- Lower in saturated fat than restaurant nachos: Baked chips and reduced-fat cheese shave off a significant amount of fat compared to the loaded versions you find at a sports bar.
- Packed with vegetables: Tomatoes, jalapeños, corn, and red onion add color, crunch, and a host of vitamins and minerals.
- Kid-friendly: Keep the jalapeños on the side and let kids build their own plate for a fun, interactive dinner.
- Great for meal prep: The seasoned turkey mixture can be made ahead of time and stored in the fridge, making weeknight nachos even faster.
- Perfect for any occasion: Serve these as a party appetizer, a casual Friday dinner, or a Super Bowl snack.
My go-to topping when I want to elevate these nachos is a generous spoonful of fresh Healthy Guacamole.
Ingredients
For the best healthy nachos, use the freshest toppings you can find and look for baked tortilla chips with minimal additives in the ingredients list.
For the Base:
- 6 oz (170 g) baked whole-grain tortilla chips
- 1 cup (115 g) reduced-fat shredded Mexican cheese blend
For the Seasoned Ground Turkey:
- 1 lb (450 g) lean ground turkey (93% lean)
- 1 tsp (5 ml) olive oil
- 1 tsp (2 g) chili powder
- 1/2 tsp (1 g) ground cumin
- 1/2 tsp (1 g) garlic powder
- 1/2 tsp (1 g) onion powder
- 1/4 tsp (0.5 g) smoked paprika
- Salt and black pepper to taste
For the Toppings:
- 1 can (15 oz / 425 g) black beans, rinsed and drained
- 1/2 cup (85 g) frozen or fresh corn kernels, thawed
- 1 cup (150 g) cherry tomatoes, halved
- 1/4 cup (40 g) red onion, finely diced
- 1 jalapeño, thinly sliced (seeds removed for less heat)
- 1 avocado, diced
- 2 tbsp (30 g) plain Greek yogurt (as a sour cream substitute)
- 2 tbsp (30 g) low-sodium salsa or pico de gallo
- Fresh cilantro, chopped, for garnish
- Juice of 1 lime
If you want an easy, homemade base to build these nachos from scratch, my Refried Beans make a fantastic spread underneath the chips.
Kitchen Equipment Needed
A handful of basic kitchen tools are all you need to pull this recipe together without any fuss.
- Large rimmed baking sheet (half-sheet pan, 18 x 13 in / 46 x 33 cm)
- Parchment paper or aluminum foil (for easy cleanup)
- Large skillet or frying pan (10-12 in / 25-30 cm)
- Wooden spoon or silicone spatula
- Chef’s knife and cutting board
- Measuring spoons and cups
- Colander or fine mesh strainer (for rinsing beans)
- Box grater (if grating your own cheese from a block, which melts better)
- Citrus juicer or fork (for squeezing lime)
- Oven mitts
Read Also: Healthy Hummus
Recommended Products for This Recipe
These are products I personally use and genuinely recommend for making the best healthy nachos at home.
1. Siete Grain-Free Tortilla Chips
These chips are made from cassava flour and avocado oil, which means they bake up crispier and hold toppings better than standard corn chips that tend to go soggy quickly. They are a great option if you are avoiding gluten or looking for a chip with a cleaner ingredient list.
2. Nordic Ware Natural Aluminum Baker’s Half Sheet
This is the baking sheet I reach for every single time I make sheet pan nachos. The even heat distribution means the chips and cheese melt uniformly, and the raised rim prevents any toppings from sliding off into the oven.
3. Chosen Foods Avocado Oil Spray
Avocado oil has a high smoke point, which makes it ideal for lightly coating your baking sheet before laying down the chips. A quick spritz prevents sticking and adds a mild richness without loading on extra calories.
4. Organic Valley Reduced Fat Mexican Cheese Blend
This is my preferred cheese for healthy nachos because it melts smoothly without the greasiness you sometimes get from full-fat pre-shredded blends. The flavor is still rich enough that you do not miss the extra fat.
5. OXO Good Grips Silicone Spatula Set
When you are breaking up ground turkey in the skillet, a good silicone spatula makes all the difference. The flexible edge gets into every corner of the pan and breaks up the meat into fine, even crumbles that distribute perfectly across the nachos.
You might also enjoy: Healthy Cornbread
Step-by-Step Instructions: How to Make Healthy Nachos
Follow these simple steps and you will have a delicious plate of healthy nachos ready in under 30 minutes.
Step 1: Preheat the Oven and Prepare the Baking Sheet
- Preheat your oven to 400°F (200°C). This high temperature is key for getting the cheese melted and bubbly without making the chips taste stale or over-baked.
- Line a large rimmed baking sheet with parchment paper or foil for easy cleanup.
- Lightly spray the lined baking sheet with avocado oil or cooking spray so the chips do not stick.
Step 2: Cook the Seasoned Ground Turkey
- Heat 1 tsp (5 ml) of olive oil in a large skillet over medium-high heat until shimmering.
- Add the lean ground turkey and break it up immediately with a spatula or wooden spoon.
- Cook for 6-8 minutes, stirring occasionally, until no pink remains and the turkey is fully cooked through.
- Drain any excess liquid from the pan if there is a noticeable amount.
- Sprinkle in the chili powder, ground cumin, garlic powder, onion powder, smoked paprika, salt, and black pepper.
- Stir everything together so the turkey is evenly coated in the spices. Cook for an additional 1 minute so the spices bloom and become fragrant. Remove from heat and set aside.
Step 3: Warm the Corn and Black Beans
- If using frozen corn, place it in a small microwave-safe bowl and microwave on high for 1-2 minutes until thawed and warmed through. Alternatively, heat in a small saucepan over medium heat for 2-3 minutes.
- Drain and rinse the canned black beans through a colander under cold running water until the water runs clear. This removes excess sodium and the starchy liquid from the can.
- Pat the beans gently with a paper towel to remove excess moisture so they do not make the chips soggy.
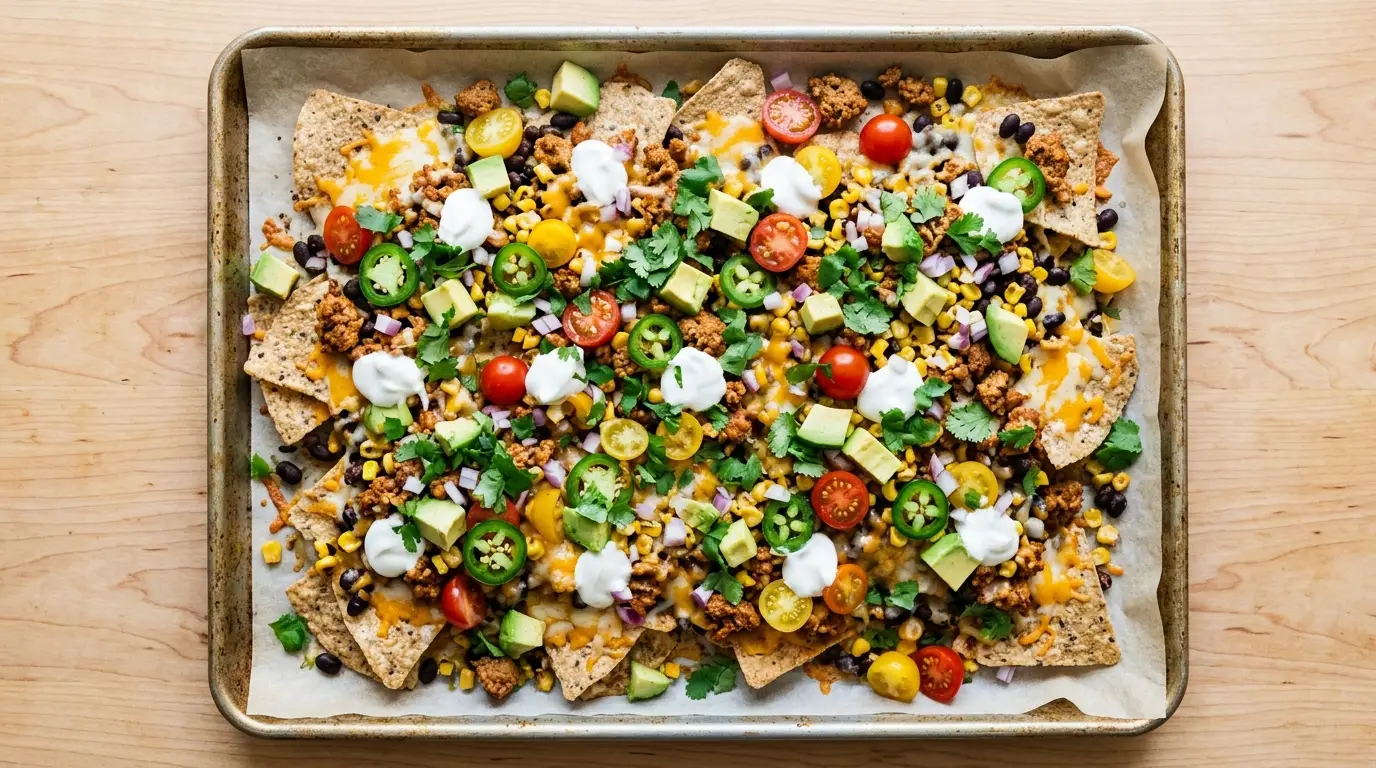
Step 4: Layer the Chips and First Round of Toppings
- Spread the baked tortilla chips in a single, even layer across the prepared baking sheet. Overlap them slightly but avoid piling them too high, so every chip gets some toppings and melted cheese.
- Distribute the seasoned ground turkey evenly over the chips.
- Scatter the drained black beans and warmed corn kernels across the turkey layer.
- Sprinkle the shredded reduced-fat Mexican cheese blend over everything in an even layer. Use the full 1 cup (115 g) for good coverage, or reduce to 3/4 cup (85 g) if you prefer a lighter touch.
Step 5: Bake Until the Cheese Melts
- Transfer the baking sheet to the preheated oven on the center rack.
- Bake for 10-12 minutes, until the cheese is fully melted, the edges of the chips are golden, and the toppings are hot throughout.
- Keep an eye on the nachos after the 8-minute mark to make sure the chips do not over-brown.
Step 6: Add the Fresh Toppings and Serve
- Remove the baking sheet from the oven and immediately scatter the cherry tomatoes, red onion, jalapeño slices, and diced avocado over the hot nachos.
- Add small dollops of plain Greek yogurt across the top as a protein-rich stand-in for sour cream.
- Spoon the salsa or pico de gallo over the center of the nachos.
- Squeeze the juice of one fresh lime evenly across the entire tray.
- Finish with a generous scatter of fresh chopped cilantro and serve immediately right from the baking sheet.
I learned a similar technique for layering bold flavors when I first started making my Street Tacos, and it translated perfectly to nachos.
Tips for The Best Healthy Nachos
A few simple tricks separate good nachos from truly great nachos, and none of them require any extra effort.
- Spread chips in a single layer: This is the single most important tip. Overlapping chips too much means the ones underneath never get cheese on them. Use two baking sheets if you are making a larger batch.
- Grate your own cheese: Pre-shredded cheese is coated in anti-caking agents that prevent it from melting as smoothly. A block of reduced-fat Monterey Jack or cheddar grated fresh will melt beautifully.
- Dry your beans thoroughly: Wet beans steam and make chips soggy. After rinsing, pat them firmly with a paper towel or spread them on a clean kitchen towel for 5 minutes before using.
- Bloom your spices: Adding the spice mix to the cooked turkey and letting it cook for an extra minute in a dry pan makes a massive difference in depth of flavor.
- Add cold toppings after baking: Avocado, Greek yogurt, fresh tomato, cilantro, and lime juice should always go on after the nachos come out of the oven. Baking them destroys their texture and freshness.
- Use a hot oven: 400°F (200°C) is the sweet spot. Lower temperatures make the chips taste limp; higher ones burn the edges before the cheese melts.
- Season in layers: Season the turkey, season the beans lightly, and add a squeeze of lime at the end. Layered seasoning means every bite is flavorful, not just the top layer.
- Serve straight from the pan: Nachos begin to lose their crunch the moment they come out of the oven, so gather everyone around the table and serve immediately.
- Use thicker chips: Thicker-style baked chips hold up better under the weight of toppings and do not shatter into dust when you pick them up.
For a crunchy, cooling side that pairs wonderfully with these nachos, my Healthy Coleslaw is always a winner.
What to Serve with Healthy Nachos
These healthy nachos are a complete snack or light meal on their own, but pairing them with the right sides takes the spread to the next level.
- Chicken Quesadilla for a heartier Mexican-inspired spread
- A big bowl of fresh homemade guacamole served alongside for extra dipping
- Mexican Street Corn for a sweet, smoky contrast to the savory nachos
- A simple green salad with lime vinaigrette to lighten the overall meal
- Crisp coleslaw for a cool, creamy crunch alongside the warm chips
- Sparkling water with lime or a non-alcoholic margarita mocktail for a refreshing drink pairing
- Taco Soup for a warming bowl to round out a full Mexican-themed dinner
- Fresh pico de gallo or salsa verde in small bowls for extra topping options
- Sliced jicama sticks for extra crunch and a light, low-calorie dipper
Read Also: 7 Layer Taco Salad
Variations of Healthy Nachos
Once you have the base technique down, the variations are nearly endless.
- Chicken Nachos: Swap the ground turkey for shredded rotisserie chicken tossed in the same spice blend. It is a great way to use leftover chicken.
- Vegetarian Nachos: Skip the meat entirely and double up on the black beans and corn. Add diced bell peppers and zucchini for extra substance.
- Vegan Nachos: Use plant-based ground meat, skip the cheese, and use a cashew-based queso or nutritional yeast for a cheesy flavor. Swap the Greek yogurt for coconut yogurt.
- Sweet Potato Nachos: Replace the tortilla chips with thinly sliced roasted sweet potato rounds for a completely grain-free, lower-carb base.
- Bell Pepper Nachos: Use halved mini bell peppers as nacho “boats” instead of chips for an ultra-low-carb version that is still incredibly satisfying.
- Breakfast Nachos: Use the same chip base but top with scrambled eggs, low-fat cheese, salsa, and diced avocado for a fun morning twist.
- Buffalo Chicken Nachos: Toss shredded chicken in buffalo sauce instead of taco spices and top with a drizzle of plain Greek yogurt to cool the heat.
- Shrimp Nachos: Use seasoned sautéed shrimp as the protein for a lighter, seafood-forward version. They cook in under 3 minutes and taste incredible.
- Keto Nachos: Use pork rinds as the chip base and top with full-fat cheese, seasoned ground beef, sour cream, and jalapeños.
- Extra-Veggie Nachos: Add roasted zucchini, sautéed mushrooms, and shredded lettuce for a supremely plant-forward plate.
You might also enjoy: Healthy Fried Rice
Storage and Reheating
Nachos are undeniably best served fresh out of the oven, but here is how to manage any leftovers.
- Storage: Store any leftover nachos in an airtight container in the refrigerator for up to 2 days. Keep the fresh toppings (avocado, Greek yogurt, tomatoes, cilantro) separate in their own container so they do not turn the chips soggy.
- Reheating in the oven: Spread the leftover chips on a baking sheet and reheat at 375°F (190°C) for 5-7 minutes until warmed through and the chips have crisped back up. Add the fresh toppings after reheating.
- Reheating in the air fryer: Place the chip layer in the air fryer basket in a single layer and cook at 350°F (175°C) for 3-4 minutes. This is the best method for reviving crispy texture.
- Do not microwave: The microwave steams the chips and makes them soft and chewy, not crispy. Avoid this method if texture matters to you.
- Freeze the turkey only: The seasoned ground turkey mixture freezes well for up to 3 months in a zip-lock bag. Thaw overnight in the fridge and reheat in a skillet before assembling fresh nachos.
- Prep ahead: Cook and refrigerate the ground turkey mixture up to 3 days ahead. Chop all the cold toppings and store separately. When ready to serve, assemble and bake in 15 minutes.
Read Also: Healthy Bruschetta
Nutritional Facts
| Nutritional Facts (Per Serving, Serves 4) | |
|---|---|
| Calories | 390 kcal |
| Total Fat | 14 g |
| Saturated Fat | 4 g |
| Cholesterol | 65 mg |
| Sodium | 520 mg |
| Total Carbohydrates | 38 g |
| Dietary Fiber | 9 g |
| Sugars | 4 g |
| Protein | 31 g |
| Vitamin C | 22% DV |
| Iron | 18% DV |
| Calcium | 20% DV |
Nutritional values are estimates and will vary based on exact brands and quantities used.
For another wholesome Mexican-inspired dish with a similarly impressive nutrition profile, my Healthy Shepherd’s Pie is a comforting and protein-packed option worth bookmarking.
Health Benefits of Key Ingredients
The ingredients in this healthy nachos recipe are doing a lot more than just tasting good.
- Black beans: These are one of the most nutrient-dense legumes available. One cup provides roughly 15 grams of fiber and 15 grams of plant-based protein, supporting blood sugar regulation, digestive health, and long-lasting fullness.
- Lean ground turkey: Turkey is an excellent source of complete protein, delivering all essential amino acids needed for muscle repair and immune function. At 93% lean, it provides significantly less saturated fat than regular ground beef.
- Avocado: Rich in heart-healthy monounsaturated fats, avocado also provides potassium, folate, and vitamins K, C, and B6. The healthy fats support the absorption of fat-soluble vitamins from the other vegetables on the tray.
- Cherry tomatoes: These are a concentrated source of lycopene, a powerful antioxidant linked to reduced risk of heart disease and certain cancers. They also provide vitamins A and C.
- Jalapeños: Capsaicin, the compound that gives jalapeños their heat, has anti-inflammatory properties and may support a slightly higher metabolic rate. They also add significant flavor without any calories.
- Plain Greek yogurt: Used here in place of sour cream, Greek yogurt delivers around 17 grams of protein per 3/4 cup compared to essentially none in sour cream. It also provides probiotics that support gut health.
- Corn: Corn contributes natural sweetness, fiber, and antioxidants including lutein and zeaxanthin, which support eye health.
- Whole-grain baked tortilla chips: Compared to standard fried chips, whole-grain baked chips provide more fiber per serving and significantly less fat, making them a smarter base for nutrient-rich toppings.
- Lime juice: Fresh lime is a fantastic source of vitamin C and also helps your body absorb the plant-based iron in the black beans more efficiently.
My Healthy Cabbage Skillet with Quinoa and Chickpeas uses many of the same nutrient-dense building blocks if you are looking for another wholesome meal idea.
FAQs About Healthy Nachos
1. Are baked tortilla chips healthier than fried ones?
Yes, baked tortilla chips generally contain significantly less fat and fewer calories than their fried counterparts. They still provide the satisfying crunch you want for nachos, especially when topped with warm, flavorful ingredients.
2. Can I make healthy nachos without meat?
Absolutely. Simply double the black beans and add extra corn, diced bell peppers, or sautéed mushrooms in place of the turkey. The beans provide plenty of protein and fiber to keep the dish hearty and filling.
3. What is a good substitute for sour cream on healthy nachos?
Plain Greek yogurt is the most popular and effective swap. It has a nearly identical tangy flavor profile but contains far more protein and much less saturated fat than traditional sour cream.
4. Can I prepare healthy nachos ahead of time for a party?
You can prep the components in advance, but you should always assemble and bake them right before serving. Pre-cooked turkey and prepped toppings can sit in the fridge for up to 3 days, making same-day assembly very quick.
5. How do I prevent the chips from getting soggy?
The key is to drain and dry your beans thoroughly, add cold toppings only after baking, and serve immediately after pulling the tray from the oven. Using thicker baked chips also helps them hold up better under the weight of the toppings.
For a flavorful finishing touch that also works beautifully as a dip alongside the chips, my Chipotle Guacamole adds a smoky, creamy dimension to the entire plate.
Healthy Nachos
Ingredients
- 6 oz baked whole-grain tortilla chips - 170g
- 1 cup reduced-fat shredded Mexican cheese blend - 115g
- 1 lb lean ground turkey - 450g; 93% lean
- 1 tsp olive oil - 5ml
- 1 tsp chili powder - 2g
- 1/2 tsp ground cumin - 1g
- 1/2 tsp garlic powder - 1g
- 1/2 tsp onion powder - 1g
- 1/4 tsp smoked paprika - 0.5g
- salt and black pepper - to taste
- 1 can black beans - 15 oz / 425g can; rinsed and drained
- 1/2 cup corn kernels - 85g; frozen or fresh, thawed
- 1 cup cherry tomatoes - 150g; halved
- 1/4 cup red onion - 40g; finely diced
- 1 jalapeño - thinly sliced; seeds removed for less heat
- 1 avocado - diced
- 2 tbsp plain Greek yogurt - 30g; use as a sour cream substitute
- 2 tbsp low-sodium salsa or pico de gallo - 30g
- fresh cilantro - chopped; for garnish
- 1 lime - juice only
Equipment
- Large rimmed baking sheet - Half-sheet pan, 18 x 13 in / 46 x 33 cm
- Parchment paper or aluminum foil - For easy cleanup
- Large skillet or frying pan - 10-12 in / 25-30 cm
- Wooden spoon or silicone spatula
- Chef’s knife
- Cutting board
- Measuring spoons and cups
- Colander or fine mesh strainer - For rinsing beans
- Box grater - Optional; for grating cheese from a block for better melting
- Citrus juicer or fork - For squeezing lime
- Oven mitts
Method
- Preheat your oven to 400°F (200°C) and line a large rimmed baking sheet with parchment paper or foil. Lightly spray the lined sheet with avocado oil or cooking spray.
- Heat olive oil in a large skillet over medium-high heat, add the ground turkey, and cook for 6-8 minutes, breaking it up, until no pink remains. Stir in chili powder, cumin, garlic powder, onion powder, smoked paprika, salt, and pepper, then cook for 1 more minute until fragrant.
- Thaw frozen corn in the microwave for 1-2 minutes or heat on the stovetop for 2-3 minutes. Rinse the canned black beans under cold running water until clear, then pat dry with a paper towel to prevent soggy chips.
- Spread the baked tortilla chips in a single, even layer on the prepared baking sheet. Evenly distribute the seasoned turkey, black beans, corn, and shredded cheese over the top.
- Bake on the center rack for 10-12 minutes, until the cheese is fully melted and the chip edges are golden. Keep a close eye after the 8-minute mark to prevent over-browning.
- Remove from the oven and immediately top with cherry tomatoes, red onion, jalapeño, diced avocado, Greek yogurt, and salsa. Squeeze fresh lime juice over everything and finish with chopped cilantro; serve right away.
Nutrition
Notes
- Always spread chips in a single layer on the baking sheet so every chip gets melted cheese and toppings — use two pans for larger batches.
- Grate your own block of reduced-fat cheese rather than using pre-shredded; it melts much more smoothly without the anti-caking coating.
- Thoroughly pat the rinsed black beans dry before adding them to the chips — excess moisture is the number one cause of soggy nachos.
- Always add cold toppings (avocado, Greek yogurt, fresh tomato, cilantro, lime juice) after the nachos come out of the oven to preserve their texture and freshness.
- For a vegetarian version, simply skip the turkey and double the black beans; add diced bell peppers or sautéed mushrooms for extra substance.
- The seasoned ground turkey can be cooked up to 3 days ahead and refrigerated, making weeknight nachos come together in under 15 minutes.
- Leftover nachos keep in the refrigerator for up to 2 days; store fresh toppings separately and reheat the chip base in a 375°F (190°C) oven for 5-7 minutes or in an air fryer at 350°F (175°C) for 3-4 minutes to restore crispiness.
- The seasoned turkey mixture freezes well for up to 3 months in a zip-lock bag — thaw overnight in the fridge and reheat in a skillet before assembling.
- For a keto-friendly version, swap the tortilla chips for pork rinds and use full-fat cheese, seasoned ground beef, and sour cream.
- Plain Greek yogurt is an excellent substitute for sour cream — it delivers a nearly identical tangy flavor with far more protein and much less saturated fat.
Private Notes
Tried this recipe?
Let us know how it was!Final Thoughts
This healthy nachos recipe shows that you truly can have it all: bold flavors, satisfying crunch, melty cheese, and ingredients that actually fuel your body well. With lean protein, fiber-rich beans, and a rainbow of fresh vegetables, every bite is as nourishing as it is delicious.
Give this recipe a try at your next game night, casual dinner, or weekend snack session. Drop a comment below to let me know how it turned out, and feel free to tag your nacho photos so I can see how you made it your own!
Recommended:
- Chicken Enchilada Casserole
- Mexican Chicken Salad
- Beef Quesadilla
- Healthy Orange Chicken
- Healthy Chicken Parmesan
- Taco Casserole
- Shrimp Quesadilla
- Easy Healthy Dinner Recipes for Family
- Chicken Fajita Lettuce Wraps
- Black Bean Enchilada Casserole
