
I made my first chicken quesadilla recipe on a random weeknight when I had leftover rotisserie chicken, a block of Monterey Jack, and absolutely no energy for anything complicated. I threw it together in about 20 minutes, and my family demolished it before I even had a chance to plate the second batch properly.
That night completely changed how I think about quick dinners. Ever since, this recipe has been in my regular rotation, and I’ve spent a lot of time refining the cheese blend, the seasoning on the chicken, and the technique for getting that perfectly golden, shatteringly crisp tortilla without burning it.
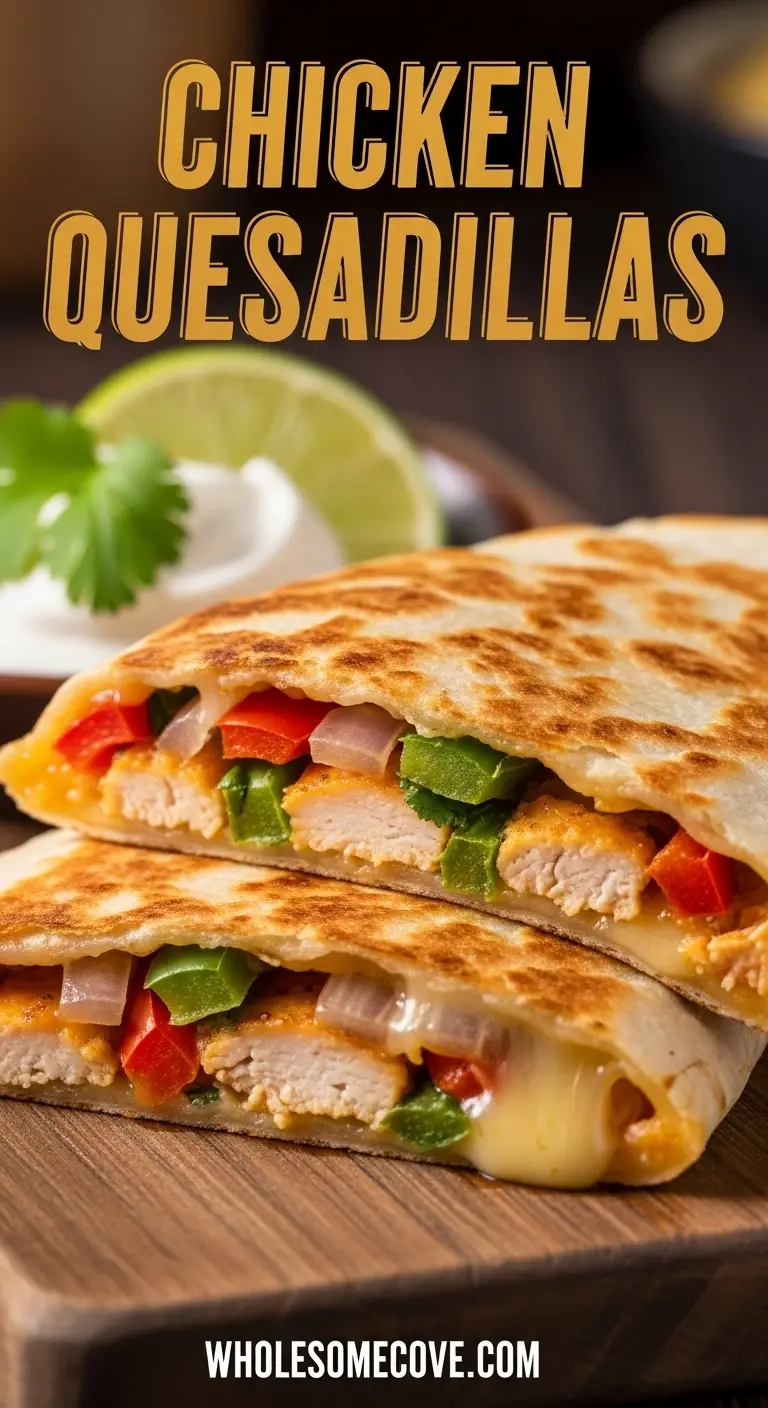
What makes this version stand out is the balance of flavors. The chicken gets a quick toss in a smoky cumin-chili spice mix, the cheese is a combination that melts evenly without going greasy, and the whole thing comes together in one skillet in under 30 minutes.
This is the kind of meal you’ll want to have on repeat. Let me show you exactly how I make it.
| Quick Recipe Summary | |
|---|---|
| Prep Time | 15 minutes |
| Cook Time | 12 minutes |
| Total Time | 27 minutes |
| Servings | 4 quesadillas |
| Difficulty Level | Easy |
If you love Mexican-inspired chicken dishes, you might also enjoy this BBQ Chicken Wrap Recipe for another quick and satisfying weeknight option.
Why You’ll Love This Chicken Quesadilla Recipe
This recipe is honestly one of the most reliable things in my kitchen. It never fails, it never disappoints, and it comes together faster than any delivery order.
Here’s what makes it so special:
- Ready in under 30 minutes. From slicing the chicken to pulling it off the pan, this whole recipe takes less than half an hour. It’s genuinely weeknight-friendly.
- Incredibly versatile. You can use leftover rotisserie chicken, grilled chicken breast, or even canned chicken in a pinch. The seasoning carries it every time.
- Kid-friendly and crowd-pleasing. I’ve served this to picky eaters of every age. Cheesy, slightly smoky, and not too spicy, it wins every time.
- Budget-friendly. A whole batch of four quesadillas costs a fraction of what you’d pay at a restaurant, and it tastes just as good, if not better.
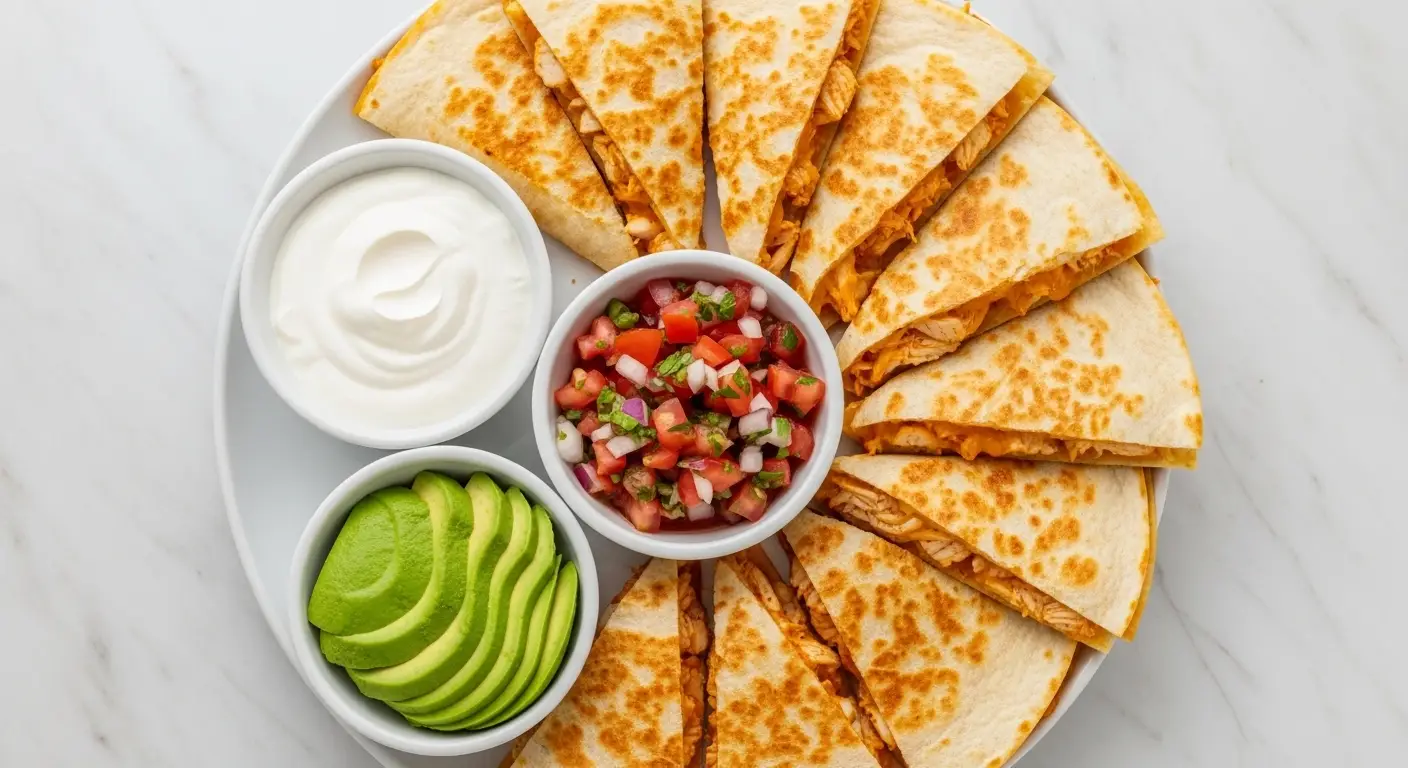
- Customizable toppings. Sour cream, guacamole, salsa, pico de gallo, jalapeños – you can set out a little topping bar and let everyone build their own.
- Minimal cleanup. One skillet, one cutting board. That’s basically it. My kind of cooking.
- Great for meal prep. The seasoned chicken filling keeps well in the fridge for up to three days, so you can assemble fresh quesadillas throughout the week in just minutes.
You might also love this Chicken Fajita Lettuce Wraps Recipe if you’re craving more Tex-Mex flavors with a lighter twist.
Ingredients
Getting the right ingredients is the difference between a good quesadilla and a great one. I use a two-cheese blend for the filling because Monterey Jack melts beautifully and adds creaminess, while sharp cheddar brings that punchy flavor you want. Don’t skip the spice rub on the chicken; it adds so much more depth than plain seasoned chicken would.
- 2 large boneless, skinless chicken breasts (about 1 lb / 450g total)
- 1 teaspoon chili powder
- 1 teaspoon ground cumin
- 1/2 teaspoon garlic powder
- 1/2 teaspoon onion powder
- 1/2 teaspoon smoked paprika
- 1/4 teaspoon salt, plus more to taste
- 1/4 teaspoon black pepper
- 1 tablespoon olive oil (for cooking chicken)
- 1 medium green bell pepper, thinly sliced
- 1 medium red bell pepper, thinly sliced
- 1/2 medium yellow onion, thinly sliced
- 4 large (10-inch / 25cm) flour tortillas
- 1 1/2 cups (170g) shredded Monterey Jack cheese
- 1 cup (115g) shredded sharp cheddar cheese
- 1-2 tablespoons butter or neutral cooking spray (for crisping the tortillas)
Optional toppings: sour cream, guacamole or sliced avocado, salsa or pico de gallo, sliced jalapeños, chopped fresh cilantro, lime wedges
Read Also: Chipotle Guacamole Recipe
Kitchen Equipment Needed
Having the right tools makes this recipe go smoothly. A heavy-bottomed skillet is the single most important piece of equipment here; it distributes heat evenly so your tortilla crisps without hot spots that burn some areas while leaving others pale and soft.
- Large cast iron or heavy-bottomed skillet (10-12 inches / 25-30cm), or a flat griddle
- Sharp chef’s knife
- Cutting board
- Medium mixing bowl
- Tongs or a spatula
- Wide, flat spatula for flipping the quesadilla
- Cheese grater (if shredding your own cheese)
- Measuring spoons
- Plate lined with paper towels (for resting finished quesadillas)
- Sharp knife or pizza cutter for slicing wedges
Another favorite for quick Mexican-inspired nights: Healthy Nachos Recipe
Recommended Products for This Recipe
These are tools and ingredients I personally reach for every single time I make quesadillas, and each one genuinely makes a difference in the final result.
1. Lodge Cast Iron Skillet (10.25 inch)
I’ve tried making quesadillas in every kind of pan imaginable, and nothing comes close to cast iron for getting that perfectly even, golden-brown crust. The heat retention means your tortilla crisps up quickly and consistently across the entire surface. It’s also incredibly durable and only gets better with use.
2. OXO Good Grips Flat Spatula
Flipping a full-sized quesadilla is one of the trickiest parts of this recipe, and a wide, sturdy flat spatula makes it so much easier. This one is thin enough to slide cleanly under the tortilla edge and wide enough to support the whole quesadilla in one confident flip. It’s been in my kitchen for years.
3. Siete Almond Flour Tortillas
If you want to try a grain-free or gluten-sensitive option, these tortillas crisp up beautifully and have a clean, neutral flavor that lets the chicken and cheese shine. I always keep a pack in my pantry for nights when someone in the group wants a lighter option.
4. Badia Spices Complete Seasoning
This all-purpose Latin-inspired seasoning blend is my go-to when I want to speed things up without sacrificing flavor. I use it as a shortcut for the spice rub when I’m in a real hurry. It adds a slightly different but equally delicious depth to the chicken.
Another favorite: Chicken Taco Soup Recipe
Step-by-Step Instructions: How to Make Chicken Quesadilla
Step 1: Season the Chicken
- In a medium mixing bowl, combine the chili powder, cumin, garlic powder, onion powder, smoked paprika, salt, and black pepper. Stir them together so the spices are evenly distributed before you add the chicken.
- Pat your chicken breasts dry with a paper towel. This helps the spice rub actually stick to the surface of the meat rather than sliding off due to surface moisture.
- Add the chicken breasts to the bowl and toss to coat evenly with the spice mixture. Use your hands or tongs to make sure every surface, including the sides and undersides, is well covered.
- Let the chicken sit for 5 minutes if you have time. Even a short rest helps the seasonings adhere and start penetrating the meat slightly for more flavor depth.
Step 2: Cook the Chicken
- Heat your large skillet over medium-high heat. Add 1 tablespoon of olive oil and let it shimmer and become slightly fragrant before adding the chicken. You want the pan hot enough that the chicken sizzles audibly when it hits the surface.
- Place the seasoned chicken breasts flat into the skillet. Do not move them for the first 5-6 minutes. Resist the urge to poke or shuffle them; this uninterrupted contact with the hot pan is what creates a proper golden-brown sear.
- Flip the chicken using tongs and cook for another 5-6 minutes on the second side. The chicken is cooked through when the internal temperature reads 165°F (74°C) on an instant-read thermometer inserted into the thickest part. Thinner breasts may be done closer to 4 minutes per side; thicker ones may need up to 7 minutes.
- Transfer the cooked chicken to a clean cutting board and let it rest for at least 5 minutes before slicing. This resting period allows the juices to redistribute throughout the meat so every bite stays moist. Cutting into it immediately causes those juices to run out onto the board.
- Once rested, slice the chicken into thin strips and then roughly chop into bite-sized pieces approximately 1/2 to 3/4 inch in size. Smaller pieces stay inside the quesadilla more neatly when you bite into it.
Step 3: Sauté the Vegetables
- Return the same skillet to medium heat. There is no need to wipe it clean; the browned bits left from the chicken (called fond) will add extra flavor to your vegetables as they cook.
- Add the thinly sliced green bell pepper, red bell pepper, and yellow onion to the pan. Spread them out in an even layer so they have contact with the hot surface rather than steaming in a pile.
- Season with a pinch of salt and black pepper. The salt draws out a little moisture and helps the vegetables soften and caramelize more evenly.
- Cook, stirring occasionally, for 5-7 minutes. You want the vegetables to be tender and showing some light caramelization at the edges while still retaining a bit of texture. Avoid cooking them until completely limp and mushy.
- Remove the vegetables from the pan and set aside in a bowl. Wipe the skillet clean using a folded paper towel held safely in a pair of tongs, as the pan will be very hot.
Step 4: Prepare the Cheese Blend
- Combine the shredded Monterey Jack cheese and shredded sharp cheddar cheese in a bowl and toss them together until evenly mixed.
- If you are grating the cheese yourself from a block, do so now. Freshly grated cheese melts more smoothly than pre-shredded cheese from a bag because it doesn’t contain the anti-caking starch coating that inhibits smooth melting.
- Keep the cheese blend nearby so it’s ready when you assemble the quesadillas.
Step 5: Assemble the Quesadillas
- Lay one large (10-inch / 25cm) flour tortilla flat on your cutting board or a clean work surface.
- Sprinkle about 1/3 cup (38g) of the cheese blend evenly over one half of the tortilla, leaving roughly a 1/2-inch (1.25cm) border around the edge. This border prevents filling from oozing out when the quesadilla is pressed in the pan.
- Add a generous but not excessive layer of the chopped chicken on top of the cheese, using approximately one quarter of the total cooked chicken for each quesadilla.
- Scatter a quarter of the sautéed bell peppers and onions over the chicken in an even layer.
- Sprinkle another small handful (about 2 tablespoons) of cheese blend over the top of the vegetables. This top layer of cheese acts as a binder that helps seal the filling and keep everything in place when sliced.
- Fold the unfilled half of the tortilla over the filled half to create a half-moon shape. Press down gently with your palm to compact the filling slightly without squeezing it out.
- Repeat with the remaining 3 tortillas and filling ingredients.
Step 6: Cook the Quesadillas
- Return your clean skillet to medium heat. Add about 1/2 teaspoon of butter and let it melt completely, tilting the pan to distribute it across the bottom. Alternatively, use a light spray of neutral cooking spray.
- Carefully slide one assembled quesadilla into the pan. Press down on it gently but firmly with your flat spatula so the entire tortilla surface makes contact with the hot pan.
- Cook for 2-3 minutes without moving or lifting the quesadilla. You’ll know it’s ready to flip when you can see the edges turning golden brown and the tortilla feels firm and set when you press on it lightly. Peeking underneath with a corner of your spatula to check the color is fine.
- Slide your wide flat spatula fully under the quesadilla, supporting its entire length, and flip it over in one swift, confident motion. A slow or hesitant flip is the most common reason fillings end up scattered on the stovetop.
- Press down again on the second side and cook for another 2-3 minutes until that side is equally golden brown and the cheese inside is fully melted. You can press the side of the quesadilla to feel whether the cheese has softened all the way through.
- Remove the finished quesadilla from the pan and let it rest on a plate lined with paper towels for about 1 minute. This brief rest allows the steam inside to settle slightly so the tortilla stays crisp longer after cutting.
- Repeat the cooking process for the remaining quesadillas, adding a fresh small pat of butter or light spray before each one to keep the pan properly greased.
Step 7: Slice and Serve
- Transfer each rested quesadilla to a cutting board. Using a sharp chef’s knife or pizza cutter, slice each half-moon into 3 equal triangular wedges by making two angled cuts from the folded edge toward the curved edge.
- Arrange the warm wedges on a serving plate or platter. They’re best served immediately while the tortilla is still crispy and the cheese is still melted and gooey.
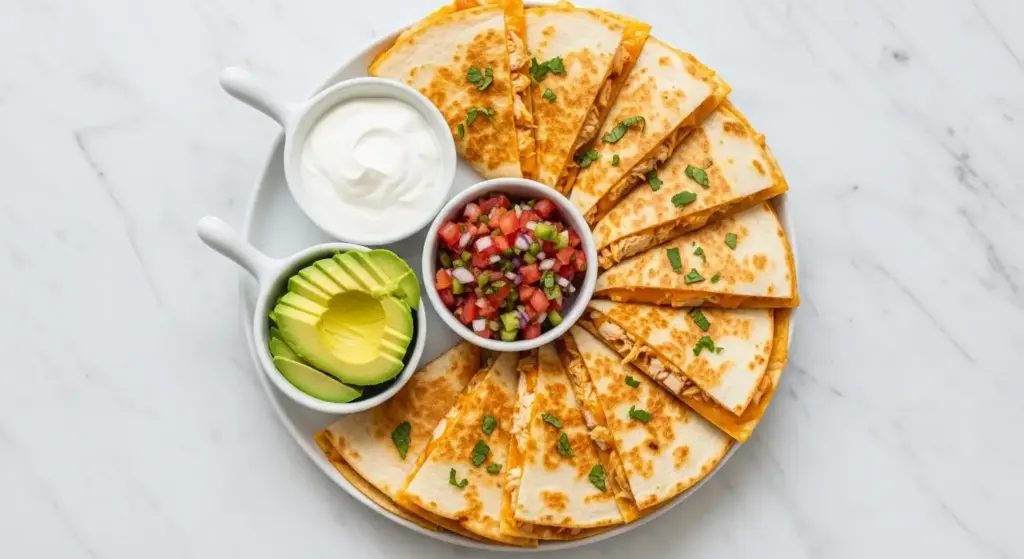
- Set out your toppings alongside in small bowls: sour cream, guacamole or sliced avocado, salsa or pico de gallo, sliced jalapeños, chopped fresh cilantro, and lime wedges. Letting everyone customize their own plate makes this feel like a real occasion.
For another crowd-pleasing Tex-Mex dinner, check out this Slow Cooker Chicken Enchilada Casserole Recipe.
Tips for The Best Chicken Quesadilla
Small details make a big difference between a mediocre quesadilla and a truly outstanding one. These are the lessons I learned the hard way, so you don’t have to.
- Shred your own cheese. Pre-shredded cheese contains potato starch or cellulose to prevent clumping, which inhibits smooth melting. Buying blocks of Monterey Jack and cheddar and grating them yourself takes a few extra minutes but results in a noticeably creamier, more cohesive melt inside the quesadilla.
- Don’t overfill. It’s tempting to pile in as much filling as possible, but overstuffed quesadillas are nearly impossible to flip cleanly without the filling escaping. A moderate, even layer gives you clean edges, a neat flip, and a properly sealed quesadilla.
- Use medium heat, not high. High heat will char the tortilla’s exterior before the cheese inside has time to melt. Medium heat gives you a slow, even golden crust while the filling gets fully heated and melted throughout.
- Press gently while cooking. Light pressure with your spatula helps the tortilla maintain full contact with the hot pan surface, giving you that evenly golden color instead of pale patches where the tortilla lifted and didn’t touch the heat.
- Let the chicken rest before chopping. Resting the cooked chicken for a full 5 minutes before cutting it keeps it moist and juicy. Cutting too soon causes the internal juices to spill out onto the cutting board instead of staying inside the meat.
- Add a second cheese layer on top of the vegetables. Sandwiching the filling between two layers of cheese helps everything bind together, so when you slice the quesadilla, the fillings stay neatly in place instead of tumbling out.
- Briefly warm stiff tortillas before folding. Cold or refrigerated tortillas can crack when you try to fold them in half. A quick 10-second microwave warm-up makes them pliable and easy to fold without splitting.
- Cook one quesadilla at a time. Unless you’re using a large flat griddle, cook them individually to maintain proper pan temperature. Crowding the pan drops the heat significantly and causes the tortillas to steam and go limp rather than crisping properly.
- Rest before cutting. Just like resting meat before slicing, letting the quesadilla sit for about a minute after cooking allows the internal steam to settle, which keeps the tortilla firmer and crisper when you cut into it.
For more Mexican chicken inspiration, check out these Mexican Chicken Thigh Recipes.
What to Serve with Chicken Quesadilla
Chicken quesadillas are filling on their own, but the right sides can turn them into a full, satisfying meal spread that feels a little more special.
- Guacamole: A must-have at our table. The creamy avocado richness is the perfect counterbalance to the salty, cheesy quesadilla, and the combination feels classic for good reason.
- Mexican Street Corn: Charred corn with chili-lime seasoning and cotija cheese is a fantastic side that shares the same bold, smoky flavor profile as the quesadilla filling.
- Healthy Coleslaw: A cool, crunchy slaw adds a refreshing contrast to the warm, cheesy quesadilla and cuts through the richness of the cheese beautifully.
- 7 Layer Taco Salad: This is what I serve when I’m feeding a crowd and want a showstopper side that people can help themselves to from a big bowl.
- Air Fryer French Fries: Crispy fries on the side make this feel like a proper restaurant meal. The kids in my house absolutely love this combination.
- Taco Soup: On cold nights, I sometimes serve quesadilla wedges alongside a warm bowl of taco soup for dunking. It’s an unexpectedly delicious pairing.
- Black beans and cilantro-lime rice: A simple side of seasoned black beans and fluffy rice makes this a complete, protein-packed dinner that stretches the whole meal further and keeps everyone satisfied longer.
- Fresh pico de gallo: Bright tomato, onion, cilantro, and lime juice provide an acidic contrast that cuts through the richness of the cheese and adds a fresh, light note to each bite.
Read Also: Broccoli Salad Recipe
Variations of Chicken Quesadilla
Once you’ve nailed the basic technique, you can take the filling in so many different directions depending on what you have on hand or what you’re in the mood for. The formula is endlessly flexible.
- BBQ Chicken Quesadilla: Swap the spice rub for your favorite BBQ Sauce and toss the cooked chicken in 3-4 tablespoons of it. Add caramelized onions and smoked gouda cheese for a rich, smoky-sweet variation that’s hard to stop eating.
- Buffalo Chicken Quesadilla: Toss the cooked chicken with your favorite hot sauce instead of the spice blend. Use a mix of mozzarella and crumbled blue cheese, and serve with ranch dressing for dipping. This is always a hit at game days and parties.
- Spinach and Artichoke Chicken Quesadilla: Add a few tablespoons of softened cream cheese to the filling along with wilted baby spinach and drained canned artichoke hearts. This turns the quesadilla into a creamy, almost dip-inspired meal that feels more indulgent than the classic.
- Black Bean Chicken Quesadilla: Add 1/3 cup of drained and rinsed canned black beans to the filling alongside the chicken and vegetables. The beans add fiber, extra protein, and a heartier, more substantial texture to each bite.
- Breakfast Quesadilla: Use the spiced chicken alongside scrambled eggs and pepper jack cheese in a slightly smaller tortilla for a filling breakfast or brunch option. This works especially well with leftover chicken from the night before.
- Rotisserie Chicken Shortcut: On truly hectic nights, grab a store-bought rotisserie chicken, shred the meat, toss it with the spice blend without any cooking required, and go straight to assembly. The whole dinner can be on the table in about 10 minutes.
- Grain-Free Version: Swap the flour tortillas for almond flour or cassava flour tortillas. These alternatives crisp up beautifully in a hot pan and have a neutral flavor that works perfectly with the smoky chicken and cheese filling.
- Ground Elk Quesadillas: For an adventurous wild game twist, try the technique from this Ground Elk Quesadillas Recipe, which uses a leaner, richly flavored filling that’s surprisingly delicious.
You might also enjoy: Chipotle Burrito Recipe
Storage and Reheating
Quesadillas are at their absolute best eaten fresh from the pan, but leftovers reheat surprisingly well as long as you choose the right method. The skillet and oven restore most of the original crispness, while the microwave is the fastest but leaves the tortilla softer.
- Refrigerator storage: Let the quesadillas cool completely to room temperature before storing. Wrap each one individually in aluminum foil or layer them in an airtight container with parchment paper between each quesadilla to prevent sticking. They will keep well in the refrigerator for up to 3 days.
- Freezer storage: Cool completely, then wrap each quesadilla tightly in plastic wrap followed by a layer of aluminum foil, and store in a zip-lock freezer bag. They will keep in the freezer for up to 2 months. Thaw overnight in the refrigerator before reheating.
- Skillet reheating (best method): Heat a dry skillet over medium heat. Place the cold quesadilla in the pan and cook for 2-3 minutes per side, pressing gently with a spatula, until heated all the way through and re-crisped to close to original texture.
- Oven reheating: Preheat your oven to 375°F (190°C). Place the quesadillas directly on the oven rack or on a baking sheet. Heat for 8-10 minutes total, flipping once halfway through, until they are warmed through and the tortilla has crisped up again.
- Air fryer reheating: Place the quesadilla in the air fryer basket and heat at 375°F (190°C) for 3-4 minutes. This is the fastest method after the microwave and produces a nicely crispy result with very little effort.
- Microwave reheating: Place on a microwave-safe plate and heat on high for 60-90 seconds. The tortilla will be soft rather than crispy, but the filling will be hot and the cheese will be melted. This method is perfectly fine for a quick lunch when texture is less of a priority.
- Store the filling separately when possible: If you anticipate leftovers before cooking, consider storing the seasoned chicken and sautéed vegetables separately in the refrigerator. When ready to eat, assembling and cooking a fresh quesadilla with the pre-made filling takes only about 5 minutes and produces a much better result than reheating a fully assembled one.
For more ideas on using up leftover chicken, explore these Leftover Smoked Chicken Recipes.
Nutritional Facts
The following are estimated values per serving (one quesadilla, approximately 1/4 of the recipe), calculated without optional toppings. Actual values will vary depending on specific brands and exact quantities used.
| Nutrient | Per Serving |
|---|---|
| Calories | 520 |
| Total Fat | 24g |
| Saturated Fat | 12g |
| Cholesterol | 100mg |
| Sodium | 680mg |
| Total Carbohydrates | 38g |
| Dietary Fiber | 2g |
| Total Sugars | 3g |
| Protein | 38g |
| Calcium | 420mg |
| Iron | 3mg |
Nutritional values are estimates calculated using standard nutritional databases. Actual values may vary based on specific ingredients and brands used.
For a lighter Mexican-inspired dinner option, check out this Healthy Shepherds Pie Recipe.
Health Benefits of Key Ingredients
This chicken quesadilla isn’t just a quick, satisfying dinner; several of its core ingredients bring genuine nutritional value that makes it a more well-rounded meal than it might first appear.
- Chicken breast: One of the leanest, highest-quality protein sources available. A single serving provides 25-30 grams of complete protein, supporting muscle maintenance, fullness, and sustained energy throughout the day without a large amount of saturated fat.
- Bell peppers: Both red and green bell peppers are nutritional powerhouses. Red bell peppers are particularly notable for their vitamin C content, providing roughly three times more than an orange by weight. They also supply vitamin A, potassium, folate, and a range of protective antioxidants including lycopene and beta-carotene.
- Onion: Often overlooked as a mere flavoring ingredient, onions are a meaningful source of quercetin, a flavonoid with well-documented anti-inflammatory effects. They also provide prebiotic fiber that supports the growth of beneficial gut bacteria and have been associated with improved cardiovascular health markers.
- Monterey Jack and cheddar cheese: While a source of saturated fat that should be consumed in moderation, cheese is also a significant source of bioavailable calcium, phosphorus, and complete protein. Cheddar in particular contains vitamin K2, which works alongside calcium and vitamin D to help direct calcium into bones and teeth.
- Cumin: Used medicinally for centuries, cumin has been studied for its potential to support digestive health and reduce bloating. It also contains iron and antioxidants that help neutralize free radical damage at the cellular level.
- Chili powder: The capsaicin found in chili peppers has been associated with temporary metabolic enhancement and has antioxidant and anti-inflammatory properties. Even in small amounts used as seasoning, it contributes these bioactive compounds to your meal.
- Olive oil: The monounsaturated fats in olive oil are associated with reduced cardiovascular risk and help the body absorb fat-soluble vitamins A, D, E, and K from the vegetables in the filling. Even a small amount used for cooking contributes these benefits.
Read Also: Healthy Coleslaw Recipe
FAQs About Chicken Quesadilla
1. Can I use corn tortillas instead of flour tortillas?
Yes, you can absolutely use corn tortillas, but the technique changes slightly. Corn tortillas are smaller (usually 6 inches / 15cm), so you’ll need to use two of them per quesadilla, placing one flat on the pan, adding the filling, and topping it with a second tortilla like a sandwich instead of folding one in half.
They’re also more delicate than flour tortillas, so handle them carefully when flipping and keep a close eye on the heat since they tend to crisp up faster.
2. How do I keep the quesadilla from getting soggy?
There are several factors that prevent sogginess. First, make sure your sautéed vegetables are fully cooked down before adding them to the filling, since raw or underdone vegetables continue releasing moisture during the final cooking step and can steam the tortilla from the inside.
Second, don’t overfill, cook on medium rather than low heat, and let the finished quesadilla rest briefly on a paper towel after cooking to wick away any surface condensation before serving.
3. What is the best cheese for quesadillas?
Monterey Jack is widely considered the gold standard for quesadillas because it melts smoothly and has a mild, creamy flavor that doesn’t compete with the other fillings. A blend of Monterey Jack and sharp cheddar gives you both meltability and bold flavor in one combination.
Pepper jack is excellent if you want extra heat, and Oaxacan cheese (a Mexican-style string cheese) is the most traditional option with a beautiful, stretchy melt that’s very satisfying.
4. Can I make chicken quesadillas ahead of time?
The best approach is to prepare the filling in advance and then assemble and cook the quesadillas fresh just before serving. The spiced chicken and sautéed vegetables can both be made up to 3 days ahead and stored separately in the refrigerator.
When you’re ready to eat, assembling and cooking a fresh quesadilla with the pre-made filling takes only about 5-6 minutes and produces results nearly as good as making it entirely from scratch.
5. Can I make this recipe in the oven instead of on the stovetop?
Yes, oven-baked quesadillas work beautifully and are a great option when you’re making several at once for a group. Preheat your oven to 425°F (220°C), assemble the quesadillas on a lightly greased baking sheet, brush the top of each tortilla lightly with melted butter, and bake for 8-10 minutes, flipping once halfway through, until golden and crispy.
This method lets you cook multiple quesadillas simultaneously without needing to stand at the stove, which is ideal for feeding a larger crowd without the stress.
For another easy and satisfying chicken dinner, try: Easy Crockpot Marry Me Chicken Recipe
Chicken Quesadillas
Ingredients
- 2 boneless skinless chicken breasts - about 1 lb / 450g total
- 1 tsp chili powder
- 1 tsp ground cumin
- 1/2 tsp garlic powder
- 1/2 tsp onion powder
- 1/2 tsp smoked paprika
- 1/4 tsp salt - plus more to taste
- 1/4 tsp black pepper
- 1 tbsp olive oil - for cooking the chicken
- 1 medium green bell pepper - thinly sliced
- 1 medium red bell pepper - thinly sliced
- 1/2 medium yellow onion - thinly sliced
- 4 large flour tortillas - 10-inch / 25cm
- 1 1/2 cups shredded Monterey Jack cheese - 170g; freshly grated melts best
- 1 cup shredded sharp cheddar cheese - 115g; freshly grated melts best
- 1-2 tbsp butter - or neutral cooking spray, for crisping tortillas
- sour cream - for serving
- guacamole or sliced avocado - for serving
- salsa or pico de gallo - for serving
- sliced jalapeños - for serving
- chopped fresh cilantro - for serving
- lime wedges - for serving
Equipment
- Large cast iron or heavy-bottomed skillet (10-12 inch) - A flat griddle also works well
- Sharp chef’s knife
- Cutting board
- Medium mixing bowl
- Tongs
- Wide flat spatula - Essential for flipping the quesadilla cleanly
- Cheese grater - Only needed if shredding cheese from a block
- Measuring spoons
- Instant-read meat thermometer - To verify chicken reaches 165°F / 74°C
- Plate lined with paper towels - For resting finished quesadillas
- Pizza cutter or sharp knife - For slicing quesadillas into wedges
Method
- In a medium bowl, combine the chili powder, cumin, garlic powder, onion powder, smoked paprika, salt, and black pepper. Pat the chicken breasts dry with a paper towel, add them to the bowl, and toss to coat every surface evenly in the spice mixture. Let rest for 5 minutes.
- Heat a large skillet over medium-high heat, add the olive oil, and sear the chicken for 5-6 minutes per side without moving it, until golden and the internal temperature reaches 165°F (74°C). Transfer to a cutting board and rest for 5 minutes, then chop into small bite-sized pieces.
- In the same skillet over medium heat, cook the sliced bell peppers and onion with a pinch of salt and pepper for 5-7 minutes, stirring occasionally, until softened and lightly caramelized. Remove from the pan and set aside, then wipe the skillet clean.
- Combine the shredded Monterey Jack and sharp cheddar in a bowl and toss together until evenly mixed. Set aside near your assembly station.
- Lay a flour tortilla flat, sprinkle about 1/3 cup of the cheese blend over one half leaving a 1/2-inch border, then layer on one quarter of the chicken, one quarter of the sautéed vegetables, and a small additional handful of cheese. Fold the tortilla over into a half-moon and press gently. Repeat with the remaining 3 tortillas.
- Melt 1/2 teaspoon of butter in the clean skillet over medium heat, slide in one assembled quesadilla, and cook for 2-3 minutes per side, pressing gently with a spatula, until deep golden brown on both sides and the cheese is fully melted. Rest on a paper-towel-lined plate for 1 minute, then repeat with the remaining quesadillas.
- Cut each quesadilla into 3 triangular wedges using a sharp knife or pizza cutter, arrange on a serving plate, and serve immediately with your choice of sour cream, guacamole, salsa, jalapeños, cilantro, and lime wedges.
Nutrition
Notes
- Shred your own cheese: Pre-shredded cheese contains anti-caking starch that prevents smooth melting. Grating from a block produces a noticeably creamier, more cohesive melt inside the quesadilla.
- Don’t overfill: A moderate, even layer of filling is key to clean folding, easy flipping, and a properly sealed quesadilla that holds together when sliced.
- Use medium heat: High heat will char the tortilla exterior before the cheese melts inside. Medium heat gives you a slow, even golden crust throughout.
- Rotisserie chicken shortcut: Skip the cooking step entirely by using shredded store-bought rotisserie chicken tossed with the spice blend. Dinner can be on the table in about 10 minutes.
- Make ahead: The seasoned cooked chicken and sautéed vegetables can be prepared up to 3 days in advance and stored separately in the refrigerator. Assemble and cook fresh quesadillas when ready to eat.
- Storage: Cool quesadillas completely, wrap individually in foil, and refrigerate for up to 3 days or freeze for up to 2 months.
- Best reheating method: Reheat in a dry skillet over medium heat for 2-3 minutes per side to restore crispness, or in an air fryer at 375°F (190°C) for 3-4 minutes. Avoid the microwave if texture matters.
- Cheese swaps: Pepper jack adds great heat; Oaxacan cheese is the most traditional Mexican option with a beautiful, stretchy melt; smoked gouda works wonderfully in the BBQ variation.
- Gluten-free option: Use two small (6-inch / 15cm) corn tortillas per quesadilla, sandwiched like a lid rather than folded in half. Handle carefully as they’re more delicate than flour tortillas.
- Cook vegetables fully first: Underdone vegetables continue releasing moisture during the final cook and can steam the tortilla from the inside, causing sogginess. Ensure they’re fully softened before assembling.
Private Notes
Tried this recipe?
Let us know how it was!Final Thoughts
A great chicken quesadilla recipe doesn’t need to be complicated. It just needs good ingredients, the right technique, and a little attention at the stove.
This version has been made in my kitchen dozens of times, and it genuinely never gets old. The smoky spiced chicken, the melty double-cheese blend, the sweet caramelized peppers and onions, and that perfectly golden, crispy tortilla are a combination worth coming back to again and again.
I hope you try this recipe soon and that it earns a permanent spot in your weeknight dinner rotation. If you do make it, I’d love to hear how it turned out for you in the comments below.
Did you try a variation? Add a topping I haven’t mentioned? Share your experience – I always love hearing how people make recipes their own.
Recommended:
- Ground Elk Quesadillas Recipe
- Mexican Chicken Soup Recipe
- Chicken Enchilada Casserole Recipe
- Enchilada Sauce Recipe
- Mexican Street Corn Recipe
- Green Chile Chicken Enchilada Casserole Recipe
- Taco Casserole Recipe
- Mexican Chicken Salad Recipe
- Chick-Fil-A Grilled Chicken Nuggets Recipe
- Black Bean Enchilada Casserole Recipe