
My daughter’s seventh birthday changed everything about how I approach special occasion baking. She wanted something “magical and purple” for her celebration, and the standard grocery store options just weren’t cutting it.
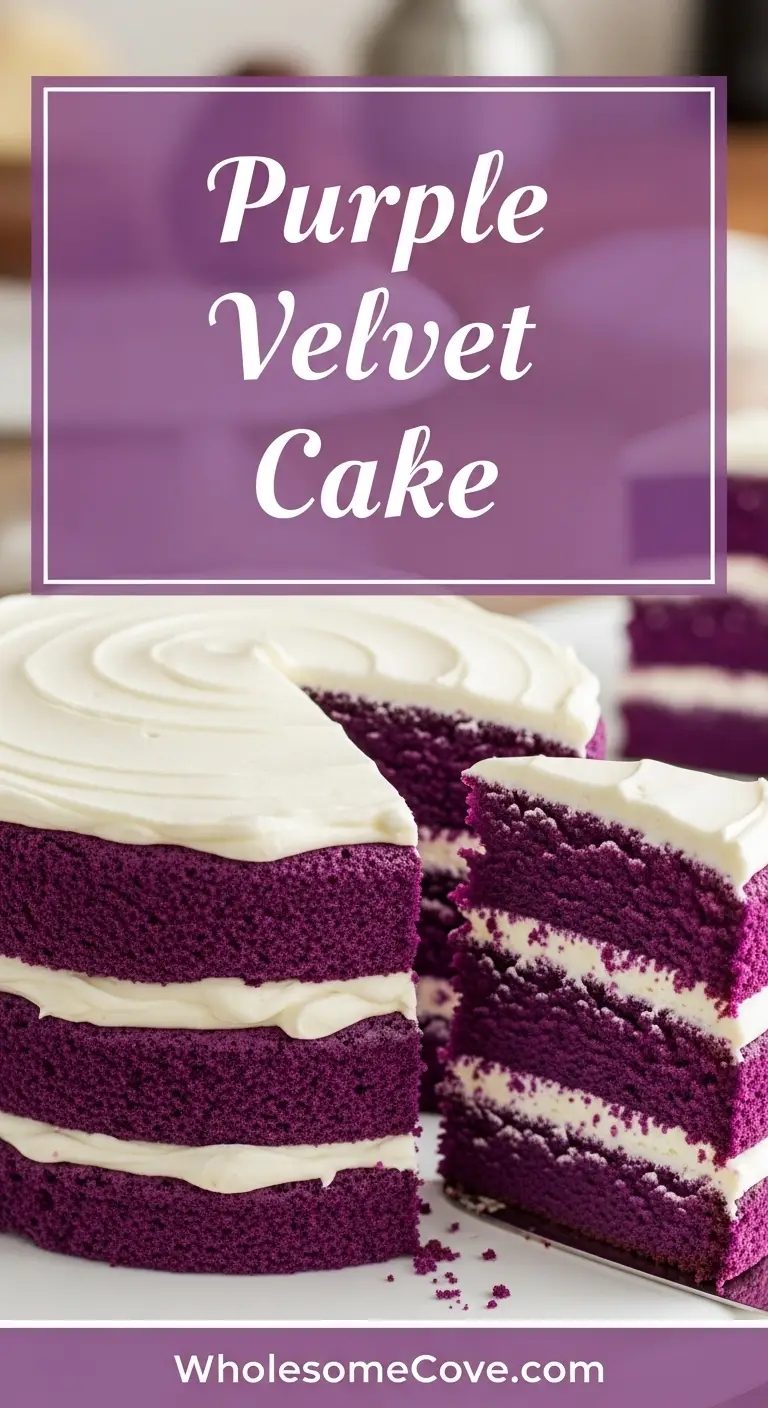
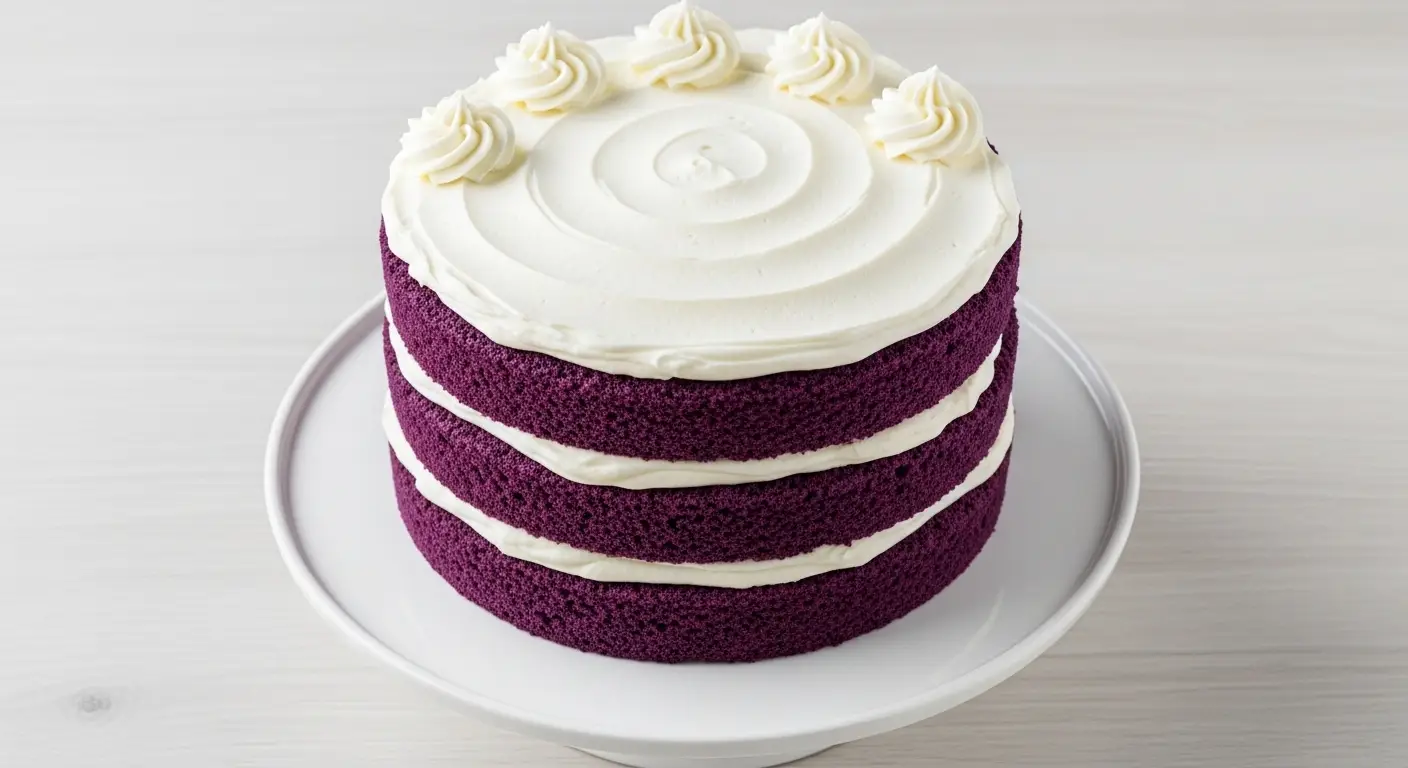
That’s when I discovered the Purple Velvet Cake Recipe, and honestly, I’ve never looked back. This stunning dessert combines the classic velvet cake texture we all love with a vibrant purple hue that makes every celebration feel extra special.
The first time I baked this cake, I’ll admit I was nervous about getting that perfect purple color. I’d experimented with food coloring before and ended up with some questionable results (hello, muddy brown cake from my cousin’s wedding attempt).
But this recipe is actually quite forgiving. The trick is using the right type of food coloring and not being afraid to embrace the vibrant hue.
What I love most about this cake is how it bridges the gap between whimsy and sophistication. It’s playful enough for a child’s birthday party yet elegant enough to serve at an adult celebration. My friend Sarah requested it for her baby shower last spring, and the cake became the centerpiece of the entire event.
| Quick Recipe Summary | |
|---|---|
| Prep Time | 20 minutes |
| Cook Time | 28 minutes |
| Total Time | 48 minutes |
| Servings | 12 slices |
| Difficulty Level | Moderate |
If looking at my Lemon Velvet Cake Recipe or Pink Velvet Cake Recipe, you’ll notice this purple version follows a similar method but creates an entirely different visual impact.
Why You’ll Love This Purple Velvet Cake Recipe
This isn’t just another colored cake that sacrifices flavor for appearance. The subtle cocoa flavor combined with tangy buttermilk creates a tender, velvety crumb that melts on your tongue.
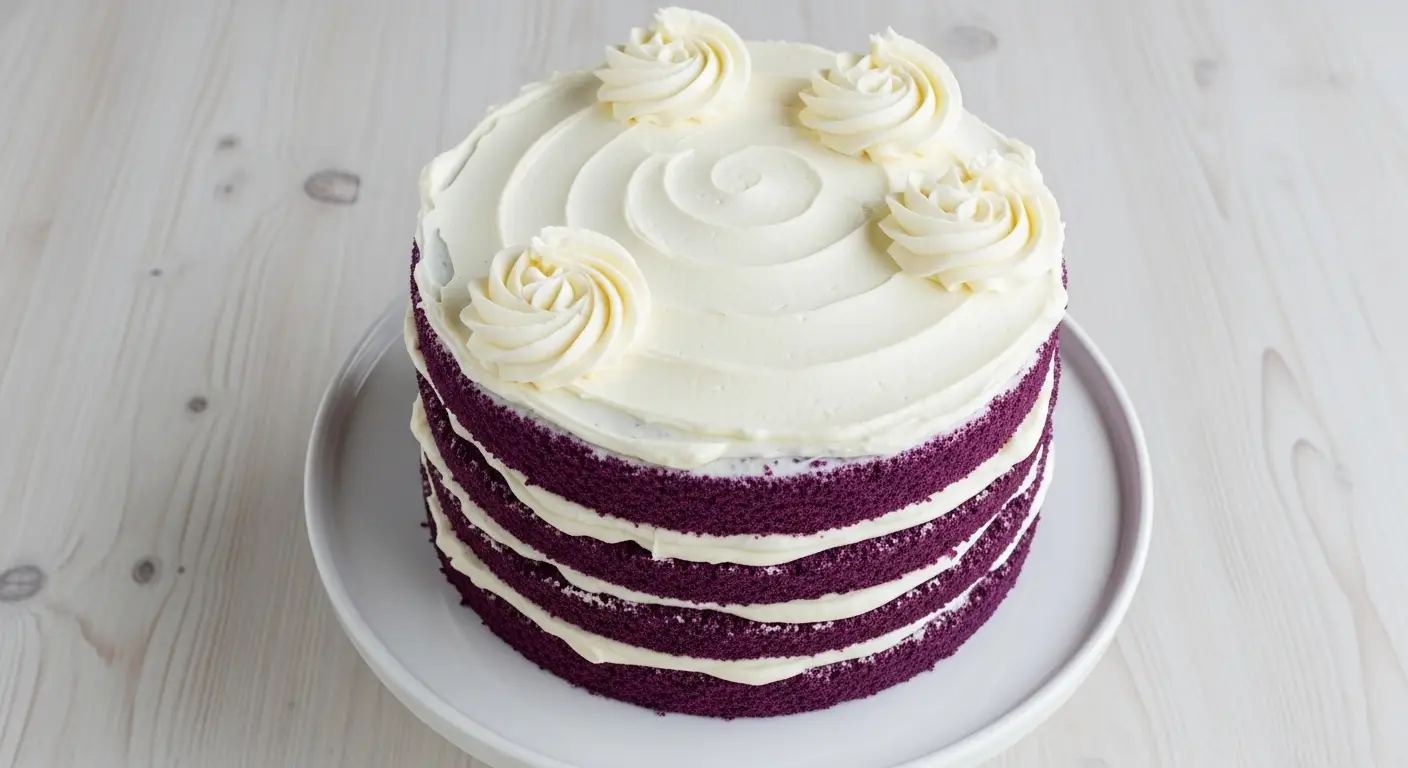
The cream cheese frosting adds the perfect balance of sweetness and tang. It’s rich without being overwhelming, and the contrast between the white frosting and purple cake layers is absolutely stunning when you cut into it.
Here’s what makes this recipe special:
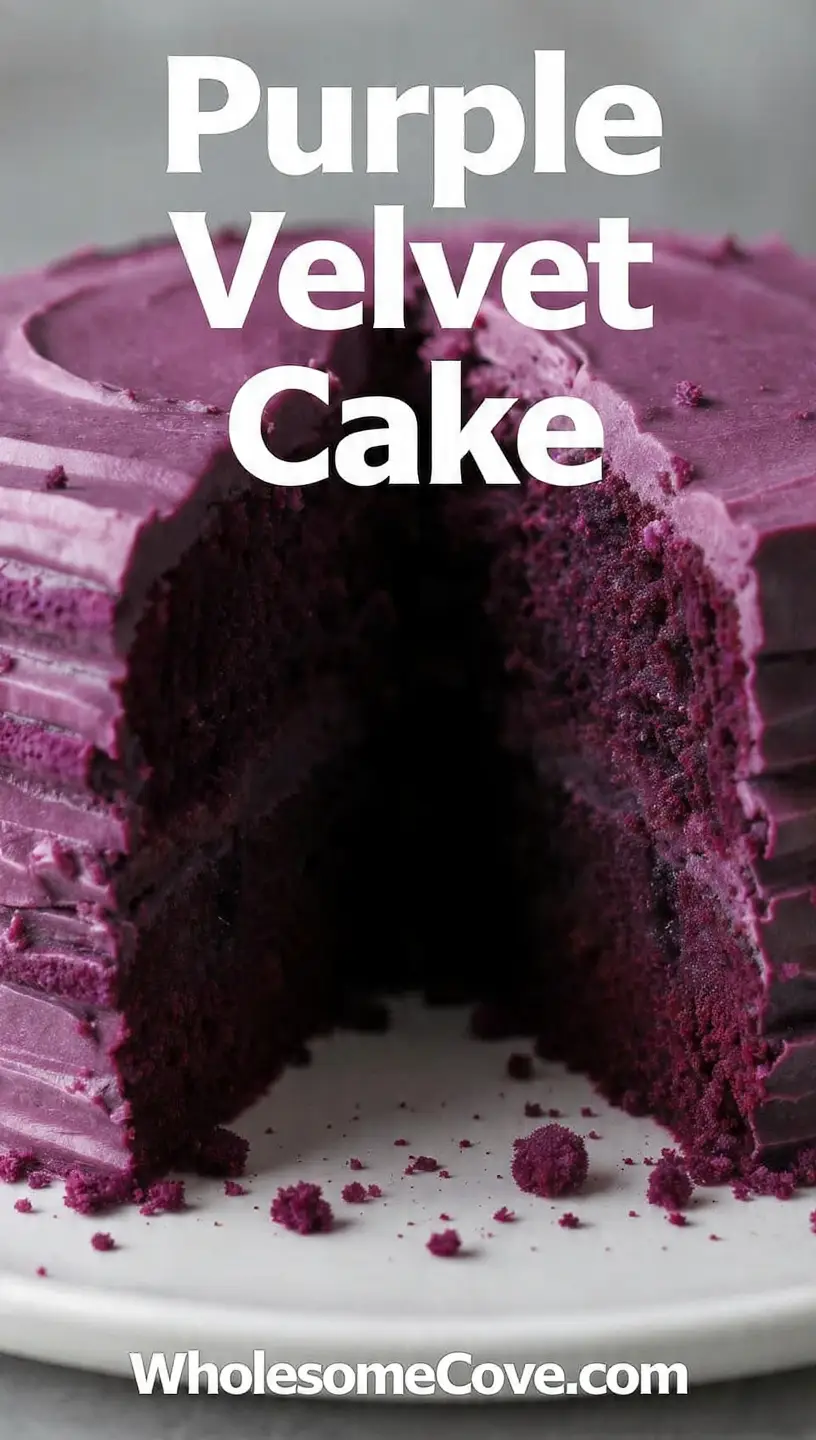
- Stunning visual impact – The vibrant purple layers create an unforgettable presentation that photographs beautifully and makes every occasion feel more festive.
- Perfect texture – The combination of buttermilk, vinegar, and proper mixing technique creates that signature velvet crumb that’s impossibly tender and moist.
- Balanced flavor – Unlike overly sweet cakes, this has just a hint of cocoa, plenty of vanilla, and a subtle tang that keeps you coming back for another slice.
- Versatile for any occasion – I’ve served this at children’s birthday parties, bridal showers, baby showers, and even a retirement party. It works beautifully for any celebration.
- Easier than it looks – Despite its impressive appearance, this cake uses straightforward techniques that even intermediate bakers can master with confidence.
- Crowd-pleaser status – I’ve never served this cake without someone asking for the recipe. The combination of familiar flavors and unexpected color creates magic.
The Blue Velvet Cake Recipe shares similar characteristics, but there’s something about purple that feels especially regal and celebratory.
Ingredients
The beauty of this Purple Velvet Cake Recipe lies in its simple ingredient list. You’ll need mostly pantry staples, with just a few special additions to create that stunning color and perfect texture.
For the Cake:
- 2 ½ cups (315g) all-purpose flour
- 1 ½ cups (300g) granulated sugar
- 1 teaspoon baking soda
- 1 teaspoon salt
- 2 tablespoons natural cocoa powder (not Dutch-processed)
- 1 ½ cups (360ml) vegetable oil
- 1 cup (240ml) buttermilk, room temperature
- 2 large eggs, room temperature
- 2 tablespoons white vinegar
- 2 teaspoons pure vanilla extract
- 1 to 2 tablespoons purple gel food coloring
- ½ to 1 teaspoon red gel food coloring (optional, for depth)
For the Cream Cheese Frosting:
- 16 ounces (450g) cream cheese, softened
- ¾ cup (170g) unsalted butter, softened
- 4 cups (480g) powdered sugar, sifted
- 2 teaspoons pure vanilla extract
- Pinch of salt
For a different take on velvet cakes, you might enjoy my White Velvet Cake Recipe.
Kitchen Equipment Needed
Having the right tools makes all the difference when creating this beautiful cake. Here’s everything you’ll need to ensure success.
- Three 9-inch round cake pans
- Parchment paper for lining pans
- Large mixing bowls (at least 2)
- Electric mixer (stand or hand)
- Wire whisk
- Rubber spatula
- Measuring cups and spoons
- Cooling racks
- Offset spatula for frosting
- Toothpicks for testing doneness
- Cake turntable (optional but helpful)
The offset spatula is worth every penny when it comes to getting smooth, professional-looking frosting. I resisted buying one for years, thinking my regular spatula was fine, but the difference is night and day.
Another fantastic velvet variation worth exploring is my Red Velvet Cake Recipe with Cake Mix for an easier shortcut version.
Recommended Products for This Recipe
After making this cake dozens of times, I’ve discovered a few products that genuinely make a difference in the final result. These aren’t just nice-to-haves but actual game-changers.
1. Wilton Purple Gel Food Coloring
This is hands down the best gel food coloring I’ve used for this recipe. It creates a vibrant, true purple without requiring excessive amounts, and it won’t water down your batter like liquid food coloring does. The consistency stays perfect, and the color remains stable through baking.
2. Philadelphia Cream Cheese Brick
I’ve tested this recipe with various cream cheese brands, and Philadelphia consistently delivers the smoothest, most flavorful frosting. The brick form (not the spreadable tub) has the perfect consistency and fat content for that classic cream cheese frosting texture everyone expects from velvet cakes.
3. Nordic Ware Naturals Aluminum Cake Pans
These pans distribute heat beautifully and evenly, which means no burnt edges or undercooked centers. They’re also naturally nonstick without any chemical coatings, and they’re the exact pans I use for all my layer cakes. Mine are five years old and still look brand new.
4. Ateco Offset Spatula
If you’re serious about making beautiful cakes, this offset spatula is essential. The angled blade makes it incredibly easy to spread frosting smoothly and evenly, and it’s perfect for creating those clean, professional-looking layers. I actually own two because I use them so frequently.
You might also enjoy: Black Velvet Cake Recipe
Step-by-Step Instructions: How to Make Purple Velvet Cake
Follow these detailed steps carefully for the best results. I’ve included all my tips and tricks learned through trial and error.
1. Prep Your Pans and Preheat the Oven
- Preheat your oven to 350°F (175°C).
- Grease three 9-inch round cake pans thoroughly with butter or nonstick spray.
- Cut circles of parchment paper to fit the bottom of each pan.
- Place the parchment circles in the pans and grease them again lightly.
- This double protection ensures your cake layers will release perfectly every time.
2. Mix the Dry Ingredients
- In a large bowl, whisk together the flour, sugar, baking soda, salt, and cocoa powder.
- Whisk vigorously for at least 30 seconds to ensure everything is evenly distributed.
- This step is crucial for avoiding pockets of leavening or cocoa in your finished cake.
- Set this bowl aside while you prepare the wet ingredients.
3. Combine the Wet Ingredients
- In another large bowl, whisk together the vegetable oil and buttermilk until smooth.
- Add the eggs one at a time, whisking well after each addition.
- Stir in the vanilla extract and vinegar.
- Now add your purple gel food coloring, starting with 1 tablespoon.
- If you want a deeper purple, add the red gel food coloring at this point (it prevents the purple from looking too blue).
- Whisk until the color is completely uniform with no streaks.
4. Create the Batter
- Pour the wet ingredients into the bowl with the dry ingredients.
- Using a whisk or electric mixer on low speed, mix until just combined.
- The batter should be smooth but don’t overmix or you’ll develop too much gluten, resulting in a tougher cake.
- Scrape down the sides and bottom of the bowl with a rubber spatula to ensure everything is incorporated.
- The batter will be quite thin and fluid, which is exactly what you want.
5. Bake the Cake Layers
- Divide the batter evenly among the three prepared pans (about 2 cups of batter per pan).
- Tap each pan gently on the counter a few times to release any air bubbles.
- Place the pans in the preheated oven, spacing them evenly for proper air circulation.
- Bake for 25 to 28 minutes, or until a toothpick inserted in the center comes out with just a few moist crumbs.
- The tops should spring back when gently pressed.
- Don’t overbake or the cake will be dry rather than moist and tender.
6. Cool the Cakes
- Remove the pans from the oven and place them on wire cooling racks.
- Let the cakes cool in the pans for exactly 10 minutes.
- Run a butter knife around the edges to loosen them.
- Invert each pan onto a cooling rack, then flip the cakes right side up.
- Allow them to cool completely before frosting (this usually takes about 1 hour).
- Rushing this step will cause your frosting to melt and slide off.
7. Make the Cream Cheese Frosting
- In a large bowl, beat the softened cream cheese and butter together with an electric mixer on medium speed.
- Beat for about 2 to 3 minutes until the mixture is completely smooth and fluffy.
- Add the vanilla extract and salt, beating to combine.
- Gradually add the powdered sugar, one cup at a time, beating on low speed after each addition.
- Once all the sugar is added, increase the speed to medium-high and beat for 2 to 3 minutes until light and fluffy.
- If the frosting seems too thick, add a tablespoon of milk or cream.
- If it’s too thin, add more powdered sugar ¼ cup at a time.
8. Assemble and Frost the Cake
- Place your first cake layer on a serving plate or cake stand.
- Spread about ¾ cup of frosting evenly over the top, leaving a small border around the edges.
- Place the second layer on top and repeat with another ¾ cup of frosting.
- Add the third layer and spread a thin layer of frosting over the entire cake (this is your crumb coat).
- Refrigerate the cake for 15 to 20 minutes to set the crumb coat.
- Apply the remaining frosting in a thick, generous layer over the top and sides.
- Use your offset spatula to smooth the frosting, creating swirls or keeping it smooth as you prefer.
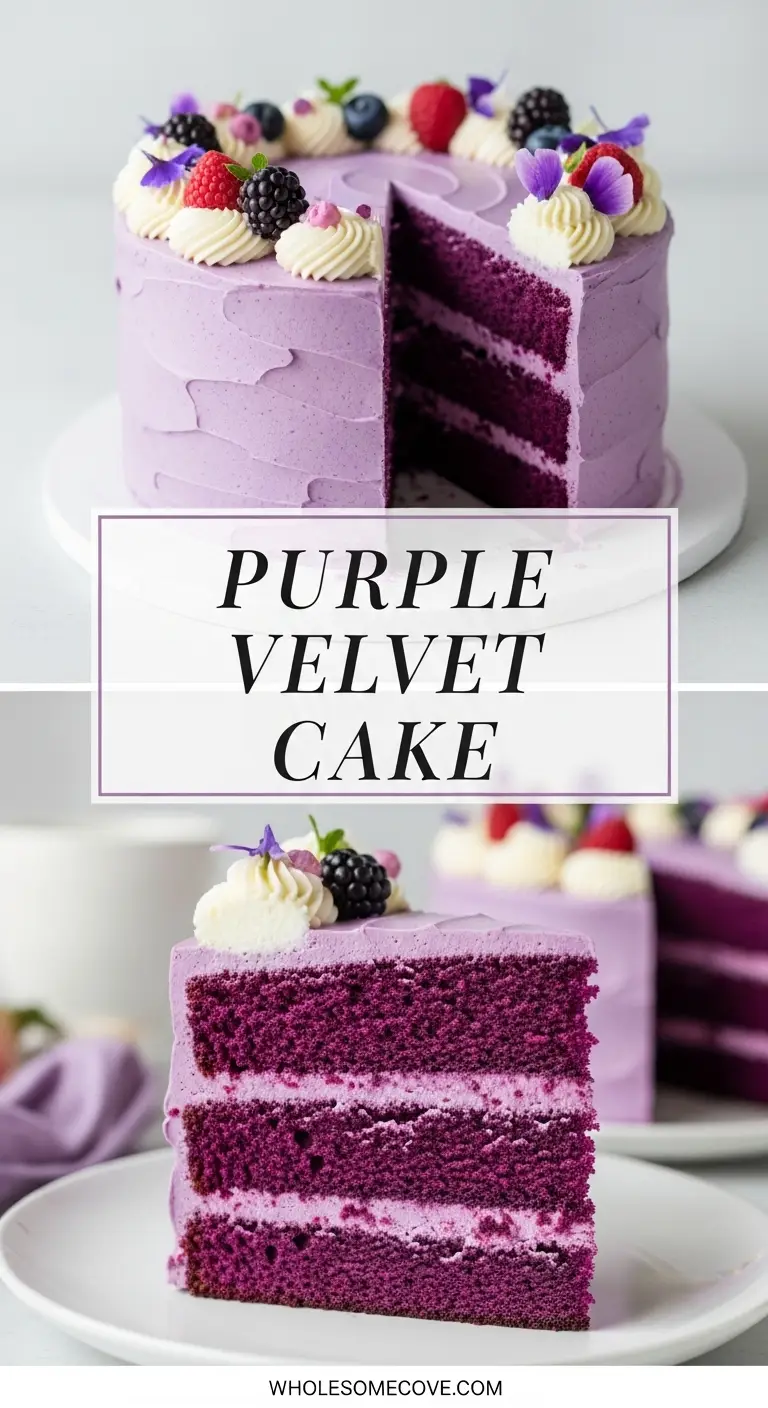
- For extra decoration, you can add fresh berries, edible flowers, or purple sprinkles.
Looking for more layer cake inspiration? Try my Red Velvet Cheesecake Cake Recipe.
Tips for The Best Purple Velvet Cake
These tips come from making this cake more times than I can count. They’ll help you avoid common pitfalls and achieve bakery-quality results.
- Use room temperature ingredients – This is absolutely critical. Cold eggs and buttermilk won’t emulsify properly with the oil, leading to a denser texture. Set everything out about an hour before baking.
- Invest in gel food coloring – Liquid food coloring simply won’t give you the vibrant purple you’re looking for. Gel coloring is concentrated, so you need less, and it won’t affect your batter’s consistency.
- Don’t skip the vinegar – It might seem like a small amount, but vinegar reacts with the baking soda to create lift and also tenderizes the crumb. The tang is subtle but important.
- Use natural cocoa powder – Dutch-processed cocoa won’t react the same way with the acidic ingredients. Natural cocoa is essential for the proper texture and subtle flavor.
- Measure flour correctly – Spoon the flour into your measuring cup and level it off with a knife. Don’t scoop directly from the bag or you’ll end up with too much flour and a dry cake.
- Don’t overbake – Check your cake at 25 minutes. It’s better to slightly underbake than overbake. The cake will continue cooking slightly as it cools in the pan.
- Level your layers – Use a serrated knife to trim any domed tops before assembling. This creates perfectly flat, professional-looking layers.
- Apply a crumb coat – That thin first layer of frosting traps all the crumbs, so your final coat will be smooth and beautiful. Don’t skip this step.
- Chill between coats – Refrigerating the crumb-coated cake makes the final frosting layer so much easier to apply smoothly.
- Bring cake to room temperature – If you’ve refrigerated the finished cake, let it sit at room temperature for about 30 minutes before serving for the best flavor and texture.
For another stunning dessert option, check out my Pumpkin Cheesecake Recipe.
What to Serve with Purple Velvet Cake
This cake is rich and decadent, so I like to serve it with accompaniments that provide contrast or complement its creamy sweetness.
A scoop of vanilla ice cream never fails to please. The cold, simple vanilla enhances the cake’s flavors without competing.
Fresh berries like blackberries, blueberries, or raspberries add a tart pop of freshness. They also reinforce the purple color theme beautifully.
- Coffee or espresso – The slight bitterness balances the cake’s sweetness perfectly, and it’s what I always serve at adult gatherings.
- Cold milk – Classic and perfect, especially for children’s parties or casual family desserts.
- Sparkling wine or champagne – For celebrations, a dry bubbly cuts through the richness beautifully and feels appropriately festive.
- Hot Chocolate – During colder months, this pairing is absolutely divine and cozy.
- Fresh whipped cream – A small dollop on the side adds extra richness and a lovely contrast in texture.
- Berry compote – I sometimes simmer mixed berries with a bit of sugar until they break down into a thick sauce. It’s incredible spooned over each slice.
- Vanilla or strawberry ice cream – Both flavors work wonderfully and kids especially love this combination.
Another delicious pairing is my Chocolate Chip Cookies Recipe for a complete dessert spread.
Variations of Purple Velvet Cake
Once you’ve mastered the basic recipe, these variations let you customize the cake for different occasions or preferences.
- Ube Purple Velvet Cake – Replace 1 cup of the buttermilk with ½ cup ube extract and ½ cup regular buttermilk. This adds a subtle sweet potato flavor that’s absolutely delicious and deepens the purple color naturally.
- Lavender Purple Velvet Cake – Add 1 tablespoon of food-grade dried lavender to the dry ingredients before mixing. The floral notes are subtle but create an elegant, sophisticated flavor perfect for bridal showers.
- Purple Velvet Cupcakes – Use the same batter to make 24 cupcakes instead. Bake at 350°F for 18 to 20 minutes. These are perfect for parties and easier to serve.
- Gluten-Free Purple Velvet Cake – Substitute the all-purpose flour with a 1:1 gluten-free baking blend. I’ve tested this with Bob’s Red Mill and it works beautifully.
- Purple Velvet Bundt Cake – Pour the batter into a greased and floured bundt pan and bake for 45 to 50 minutes. The presentation is stunning with just a simple glaze.
- Chocolate Ganache Topping – Instead of cream cheese frosting, try a dark chocolate ganache for a more sophisticated, less sweet option that adults particularly appreciate.
- Purple Velvet Sheet Cake – Bake in a 9×13-inch pan for 30 to 35 minutes. Perfect for large gatherings and easier to transport.
- Vegan Purple Velvet Cake – Use vegan buttermilk (plant milk plus vinegar), flax eggs, and vegan cream cheese for the frosting. The texture is remarkably similar.
If you love creative cake variations, you’ll enjoy my Red Velvet Cake Recipe which offers even more ideas.
Storage and Reheating
Proper storage keeps this cake fresh and delicious for days. Here’s exactly how to handle leftovers.
- Room temperature storage – If you’ll finish the cake within 1 to 2 days, you can keep it covered at room temperature in a cool location. Use a cake dome or cover it loosely with plastic wrap.
- Refrigerator storage – Because of the cream cheese frosting, refrigeration is recommended for anything longer than 2 days. Store in an airtight container or cover tightly with plastic wrap. The cake will stay fresh for 4 to 5 days.
- Freezing whole cake – You can freeze the assembled, frosted cake for up to 2 months. Freeze it unwrapped for 1 hour first, then wrap tightly in plastic wrap followed by aluminum foil. This prevents the frosting from getting damaged.
- Freezing individual slices – Wrap each slice separately in plastic wrap, then place in a freezer bag. These thaw quickly and are perfect for portion control.
- Freezing unfrosted layers – Wrap cooled cake layers individually in plastic wrap, then foil. They’ll keep for 3 months and you can frost them whenever you’re ready.
- Thawing frozen cake – Transfer frozen cake to the refrigerator and let it thaw overnight. Bring to room temperature for 30 minutes before serving for the best texture and flavor.
- Not recommended – Don’t try to reheat this cake. It’s meant to be served at room temperature or slightly chilled. Heating will make the frosting melt and the texture become gummy.
My Creme Brulee Cheesecake Recipe also stores beautifully using similar methods.
Nutritional Facts
Here’s the approximate nutritional information per slice (based on 12 servings):
- Calories: 625
- Total Fat: 36g
- Saturated Fat: 13g
- Cholesterol: 85mg
- Sodium: 380mg
- Total Carbohydrates: 72g
- Dietary Fiber: 1g
- Sugars: 55g
- Protein: 6g
Please note that these values are estimates and can vary based on specific brands and measurements. The cake is definitely an indulgent treat meant for special occasions.
If you’re looking for lighter options, my Healthy Carrot Cake Recipe offers a more nutritious alternative.
Health Benefits of Key Ingredients
While this is definitely a dessert meant for celebration rather than daily nutrition, some ingredients do offer benefits worth noting.
Cocoa powder contains antioxidants called flavonoids that support heart health and reduce inflammation. Even the small amount in this recipe contributes some of these beneficial compounds.
Buttermilk provides calcium for bone health and probiotics that support digestive function. It’s also lower in fat than regular milk while adding that characteristic tangy flavor.
- Eggs – Provide high-quality protein and essential nutrients like vitamin D, B vitamins, and choline for brain health.
- Vanilla extract – Contains small amounts of antioxidants and has been shown to have calming effects.
- Cream cheese – Offers calcium, vitamin A, and protein, though it’s also high in fat and calories.
- Butter – Provides fat-soluble vitamins A, D, E, and K that your body needs for various functions.
For more desserts that balance indulgence with better ingredients, try my Healthy Apple Pie Recipe.
FAQs About Purple Velvet Cake
1. Can I use liquid food coloring instead of gel?
You can, but I don’t recommend it. Liquid food coloring contains more water, which can affect your batter’s consistency and make it thinner.
You’ll also need to use a much larger quantity to achieve the same vibrant color, which can give the cake a slightly bitter aftertaste. Gel food coloring is concentrated and provides better results.
2. Why is my purple velvet cake turning out brown or gray?
This usually happens when you use too much cocoa powder or Dutch-processed cocoa instead of natural cocoa. The cocoa can muddy the purple color, especially if you’re not using enough food coloring.
Make sure you’re using the exact amount of natural cocoa powder specified and don’t be shy with the gel food coloring. Adding a tiny bit of red gel along with the purple can also help prevent that grayish tone.
3. Can I make this cake ahead of time?
Absolutely! You can bake the cake layers up to 2 days in advance.
Wrap them tightly in plastic wrap and store at room temperature. You can also freeze unfrosted layers for up to 3 months. The frosted cake keeps well in the refrigerator for 4 to 5 days, making it perfect for party planning.
4. My frosting is too runny. How do I fix it?
The most common cause is butter or cream cheese that’s too soft. Both should be softened but still hold their shape.
If your frosting is runny, refrigerate it for 15 to 20 minutes, then beat it again. You can also gradually add more powdered sugar (¼ cup at a time) until it reaches the right consistency.
5. Do I have to use buttermilk or is there a substitute?
Buttermilk is really important for the tender texture and subtle tang in velvet cakes, but you can make a substitute. Mix 1 cup of whole milk with 1 tablespoon of white vinegar or lemon juice.
Let it sit for 5 minutes before using. It won’t be quite identical to real buttermilk, but it works in a pinch.
Read Also: Eggnog Cake Recipe
Purple Velvet Cake
Ingredients
- 2 ½ cups all-purpose flour - 315g
- 1 ½ cups granulated sugar - 300g
- 1 teaspoon baking soda
- 1 teaspoon salt
- 2 tablespoons natural cocoa powder - not Dutch-processed
- 1 ½ cups vegetable oil - 360ml
- 1 cup buttermilk - 240ml, room temperature
- 2 large eggs - room temperature
- 2 tablespoons white vinegar
- 2 teaspoons pure vanilla extract
- 1-2 tablespoons purple gel food coloring
- ½-1 teaspoon red gel food coloring - optional, for depth
- 16 ounces cream cheese - 450g, softened
- ¾ cup unsalted butter - 170g, softened
- 4 cups powdered sugar - 480g, sifted
- 2 teaspoons pure vanilla extract
- salt - pinch
Equipment
- Three 9-inch round cake pans
- Parchment paper
- Large mixing bowls - at least 2
- Electric mixer - stand or hand mixer
- Wire whisk
- Rubber spatula
- Measuring cups and spoons
- Cooling racks
- Offset spatula - for frosting
- Toothpicks - for testing doneness
- Cake turntable - optional but helpful
Method
- Preheat oven to 350°F (175°C). Grease three 9-inch round cake pans, line bottoms with parchment paper, and grease again.
- In a large bowl, whisk together flour, sugar, baking soda, salt, and cocoa powder for at least 30 seconds until evenly distributed. Set aside.
- In another large bowl, whisk together oil, buttermilk, eggs, vanilla, and vinegar. Add purple gel food coloring (and optional red coloring) and whisk until color is completely uniform.
- Pour wet ingredients into dry ingredients and mix on low speed until just combined and smooth. Scrape down bowl to ensure everything is incorporated.
- Divide batter evenly among prepared pans (about 2 cups per pan). Tap pans gently on counter to release air bubbles.
- Bake for 25-28 minutes until toothpick inserted in center comes out with just a few moist crumbs. Cool in pans for 10 minutes, then turn out onto cooling racks and cool completely.
- Beat softened cream cheese and butter together for 2-3 minutes until smooth and fluffy. Add vanilla and salt, then gradually add powdered sugar one cup at a time, beating until light and fluffy.
- Place first cake layer on serving plate, spread ¾ cup frosting on top. Add second layer, frost, then add third layer. Apply thin crumb coat over entire cake and refrigerate 15-20 minutes.
- Apply remaining frosting in a thick layer over top and sides. Smooth with offset spatula and decorate as desired with berries, flowers, or sprinkles.
Nutrition
Notes
- Use room temperature eggs and buttermilk for best texture and proper emulsification.
- Gel food coloring is essential – liquid coloring won’t create vibrant purple and can affect batter consistency.
- Natural cocoa powder (not Dutch-processed) is required for proper chemical reaction with acidic ingredients.
- Don’t skip the crumb coat – it traps crumbs and makes final frosting layer smooth and professional-looking.
- Store frosted cake in refrigerator for up to 5 days in airtight container. Bring to room temperature 30 minutes before serving.
- Cake layers can be baked 2 days ahead and stored wrapped in plastic wrap at room temperature, or frozen for up to 3 months.
- For cupcakes, divide batter into 24 cupcake liners and bake at 350°F for 18-20 minutes.
- To make vegan, use plant milk plus vinegar for buttermilk, flax eggs, and vegan cream cheese for frosting.
- Adding ½-1 teaspoon red gel food coloring with purple prevents grayish tone and creates deeper purple color.
- Measure flour by spooning into measuring cup and leveling off – don’t scoop directly from bag or cake will be dry.
Private Notes
Tried this recipe?
Let us know how it was!Final Thoughts
This Purple Velvet Cake Recipe has become one of my most treasured desserts, and I hope it brings as much joy to your celebrations as it has to mine. The combination of stunning appearance and delicious flavor makes it a guaranteed crowd-pleaser.
Don’t be intimidated by the layers or the coloring process. Take your time, follow the steps, and you’ll create something truly special that everyone will remember.
I’d love to hear about your experience making this cake! Drop a comment below with your results, any variations you tried, or questions you might have. And if you make it for a special occasion, tag me on social media so I can see your beautiful creation.
Recommended:
- Fruit Cocktail Cake Recipe
- Amish Apple Cake Recipe
- Cannoli Poke Cake Recipe
- Coffee Cake Recipe Using Cake Mix
- Eggnog Cookies Recipe
- Funnel Cake Bites Recipe
- Easy Carrot Cake Recipe
- Starbucks Banana Bread Recipe
- Healthy Banana Bread Recipe
- Air Fryer Banana Bread Recipe