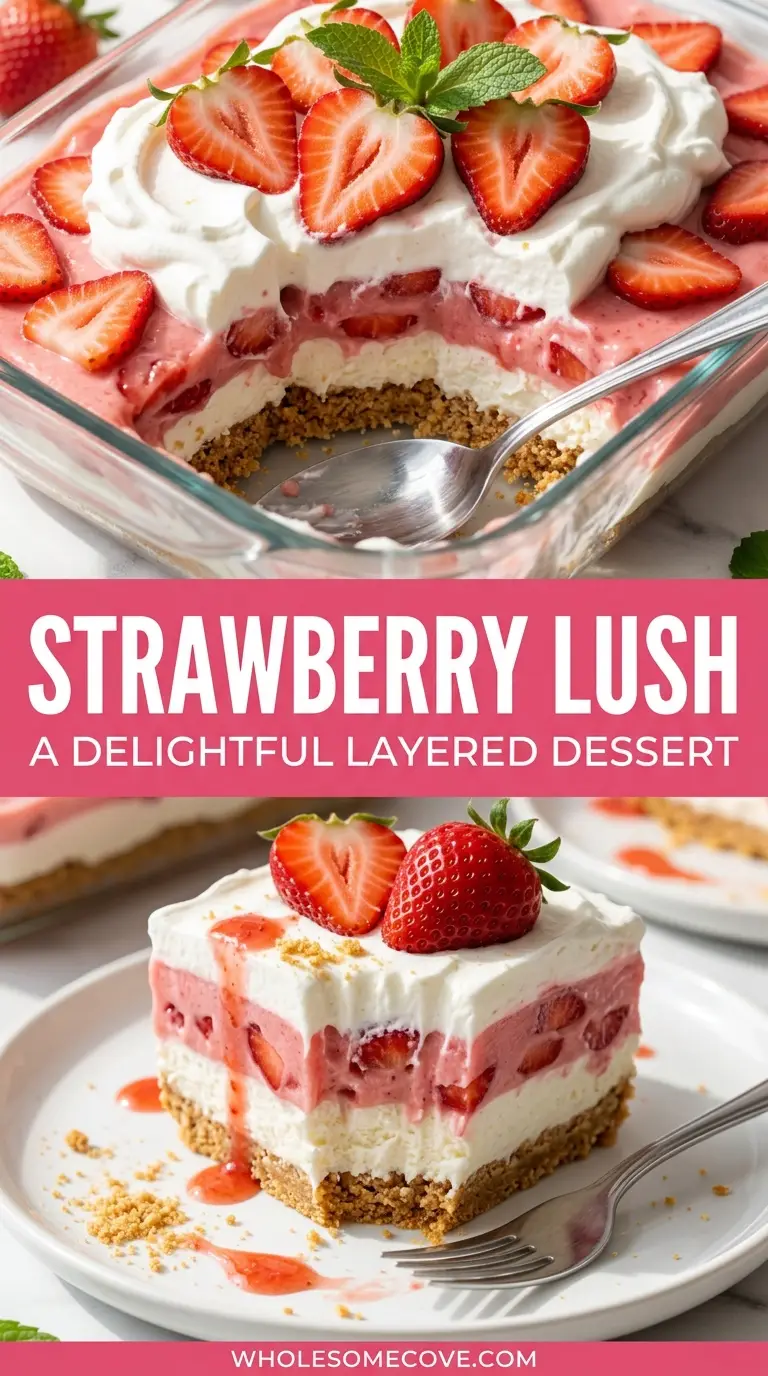
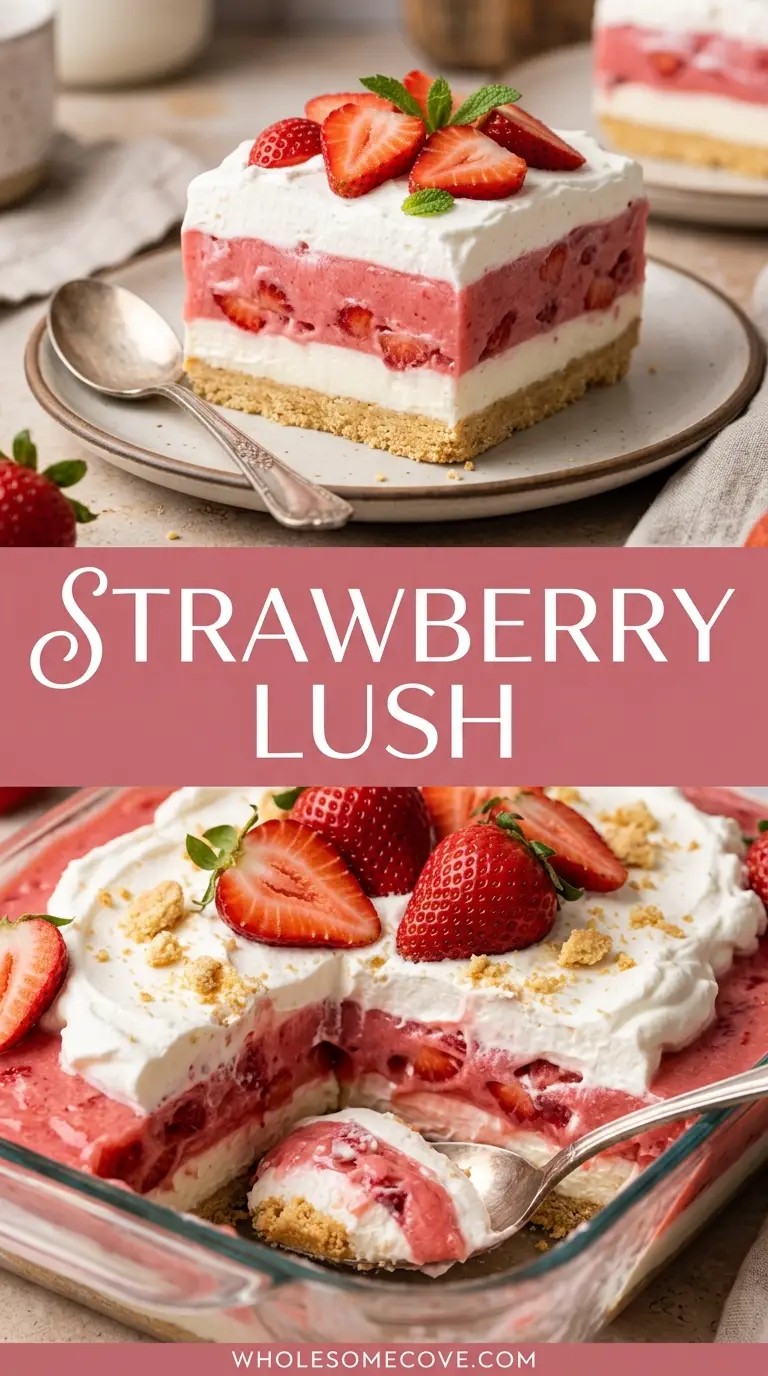
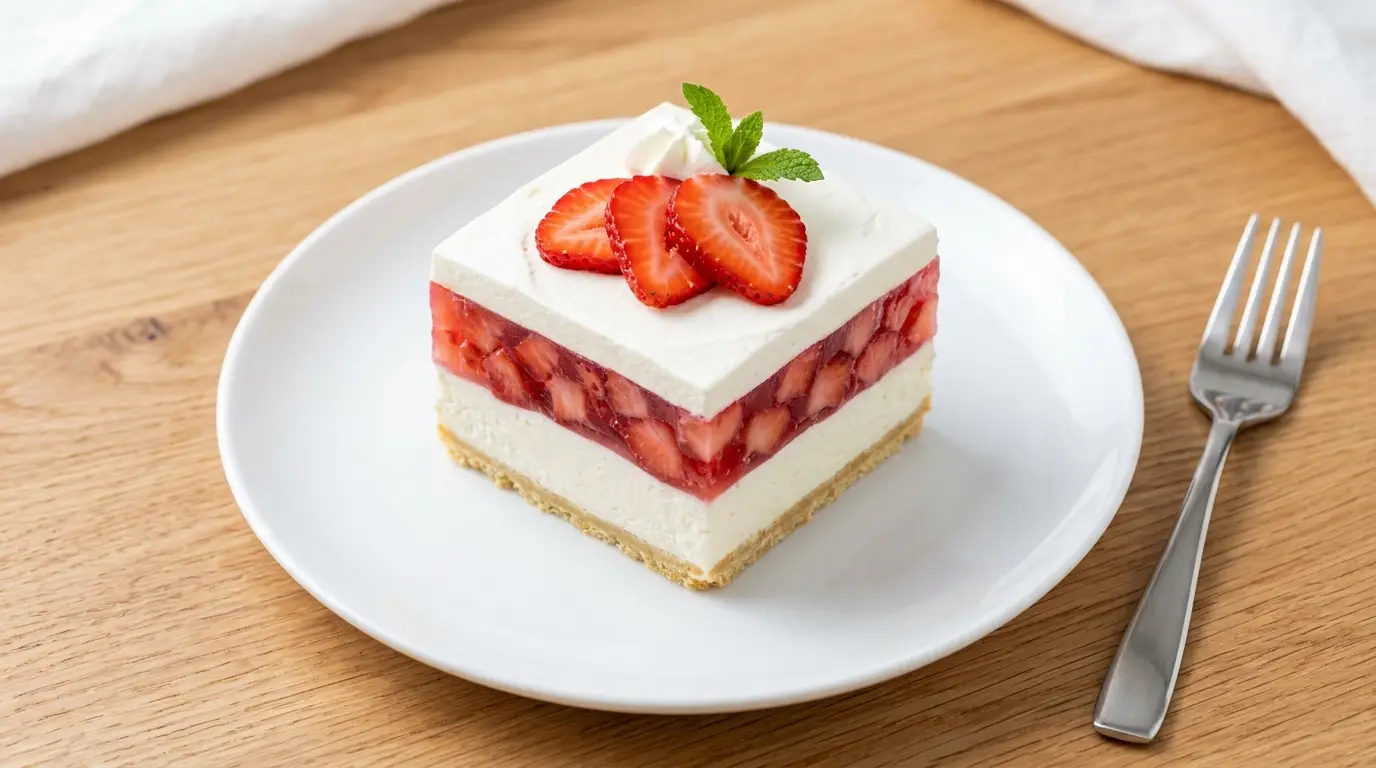
This Strawberry Lush recipe stacks four distinct layers into one chilled 9×13 dish: a buttery Golden Oreo crust, a thick no-bake cheesecake filling, a pink strawberry Jell-O layer studded with fresh diced berries, and a cloud of whipped topping.
The whole thing is no-bake, so the oven never turns on. You need about 30 minutes of hands-on work, then the fridge does the rest.
Most versions fall apart at the same spot: the Jell-O layer gets folded into whipped topping while it’s still warm, which makes it separate and go soupy. This recipe fixes that by chilling the gelatin until it’s cold and just starting to thicken before anything else touches it.
The strawberry layer here uses fluffy jello and cream instead of a heavy canned pie filling, which keeps each slice light rather than dense. With two 8-ounce blocks of cream cheese and a full pound of fresh strawberries, the cheesecake layer holds its shape and the fruit flavor stays real.
| Quick Recipe Summary | |
|---|---|
| Prep Time | 30 minutes |
| Cook Time | 0 minutes |
| Chill Time | 4 hours |
| Total Time | 4 hours 30 minutes |
| Servings | 12 servings |
| Difficulty Level | Easy |
For another chilled layered dessert in this same family, see Lemon Lush.
Why You’ll Love This Strawberry Lush Recipe
This dessert looks like it took real effort, but the actual work is spreading four layers into a pan. The fridge handles the hard part while you do something else.
Here is what makes it worth keeping in your rotation:
- No oven required. The crust sets in the freezer and every layer is assembled cold, which makes this a good choice for hot days when you don’t want to heat the kitchen.
- Feeds a crowd. One 9×13 pan cuts into 12 generous squares, enough for a potluck, a barbecue, or a family gathering with leftovers.
- Make-ahead friendly. You can build it the night before and let it chill overnight, so serving day only needs the final whipped topping and a few sliced berries.
- Real strawberry flavor. A full pound of fresh strawberries goes into the layers, not just artificial flavoring, so each bite tastes like actual fruit.
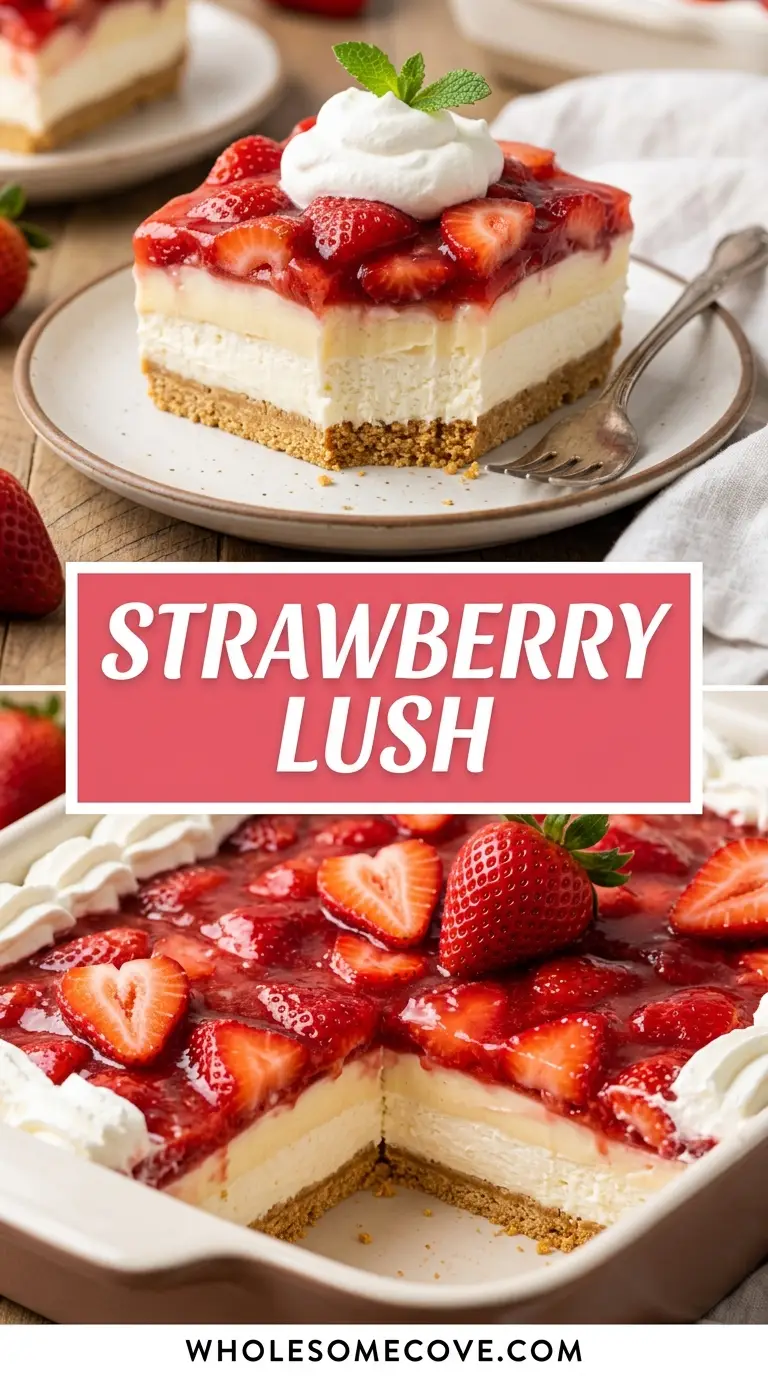
- Distinct, pretty layers. The white cheesecake, pink jello, and cloud-white topping stack into clean stripes that look striking when you cut into them.
- Beginner-proof. There is no baking, no tempering, and no tricky technique. If you can operate a hand mixer, you can make this.
You might also enjoy: Strawberry Peach Tart
Ingredients
Every layer uses simple grocery-store ingredients, and the amounts below fill a standard 9×13-inch (23×33 cm) baking dish. Room-temperature cream cheese matters more than anything else here, so pull it out of the fridge before you start.
For the crust:
- 1 package (about 14 oz / 400 g) Golden Oreo cookies, crushed into fine crumbs (roughly 3 cups of crumbs)
- 8 tablespoons (113 g) unsalted butter, melted
- 1/4 teaspoon fine salt
For the cream cheese layer:
- 2 blocks (8 oz / 226 g each) full-fat cream cheese, softened to room temperature
- 1 cup (120 g) powdered sugar
- 1 cup (240 ml) heavy whipping cream, cold
- 1 teaspoon pure vanilla extract
For the strawberry layer:
- 1 box (3 oz / 85 g) strawberry Jell-O
- 3/4 cup (180 ml) boiling water
- 3/4 cup (180 ml) cold water with ice cubes
- 1 1/2 cups (about 250 g) fresh strawberries, hulled and diced small
- 1 container (8 oz / 226 g) whipped topping such as Cool Whip, thawed
For the topping:
- 1 container (8 oz / 226 g) whipped topping, thawed
- 1/2 cup (about 85 g) fresh strawberries, sliced, for garnish
Read Also: Cherry Lush
Kitchen Equipment Needed
You don’t need anything specialized, but a couple of tools make the layers cleaner and the mixing faster. A hand mixer is the one item worth having, since whipping cream by hand is slow work.
Here is the full list:
- 9×13-inch baking dish, glass or ceramic
- Electric hand mixer or stand mixer
- Food processor for crushing cookies
- 2 or 3 medium and large mixing bowls
- Offset spatula for spreading layers
- Rubber spatula for folding
- Measuring cups and spoons
- Plastic wrap or a lid for covering
A related recipe worth a look is Butterscotch Lush.
Recommended Products for This Recipe
These are the specific items I reach for when making layered no-bake desserts. Each one solves a problem I ran into more than once before I upgraded.
1. OXO Good Grips Offset Spatula
Spreading a soft cream cheese layer over a loose crumb crust is where most lushes get wrecked, because a flat knife drags the crumbs up into the filling. An offset spatula keeps your hand above the surface and lets you feather the layer out without disturbing the crust underneath. It also gets the top whipped topping perfectly smooth for that bakery look.
2. Pyrex 9×13 Glass Baking Dish with Lid
A clear glass dish lets you see the layers from the side, which is half the appeal of a lush. The fitted lid matters more than you’d think, since this dessert needs hours in the fridge and plastic wrap always slides off or sticks to the topping.
3. Cuisinart Food Processor
Crushing a whole package of cookies by hand in a bag never gets you truly fine crumbs, and uneven crumbs make a crust that crumbles when you cut it. A food processor turns the cookies to sand in about 20 seconds and mixes in the melted butter in the same bowl.
4. KitchenAid Hand Mixer
The cream cheese layer needs to be beaten smooth and then whipped with cream until it holds its shape, and a weak motor leaves you with lumps. A sturdy hand mixer powers through both jobs without straining, and the beaters wipe clean between the cheesecake and topping steps.
For a different chilled treat, see Pumpkin Lush.
Step-by-Step Instructions: How to Make Strawberry Lush
Follow these steps in order and let each layer set where noted, and you’ll end up with clean stripes instead of a swirled mess.
1. Make and Chill the Crust
- Crush the Golden Oreos in a food processor until they become fine, sandy crumbs with no large chunks left.
- Pour in the melted butter and the salt, then pulse until the crumbs look evenly moistened, like wet sand.
- Press the mixture firmly and evenly into the bottom of your 9×13-inch dish, using the flat bottom of a glass to pack it down hard.
- Place the dish in the freezer for at least 15 minutes while you make the next layer, which firms the butter so the crust holds together.
2. Whip the Cream Cheese Layer
- In a large bowl, beat the softened cream cheese and powdered sugar on medium speed until completely smooth and no lumps remain, about 2 minutes.
- With the mixer still running, pour in the cold heavy cream and the vanilla extract.
- Increase the speed to medium-high and beat until the mixture thickens and holds soft peaks, roughly 2 to 3 minutes.
- Remove the crust from the freezer and spread the cream cheese layer evenly over it with an offset spatula, working gently so you don’t pull up crumbs.
- Return the dish to the fridge while you make the strawberry layer.
3. Prepare the Strawberry Jell-O Layer
- In a medium bowl, whisk the strawberry Jell-O powder into the boiling water until it fully dissolves, about 2 minutes.
- Add the cold water with ice cubes and stir until the ice melts completely and the mixture feels cold to the touch.
- Place the bowl in the refrigerator for about 20 to 30 minutes, until the gelatin is cold and just barely starting to thicken but not set.
- Once thickened slightly, fold in the diced strawberries and one 8-ounce container of whipped topping until the color is even and no white streaks remain.
4. Add the Strawberry Layer
- Remove the dish from the fridge and pour the strawberry mixture evenly over the cream cheese layer.
- Spread it gently to the edges with a clean spatula. It will look slightly loose, which is normal, and it firms up as it chills.
5. Chill Until Set
- Cover the dish tightly with a lid or plastic wrap.
- Refrigerate for at least 4 hours, or overnight for the cleanest slices.
6. Finish and Serve
- Once the lush is fully set, spread the second 8-ounce container of whipped topping over the top in an even layer.
- Arrange the sliced strawberries over the top just before serving.
- Cut into 12 squares with a knife wiped clean between cuts, and serve cold.
For more chilled layered ideas, check out Butterfinger Lush.
Tips for The Best Strawberry Lush
The difference between a lush that slices cleanly and one that slumps into a puddle comes down to a few small habits. Most of them are about temperature and patience.
Keep these in mind:
- Soften the cream cheese fully. Cold cream cheese leaves lumps that never fully smooth out, so leave it on the counter for an hour before starting.
- Cool the gelatin before folding. I ruined my first batch by folding whipped topping into warm Jell-O, and it separated into a watery layer that never firmed up. Chill the gelatin until it’s cold and syrupy first.
- Pat the strawberries dry. Diced fresh berries release juice, and that extra liquid thins the layers. Blot them with a paper towel before folding them in.
- Pack the crust hard. A loosely pressed crust falls apart when you cut it, so press it down with real force using a flat glass.
- Don’t rush the chill. Four hours is the minimum, but I’ve found the layers cut noticeably cleaner after a full overnight rest.
- Wipe the knife between cuts. A clean blade gives you sharp, defined layers instead of dragging one color into the next.
- Add the top berries last. Sliced strawberries weep juice over time, so garnish right before serving to keep the top looking fresh.
You’ll find more inspiration in Chocolate Lush.
What to Serve with Strawberry Lush
Strawberry Lush is rich and creamy, so it pairs best with lighter drinks and simple accompaniments that don’t compete with it. Since it’s a cool dessert, it fits naturally at the end of a warm-weather meal or alongside other picnic spreads.
Here are pairings that work well:
- A tall glass of Strawberry Smoothie for a double dose of berry flavor at a brunch
- Peach Lemonade or plain iced tea to cut through the richness
- Fresh coffee or espresso, which balances the sweetness for an after-dinner serving
- A scoop of Peach Sorbet on the side for guests who want something extra fruity
- Alongside a Grilled Peach and Burrata Salad as part of a summer dessert-and-salad table
- A batch of Peach Iced Tea for potlucks and barbecues
- Simple butter cookies or shortbread for guests who like a crisp bite next to the creamy squares
For a lighter option, try: Peach Popsicles
Variations of Strawberry Lush
Once you know the four-layer method, you can swap flavors and components without changing the technique. The structure stays the same: crust, cream cheese, fruit layer, topping.
Try these variations:
- Graham cracker crust. Swap the Golden Oreos for 2 cups of graham cracker crumbs mixed with 1/3 cup sugar and the melted butter for a more classic base.
- Strawberry cheesecake pudding layer. Replace the Jell-O layer with cheesecake instant pudding beaten with milk and a spoonful of strawberry Jell-O powder for a thicker, denser middle.
- Mixed berry lush. Fold blueberries or raspberries in with the strawberries for a berry-medley version.
- Chocolate-dipped twist. Drizzle melted chocolate over the finished top for a chocolate-covered-strawberry effect.
- Nutty crust. Add 1/2 cup finely chopped pecans or walnuts to the crust for crunch and a shortbread-like flavor.
- Lighter version. Use reduced-fat cream cheese and sugar-free Jell-O, though the layers set a little softer.
- Vanilla wafer base. Line the pan with whole vanilla wafers instead of a crumb crust for a softer, cake-like bottom.
Read Also: Lemon Cream Cheese Dump Cake
Storage and Reheating
This is a chilled dessert, so there’s no reheating involved, but proper storage keeps the layers distinct and the crust from going soggy. It’s best eaten within a couple of days, since fresh strawberries release juice over time.
Follow these guidelines:
- Refrigerator: Cover tightly and store in the fridge for up to 3 days. The crust softens after that as berry juice works down through the layers.
- Best within 1 to 2 days: For the cleanest layers and firmest crust, serve it within the first two days.
- Freezer: You can freeze it for up to 1 month, wrapped well. The texture of the whipped and jello layers changes slightly once thawed, becoming a bit softer.
- Thawing: Move a frozen lush to the fridge overnight to thaw slowly rather than at room temperature.
- Make-ahead: Build the dessert through the strawberry layer, chill overnight, then add the top whipped topping and fresh berries the day you serve it.
- Serve cold: Keep it in the fridge until the moment you serve, since the layers soften quickly at room temperature.
For another make-ahead treat, see Peach Trifle.
Nutritional Facts
Values below are estimates per serving, based on the dessert cut into 12 squares. Actual numbers vary with the specific brands you use.
| Nutrient | Amount per Serving |
|---|---|
| Calories | 410 kcal |
| Total Fat | 28 g |
| Saturated Fat | 17 g |
| Cholesterol | 65 mg |
| Sodium | 230 mg |
| Total Carbohydrates | 36 g |
| Sugars | 26 g |
| Protein | 4 g |
For a fruit-forward lighter dessert, see Peach Compote.
Health Benefits of Key Ingredients
While this is a dessert first, a few of its core ingredients bring real nutritional value to the table. The fresh strawberries in particular carry most of the benefit here.
Here’s what the key ingredients offer:
- Strawberries: High in vitamin C, which supports immune function and skin health, and a good source of manganese and antioxidants called anthocyanins.
- Fresh berries and fiber: Whole strawberries contribute dietary fiber that supports digestion, more than you’d get from artificial flavoring alone.
- Cream cheese: Provides calcium and a small amount of protein, along with fat-soluble vitamin A.
- Heavy cream: Contains calcium and vitamin D, both of which support bone health in modest amounts.
- Vanilla extract: Real vanilla contains trace antioxidant compounds, and a little goes a long way on flavor without added sugar.
- Low sodium fruit base: Choosing fresh strawberries over syrupy canned fillings keeps added sugar and sodium lower in the fruit layer.
A related recipe is Peach Chia Pudding.
FAQs About Strawberry Lush
1. Why is my strawberry layer runny and not setting?
The most common cause is folding whipped topping into the Jell-O while it’s still warm, which breaks the gelatin and keeps it from firming. Chill the gelatin until it’s cold and slightly thickened before adding anything, and give the assembled dessert a full 4 hours minimum in the fridge.
2. Can I use frozen strawberries instead of fresh?
Yes, but thaw them completely and pat them very dry first. Frozen berries release a lot of water as they thaw, and that extra liquid thins the layers and can make the crust soggy.
3. How far in advance can I make Strawberry Lush?
You can assemble it up to a day ahead and chill it overnight, which actually improves how cleanly it slices. Wait to add the final whipped topping and garnish berries until the day you serve it for the freshest look.
4. Can I make this without Jell-O?
Yes, you can swap the Jell-O layer for a strawberry cheesecake pudding layer made with instant pudding and milk. The texture will be thicker and denser, but it still sets into a distinct middle stripe.
5. What’s the best crust for a lush?
Golden Oreos give a buttery, sweet base that pairs well with strawberries, but graham crackers and vanilla wafers both work. Whatever you choose, press it down firmly and chill it so it holds together when sliced.
6. Why did my cream cheese layer turn out lumpy?
Cold cream cheese is almost always the culprit, since it won’t beat smooth straight from the fridge. Let it sit at room temperature for about an hour, then beat it fully smooth before adding any liquid.
For another crowd-pleasing dessert, see Peach Cobbler.
Strawberry Lush
Ingredients
- 1 package Golden Oreo cookies - about 14 oz or 400g, crushed into fine crumbs (roughly 3 cups of crumbs)
- 8 tablespoons unsalted butter - 113g, melted
- 1/4 teaspoon fine salt
- 2 blocks full-fat cream cheese - 8 oz or 226g each, softened to room temperature
- 1 cup powdered sugar - 120g
- 1 cup heavy whipping cream - 240ml, cold
- 1 teaspoon pure vanilla extract
- 1 box strawberry Jell-O - 3 oz or 85g
- 3/4 cup boiling water - 180ml
- 3/4 cup cold water with ice cubes - 180ml
- 1 1/2 cups fresh strawberries - about 250g, hulled and diced small
- 1 container whipped topping - 8 oz or 226g, such as Cool Whip, thawed
- 1 container whipped topping - 8 oz or 226g, thawed
- 1/2 cup fresh strawberries - about 85g, sliced, for garnish
Equipment
- 9×13 inch baking dish - glass or ceramic
- Electric hand mixer - or stand mixer
- Food processor - for crushing cookies
- Mixing bowls - 2 or 3 medium and large
- Offset spatula - for spreading layers
- Rubber spatula - for folding
- Plastic wrap - or a lid for covering
Method
- Crush the Golden Oreos in a food processor until they become fine, sandy crumbs. Pour in the melted butter and salt, then pulse until evenly moistened like wet sand.
- Press the mixture firmly and evenly into the bottom of a 9×13-inch dish using the flat bottom of a glass. Freeze for at least 15 minutes.
- Beat the softened cream cheese and powdered sugar on medium speed until completely smooth, about 2 minutes. Add the cold heavy cream and vanilla, then beat on medium-high until thick and holding soft peaks, 2 to 3 minutes.
- Spread the cream cheese layer evenly over the chilled crust with an offset spatula, working gently. Return the dish to the fridge.
- Whisk the strawberry Jell-O powder into the boiling water until fully dissolved, about 2 minutes. Add the cold water with ice cubes and stir until the ice melts and the mixture feels cold.
- Refrigerate the gelatin for 20 to 30 minutes, until cold and just barely starting to thicken but not set.
- Fold in the diced strawberries and one 8-ounce container of whipped topping until the color is even and no white streaks remain.
- Pour the strawberry mixture evenly over the cream cheese layer and spread gently to the edges with a clean spatula. It will look slightly loose, which is normal.
- Cover the dish tightly with a lid or plastic wrap and refrigerate for at least 4 hours, or overnight for the cleanest slices.
- Spread the second 8-ounce container of whipped topping over the top in an even layer. Arrange sliced strawberries over the top just before serving.
- Cut into 12 squares with a knife wiped clean between cuts, and serve cold.
Nutrition
Notes
- Soften the cream cheese fully: Cold cream cheese leaves lumps that never fully smooth out, so leave it on the counter for an hour before starting.
- Cool the gelatin before folding: Folding whipped topping into warm Jell-O causes it to separate into a watery layer. Chill the gelatin until it’s cold and syrupy first.
- Pat the strawberries dry: Diced fresh berries release juice that thins the layers. Blot them with a paper towel before folding them in.
- Pack the crust hard: A loosely pressed crust falls apart when you cut it, so press it down with real force using a flat glass.
- Don’t rush the chill: Four hours is the minimum, but the layers cut noticeably cleaner after a full overnight rest.
- Wipe the knife between cuts: A clean blade gives you sharp, defined layers instead of dragging one color into the next.
- Add the top berries last: Sliced strawberries weep juice over time, so garnish right before serving to keep the top looking fresh.
- Storage: Cover tightly and store in the fridge for up to 3 days. The crust softens after that as berry juice works down through the layers.
- Freezer: You can freeze it for up to 1 month, wrapped well. The texture of the whipped and jello layers changes slightly once thawed, becoming a bit softer.
- Make-ahead: Build the dessert through the strawberry layer, chill overnight, then add the top whipped topping and fresh berries the day you serve it.
Private Notes
Tried this recipe?
Let us know how it was!Final Thoughts
Strawberry Lush is the kind of dessert that looks far more impressive than the effort it takes. Four cool layers, no oven, and a fridge that does most of the work while you go about your day.
Once you’ve made it once, you’ll have the method down for every lush flavor out there. The crust, cream cheese, fruit, and topping formula never changes.
Give this one a try for your next potluck or summer gathering. If you make it, come back and leave a comment to let me know how your layers turned out, and share it with a friend who loves no-bake desserts.
Recommended:
- Peach Milkshake
- Strawberry Peach Smoothie
- Peach Ice Cream
- No Bake Cookies
- Fruit Tart
- Peach Frozen Yogurt
- Sugar Cookies
- Coconut Cream Pie
- Pecan Pie